I will explain how to add lyrics to a song by using Unity’s Timeline function.
This tutorial will be great for people who want to learn how to use Timeline and start creating a particle live show.
Let’s Use Timeline
What is ‘Timeline’?
Unity has a function called Timeline (Unity’s official manual).
In the Timeline Editor window, you can control various elements in sequence, switching objects and playing music, animations, particle effects, etc. It is great for adjusting the timing of interaction between objects, so it’s an indispensable function for creating a particle live show and adding effects to a song.
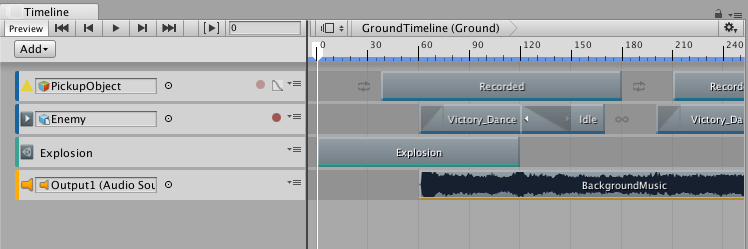
Screenshot – Editing sequences with Timeline
Add Timeline
First, open the Timeline Editor in Unity by selecting ‘Window > Timeline’ in the top menu.
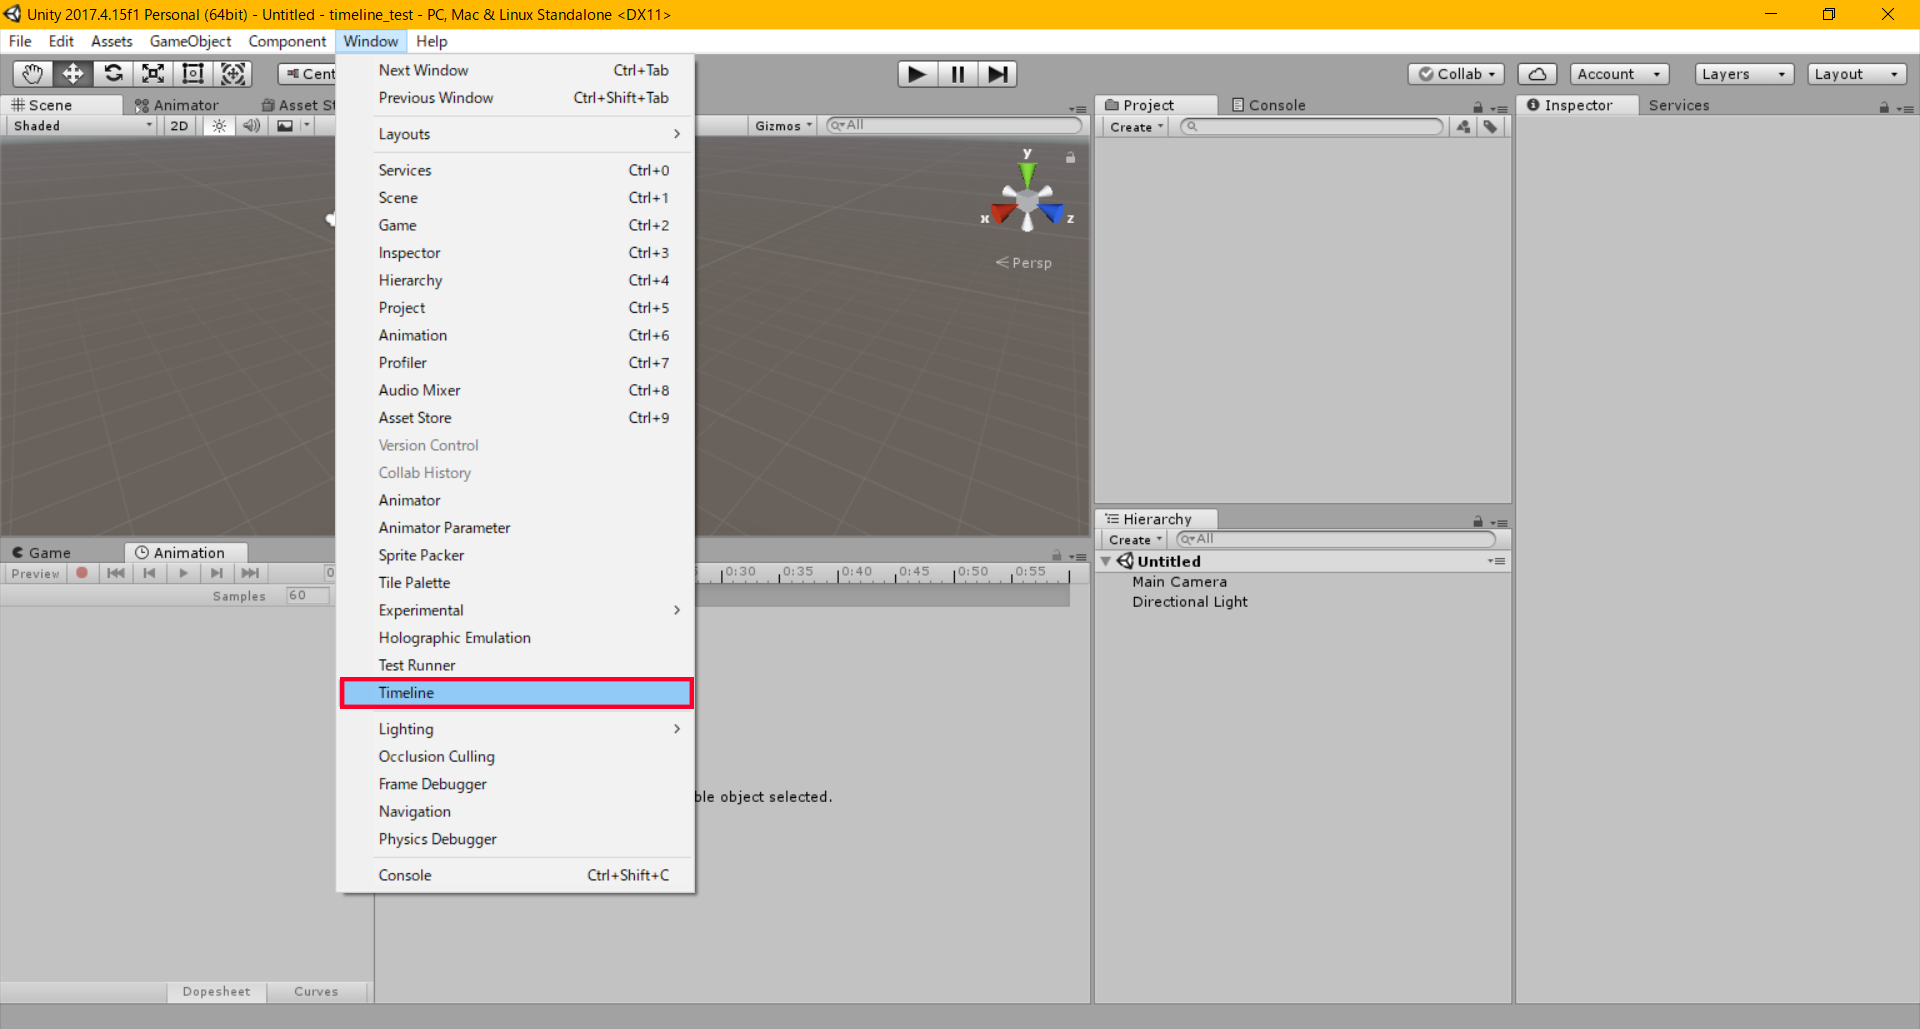
Open Timeline Editor
Next, in the Hierarchy window, create an empty object (‘Create > Create Empty’), which becomes the GameObject that stores the data of the Timeline. This time I named it ‘TLLyrics’.
With the object (‘TLLyrics’) created in the Hierarchy window, press ‘Create’ in the Timeline Editor to get it ready. It will create the Timeline asset (‘TLLyricsTimeline’) automatically and also attaches the ‘Playable Director’ and ‘Animator’ components to ‘TLLyrics’.
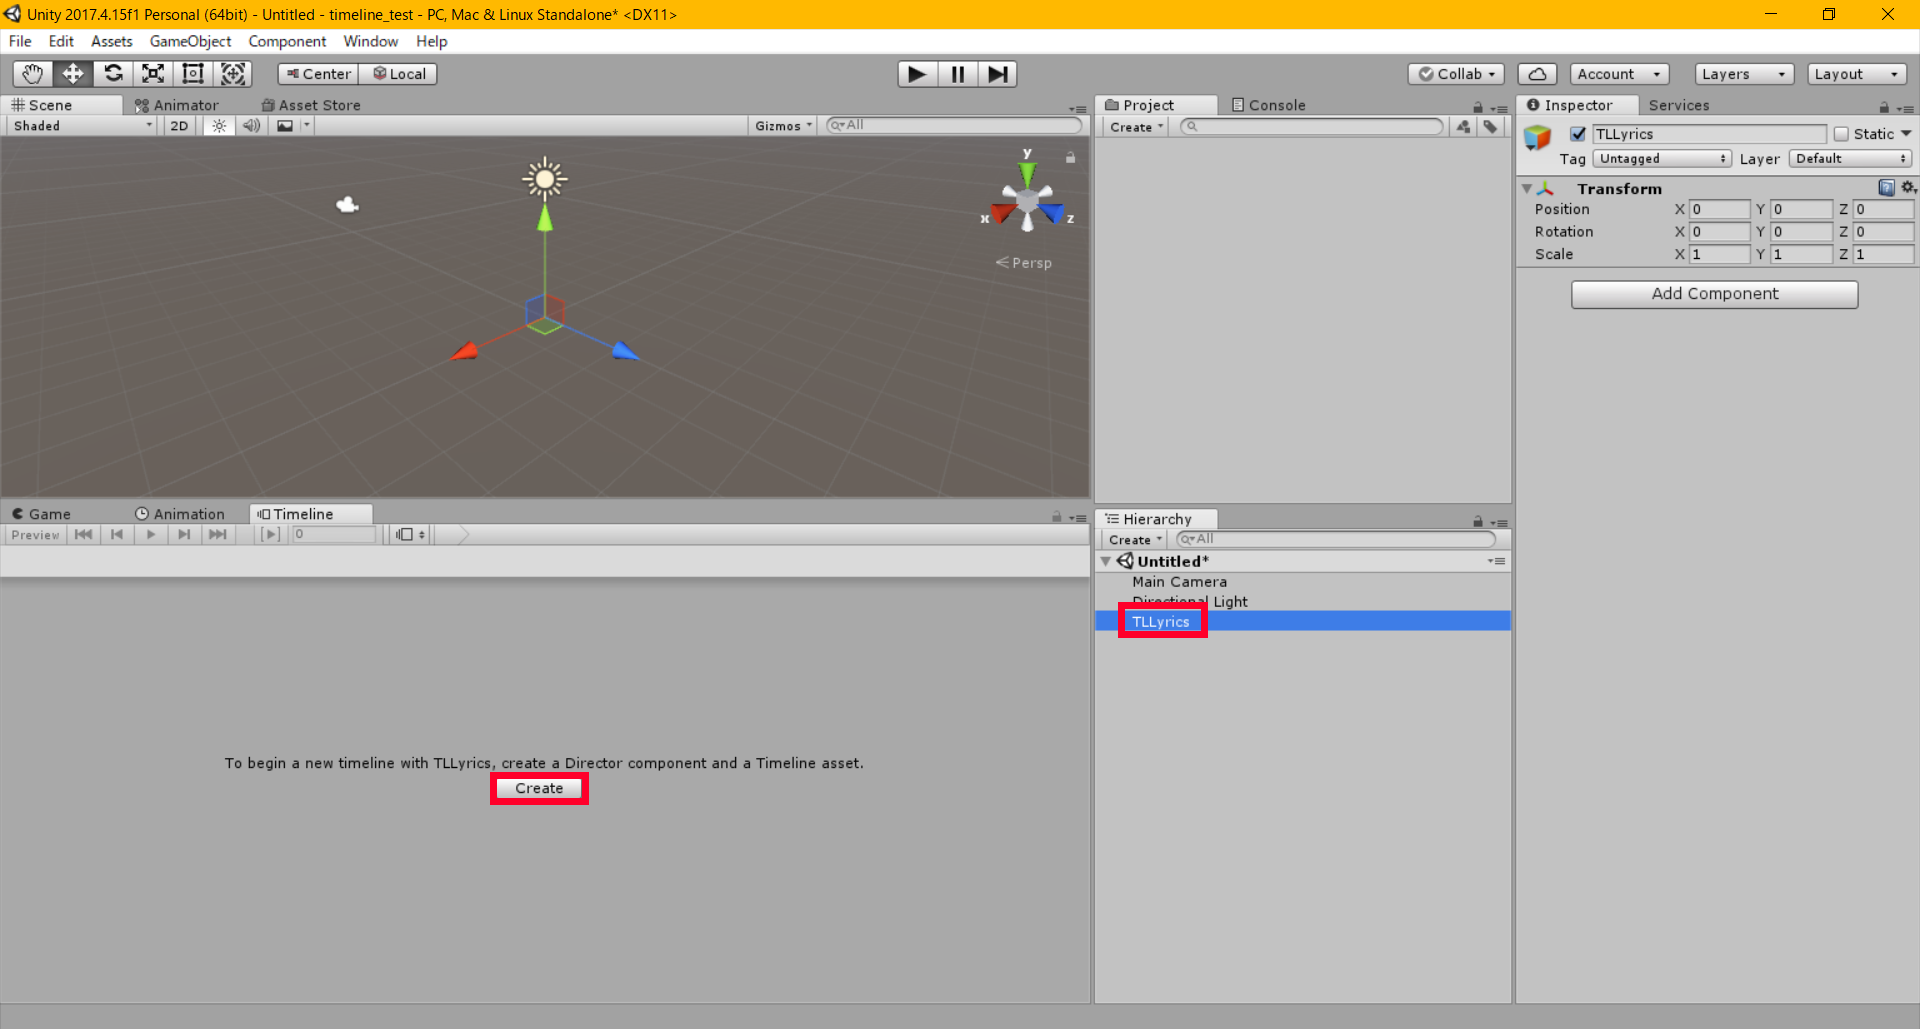
Create the Timeline asset #1
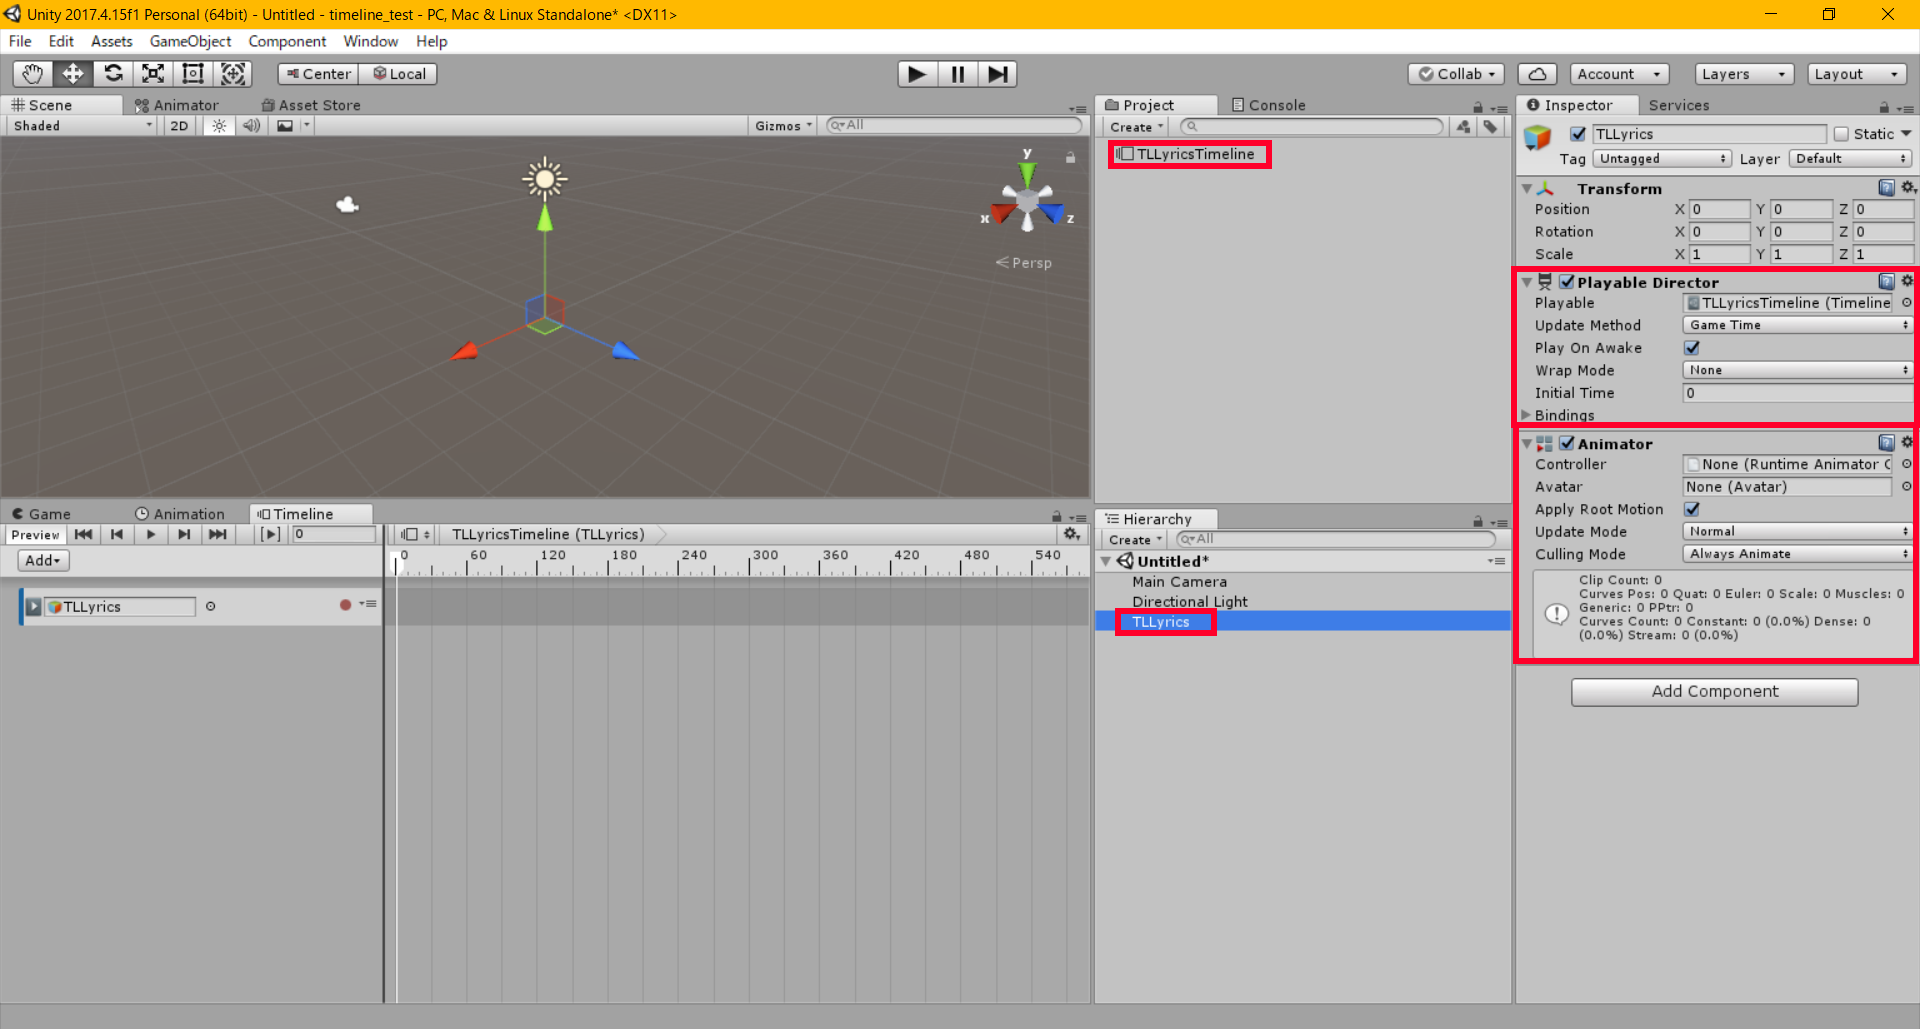
Create the Timeline asset #2
How to Activate and Deactivate an Object by Using Timeline
Now, let’s use Timeline Editor.
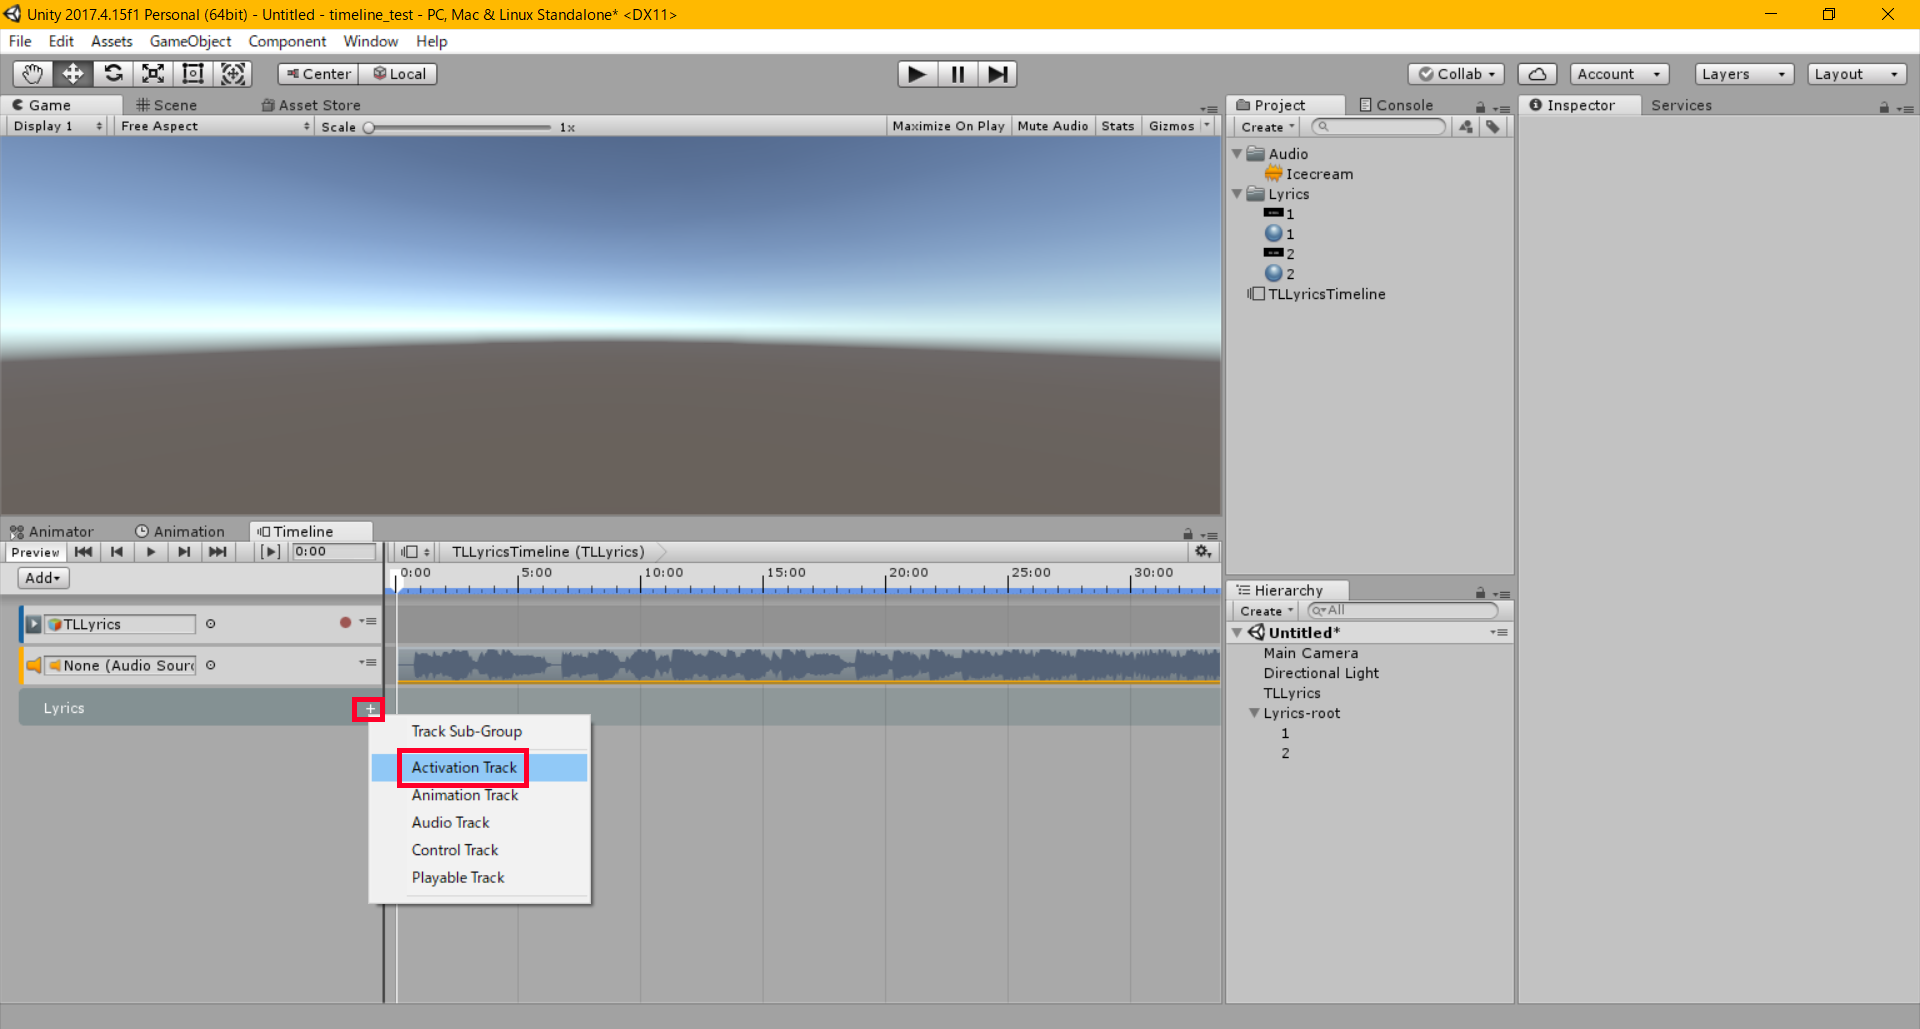
We want to make a GameObject appear at a specified time. You need to add ‘Activation Track’ to activate and deactivate the GameObject. Press ‘Add’ in the top left corner of the Timeline Editor and select ‘Activation Track’ to add a new track to the Editor.

Add ‘ActivationTrack’ #1
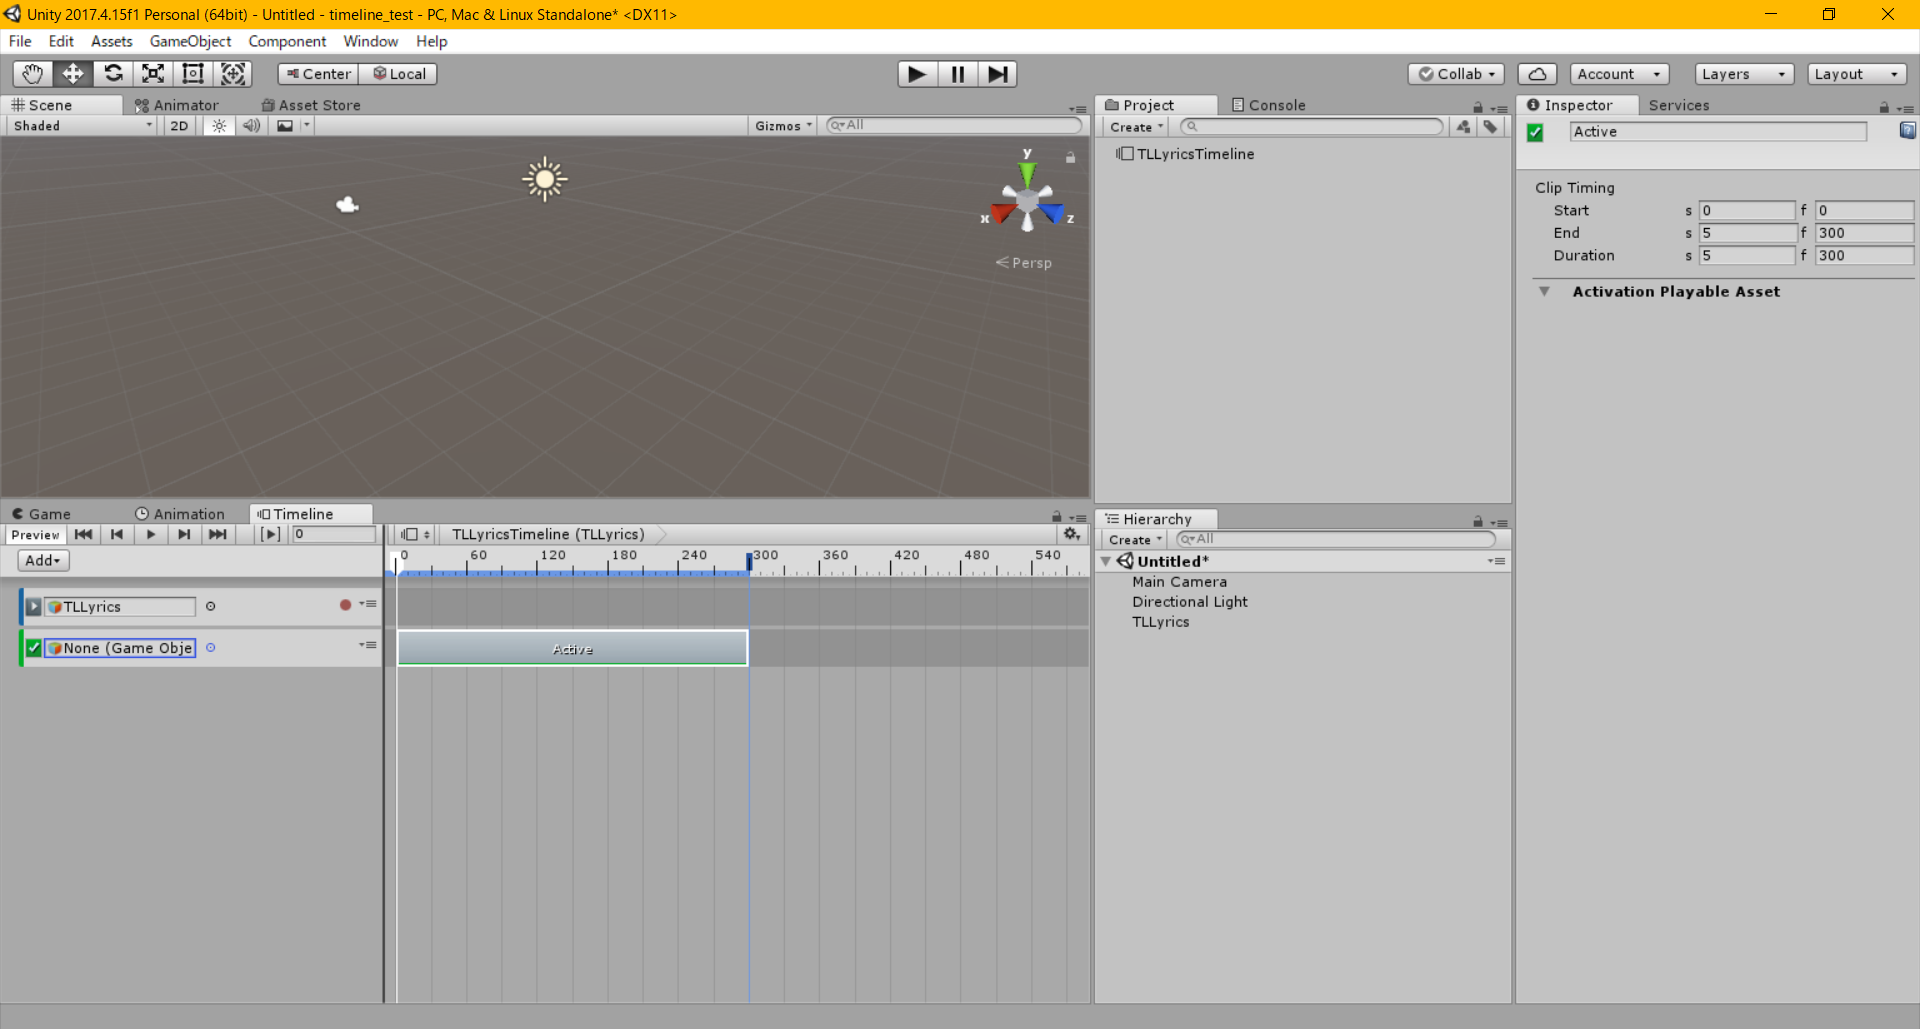
Add ‘ActivationTrack’ #2
Let’s use a Cube as the object to appear. Create a Cube ( ‘Create > 3D Object > Cube’) in the Hierarchy and specify it in the Activation Track created earlier (Alternatively, you can do the same by dragging and dropping the GameObject to appear in the Timeline Editor).
Let’s change the timing to activate (This time, I made it active from 60f to 180f).
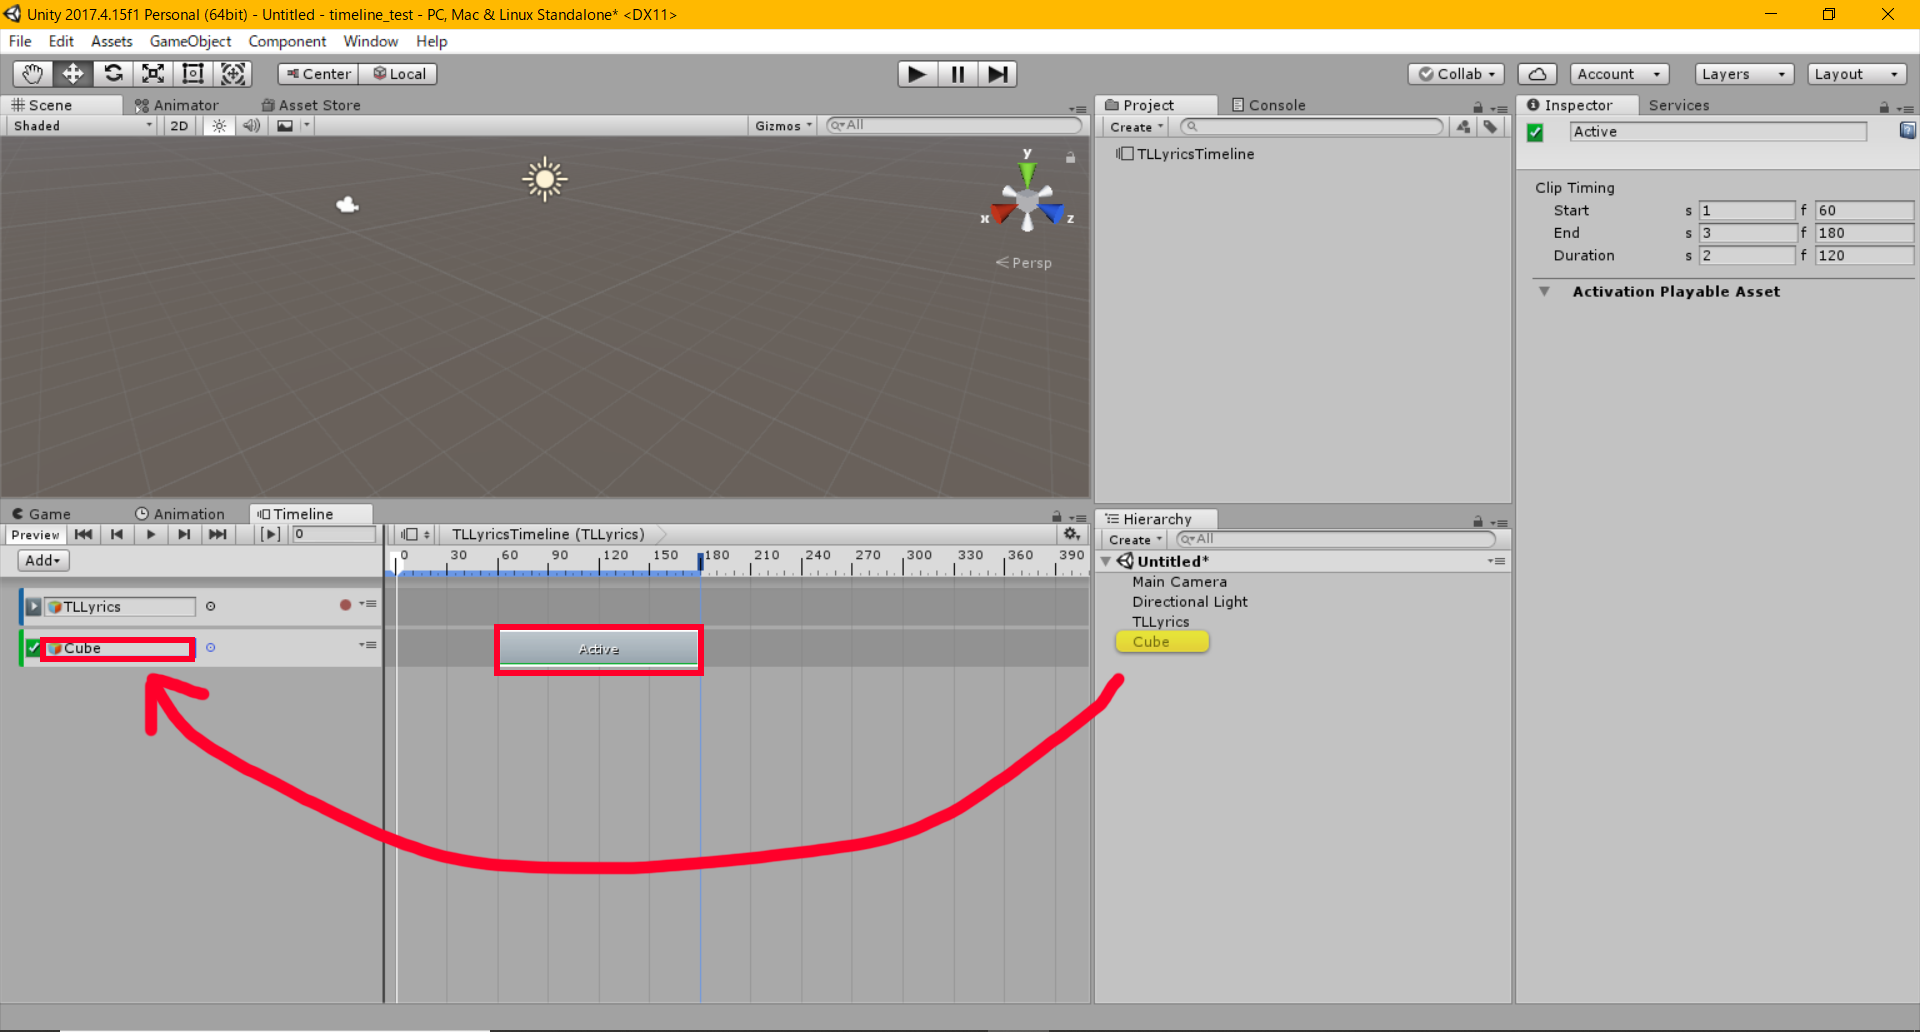
Editing the Activation Track
Play it to check if the Cube appears in one second.
As you can see here, it’s visually intuitive to control objects with the Timeline, so it is useful when you want to synchronize many objects and effects.
Create the ‘Lyrics’ Particles
Prepare Songs and Images
This time I use ’Ice Cream’ by 8gatsu2yuki as an example.
Song: https://twitter.com/8gatsu2yuki/status/1141346491992166400
Lyrics: http://hachigatsuniyuki.blog.fc2.com/blog-entry-22.html
Here, I create the ‘Lyrics’ particles for the first part, ‘Namae Wo Yobaretara (when my name is called)’ and ‘Mieru Kokoro No Okusoko (It reveals the depth of my heart). Prepare the image for the lyrics with a transparent background. If you create the particles while following this tutorial, please use the following images (the lyrics are almost invisible on the screen…).
‘Ice Cream’ lyrics #1 – ‘Namae Wo Yobaretara (When my name is called)’ ※ It’s hard to read the white characters on the transparent background.
‘Ice Cream’ lyrics #2 – ‘Mieru Kokoro No Okusoko (It reveals the depth of my heart)’ ※ It’s hard to read the white characters on the transparent background.
If you want to prepare such an image by yourself, you can create it with free software such as GIMP.
When creating a ‘lyrics’ image with GIMP, set ‘Fill with’ to ‘Transparency’ to create a new image.
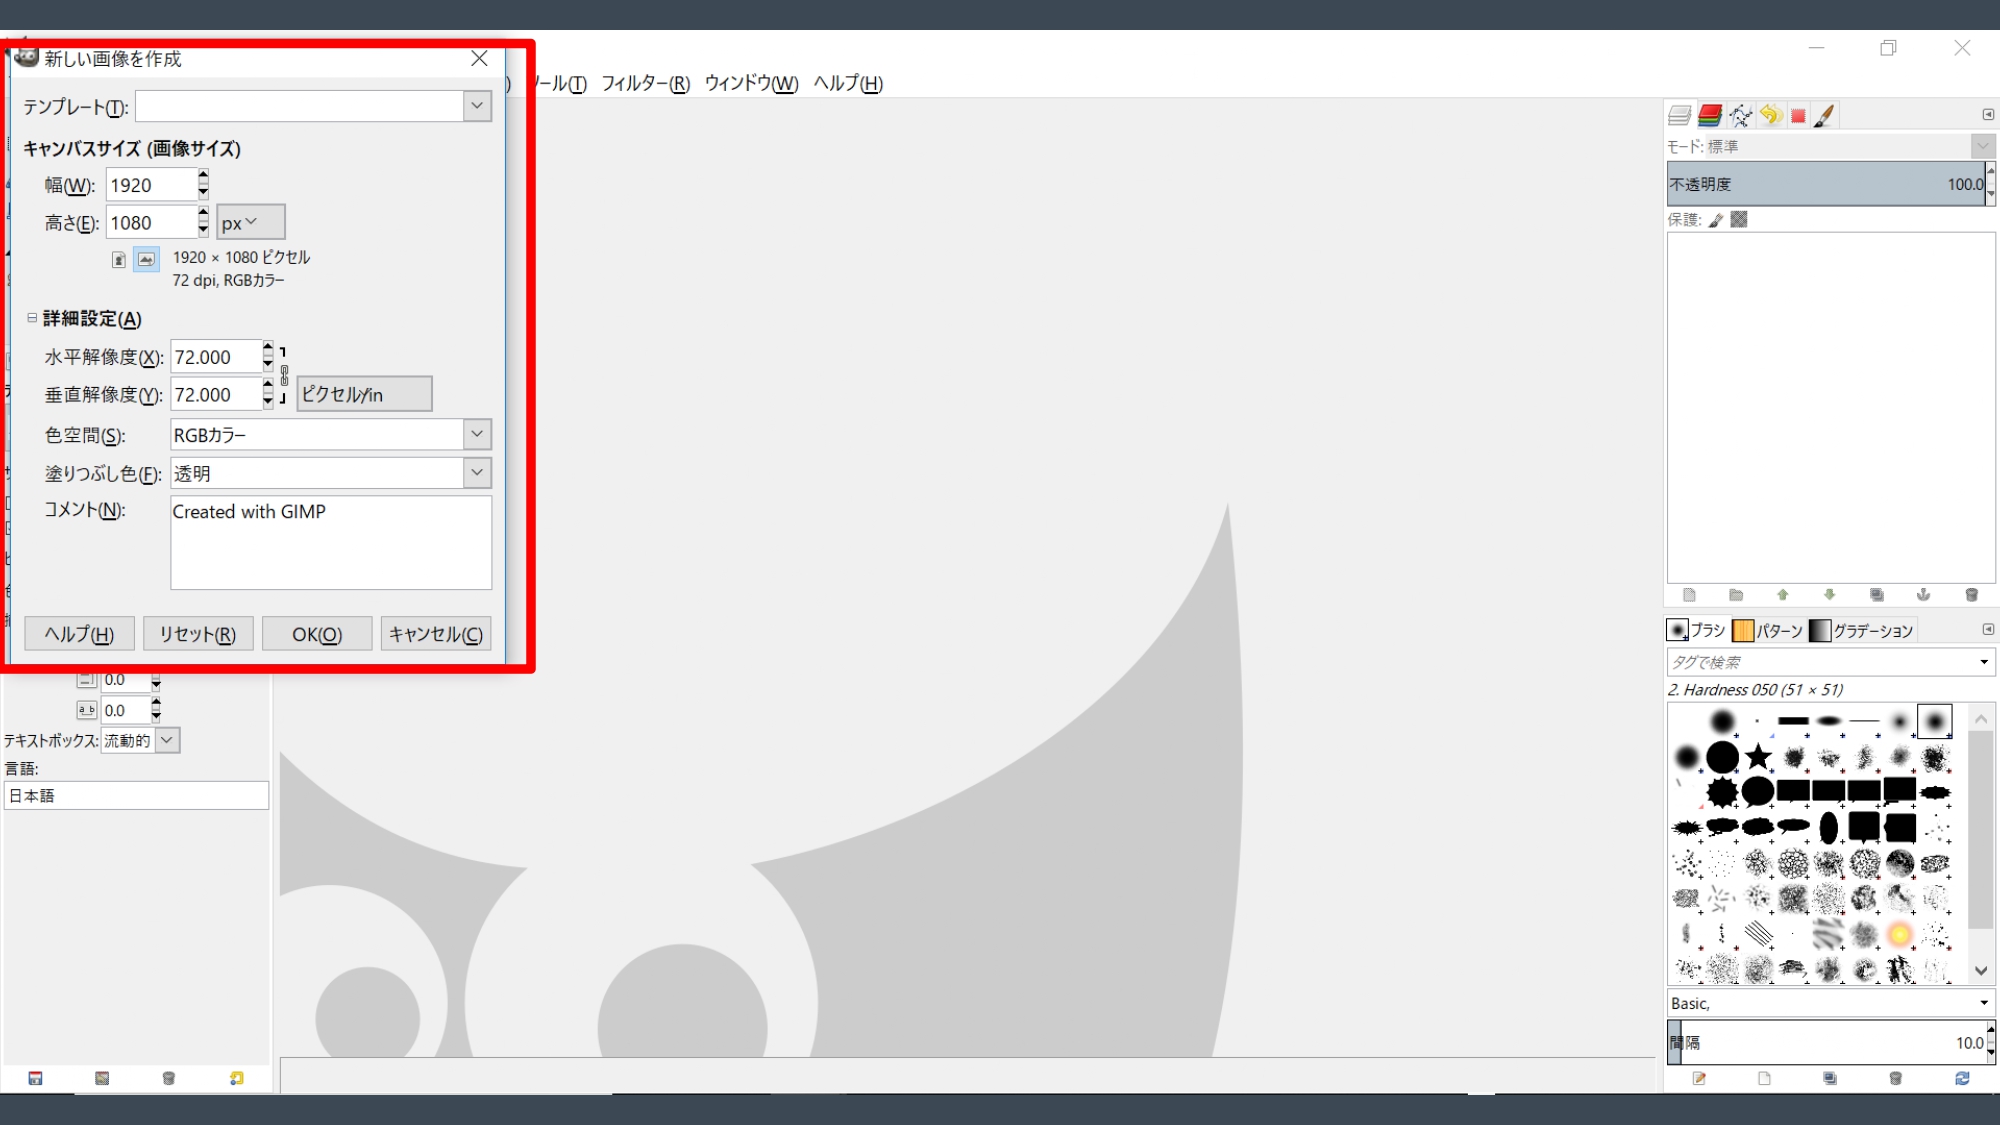
Create a new image with GIMP
Enter the lyrics in your favorite color. You can make them centered by pressing the ‘Justify/Centered’ button. I recommend justifying and centering the lyrics in Unity.

GIMP – ‘Justify: Centered’
Once you exported it as a PNG image, it’s ready to use.
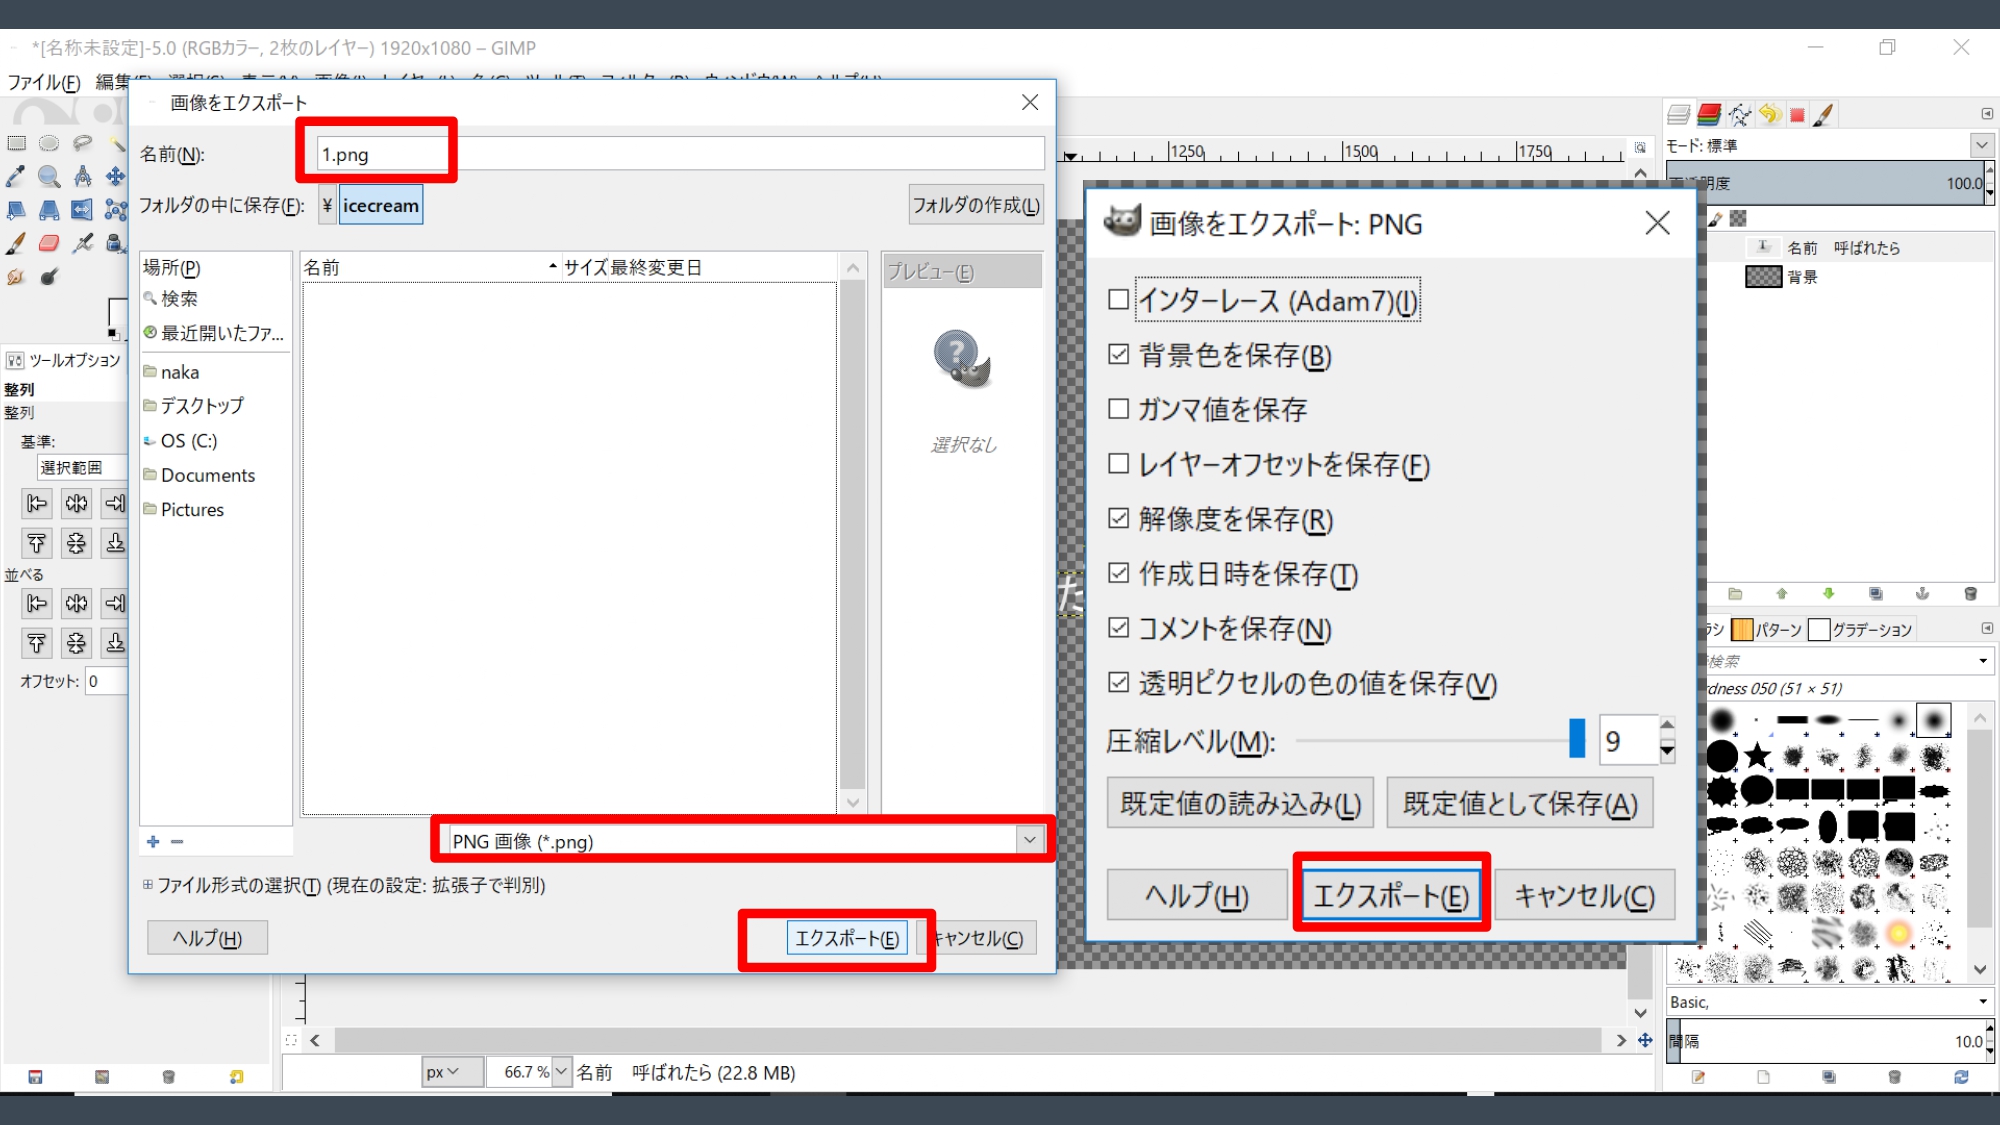
GIMP – Export as a PNG image
Material for ‘Lyrics’ Particles
Import the above image into the project in Unity. Next, we are going to create material for particles. I will make a new folder named ‘Lyrics’ and place all work under this.
In the Project window, create material (Create > Material) and set the shader to ‘Particles/Additive’. Set the ‘lyrics’ image prepared earlier in ‘Particle Texture’. Now you’ve got the material ready.
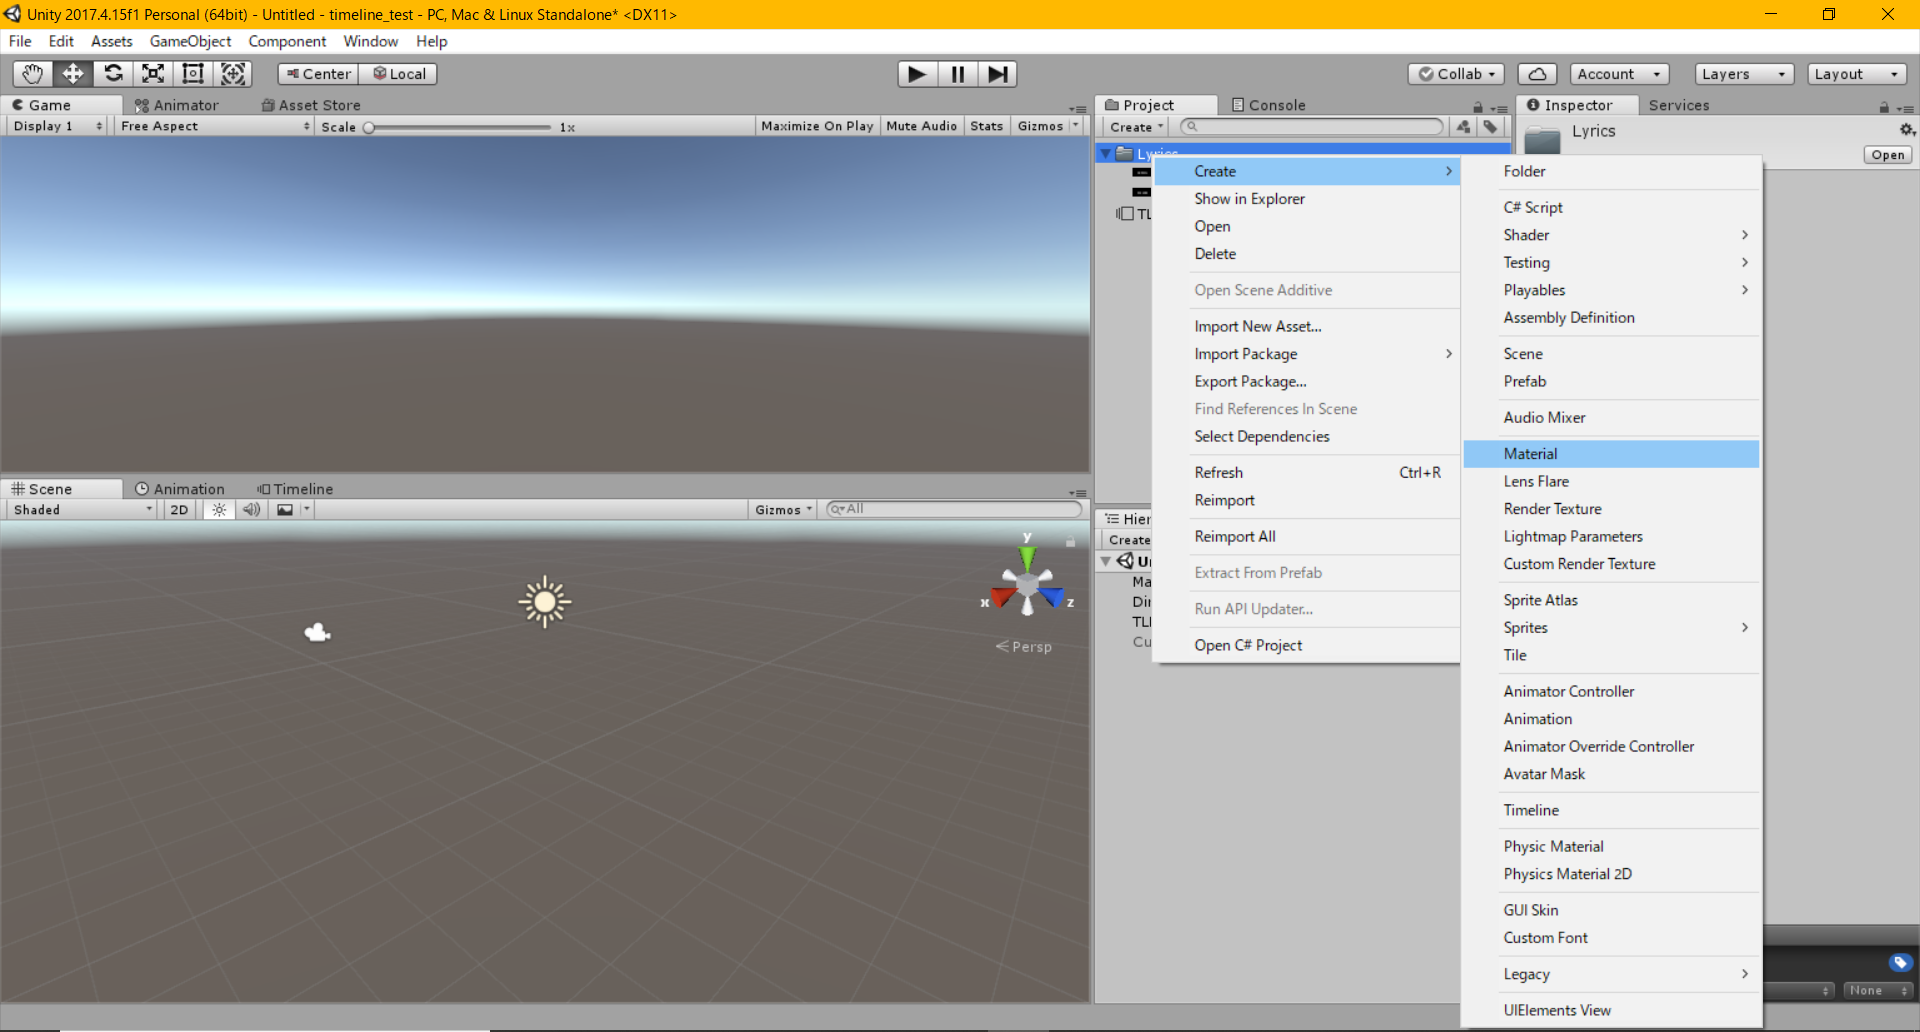
Create Material
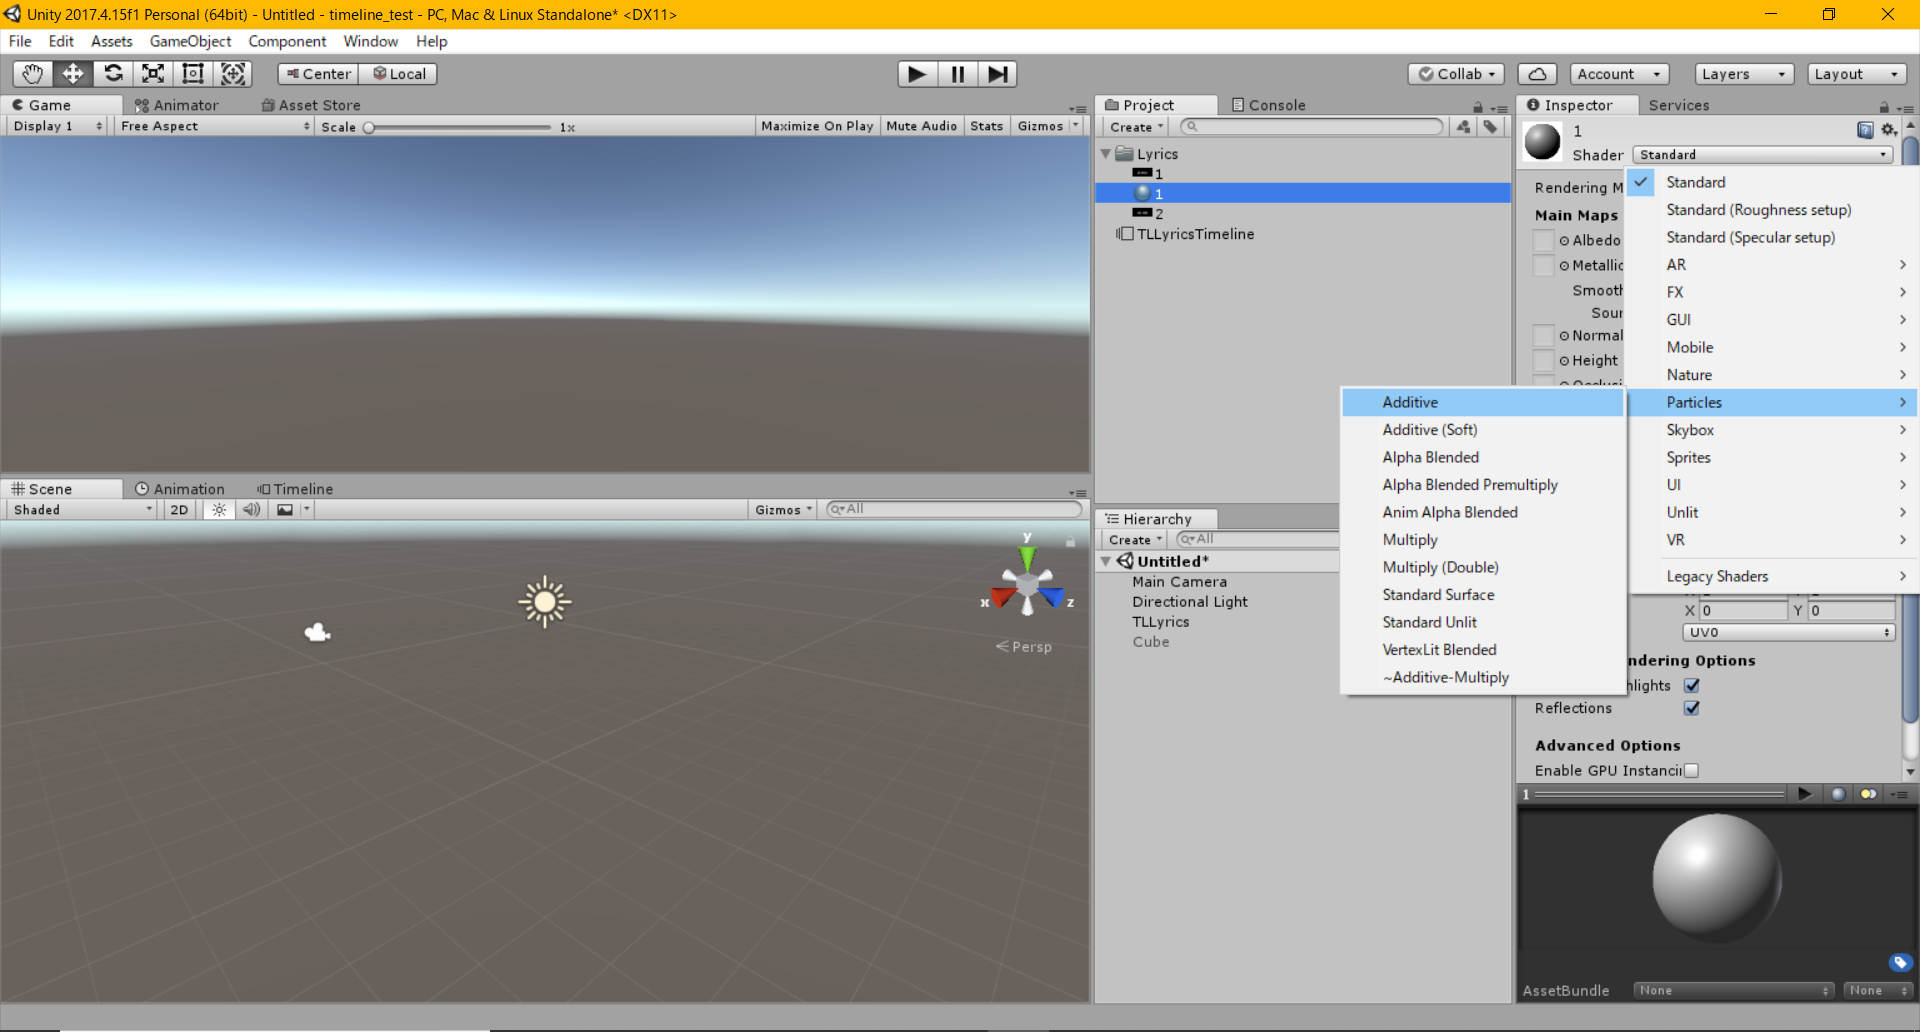
Set up the shader (Particle/Additive)
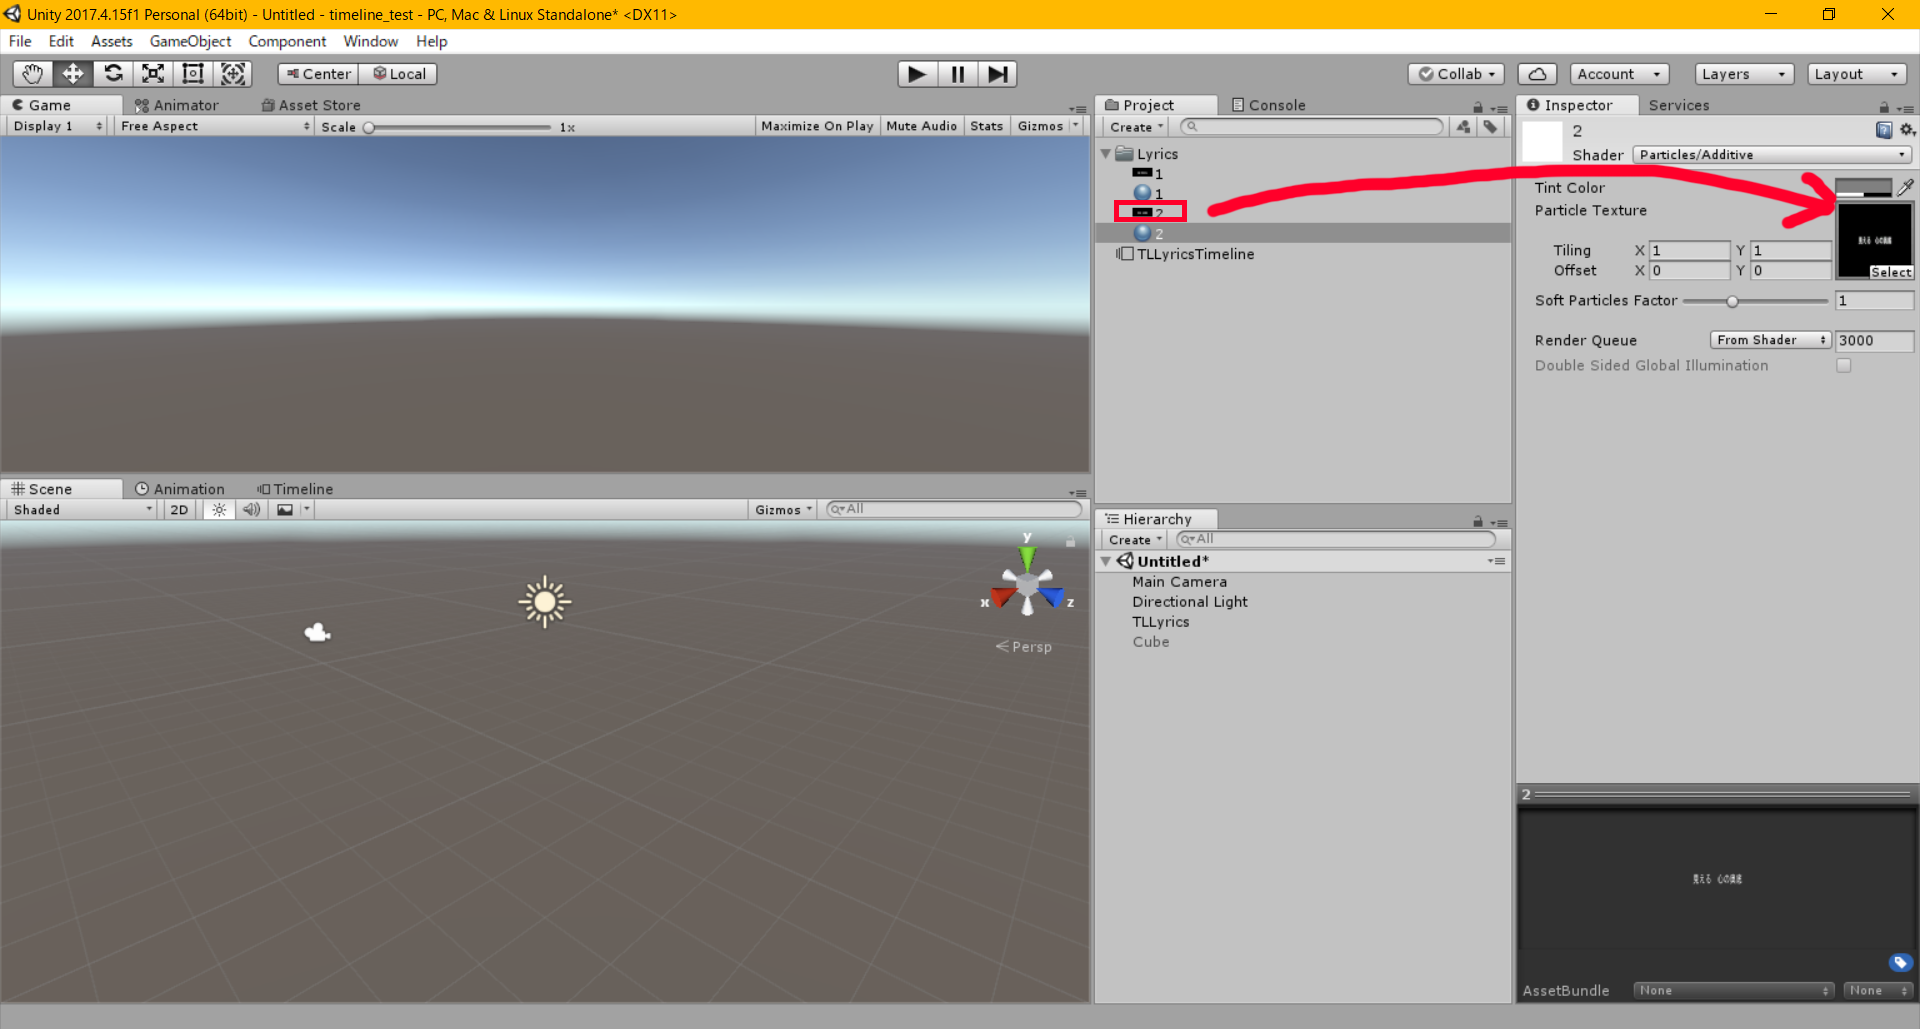
Create Material (Texture)
Create material for each ‘lyrics’ image (i.e. ‘1’ and ‘2’ ). Now they are ready to use.
Create ‘Lyrics’ Particles
Now, we are going to create ‘lyrics’ particles.
First, in the Hierarchy, prepare the following structure by using ‘CreateEmpty’. This time I will place each ‘lyrics’ particle under ‘Lyrics-root’ (Please delete the Cube created earlier during the ‘Timeline’ introduction).
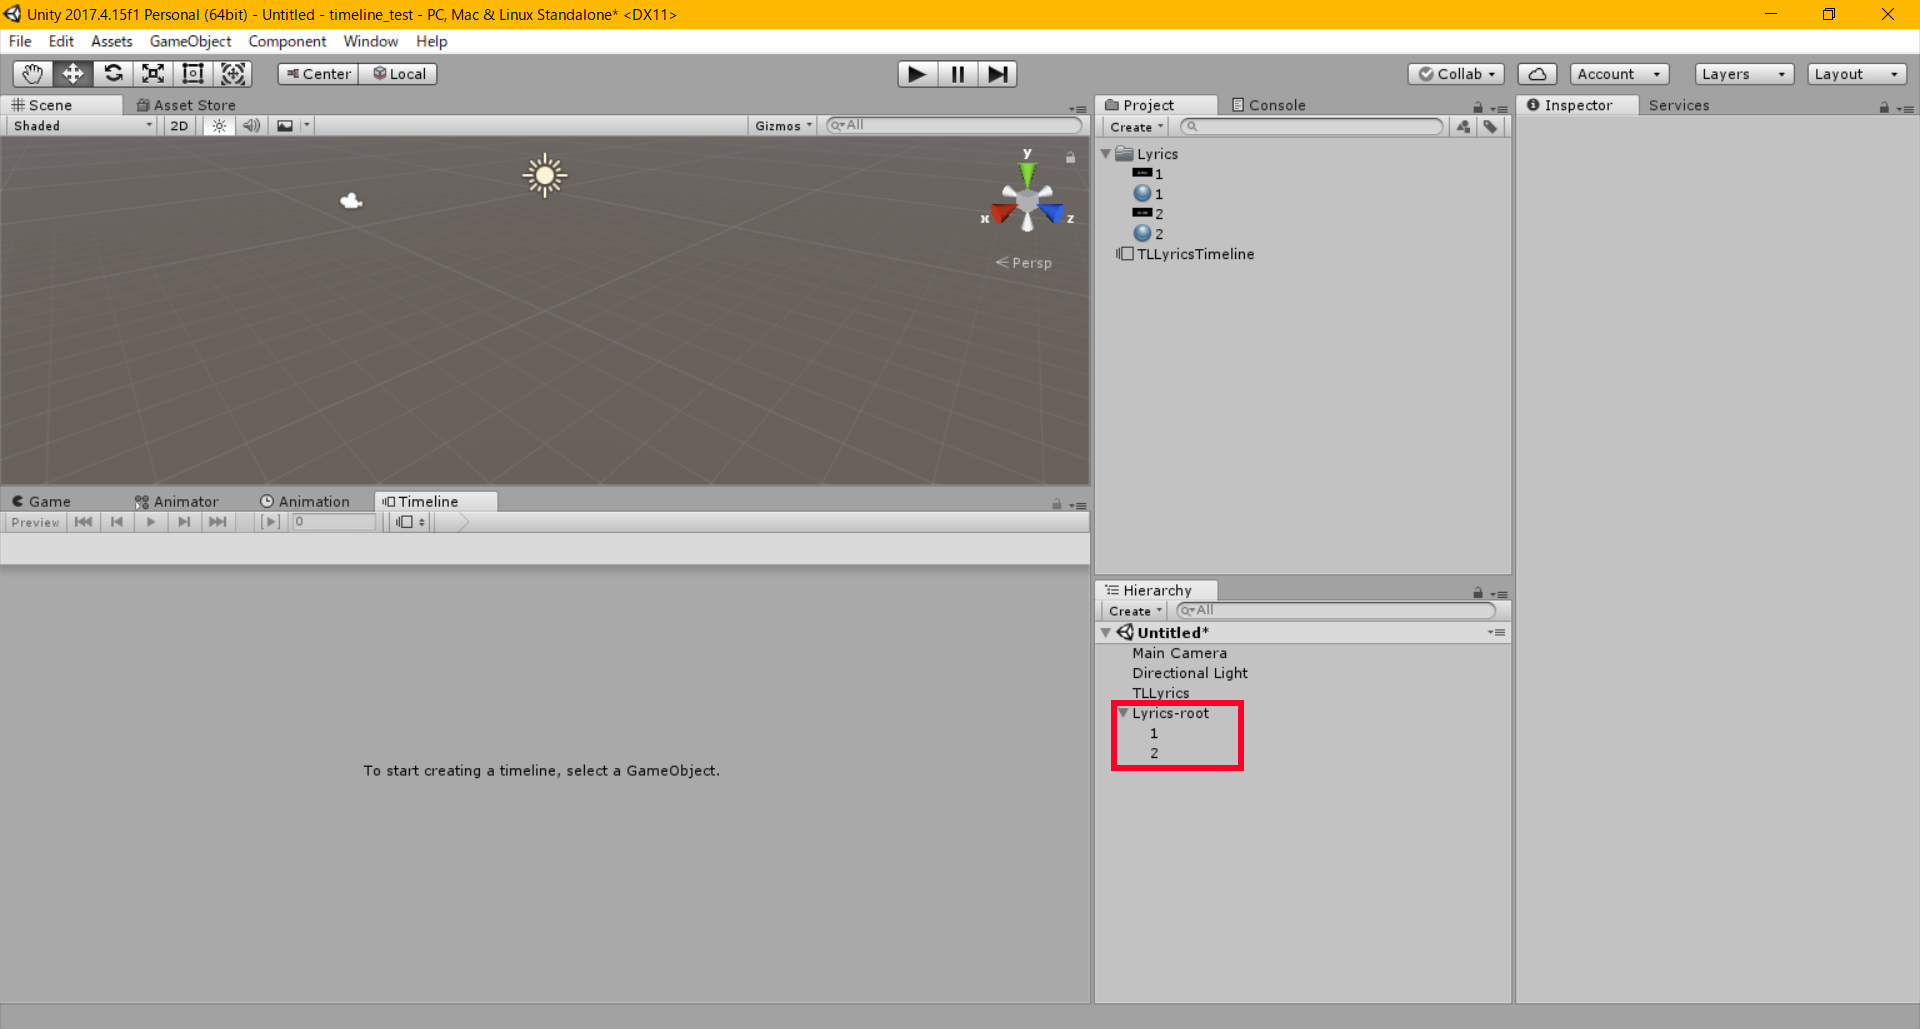
Place each ‘Lyrics’ under ‘Lyrics-root’.
Add the particle components to the GameObject (Lyrics-root/1) where you want to attach ‘lyrics’ particles and set the parameters for each component.

Add ‘Particle System Component’
Once you have added a component, set the parameters so that each ‘lyrics’ image gradually appears and disappears in order without changing its position.
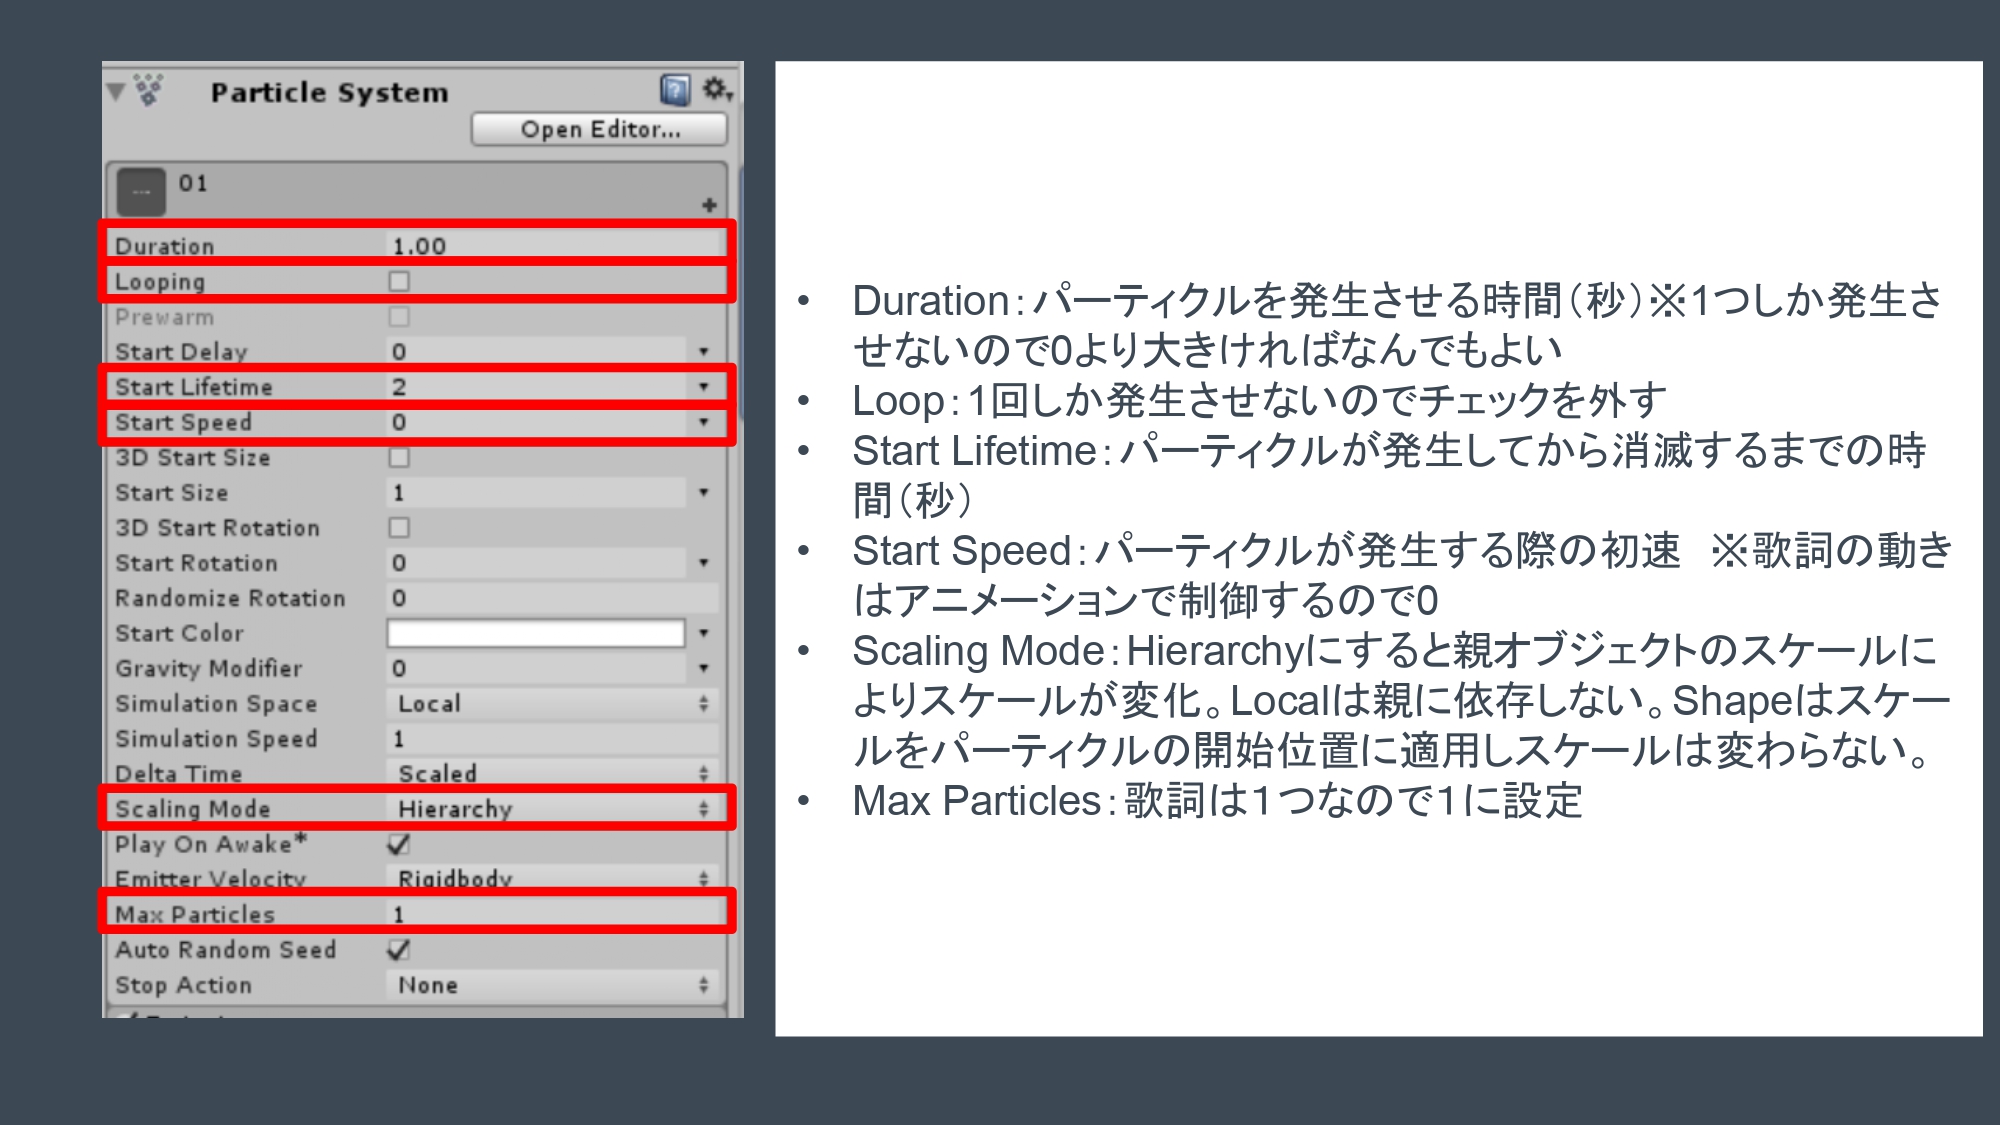
‘lyrics’ particle #1
- Duration: The length of time the particle system runs (Any value more than zero will do because we will just generate a single particle at this time).
- Loop: Uncheck this because we will only run it once.
- Start Lifetime: The initial lifetime for particles (unit: sec).
- Start Speed: The initial speed of each particle (The ‘lyrics’ is controlled by the animator, so set it to zero).
- Scaling Mode: If you set it to ‘Hierarchy’, the scale of the parent object would affect that of the particle. Set to ‘Local’ to make the scale unaffected by the parent. Shape mode applies the specified scale to the start position of the particles, but it doesn’t affect their size.
- Max Particles: The maximum number of particles in the system at once. Set this to one because only one ‘lyrics’ image appears at a time.
‘lyrics’ particle #2
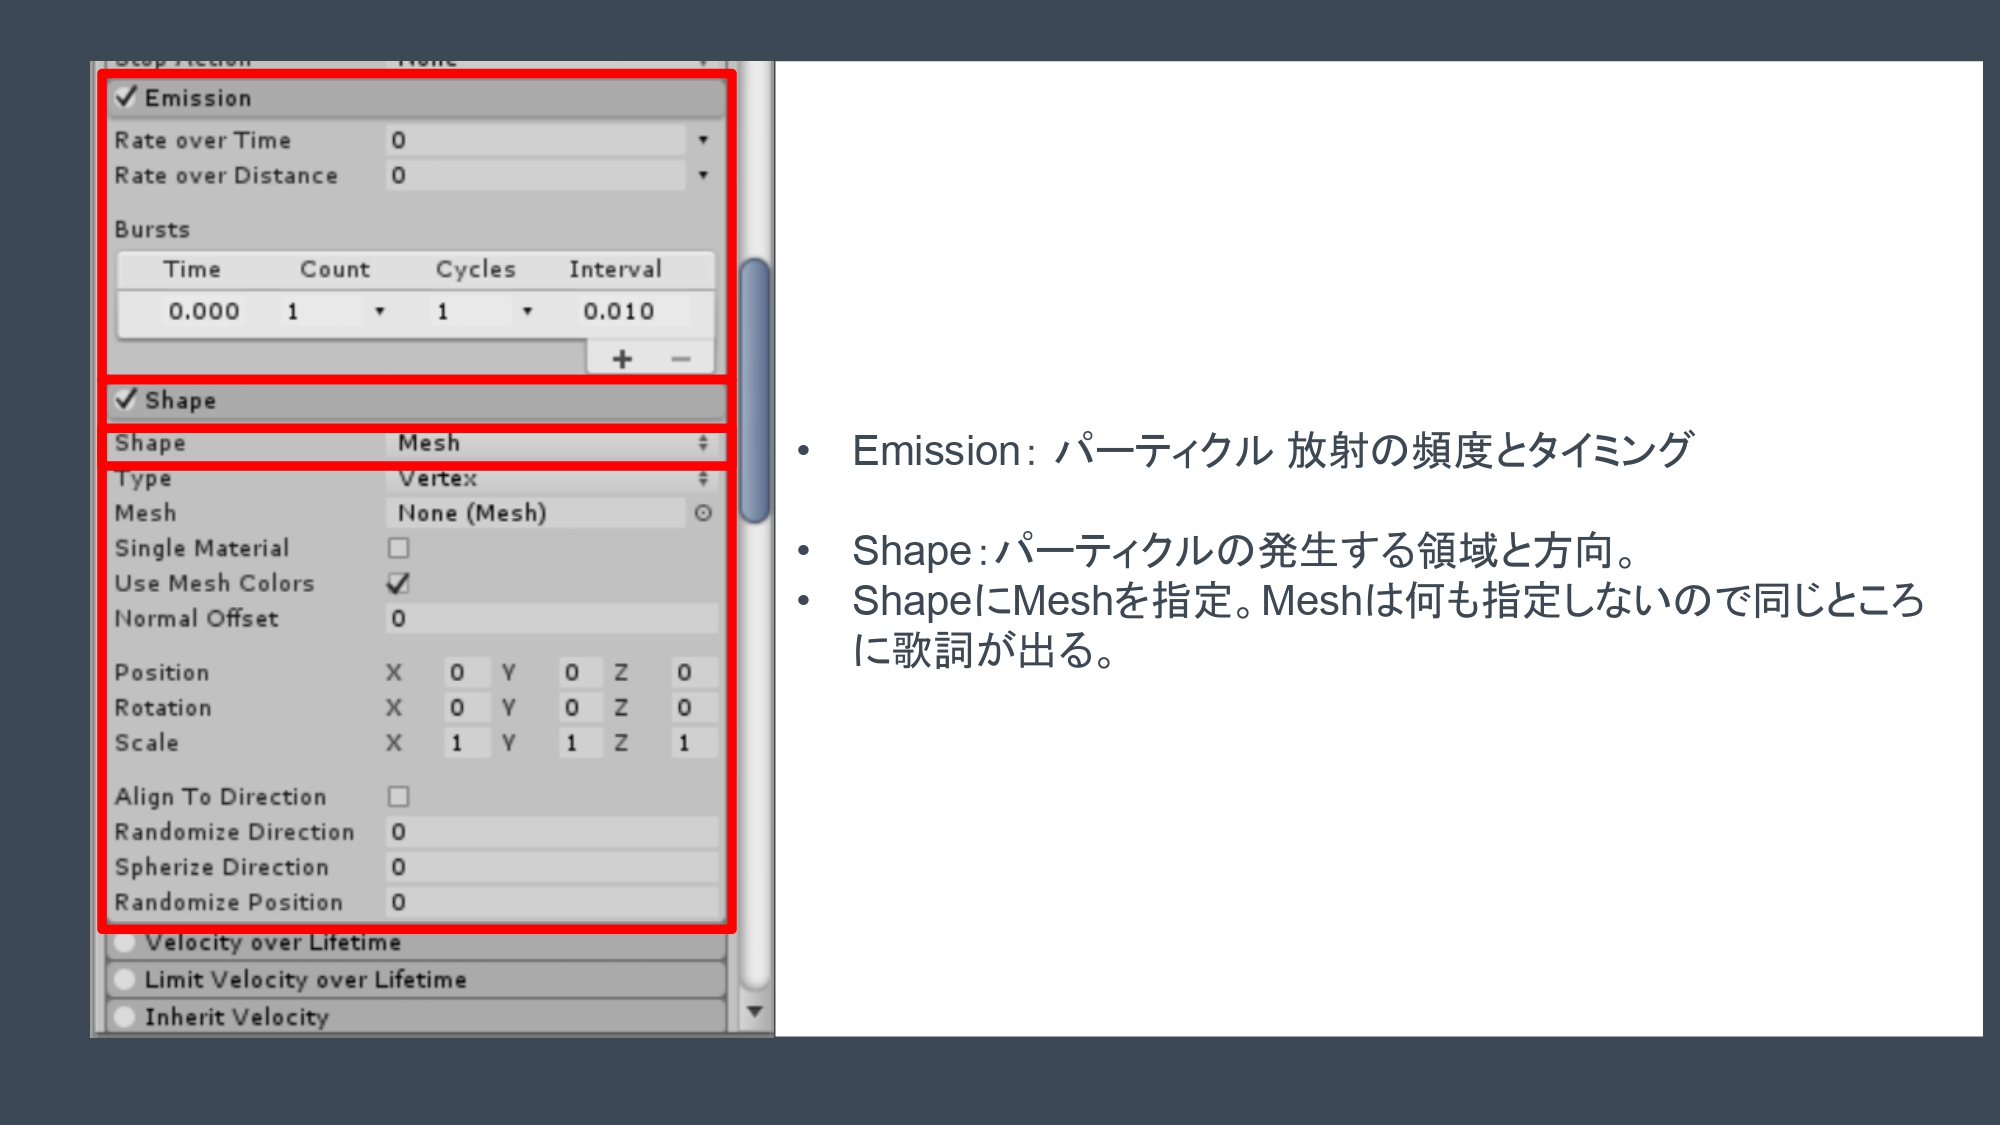
- Emission Module: It controls the rate and timing of Particle-system emissions.
- Shape Module: It defines the volume from which particles are emitted and the direction of the start velocity.
- Set ‘Shape’ to ‘Mesh’: In this state, the ‘Lyrics’ images will always appear in the same place if you don’t specify any mesh.
‘Lyrics’ Particle #3 (1/2)
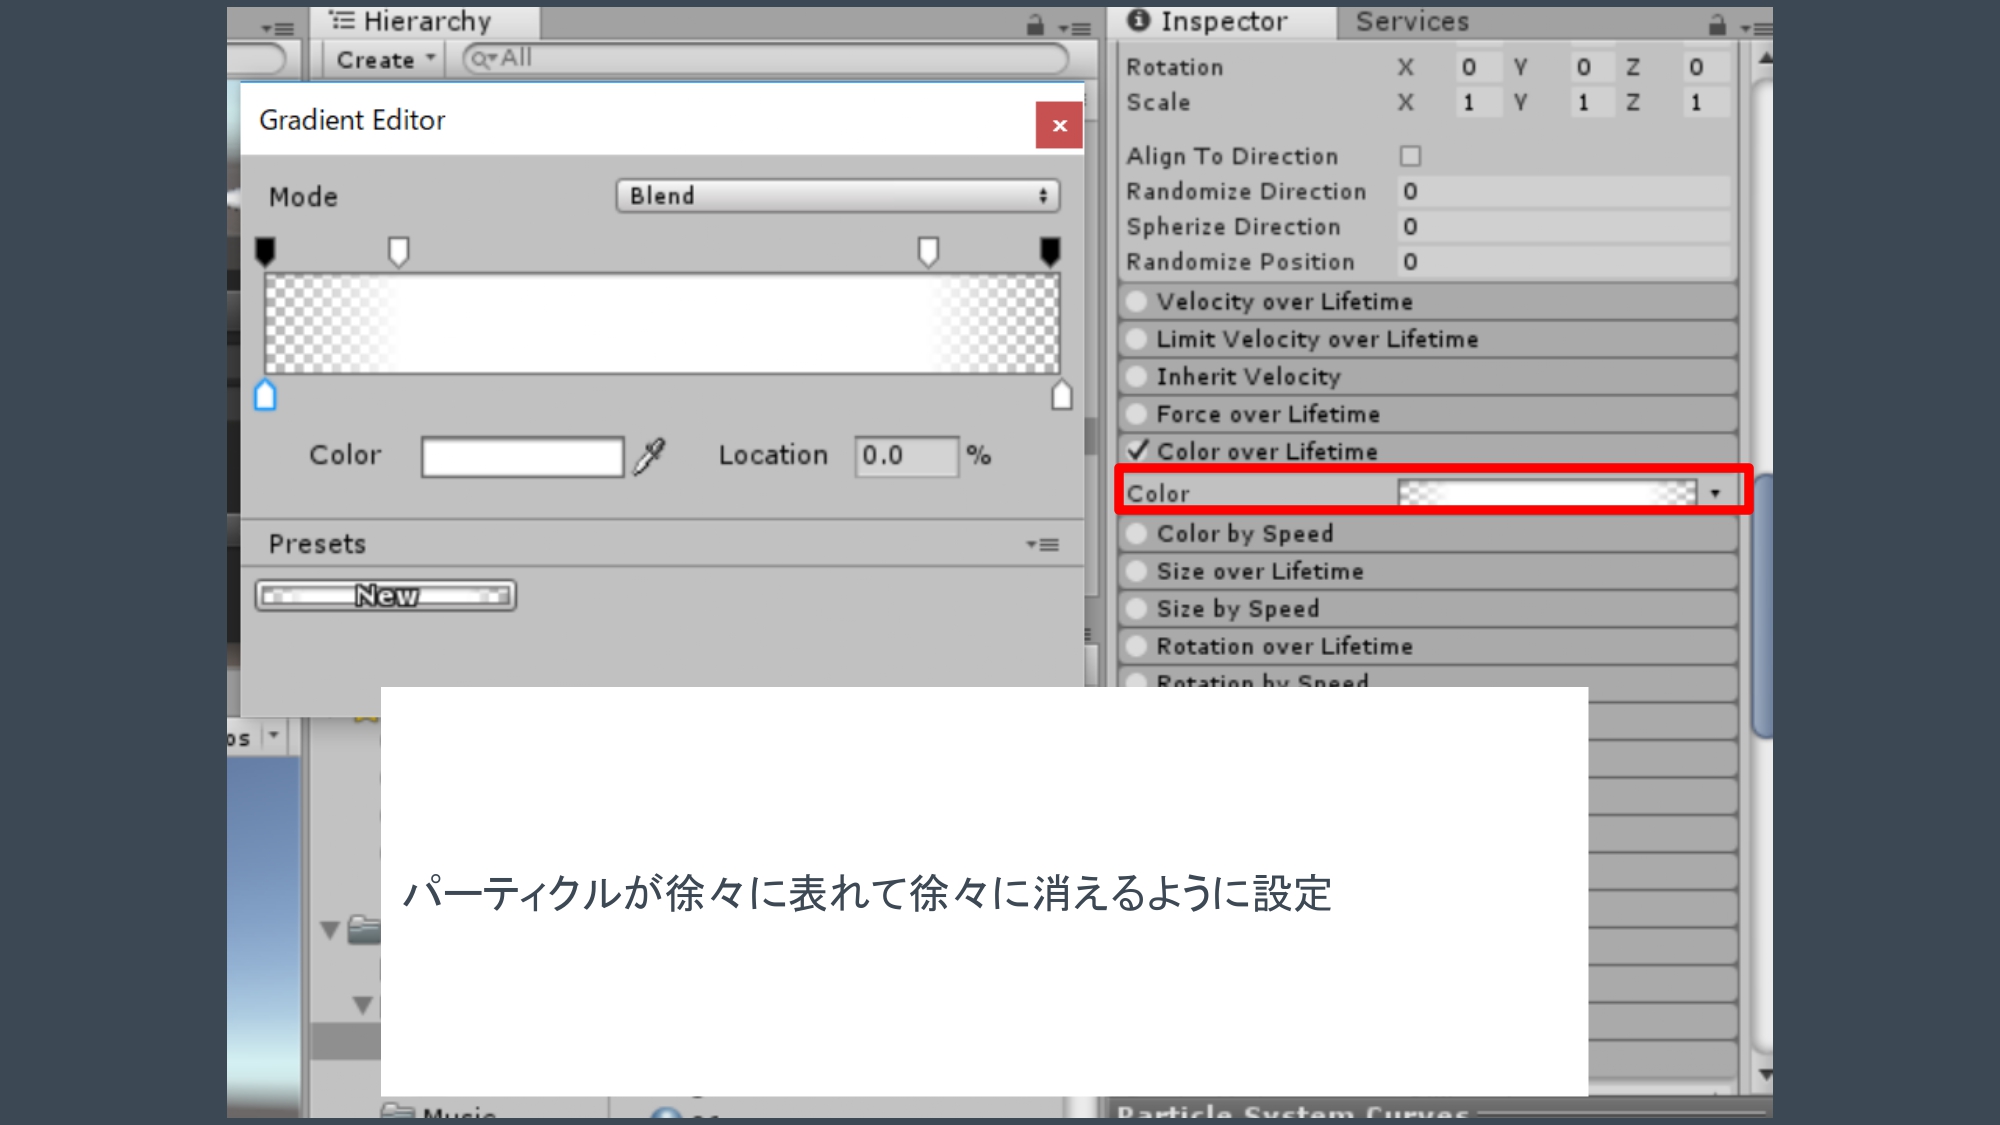
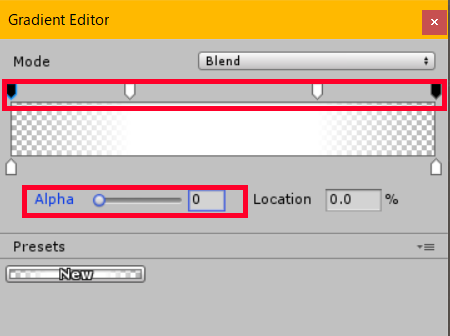
Set ‘Color’ so that the particle appears and disappears gradually (See the following screenshot).
‘Lyrics’ Particle #3 (2/2)
‘Lyrics’ particle #4
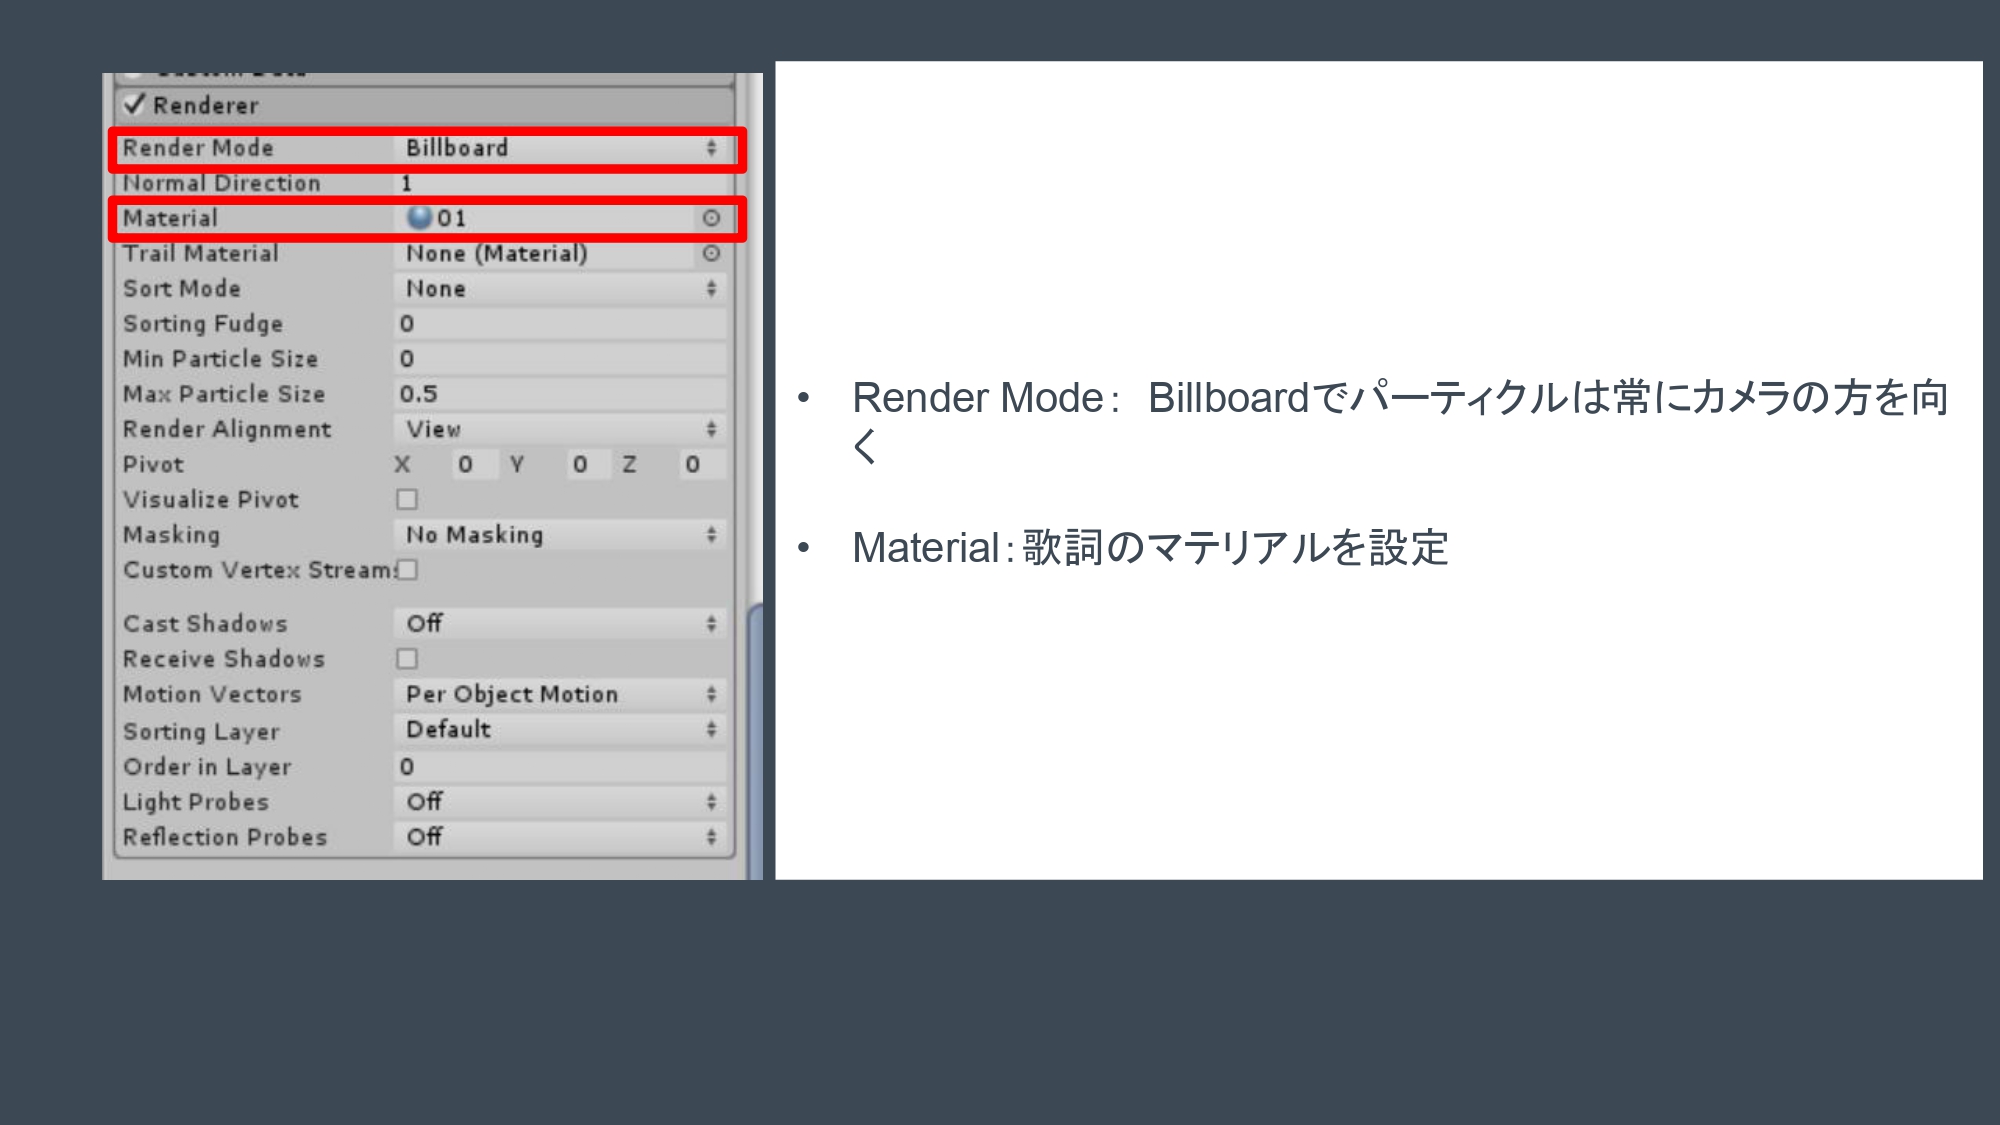
- Render Mode: Set it to ‘Billboard’ to direct particles towards the main camera.
- Material: Set the material of the lyrics.
With these settings, the ‘lyrics’ particles will be played as shown in the below animation.
Check how the ‘lyrics’ particles behave.
You can use any lyrics particle with the same settings except for ‘Start Lifetime’ and ‘Material’. Set up the next lyrics, ‘Mieru Kokoro No Okusoko’ (Lyrics-root/2) in the exact same way and replace ‘Material’ with this corresponding one. You can duplicate (Ctrl+D) the created ‘Lyrics-root/1’ and rename it. Alternatively, you can duplicate the particle with the parameters set and paste it.
Show the Lyrics Particles with the Music
In the Timeline editor, make the created lyrics particles appear with the song.
Import the Song into Timeline
Select the ‘TLLyrics’ created when I explained Timeline and check it in the Timeline Editor (I have deleted the Activation Track for the Cube I used in the explanation).
Import the audio file (‘IceCream’) into the project and drag it into the Timeline Editor to add a new track (Audio Track).
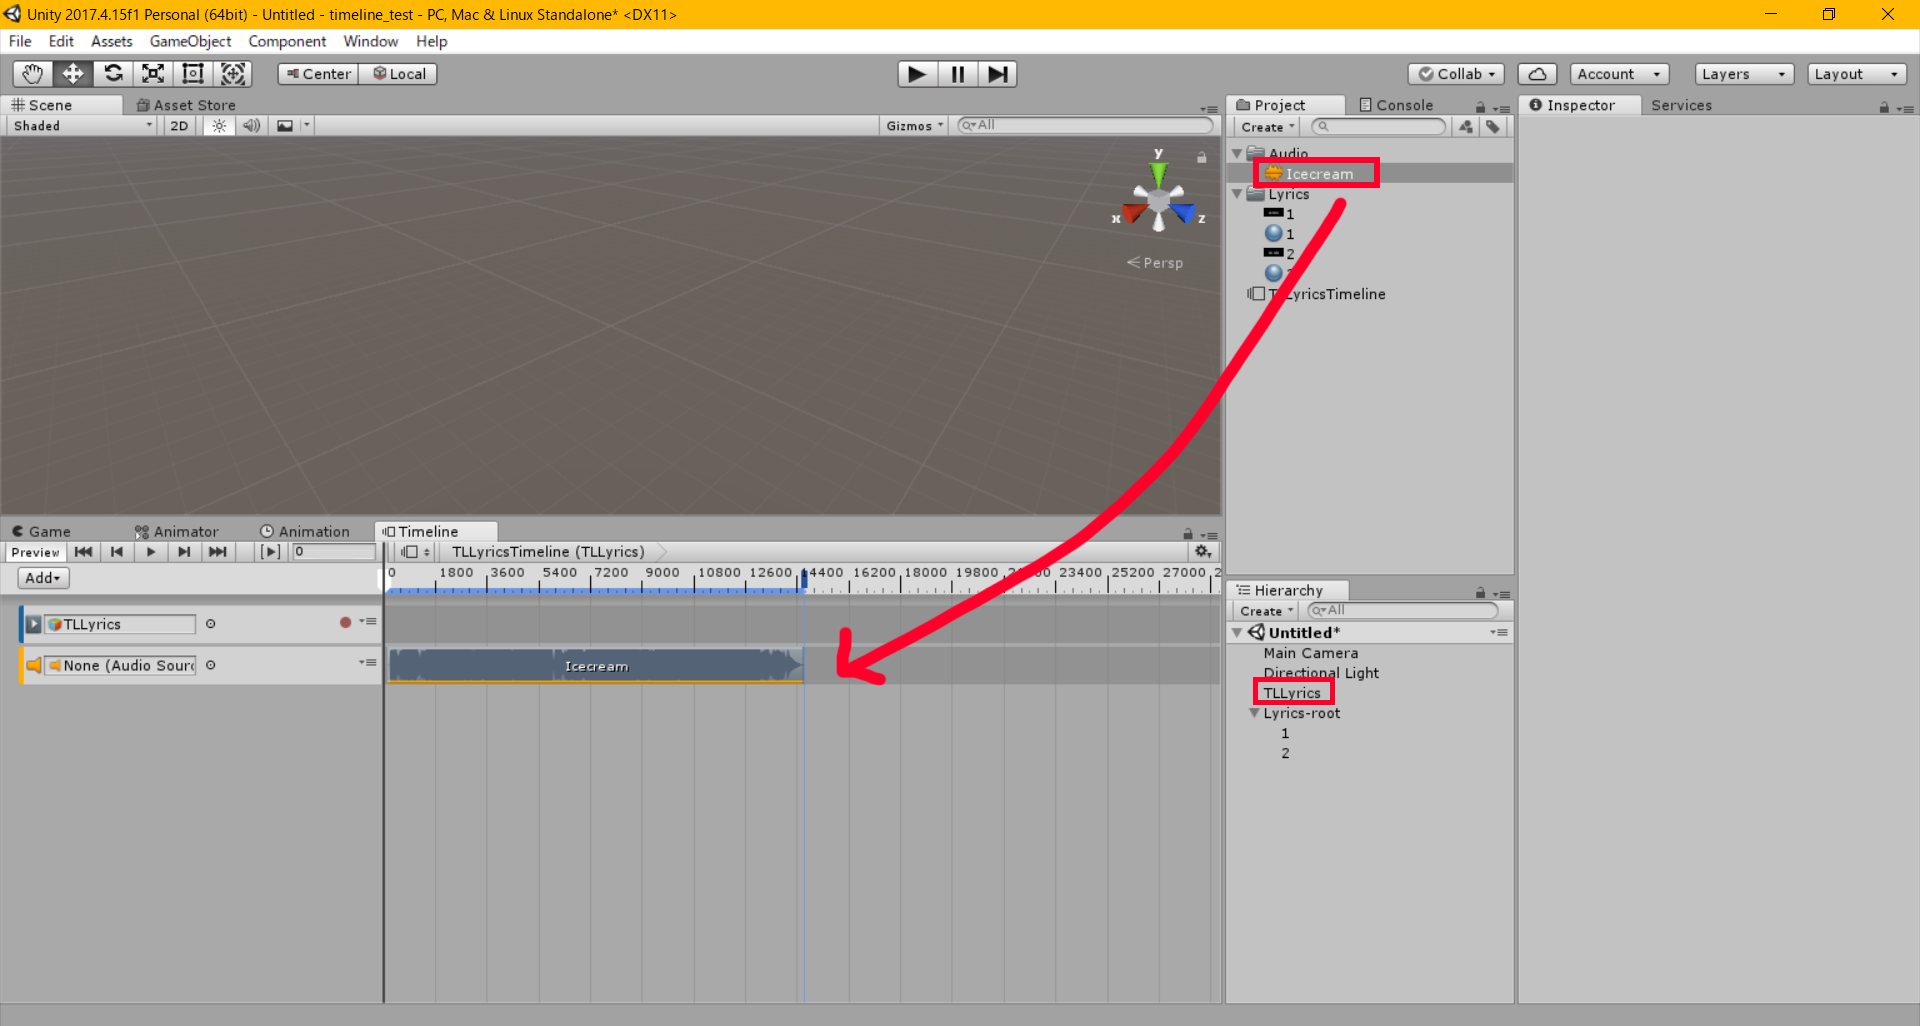
Add a song to Timeline
I changed the unit of time from ‘Frames’ to ‘Seconds’ to make it more intuitive.
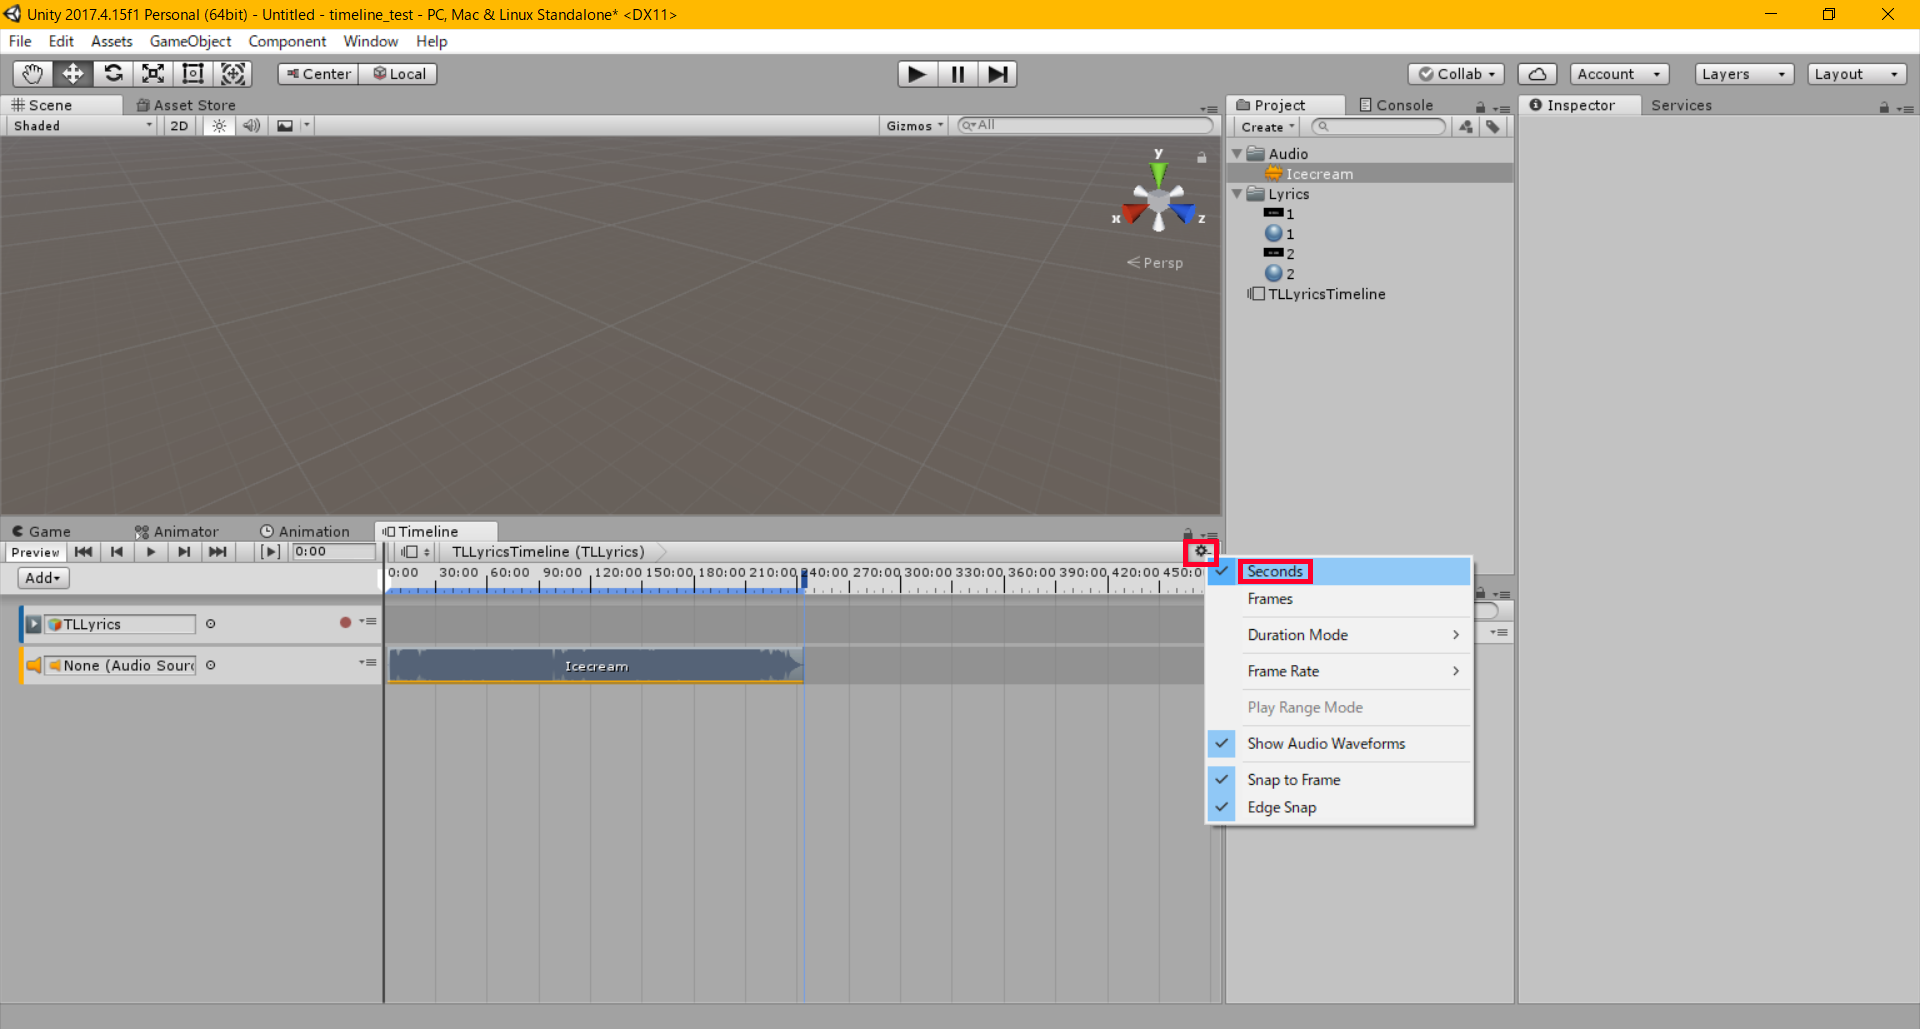
The setting for Timeline (Frames/Seconds)
Add ‘Track Group’ and Lyrics Particles
Next, we are going to add ‘ActivationTrack’ for each lyrics particle. Use ‘TrackGroup’ here to manage many lyrics particles. In the Timeline Editor, add a TrackGroup by pressing ‘Add’ and select ‘Track Group’.
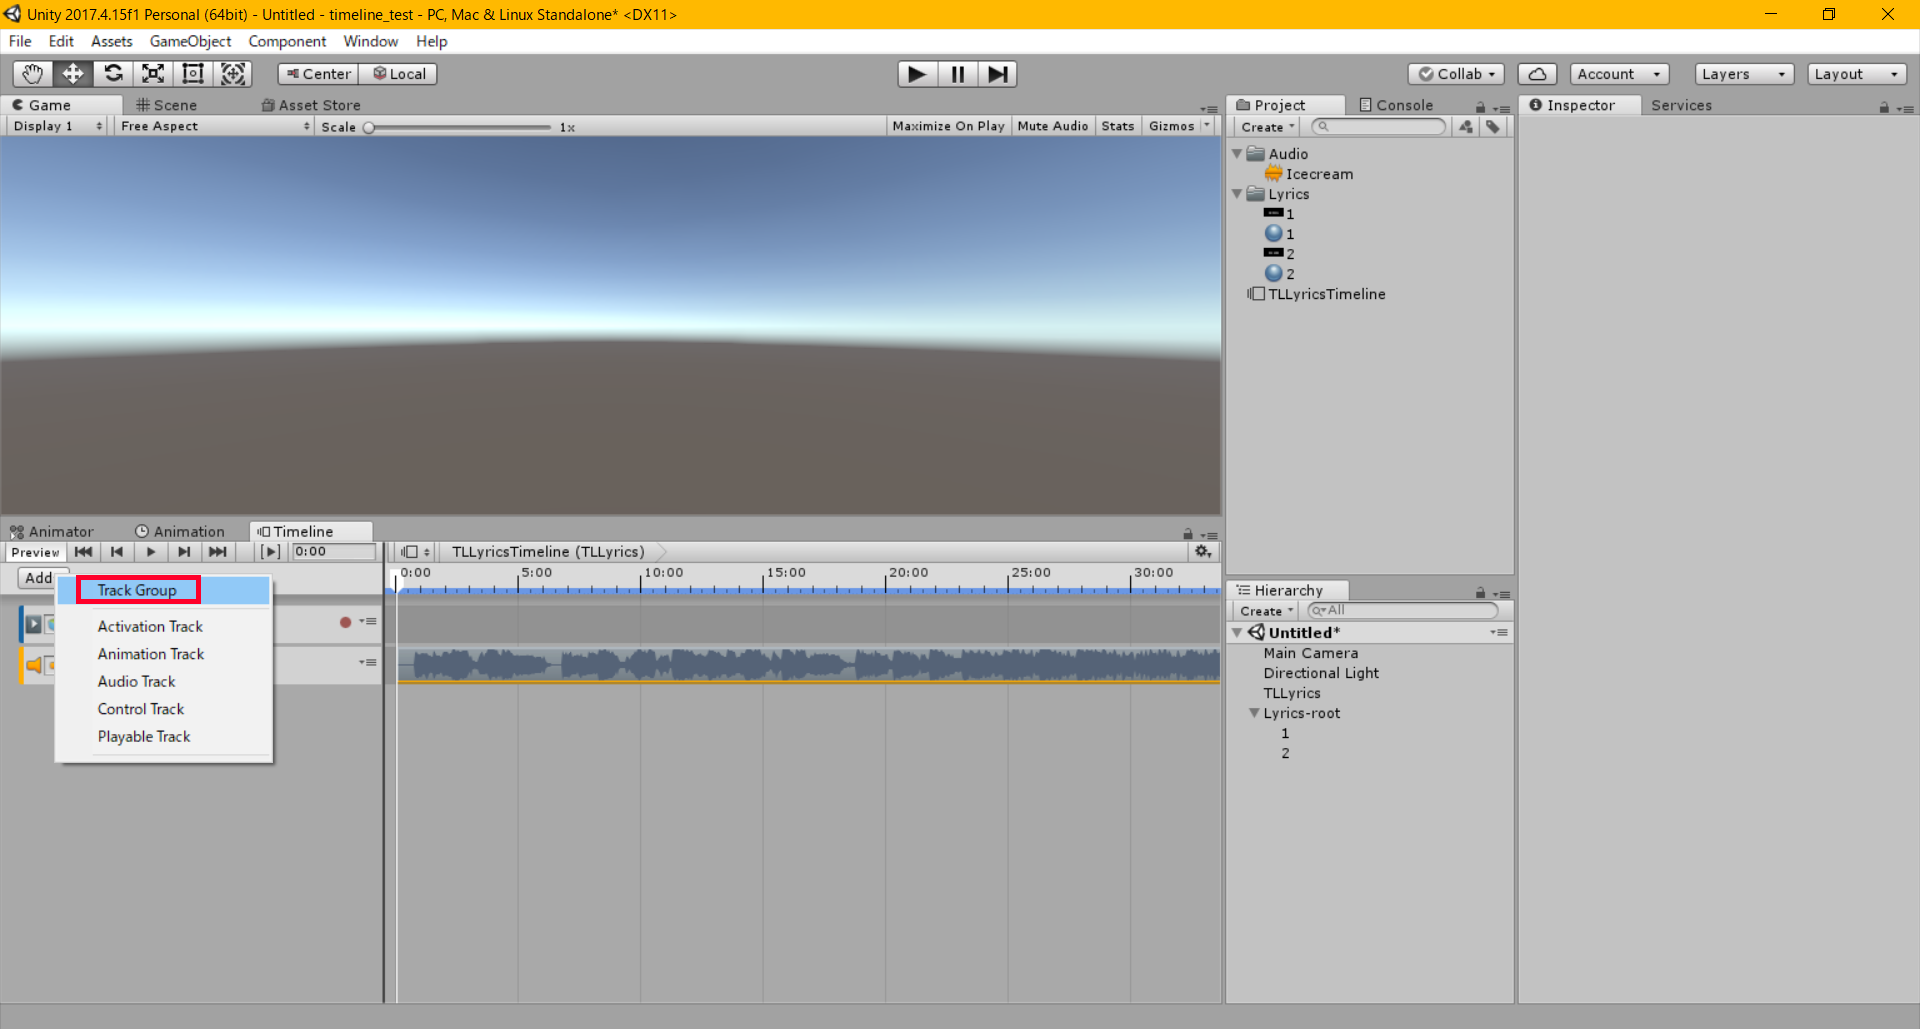
Add ‘Track Group’
Add two ActivationTracks to the TrackGroup and put the lyrics particles created under ‘Lyrics-root’ in the Timeline.
Add ‘ActivationTrack’ to ‘TrackGroup’.
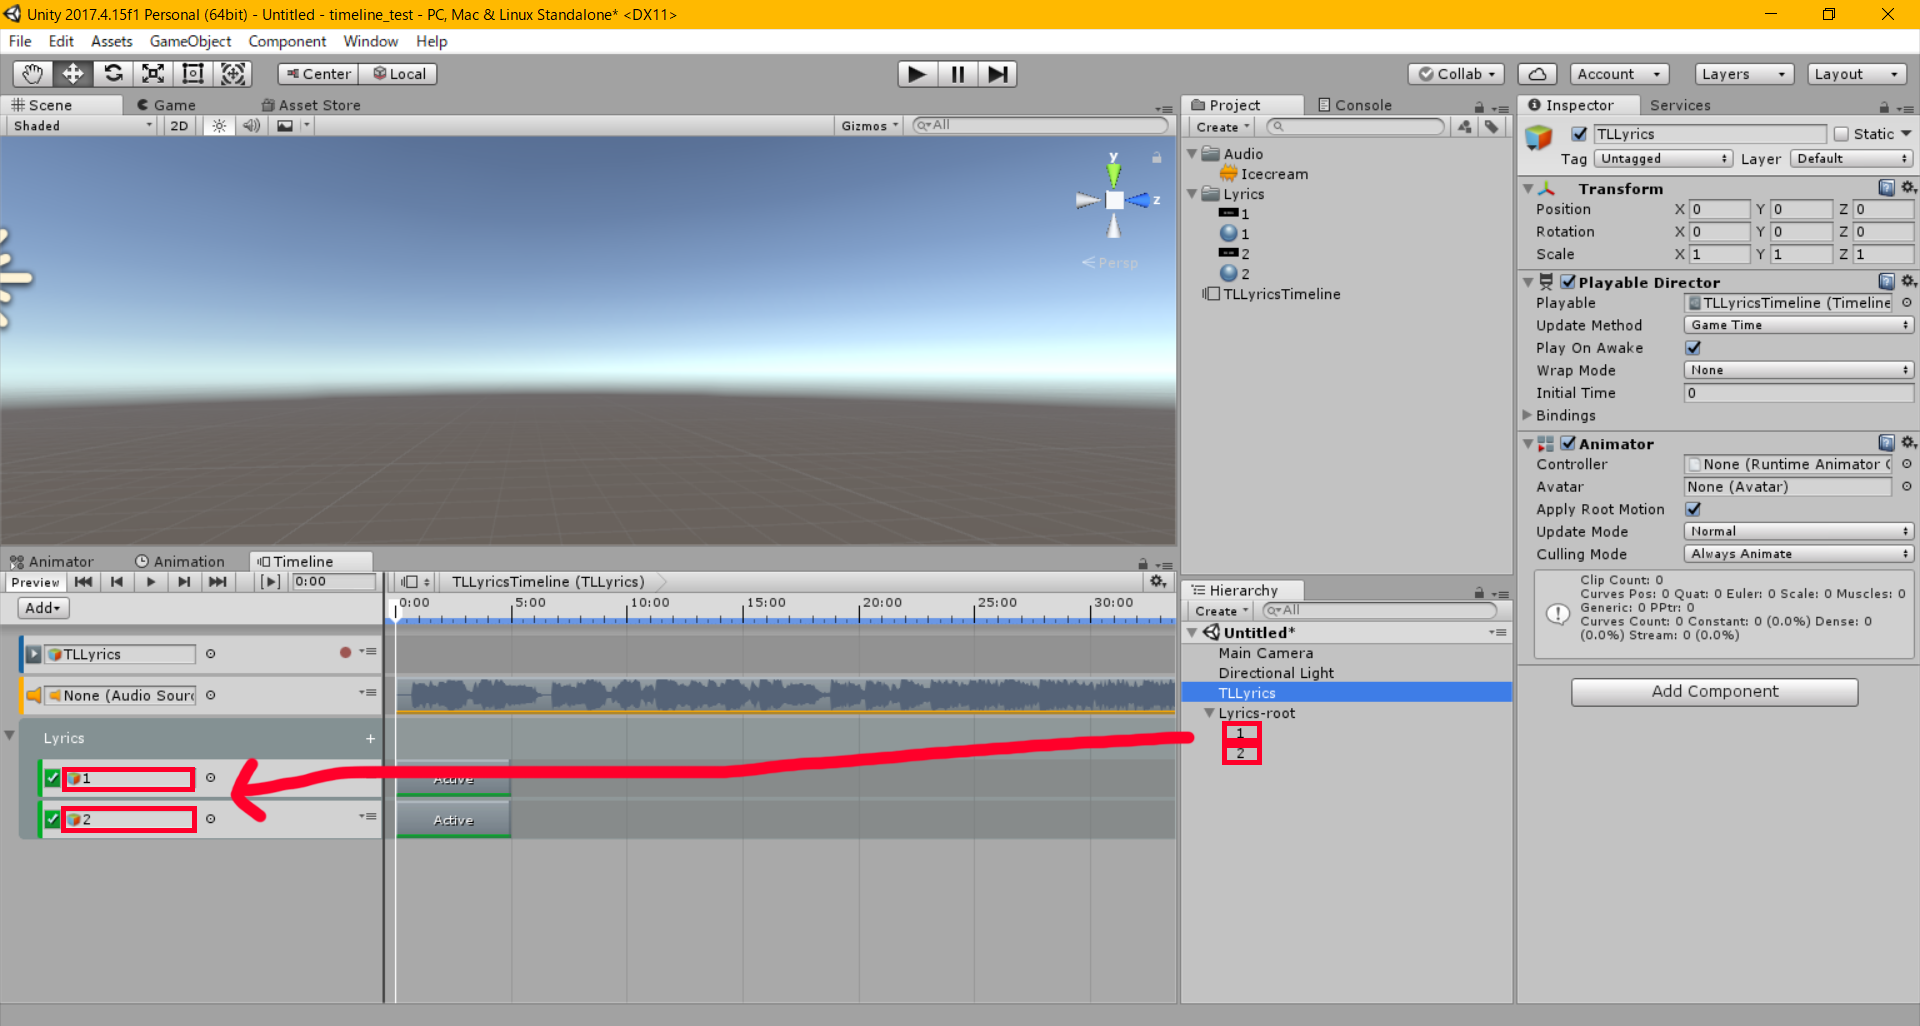
Put the lyrics particles in the Timeline
Make Lyrics Appear to Match the Song
Now, we are going to adjust the settings so that the lyrics appear to match the song.
Play the Scene and while listening to the music, time the lyrics particles so that they appear to match the song. I adjusted the main camera for better visibility. I set the Position of Transform to (0, 0, -0.5) and ‘Clear Frags’ of the camera component to ‘Solid Color’ (with the background set to black).
Now, we want to time the lyrics to match the song. Play the Scene and stop it at the beginning of the lyrics and then adjust the clip to the Timeline Playhead. You can also fine-tune it with the waveform. Next, adjust the clip so that it disappears when the song finishes.
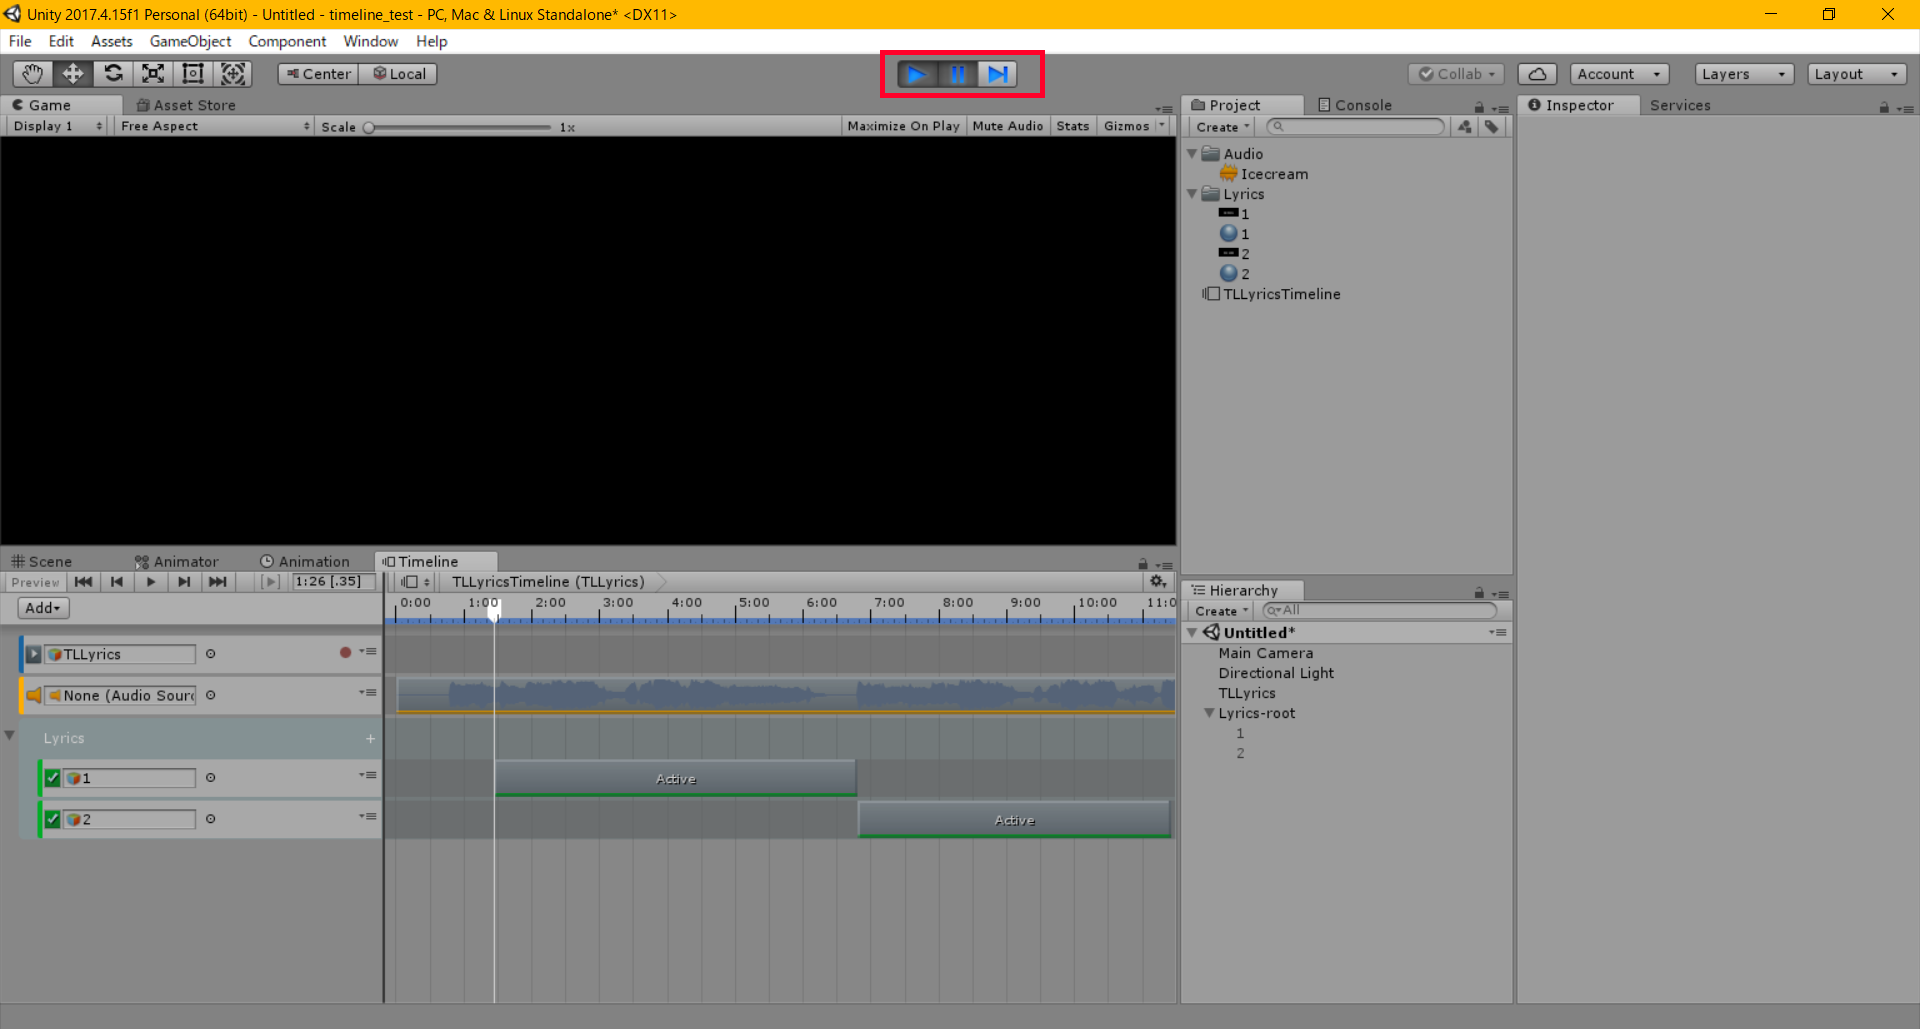
Adjust the clips of the lyrics particles.
In this state, the particle doesn’t disappear at the specified timing although it does appear at the specified timing. This is because the length of the clip doesn’t correspond with the lifetime of the particle.
Stop the Scene, select the clip and copy the value of ‘Duration’. Paste it into the ‘Start LifeTime’ of the corresponding lyrics particle to make the particle appear and disappear at the timing that corresponds to the length of the clip.
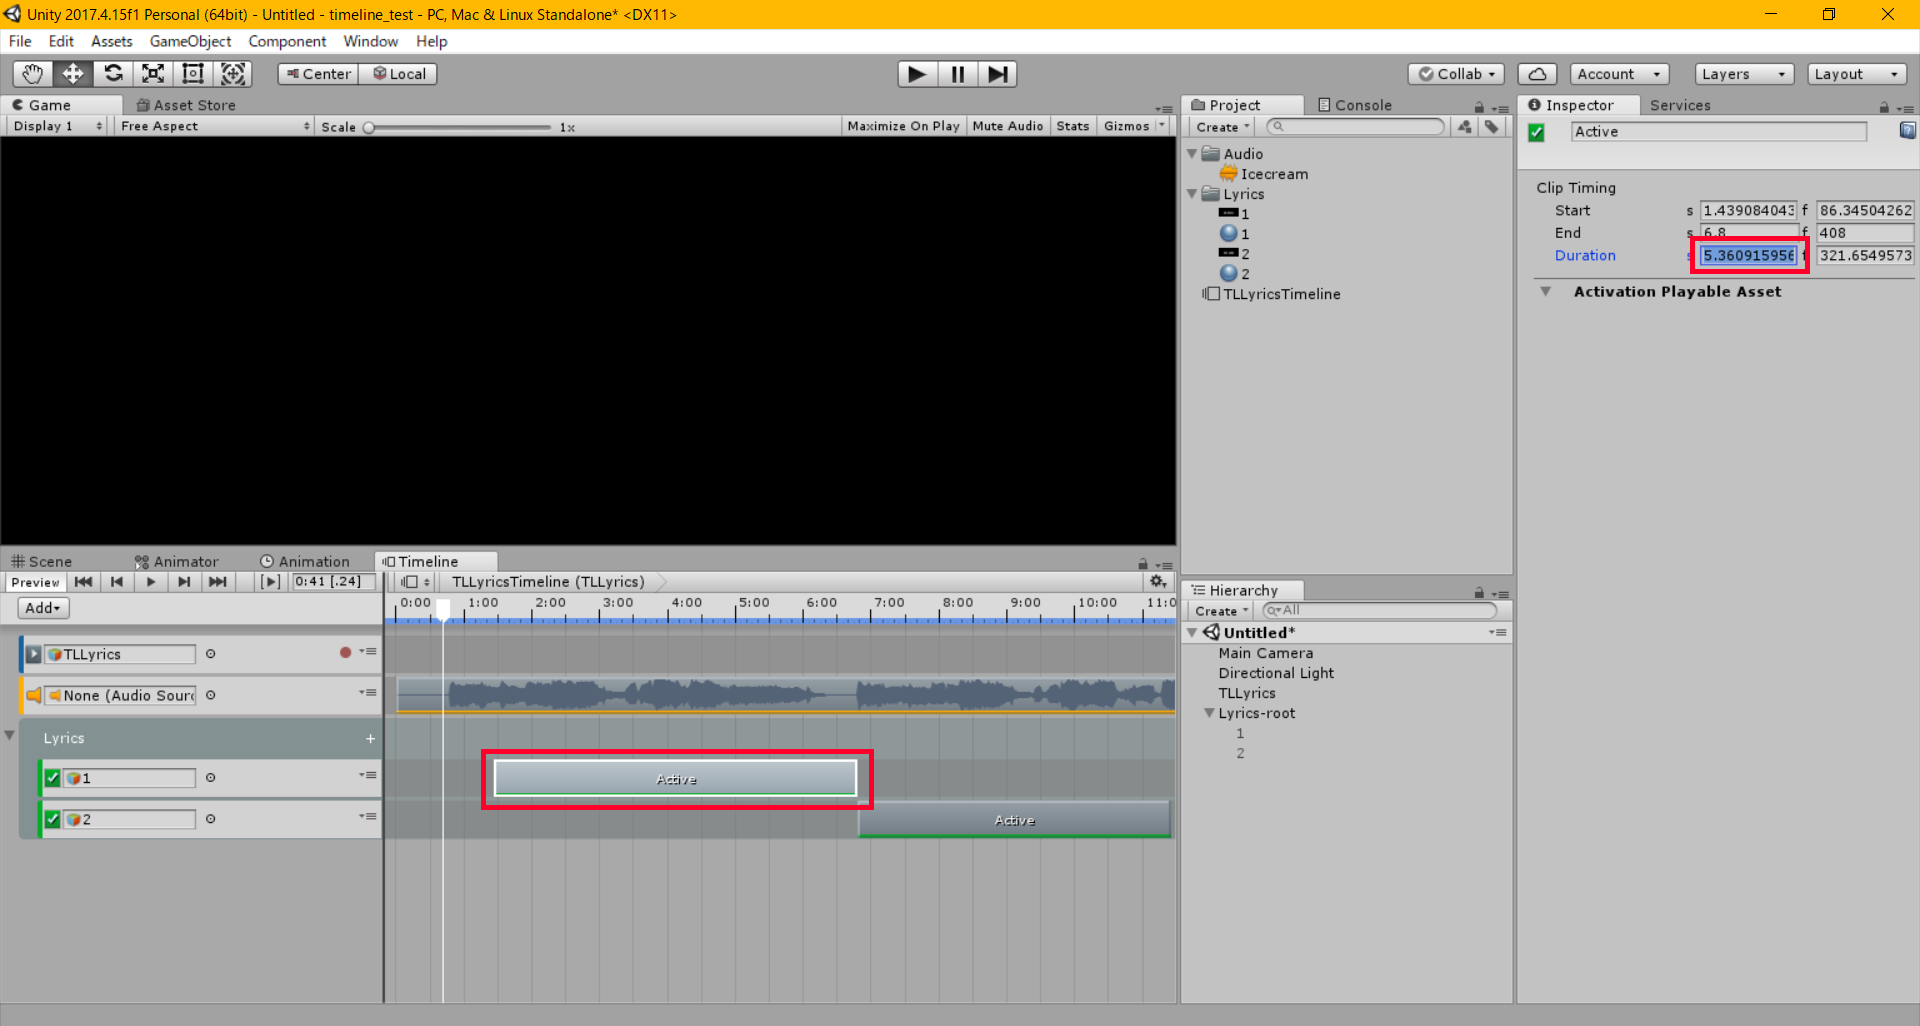
Copy ‘Duration (Seconds)’ of the clip
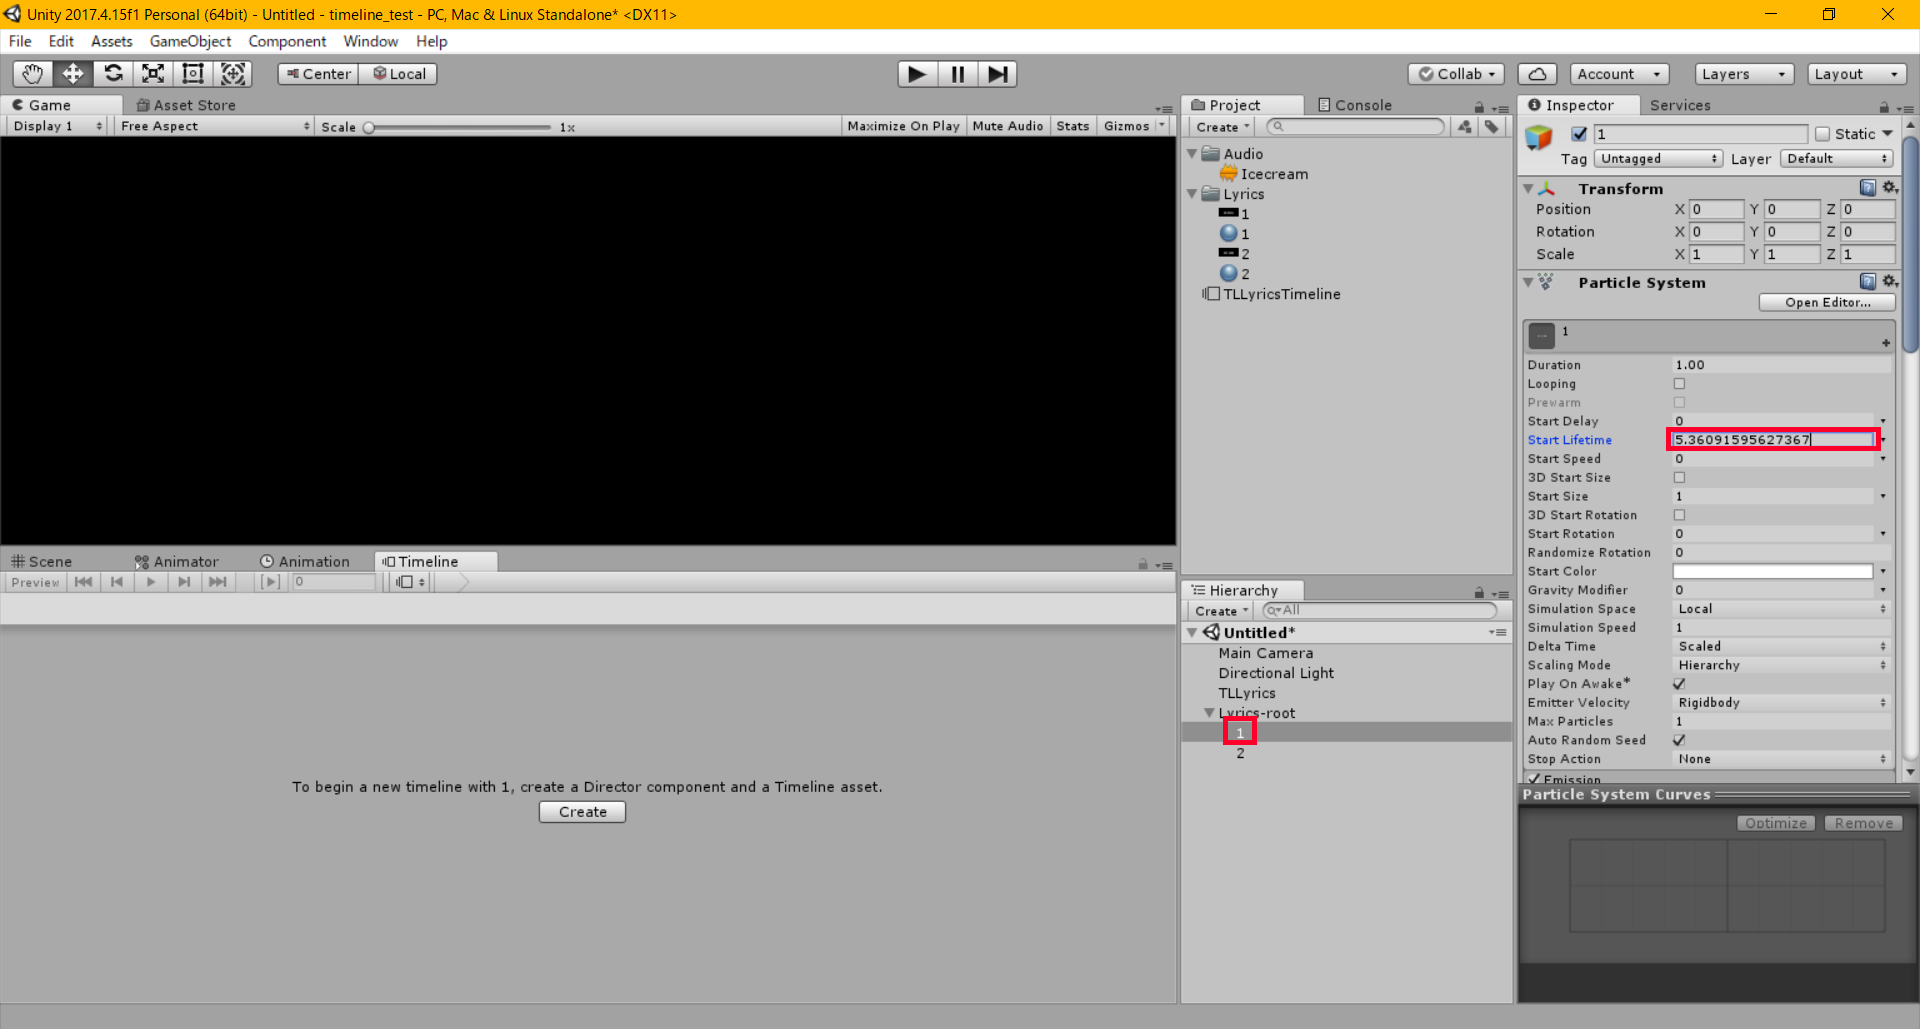
Set it as the ‘Start LifeTime’ of the corresponding particle
By applying these settings to both ‘lyrics’ particles ‘Namae Wo Yobareta’ and ‘Mieru Kokoro No Okusoko’ (1 and 2), they successfully appear and disappear at the specified timing which is now synchronized with the song.
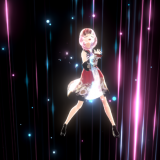
I added an avatar and other particles to those ‘lyrics’ particles to create a Scene which is shown below.
This concludes the tutorial on the basics of lyrics-based particle live shows.
I also recommend the following article to create various expressions by using particles and shaders. Please try to make other expressions by yourself!