Check with Unity
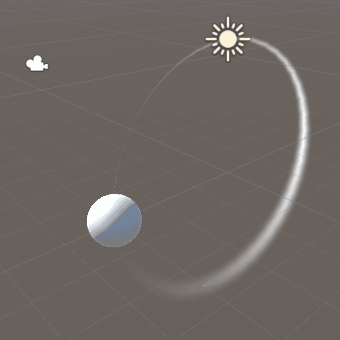
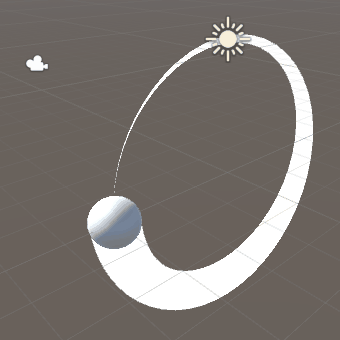
Finally, you will be able to draw a trajectory like this.
I have tried lighting up the tuna trail
I think there are a few tuna jumping around like flying fish in the following piece. The white tracks coming out from behind those tuna are the “trail renders”.
(Click the arrow button at the center of the screen to start.)
In this article, I am going to show you how to use this trail renderer in STYLY.
What is Trail Renderer?
Trail may refer to “a trail” in English. It also means something like a “meteor’s tail,” and this time it might be closer to the image of the latter.
Trail Renderer allows you to create a trajectory behind an object as it moves.
It is included in Unity by default, so you don’t need to add an asset for usage.
For more information, please see the official page of Unity.
https://docs.unity3d.com/ja/2017.4/Manual/class-TrailRenderer.html
Using the Trail Renderer in Unity
Now, let’s see how to use the trail renderer.
Set up a ball
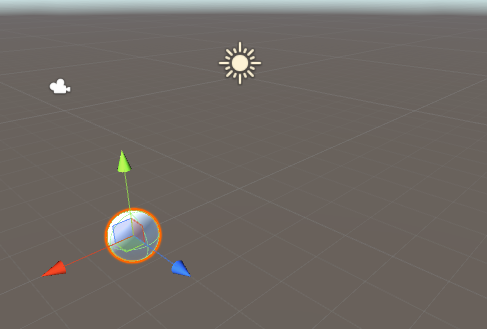
First, let’s create a Unity project and set up a sphere.
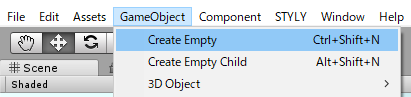
Select Create Empty
Click on “GameObject > Create Empty” in the menu bar.
Continue and click on “GameObject > 3D Object > Sphere”.
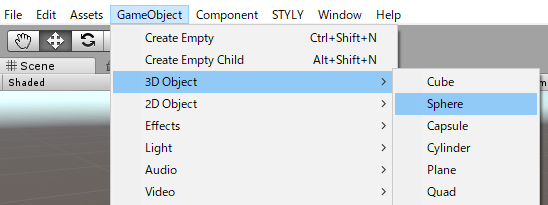
Select “Sphere”
Look at the “Scene” tab. I believe the sphere was placed at the origin as shown below.

Place the ball at the origin
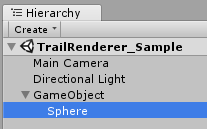
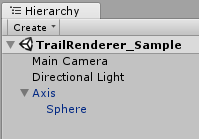
In the “Hierarchy” tab, I believe we have added “GameObject” and “Sphere” as shown below.
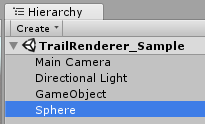
Check the Hierarchy window
As shown in the figure below, the Sphere should be subordinate to GameObject.
Storing the Sphere in GmaeObject
It’s hard to understand if the name is still “GameObject”, so let’s change the name to “Axis” as follows.
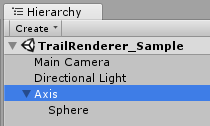
Name changed to Axis
Select “Sphere” again.
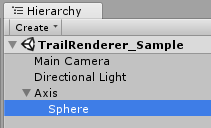
Select “Sphere”
When selected, go to the Inspector tab and change the Transform > Position > X to 3. It’s the “Sphere” position that changes, not the Axis’. Be mindful not to make a mistake here.
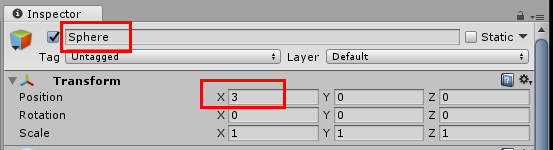
Sphere, Position x to 3
The position of the ball was slightly shifted as shown below.
The ball was out of position
Create an animation of a ball in circular motion
Next, let’s create an animation that rotates the sphere.
Click “Window > Animation” in the menu bar.
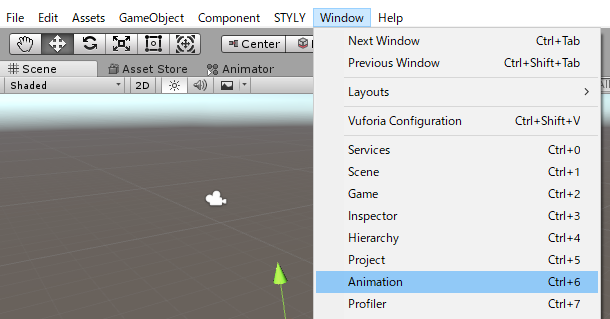
Click on Animation
You should now see the “Animation” tab as shown below.
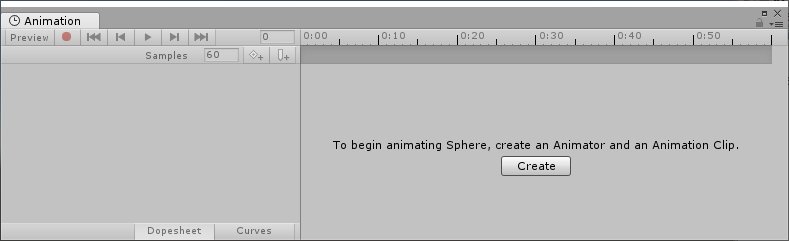
View Animation Tab
In the Hierarchy tab, select Axis.

Select Axis
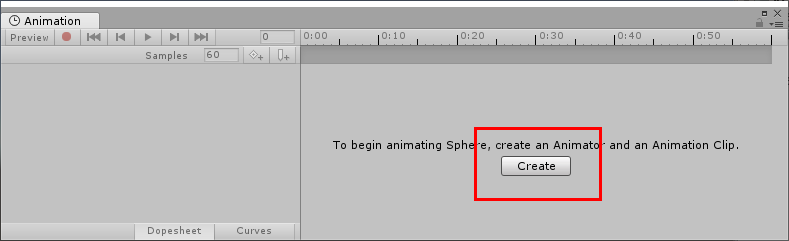
Click on Create
With “Axis” selected, go to the “Animation” tab and click “Create”.
Then the following dialog will be displayed.
Please save the file as “Circular.anim” in an appropriate folder.
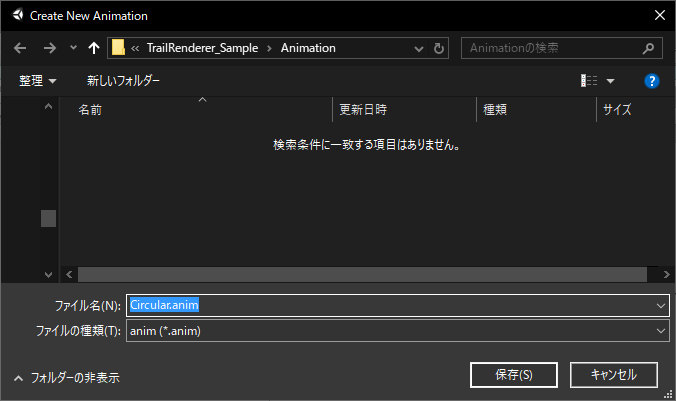
Save the animation file
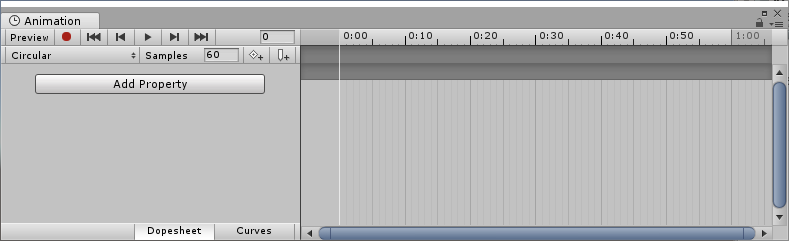
Animation Tab
Then, the “Animation” tab will look like the following-
Click on “Add Property” and click on the + to the right of “Transform > Rotation”.
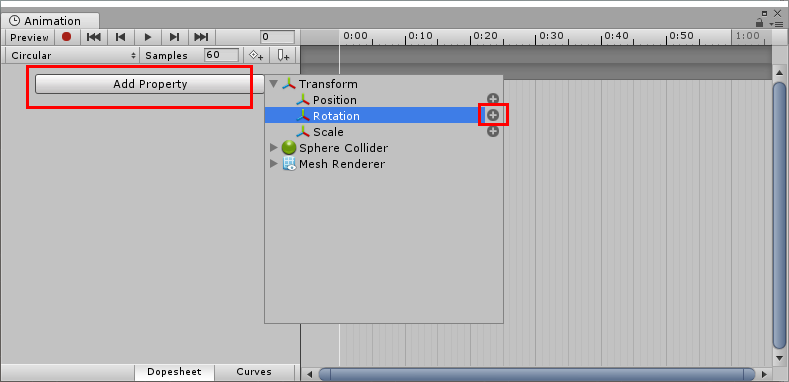
Click the + button on the right of Rotation
Then, the “Animation” tab will look like the following.
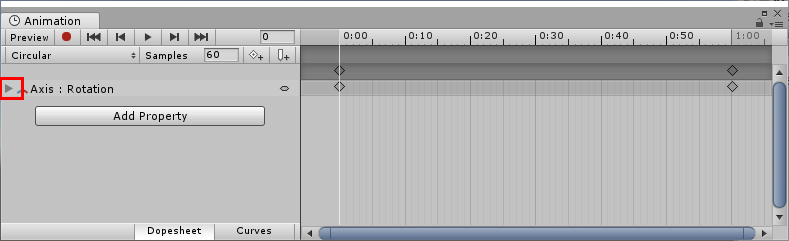
Click on “▶” to the left of “Axis:Rotation” and select “Rotation.z”.
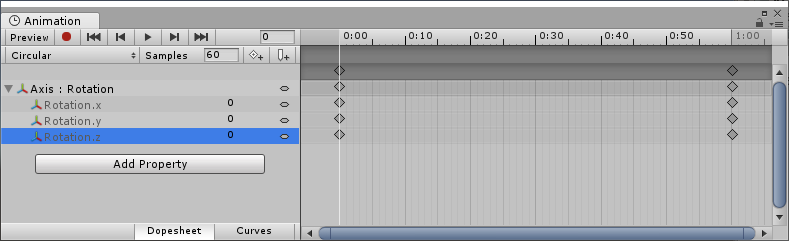
Select “Rotation.z”
Change the number in the red frame to “60” and press enter. Then, the white vertical line will move to the “1:00” point.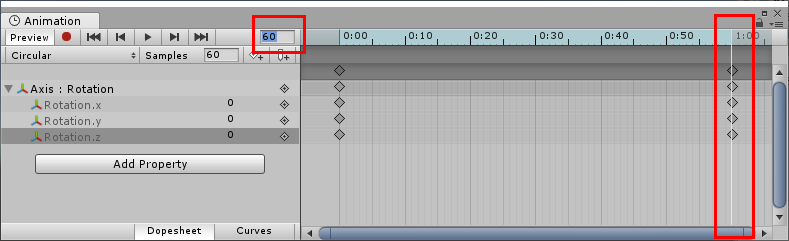
Change the number in “Rotation.z” to “360” and press enter.
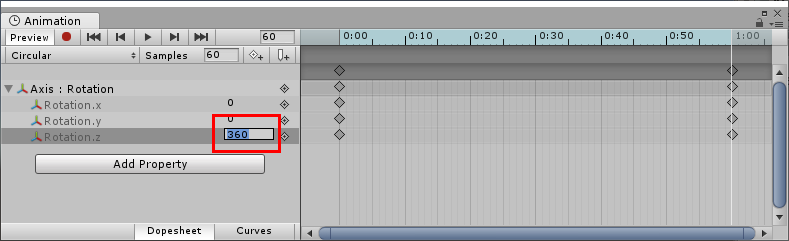
Set Rotation.z to 360
Now that you’ve made it this far, let’s run the scene!
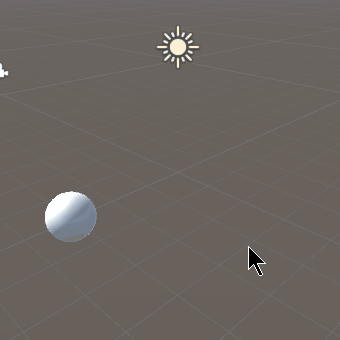
The ball spins
The ball moved in circular motion!
Trailing the ball with a trail renderer
Finally, it’s time for the trail renders.
First, select “Sphere”.
Select Sphere.
Click on “Component > Effects > Trail Renderer” in the menu bar.

Select Trail Renderer
The “Inspector” tab now has a new component called “Trail Renderer”.
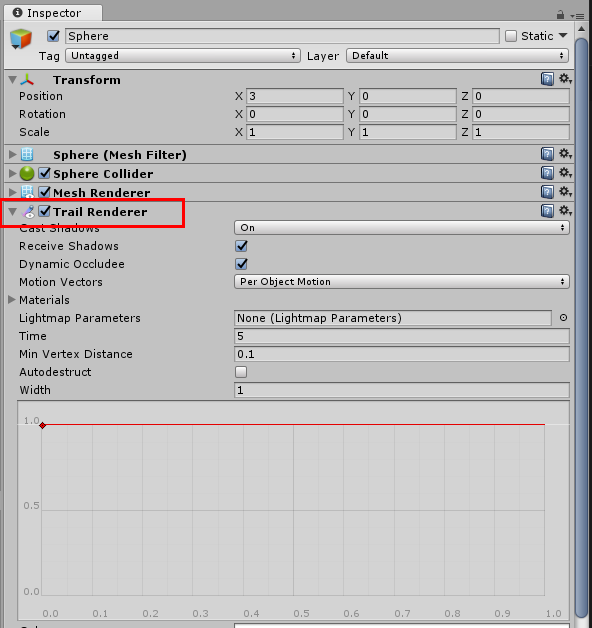
Trail Renderer settings
Let’s run the scene once and for all!
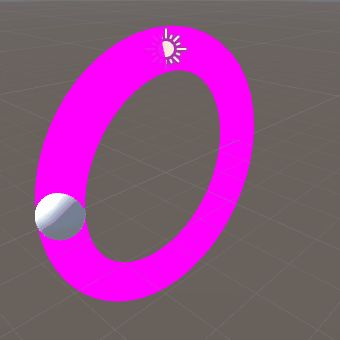
Check out the pink trail
A pink trajectory has been displayed!
Adjusting the lifetime and thickness of the locus
Let’s get the trails (trails) in shape.
First, set “Time” to “1”, as the life of the trail is set as one second.
Next, we will adjust the “Width” graph. If you double-click on the bottom right side of the graph, you’ll get one more control point, so place it exactly at the bottom right. It should look like the diagram below.
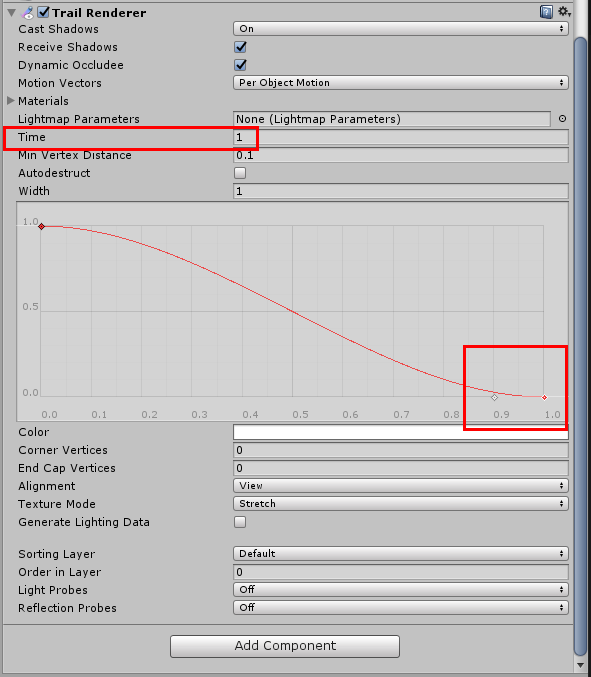
Time is set to 1
Let’s run the scene at this point!
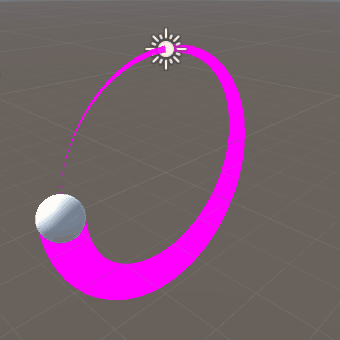
The trajectory gets progressively narrower.
The trajectory is getting progressively thinner!
Change the color of the locus
The locus is pink is because the material has not been applied. From there, we will create a material.
Right-click on the appropriate folder on the ‘Project’ tab and select ‘Create > Material’.
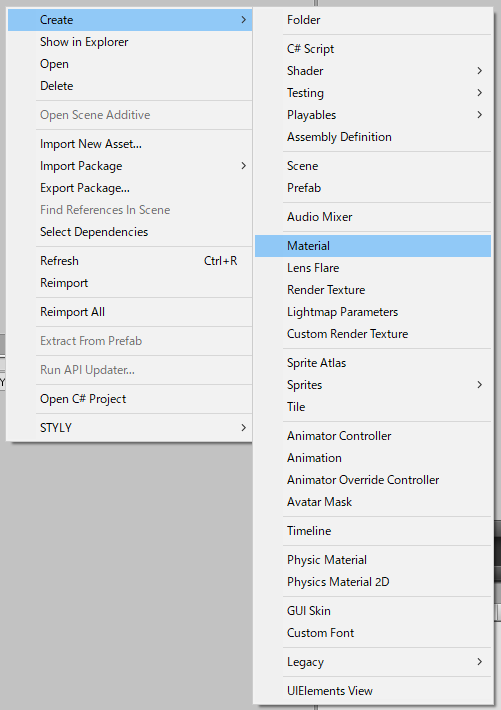
Select Material
The material will be named as “Trail”.
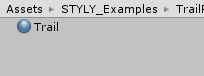
Changed the name of Material to Trail
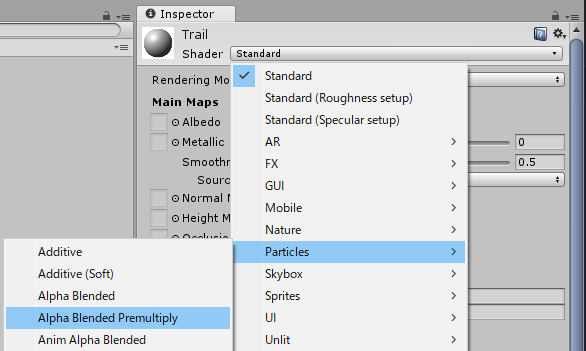
Set to Alpha Blended Premultiply
In the Inspector tab, change Shader to Particles > Alpha Blended Premultiply.
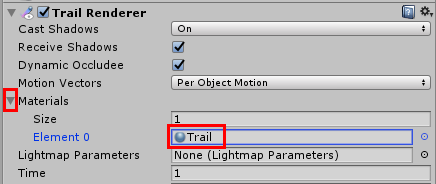
Once the material is created, set it to “Materials > Element 0” in the “Trail Renderer” section of the “Sphere” section.
Let’s run the scene!
The trajectory turned white
The trajectory has turned white!
Changing the texture of the locus
Let’s change the texture of the locus.
In the “Inspector” tab of the “Trail” material, change “Particle Texture” to “Default-Particle” as shown in the image below.
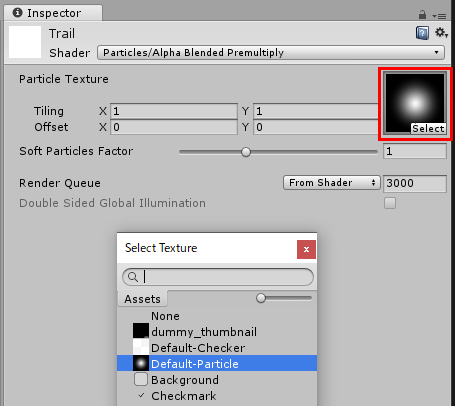
Changed texture to Default-Particle
Let’s run the scene again!
The trajectory became thinner
How to upload to STYLY
Once you’ve done that, you can now prefabricate Axis in the “Hierarchy” tab and upload it to STYLY.
Make Axis prefab
Check out this article on how to upload a prefab from Unity.

How to upload a prefab from Unity to STYLY
Take a look at a sample scene.
The trajectory of the ball is now properly displayed!
With the Trail Renderer, you can easily add effects to moving objects. We hope you’ll try different variations!