In this article, I’ll show you how to implement an animation of the camera moving in space in Unity using PlayMaker and upload it to STYLY. If you can understand the flow of this article, you can create an animation that looks like the following

Sample GIFs
At the end of this article, I’ve attached a Unity package for camera detection for those with time constraints and already understand how Playmaker works.
That Unity package allows you to easily create features like moving and rotating the camera, as described in this article.
Sample.
You can experience “REM” in VR, which is an evolution of the camera movement function from STYLY GALLERY.
Preparation.
Import Playmaker (paid).
Playmaker 1.9.0 https://assetstore.unity.com/packages/tools/visual-scripting/playmaker-36
Once you’ve imported Playmaker, open a new project in Unity and install PlayMaker.
The Asset named iTween used this time is mentioned here but is not included in PlayMaker version 1.9 or later, it is necessary to import iTween manually.
If you are using a PlayMaker version anterior to v1.9, you can skip the following “Import of iTween (direction of using PlayMaker 1.9 or later)” because it is included when you install PlayMaker. You can check if iTween is included or not from the Assets in the Project window.
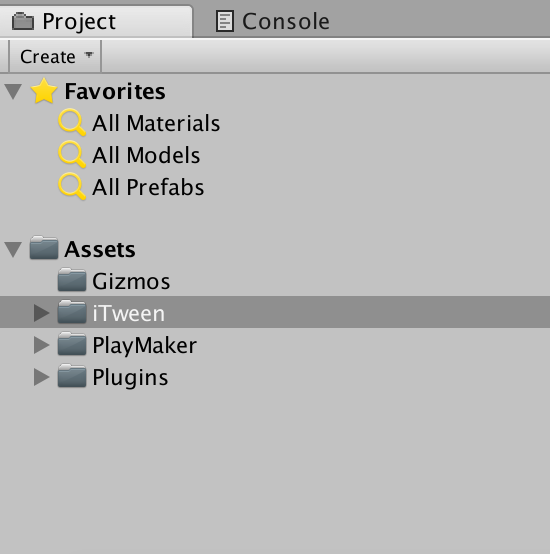
Project window (with iTween)
If you don’t see iTween in Assets, you need to import it, so read the next chapter to import it.
Importing iTween (for users with PlayMaker 1.9 or later)
First, import iTween in the Asset.https://assetstore.unity.com/packages/tools/animation/itween-84
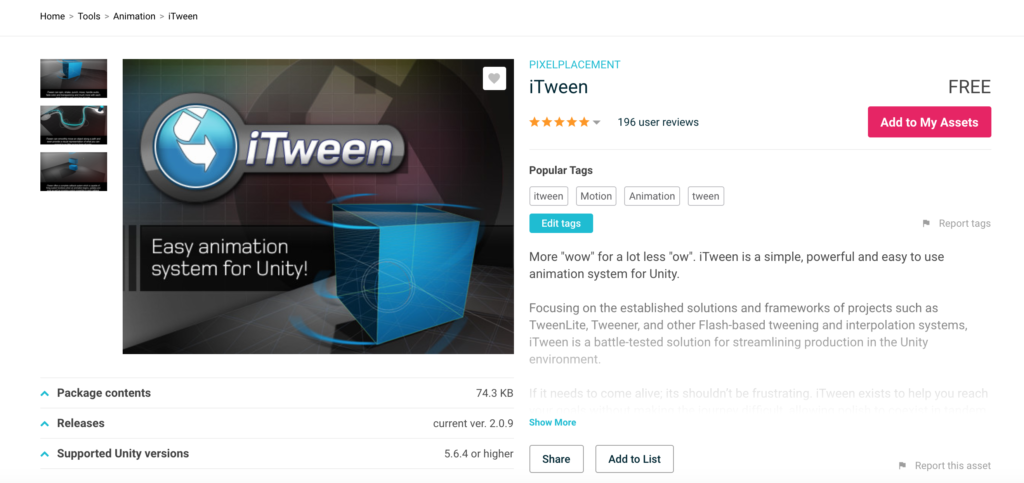
iTween import screen
Click on “Add to My Assets” and you will be prompted to enter your Unity account information and sign in with your email address and password.
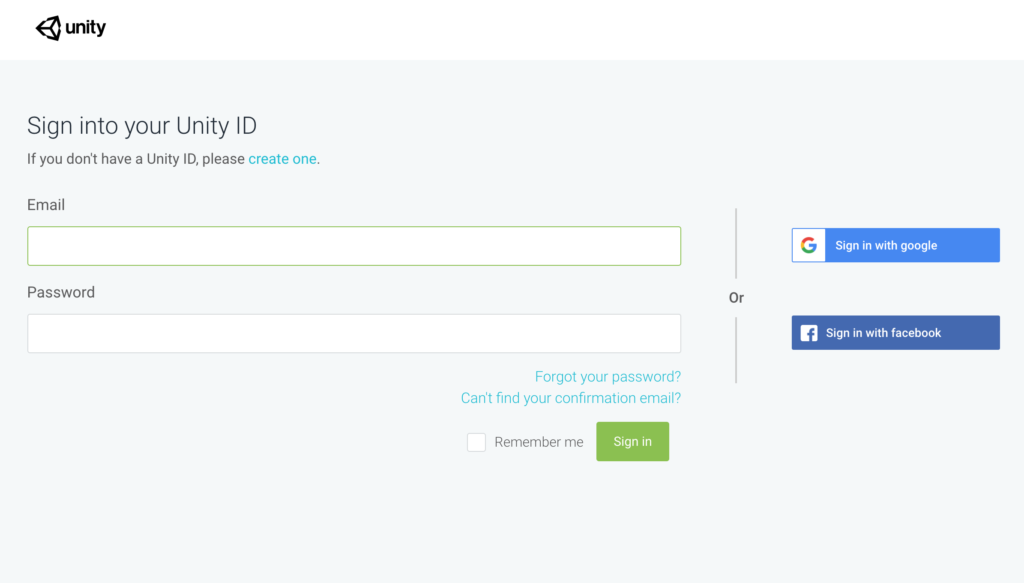
sign-in screen
Check out Unity’s Asset Store. Make sure that iTween is installed from “My Assets” under “Asset Store” and click “Import”.

Asset Store
Next, go to “PlayMaker” in the menu bar and select “Welcome Screen”.
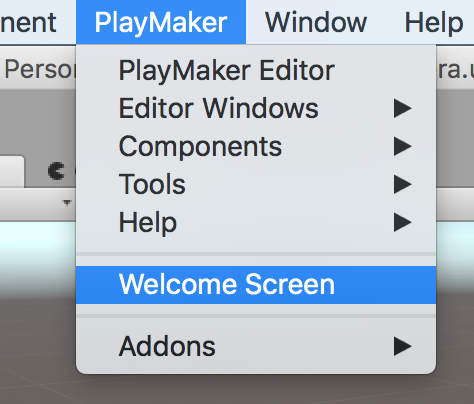
Welcome Screen
Next, click on “Add-Ons”.
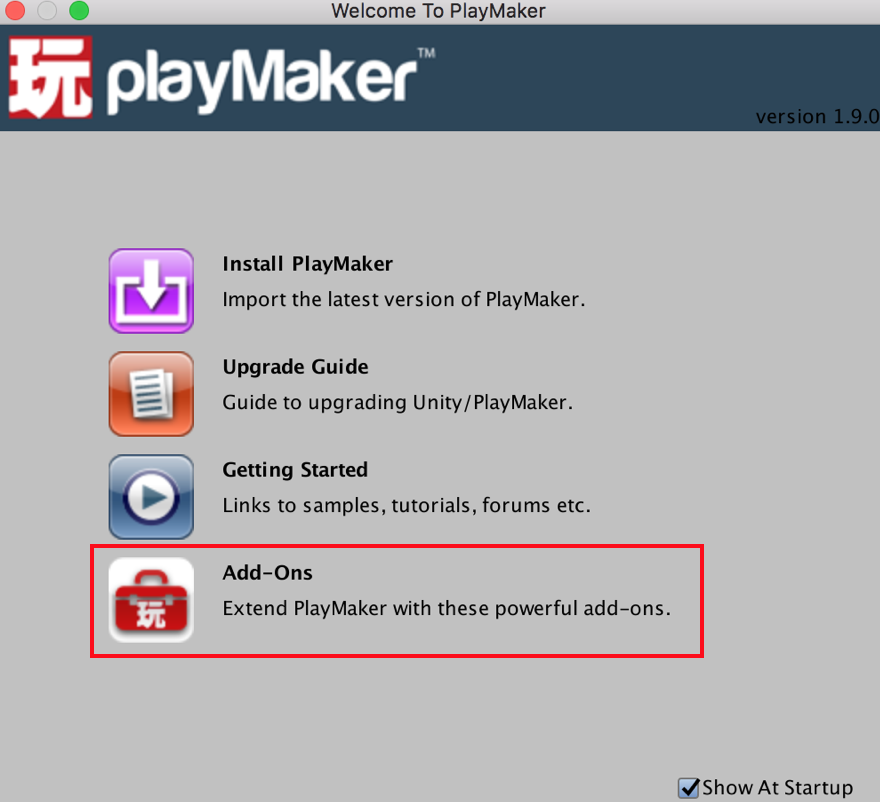
Add-On selection screen
Click on “Import iTween Support” at the bottom and select “Yes” once an alert is displayed to start importing.
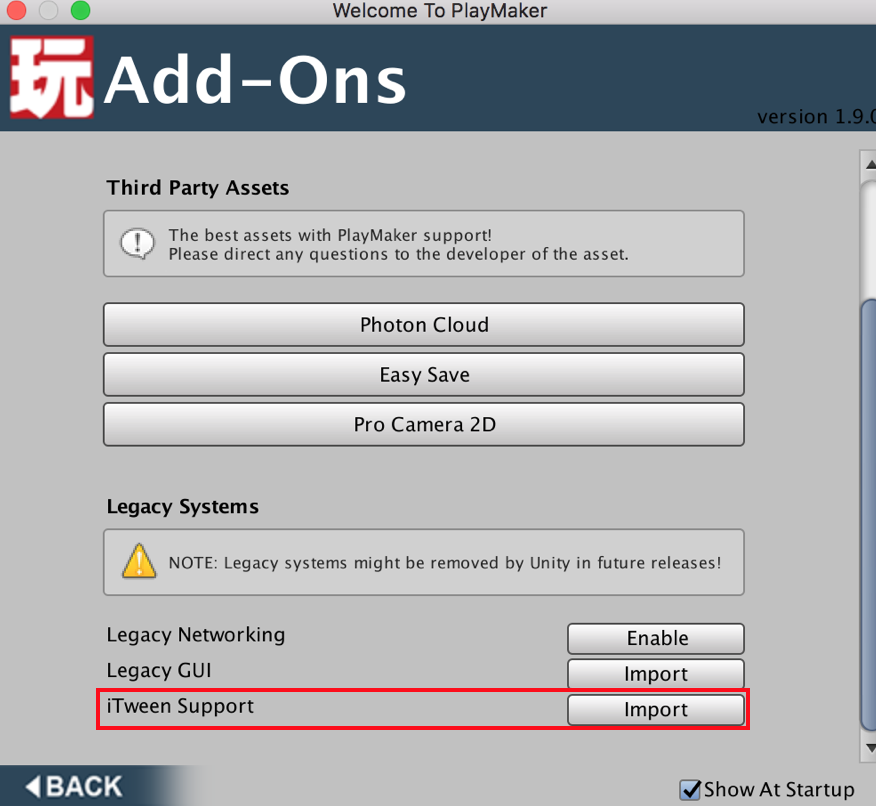
iTween import screen
Check Assets in the Project window. iTween should be in the PlayMaker folder.

iTween
Settings to support various headsets.
In this article, we will create an animation that moves the camera between two blocks, as shown below.
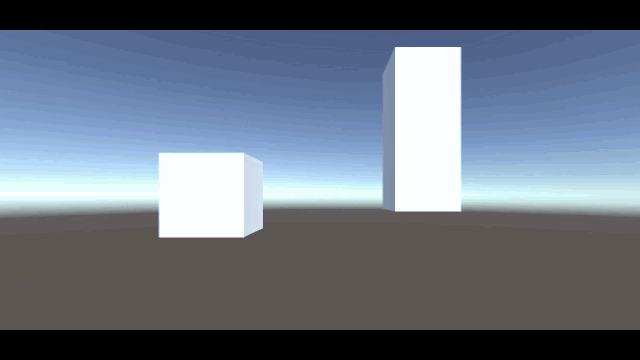
Finished GIFs
Create two cubes in the Hierarchy window with Create and name them “block1” and “block2” respectively. The settings in the Inspector view of block1 and block2 should be as shown in the following image.

Configuration of block1 and block2
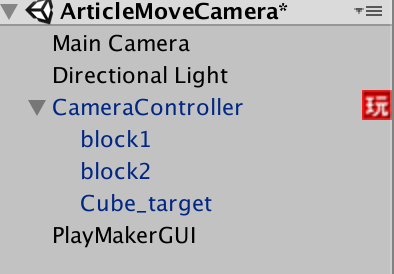
Next, in the Hierarchy window, right-click on CreateEmpty and name the object “CameraController”.
This CameraController is the object used to run the camera.
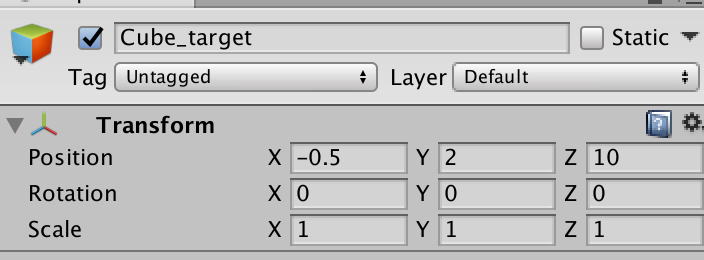
Create one more “Cube_target” in CreateEmpty. The setting of the Inspector view of Cube_target will be explained later with the purpose, so please skip it for now.
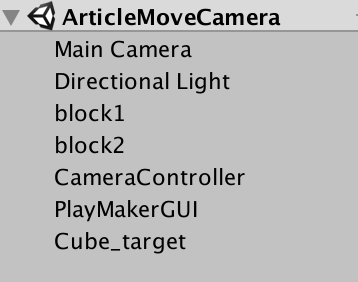
Hierarchy Window
With CameraController selected, click [PlayMaker] and [PlayMaker Editor] in the menu bar.
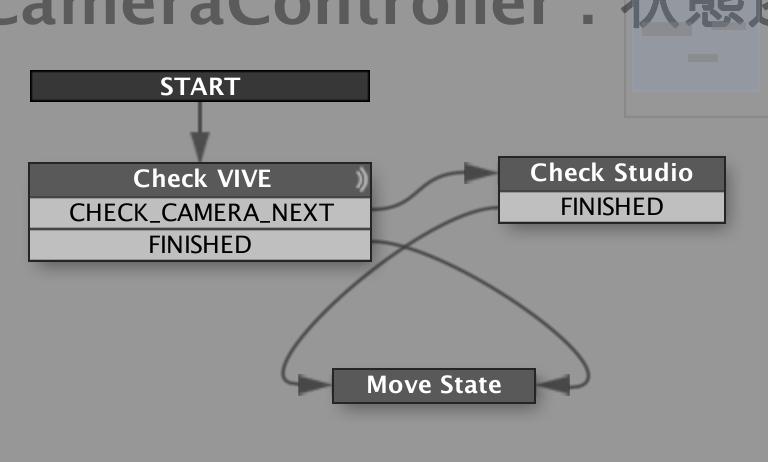
In PlayMaker, right-click on “Add State”.
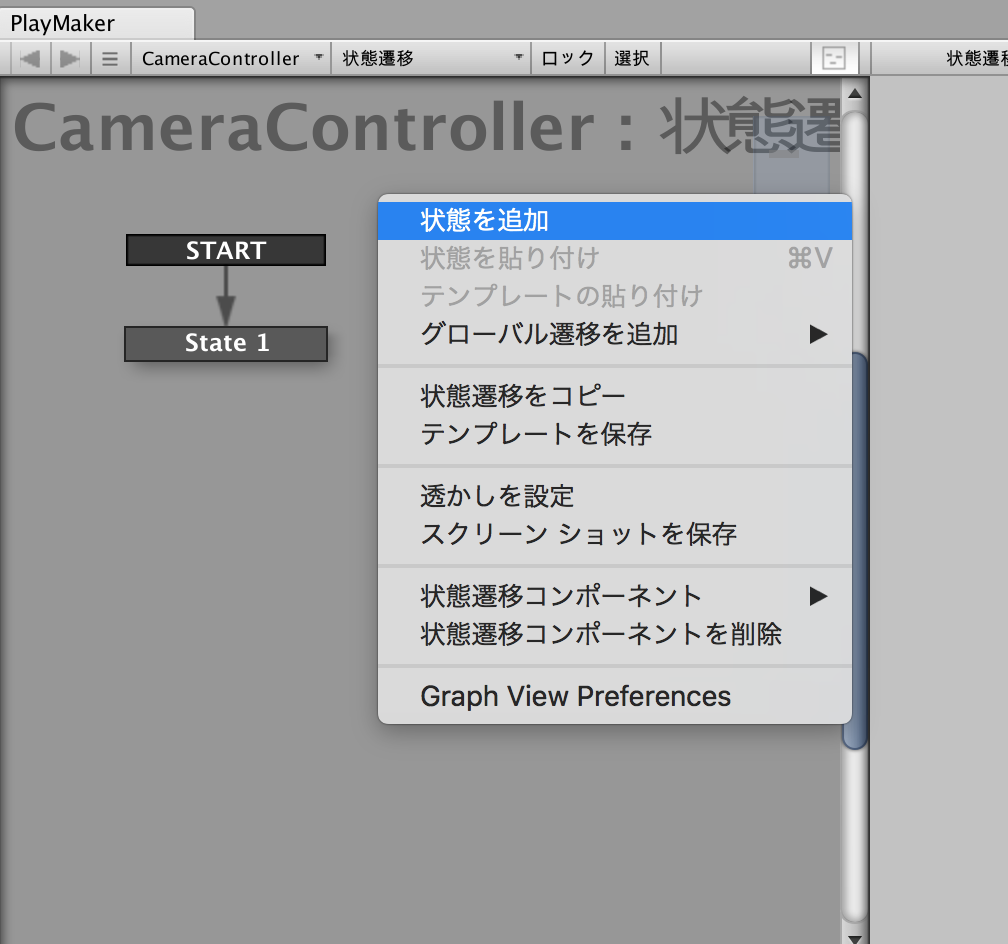
Add State Transition Screen
Add a variable in the Variables tab.
Set the name of the variable to “camera” and the type of the variable to “Game Object” and click “Add”.
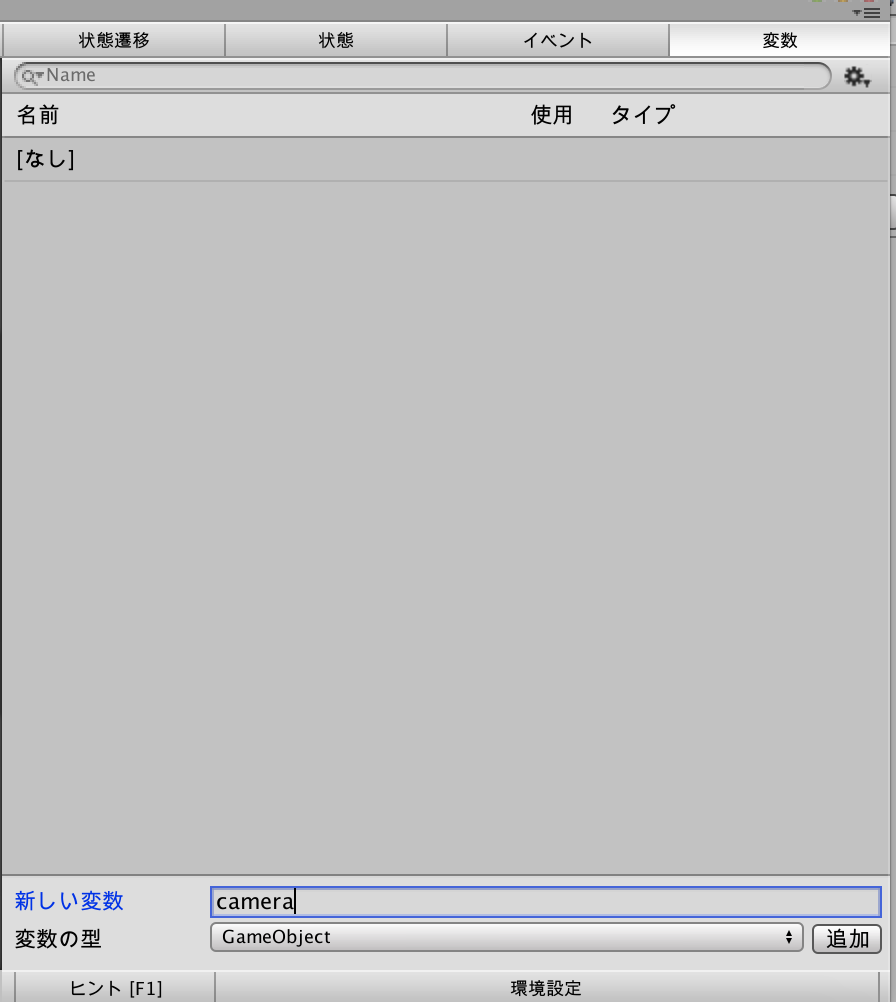
Add Variable Screen
Next, in the Events tab, enter “CHECK_CAMERA_NEXT” and add it with the Enter key.
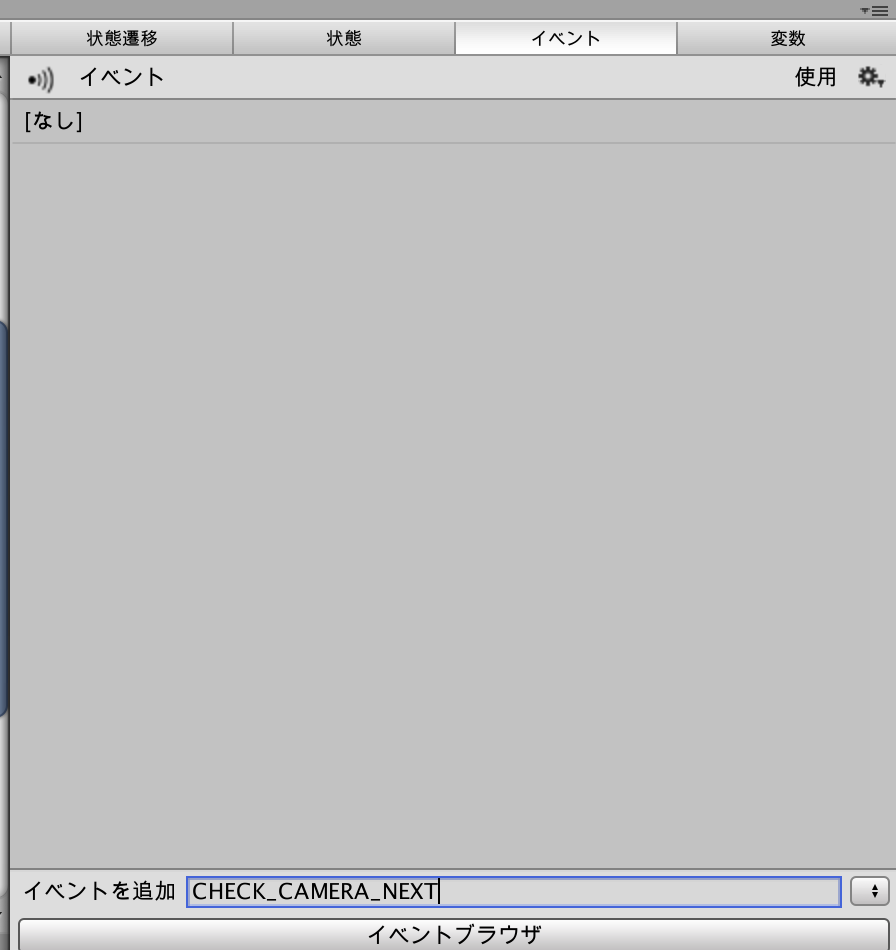
Add Event Screen
Once the event is created, select “Add Transitions” – CHECK_CAMERA_NEXT.
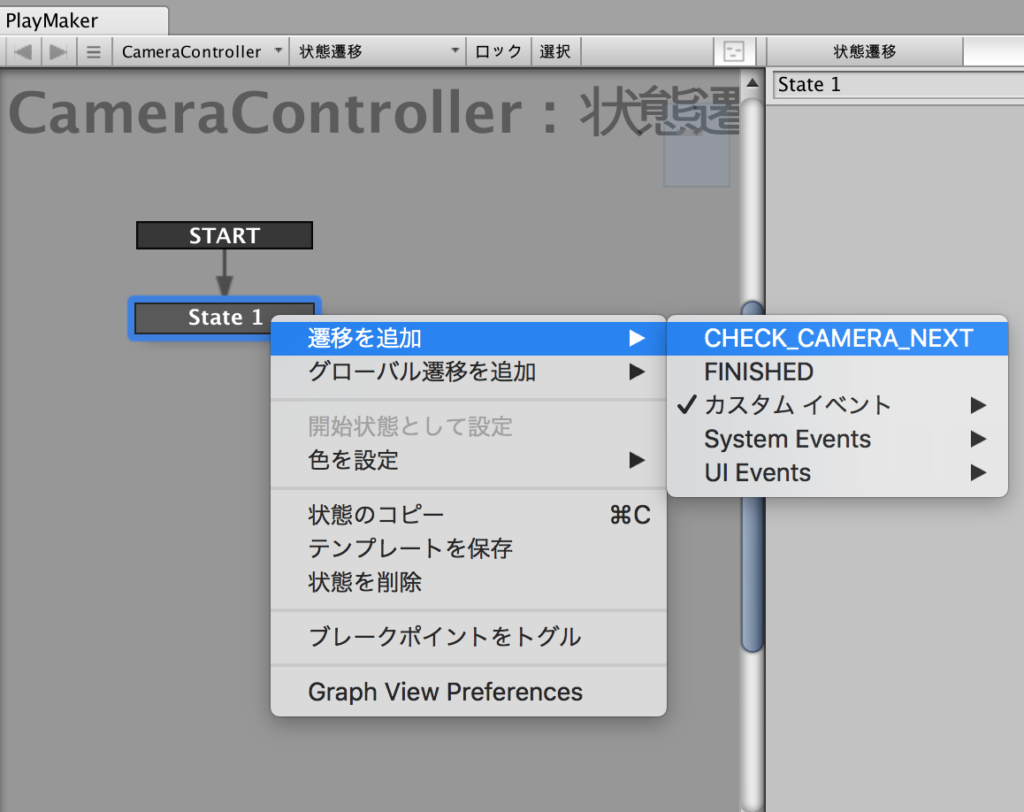
transition addition screen
Similarly, FINISHED should be added under “Add Transitions”.
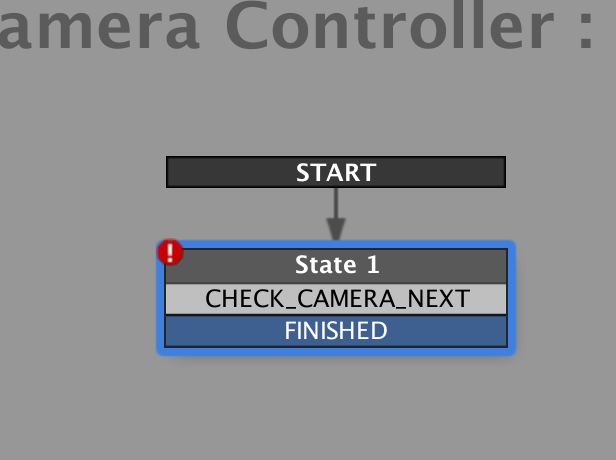
Add FINISHED
Then rename State1 to “Check VIVE”.
Next, from the Action Browser on the Status tab, add two actions, “Find Game Object” and “Game Object Is Null”.
The settings for each action should be as shown in the image below.
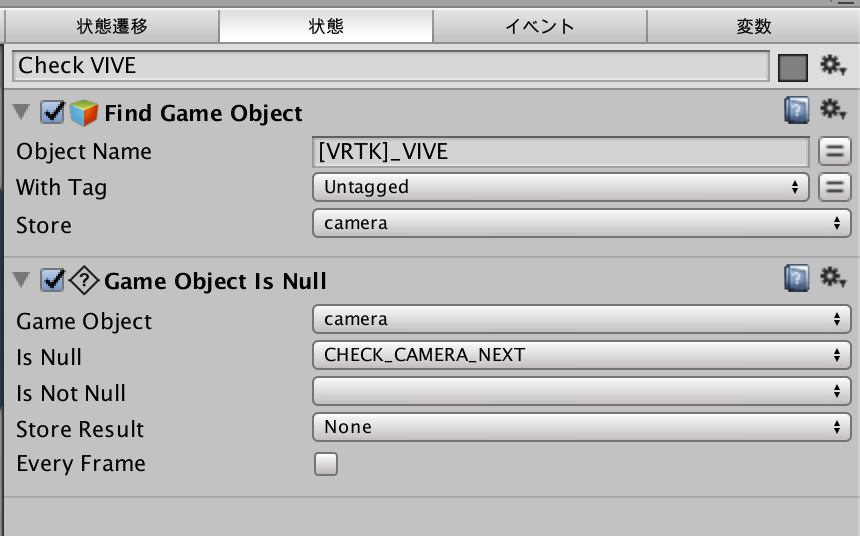
Setting the status of “Check VIVE”.
This completes the configuration of Check VIVE.
Check “VIVE” but with this setting, not only VIVE but also Meta Quest will work.
Next, create a new state, change the state name to “Check Studio” and add a “FINISHED” transition.

Change the state name
Add “Get Main Camera” from the Action Browser on the Status tab.
Store the camera in the Store Game Object.
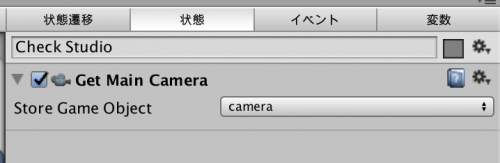
Configuring Check Studio
Connect to Check WebEditor from “CHECK_CAMERA_NEXT” of Check VIVE with the arrow.

Now, if the headset is not detected, it will go to WebEditor.
The next step is to implement the animation that moves the camera.
Settings for moving the camera
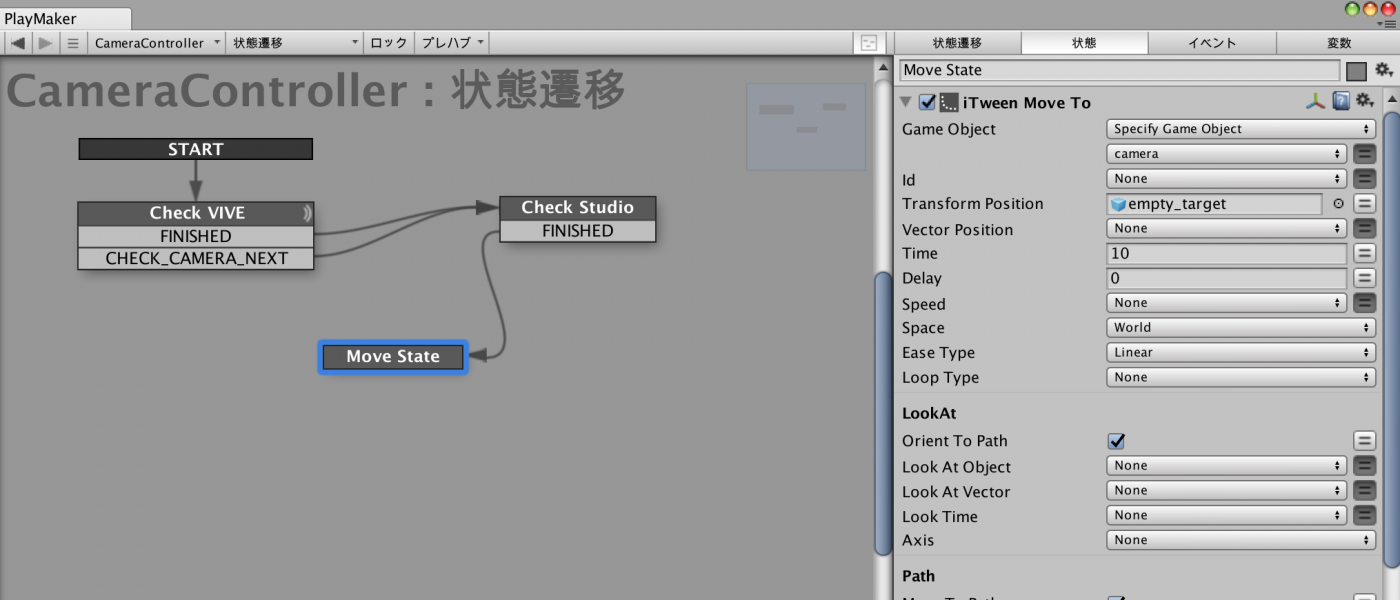
Add a new “Move State” state.
Add an “iTween Move to” action on the Status tab.
This iTween Move to is the action to add the animation. Please configure the iTween Move to as follows.
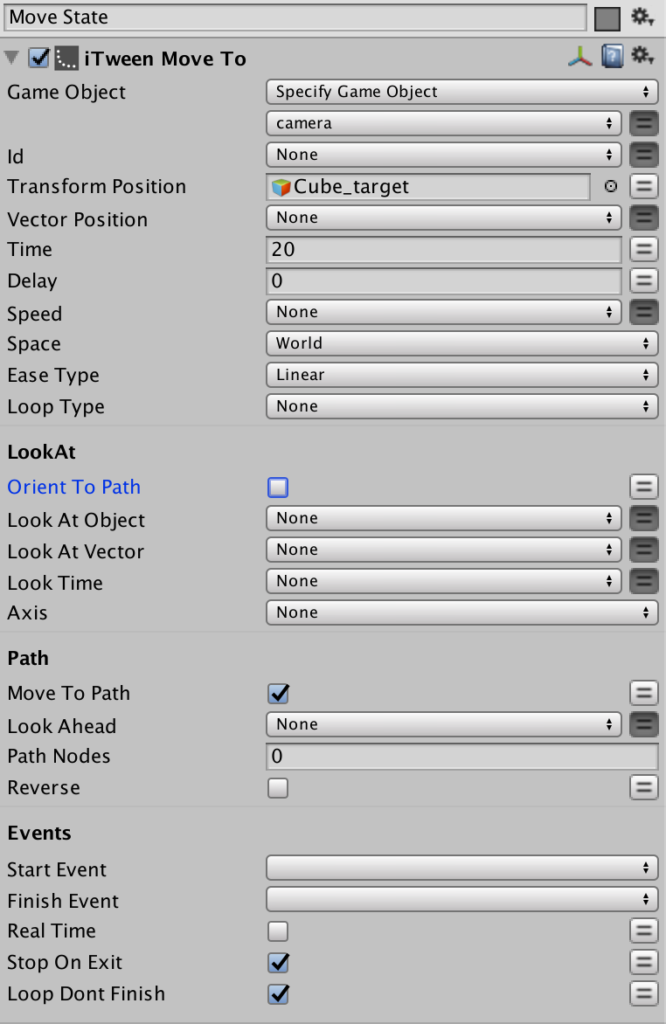
iTween Settings Screen
Here, we briefly explain the meaning and purpose of each of the iTween Move to settings, which are particularly important.
| Game Object | The GameObject to add movement to. |
| Transform Position | Move the GameObject. |
| Time | Time for the animation to complete. |
| Delay | Time to wait for the animation before starting. |
| Speed | This can be used as the speed of the GameObject instead of the time specified in Speed Time. If you define a speed, the Time variable is ignored |
| Ease Type | Easing curve trajectories applied to Ease Type animation. |
| Loop Type | The type of loop to apply after the animation is complete. |
| Move To Path | Whether to automatically generate a curve from the current position of the Move To Path GameObject to the beginning of the path. True by default. |
| Look Ahead | To show how strictly Look Ahead Orient To Path is affected, what percentage (0 to 1) is shown on the path. |
| Start Event | The event to be fired when the iTween is started. |
| Finish Event | The event to be fired when the iTween is finished. |
| Stop On Exit | When the current state is finished, stop the iTween. |
| Loop Dont Finish | Set whether the looping iTween will send anexit event or not. |
So, in order to move the camera between the two blocks, we need to place the Cube target between the two blocks as seen from the main camera.
Let’s also set up the Inspector view of Cube_Target, while confirming the settings in the Inspector view of block1 and block mentioned above.
The author set it up like this.
Cube_target setting screen
Once the configuration is complete, connect the five states of Check with the arrows to “Move State”.
Let’s save it and run the Scene.
Finished GIFs
You were able to move it so that it passed between the two blocks. You are now set up with PlayMaker.
Upload and place on STYLY
Download and import the UnityPlugin from STYLY’s Download site.
Refer to the download site for the initial settings of UnityPlugin. In order to upload the “Camera Controller” object to STYLY, it needs to be a Prefab. Please store block1, block2, and Cube_target in CameraController.
Prefabrication screen
Create a Prefab in the Project view using Create→Prefab and insert the Camera Controller object in the Hierarchy window by dragging and dropping it there.
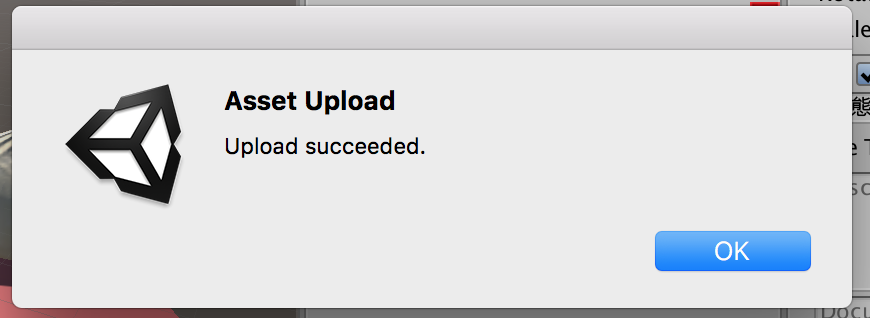
Right-click on Camera Controller Prefab→STYLY→Upload prefab or scene to STYLY.
After a while, the Upload Success pop-up will appear.
Upload Success Screen
Open the STYLY Studio in your browser and open the 3D Model > My Models tab in your asset selection to see your uploaded assets.
My Models
Click on it to place it in the Scene.
If you feel sick while wearing the headset, please take off the headset immediately and take a rest, because you will get VR sickness if you are not careful about moving the camera.
That’s the end of how to implement the camera moving animation in PlayMaker and upload it to STYLY.
Once you understand the flow of this article, you’ll be able to achieve It’s a Small World-like camerawork on your own, so give it a try.
Unity package for camera detection
The camera detection feature described above is shared with the Unity package. You can download it from the link.
https://drive.google.com/file/d/1FbmGCSooFsbrsfyedj9LZXlg0p8W4z1I/view
If you want to create a function to detect the camera, such as moving or rotating the camera, we will explain how to use it.
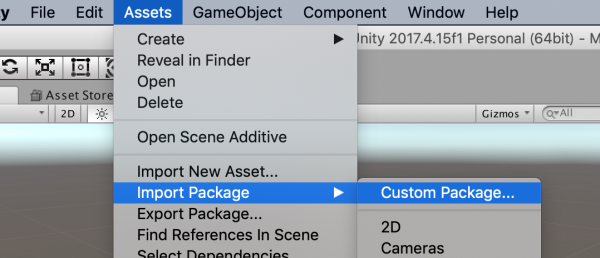
Open Unity and go to the menu bar, “Assets”, “Import Package”, “Custom Package” and wash the Unity package you just downloaded.
Importing Unity packages
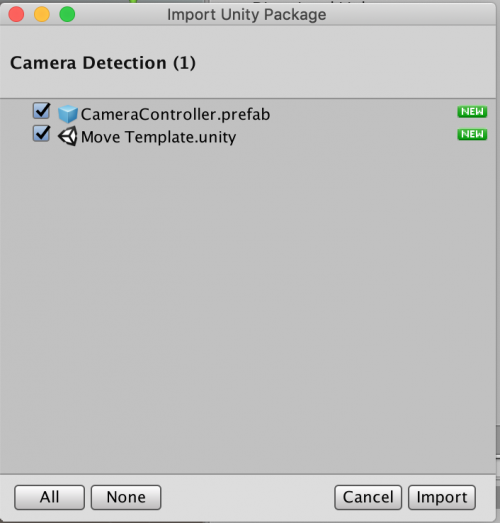
You will see the contents of the Unity package (2 items), so make sure both items are checked before importing.
Check the package contents
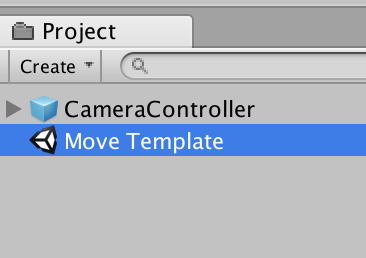
You’ll see the imported Unity package in the Project view, so open the “Move Template” scene.
Open a scene.
The “CameraCotroller” is supposed to have PlayMaker, but I haven’t imported PlaMaker into my Unity project yet, so I’m going to import PlayMaker and iTween.
Before importing PlayMaker, it is set to “Nothing Selected” and no objects are selected as shown in the image below.
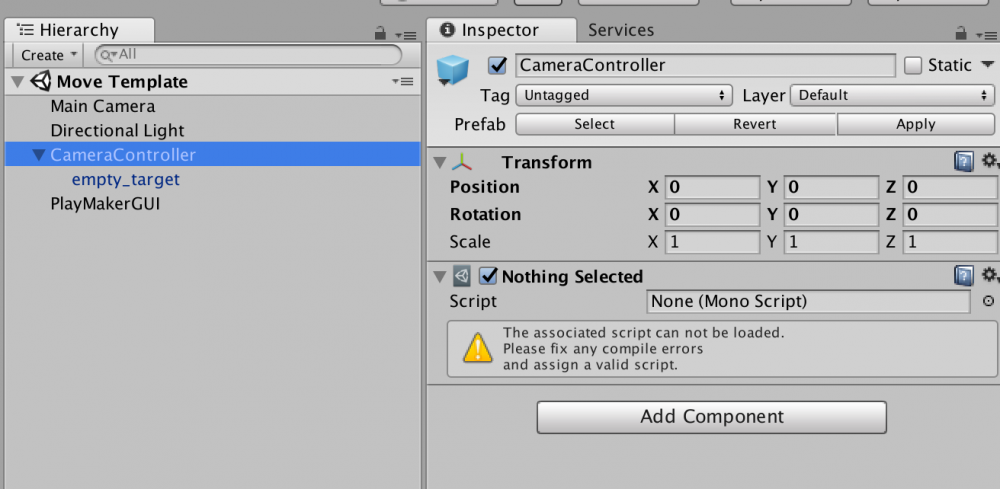
Before importing PlayMaker
Follow the article above to import PlayMaker and iTween.
The procedure for importing is exactly the same.
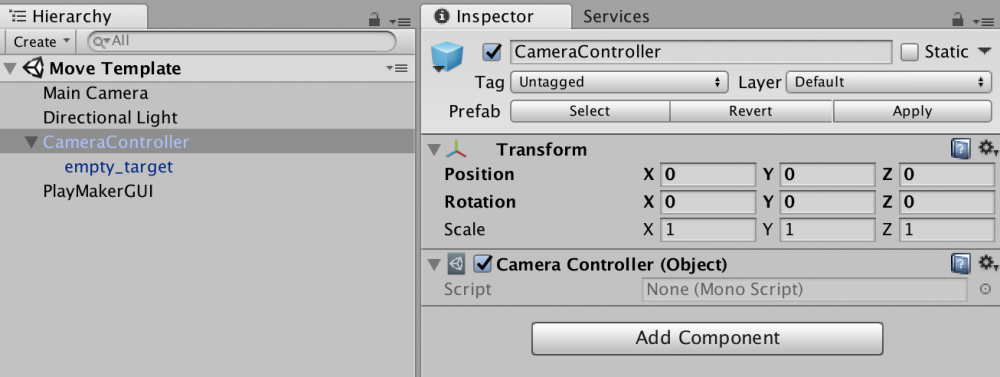
After importing PlayMaker
An object has been selected for the CameraController.
Right now the camera moves in a straight line, but if you edit Move State, you can change it to adjust the speed, rotate it, etc.
finished product