This is the third article in the series about creating simple games in Unity with PlayMaker. Let’s get started with an overview of PlayMaker, its installation and simple operation.
PlayMaker can be used to create Unity/VR content easily without any background knowledge about programming language (C#) used in Unity.
You can even use it together with STYLY to create VR contents. So, let’s get started creating some simple games!
Previously, we have introduced some basic operations of PlayMaker. For any questions, please get here.
Starting from this article, we are going to create a simple game using PlayMaker.
First, we’ll build the game foundation by allowing the ball to be moved by keystrokes.
Preparation
First, install PlayMaker, a plugin for Unity.
![[Unity Tutorial] Creating a Game Using Playmaker ① From Basic Introduction to Installing](https://styly.cc/wp-content/uploads/2019/06/1200px-160x160.jpg)
If you are new to PlayMaker, you can read the following articles first to get a better understanding of the software.
![[Unity] Starting Playmaker from Scratch](https://styly.cc/wp-content/uploads/2019/09/PlaymaerCoreConcept-160x160.png)
Games to create
Here’s an image of the game we’ll be creating in this and the next article.
I will create a ball rolling game in which you control the ball by keystrokes and getting 12 items.

An image of the completed game
You can experience a sample scene here.
Please note that this is a free Unity official “Roll-a-ball” tutorial created in PlayMaker.
By creating this game, you will learn the basics about game creation by using Unity and PlayMaker.
Creating a Stage
Creating GameObjects
First, create a GameObject and rename it “MiniGame”.
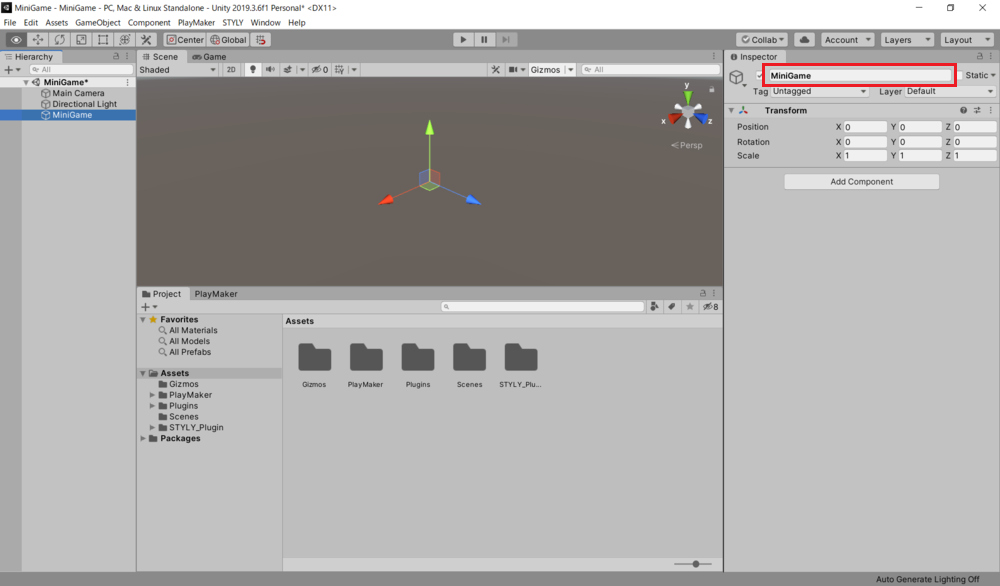
Create a GameObject
Creating a floor surface
Select 3D Object > Plane to create the floor
Select Position (0,0,0) and Scale (2,1,2) from inspector and rename it as “Ground”.
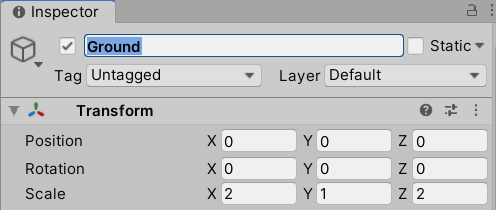
Position (0,0,0), Scale (2,1,2)
Let’s set up a material on the floor.
Right-click the Project, go to Create > Materials and create a material and rename it as “GroundMaterial”.
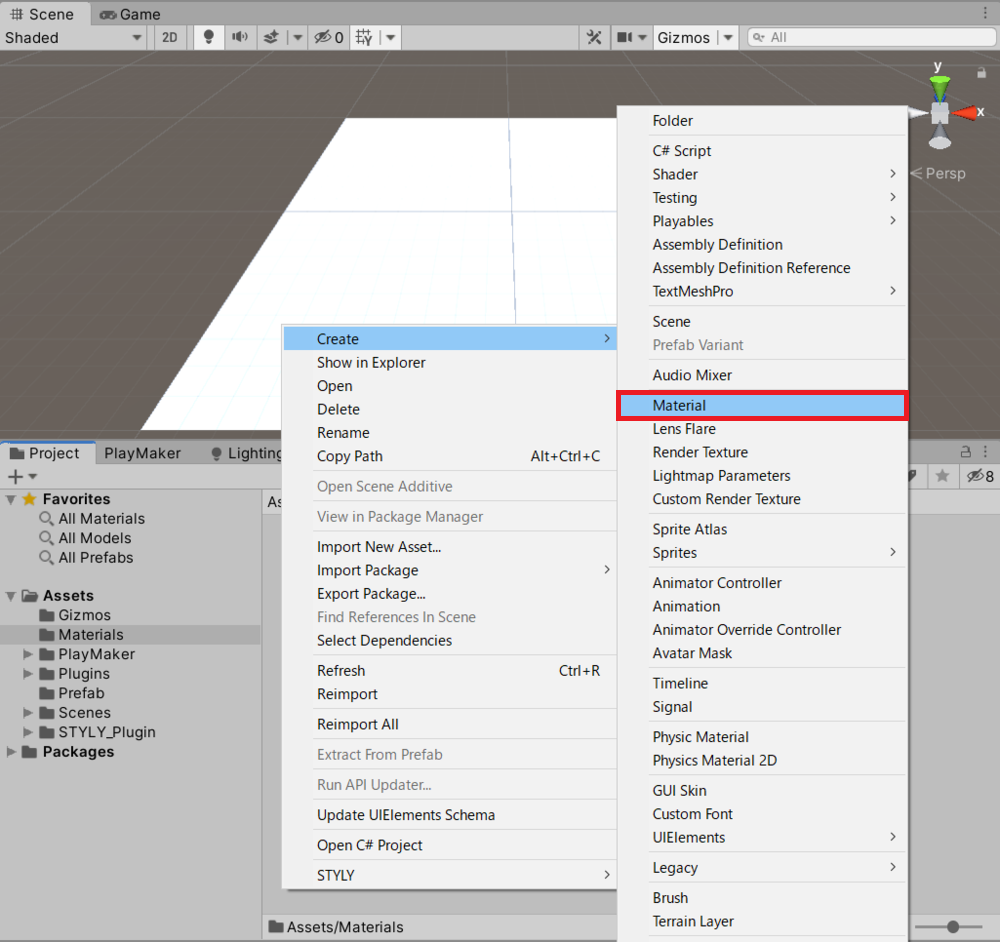
Create > Create Materials and Material
Open the inspector of the material and set the color from the right-side square of Albedo.

Set the color from the right side of Albedo’s rectangle
Drag and drop the material you have created onto Ground and complete the setup.
I’ve set colored the material blue while you can choose any color you like.
Create the wall
Without this step, the player (sphere) we are going to create later will fall, so let’s create a wall in the frame of the stage.
Go to 3D object > Cube and create a cube and rename it as “Wall”.
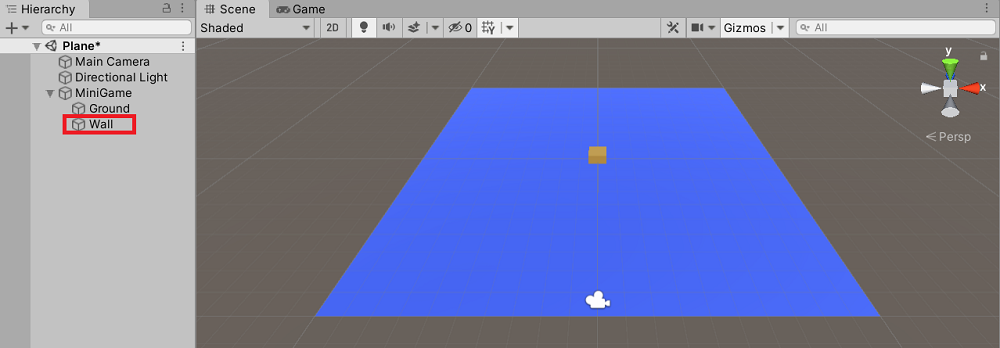
Create the Cube
Set up the material in the same way as the floor.
Create a material and rename it “WallMaterial”.
Change the material to your favorite color from inspector.
Change the Transform of the wall as shown in the image.
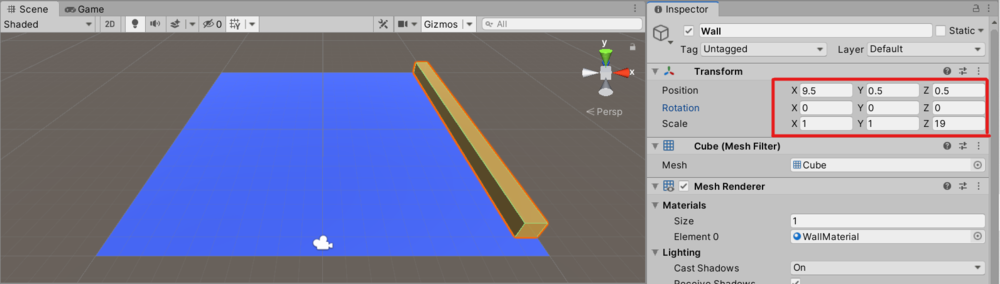
Set up Transform
Press [Ctrl]+[D] to duplicate three walls.
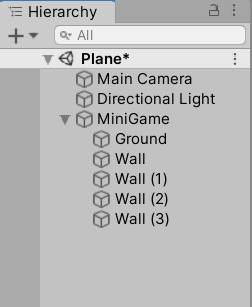
Duplicate a wall
Change each Transform as follows- scale is all (1,1,19; e.g. “I’ll be back”)
| Name | Position | Rotation |
| Wall | 9.5 , 0.5 , 0.5 | 0 , 0 , 0 |
| Wall(1) | -9.5 , 0.5 , -0.5 | 0 , 0 , 0 |
| Wall(2) | -0.5 , 0.5 , 9.5 | 0 , 90 , 0 |
| Wall(3) | 0.5 , 0.5 , -9.5 | 0 , 90 , 0 |
When everything is placed, the wall is completed as shown in the image.
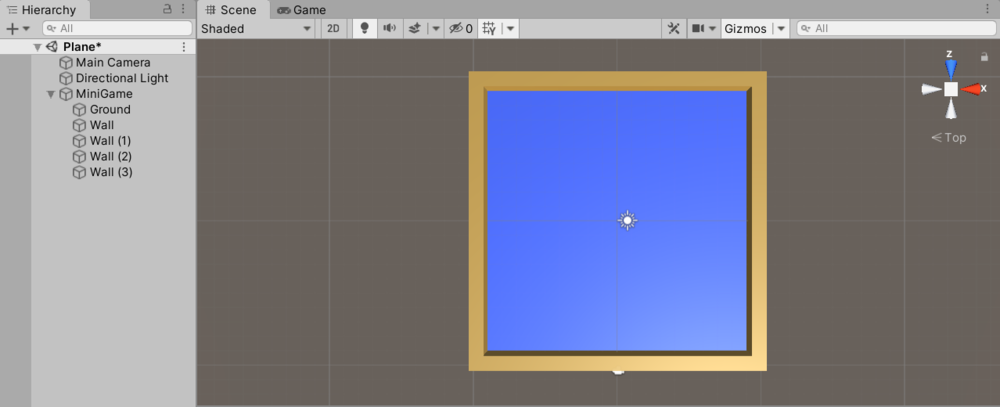
Create the Stage Wall
The Ball Transfer Process
Create a ball and make it can movable by typing a key (arrow or WASD key).
We will use PlayMaker to complete this process.
Create the Sphere
Now, create a Sphere from 3D Object > Sphere and create a Position (0, (0.5,0) and change the name to “Ball”.
Let’s set the ball to any materials you want as well.
We have created a new BallMaterial and changed the ball to red.
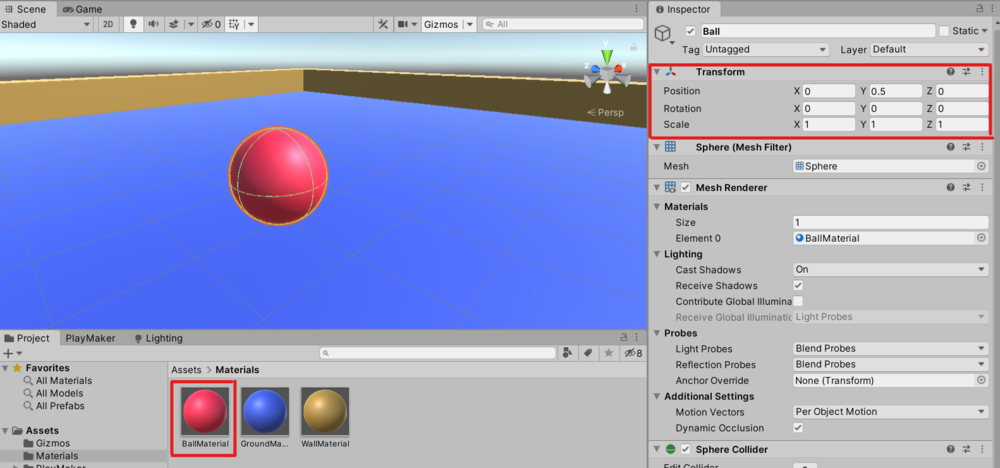
Create a new Sphere and change the material
Rigidbody is added to the Ball
Use the physics engine (Rigidbody) to make the ball move in a realistic way.
Open the ball’s Inspector and add a Rigidbody from Add Component.
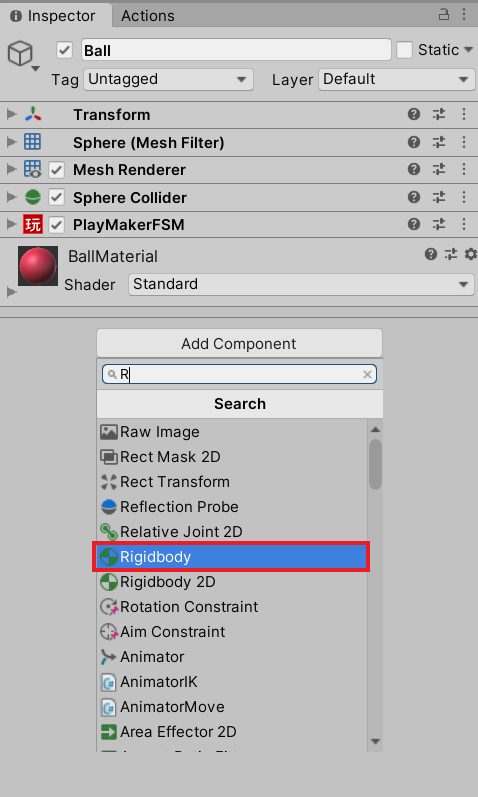
Add “Rigidbody” from Add Component
Add FSM to the Ball
With the Ball selected, open the PlayMaker editor, and add the FSM.
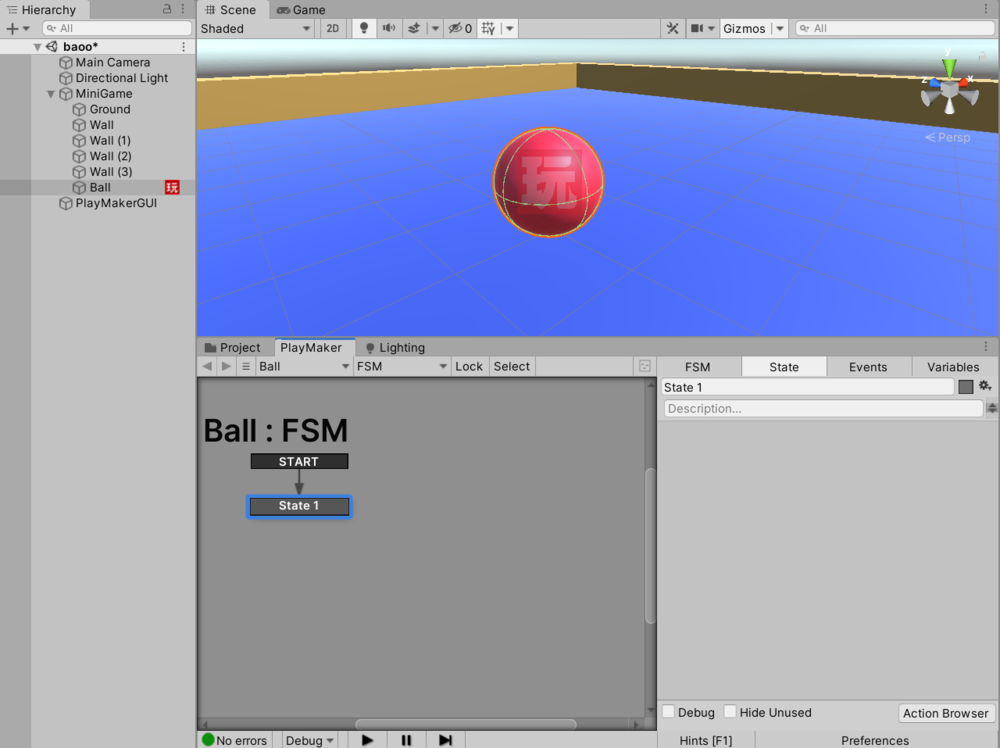
Add the FSM
The FSM name is changed to BallController.
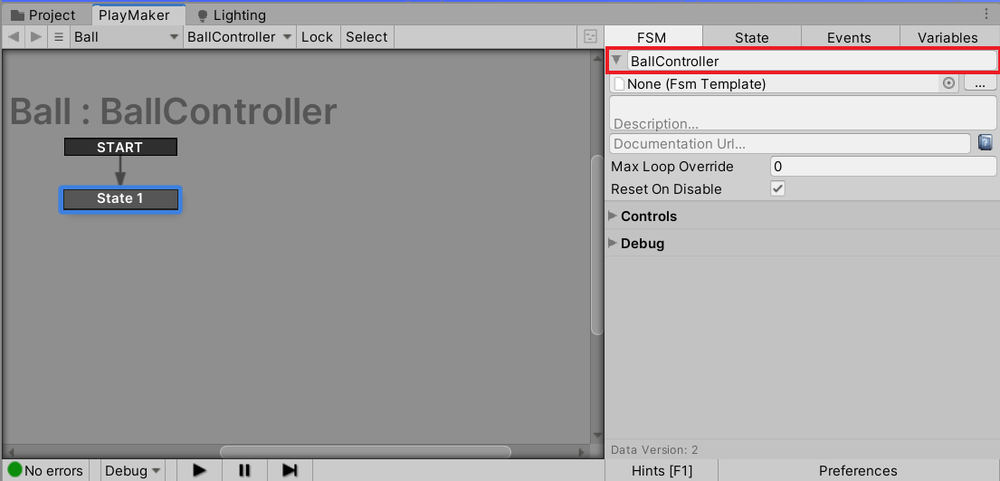
Rename the FSM to BallController
Variable definition
You can predefine the variables to be used in the action.
You can add a variable by opening the Variables tab of the FSM and typing the name of the variable in New Variable.
Define 5 variables as shown in the image, and change the Variables Type as well.
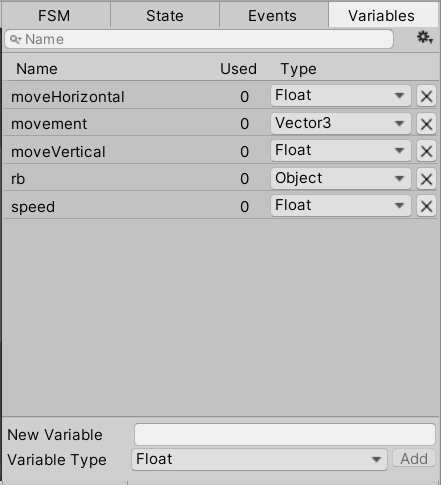
Define the 5 variables
Advanced rb settings
Select the rb variable and set the Object Type in the Advanced Settings screen to UnityEngine > Change to Rigidbody (scroll down with the arrows at the bottom.)
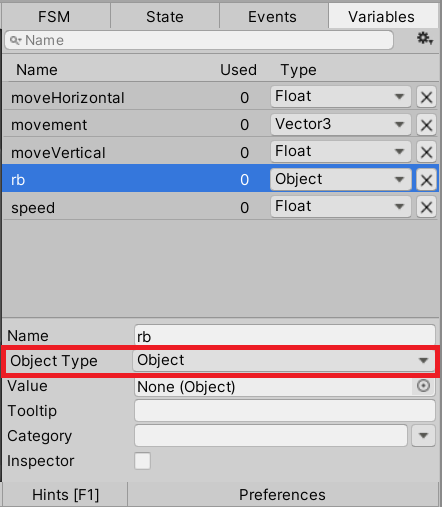
Advanced settings screen of rb
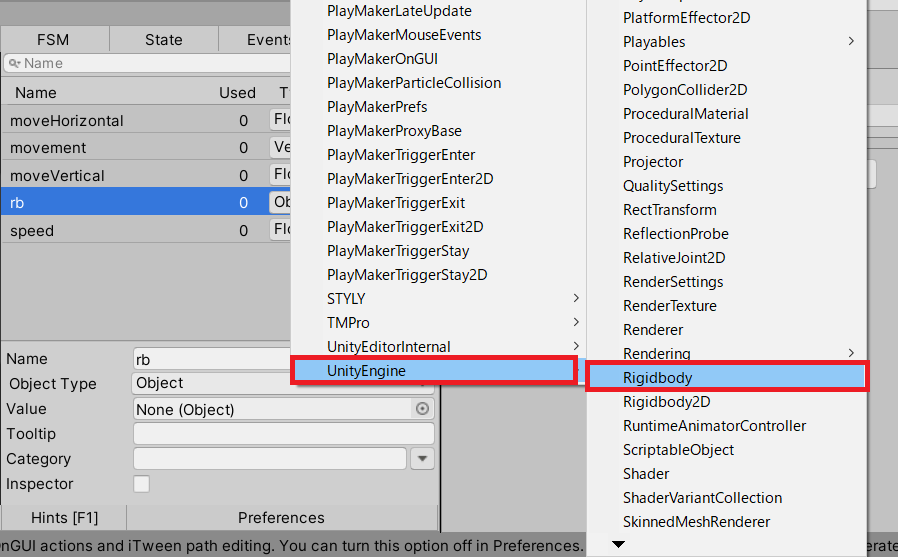
Scroll down and select Rigidbody
Advanced speed settings
Select the rb variable and set Value to 10 in the Advanced Settings screen.
Check Inspector.
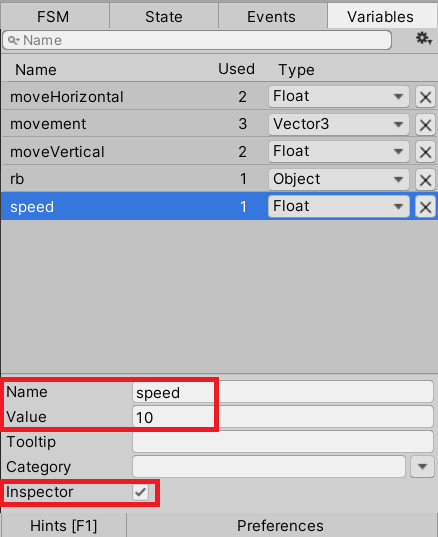
Set Value to 10 in the advanced setting screen
If you check the box, speed is added to the ball’s Inspector and the ball will thus have a speed.
In this case, we have set the value of speed to 10, but if you increase the value, the ball will move faster accordingly, so you can change it as you like.
“Init” State Settings
The state name of State1 is changed to “Init”.
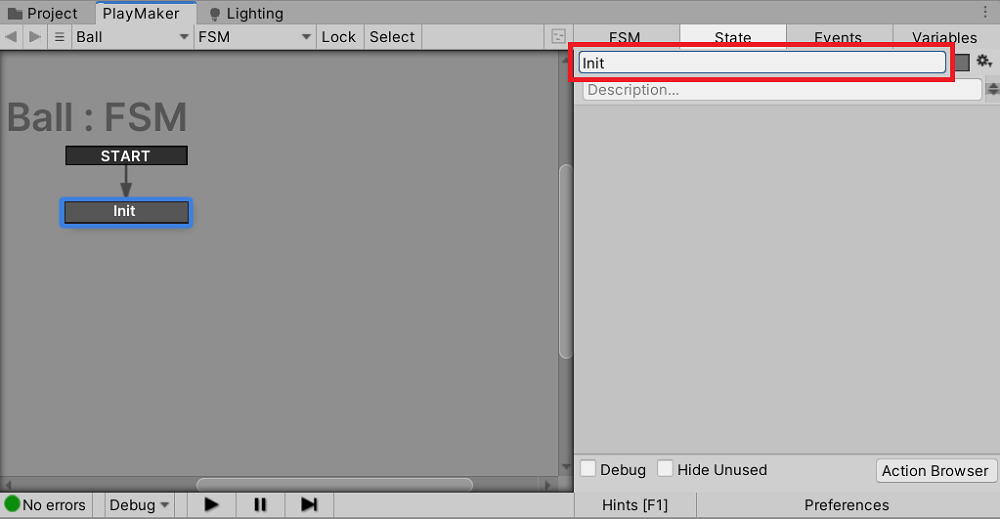
Change the state name to “Init”
Add the “Get Component” action to the Init state from the action browser.
The Get Component action allows you to get the Component set to the object.
Click on None for Store Component and specify the “rb” that you have defined earlier.
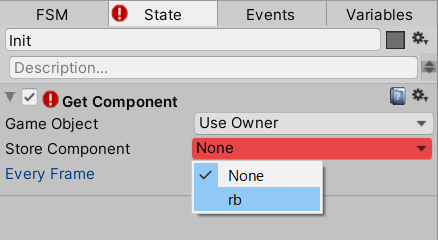
Specify the “rb”
Note that it only needs to be executed once, no need to check Every Frame.
Moving State Settings
Create a new state and change its name to Moving.
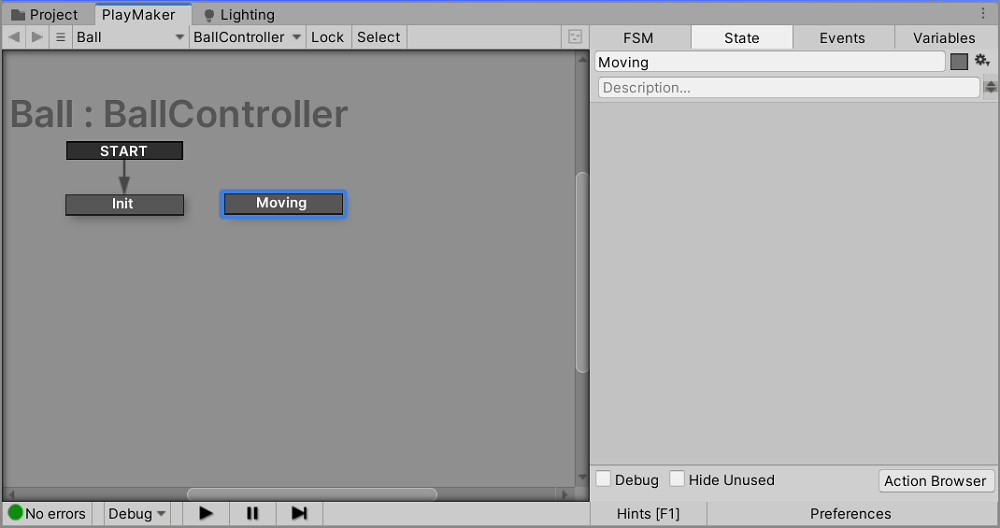
Create the Moving state
Get Axis action settings
We’ll add two more Get Axis actions. This is the Get Axis action to get the horizontal and vertical axis.
Enter “Horizontal” and “Vertical” for the Axis Name, respectively. (Note that you need to type every single word correctly.)
In Store, specify the moveHorizontal and moveVertical defined earlier, respectively.
Check Every Frame because every frame must be calculated.

Configuration of the Get Axis action
Set Vector3 XYZ action settings
Add the Set Vector3 XYZ action.
This sets the X, Y, and Z coordinates of the vector and assigns them to a variable.
In this case, it sets the moveHorizontal and moveVertical obtained by the Get Axis action to X and Y. It also assigns them to the movement variable.
Set numbers and variables as shown in the image. Don’t forget to check Every Frame.
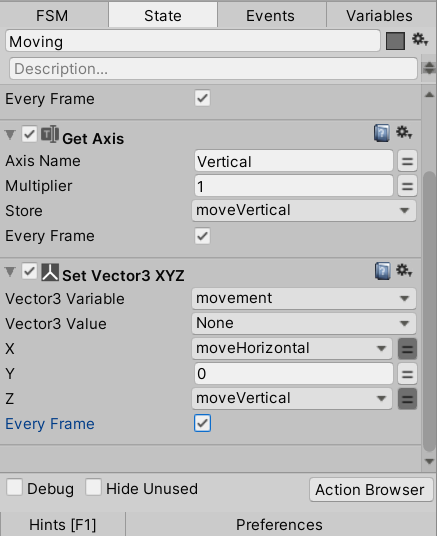
Set the Vector3 XYZ action
Vector3 Multiply action settings
Add the Vector3 Multiply action.
Set the Vector3 Variable to movement, Multiply By to speed, and check Every Frame box.
Since speed is now multiplied by movement, any changes in the speed value will change the speed of the ball.
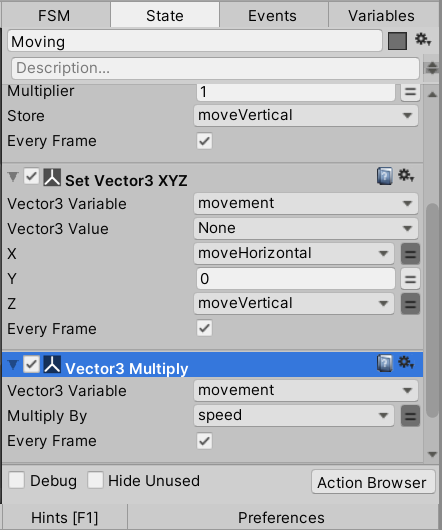
Configure the Vector3 Multiply action
Add Force Action Settings
Finally, we are going to add the Add Force action.
This is a physical action that applies a force to an object with a rigidbody component.
If we specify the movement as a vector, as shown in the image, the force will be applied to that specific vector.

Configure the Add Force action
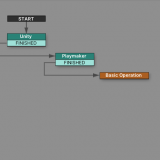
Transition from Init to Moving State
Select the Init state and add a FINISHED event.
This connects the transition from the FINISHED event to the Moving state.
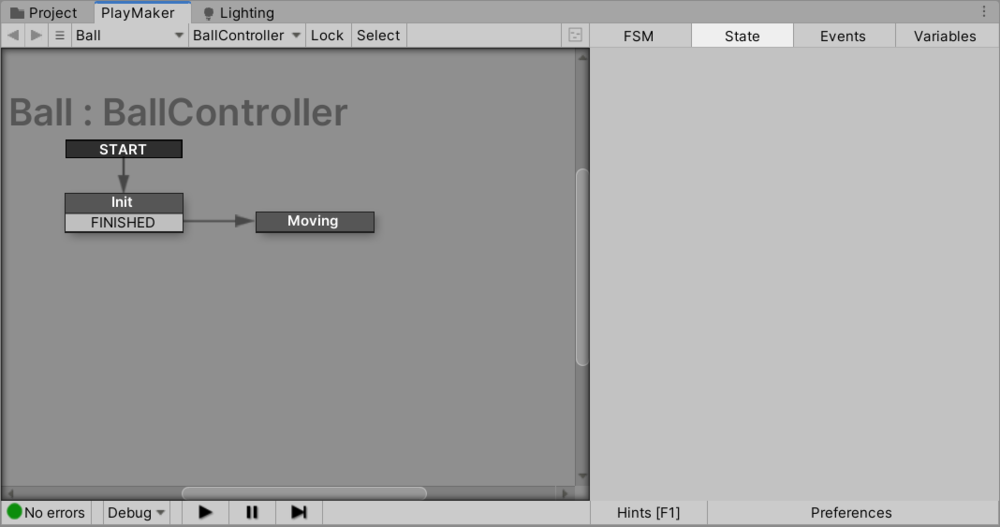
Connect Transitions to the Moving State
Now, the ball moves on keystrokes.
Change the MainCamera Transform as shown in the image and play the game.
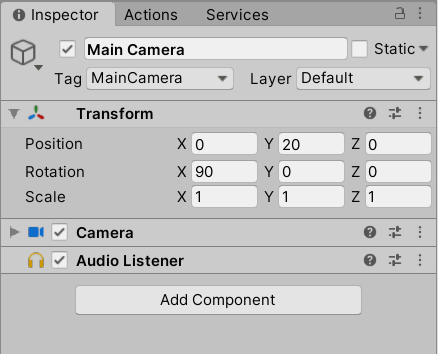
Transform settings in MainCamera
Keystrokes to move
You can now move the ball around as the foundation of your game!
Next time we are going to set up your items so you can collect them with the ball!
This article adopts a modified version of Unity Technologies Japan, LLC’s [Unity Dojo 2017] first Unity programming slides with PlayMaker.