This article describes how to use PlayMaker to implement interactive features, such as rotating and shaking objects when you touch them with the controller, and upload them to STYLY.
Setup
As an exercise, let’s make a simple animation that rotates around the Y axis when the controller touches the Cube.
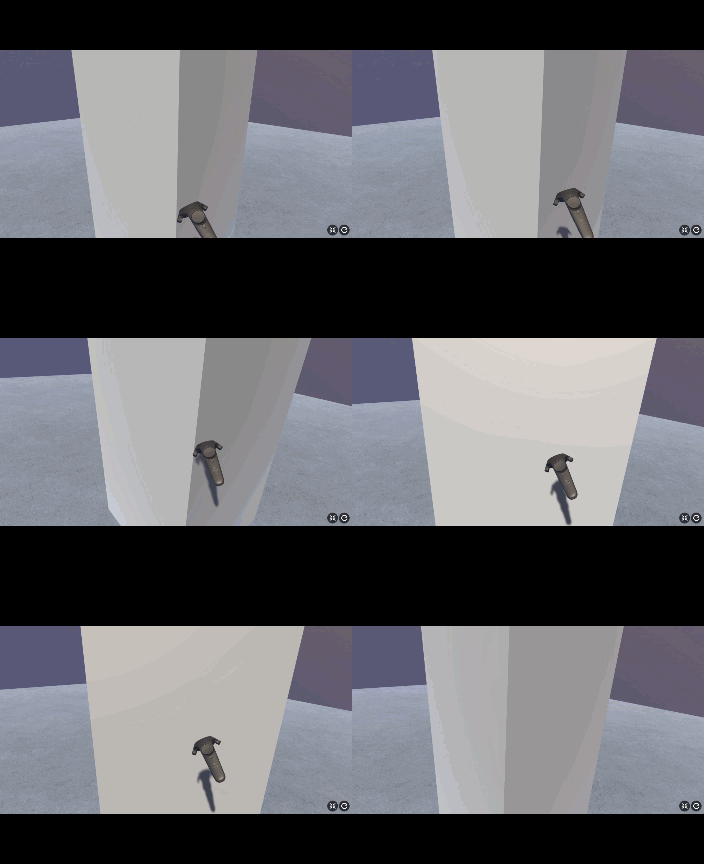
Rotating GIFs
Import Playmaker (paid).
Once you have imported and installed PlayMaker, create a Cube in the Hierarchy window.
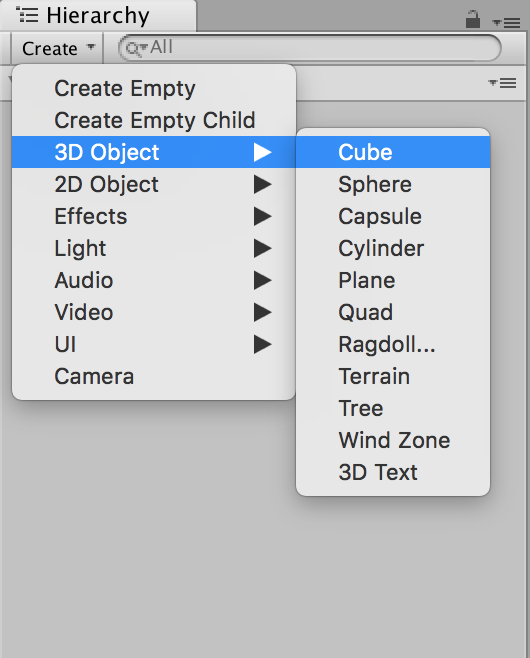
Cube creation screen
In this case, we want to rotate the Cube around the Y axis, so the Cube is stretched toward the direction of the Y axis to make it easier to understand at runtime.
Set it as follows in the Inspector window of the Cube.
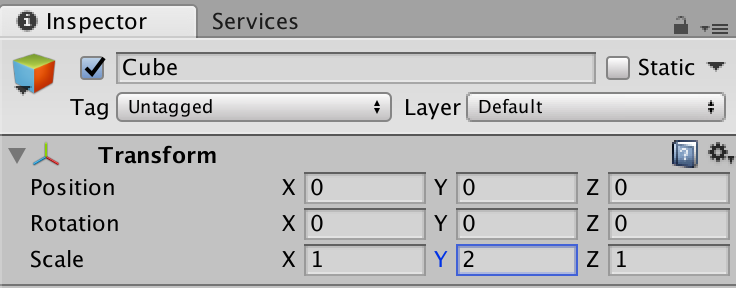
Cube’s Inspector screen
We need to detect that the Cube has touched another object, so we’ll add a Rigidbody in the Inspector window in the “Add Component”.
To set up Rigidbody, check the “Is Kinematic checkbox” as shown in the image below.
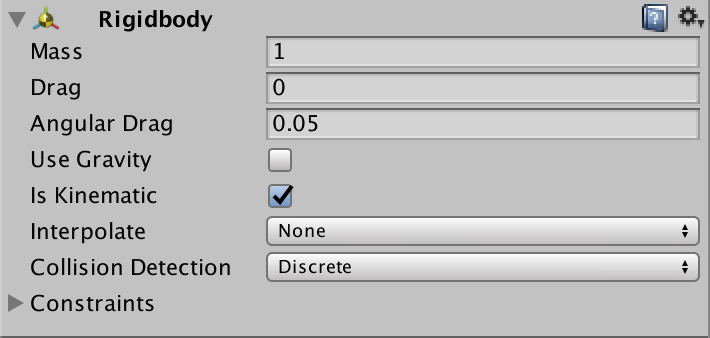
Rigidbody setting screen
Next, in order to implement the functions in the Cube, select the Cube and start PlayMaker→PlayMaker Editor.
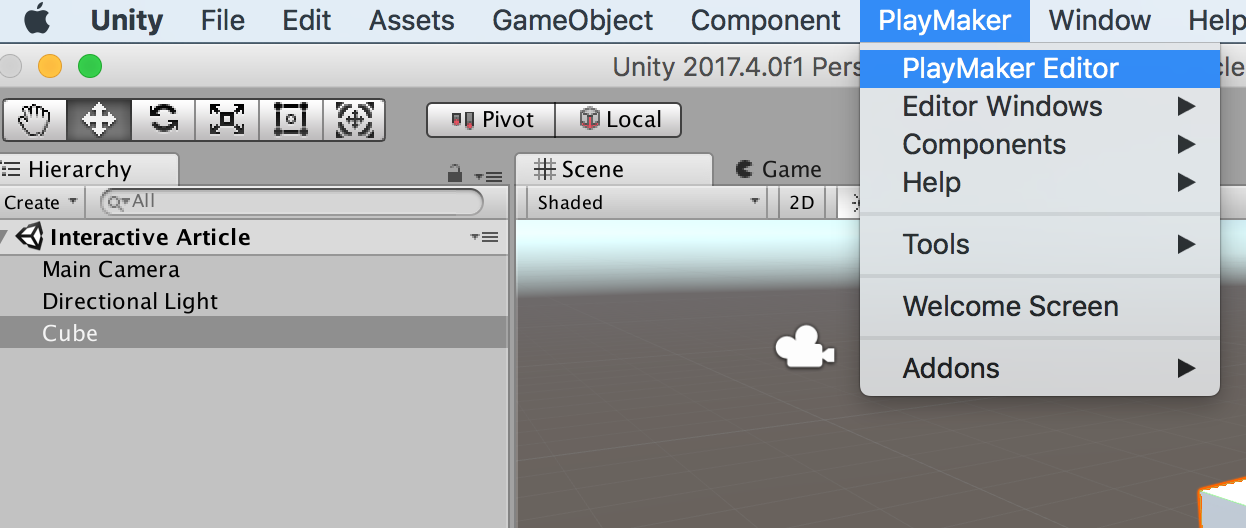
PlayMaker Launch Screen
Setting the Trigger Enter event
In this article, the “TRIGGER ENTER” event is used as a way to trigger the interaction.
For more information on TRIGGER ENTER, please refer to the following articles.
After launching the PlayMaker Editor, right-click and click “Add State Transition”.
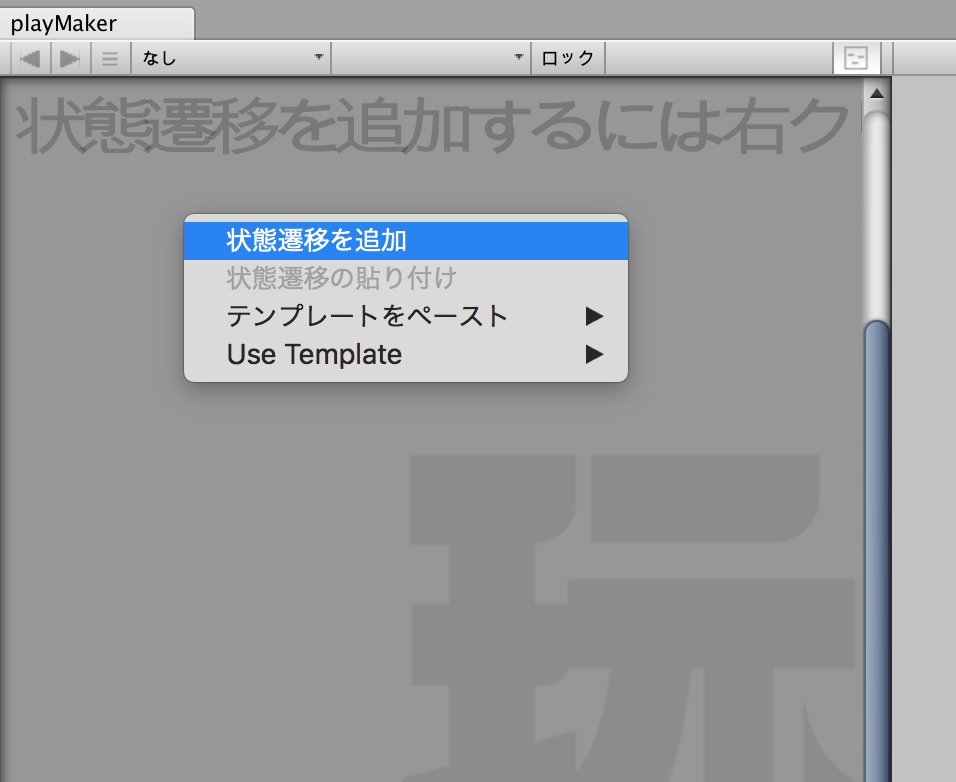
Add Status Screen
Now, add the event that will make the Cube rotate. Rightclick on “Add State” and change the state name to “Rotating”.
Next, right- click on “Rotating” -> “Add Global Transitions” -> “System Events” -> “Trigger Enter”.
This Trigger Enter is responsible for detecting when something has collided and connecting it to the next event.
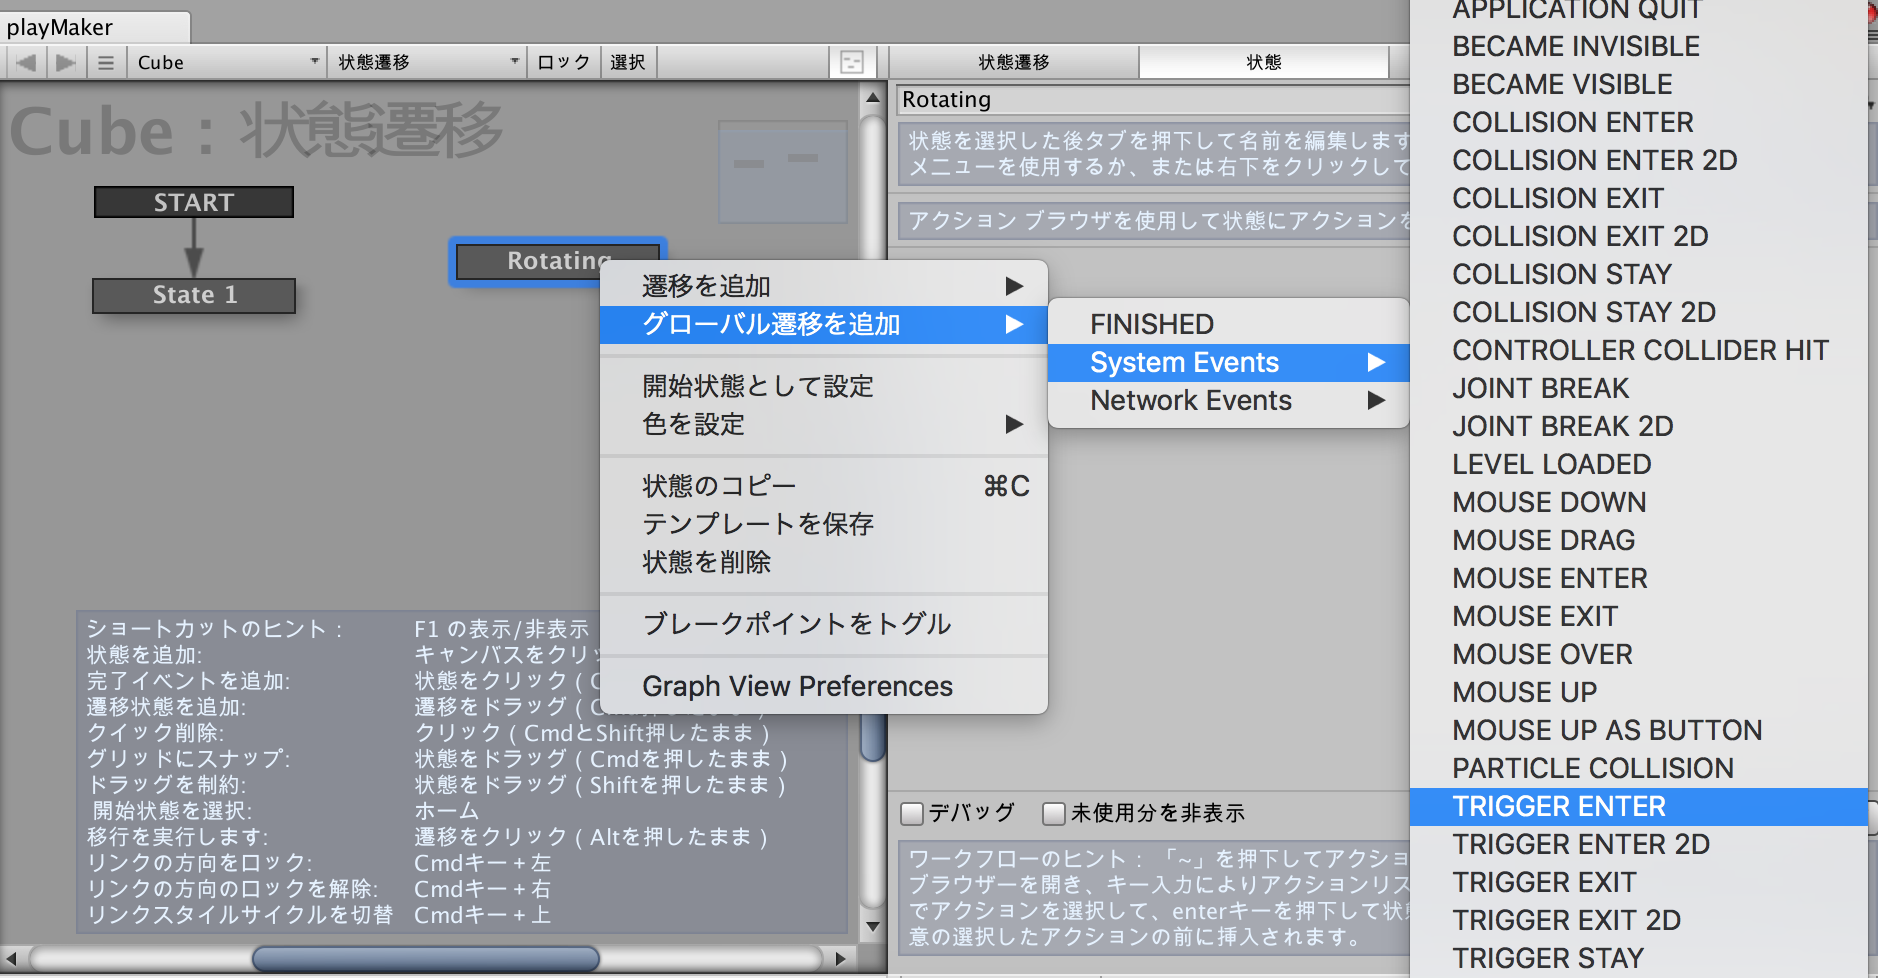
Trigger Enter add screen
This time, I created an animation in which the cube rotates around the Y-axis when the controller touches the cube.
With the “Rotating” state selected, add the “Rotate” action in the Actions window.
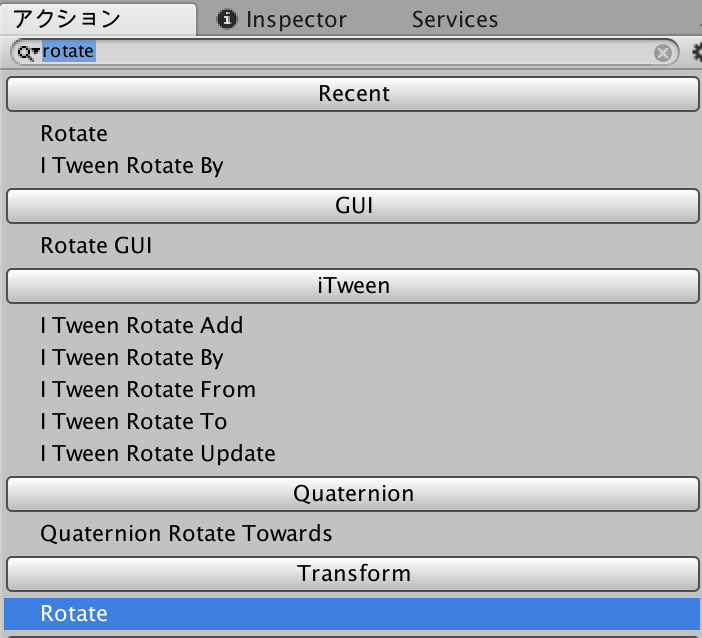
Rotate action addition screen
The Rotate action should be set as shown in the image below.
Click on the two lines next to “Y Angle” so that you can enter a value, and then enter the speed of the rotation. The speed is set to 45 in this example.
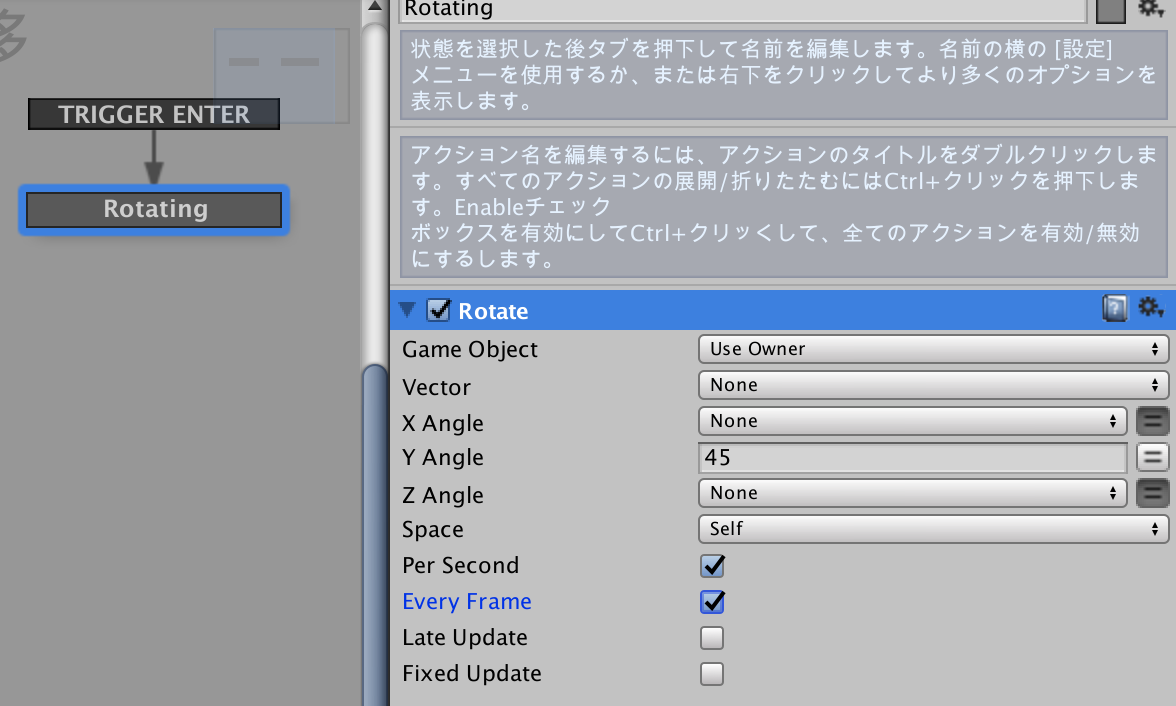
Rotate action setting screen
Now you’re done setting up the rotating animation.
But as it is, any object that collides with it will be rotated. Here, we need a controller to make the object rotate when it is touched, so we’ll set up the controller in the next chapter.
Controller Settings
A Collider needs to be attached to the object that will be hit as a condition for firing a TRIGGER ENTER.
In this example, the object to hit will be the controller. Attach the Collider to the controller.
Please refer to the following articles on how to install the Collider.
When the Cube object and the Controller object are ready, it is complete.
Upload and place on STYLY
Download and import the UnityPlugin from STYLY’s Download site.
See the download site for the initial settings of UnityPlugin.
In order to upload your Cube and Controller (right) to STYLY, you need to make them Prefab.
Drag and drop the Cube in the Hierarchy window into the Project window to turn it into a Prefab.

Prefabization
Right-click on the uploaded prefab and select STYLY -> Upload prefab or scene to STYLY.
After a while, the Upload Success pop-up will appear.
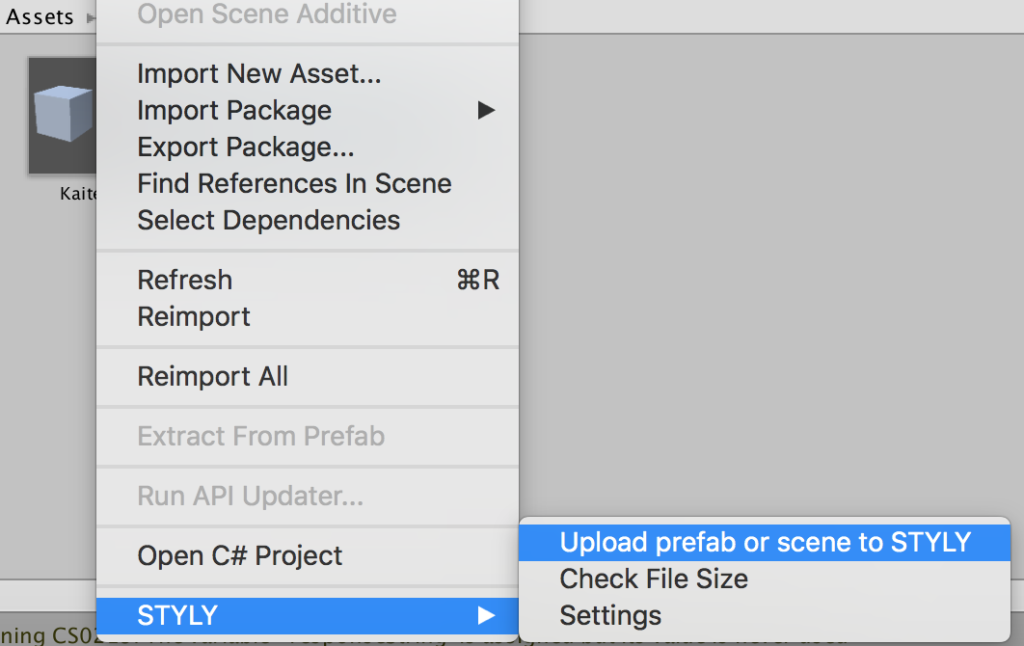
Prefab upload screen
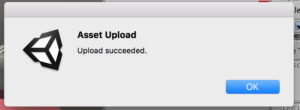
Upload Success Screen
Open the STYLY Studio in your browser and open the 3D Model > My Models tab in your asset selection to see your uploaded assets.
Click on it to place it in the Scene.

Rotating GIFs
The moment you touch the controller, it starts to rotate around the Y axis! It is now complete.
If you have a VR environment, you can experience this interactive feature in this gallery.
Incidentally, if you change the Rotating state action, you can also implement the following functionality
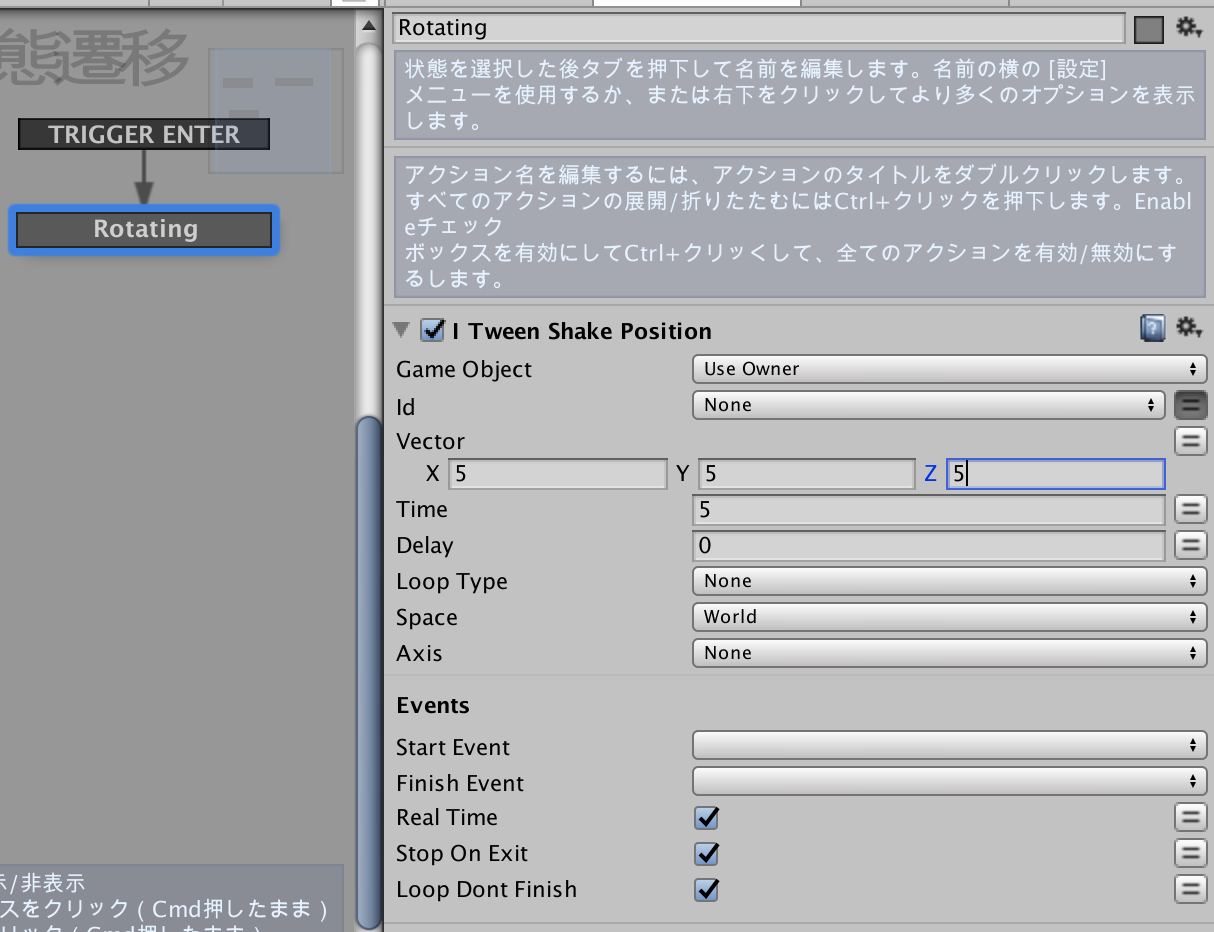
Random occurrence setting screen

Random GIFs11e8-b34d-4783bb2170d0
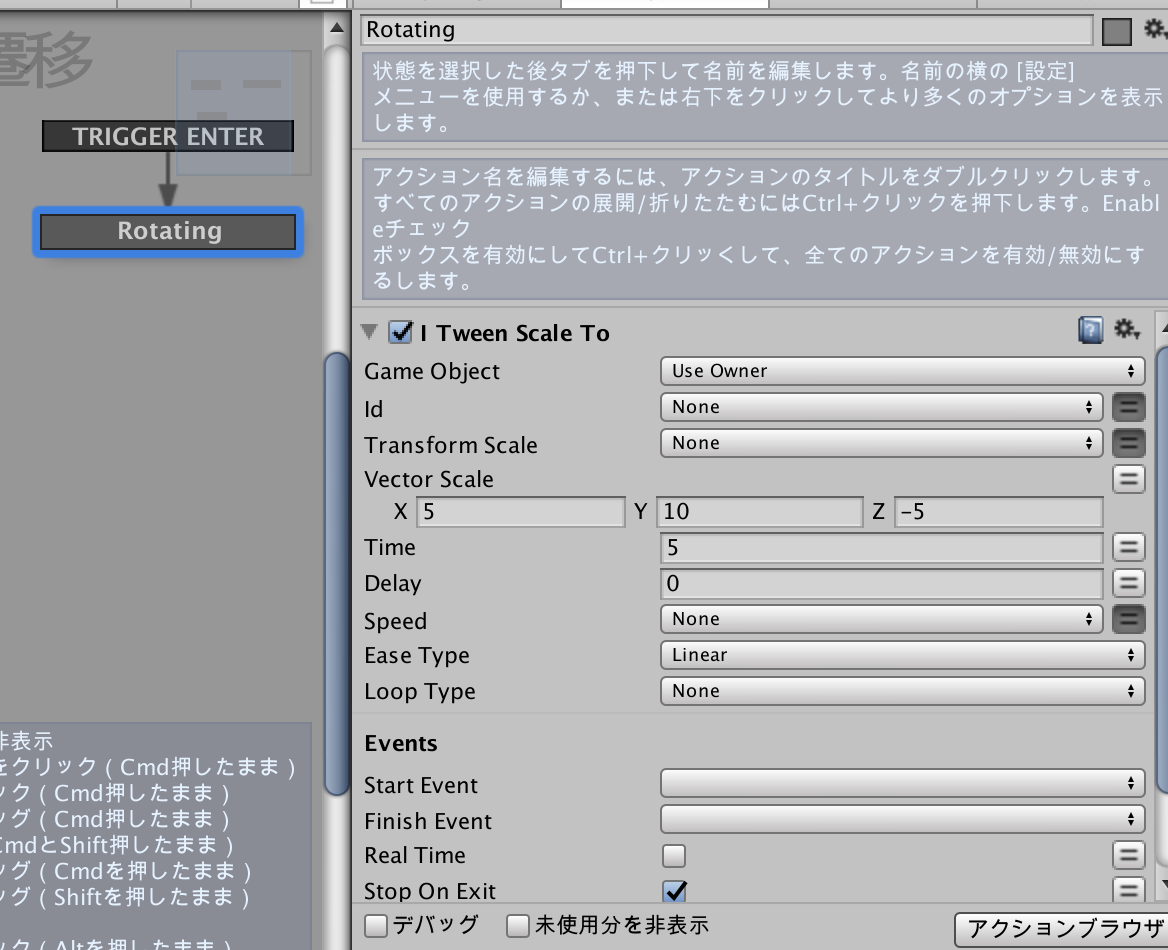
Enlarge setting screen
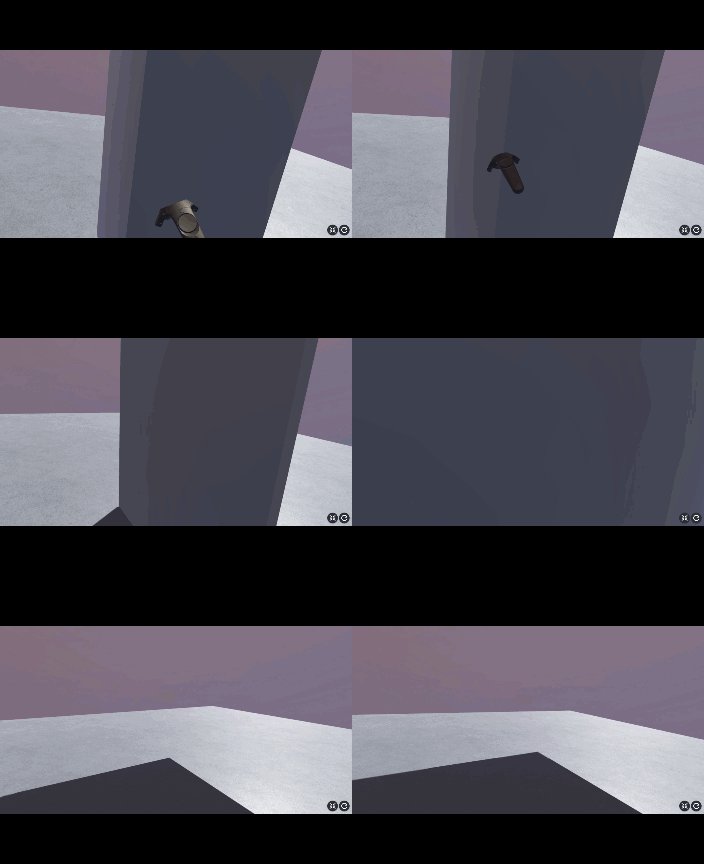
Giant GIFs
This brings us to the end of how to use PlayMaker to implement interactive features, such as rotating and shaking objects when you touch them with the controller, and upload them to STYLY.
Of course, if you can manipulate VR space with the controller, you can expand the range of expressions, so be sure to try it!
(Bonus) Setting for when the controller cannot be detected
This chapter is written to deal with common problems, so you don’t necessarily need to read it if you don’t have any problems.
With this implementation, it is difficult to find bugs while working in Unity until you upload to STYLY.
Because STYLY has a controller built in by default, it should detect the controller when it is uploaded to STYLY if the settings up to this point work well, but since there is no controller in Unity, it can’t detect the controller while working in Unity, so the
- Is the controller really being detected?
- Does the rotation action start when the controller is touched?
This is because it is difficult to verify such things.
So by adding a setting for when the controller cannot be detected, it will be easier to determine whether or not the controller has been detected in the first place.
Add a new state in Cube’s PlayMaker Editor and add a “Rotate” action.
When the controller is touched, the action is 45/s rotation around the Y-axis, so to make the difference easier to understand, the rotation action should be 90/s rotation around the X-axis when the controller is undetectable.
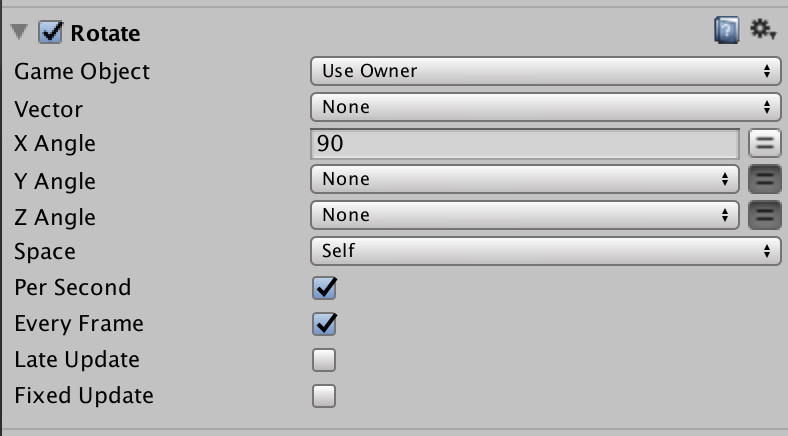
Rotate action setting screen
Right-click on the State1 state and select “Add Transition” -> “FINISHED”.
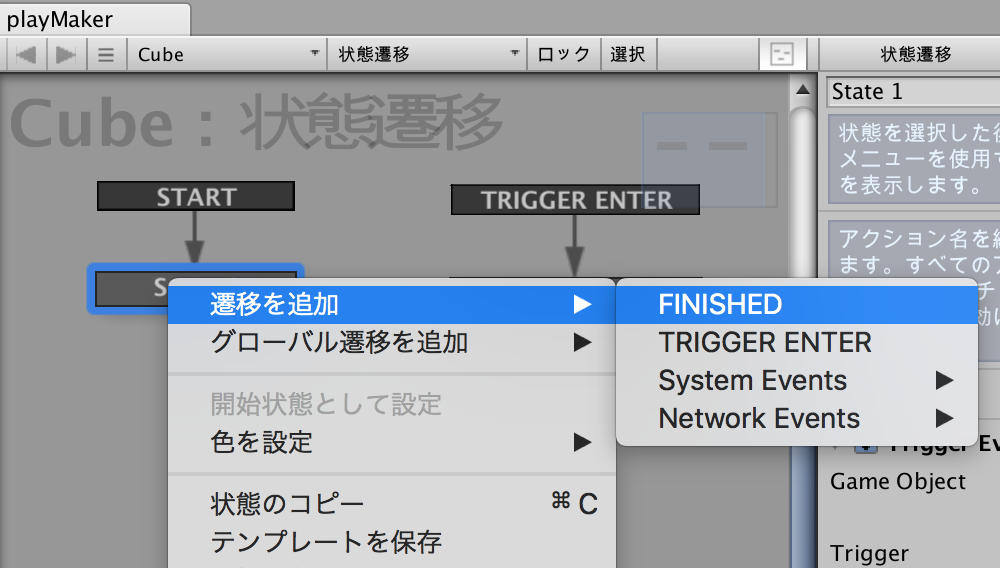
FINISHED event addition screen
Then add a “Game Object Is Null” action in the State1 state.
This is an action to describe the event when the object specified in “Find Game Object” (in this article, the controller) cannot be detected.
The settings for Find Game Object should look like the following image.
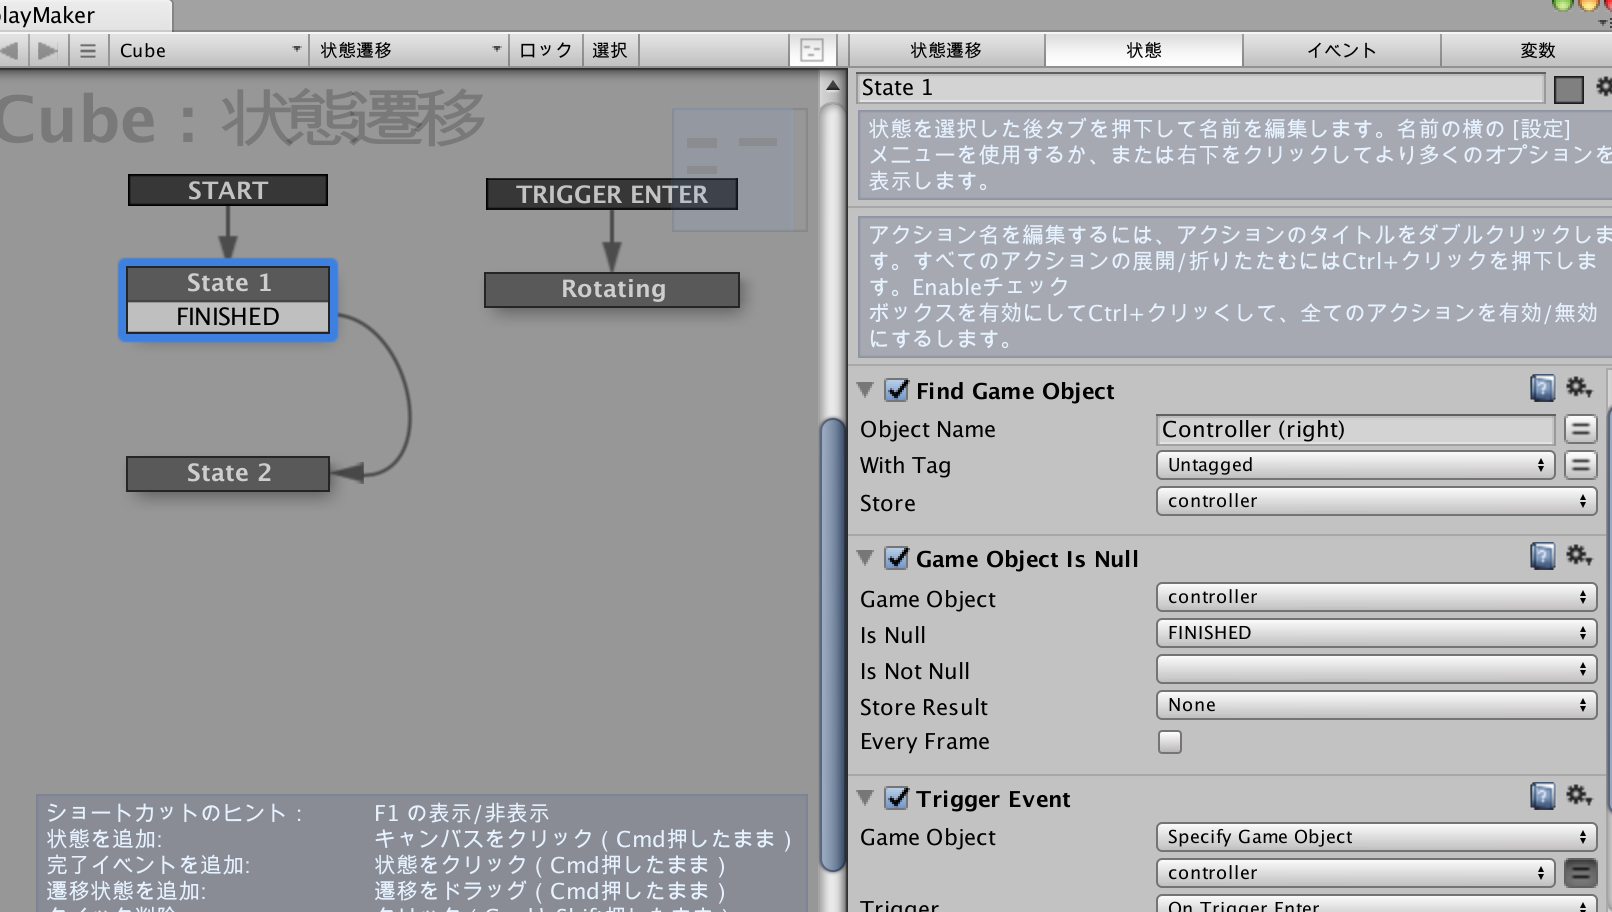
GameObject Is Null configuration screen
Then, connect the State1 state to the State2 state.
In this way, when the controller cannot be detected, the Cube will rotate 90/s around the X-axis.
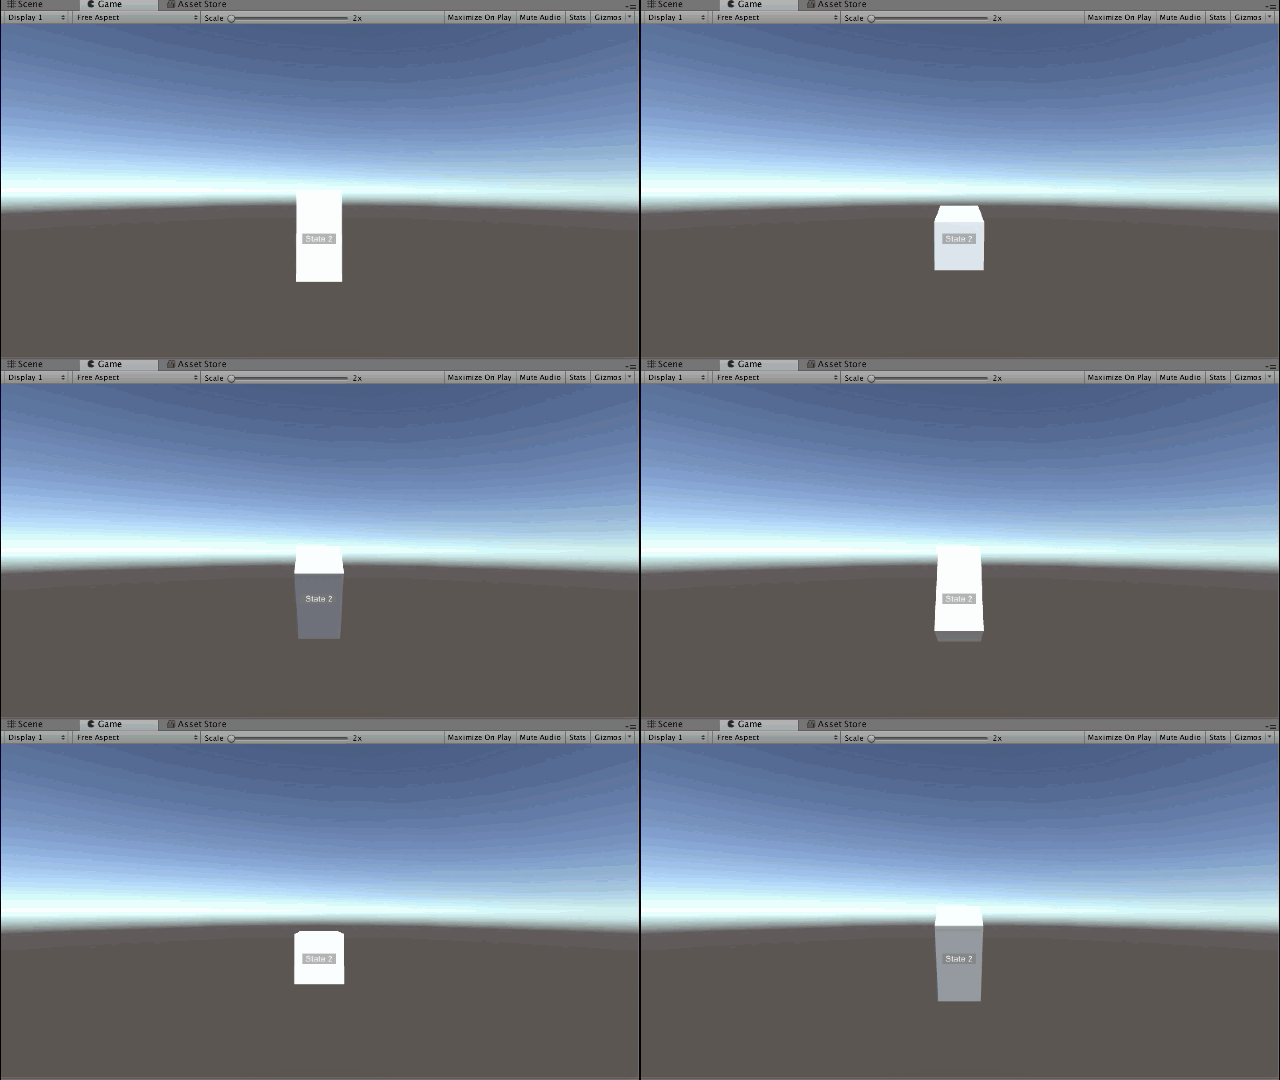
X-axis rotation
![[Unity/Playmaker] How to Trigger an Event when the Controller Touches an Object (TRIGGER EVENT)](https://styly.cc/wp-content/uploads/2020/02/Controller-69-160x160.jpg)
