This article shows you how to trigger an interaction by entering the trigger button on the controller.
Implementing interaction, through input button, can increase the sense of immersion in the space.
Understanding this article, it enables you to create interactions as follows;

Advanced preparation
First of all, install “ PlayMaker”, the plugin for Unity.
![[Unity Tutorial] Creating a Game Using Playmaker ① From Basic Introduction to Installing](https://styly.cc/wp-content/uploads/2019/06/1200px-160x160.jpg)
For the new users of PlayMaker, read the following articles for the better understanding.
![[Unity] Starting Playmaker from Scratch](https://styly.cc/wp-content/uploads/2019/09/PlaymaerCoreConcept-160x160.png)
Overview
Global events; “Global_TriggerPressDown_R (right controller button)” and “Global_TriggerPressDown_L (left controller button)” are built into STYLY in advance.
These two global events, combined with the action, can trigger an interaction.
This time, as an example, we’ll design a mechanism that fires a bullet when a button on the controller is entered.
Here is process flow;
- Make bullet
- Set up bullet actions in PlayMaker
- Build a launch pad
- Set the launch pad action in PlayMaker
Make bullet
First, we make the bullets.
In Hierarchy window, right click on the Hierarchy and select Create > 3D Object > Sphere. Then, the Sphere is created and becomes a bullet.
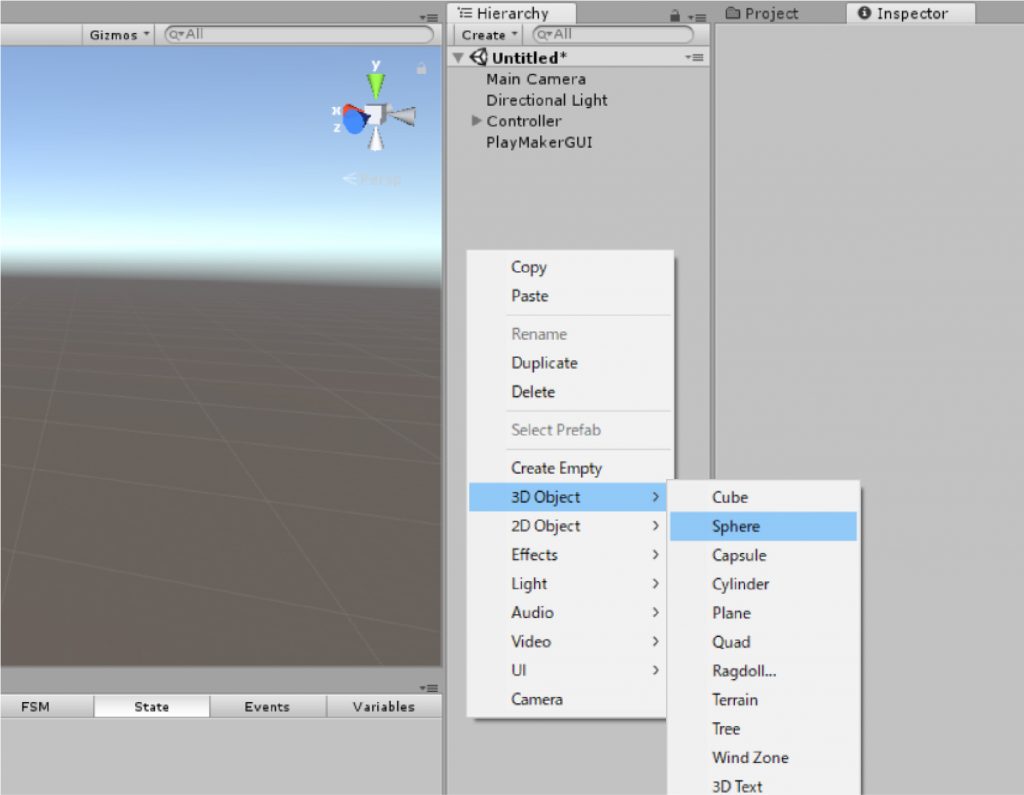
Create a Sphere
Once the Sphere is created, open the Inspector screen. Set the bullets.
Name: bullet
Set Position to ( X, Y, Z ) = ( 0, 0, 0, 0)
Let Scale be ( X, Y, Z ) = ( 0.5, 0.5, 0.5 )
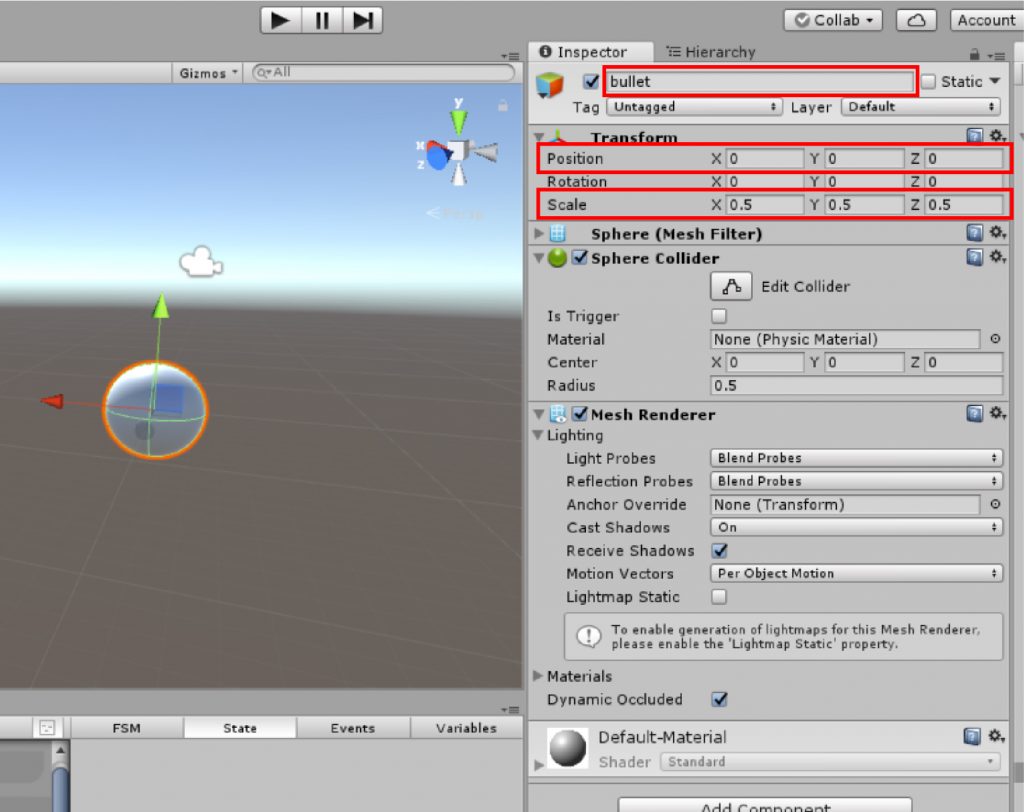
Name : Position : Change the Scale
Add an action in PlayMaker to this bullet.
Setting up bullet actions in PlayMaker
When the bullet is selected, open the PlayMaker Editor and right-click on it and select “Add FSM” to add an FSM.
When the red “toy” icon appears on the bullet, the FSM is added.
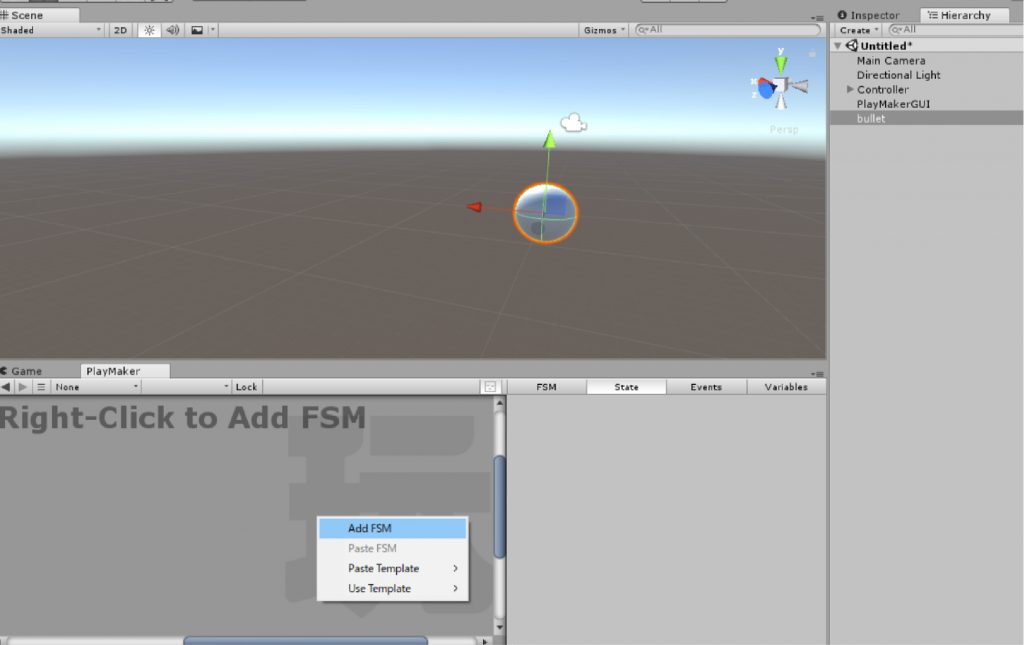
Add FS
Once the FSM is added, rename as “State 1” to “bullet action”.
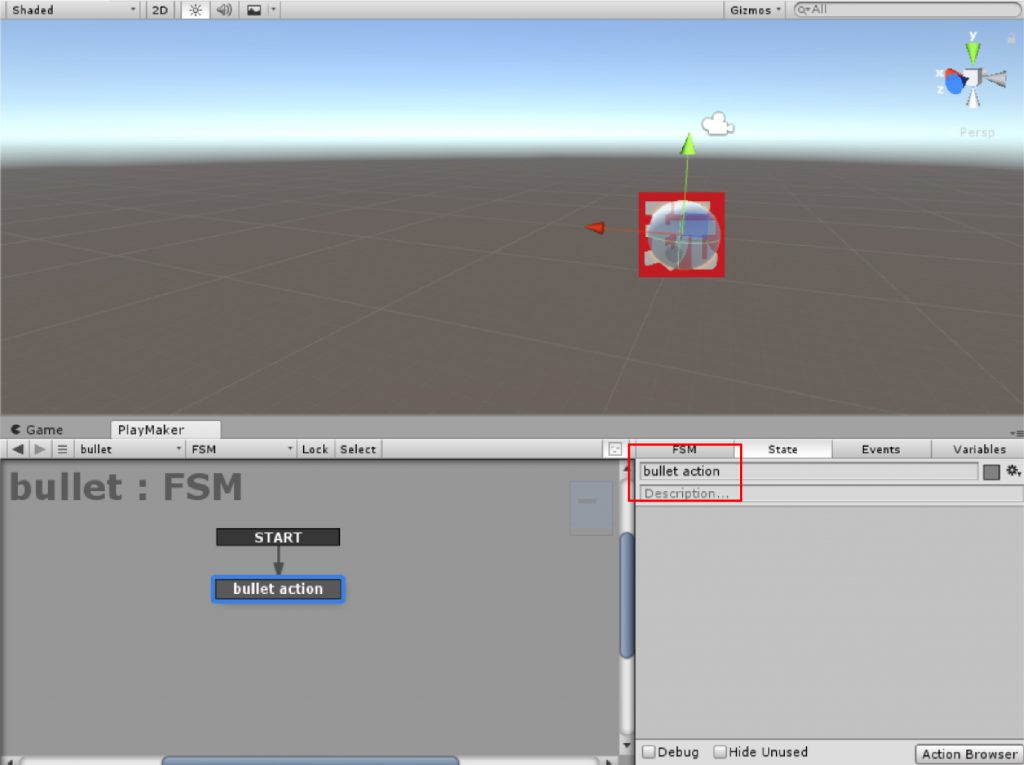
Rename as State 1
Next, add an action. To add an action, select the State tab, choose “Action Browser” in the lower right hand corner, and then select the action you want to use from the browser.
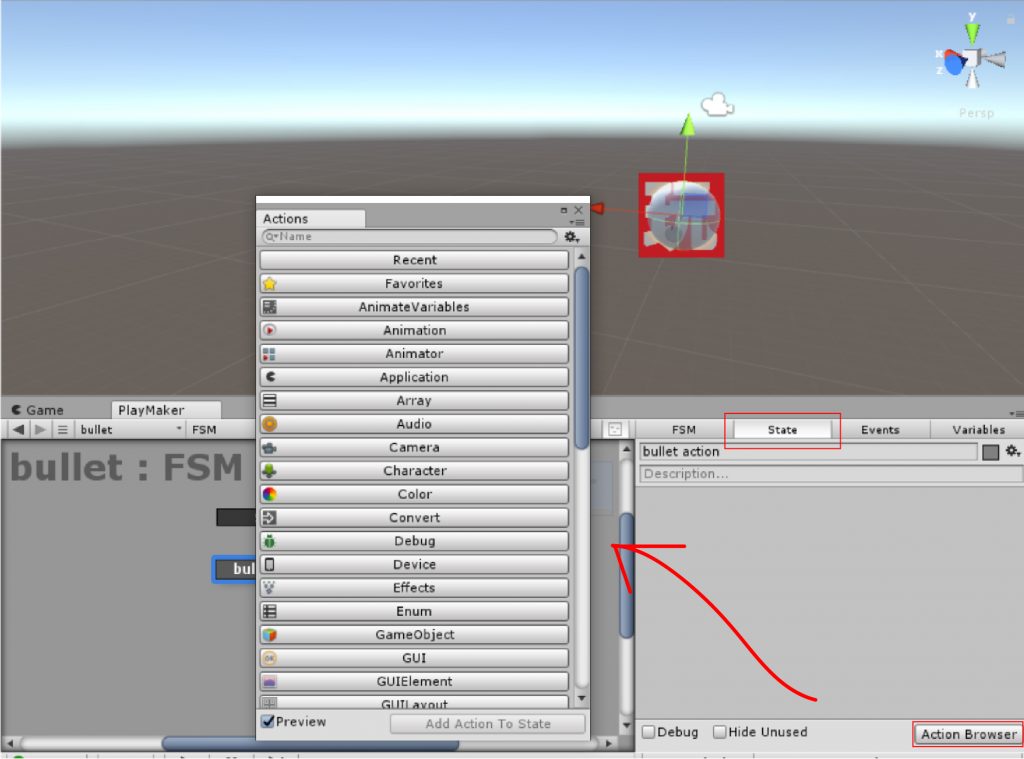
View the Action Browser
“Translate” and “Destroy Object” will be used in this action.
From the top search field, search“Translate” and “Destroy Object” and add them to the state.
Add “Translate” and “Destroy Object”
Once the action is added, configure it.
Translate: This action enables to move the 3D model.
Set it as follows;
For X, select the = icon and enter 5.
Space, enter Self
There are two types of Space, World (world coordinates) and Self (local coordinates).
World coordinates are the coordinates seen from the origin, and local coordinates are relative to the parent.
In this case, I chose Self because I wanted the bullet’s coordination to change relative to the coordination of the launch pad when I rotated or changed the position of the launch pad.
Set Translation
You now have a move (fire) action added to the bullet.
Next, set the Destroy Object.
Destroy Object: An action that destroys the target 3D model.
This is because if you don’t set Destroy Object, it will remain until you fire a bullet.
Configure it as follows;
- Game Object : Drag the “bullet” in the Hierarchy to set it.
- Delay : Set to 5
Delay is the time it takes for the Game Object to disappear. This time, I set the bullet to disappear after 5 seconds.
Set the Destroy Object
Now we have the bullet settings.
Finally, drag the bullet into the project view to pre-fab it.
If you make it pre-fab, the bullet in Hierarchy will be deleted.
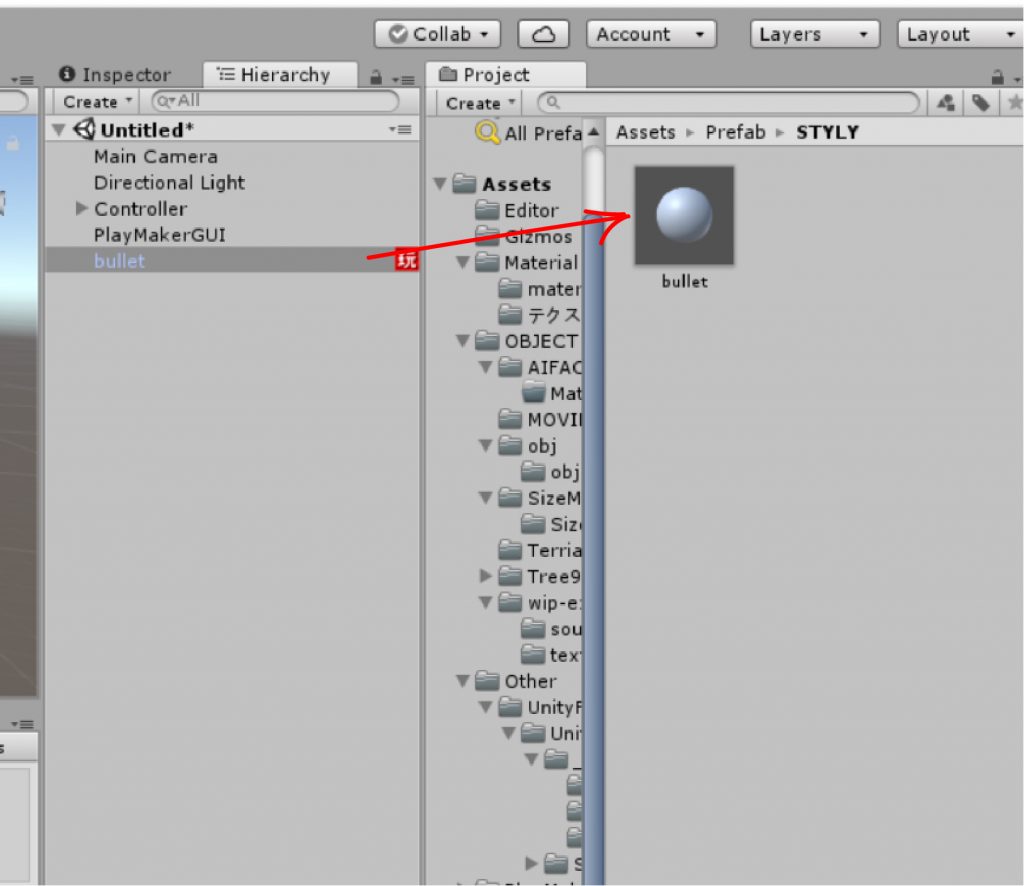
Prefabrication
Next, build a launch pad.
Build a launch pad
On Hierarcy, right-click and select “Create > 3D Object > Cube” to create a Cube, which will be the launch pad for the bullet.
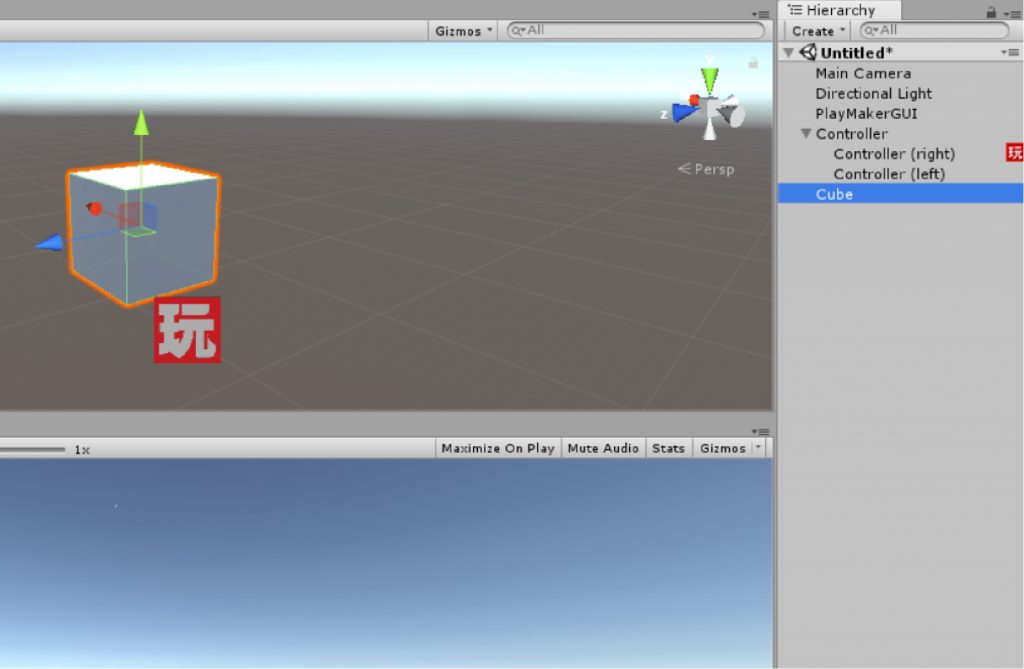
Create a Cube
Set up the Cube. Configure it as follows;
- Name: Point
- Position / Rotation : ( X, Y, Z) = ( 0, 0, 0, 0 )
- Scale : ( X, Y, Z ) = ( 1, 1, 1 )
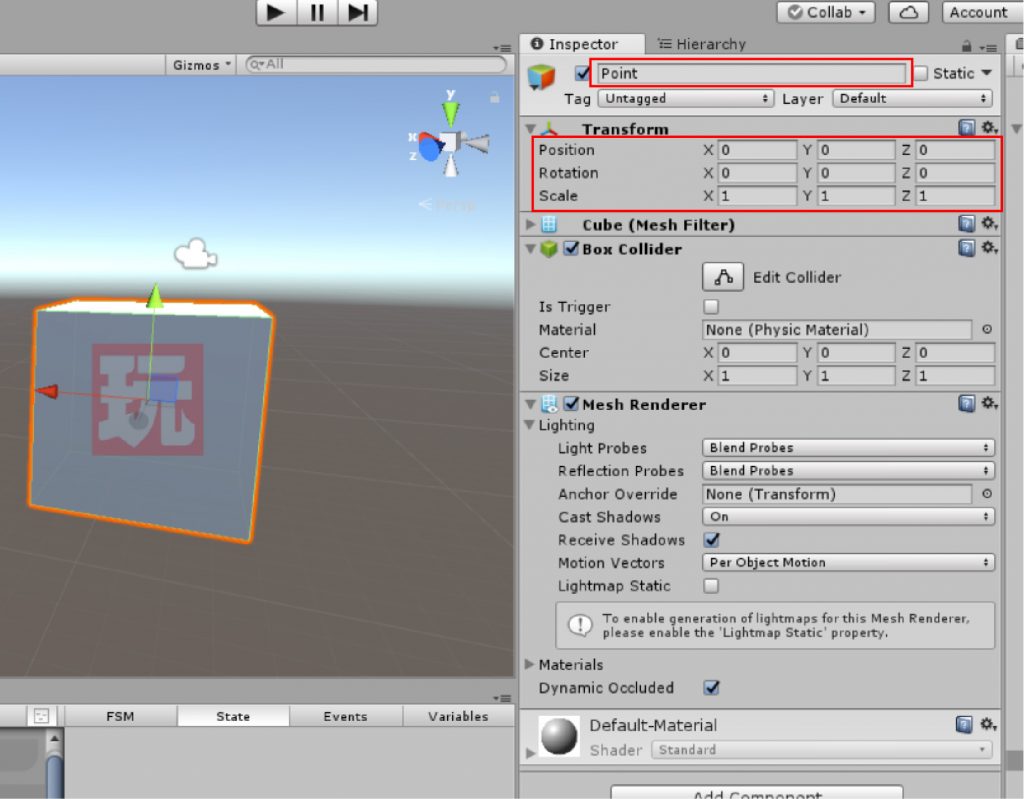
Set the launch pad (Point)
Add a Cube action.
Setting the launch pad action in PlayMaker
With Cube selected, right-click on the PlayMaker Editor. The menu will open and you can now select “Add State” and “State 1” has been added.
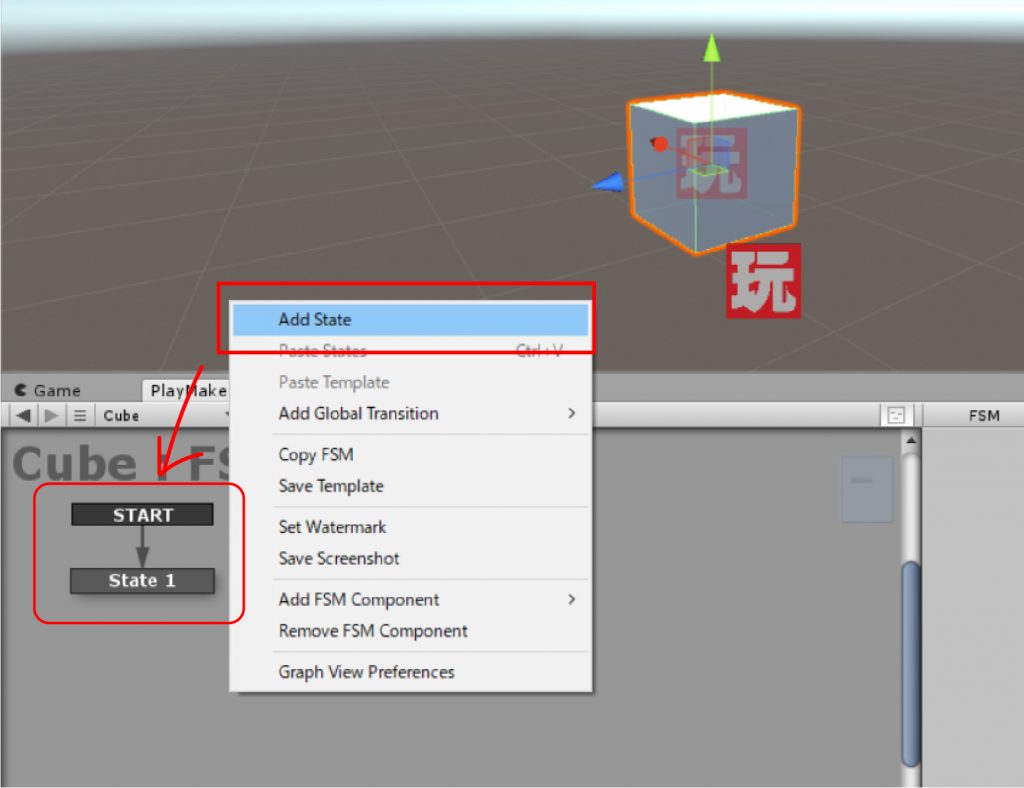
Add State
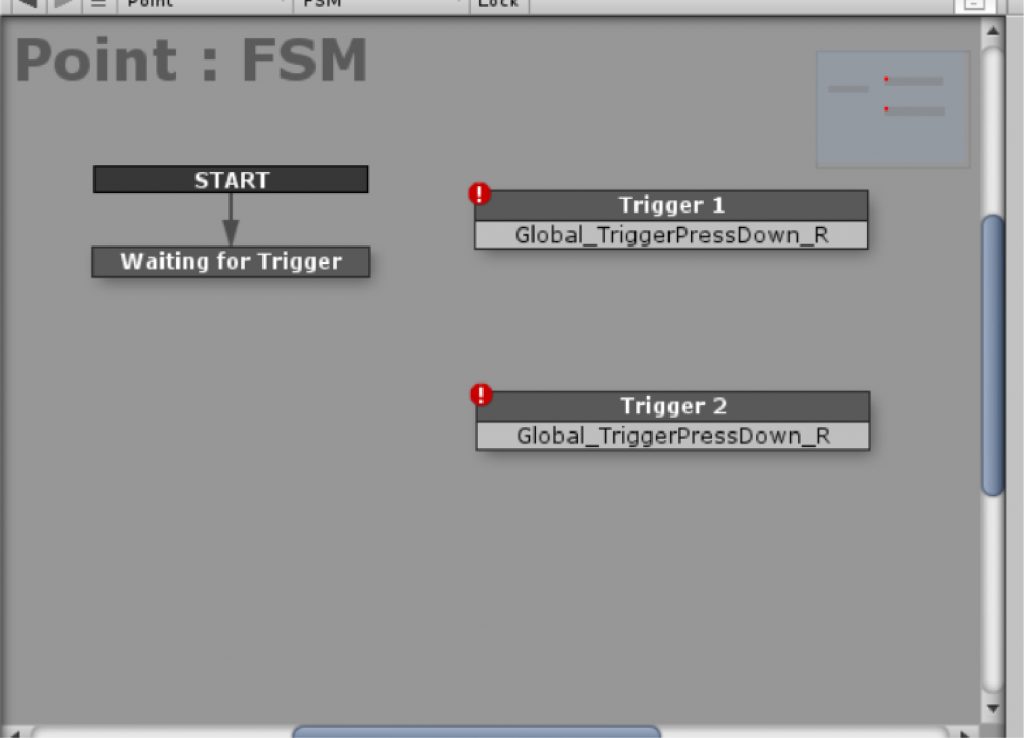
Let’s name State 1 “Waiting for Trigger”.
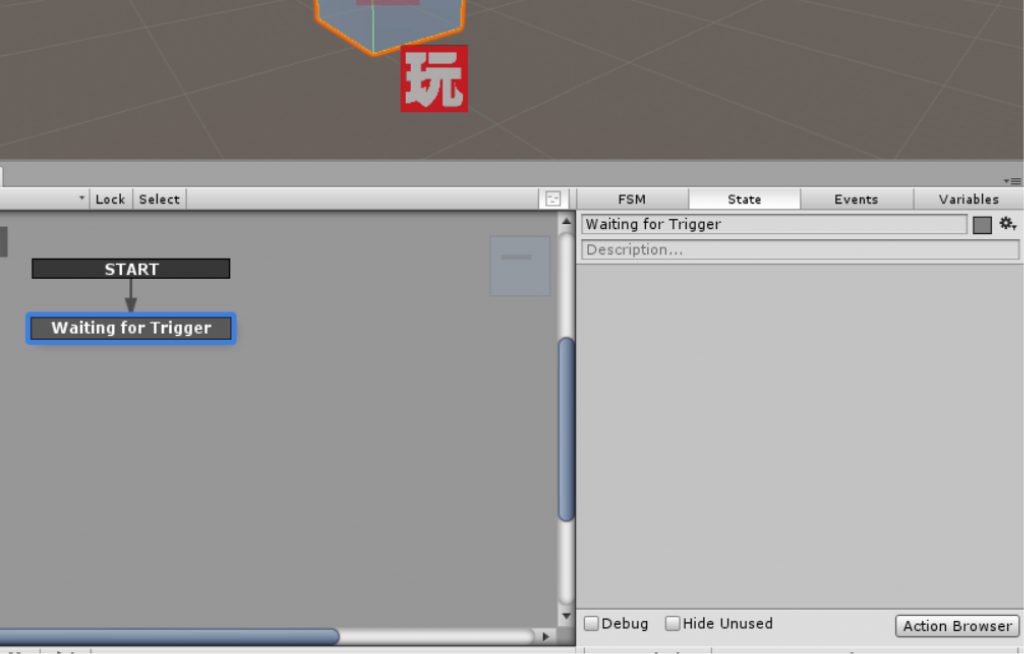
Change your name
Next, add two States.
Right click on the PlayMaker Editor and select “Add State”, do it twice and add two States.
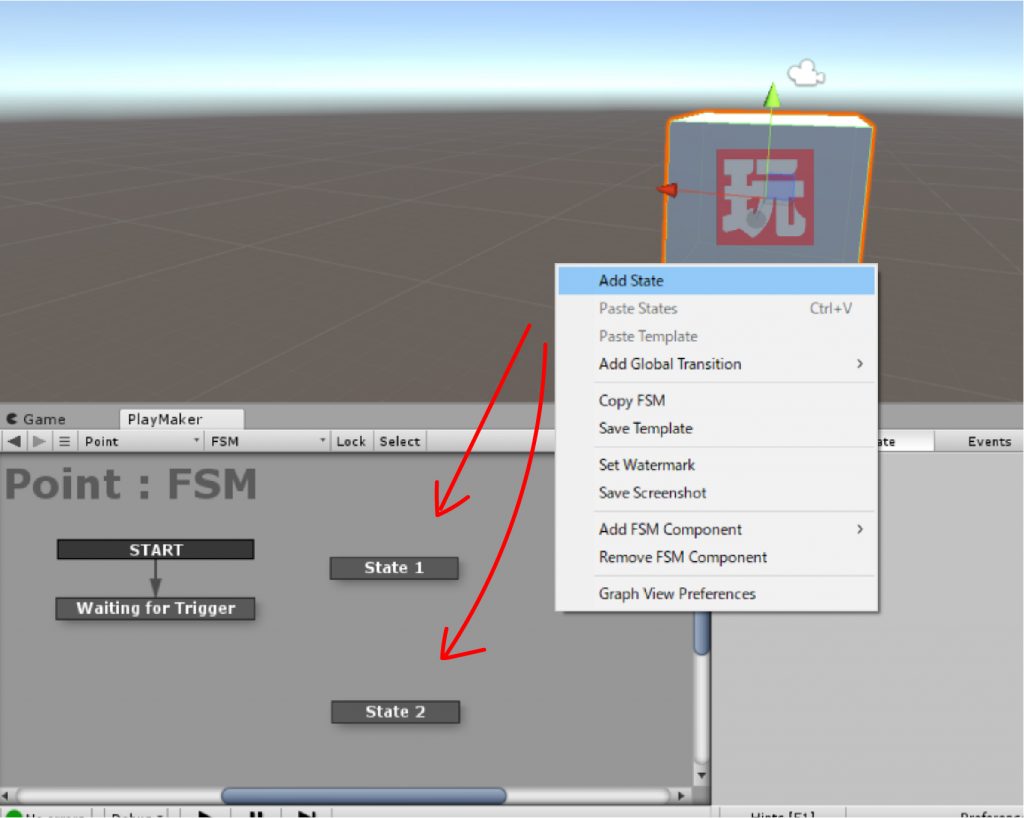
Add two states
Change the name of State. Do the followings;
- State 1 → Trigger 1
- State 2 → Trigger 2
In the Trigger 1 and 2, implement the interaction by the input buttons of the controller.
Open the “Events” tab on the right screen of the PlayMaker Editor, select “Add Event” at the bottom, and add “Global_TriggerPressDown_R” and “Global_TriggerPressDown_L”.
Add Global_TriggerPressDown_R / Global_TriggerPressDown_L
This “Global_TriggerPressDown_R/L” will be the event to get the information of the controller’s trigger button.
Start with the right controller (Global_TriggerPressDown_R) setting.
Right-click on Trigger 1 and select Add Transition > Global_TriggerPressDown_R.
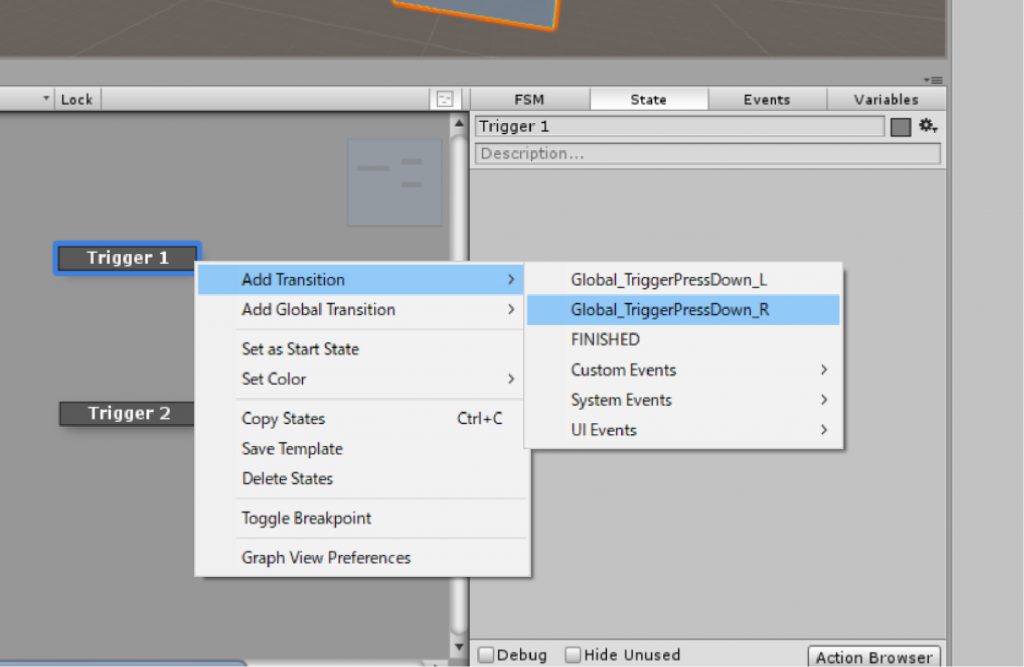
Add an event
Select the same for Trigger 2 and make it look like the one below;
Add an event
Next, add an event transition; select the “Global_TriggerPressDown_R” box in Trigger 1 and connect the arrow to Trigger 2.
In the same way, connect Trigger 2 to Trigger 1.
Configuring event transitions
This event transition setting is the mechanism, which a bullet is fired every time the trigger button is pressed.
In addition, set “Global_TriggerPressDown_R” in “Waiting for Trigger” to connect to Trigger 1.

Set up event transitions
Now you can set up the event transitions.
Next, add an action to implement the interaction.
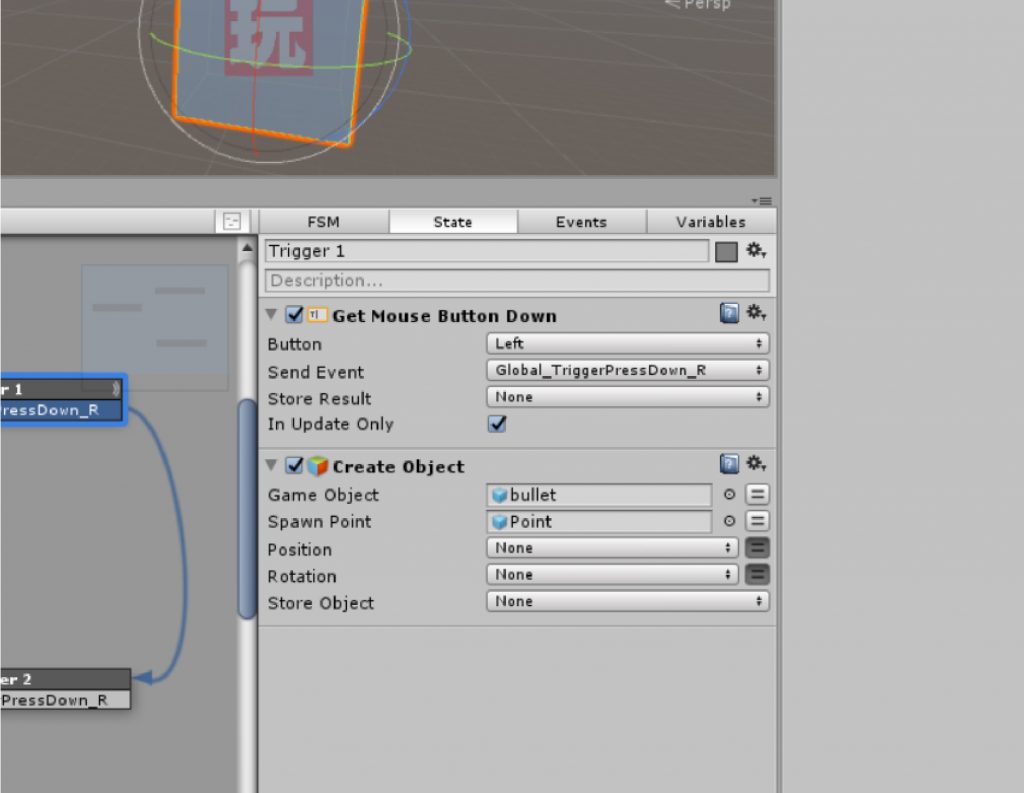
Add a “Get Mouse Button Down” action to Waiting for Trigger.
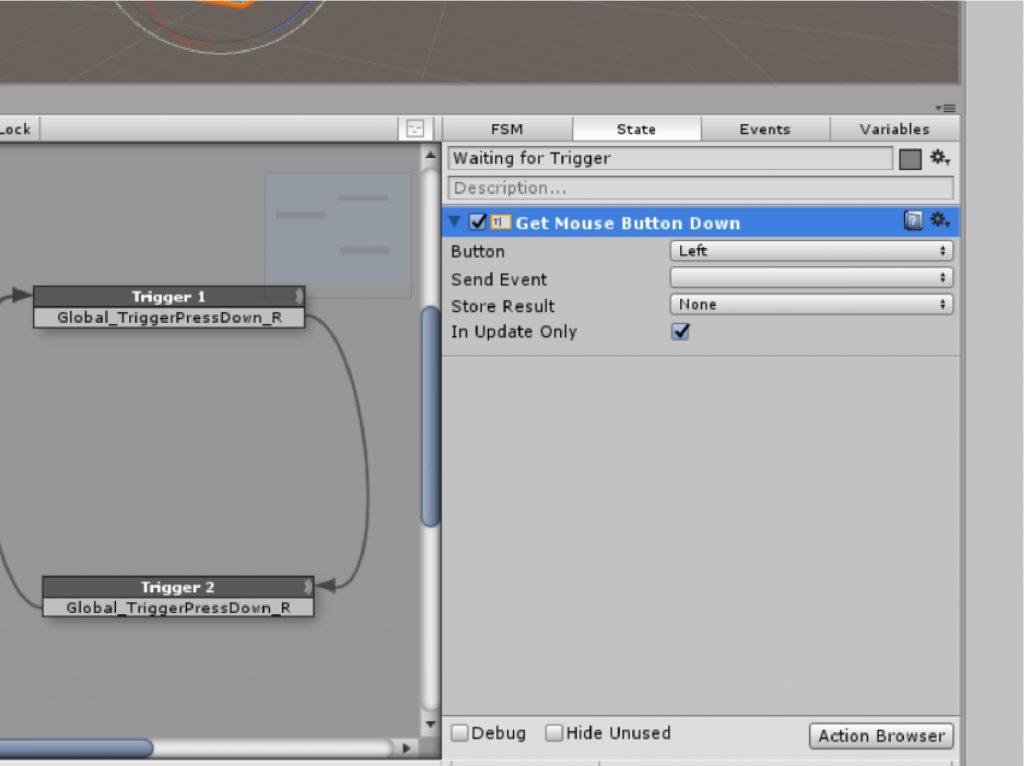
Get Mouse Button Down
Get Mouse Button Down: is an action that allows you to input the mouse button operation as information for the controller buttons when you watch or experience STYLY on your web browser.
The item should be changed as follows;
Send Event : Global_TriggerPressDown_R (selected from the tab)
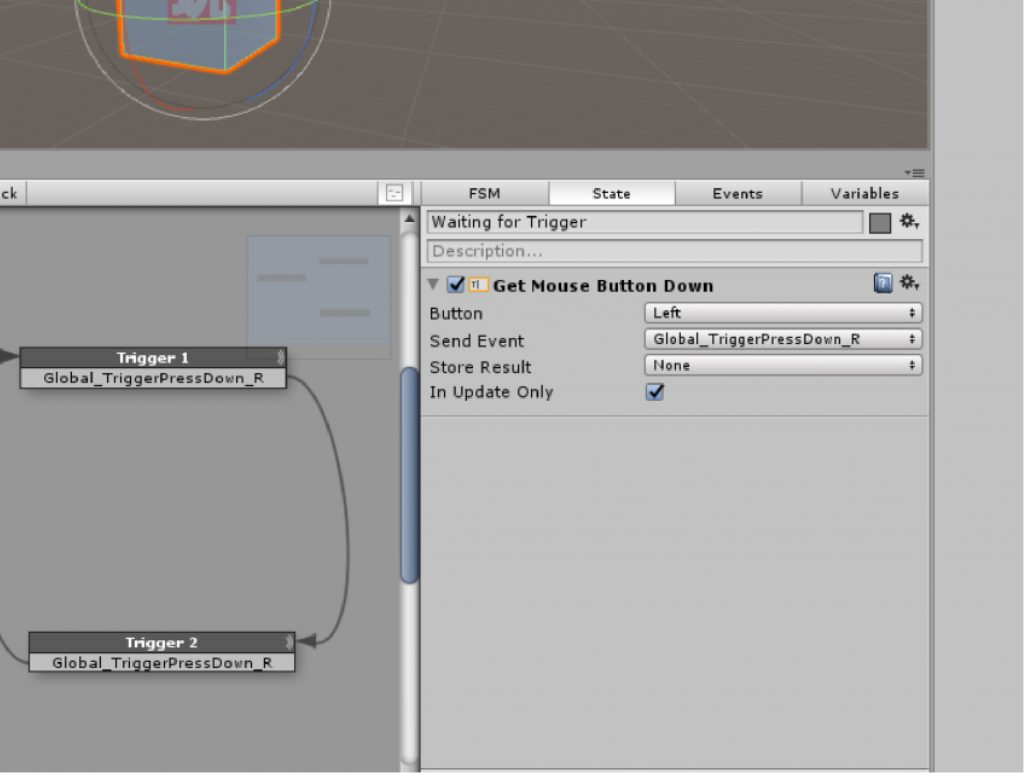
Set the Get Mouse Button Down
Next, add a bullet firing action to Trigger 1 and 2.
Select the State tab in Trigger 1 and add an action from the Action Browser.
The actions, used this time, are “Create Object” and “Get Mouse Button Down”.
Add it from the action browser.
Add “Create Object” and “Get Mouse Button Down”
Create Object: When this action is triggered, the specified 3D model will be created.
Set up these items as follows;
- Game Object: A pre-fabricated “bullet” (dragged from a project)
- Spawn Point: “Points” in Hierarchy (dragged from Hierarchy)
A Game Object is a 3D model that is generated. This time, select a pre-fabricated bullet to fire (generate) the bullet.
Spawn Point specifies where the Game Object should be generated. This time, the Point will be the launch pad, so select the Point.
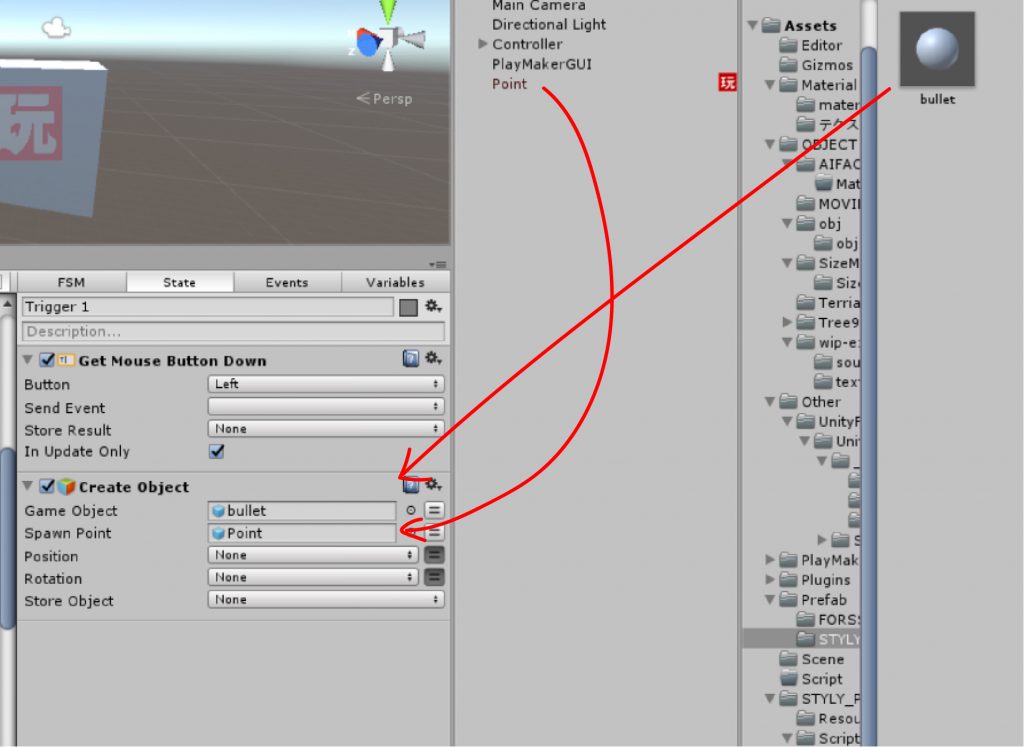
Specification of Game Object / Spawn Point
Next, set the Get Mouse Button Down.
Set the Get Mouse Button Down
Copy “Get Mouse Button Down” and “Create Object” and paste them into Trigger 2.
Duplicate Trigger 1’s action to Trigger 2
This procedure completes the interaction where the bullet is fired.
Upload to STYLY
Finally, let’s prehab the launch pad (Point) to upload it to STYLY.
Drag it from Hierarchy to the project screen and make it pre-fab.
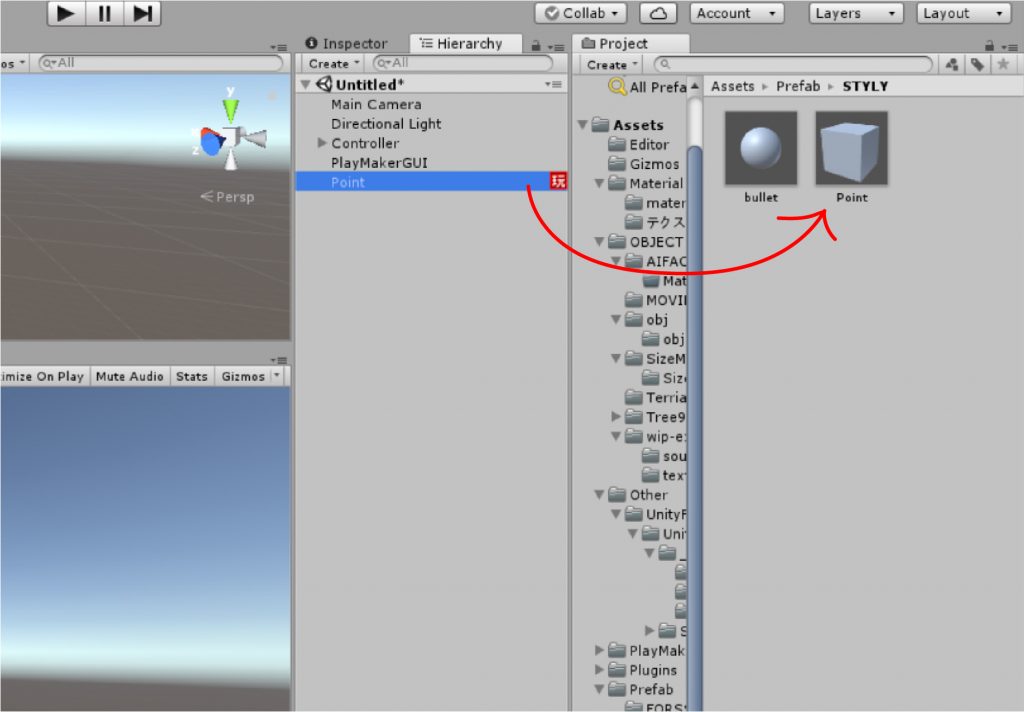
Make it pre-fab
There is -a bullet pre-fab, but only the “Point” is uploaded to STYLY.
For more information on how to upload, please click here.

Here is a sample;
Operation can be confirmed.
Implement a variety of actions!