In this article, with Unity, I clean up the texture of a scanned model with rig set by Mixamo.
This work doen’t require any coding so this article would be helpful for the people who cannot write any program code like me.
If you set Auto Rig for a scanned data, it would look untidy since the texture is displayed as ‘Standard Texture Display’. So, let’s make it look tidy with Unlit Texture in Unity.
Download a scanned model from Mixamo to use in Unity
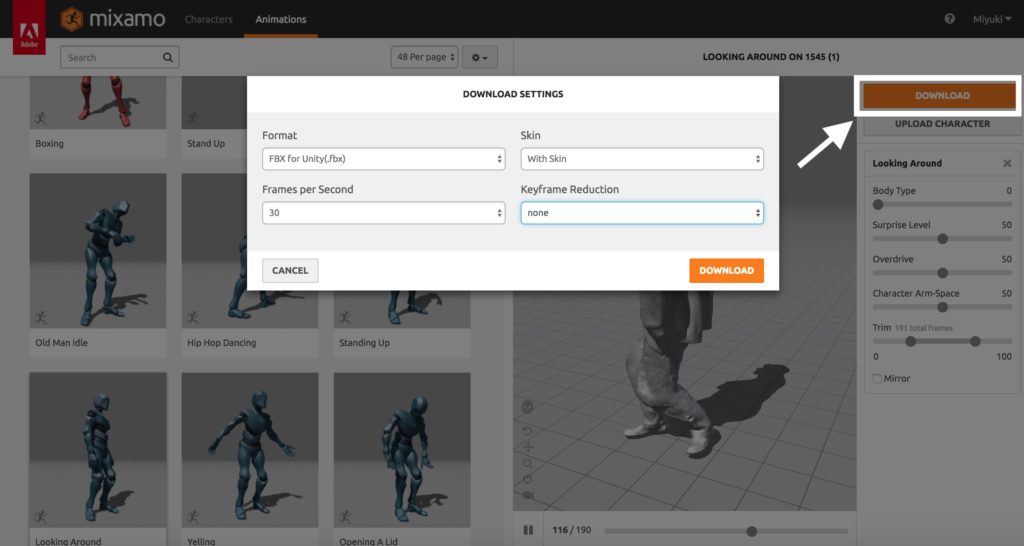
To download the scanned model with animation from Mixamo, select ‘FBX for Unity’ from the ‘Format’ drop-down in the DOWNLOAD SETTING window.
To use a model in Unity, export it as ‘FBX for Unity’ from Mixamo.
Add an animation to the scanned model with Mixamo.
Don’t hesitate to stop it short as it stresses your PC very much.
After that, click the ‘DOWNLOAD’ button in the top-right corner of the screen to open ‘DOWNLOAD SETTING’ window.
Set ‘Format’ to ‘FBX for Unity (.fbx)’. Then, press the DOWNLOAD button.
Clean up the texture with Unity
Next, create a new project in Unity.
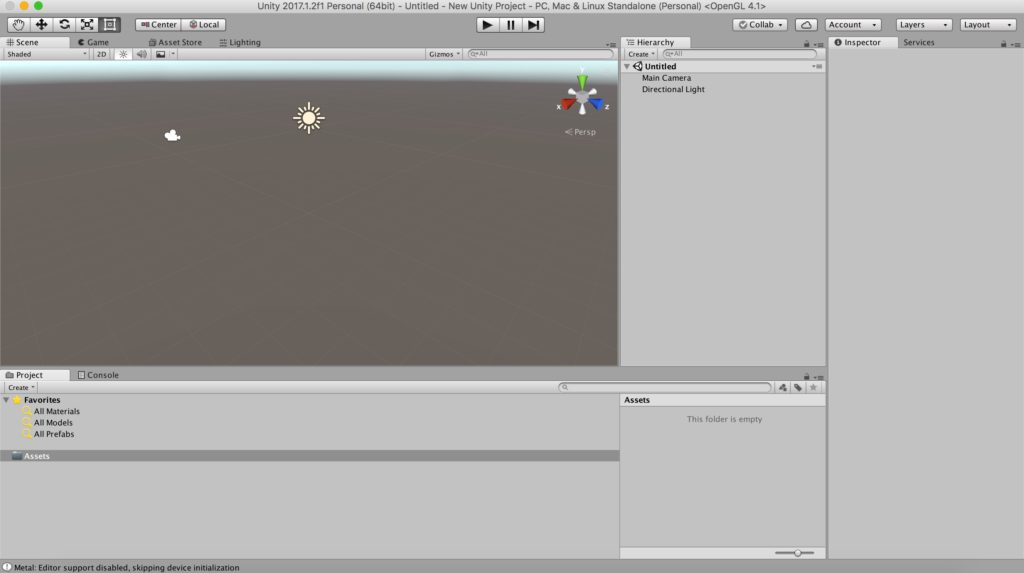
Unity screen – a new project
Drag the file of the scanned model data onto ‘Asset’ in the Project window.
After that, drag it from the Project view onto the Hierarchy window.
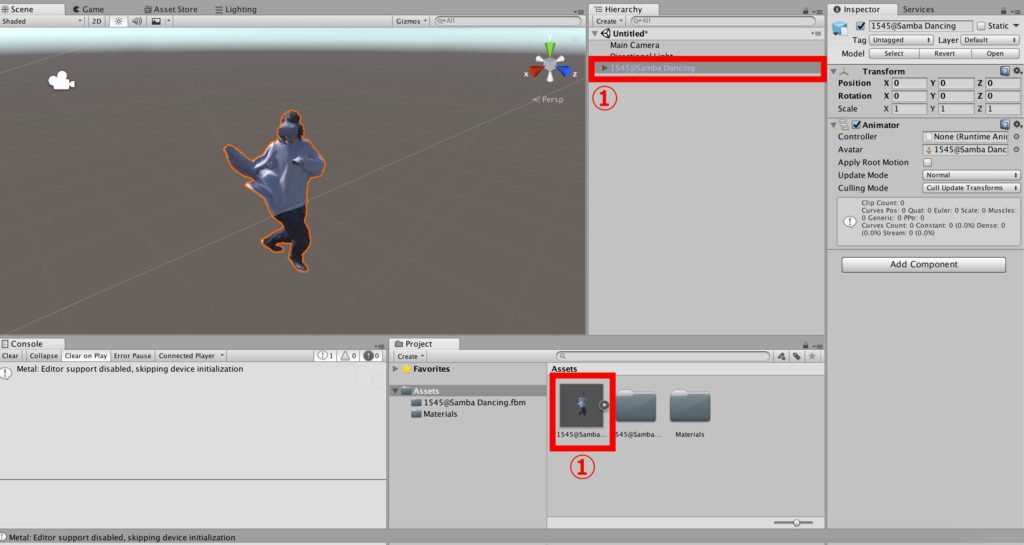
Drag the asset file onto the Project window, and then drag it onto the Hierarchy window.
It should display the model in the Scene view.
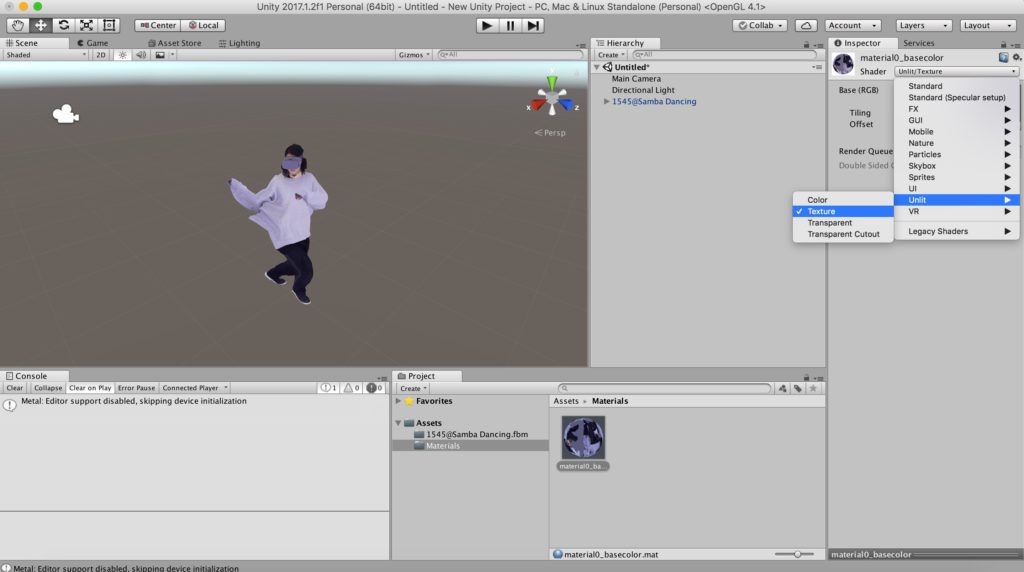
Display the material clearly by Unlit Texture.
Double-click the material to show its details in the Inspector view.
Set Shader as follows:
- Shader > Unlit > Texture
You can see the texture more clearly than what it looked when imported.
The animation added by Mixamo wouldn’t work if you uploaded the model as it is.
So I explain how to set the animation.
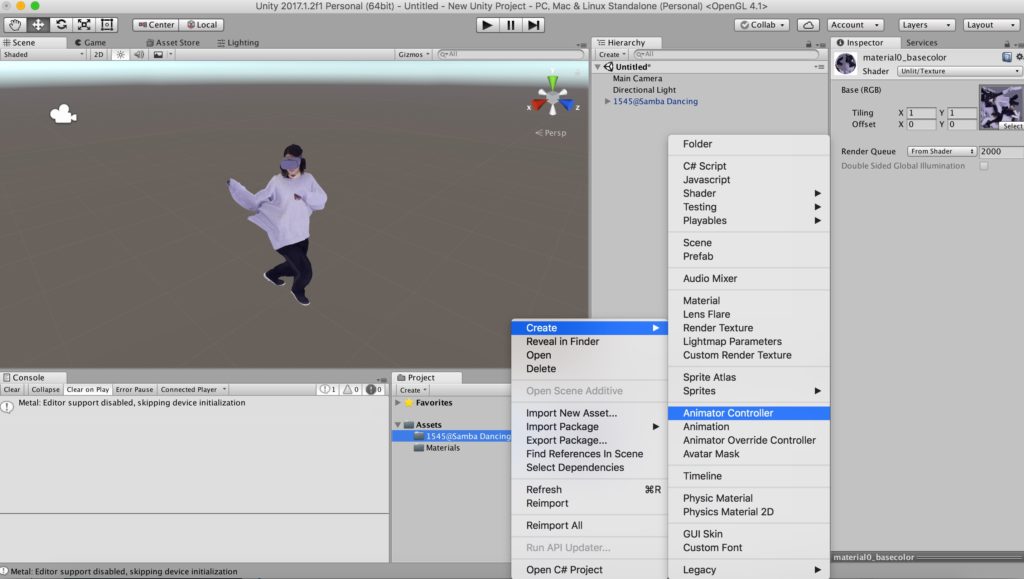
Create a new Animator Controller
Next, right-click in the Project view and select ‘Create > Animator’ to create a new Animator Controller.
Double-click the Animator Controller created to open the Animator window in the Scene view.
Right-click at a blank place in the window.
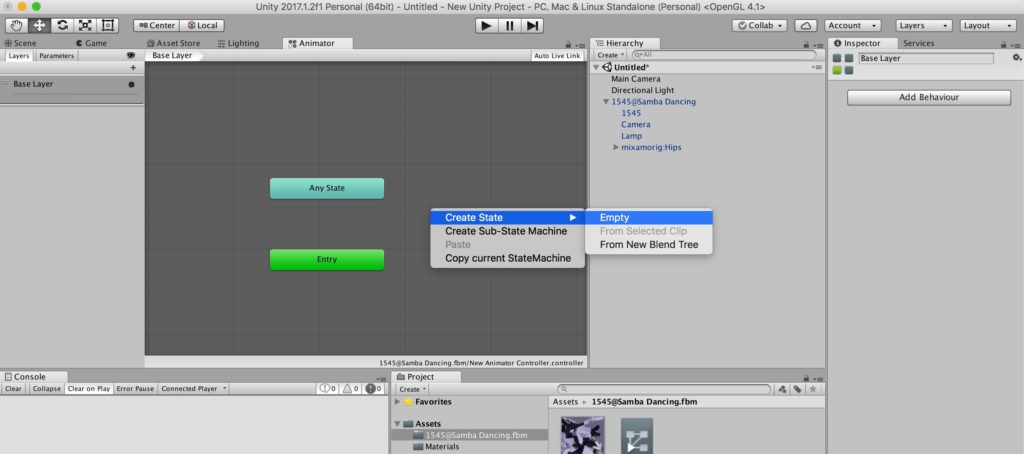
By ‘Create State’, create ‘Empty’ on the Animator Controller.
Select ‘Create State > Empty’.
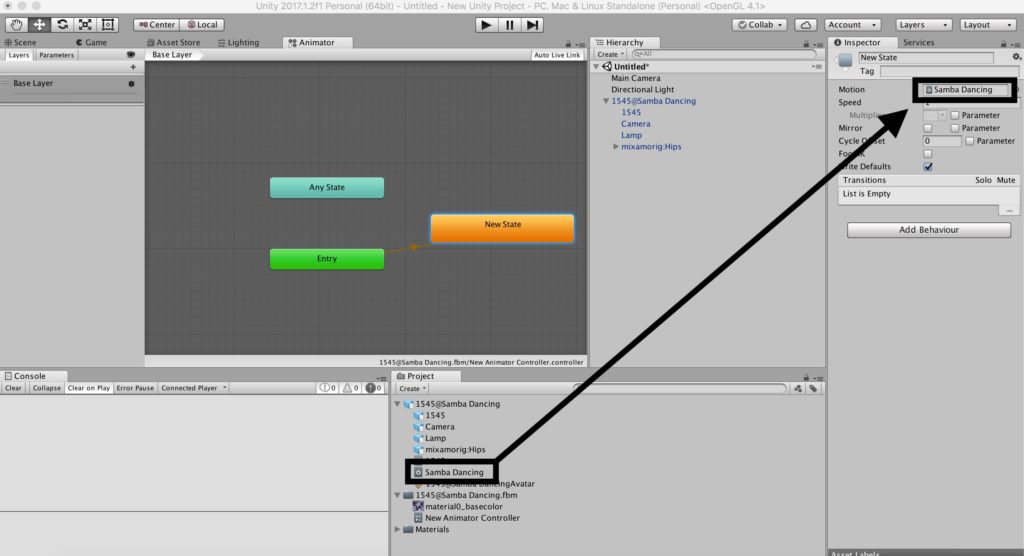
Drag the animation into the Motion field.
Check the Inspector for ‘New State’.
The Motion field has been set to ‘None’ by default.
Drag the animation data (‘Samba Dancing’ in this example) in the Project view onto the filed.
Now you can see ‘Samba Dancing’ displayed in Motion field.
HierarchyのInspectorにNew Animator Controllerをドラックドロップする
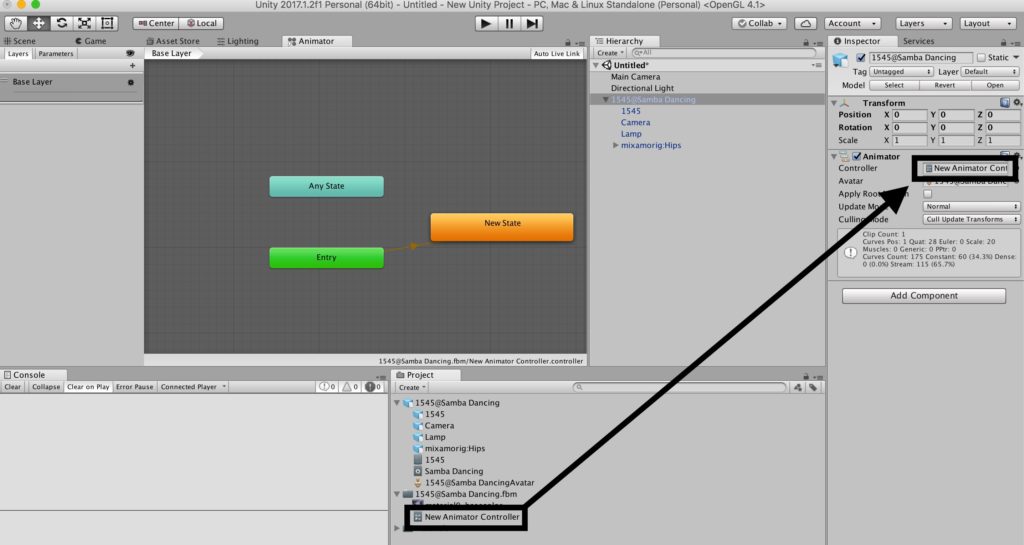
Then, see the Inspector by selecting the scanned model data in the Hierarchy view.
The Controller field has been set to ‘None’ by default.
So, drag the Animation Controller created earlier onto the field.
Let’s press the Play button. Now you should see the animation running.
How to loop the animation
Edit the Inspector of the animation
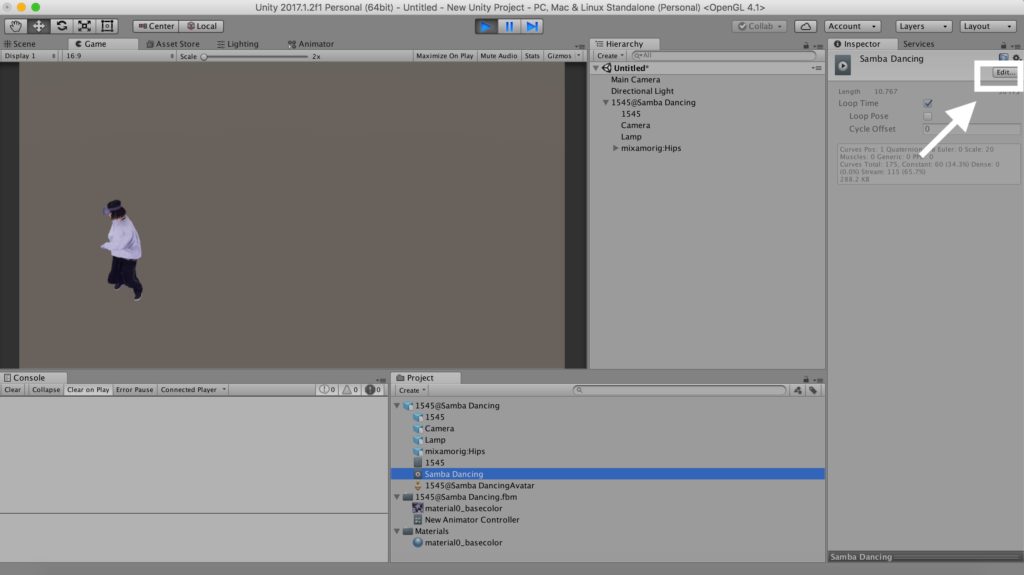
Select ‘Samba Dancing’ in the Project, and then click ‘Edit…’ in the Inspector.
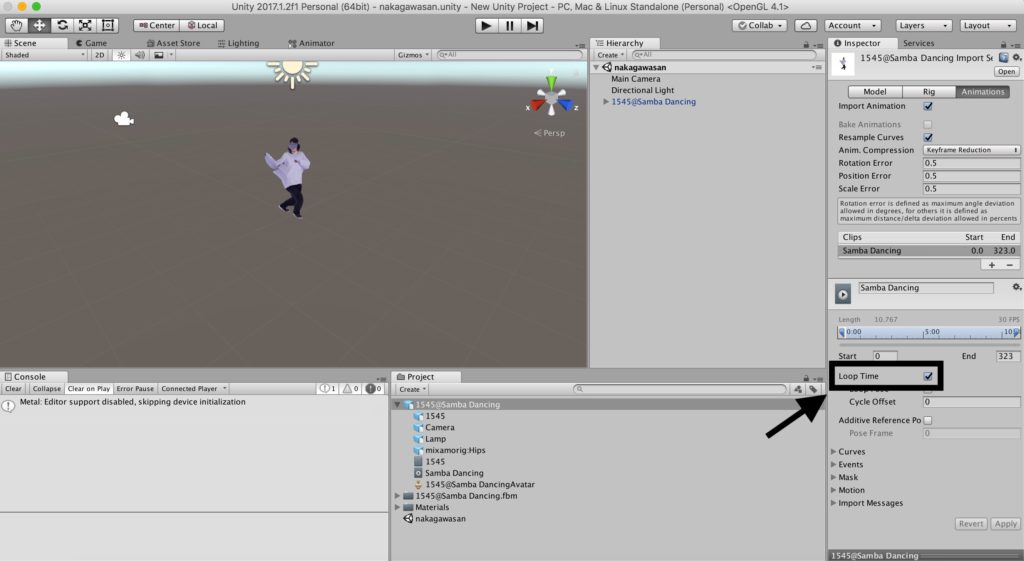
Check the Loop Time box.
Check the ‘Loop Time’ box a little bit below the middle of the Inspector window.
Press ‘Apply’ to save the setting. You now have set the loop for the animation.
Convert it into a Prefab
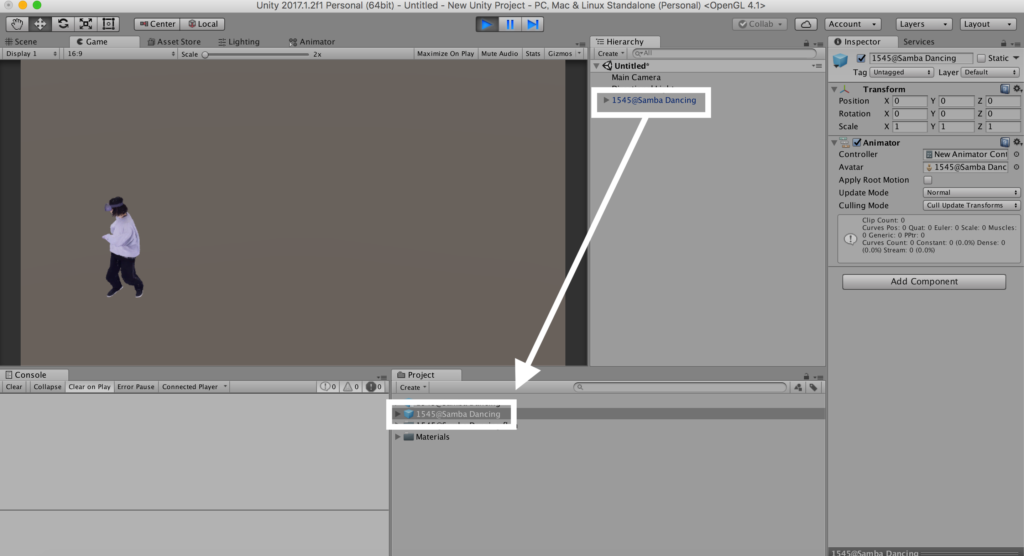
Finally, drag the whole asset file in the Hierarchy window onto the Project window to convert it into a Prefab.
Export it then you are ready to upload it to STYLY.
See the article below to learn how to upload assets from Unity to STYLY.
