This article is the ninth installment in the Visual Scripting Introduction series.
In this article, we will explain how to create and play animations using Visual Scripting, as well as how to play audio.
Creating Animations in Unity
Animation is a feature built into Unity that allows you to create animations by setting keyframes.
To play the animation created using Visual Scripting, let’s first create the object to be animated.
Click the + button in the Hierarchy, select 3D Object → Cube to create a Cube.
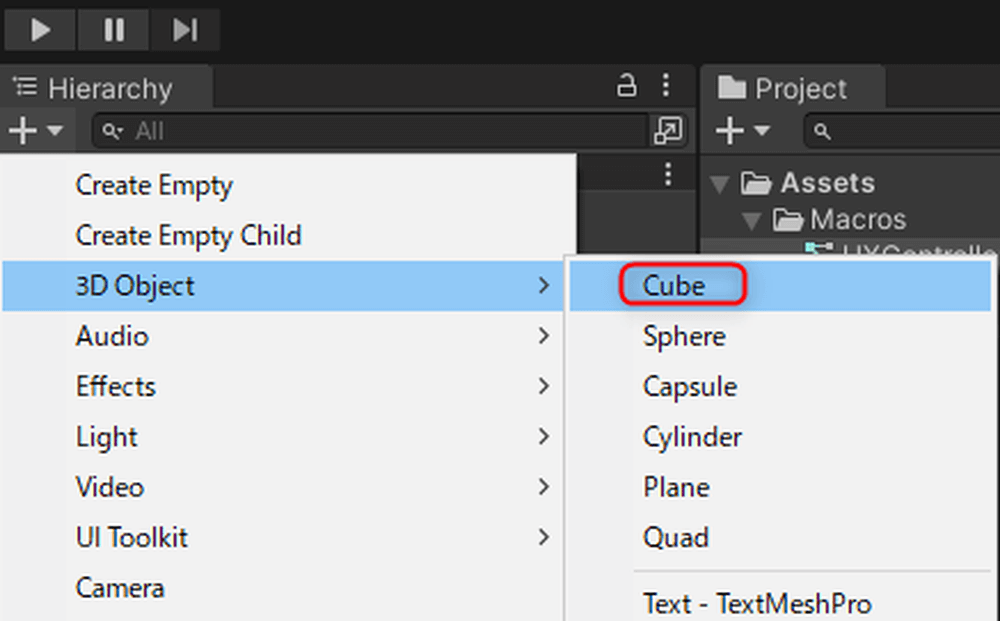
3D Object → Cube
Name it [AnimationCube].

AnimationCube
From the top menu bar, select Window → Animation → Animation to open the Animation window.
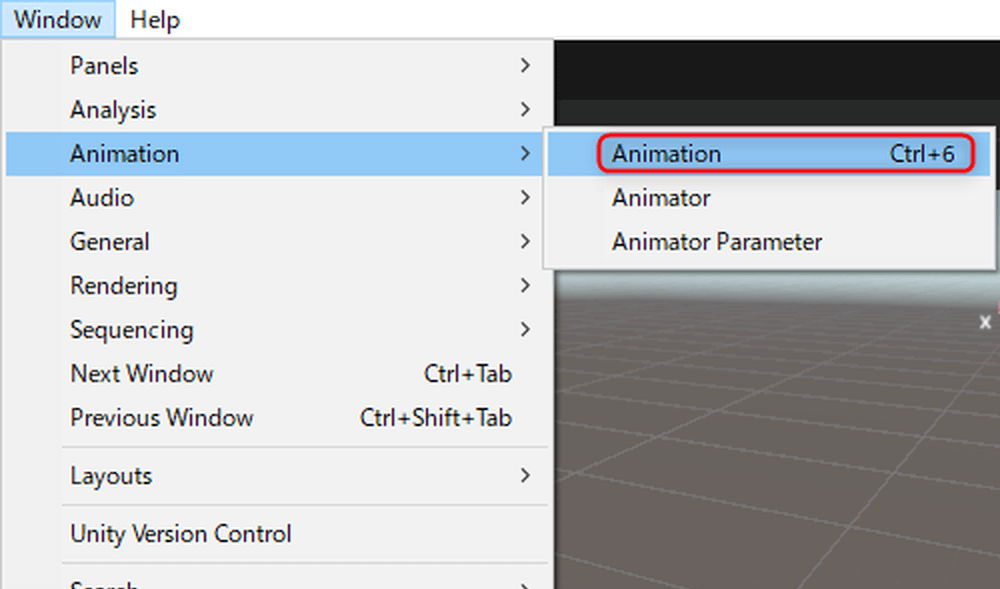
Animation Window
With [AnimationCube] selected, click the Create button in the Animation window.
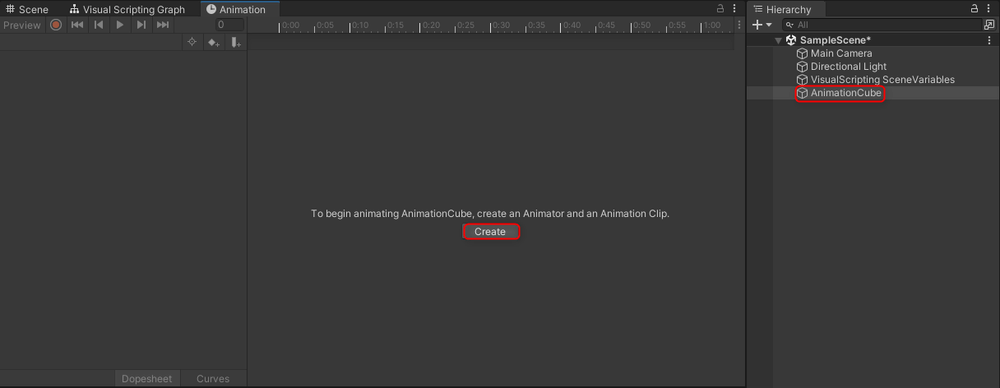
Create in the Animation Window
Set the Position of AnimationCube to (10, 0, 0).
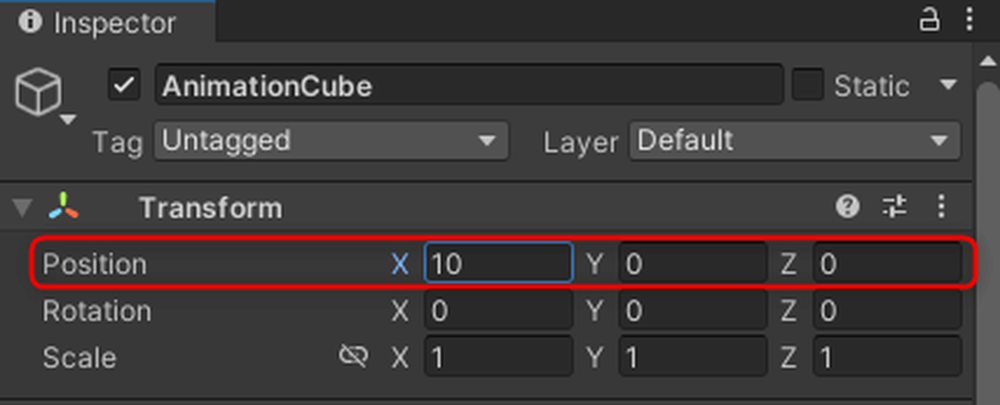
Set Position to (10, 0, 0)
Click Add Property, then click the + next to Transform → Position.
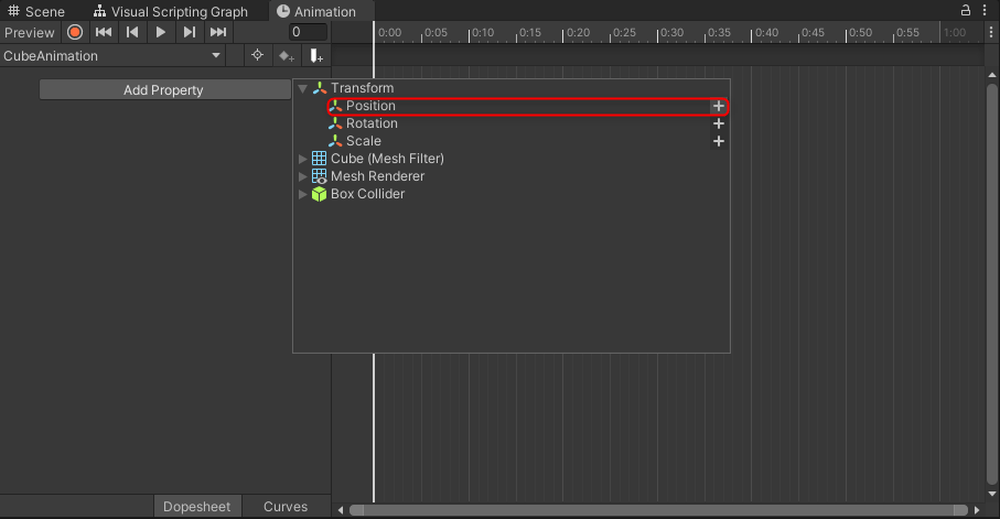
Transform → Position
This time, we will make the object move back and forth.
Move the timeline to 0:30 and set Position.x to -10.
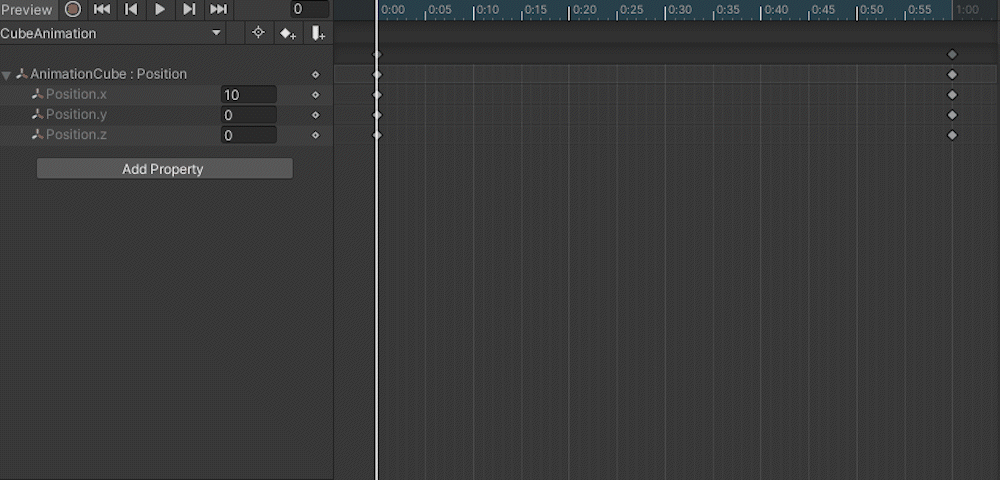
Set Position.x to -10
Click the play button in the Animation window to play the animation.
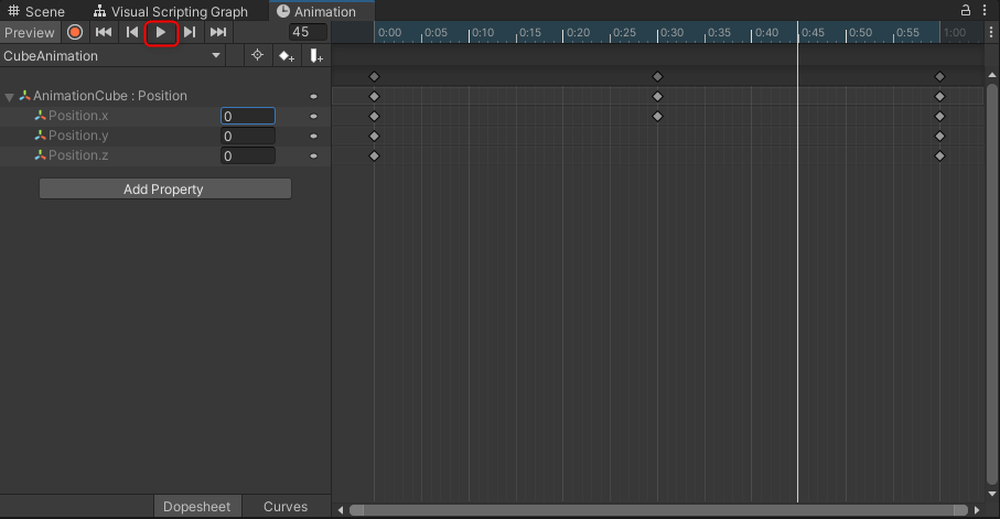
Play Button in Animation Window
The animation is now playing.

Playing the Animation
Playing Animations with Visual Scripting
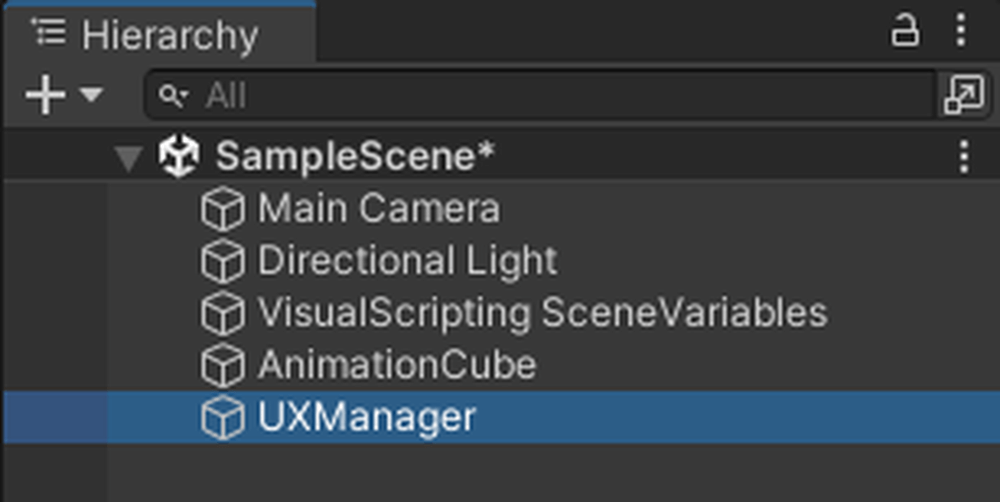
Click the + button in the Hierarchy and select Create Empty to create an empty GameObject.
Name it [UXManager].
“`html
UXManager
Attach a Script Machine to [UXManager].
Create a folder named Macros, and inside it, create a Graph named [UXController].
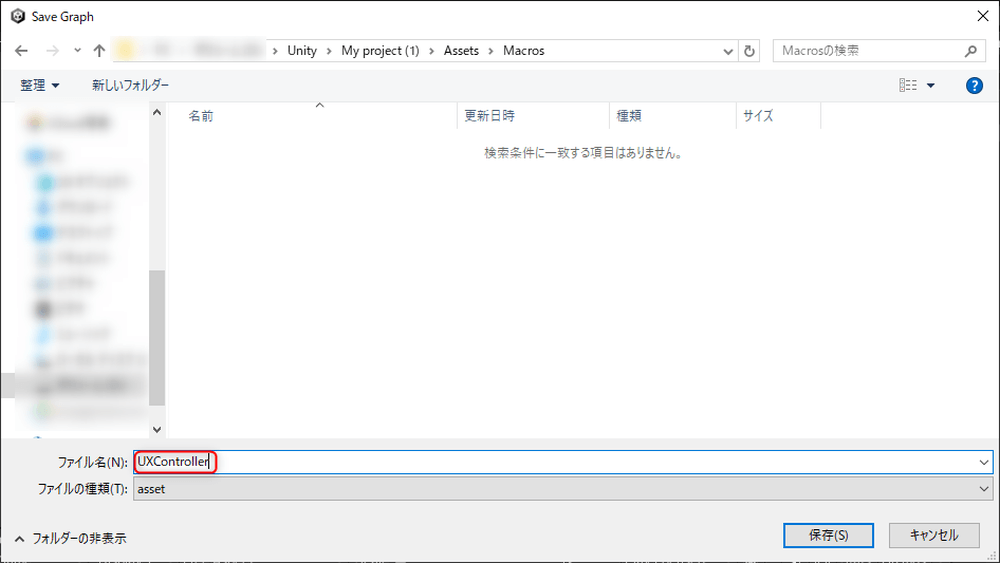
UXController
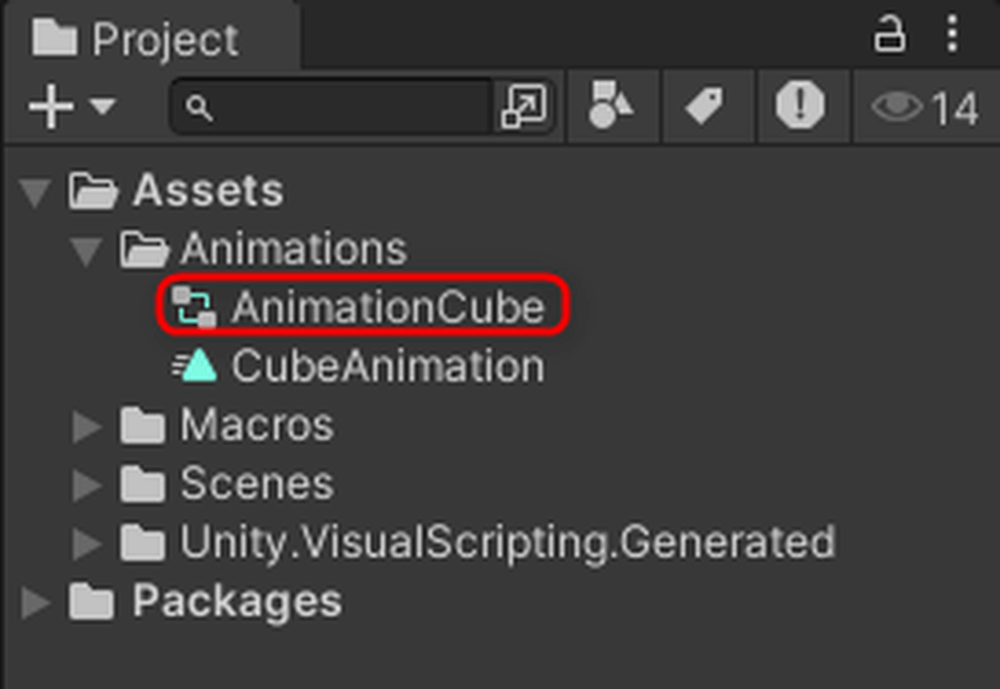
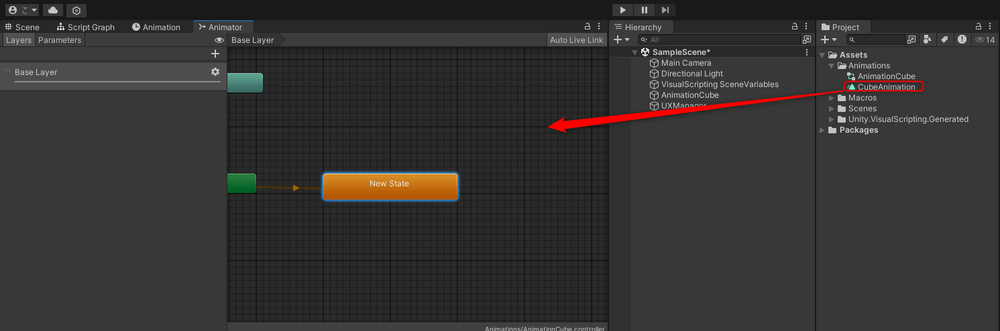
Double-click AnimationCube in the Animations folder to open the Animator window.
Animator Window
Right-click on CubeAnimation and select Delete.
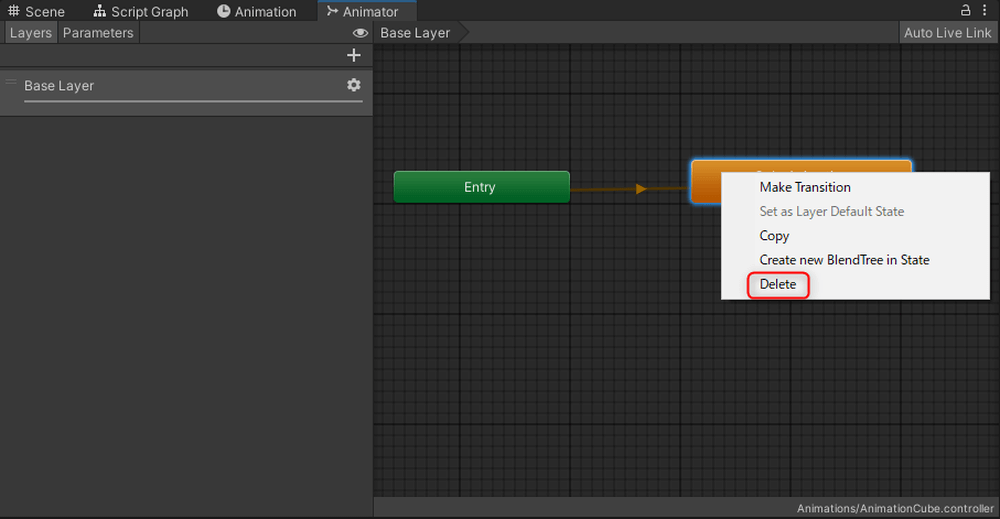
Delete
In the empty space of the Animator window, right-click and select Create State → Empty.

Create State → Empty
Drag and drop CubeAnimation from the Animations folder into the Animator window.
Drag and drop CubeAnimation into the Animator window
Right-click on the New State and select Make Transition, then connect the arrow to CubeAnimation.
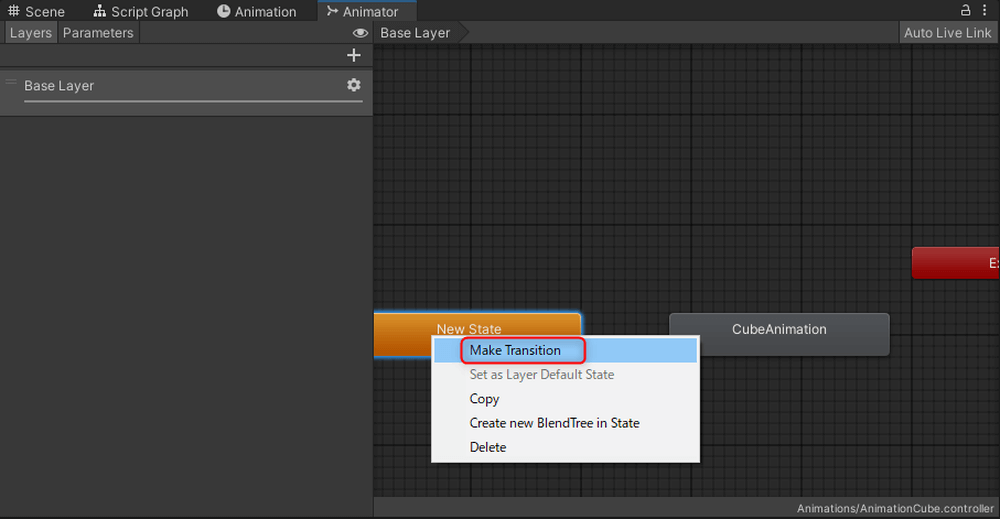
Connect the arrow to CubeAnimation
Click the + button in the Parameters section of the Animator window, select Bool, and name it [Play].
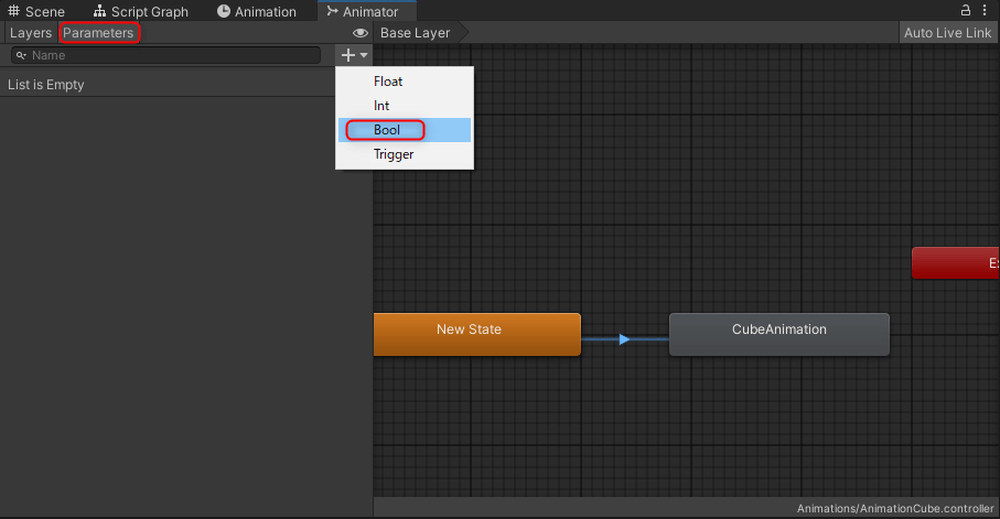
Play
Select the arrow connecting New State and CubeAnimation in the Animator window, and click the + button in the Conditions section of the Inspector.
By doing this, the next animation will play when [Play] becomes True.
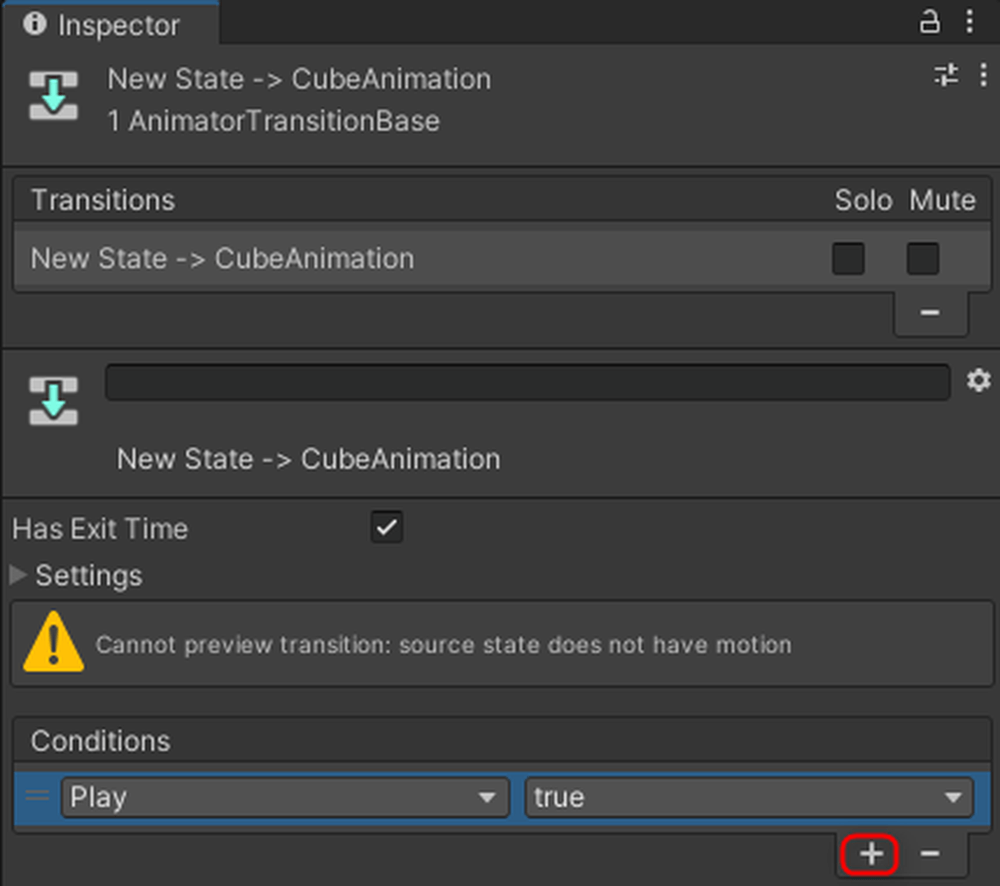
Click the + button in the Conditions section of the Inspector
Set the animation to play when the spacebar is pressed.
Create a GameObject variable in Variables named [Cube] and set the Value to [AnimationCube].
Add [Cube] to the Graph Editor.
![Add [Cube] to the Graph Editor](https://styly.cc/wp-content/uploads/2024/08/19-3.png)
Add [Cube] to the Graph Editor
Add the following nodes to the Graph Editor.
*Only the nodes that are difficult to understand are shown in the images.
- Get Key Down (Key)
- If
- SetBool (Name, Value)
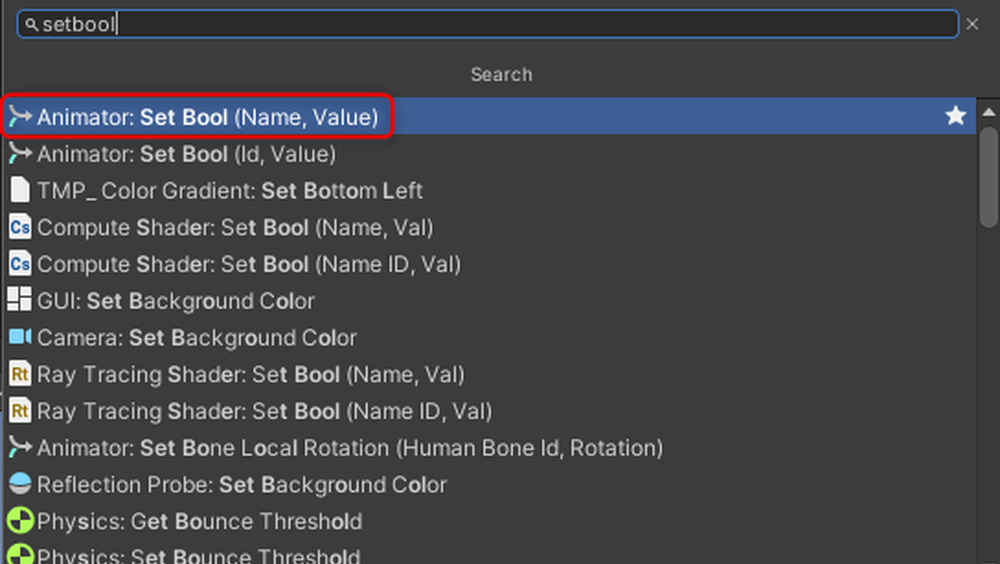
SetBool (Name, Value)
Connect the nodes as shown below.
Set the Bool Name to [Play], which was set in the Animator.
Since we set the animation to play when [Play] is True, check the Value box.
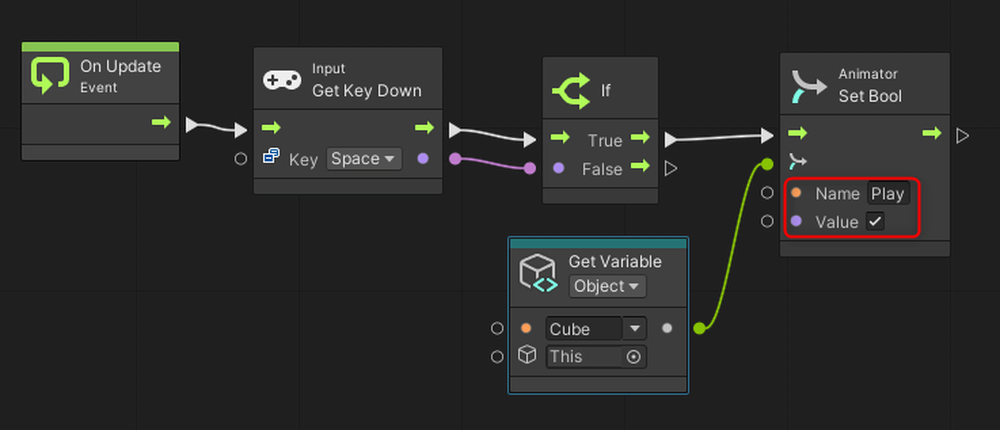
Connect the nodes
Press play. The animation will play when the spacebar is pressed.

Playing the Animation
Playing Audio with Visual Scripting
This time, we will use free audio.
You can download the audio from this download page.
You can also use any audio you like.
“`html
Drag and drop the downloaded audio file directly into the Assets folder.
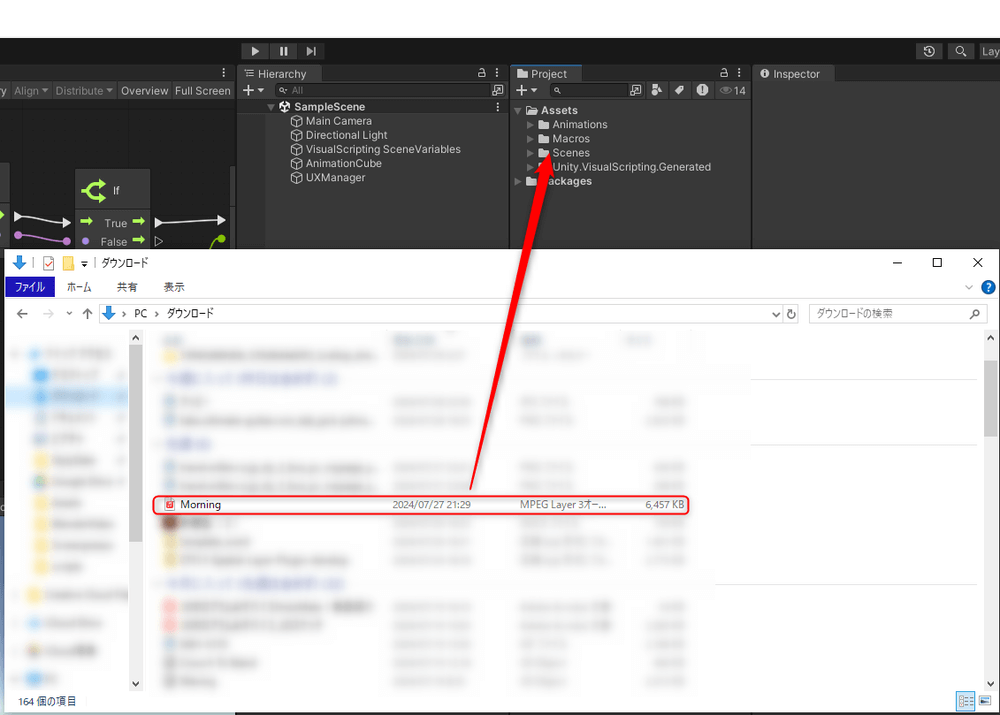
Drag and drop the downloaded audio file into the Assets folder
Click the + button in the Hierarchy, then select 3DObject → Cube to create a Cube.
Name the Cube [SpeakerCube].
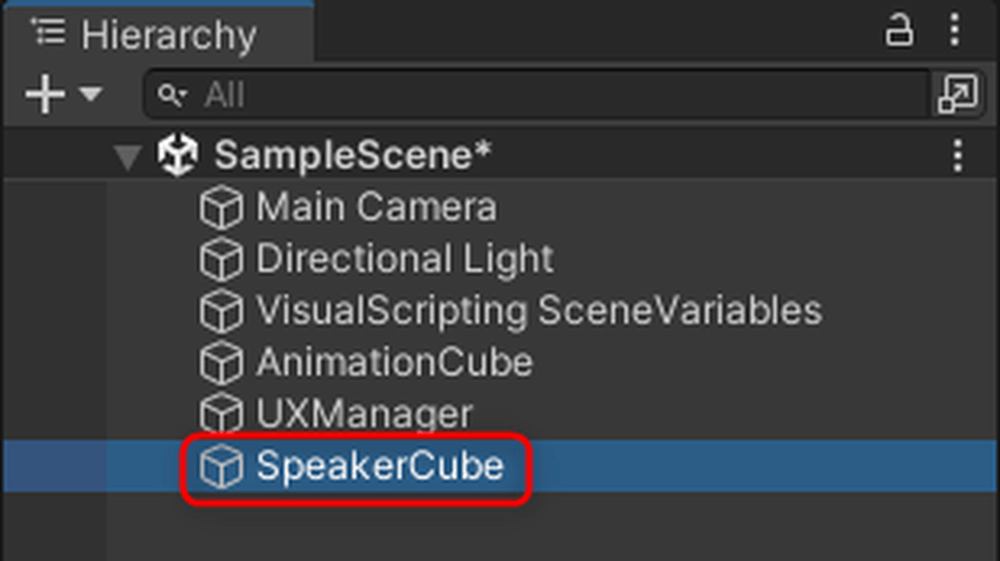
SpeakerCube
Click AddComponent on SpeakerCube and add the [Audio Source] component.
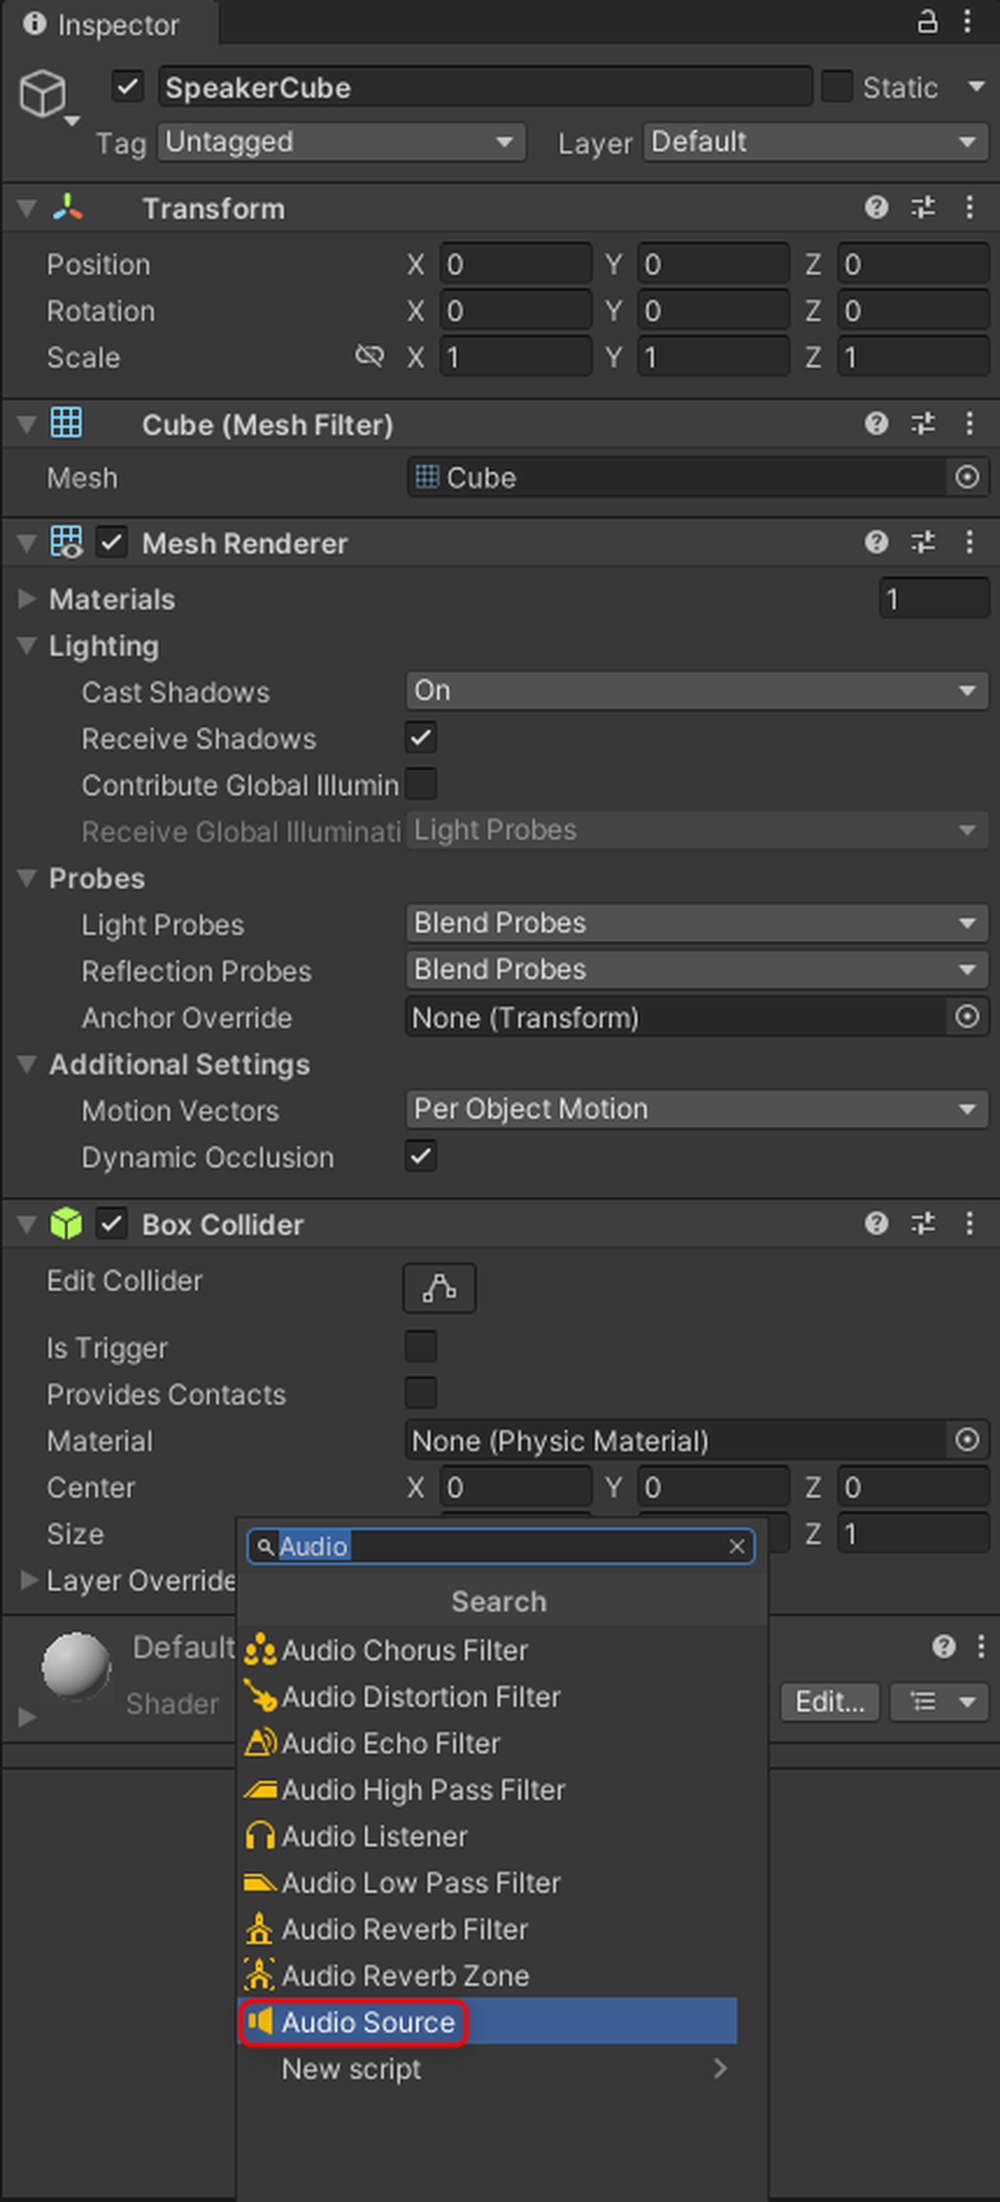
Audio Source
Add a GameObject variable named [Speaker] to UXManager’s Variables.
Set the Value to [SpeakerCube]. Add [Speaker] to the Graph Editor.
![Add a GameObject variable named [Speaker]](https://styly.cc/wp-content/uploads/2024/08/26-1.png)
Add a GameObject variable named [Speaker]
Add the following nodes to the Graph Editor.
*Only the nodes that are difficult to understand are shown in the images.
- On Update
- Get Key Down (Key)
- If
- Set Clip
- Play
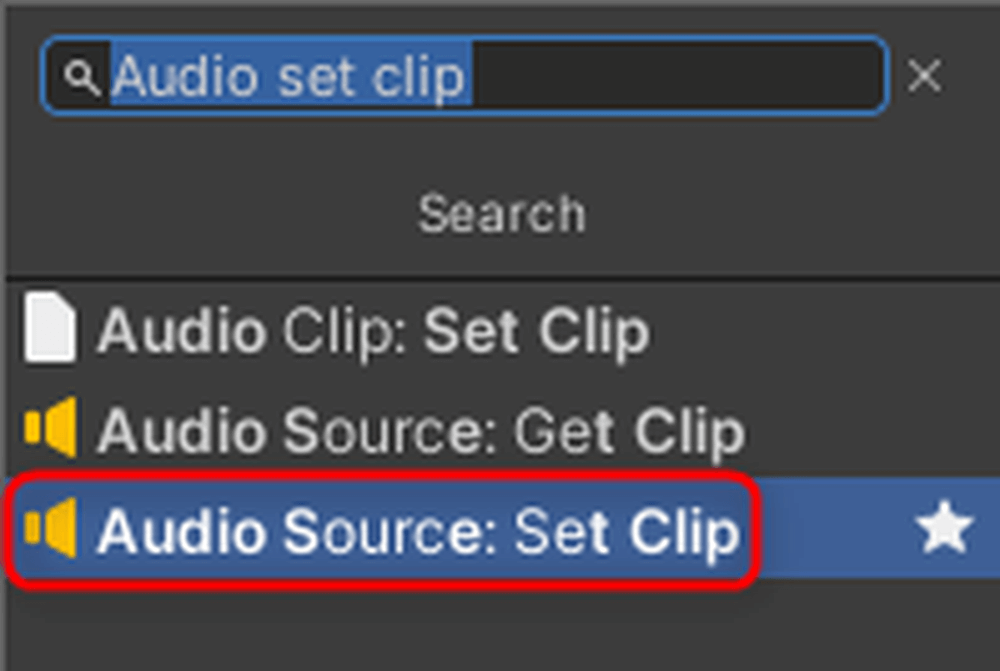
Set Clip
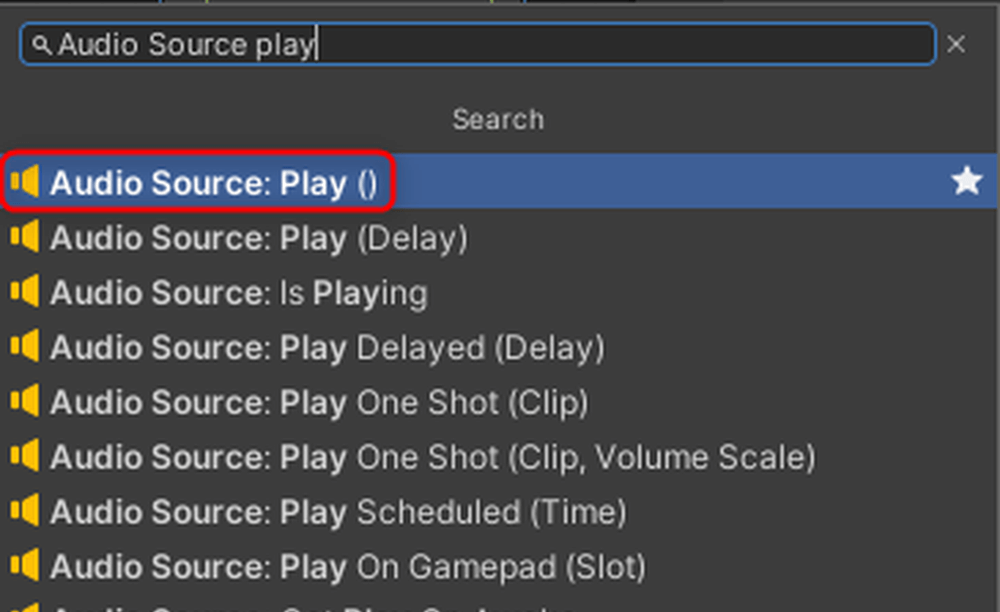
Play
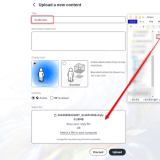
Drag and drop the downloaded audio file into the Graph Editor.
A window like the one below will appear; select the top option.
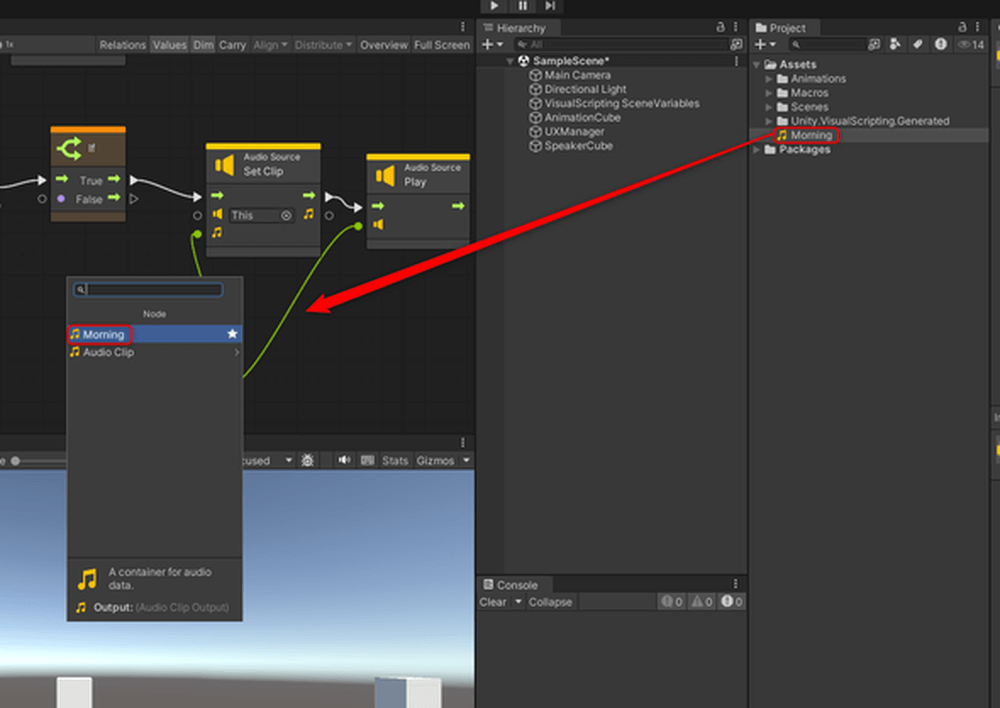
Drag and drop the downloaded audio file into the Graph Editor
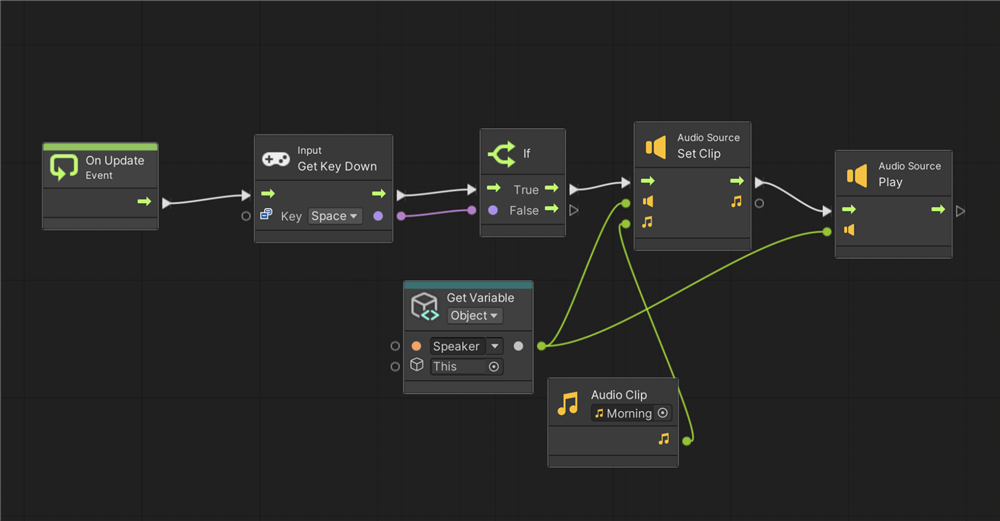
Connect the nodes as shown below.
Set the space key for Get Key Down.
Set Clip Node: You can set the audio file in the Audio Source’s Audio Clip.
Connect the object with the Audio Source attached to the middle-left port.
Connect the audio file to the bottom-left port of the Audio Source’s Audio Clip.
“`html
Play Node: This node plays the audio file set in the Audio Clip of the Audio Source.
Connect the object with the Audio Source attached to the bottom-left port.
Connect the nodes
Press the play button to run the scene. The AnimationCube begins to move along with the music.

Run the scene
This time, we introduced how to animate and play audio using Visual Scripting.
Next time, we’ll cover integration with STYLY for VisionPro.