こんにちは!SensitiveCubeです!
このチュートリアルでは、様々なパターンの岩の作成方法を案内します。パート1ではCinema4D R20のボリュームモデリングの基礎を解説します。パート2では、Substance Painterの基礎を解説します。
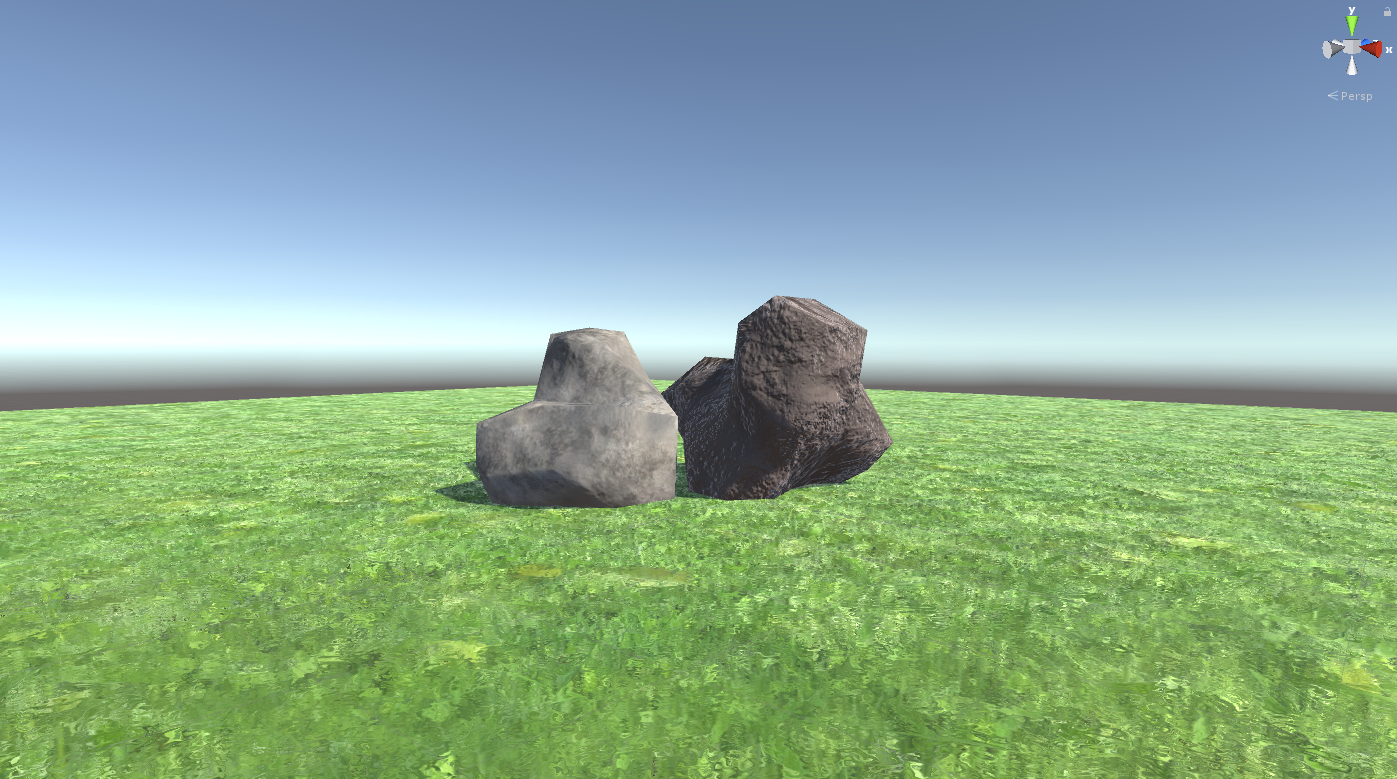
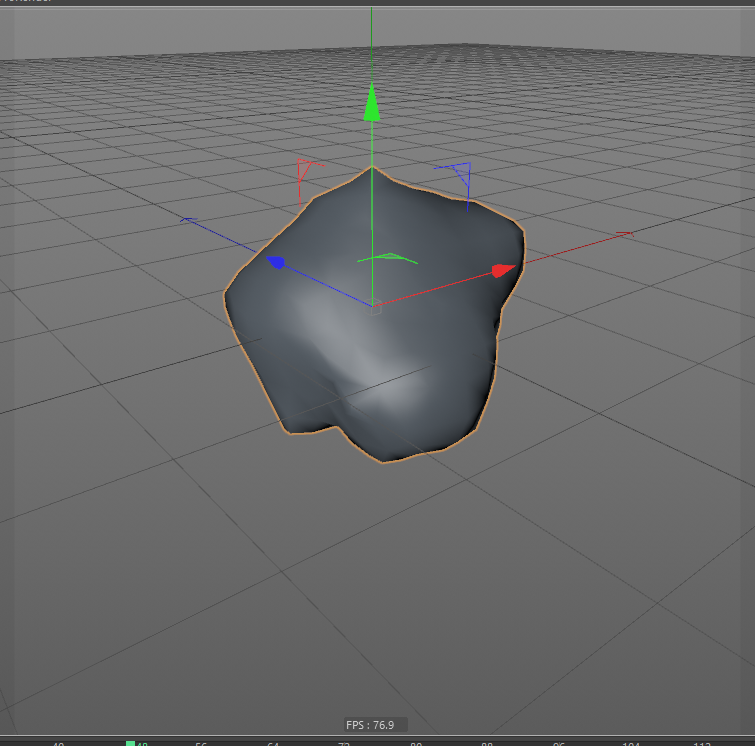
Cinema4D R20のボリュームモデリングで作成したモデル
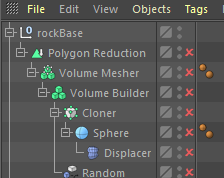
岩オブジェクトセット用に、ベースオブジェクトを作成
まず、C4DのシーンのHierarchyをご覧ください。画像と同じようにHierarchyを構成してください。
Cinema4D R20のボリュームモデリングのイメージ 1
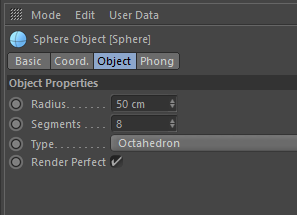
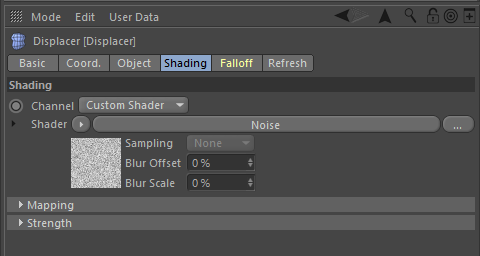
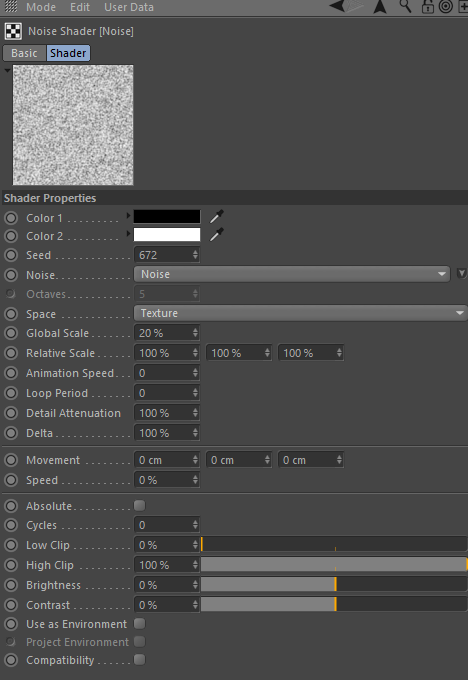
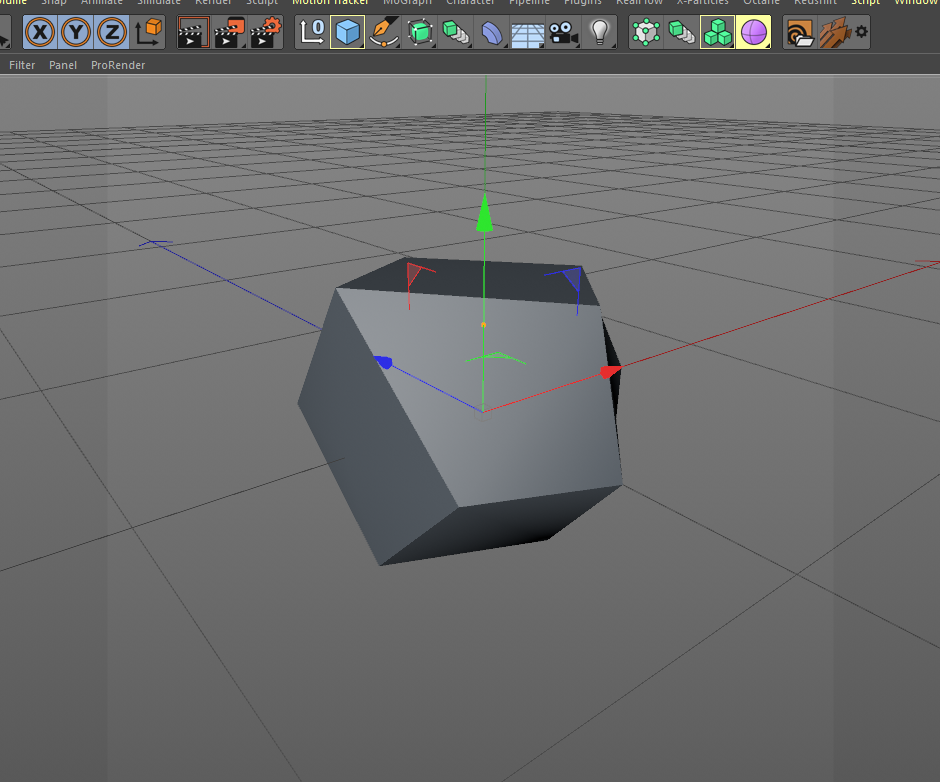
まず、Sphereオブジェクトを作成し、Typeを”Octahedron”に変更しましょう。Sphere配下にDisplacerを追加し、シェーダーにノイズを追加してください。ノイズにはパラメータがたくさんありますが、心配する必要はありません、今回使用するのは3つだけです。Noise、Global Scale、Seedを使用します。
Cinema4D R20のボリュームモデリングのイメージ 2
Cinema4D R20のボリュームモデリングのイメージ 3
Cinema4D R20のボリュームモデリングのイメージ 4
Cinema4D R20のボリュームモデリングのイメージ 5
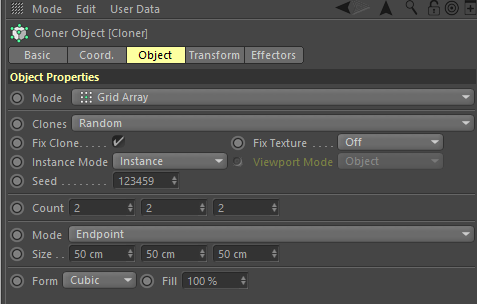
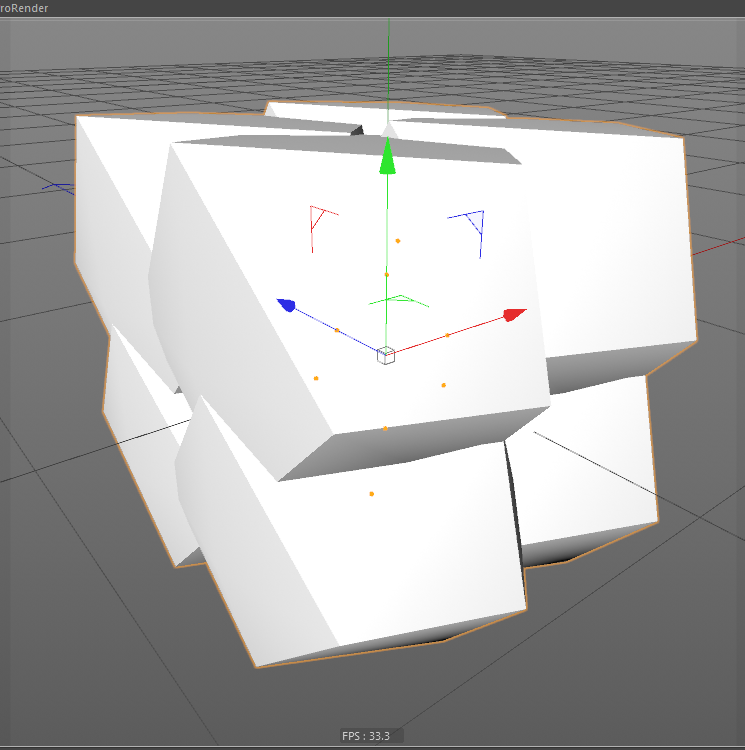
次に、mographのClonerとrandom設定を行います。Sphereを選択し、Altキーを押下した状態でClonerアイコンをクリックしてください。ModeはGrid Arrayとし、Countの値は2 2 2とします。
Cinema4D R20のボリュームモデリングのイメージ 6
Cinema4D R20のボリュームモデリングのイメージ 7
Clonerオブジェクトを選択したまま、random effectorを作成してください。パラメータタブを開き、Transformを以下の画像のように設定してください。
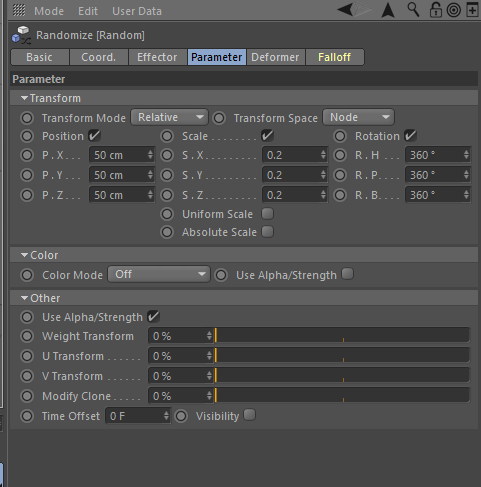
Cinema4D R20のボリュームモデリングのイメージ 8
Cinema4D R20のボリュームモデリングのイメージ 9
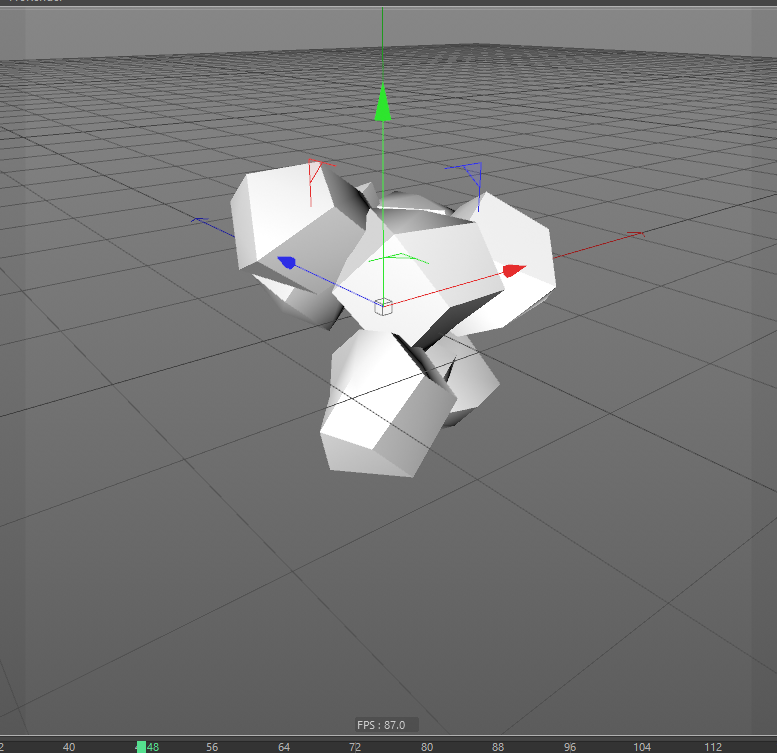
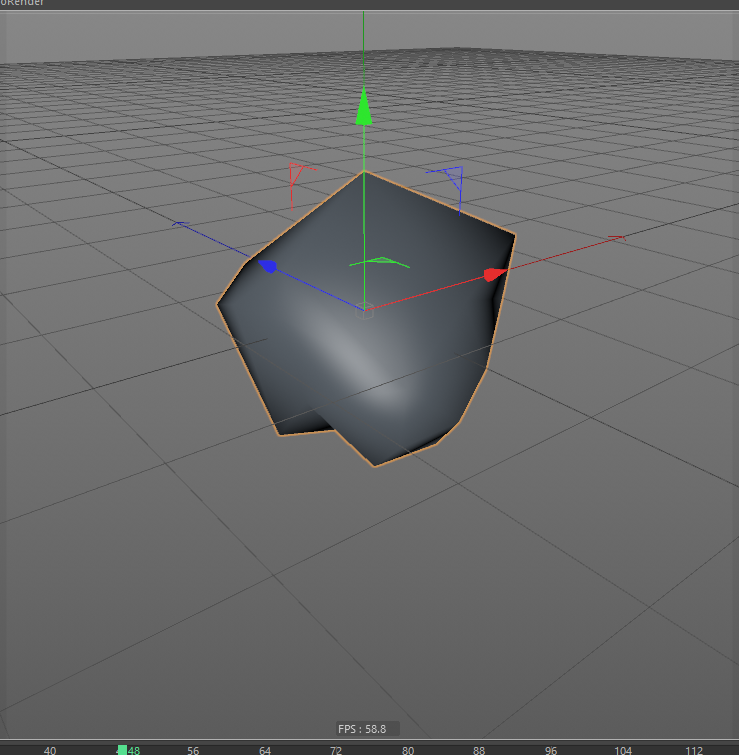
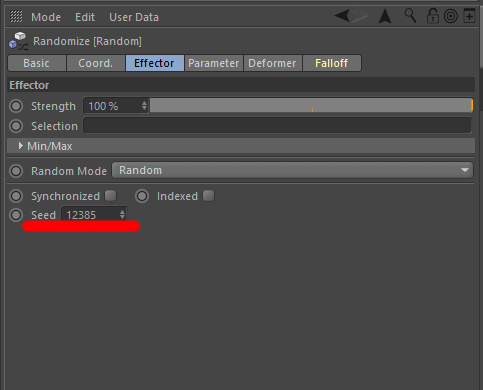
次はEffectorタブを開いてください。Seedのパラメータを確認しましょう。これは後ほど使用します。
ボリュームオブジェクトの追加
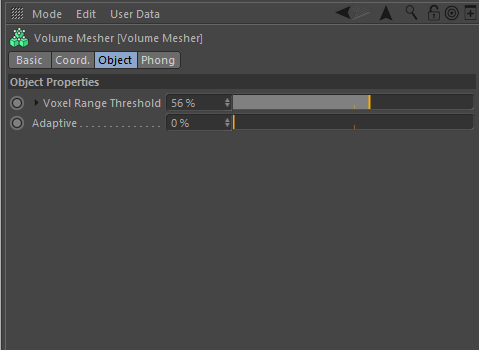
今回は2つのボリュームオブジェクト、Volume builderとVolume Mesherを使用します。C4Dのこの新しいモデリング方法はとても便利で応用しやすいです。Volume builderはオブジェクトをvoxel(volume + pixel)データに変換します。
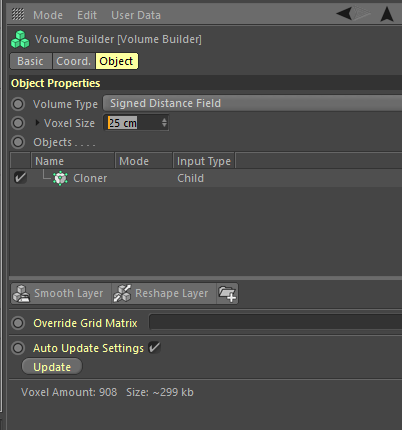
Cinema4D R20のボリュームモデリングのイメージ 10
Cinema4D R20のボリュームモデリングのイメージ 11
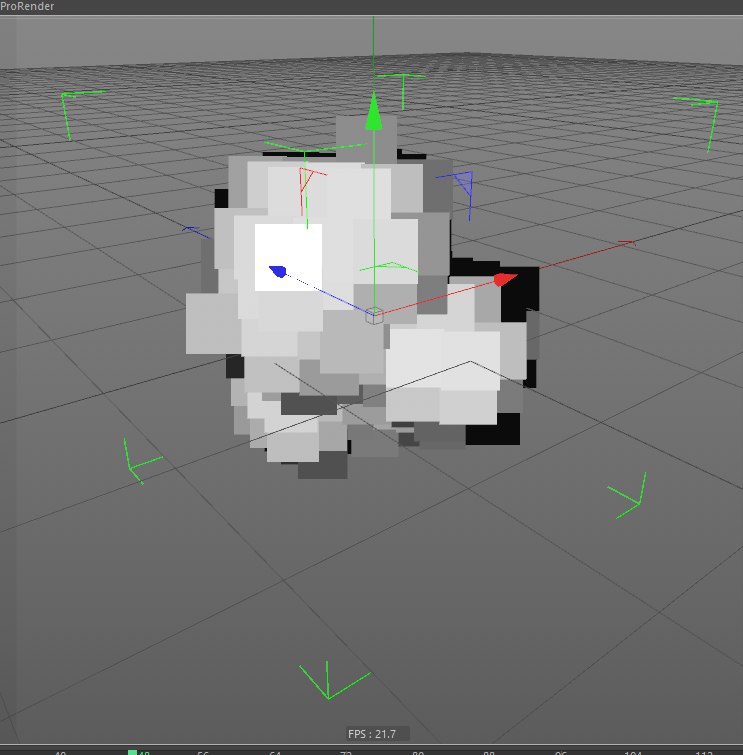
こちらに関して詳細を知りたい方は、”OpenVDB”フォーマットを確認してください。Volume Mesherがvoxelデータよりポリゴンメッシュを作成します。
Cinema4D R20のボリュームモデリングのイメージ 12
Cinema4D R20のボリュームモデリングのイメージ 13
Volume builderオブジェクトは他にも、ポリゴンメッシュをパーティクルとして使用することもできます。かっこいいですよね!
Cinema4D R20のボリュームモデリングのイメージ 14
様々なパターンを作成
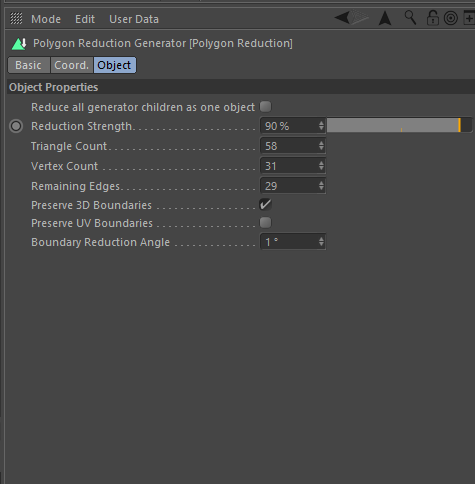
ではチュートリアルに戻りましょう。Amorphous poly-meshを作成します。見た目はいいのですが、VR(またはリアルタイムレンダリング)に使用するためにはポリゴン数が多すぎます。その対処としてPolygon Reductionオブジェクトを利用します。以下のようにパラメータを設定してください。
Cinema4D R20のボリュームモデリングのイメージ 15
Cinema4D R20のボリュームモデリングのイメージ 16
岩や雲のような不定形の形を作成する際、コンピュータのランダム生成機能を利用すると便利です。または、C4Dの新機能”ボリュームモデリング”もおすすめです。
今回のチュートリアルでは、”seeds”パラメータ内mographのrandomize effecterがランダム生成に用いられています。
それではランダムオブジェクトの生成に戻ります。満足行く形ができるまで、seedsの値を変更し続けてください。納得できたら、オブジェクトのセットをコピーします。Seedsの値のメモを取ることを推奨します。C4DのAnnotationタブを利用すると便利です。
Cinema4D R20のボリュームモデリングのイメージ 17
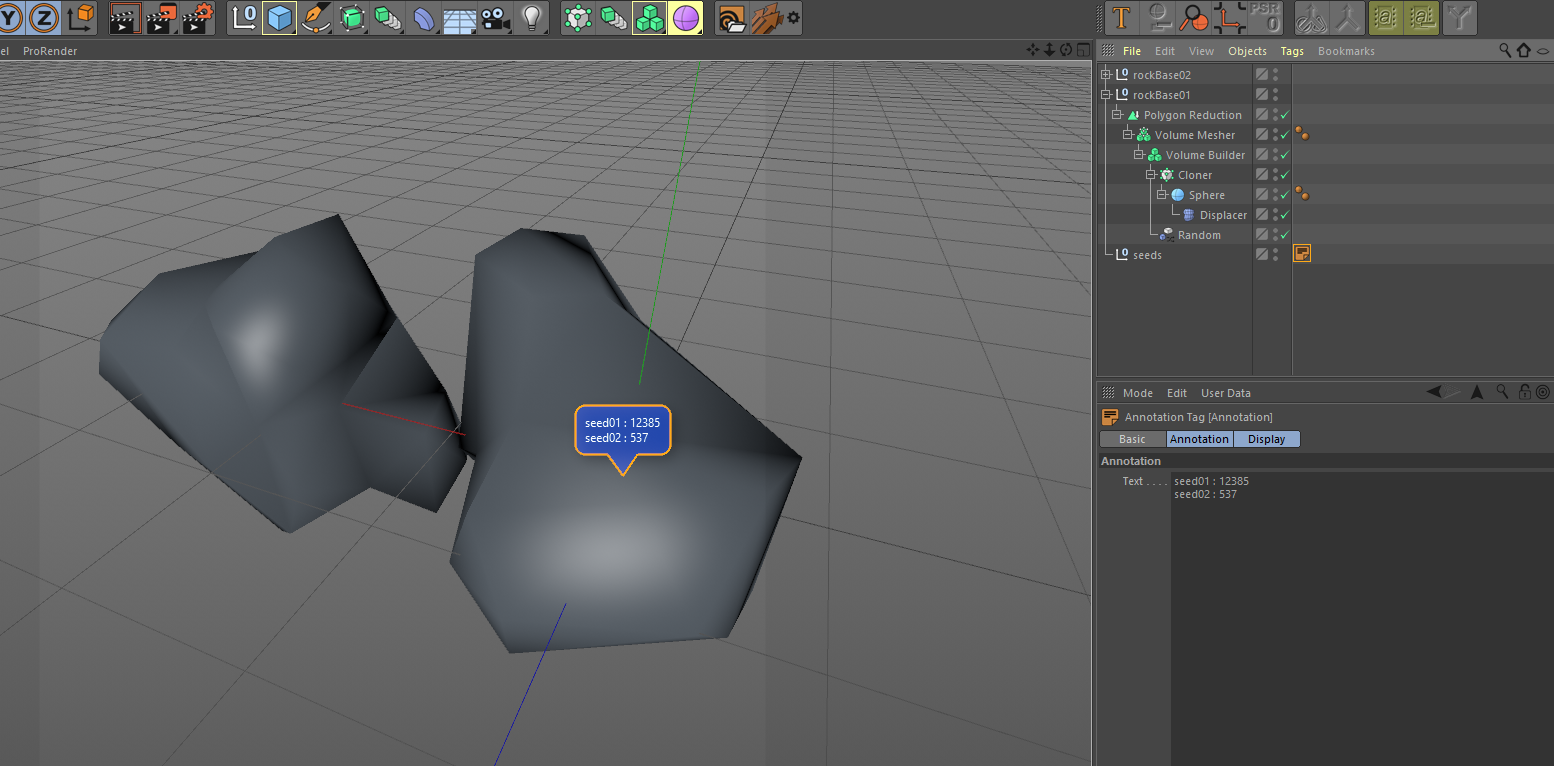
Cinema4D R20のボリュームモデリングのイメージ 18
他の形を作成するには、seedの値を変更してください。簡単ですよね?
次回のチュートリアルでは、モデルのエクスポートを行いテクスチャとマテリアルの作成を行います。