Unityでマインクラフト風の地形を作り、STYLYへアップロードするまでの手順を解説します。

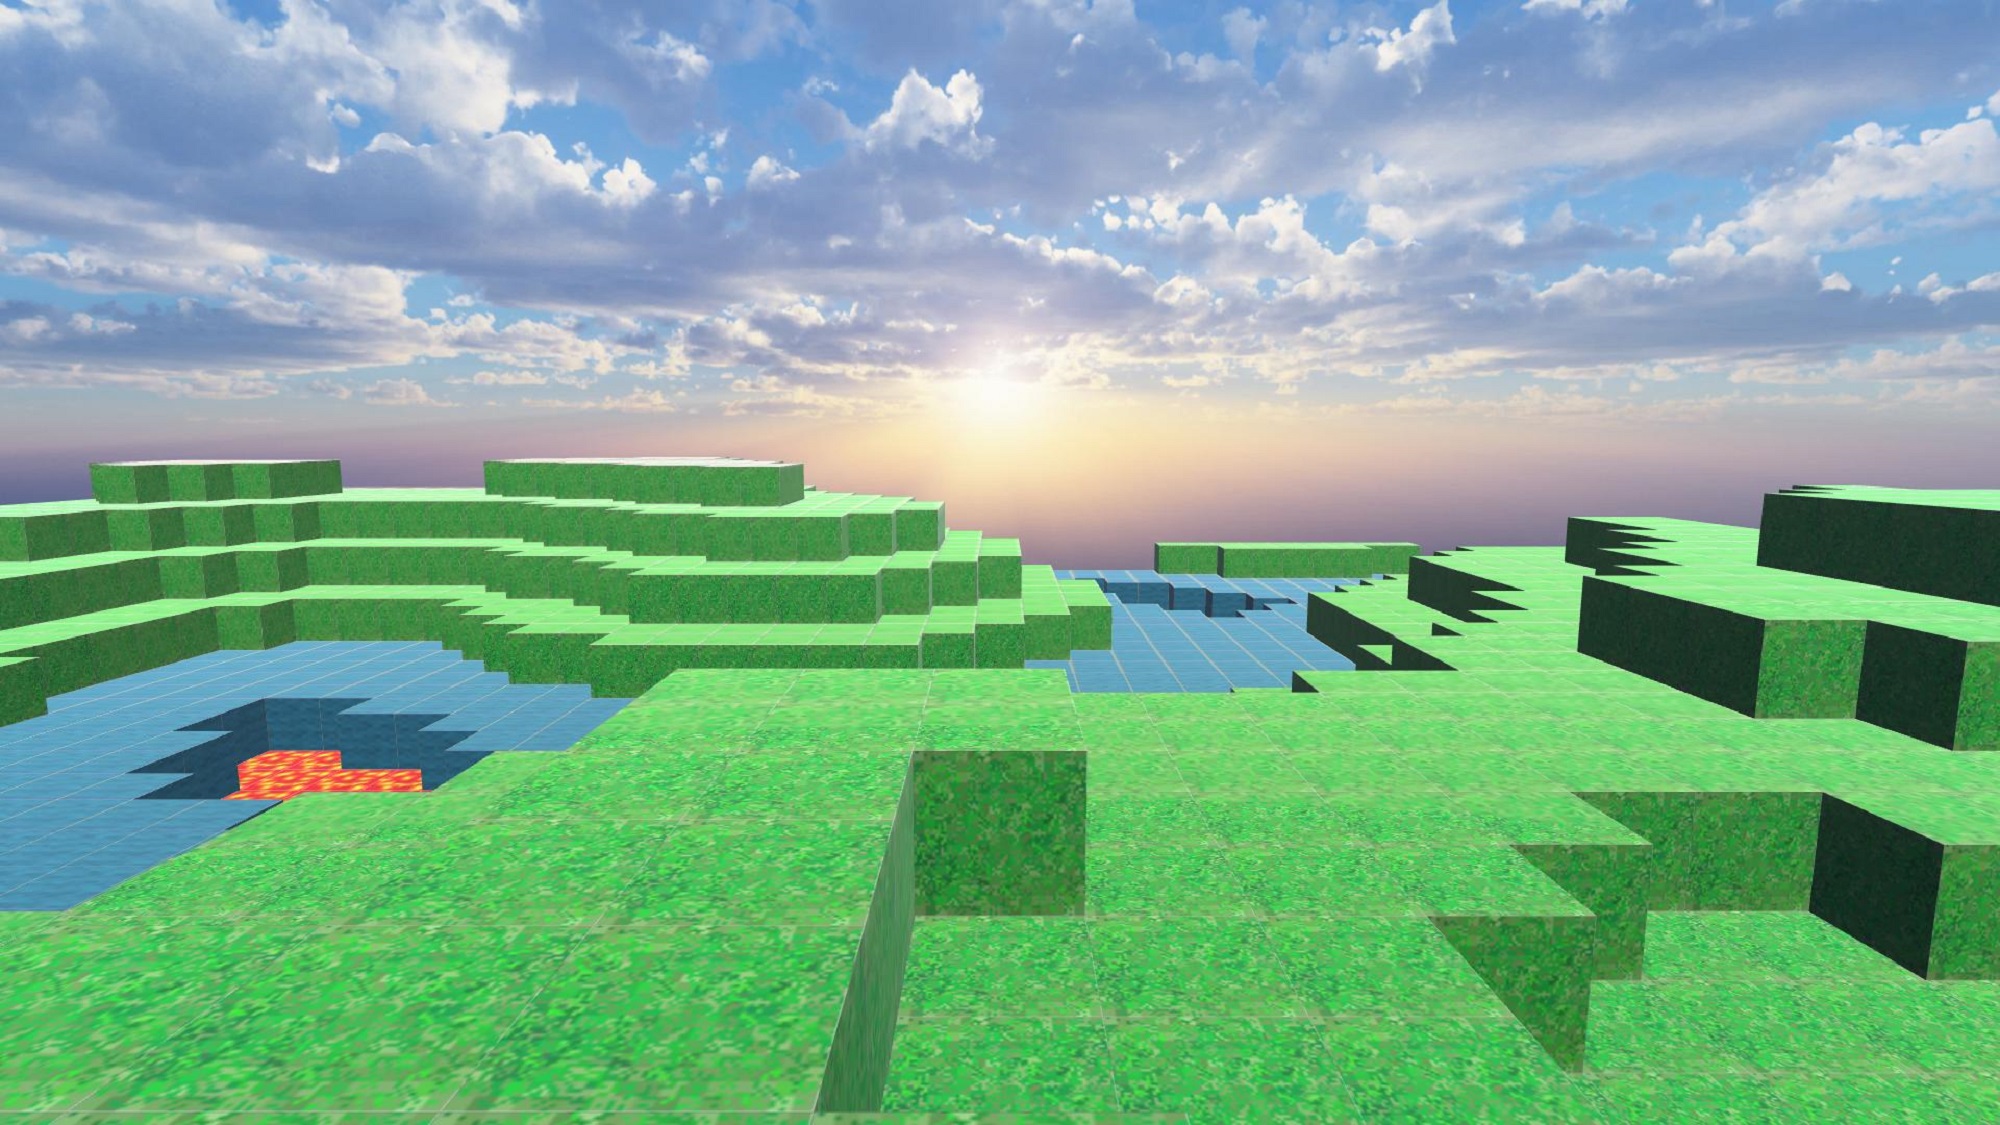
Minecraft風の地形
サンプル
STYLY GALLERYからサンプル空間を体験できます。
マインクラフト風の地形を作る方法
以下の5ステップで作成していきます。
-
- Unity内での地形の自動生成
- テクスチャ貼り付け
- メッシュの結合によるパフォーマンスの改善
- 自動生成したメッシュの保存
- 保存したメッシュのPrefab化とアップロード
以下、各ステップの概要です。
Unity内での地形の自動生成
Unityのランダム関数を使って、地形っぽくキューブを配置します。
テクスチャ貼り付け
高さによって張り付けるテクスチャを変えていきます。
メッシュの結合によるパフォーマンスの改善

2500個のキューブ。これをSTYLYにアップロードしても、ビューワが落ちます。
2500個のキューブを結合してできたメッシュ。これならビューワも落ちません。
自動生成したメッシュの保存
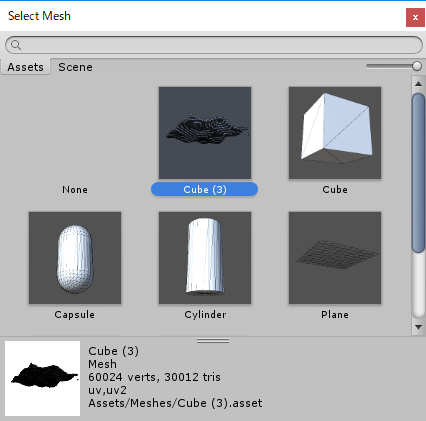
生成したメッシュを保存しておきます。
保存したメッシュのPrefab化とアップロード

作成したメッシュを適当なGameObjectに貼り付け、Prefab化します。
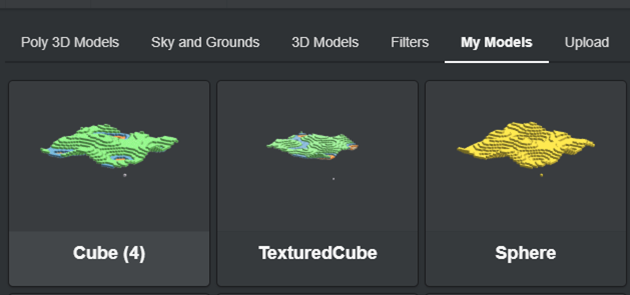
最後にSTYLYにアップロードすれば完成です。
それでは、上記の手順を詳しく説明します。
Unity内での地形の自動生成
準備
①ベースオブジェクトの作成
Sceneにキューブを1つ作成し、名前を「Ground」にしておきます。

Groundオブジェクトの作成
②地形生成スクリプトの作成
以下のスクリプトを「VoxelGround.cs」として作成しておきます。
using UnityEngine;

public class VoxelGround : MonoBehaviour
{
    private float sizeX = 50f;
    private float sizeY = 10f;
    private float sizeZ = 50f;
    private float sizeW = 17f;
    private void Awake()
    {
        var material = this.GetComponent<MeshRenderer>().material;
        for (float x = 0; x < sizeX; x++)
        {
            for (float z = 0; z < sizeZ; z++)
            {
                GameObject cube = GameObject.CreatePrimitive(PrimitiveType.Cube);
                cube.transform.SetParent(transform);
                float noise = Mathf.PerlinNoise(x/ sizeW, z/ sizeW);
                float y = Mathf.Round(sizeY * noise);
                cube.transform.localPosition = new Vector3(x, y, z);
            }
        }
        transform.localPosition = new Vector3(-sizeX / 2, 0, -sizeZ / 2);
    }
}
結果確認
Groundオブジェクトのコンポーネントに「VoxelGround(Script)」を追加します。
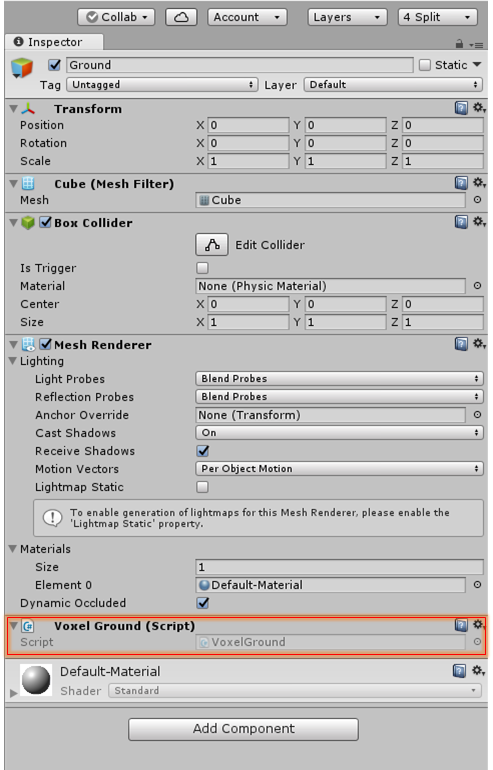
「VoxelGround(Script)」を追加
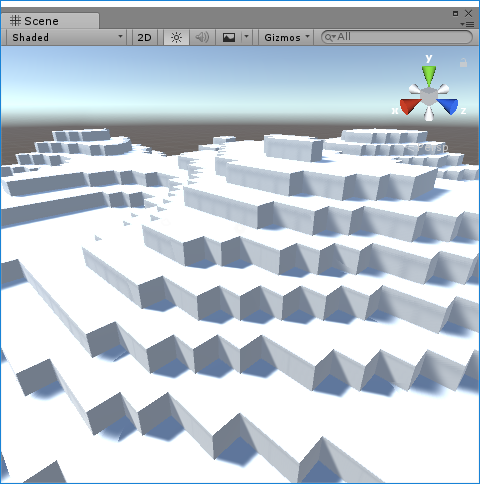
「Ctrl+P」を押して、エディター画面に以下のような地形が生成されれば成功です。

成功
解説
VoxelGround.csについて
    private float sizeX = 50f; //X軸上に並べるブロックの数
    private float sizeY = 10f; //地形の最大高さ
    private float sizeZ = 50f; //Z軸上に並べるブロックの数
    private float sizeW = 17f; //起伏のサイズ
ここでは地形のサイズを指定しています。
sizeW(起伏のサイズ)が分かりにくいかもしれませんが、これは山の頂上から平地までの距離と思ってください。
つまり、17ブロックでひとつの山を作るので、50ブロックの中に凡そ3つの山ができる計算になります。
従って、17よりも小さな数字にすると、より起伏の激しい地形となります。
    private void Awake()
    {
        var material = this.GetComponent<MeshRenderer>().material;
        for (float x = 0; x < sizeX; x++)
        {
            for (float z = 0; z < sizeZ; z++)
            {
                //ブロック生成
                GameObject cube = GameObject.CreatePrimitive(PrimitiveType.Cube);
                cube.transform.SetParent(transform);

                //X,Y軸に沿って滑らかに変化する数値を生成
                float noise = Mathf.PerlinNoise(x/ sizeW, z/ sizeW);

                //生成した数値をブロックのY軸位置(高さ)として設定
                float y = Mathf.Round(sizeY * noise);
                cube.transform.localPosition = new Vector3(x, y, z);
            }
        }
        transform.localPosition = new Vector3(-sizeX / 2, 0, -sizeZ / 2);
    }
ここではX軸上に50個、Z軸上に50個で計2500個のブロックを生成していきます。
このとき、Mathf.PerlinNoiseによりブロックの高さを設定することで、滑らかに変化する地形を作ります。
テクスチャ貼り付け
準備
①テクスチャの取込
Minecraftのファンサイト等からテクスチャパックをダウンロードします。
今回使用した画像は以下のURLからダウンロードしたものです。
detaled minecraft

テクスチャパック
Unityエディターにテクスチャをインポートします。

テクスチャのインポート
②マテリアルの作成
インポートしたテクスチャを、「Ground」ゲームオブジェクトにドラッグアンドドロップします。
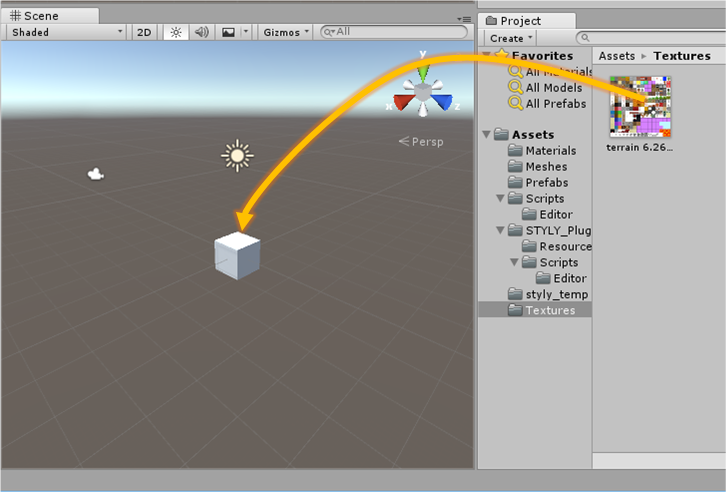
テクスチャをゲームオブジェクトにドラッグアンドドロップする
「Ground」オブジェクトにテクスチャが適用され、テクスチャと同名のマテリアルが作成されていることを確認します(ここではマテリアル名をterrain 6.26.56 PMとします)。
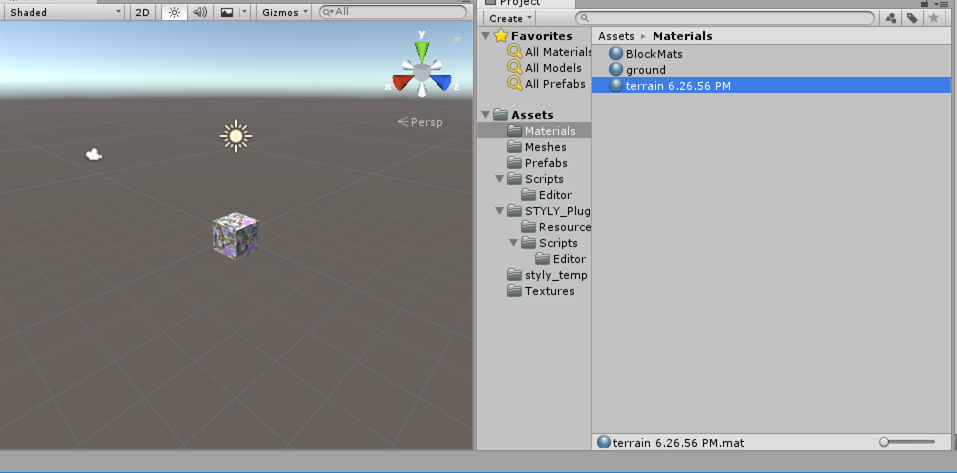
マテリアルが作成される
③地形生成スクリプトの修正
「VoxelGround.cs」を以下のように修正します。
using UnityEngine;

public class VoxelGround : MonoBehaviour
{

    private float sizeX = 50f;
    private float sizeY = 10f;
    private float sizeZ = 50f;
    private float sizeW = 17f;

    private void Awake()
    {
        var material = this.GetComponent<MeshRenderer>().material;
        for (float x = 0; x < sizeX; x++)
        {
            for (float z = 0; z < sizeZ; z++)
            {
                GameObject cube = GameObject.CreatePrimitive(PrimitiveType.Cube);
                cube.transform.SetParent(transform);
                cube.GetComponent<MeshRenderer>().material = material;

                float noise = Mathf.PerlinNoise(x/ sizeW, z/ sizeW);
                float y = Mathf.Round(sizeY * noise);
                cube.transform.localPosition = new Vector3(x, y, z);

                SetUV(cube);
            }
        }
        transform.localPosition = new Vector3(-sizeX / 2, 0, -sizeZ / 2);
    }

    private void SetUV(GameObject cube)
    {
        cube.GetComponent<MeshFilter>().mesh.uv = GetBlockUVs(2, 15);
        if (cube.transform.position.y > sizeY * 0.3f)
        {
            cube.GetComponent<MeshFilter>().mesh.uv = GetBlockUVs(0, 15);
        }
        else if (cube.transform.position.y > sizeY * 0.2f)
        {
            cube.GetComponent<MeshFilter>().mesh.uv = GetBlockUVs(1, 2);
        }
        else if (cube.transform.position.y > sizeY * 0.1f)
        {
            cube.GetComponent<MeshFilter>().mesh.uv = GetBlockUVs(15, 0);
        }
    }

    private Vector2[] GetBlockUVs(float tileX, float tileY)
    {
        float pixelSize = 16;
        float tilePerc = 1 / pixelSize;

        float umin = tilePerc * tileX;
        float umax = tilePerc * (tileX + 1);
        float vmin = tilePerc * tileY;
        float vmax = tilePerc * (tileY + 1);

        Vector2[] blockUVs = new Vector2[24];

        //-X
        blockUVs[2] = new Vector2(umax, vmax);
        blockUVs[3] = new Vector2(umin, vmax);
        blockUVs[0] = new Vector2(umax, vmin);
        blockUVs[1] = new Vector2(umin, vmin);

        //+Y
        blockUVs[4] = new Vector2(umin, vmin);
        blockUVs[5] = new Vector2(umax, vmin);
        blockUVs[8] = new Vector2(umin, vmax);
        blockUVs[9] = new Vector2(umax, vmax);

        //-Z
        blockUVs[23] = new Vector2(umax, vmin);
        blockUVs[21] = new Vector2(umin, vmax);
        blockUVs[20] = new Vector2(umin, vmin);
        blockUVs[22] = new Vector2(umax, vmax);

        //+Z
        blockUVs[19] = new Vector2(umax, vmin);
        blockUVs[17] = new Vector2(umin, vmax);
        blockUVs[16] = new Vector2(umin, vmin);
        blockUVs[18] = new Vector2(umax, vmax);

        //-Y
        blockUVs[15] = new Vector2(umax, vmin);
        blockUVs[13] = new Vector2(umin, vmax);
        blockUVs[12] = new Vector2(umin, vmin);
        blockUVs[14] = new Vector2(umax, vmax);

        //+X
        blockUVs[6] = new Vector2(umin, vmin);
        blockUVs[7] = new Vector2(umax, vmin);
        blockUVs[10] = new Vector2(umin, vmax);
        blockUVs[11] = new Vector2(umax, vmax);

        return blockUVs;
    }
}
結果確認
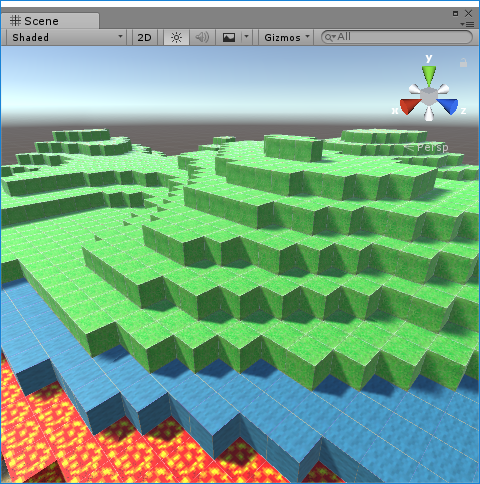
「Ctrl+P」を押して、エディター画面に以下のような地形が生成されたら成功です。

地形にテクスチャを適用
解説
テクスチャについて
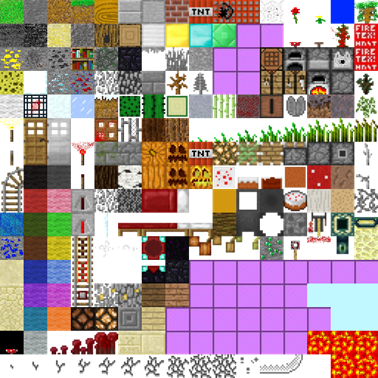
テクスチャパック
上記はテクスチャパックと呼ばれるもので、マインクラフト風の地形を作成する際に必要なテクスチャをひとつの画像に詰め込んだものです。
テクスチャパックを利用することで使用するマテリアルもひとつで済むため、後述する「メッシュの結合」が可能になります。
①スクリプトの修正について
    private void SetUV(GameObject cube)
    {
        cube.GetComponent<MeshFilter>().mesh.uv = GetBlockUVs(2, 15);
        if (cube.transform.position.y > sizeY * 0.3f)
        {
            cube.GetComponent<MeshFilter>().mesh.uv = GetBlockUVs(0, 15); //山
        }
        else if (cube.transform.position.y > sizeY * 0.2f)
        {
            cube.GetComponent<MeshFilter>().mesh.uv = GetBlockUVs(1, 2); //水面
        }
        else if (cube.transform.position.y > sizeY * 0.1f)
        {
            cube.GetComponent<MeshFilter>().mesh.uv = GetBlockUVs(15, 0); //溶岩
        }
    }
ここでは、地形の高さによって表示するテクスチャを変えています。
GetBlockUVs(0, 15)ではテクスチャパック左上に位置する芝の緑。
GetBlockUVs(15, 0)ではテクスチャパック右下に位置する溶岩の赤を指定しています。
②スクリプトの修正について
    private Vector2[] GetBlockUVs(float tileX, float tileY)
    {

        float pixelSize = 16;
        float tilePerc = 1 / pixelSize;

        float umin = tilePerc * tileX;
        float umax = tilePerc * (tileX + 1);
        float vmin = tilePerc * tileY;
        float vmax = tilePerc * (tileY + 1);

        Vector2[] blockUVs = new Vector2[24];

        //-X
        blockUVs[2] = new Vector2(umax, vmax);
        blockUVs[3] = new Vector2(umin, vmax);
        blockUVs[0] = new Vector2(umax, vmin);
        blockUVs[1] = new Vector2(umin, vmin);

        //+Y
        blockUVs[4] = new Vector2(umin, vmin);
        blockUVs[5] = new Vector2(umax, vmin);
        blockUVs[8] = new Vector2(umin, vmax);
        blockUVs[9] = new Vector2(umax, vmax);

        //-Z
        blockUVs[23] = new Vector2(umax, vmin);
        blockUVs[21] = new Vector2(umin, vmax);
        blockUVs[20] = new Vector2(umin, vmin);
        blockUVs[22] = new Vector2(umax, vmax);

        //+Z
        blockUVs[19] = new Vector2(umax, vmin);
        blockUVs[17] = new Vector2(umin, vmax);
        blockUVs[16] = new Vector2(umin, vmin);
        blockUVs[18] = new Vector2(umax, vmax);

        //-Y
        blockUVs[15] = new Vector2(umax, vmin);
        blockUVs[13] = new Vector2(umin, vmax);
        blockUVs[12] = new Vector2(umin, vmin);
        blockUVs[14] = new Vector2(umax, vmax);

        //+X
        blockUVs[6] = new Vector2(umin, vmin);
        blockUVs[7] = new Vector2(umax, vmin);
        blockUVs[10] = new Vector2(umin, vmax);
        blockUVs[11] = new Vector2(umax, vmax);

        return blockUVs;
    }
ここでは指定したテクスチャをキューブ型のメッシュに張り付けています。
pixelSizeではテクスチャパックの列数を指定します。
今回使用したテクスチャパックには16×16の画像が収録されているため、16を指定しています。
UVについては以下のブログを参考に作成しました。
「Unity の Cube を使う時、側面の天地が揃う UV 作った」
まとめ
前編は以上となります。
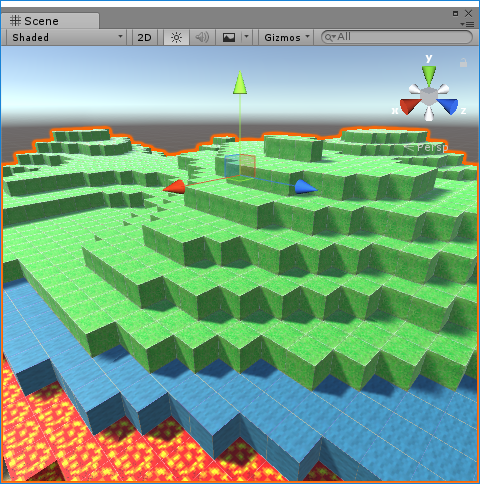
全5ステップのうち、前半2ステップについて説明し、ここまでで見た目は完成しました。
Unity内での地形の自動生成テクスチャ貼り付け- メッシュの結合によるパフォーマンスの改善
- 自動生成したメッシュの保存
- 保存したメッシュのPrefab化とアップロード
これをSTYLYにアップロードし公開するには、数千個のキューブの結合と保存という仕上げ作業が必要となります。
後編はこの仕上げ作業について説明します。
また、Minecraft公式製品ではありません。
Mojangから承認されておらず、Mojang とは関係ありません。
続きの後編は以下をご参照ください。