In this article, I will introduce how to download Magica Voxel, how to use it, and how to export a 3D model created with it.
In this tutorial, I am using macOS, but you can use Windows in the same way. Please be aware that the UI and other features may be different.
About Magica Voxel
Magica Voxel is open-source software which allows you to create models with voxels.
The official site is here. You can download the software from this site.
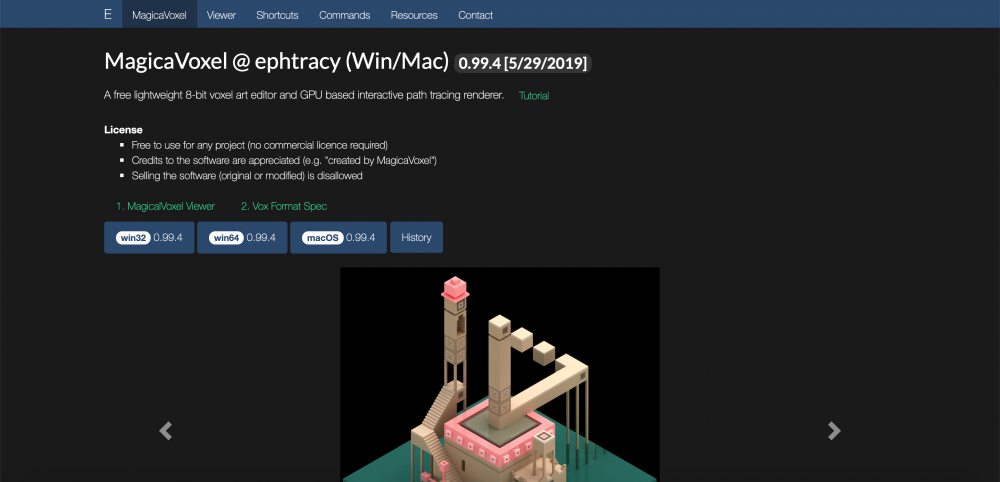
Magica Voxel – Top page
How to Download Magica Voxel
Access the official site, where you will be able to download the software.
There is a version for each OS (Magica Voxel supports Mac and Windows only), so download the one compatible with your system. The download doesn’t take long.
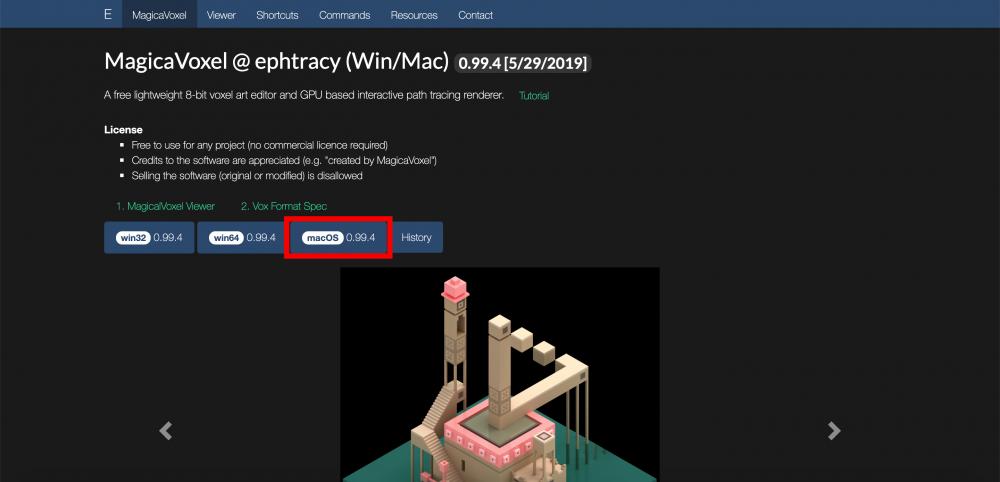
Download ‘Magica Voxel’
About the Error When Launching
When launching Magica Voxel on macOS, you may see it doesn’t start up, showing a black screen.
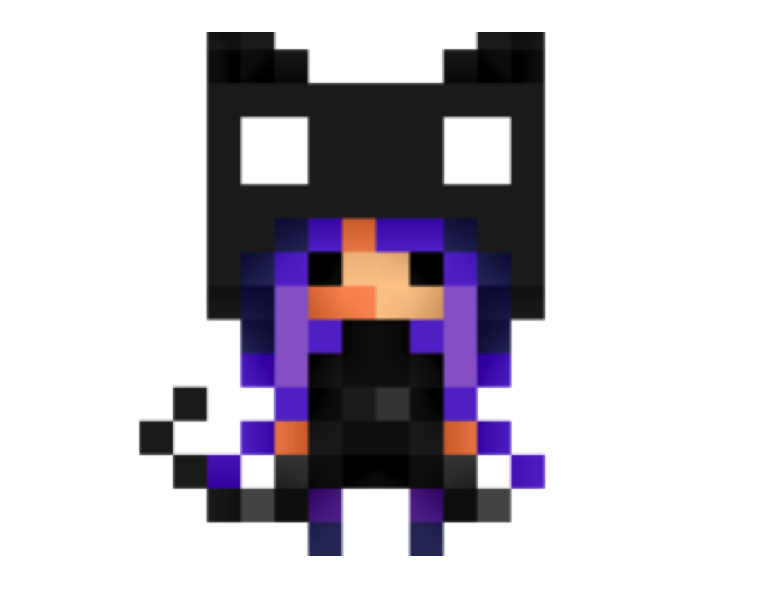
‘Magica Voxel’ icon
In that case, follow the sequence below to launch.
- Decompress the compressed file you downloaded.
- Temporarily move the ‘Magica Voxel’ icon (See the image above) from the decompressed file to the desktop or another folder.
- Move the ‘Magica Voxel’ icon, which you just moved to the desktop, back to the decompressed file.
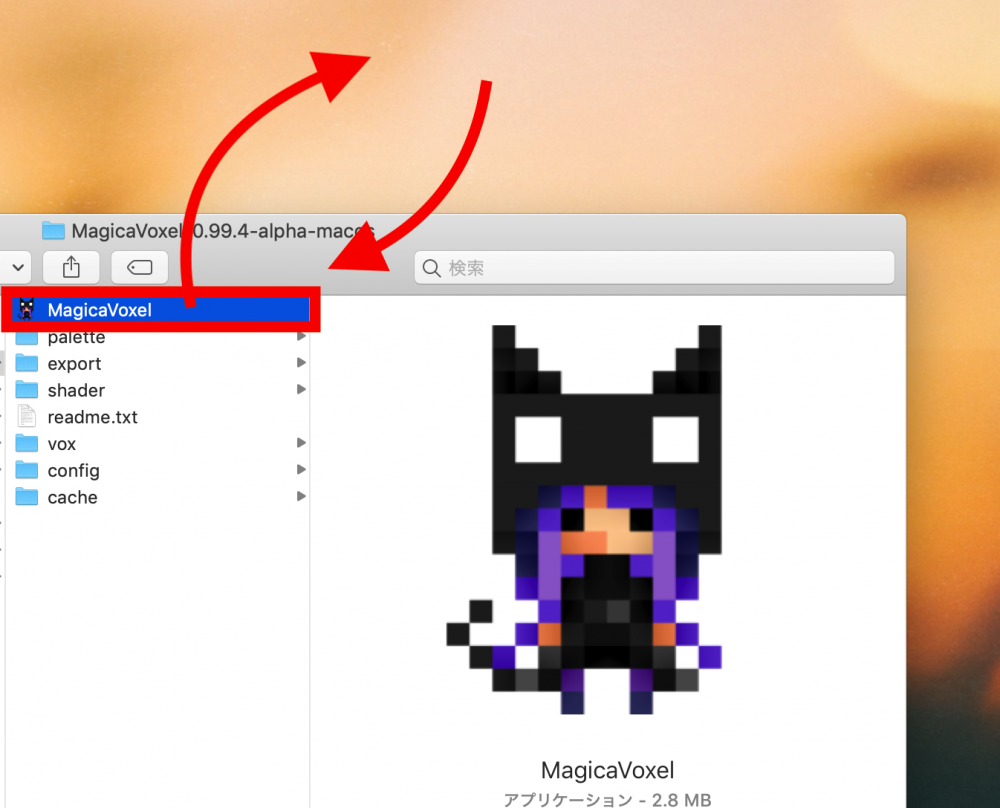
How to solve the error when launching Magica Voxel
That should fix any launch errors. Please try this solution if you struggle with this error.
Now, I will explain how to use the navigation tools and user interface in Magica Voxel.
Of course, you can use the navigation tools with your mouse. But, I will be using them with a trackpad.
- Scale > Slide two fingers
Navigation – Scale-up
Navigation – Scale-down
- Rotate camera (Scene Tumbling) > Click with two fingers and slide them. If you do the same with one finger, it selects an area or creates a voxel, etc.
- Undo (Ctrl+Z)
- Cancel the selection (Ctrl+D)
- Delete (‘Delete’ key) > you can delete the voxel selected.
By the way, I found that ‘Copy and Paste’ commands will not work.
User Interface in Magica Voxel
Now, I will explain the basics of the user interface in Magica Voxel.
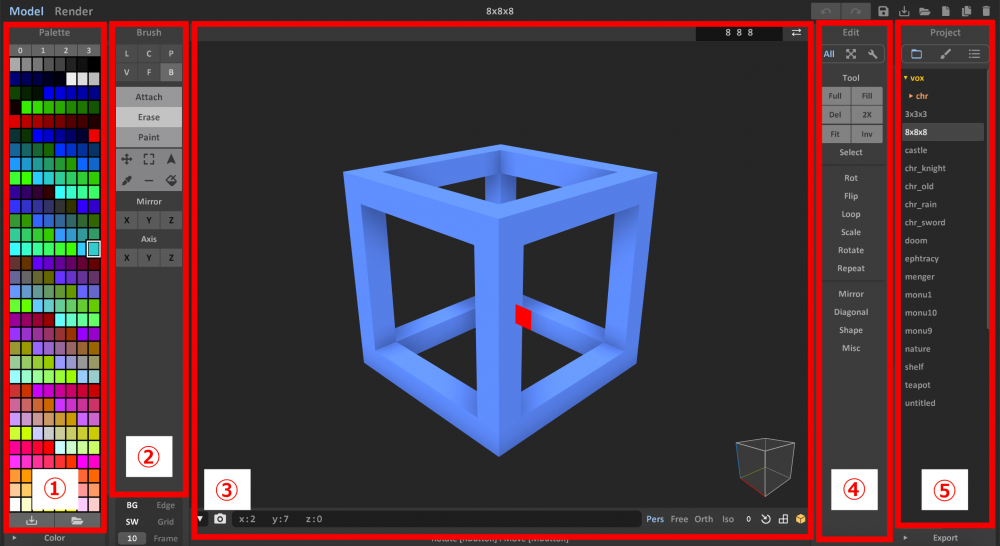
The UI in Magica Voxel
1. Color Palette
You can change the color of each voxel here. The numbers, 1 to 4, are written below the caption ‘Palette’. These are the color palettes for each color tone. By default, there are some color palettes that are available like grayscale, low-tone colors, etc.
2. Brush Palette
This palette allows you to change the ‘Edit’ mode when you paint or create voxels.
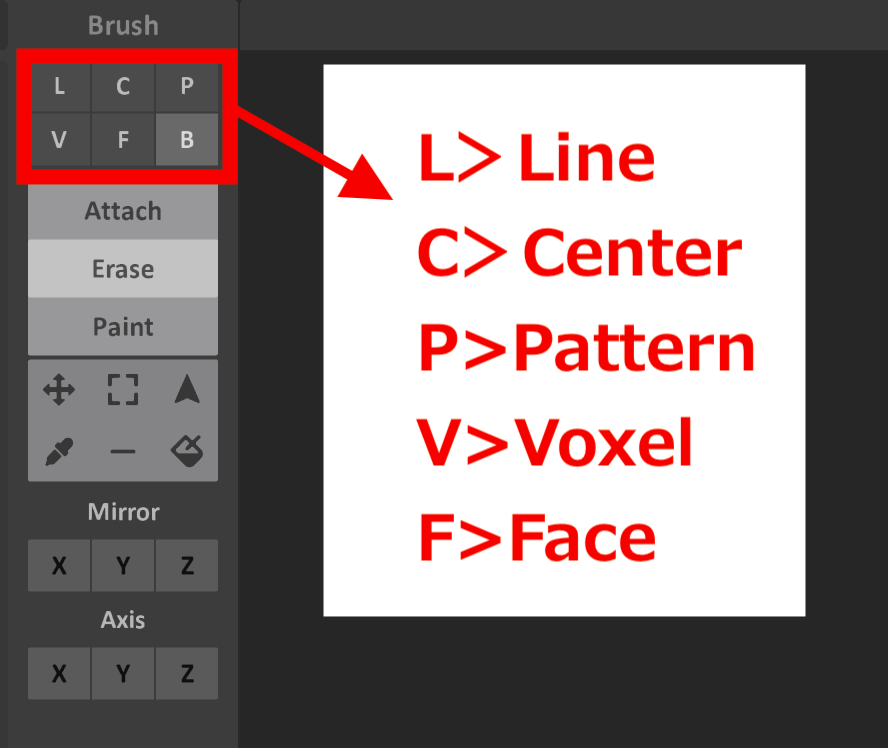
The Edit mode
The Brush tool has the following Edit modes .
L>Line
When you create a line, press the ‘Attach’ button first. Then, you can draw a line with voxels. There are ‘Project’ and ‘Straight’ modes.
C>Center
When you create a face, press the ‘Attach’ button first. You can create ‘Circle’ or ‘Square’ faces. They are created from the center point.
C>Center
P>Pattern
You can add a registered pattern. Patterns can be rotated around X, Y, and Z-axes.
V>Voxel
This allows you to create a sphere or voxel. You can create or add them in ‘Attach’ mode and you can paint them in ‘Paint’ mode. In ‘Erase’ mode, you can erase voxels with the pattern you set.
F>Face
This allows you to create a face with voxels. You can create or add it in ‘Attach’ mode and paint a face in ‘Paint’ mode. In ‘Erase’ mode, you can delete the face selected.
B>Box
You can add, paint, and delete voxels with a box specified by dragging the mouse. ‘Attach’ mode adds voxels and ‘Paint’ mode paints them with the color selected from the color palette. In ‘Erase’ mode, you can delete voxels with the box specified.
3. Scene
You make your voxel model here. You can switch the screen to display the rendered image by selecting the ‘Render’ tab that is highlighted in the red box below.
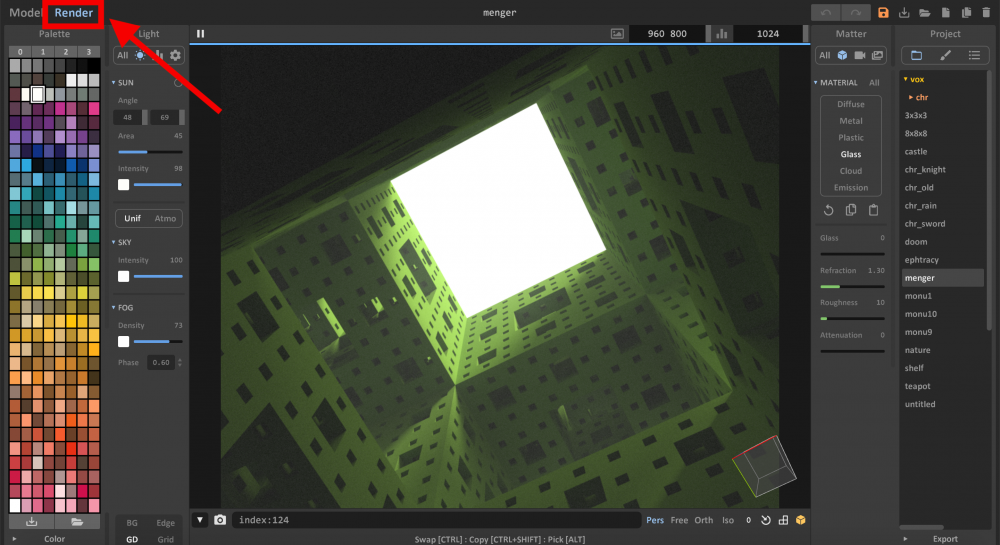
‘Rendering’ screen
4. Edit Tool
In the panel highlighted in the red box below, you can set scale, flip, and rotate voxels.
By the way, in Magica Voxel, you can only create voxels in the wireframe box that contains the model. If you want to modify it you change the values highlighted in the light blue box below.
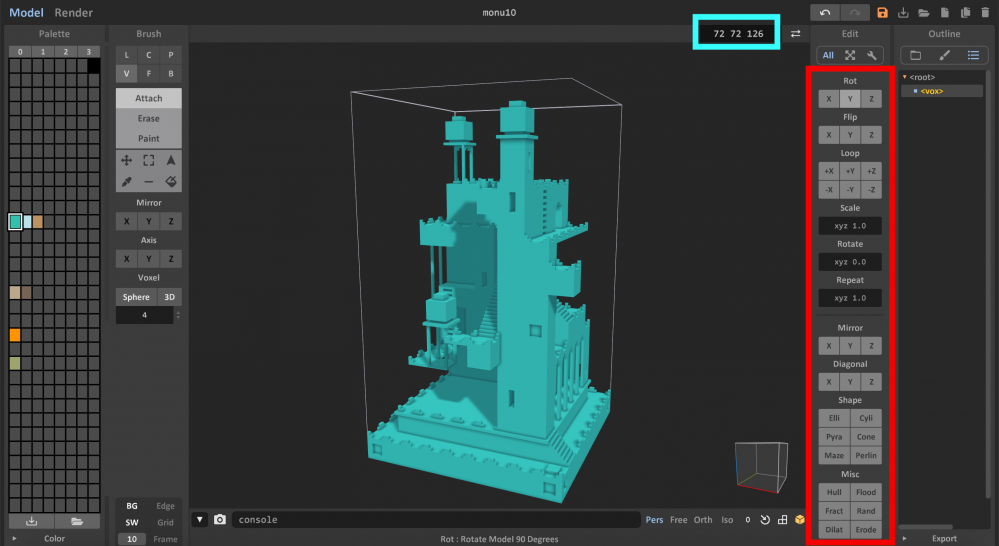
Edit tool
5. Project and Outline
In the panel highlight in the red box, you can find voxel models available by default and there is the ‘Outline’ tab where you can manage the hierarchy of the model.
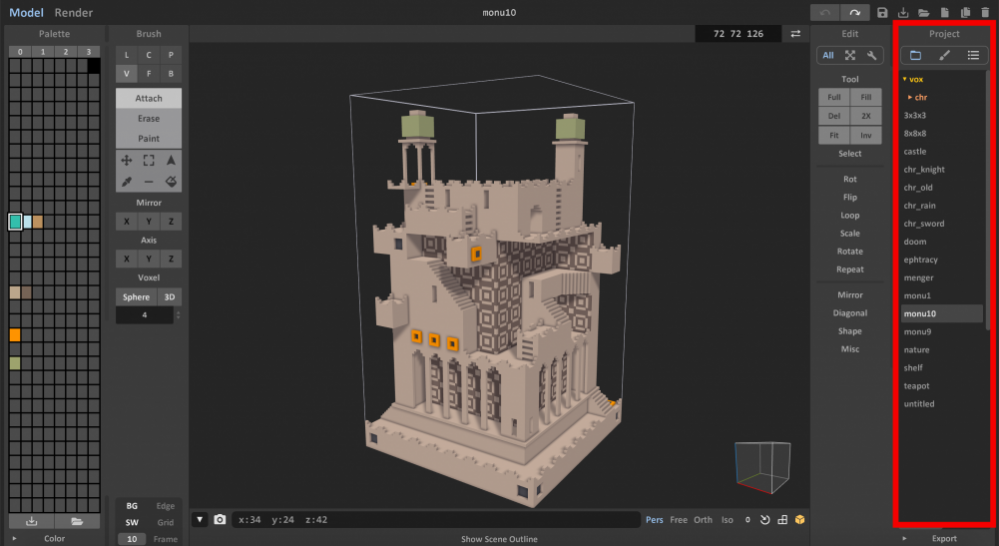
Project / Pattern / Outline
Next, let’s create a voxel model.
Modelling with Magica Voxel
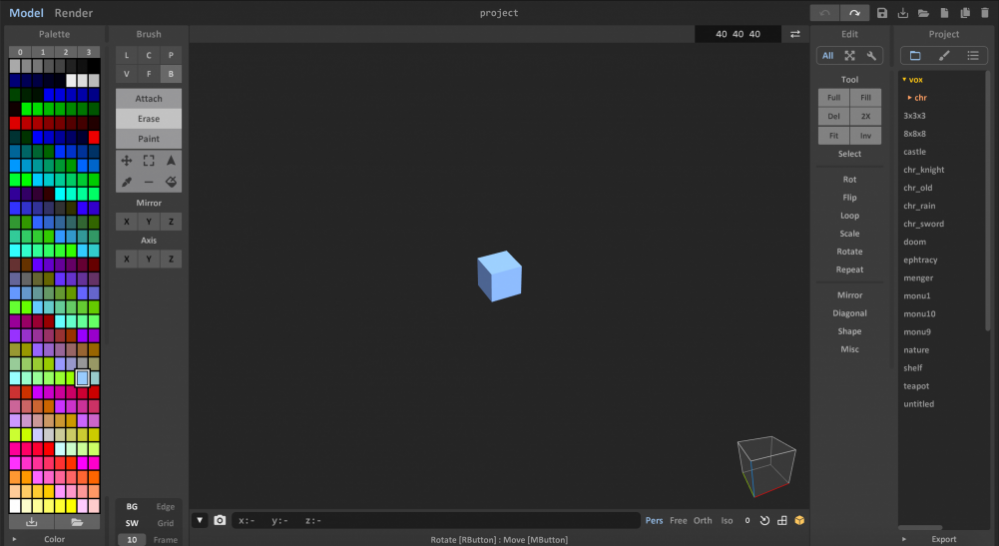
First, launch Magica Voxel and display a new Scene.
After getting used to the user interface, press the ‘Document’ icon (New Project) in the top right corner of the screen to create a new voxel model.
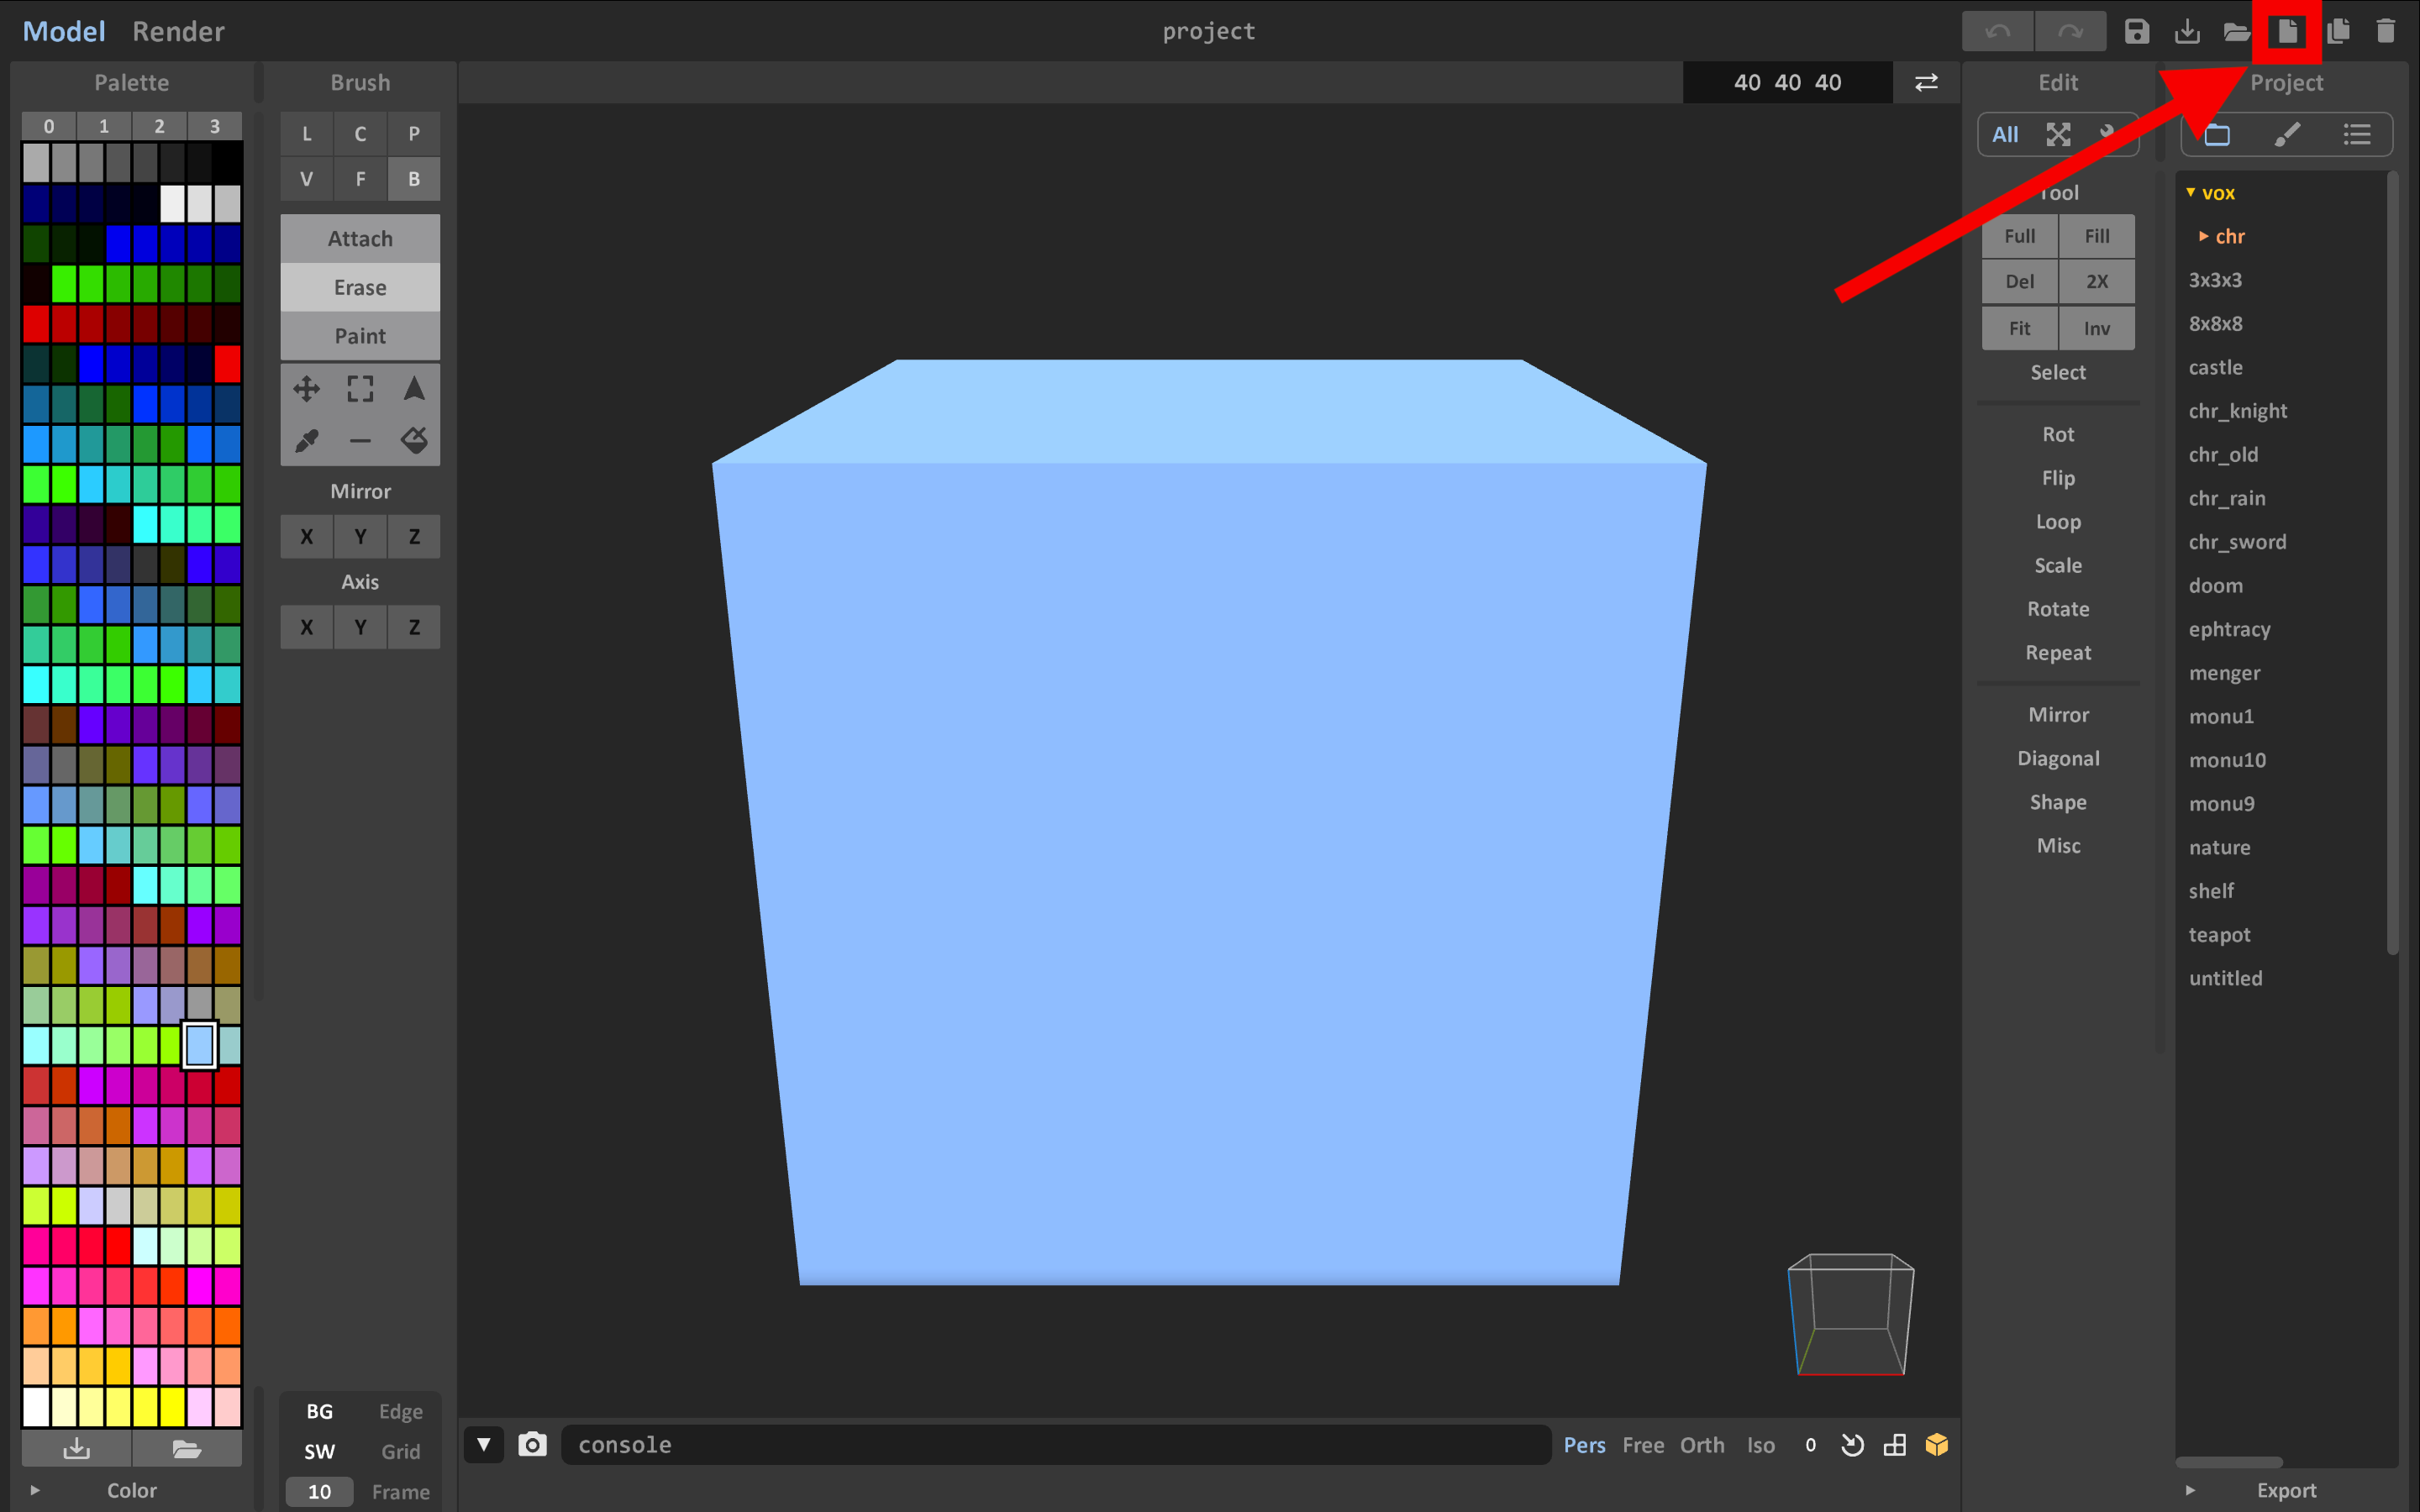
‘Create New’
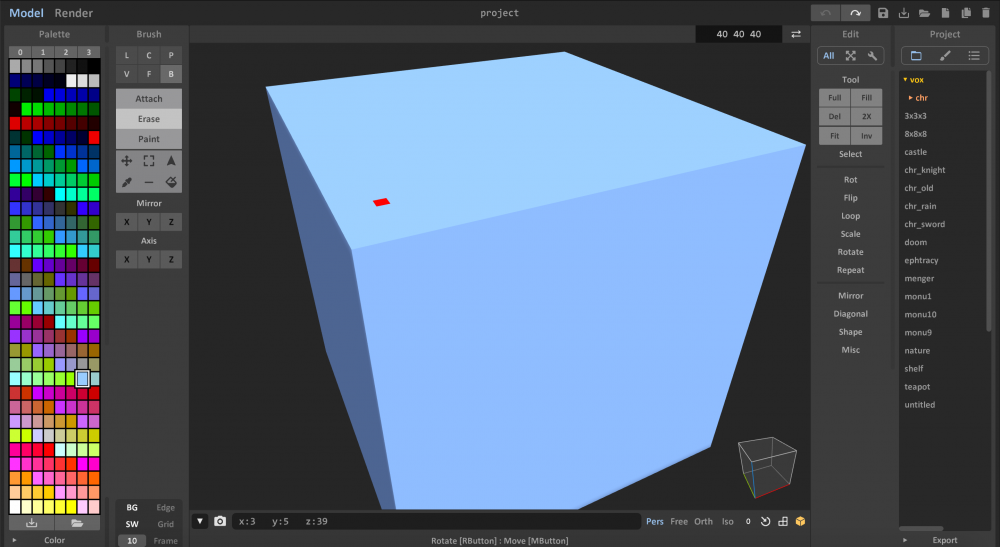
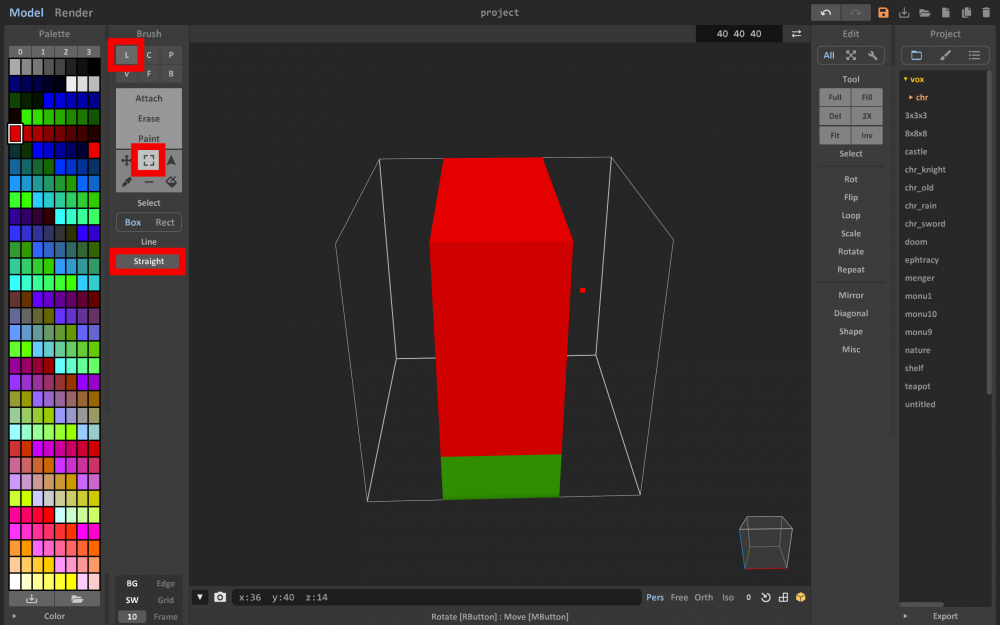
First, select ‘Line Mode’, ‘Attach’, and ‘Box Select’. Set ‘Line Mode Option’ to ‘Straight’ and then select one-fifth of the total height from the bottom.
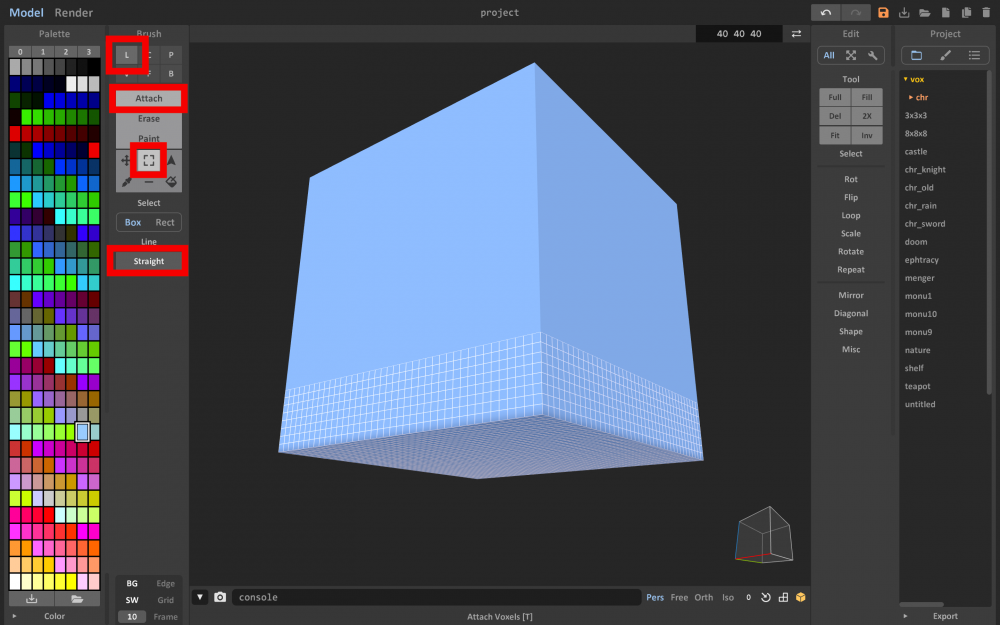
‘Box Select’
Next, select a green color from the color palette and press the ‘Replace Vox Color’ icon.
By clicking the voxels selected earlier you can paint them all at the same time.
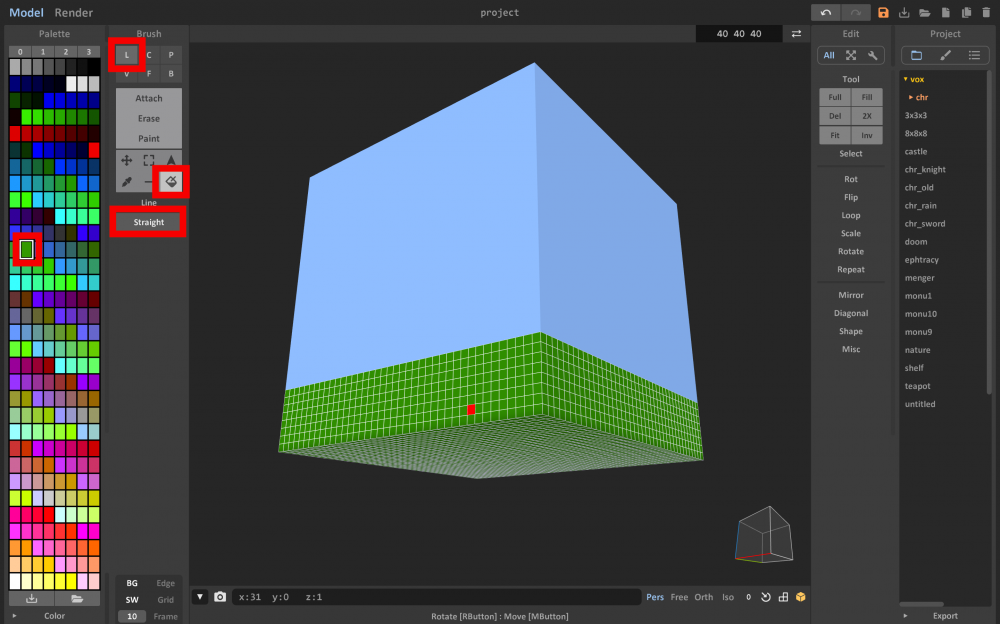
Color voxels #1
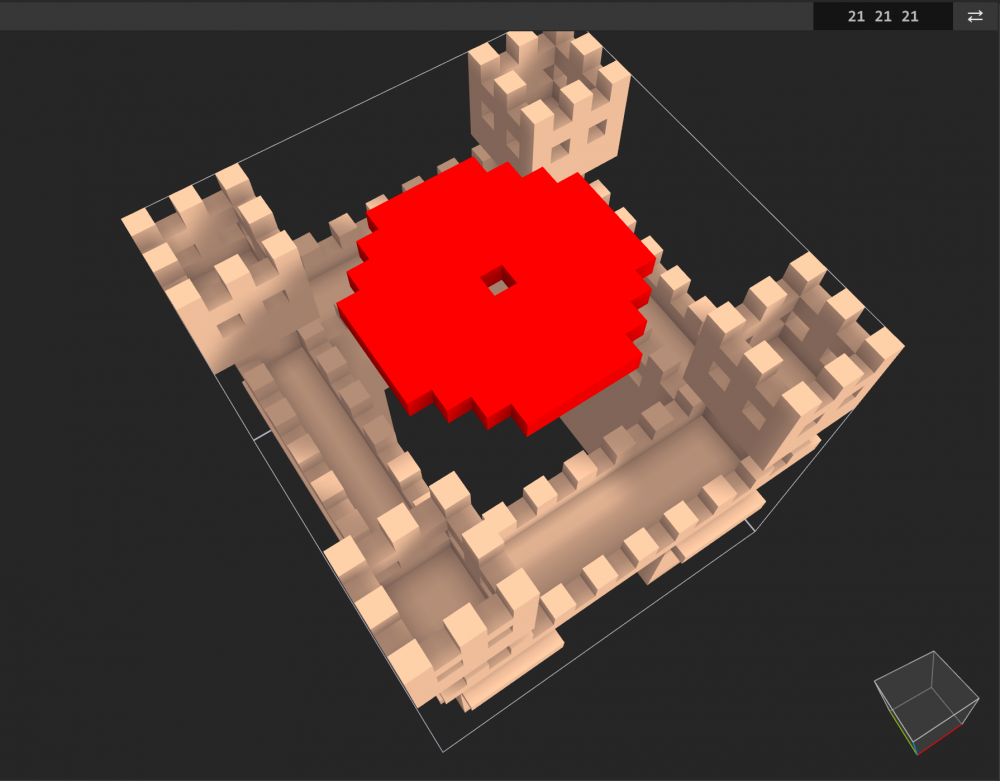
Similarly, paint the rest (i.e. remaining 80% of the height) red.
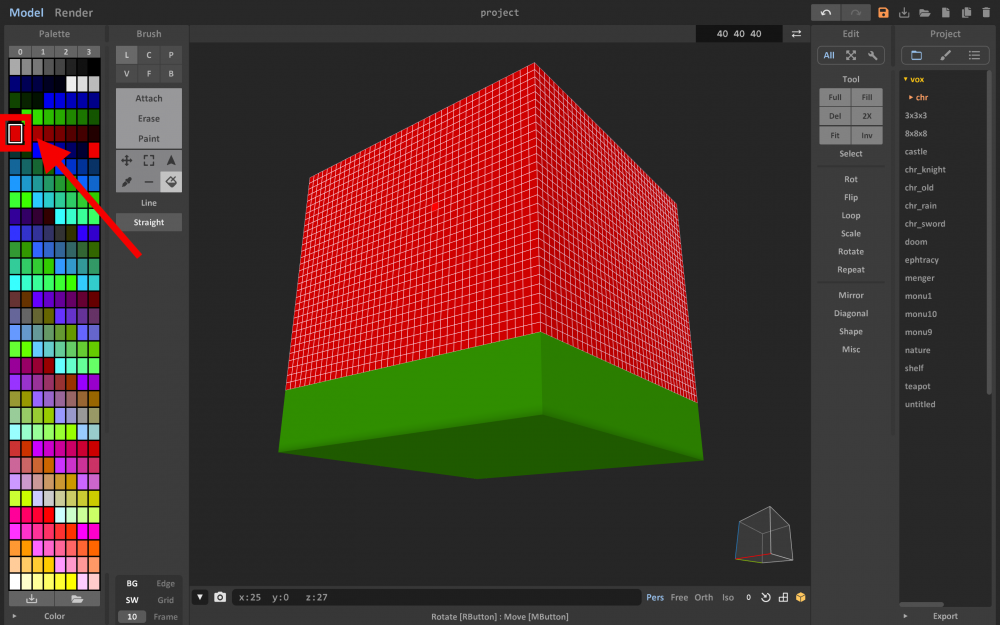
Colour voxels #2
Next, let’s shape the model.
Select voxels with ‘Box Select’ and press the ‘Delete’ key. As shown in the image below, delete each end by 1/3 of the width.
Delete by using ‘Box Select’
Now, let’s add the details.
Select ‘Voxel Mode’ and ‘Erase’. Then set ‘Mirror’ to ‘Y’ and ‘Axis’ to ‘X’. As shown in the following screenshot, draw lines to form a triangle.
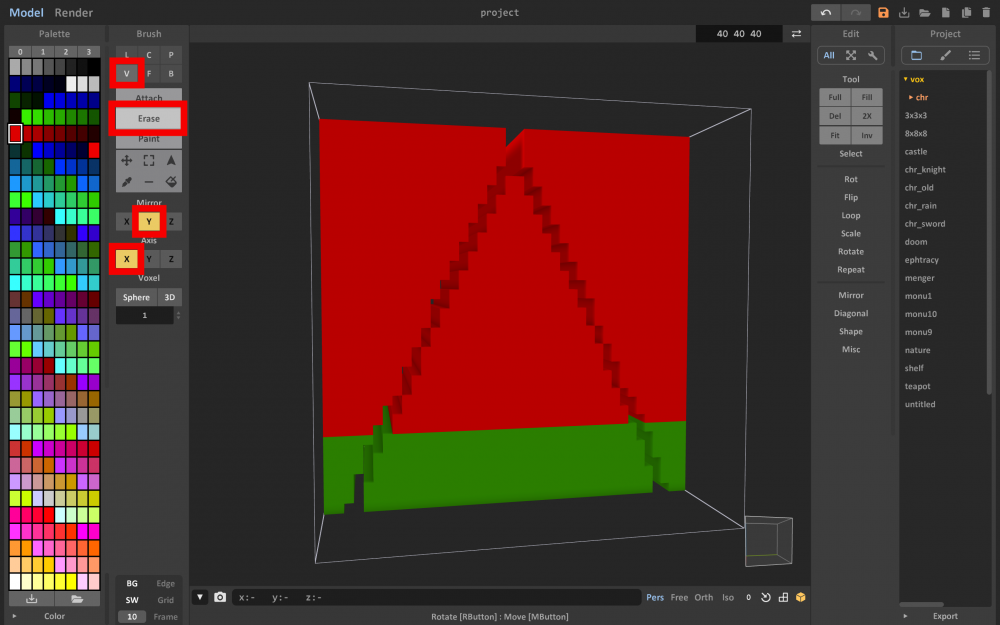
Erase with ‘Mirror’ function
After drawing a triangle with ‘Mirror’ function, we are going to cut off unnecessary voxels.
Select ‘Face Mode’ and ‘Erase’. Then set ‘Mirror’ to ‘Y’ and ‘Axis’ to ‘X’. You can delete the remaining part all at once by selecting it and pressing the Delete button.
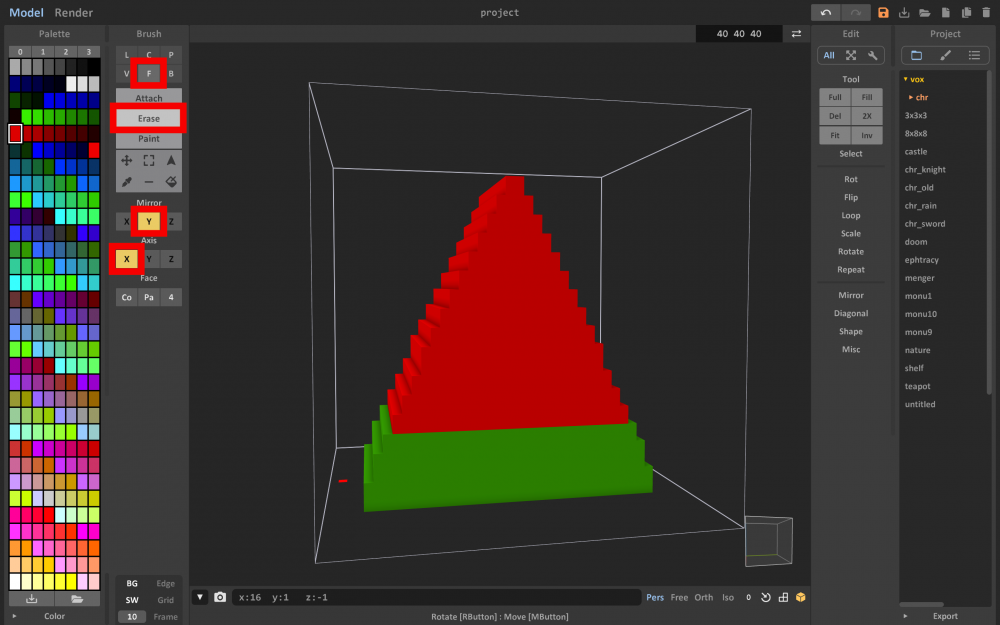
Erase with ‘Face’ mode
Lastly, we will paint the model.
Select ‘Voxel Mode’ and ‘Paint’. Then, select color from a color palette.

Paint the model
Rendering
To finish this model, I will briefly explain how to apply ‘Rendering’.
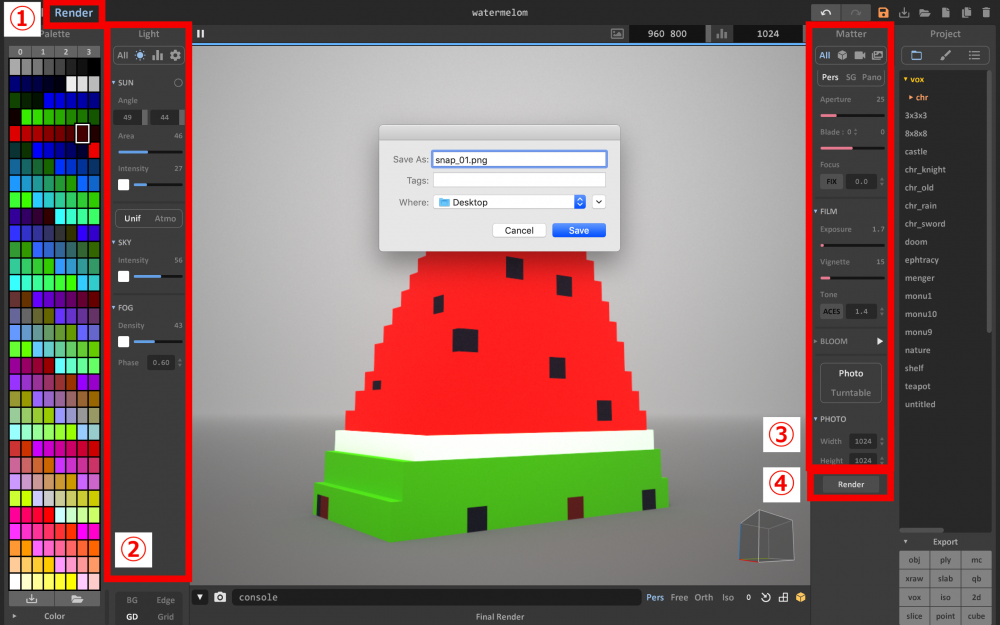
Rendering
1. Render Button
Press this button to switch to the ‘Rendering’ screen.
2. Light Editor
You can set up ‘Area Light’, ‘Sky Light’, ‘Fog’, etc.
3. Matter Editor
This allows you to change the material (Diffuse, Metal, Glass, etc.). You can set up the camera and insert an image. You can also modify the image size when exporting the model.
4. ‘Render’ Button
This will start exporting the rendered image.
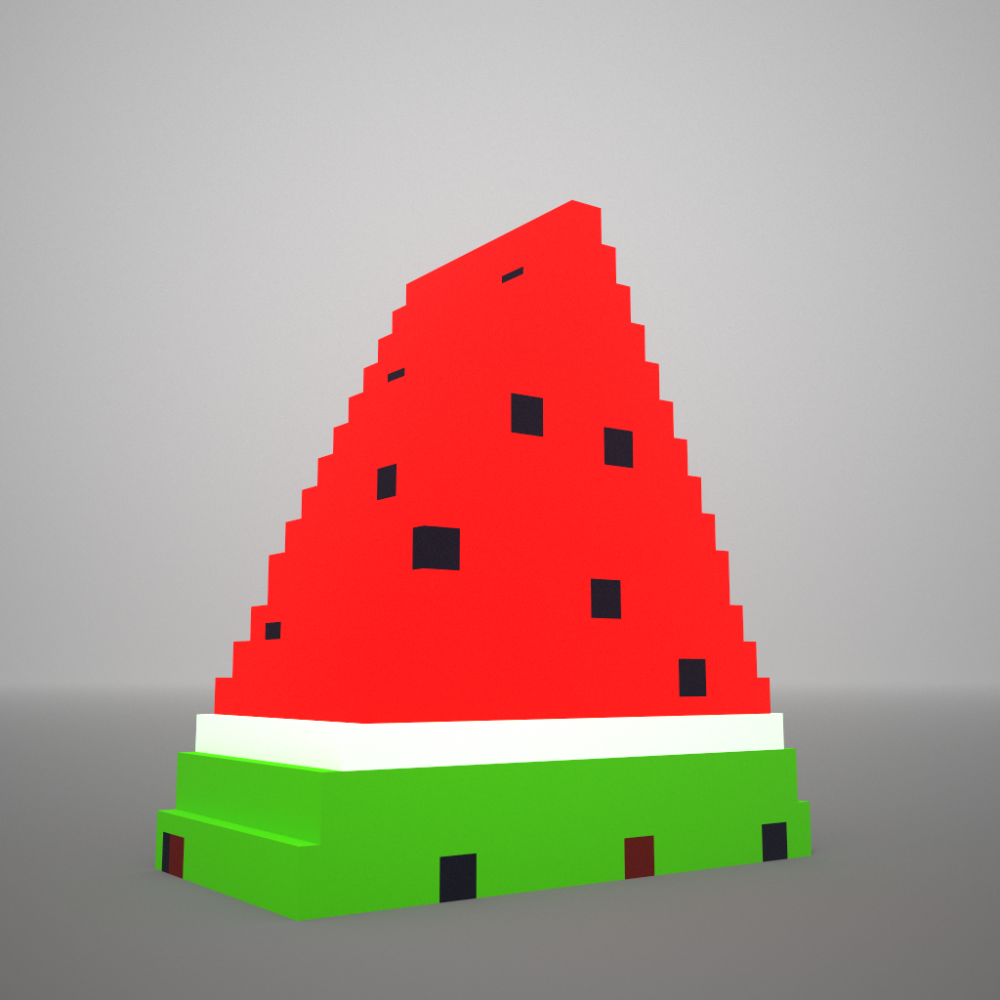
The rendered image
If you change parameters often, this could drain the battery quickly. So, render the model step by step while monitoring the condition.
Export
When the model is completed, export it in a 3D file format.
In the ‘Export’ menu in the bottom right corner of the screen, select a file format to export. This time we export the model as an .obj file format.
Specify where to save it and press ‘Save’ to export the model.
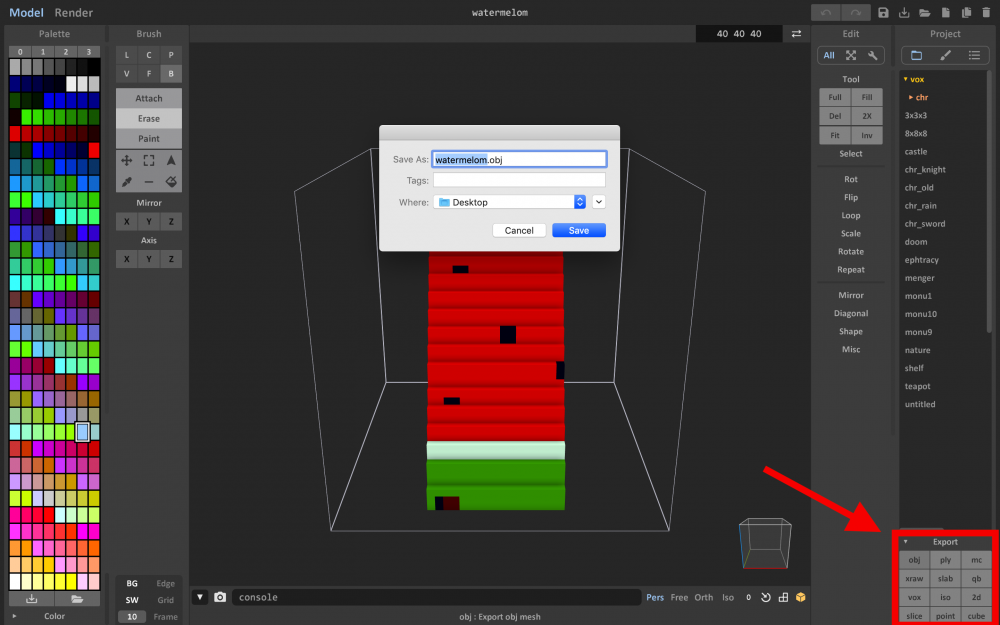
Export the model
Import Your Model Into STYLY
After preparing your 3D model, check the final state by importing it into STYLY.
Login to STYLY and create a VR space. Please refer to the following article to create your STYLY account.

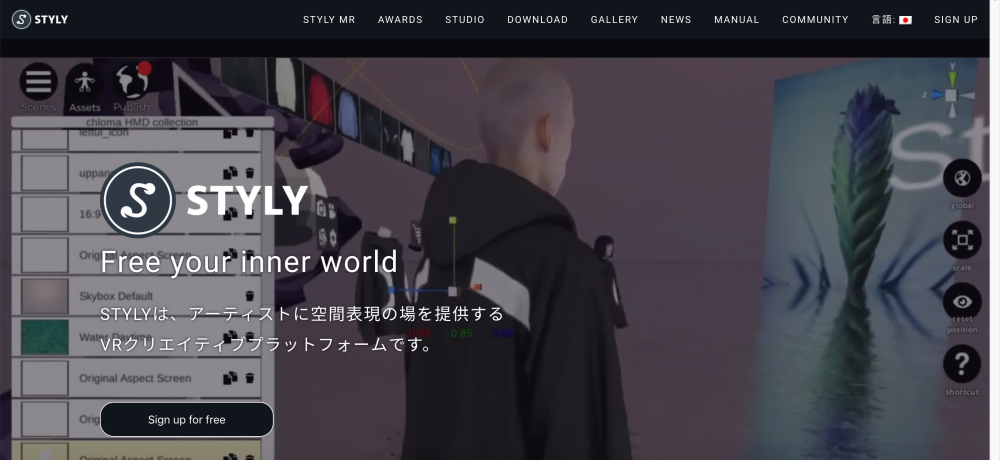
STYLY – top page
Open the Import screen as shown below (Press ① and then ②).
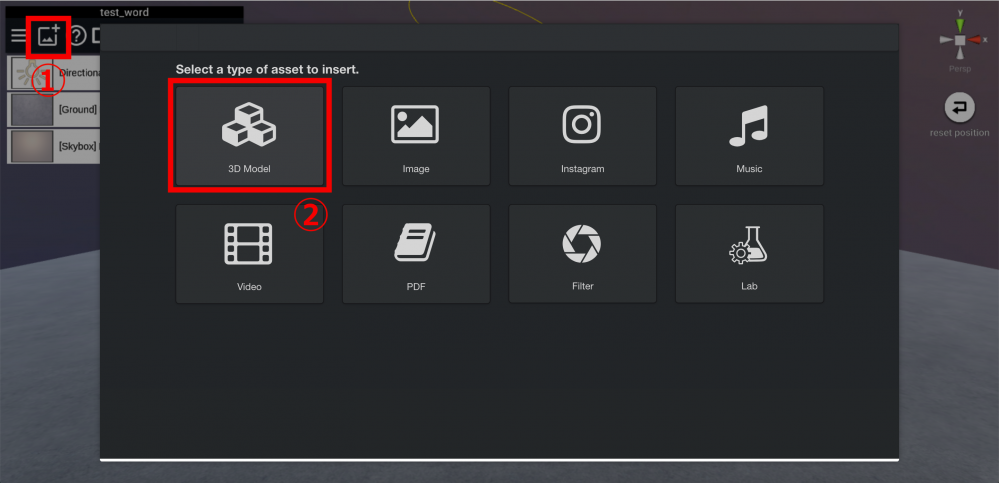
STYLY – ‘3D model import’ screen
After uploading the model, click on the added model from your ‘My Model’ page.
I found that the model imported to STYLY had its pivot point shifted and had no textures attached. You could adjust the pivot center and textures in Unity if you want to. The model doesn’t make sense without textures.
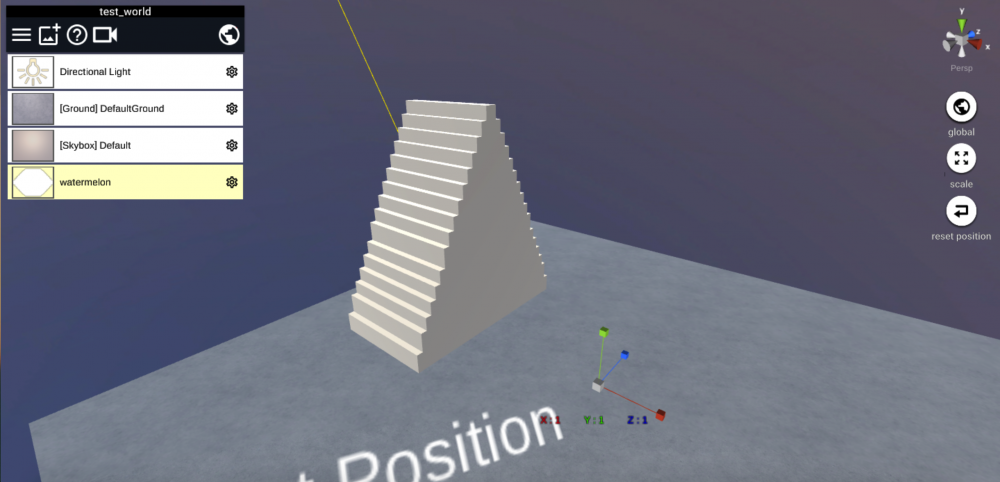
The model imported
That’s all for this tutorial. In this tutorial we have ‘created a simple model’ and ‘imported it to STYLY’.
How did you like this tutorial? It’s fairly easy to create a voxel model with Magica Voxel. Although it’s a free software, the renderer feature performs very well. You can generate a beautiful high-quality image. Please try Magica Voxel and create your own original models through trial and error.