In this article, I’ll explain how to create an automatic door that opens when the camera approaches using Animator Controller and Playmaker to control the animation.
Sample GIFs
You’ll be able to switch between animations using Playmaker, so I think it will help you to expand your imagination!
Preparation in advance
In this article we will use Playmaker.
You should install PlayMaker, a plugin for Unity, beforehand.
![[Unity Tutorial] Creating a Game Using Playmaker ① From Basic Introduction to Installing](https://styly.cc/wp-content/uploads/2019/06/1200px-160x160.jpg)
If you are using PlayMaker for the first time, please read the following articles to learn more about it.
![[Unity] Starting Playmaker from Scratch](https://styly.cc/wp-content/uploads/2019/09/PlaymaerCoreConcept-160x160.png)
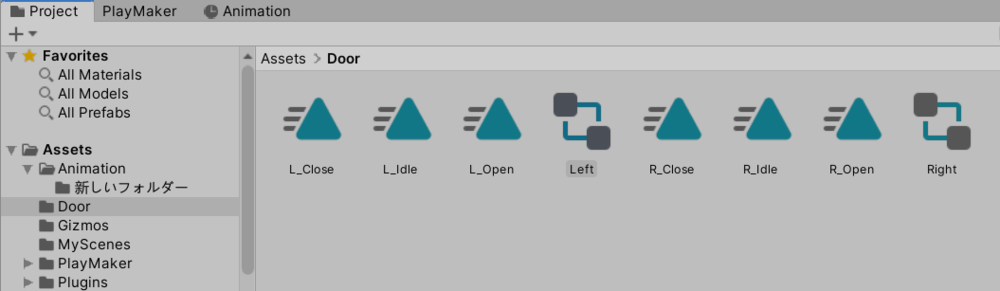
Creating a door
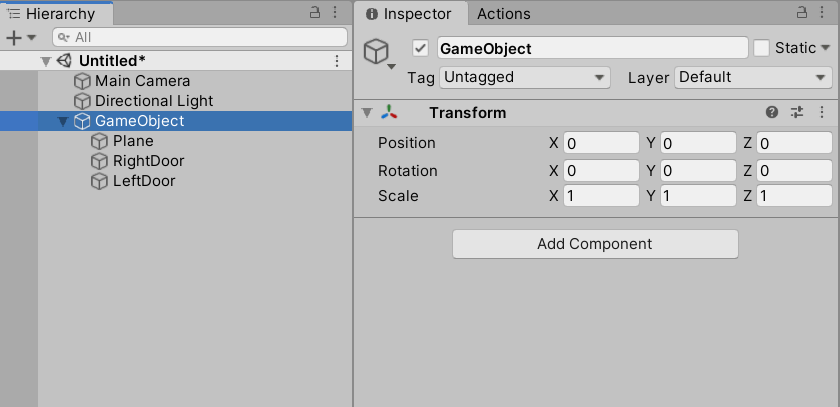
First, we will create an empty GameObject.
Here, we will create the left and right door objects as children.
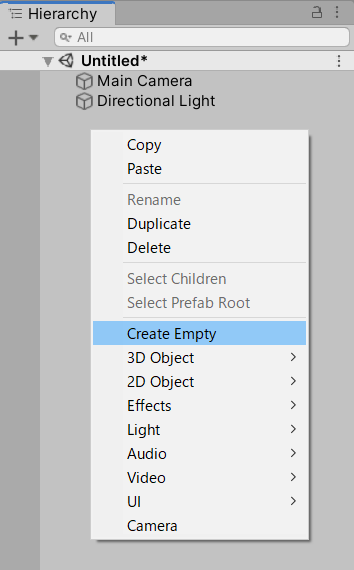
Select Empty Seat
Select the Plane from the 3D Object to create the floor.
Let’s set the Y-coordinate to -1 for the position of the plane as shown in the image.
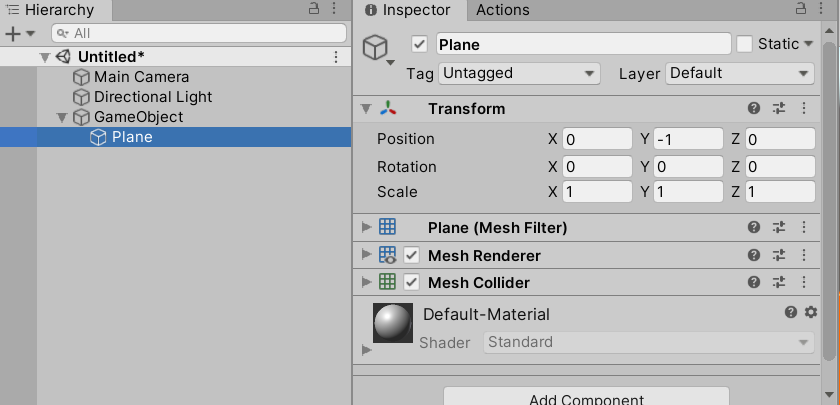
Hierarchy and Plane Position
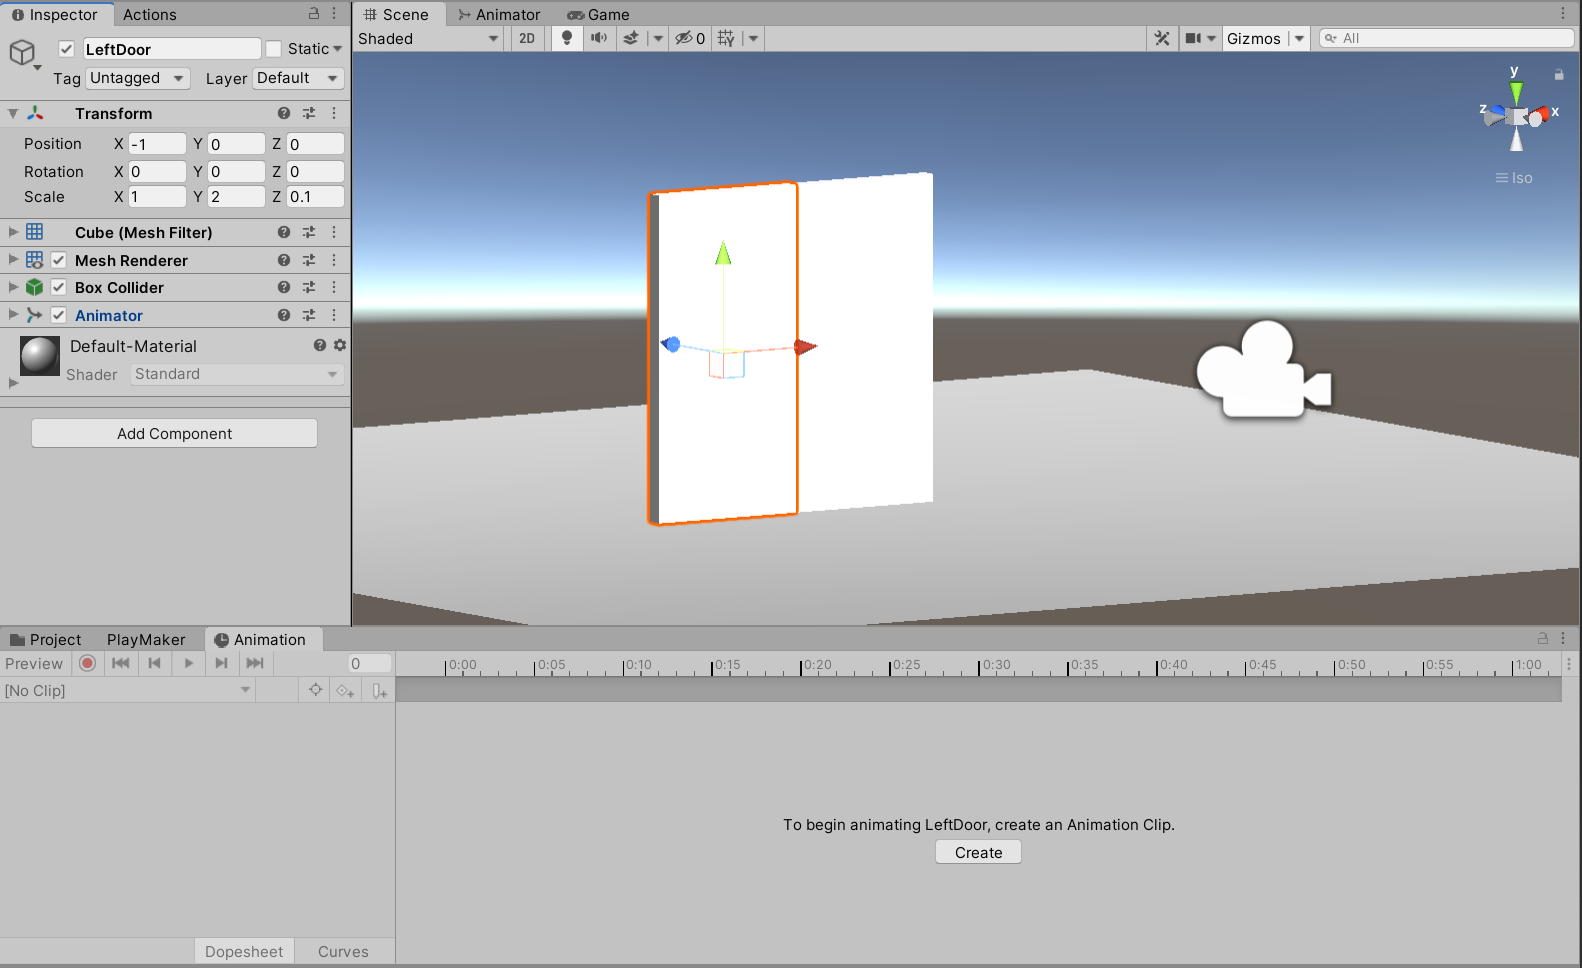
Next, let’s generate one cube and change its size as shown in the image.
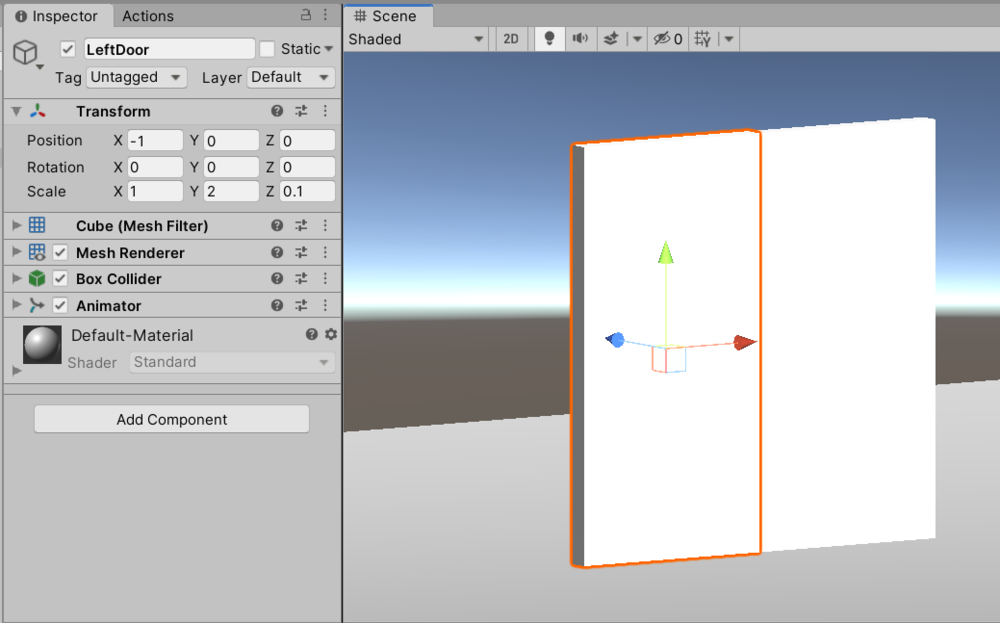
Name it “Right Door” so that you will know it’s the right door.
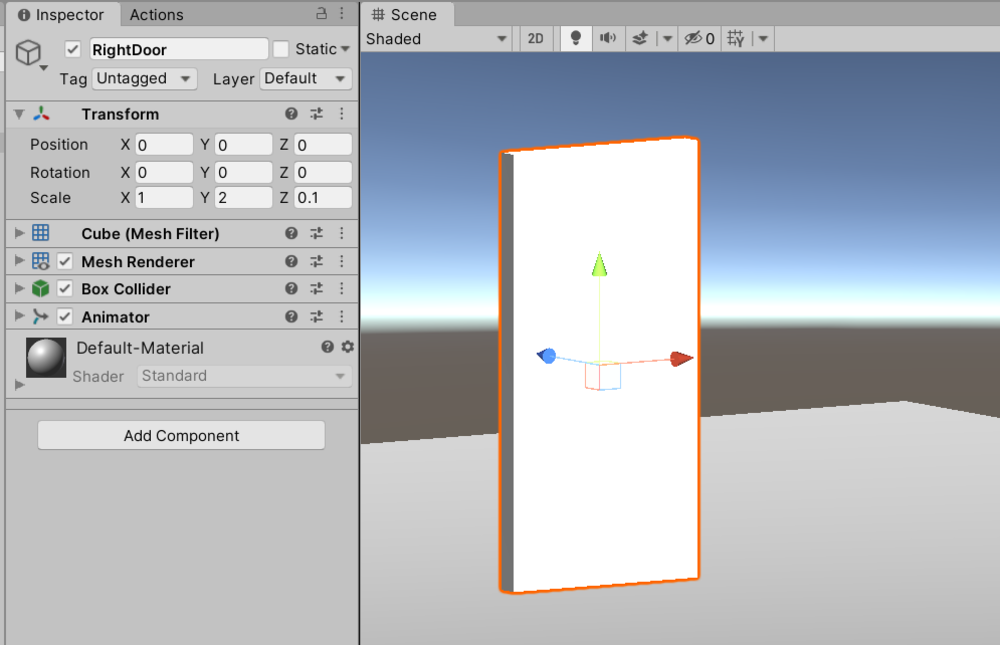
Create a Right Door
Duplicate it and make the left door as well and name it “Left Door”.
Put these next to each other, and the door is ready.
Create a Left Door and line it up
Make sure that Game Objects are parent and child as shown in the image.
Game Object (parent-child) relationships
Create an animation
Create an animation of a door opening or closing.
If you want to understand Unity’s animations, please check out the following article first.
![[Introduction to Unity] Learn Animation System](https://styly.cc/wp-content/uploads/2019/06/回転-160x160.gif)
Here are the three animations necessary for an automatic door
- Animation of a door opening
- Animation of a door closing
- Animation of a stationary door
The left and right doors are placed together to create six animations in sequence.
Animation of the door on the right side
R_Open animation
Create an animation of opening the door on the right side.
First, select Right Door from the scene view and open the animation editor.
Press the “create” button to create an animation with the name “R_Open”.

Press the create button to create an animation

R_Open animation
Add the Position property and click the “0” mark on the key at 0:00 in “Position.x” and type “0”.
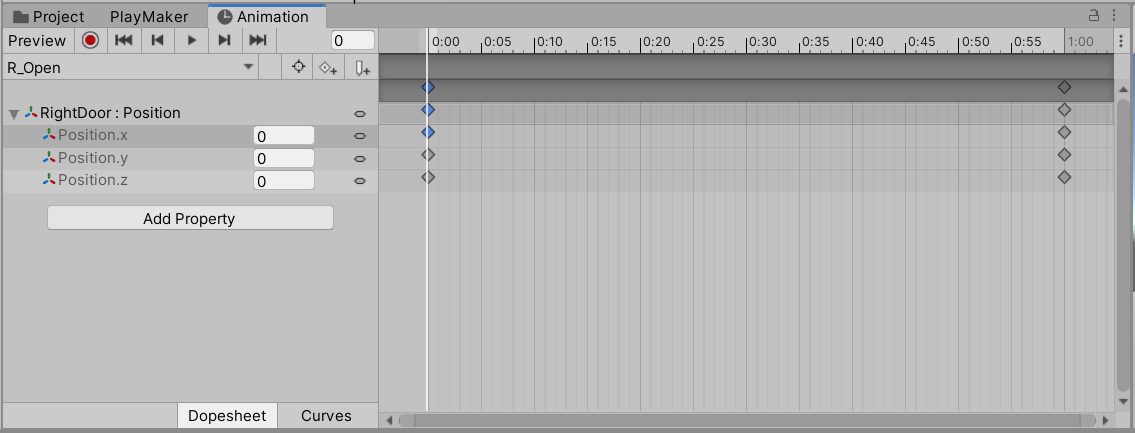
Number is 0:00
Next, click on the “Position.x” key at 1:00 and type 1.
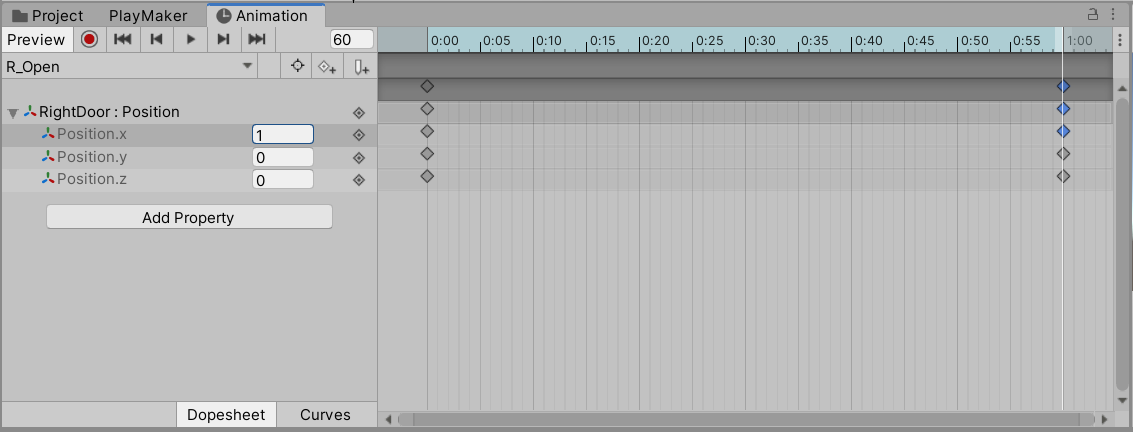
Number is 1:00
Finally, open the animation inspector and uncheck the Loop Time to prevent the animation from looping.
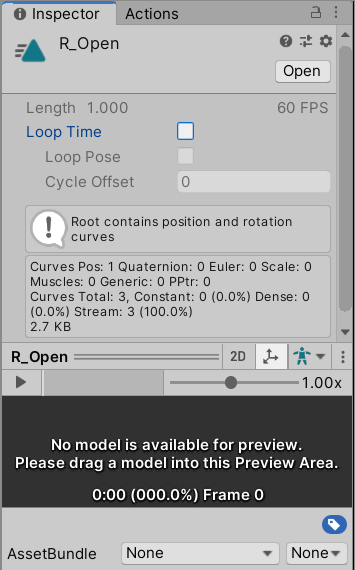
Uncheck the Loop Time
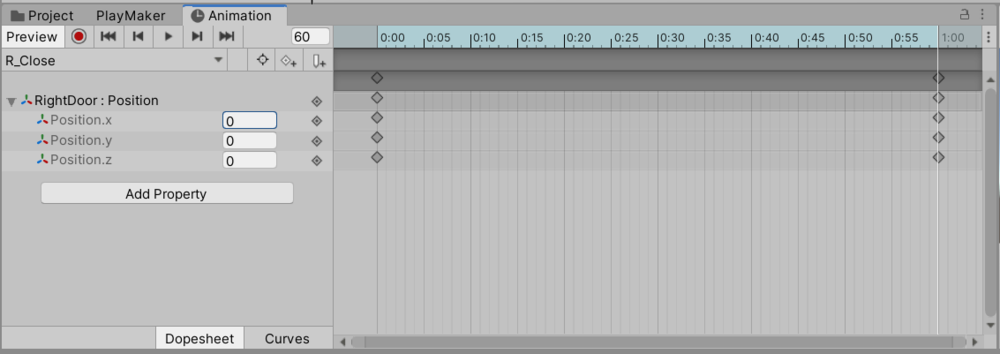
R_Close animation
Create an animation of the closing door on the right side.
Add a new “R_Close” animation from Create New Clip.
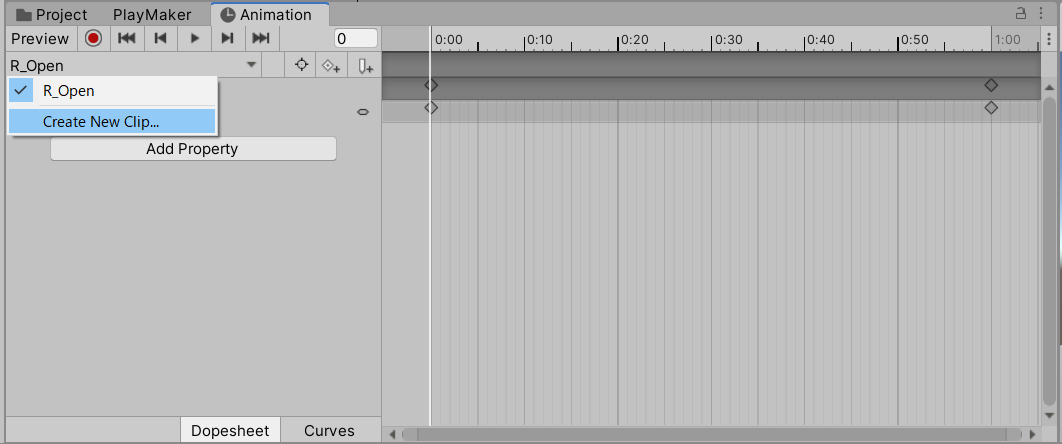
Add animation from Create New Clip
Add the Position property and enter the value of “Position.x”.
Since it’s the opposite of what we just saw, we’ll enter 1 for 0:00 and 0 for 1:00.

Number of 0:00
Number of 1:00
Uncheck the Loop Time so that it does not loop as well as R_Open.
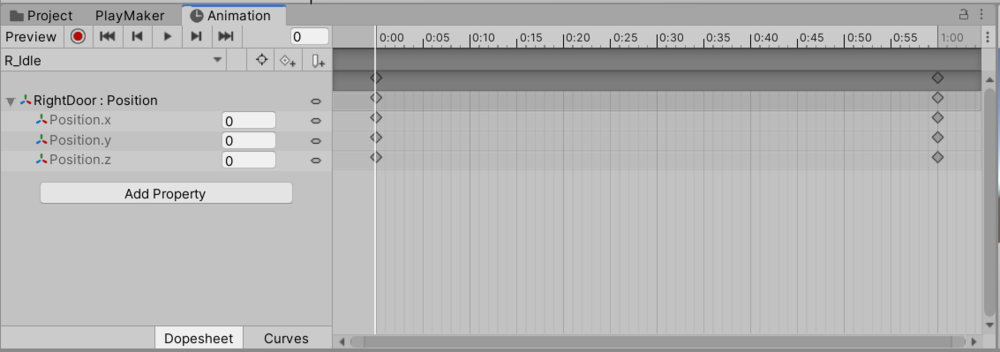
R_Idle animation
Create an animation of the first state, the door, standing still.
Create a “R_Idle” animation from the Creat New Clip and add the Position property.
However, since we don’t need to add any movement, we leave the value at the default value of 0.
Number of 0:00
Animation of the door on the left
Next, select Left Door from the scene view to open the animation editor.
Create an animation of Left Door
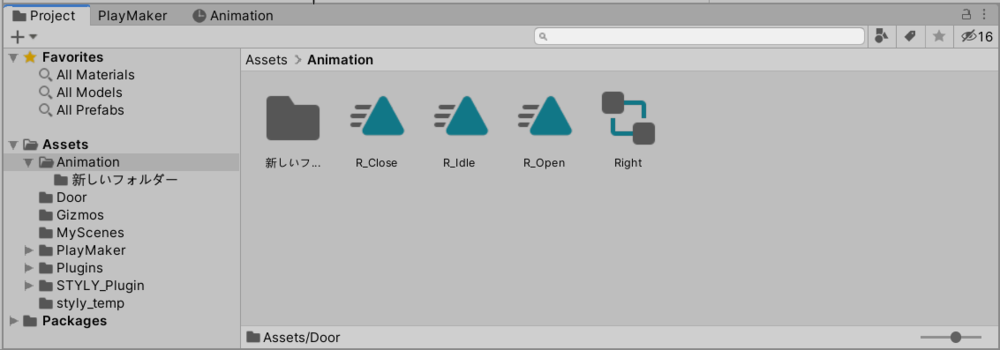
Create three animations using the same procedure as the door on the right.
L_Open animation
Set the value of the Position property as shown in the image.
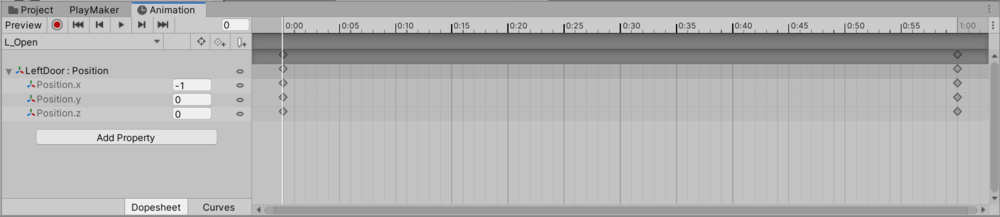
Number of 0:00
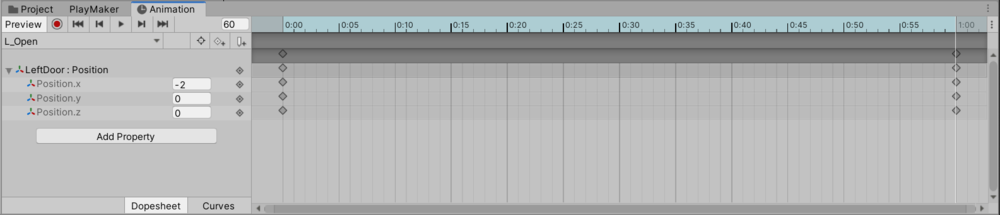
Number of 1:00
Don’t forget to uncheck the Loop Time of the animation.
L_Close animation
Set the value of the Position property as shown in the image.
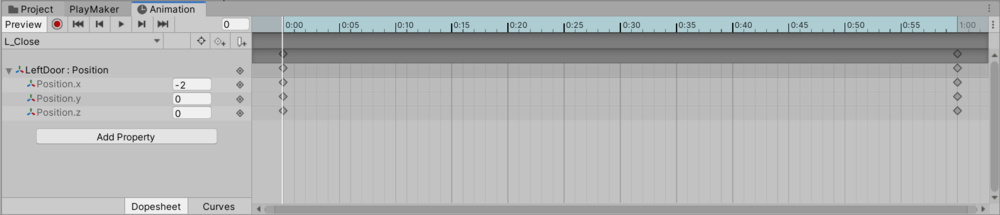
Number of 0:00
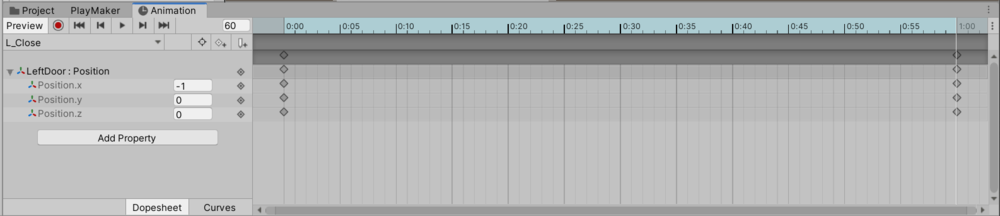
Number of 1:00
Uncheck the animation’s Loop Time.
L_Idle animation
Set the value of the Position property as shown in the image.
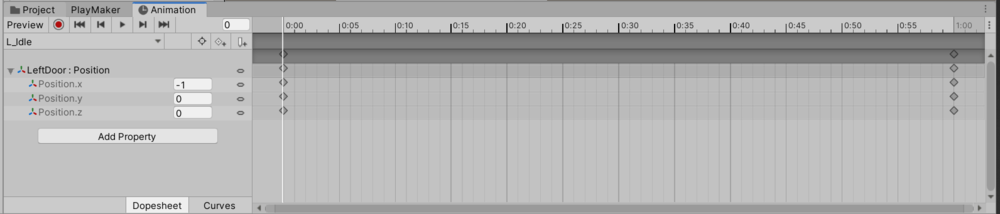
Number of 0:00

Number of 1:00
Setting the animator
Now that we’ve finished animating the automatic door, we’ll use Animator Controller to set up the animation so that it can be switched.
If you want to understand the principle of work of Unity’s Animator Controller, please read the following article first.
In order to switch the animation, a “trigger” is required.
An automatic door opens when you “approach” the door and closes when you “leave” the door.
Please note there are two types of triggers: “approaching” and “leaving”.
The door is on the right
Create an AnimatorController file by selecting [Create] and [Animator Controller] from the Project view.
Let’s name the file “Right” so that we know that the animation on the right side of the door switches.
Create an animator file
Double-click on the Animator Controller file to display the Animator screen in the Scene screen.
The three animation states of R_Open, R_Close, and R_Idle that we made earlier are arranged as shown in the image.
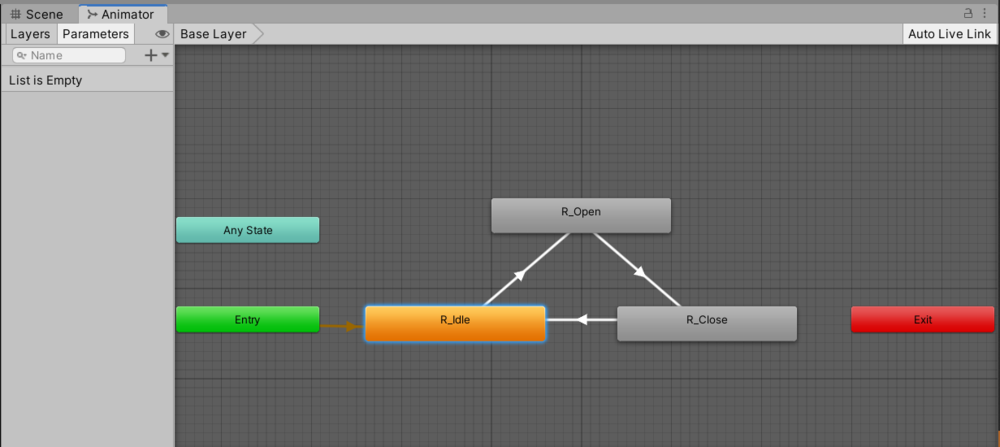
Animation state arrangement diagram
Add a trigger
You can add a trigger by clicking on Trigger from the + button on the Parameter tab.
Let’s name your additions “Open Trigger”.

Click on Trigger by pushing the + button
Add a “Close Trigger” trigger in the same way.
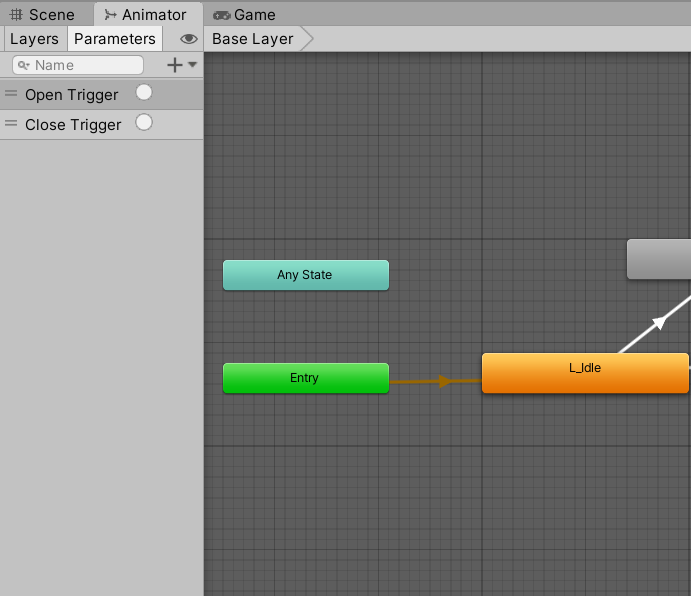
Add two more triggers
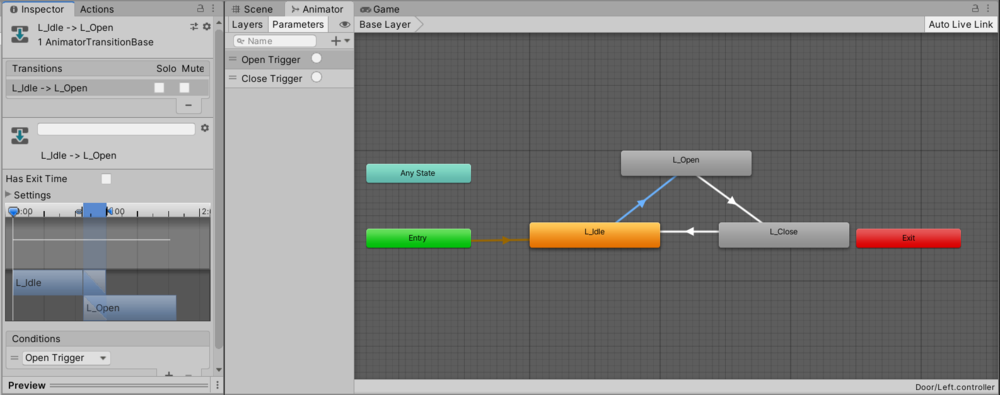
Transition setting to R_Open
Select the arrow from R_Idle to R_Open to bring up the inspector.
Uncheck Has Exittime and set “Open Trigger” from Conditon’s +.
Now, when the Open Trigger is triggered, the door will start opening animation.
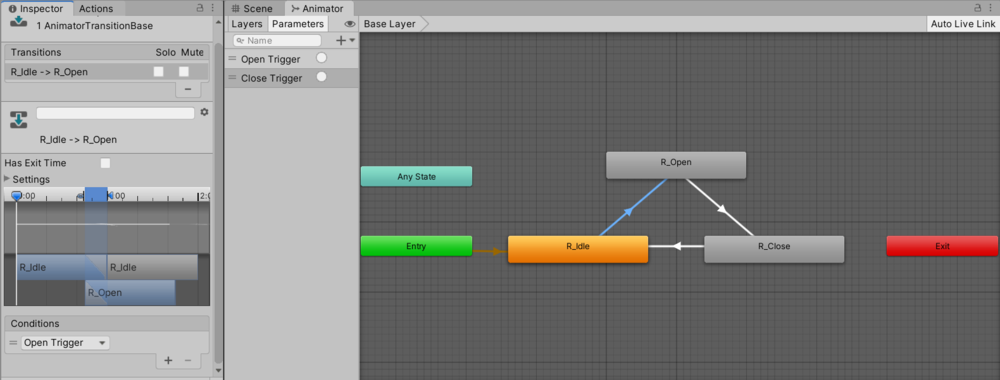
Transition setting to R_Open
Transition setting to R_Close
Select the arrow from R_Open to R_Close to display the inspector.
Uncheck “Has Exit time” and set “Close Trigger” from the Conditon’s +.
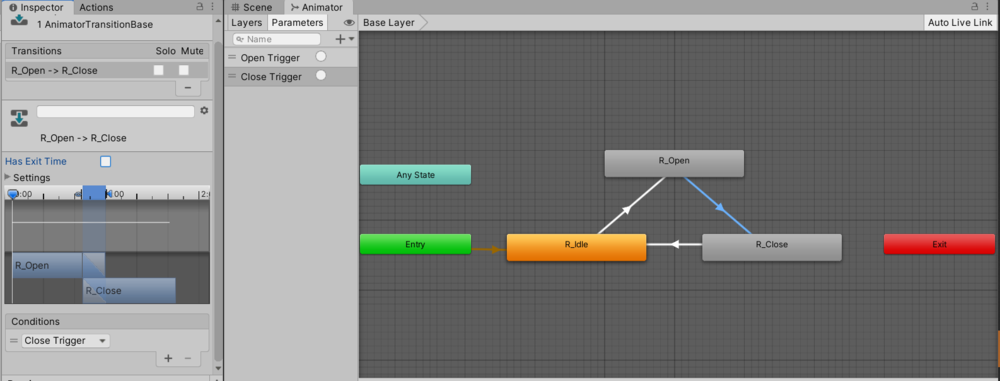
Transition setting to R_Close
Set animators on objects
Finally, set the Right Animator file from inspector of Right Door.
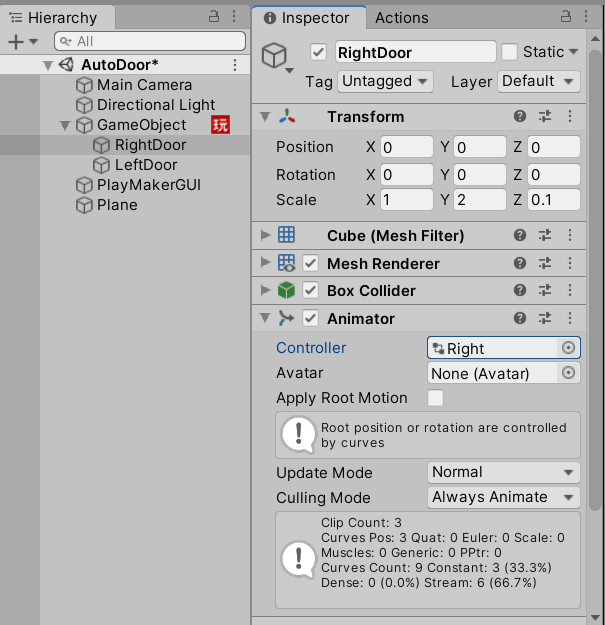
Configuring the inspector
The door on the left
Create an animator file using the same steps as the right door and name it “Left”.
Create an animator file
Place the animation state in the same way as on the right.
Add a trigger
Add an “Open Trigger” and a “Close Trigger”.
Add two more triggers
Setting the transition to L_Open
Select the arrow from L_Idle to L_Open, uncheck Has Exit Time, and set “Open Trigger” from the Conditon’s +.
Setting the transition to L_Open
Setting the transition to L_Close
Select the arrow from L_Open to L_Close, uncheck Has Exit Time, and set “Close Trigger” from the Conditon’s +.
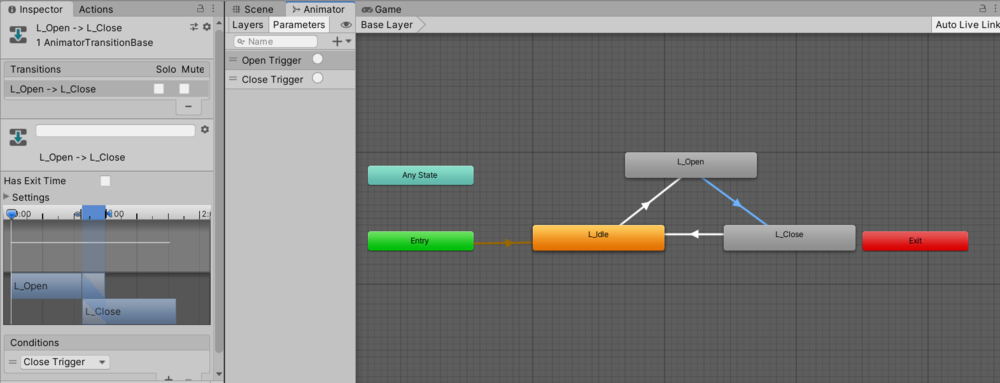
Setting the transition to L_Close
Set animators on objects
Set the Left animator file from the LeftDoor inspector.
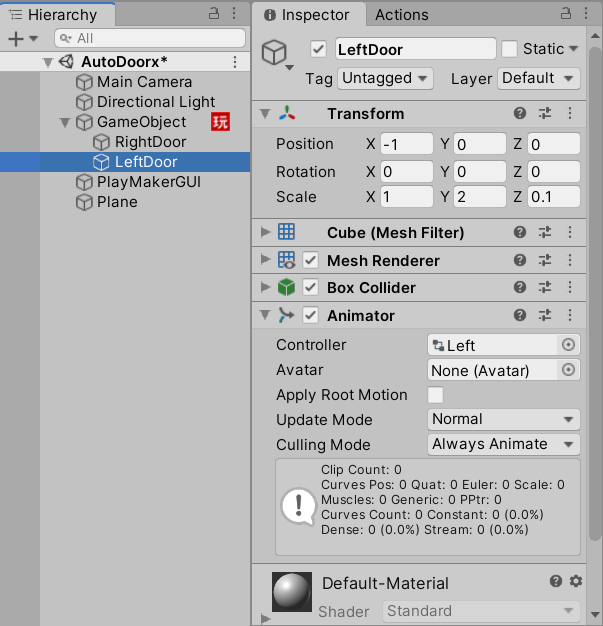
Setting up the inspecot
Playmaker settings
In Playmaker, you can create a mechanism that triggers the animator when you approach or move away from an automatic door.
Specifically, the system acquires the position of the camera, measures the distance from the door, and switches the trigger that is triggered according to the distance.
If you want to understand the basics of how Playmaker works, please read this article.
Overall structure of the FSM
Let’s start with an image of a completed drawing.
The overall structure of the FSM, events, and variable settings are as follows.

Overall structure of the FSM
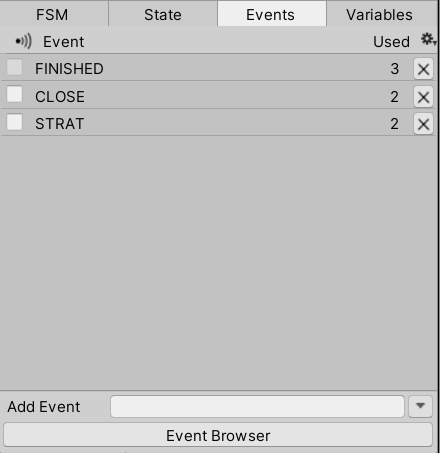
Events Tab
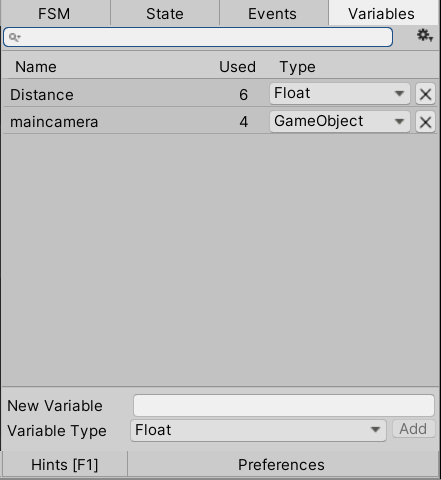
Variables to use
Setting the Set State
Right-click in the GameObject’s Playmaker window and add an FSM.
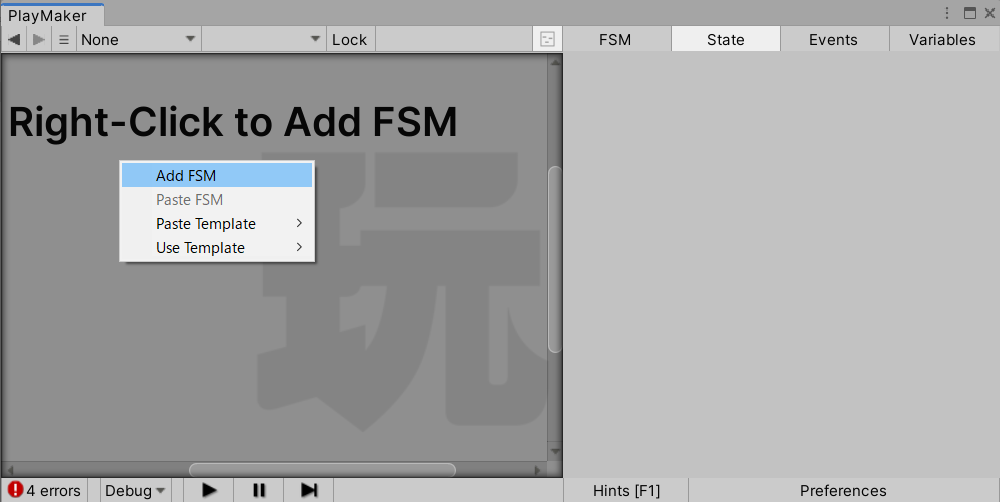
Adding the FSM
Change the state name to Set.
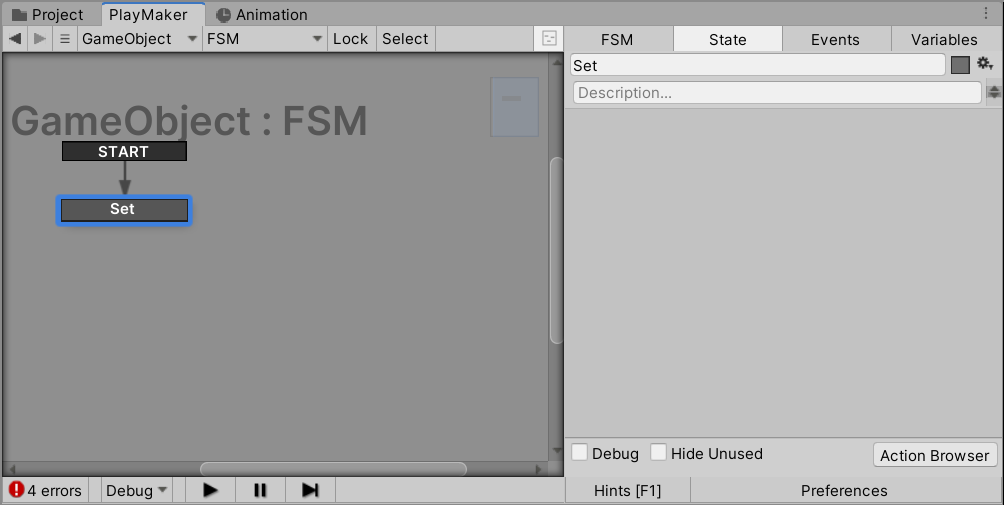
Change the state name to Set
“Get Main Camera” action is added
Add an action browser as shown in the image.
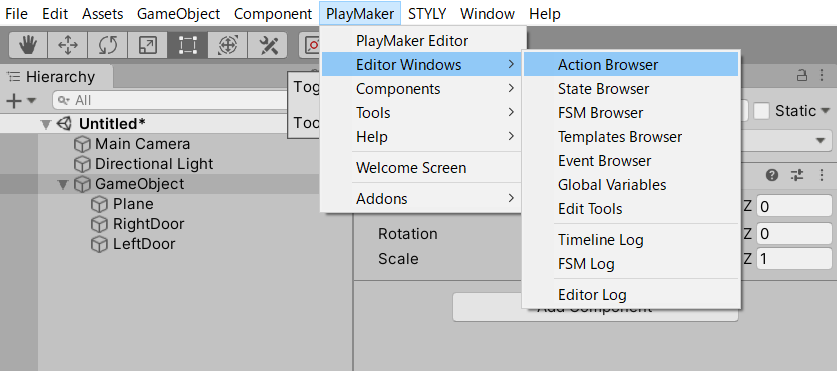
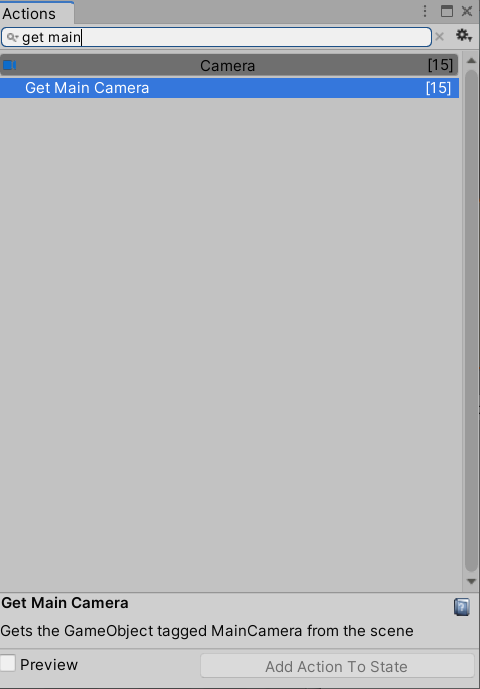
Search for the action you want to add, select it and state it.
Set the variable “Main Camera” as shown in the image.
This allows you to income the position of the camera.
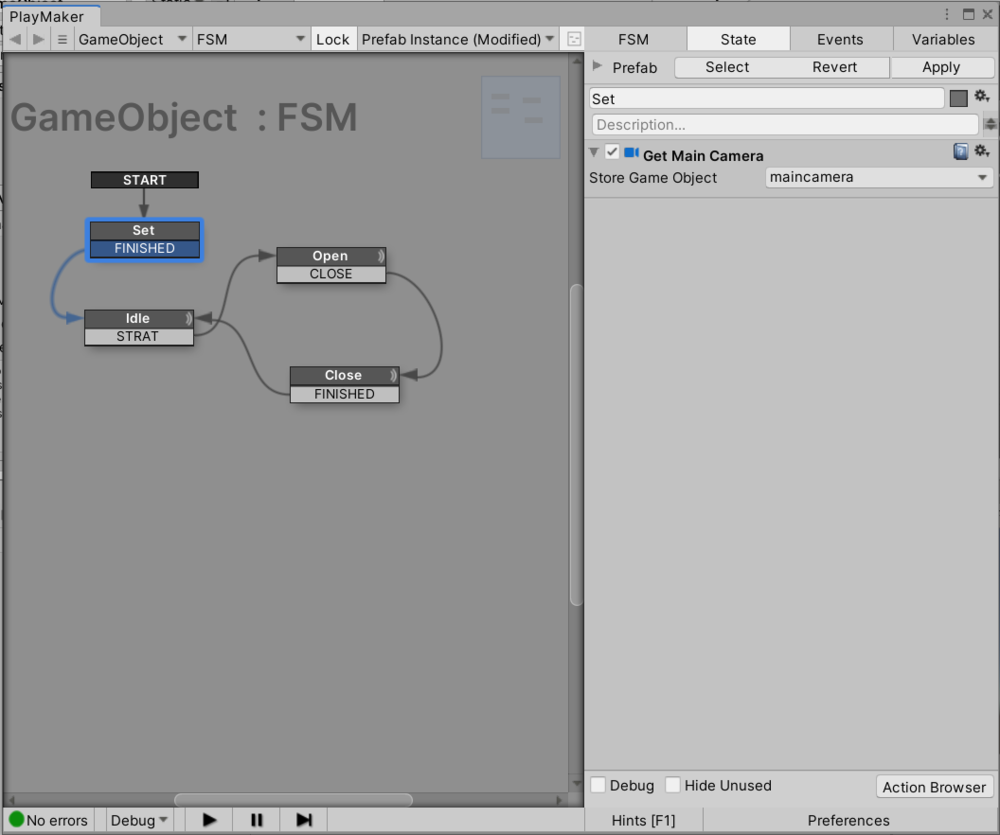
Setting the Set State
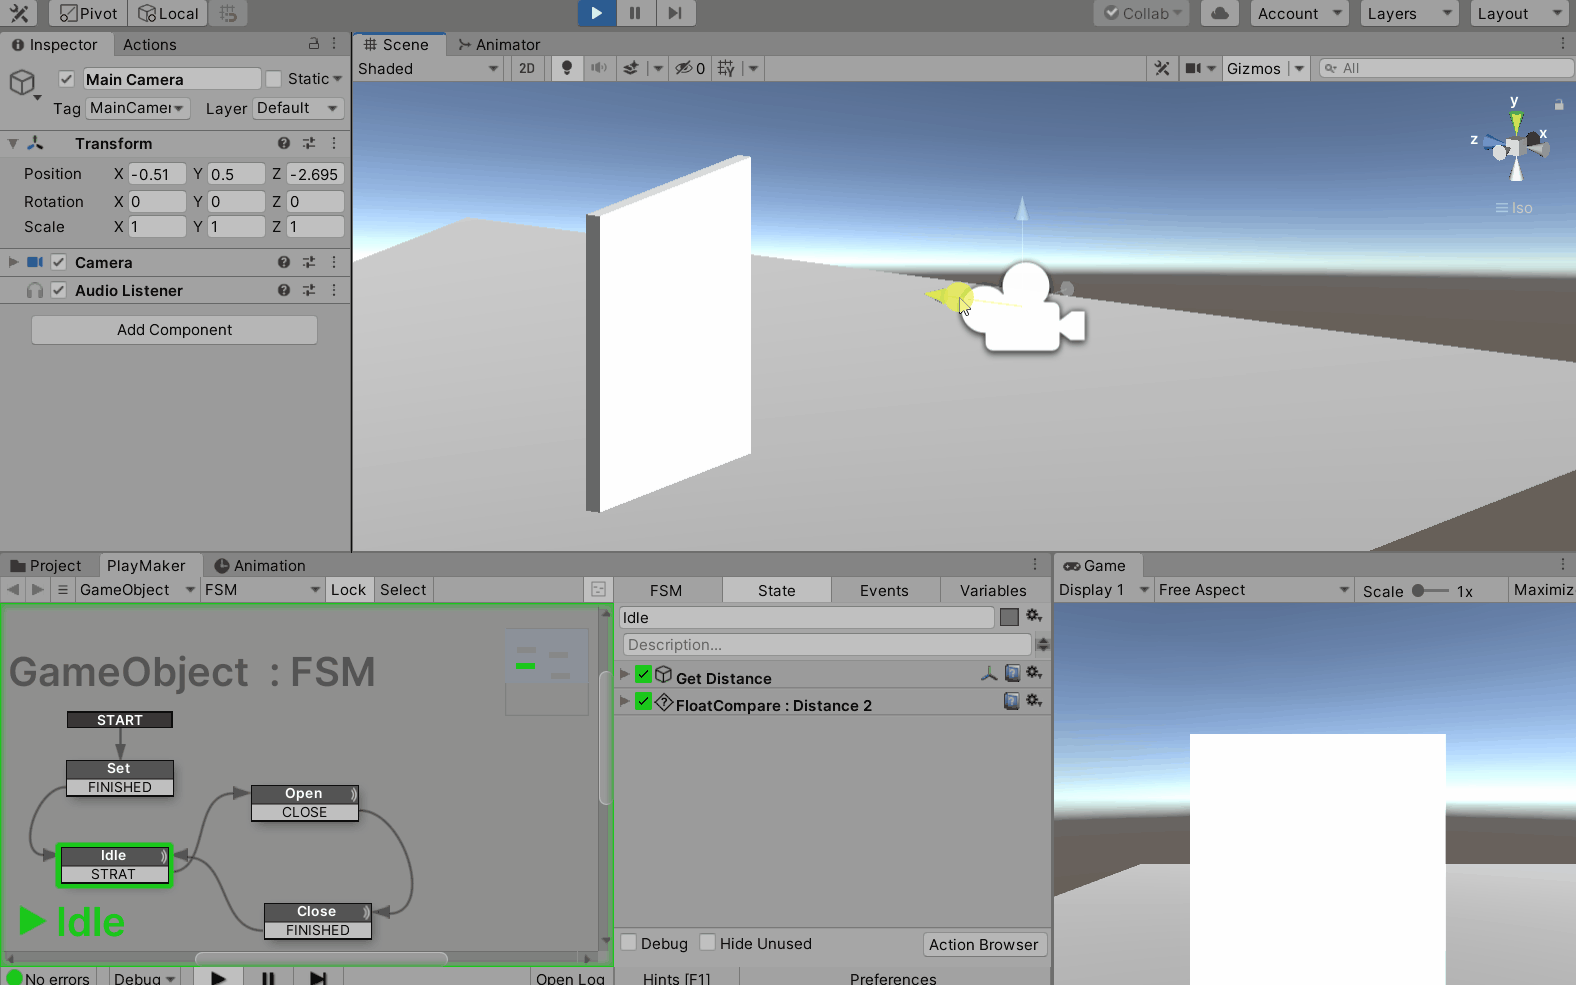
Configuring the Idle State
Right-click to add a state and change the state name to Idle.
“Get Distance” action is added
This will measure the distance between GameObject and Main Camera and set it to a variable called “Distance”.
“Float Compare” action is added
The event will happen when Distance is less than 2.
That is, when the Main Camera gets close to the GameObject by 2m, it transitions to the START event.
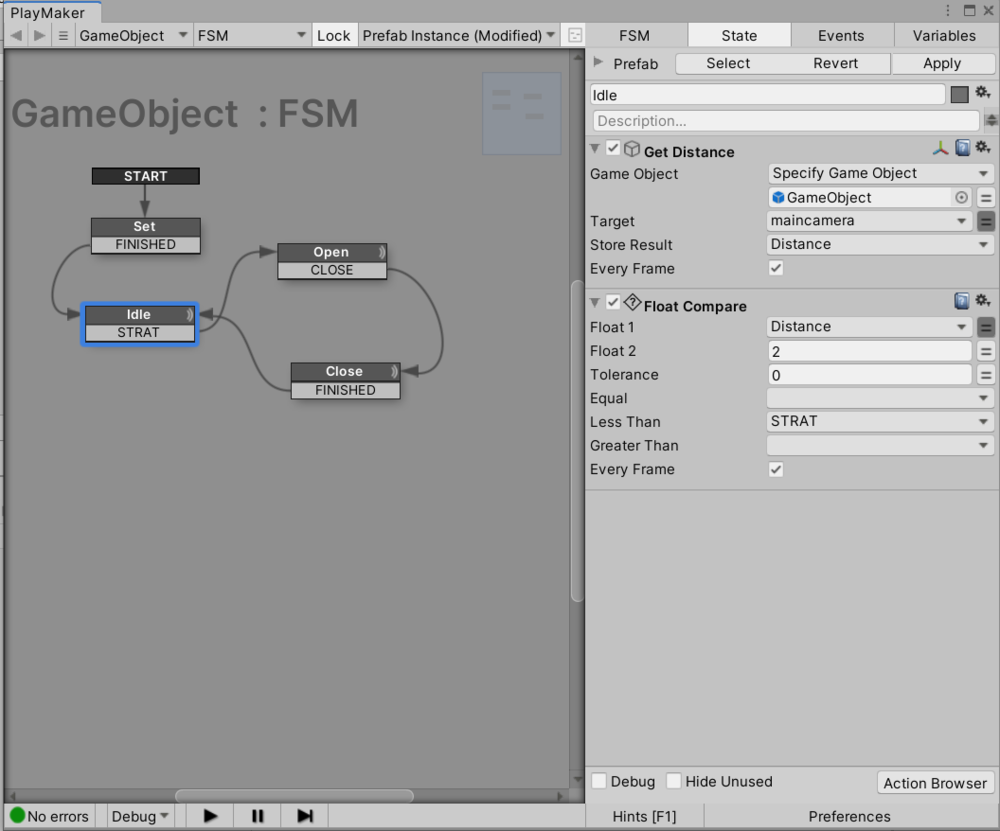
Configuring the Idle State
Open State Configuration
Add a state and change the state name to Open.
“Set Animator Trigger” actions is added.
Activate the “Open Trigger” that we just set so that the RightDoor and LeftDoor opening animation will start.
Adding a “Get Distance” action
We will measure the distance between GameObject and Main Camera again and set it to the “Distance” variable.
Adding a “Float Compare” action
If the Main Camera is more than 2m away from the Game Object, it will transition to a CLOSE event.
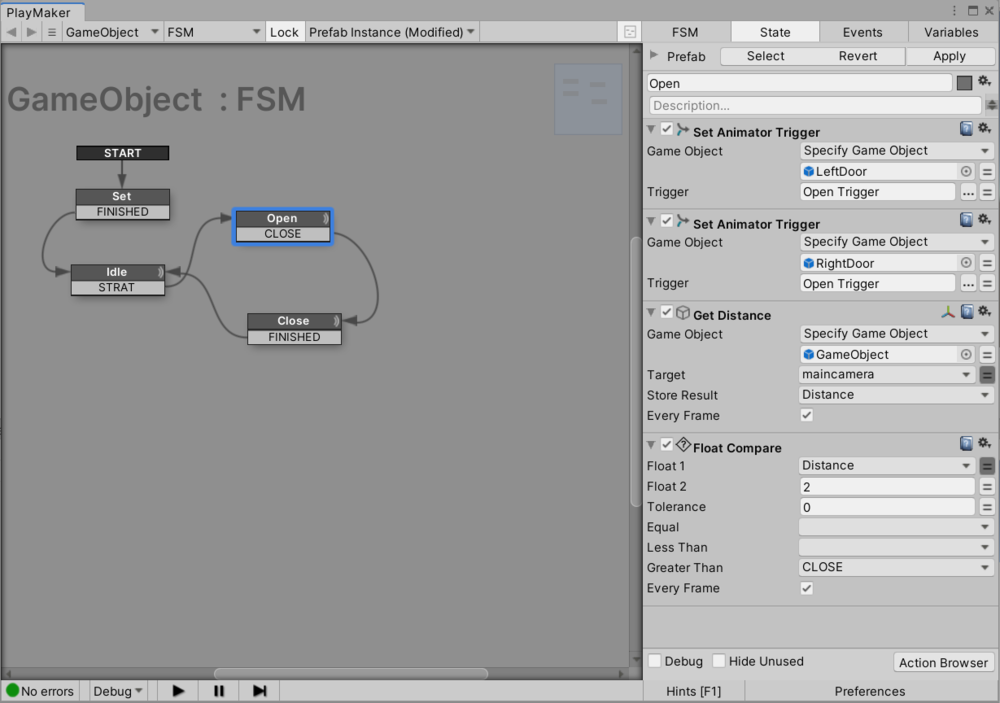
Open State Configuration
Setting the Close State
Add a state and change the state name to Close.
Two “Set Animator Trigger” actions are added
When you activate the “Close Trigger” that we just set, the RightDoor and LeftDoor close animations will start.
“Get Distance” action is added
Measure the distance between GameObject and Main Camera and set it to the “Distance” variable.
Added a “Float Compare” action
If the Main Camera is more than 2m away from the Game Object, it will start its transition to a START event.
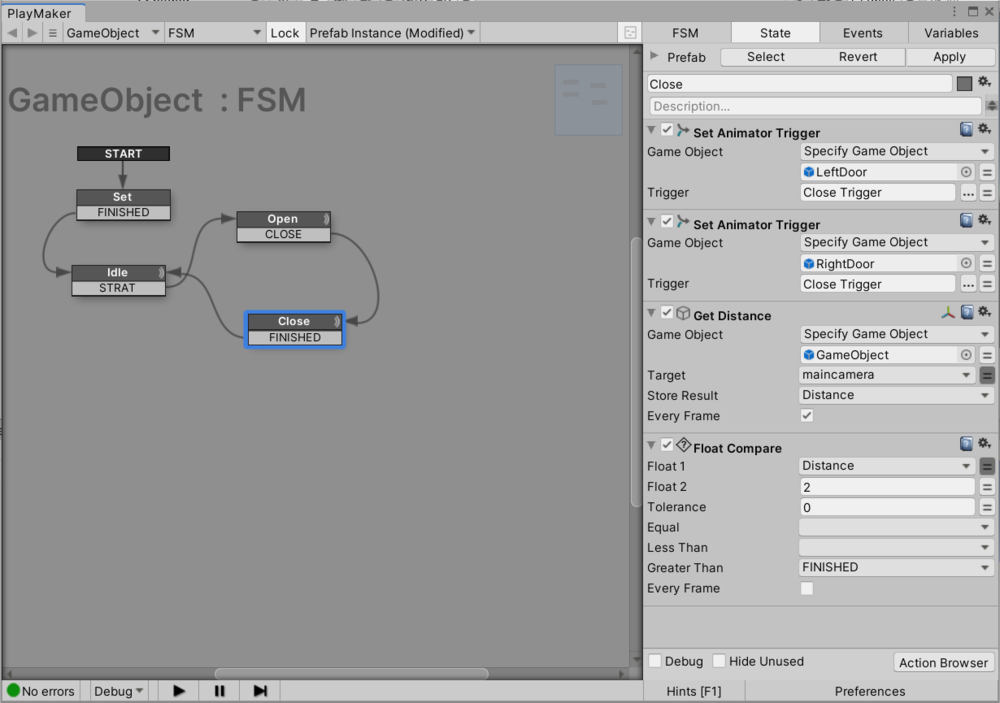
Set the Close state
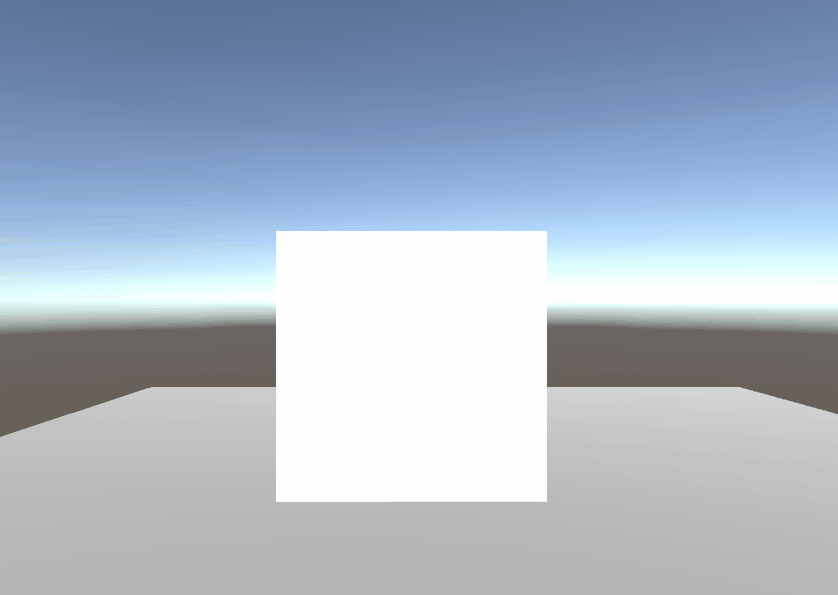
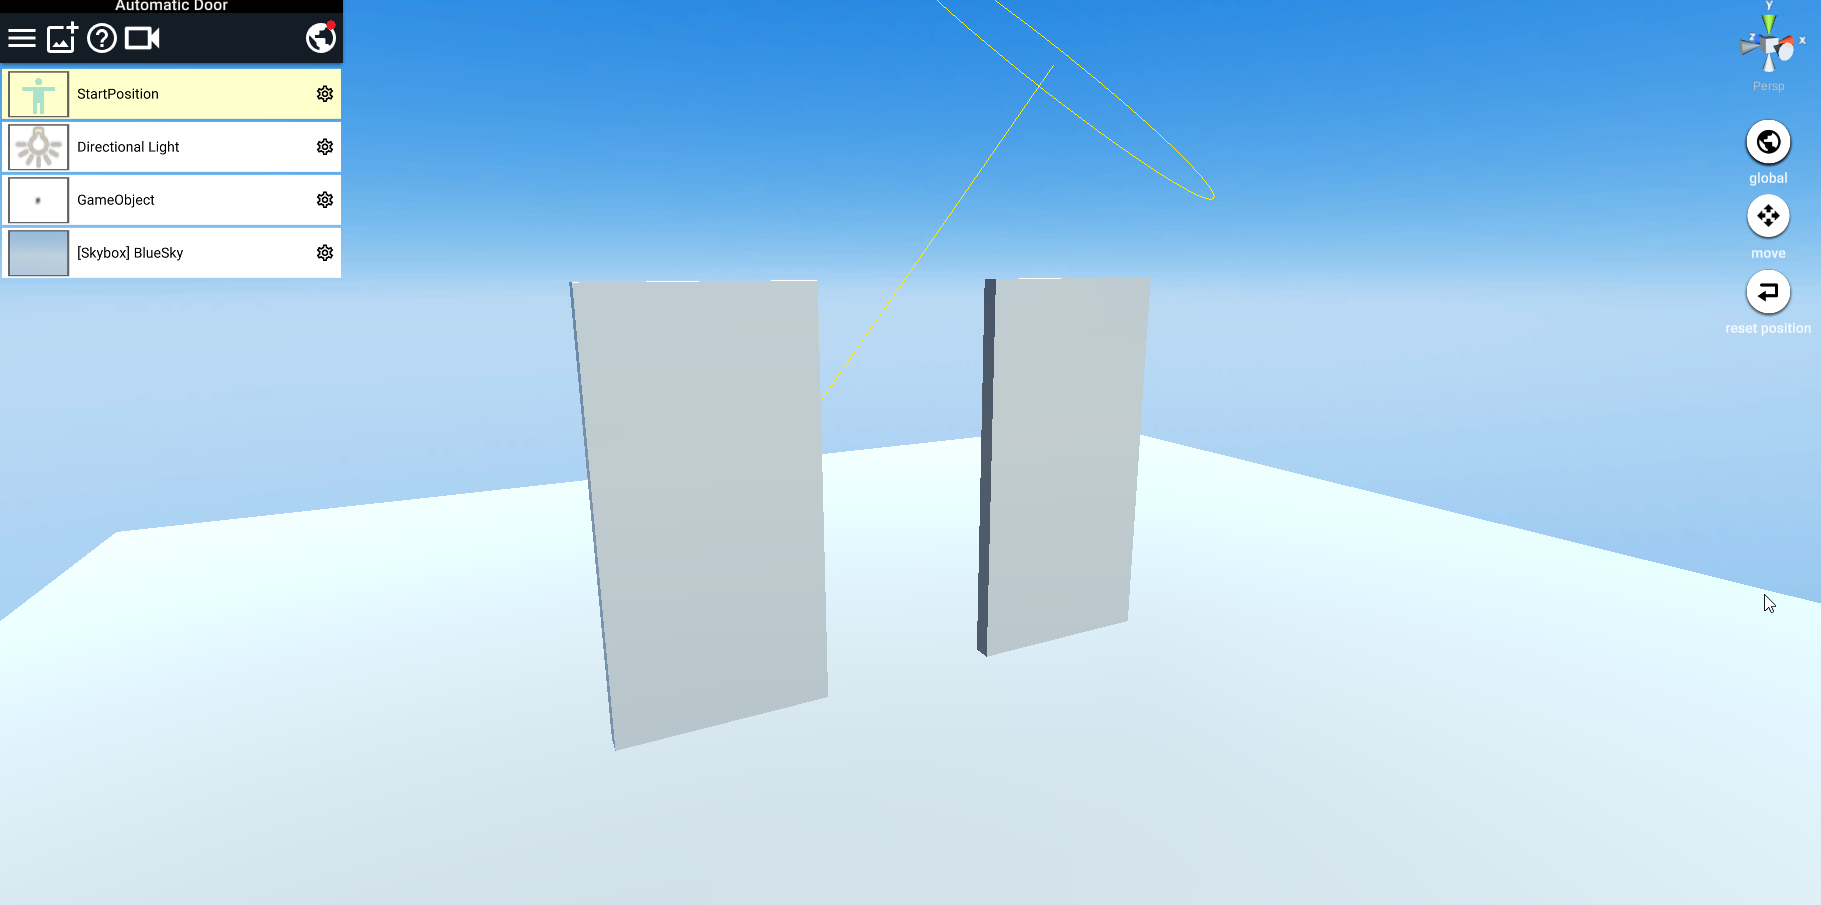
This is for the automatic door that opens when the camera approaches!
Press the play button in Unity to move the camera and the door will move.
The finished product
How to upload to STYLY
To upload an automatic door to STYLY, make the Game Object prefab, right click on the prefab and select “Upload prefab or scene”.
How to upload a prefab from Unity to STYLY is explained in the article below.
How to upload from Unity to STYLY.

How to create an account.

How to upload to STYLY.

When you upload it, it looks like this.
Upload to STYLY
In the end
In this article, we created an automatic door using Animator Controller and Playmaker to control the animation.
In this case, the trigger was triggered by moving the camera, but if you use the Playmaker well, you can do a lot of things.
Hope you will enjoy your play!