When creating VR/AR scenes, the size of the scene tends to grow and the rendering load becomes higher and higher.
When actually trying to view the scene in VR or AR, the high load often causes the scene to not display properly or the application to force close due to lack of memory.
These load issues tend to be more prevalent with standalone HMDs and smartphone ARs that do not have sufficient machine specs.
Often, lightweighting scenes does little to change the look and feel of the work itself, so try to lightweight as much as possible.
In this article, we will understand each of the points that tend to increase the load in creating VR/AR scenes in STYLY, and learn how to properly lighten scenes.
Inconveniences caused by heavy load
As mentioned in the previous section, various problems can occur when the load on a scene increases, and if any of the phenomena listed below occur, it is likely that the load on the scene has increased and the scene needs to be lightened.
|
Symptoms Caused by Increased Load |
Supplemental information |
|
Frame rate drop |
This phenomenon is likely to occur in both VR and AR. |
|
Forced termination of applications |
In the case of AR, this phenomenon is especially likely to occur due to the small memory capacity of the smartphone. |
|
Screen flicker |
|
|
Drawing bug |
|
|
Longer loading time |
Especially in the case of STYLY mobile, data is often downloaded via mobile communication, so |
If you are using a high-spec PC or smartphone to check VR/AR scenes, you may not experience the above problems even with heavily loaded scenes.
However, if you are considering having many people view your work, you should be aware that the majority of users’ PCs and smartphones do not necessarily have high specifications.
Once you get used to working with STYLY, it is always a good idea to be aware of how to make your scenes lighter.
What causes a heavy load?
There are various reasons why the load of a scene created in Unity may become heavy. The table below summarizes the points to keep in mind when creating VR/AR scenes in STYLY.
If your scene becomes heavy, check the following table for applicable areas.
|
Category |
Cause of load |
|
Number of objects to be placed |
Too many objects to be placed |
|
Material problem |
Too many vertices in the 3D object |
|
Texture resolution is too large |
|
|
Video data is too large |
|
|
Use of Unity’s high-load features |
Excessive use of lights and shadows |
|
Too many physics behaviors using Rigidbody |
|
|
Excessive use of video playback functions |
|
|
Heavy use of particles in high-load settings |
|
|
Many other high-load features |
|
|
Problems with PlayMaker |
Inappropriate structure of the FSM |
|
Heavy use of high-load actions such as “create gameobject |
|
|
There are many other causes in addition to the above. |
|
List of points to review when reducing weight
It is difficult to make a general recommendation on how to lighten the weight of a scene, since it is a case-by-case basis; however, there are certain points that Unity beginners tend to fall into, so if you are not sure where to start, please refer to the table below and try to lighten the weight of your scene.
*The examples listed in the “points to review” in the table below are for reference only, and there may be no problem for people viewing the work on PCVR, or it may be more severe for people viewing the work on smartphone AR.
We hope you will take it as a guideline only.
For example, if you want viewers to see a very high-definition 3D model created with photogrammetry, you should consider different options than reducing the polygon count or compressing the textures.
You will need to carefully examine the areas to be lightened while keeping in mind what parts of your work you want to highlight.
|
Key Points |
Points to review |
Solution |
Effect |
|
Eliminate parts that are clearly inappropriate |
Polygon count or texture size of 3D object is too large |
Avoid using material data that is too large because of high load |
Large |
|
Too many lights |
Avoid unlimited use of Light because of its high load |
Large |
|
|
Excessive use of Rigidbody physics |
Avoid unlimited use of Rigidbody, as moving a large number of objects with Rigidbody is very demanding! |
Large |
|
|
Using too many particles in a heavy load setting, such as generating a large number of particles at once. |
Using particles in an unreasonable way is highly burdensome, so be sure to use them in an appropriate way! |
It depends. |
|
|
You are using PlayMaker in a way that is clearly unreasonable. |
Inappropriate use of PlayMaker is highly loaded and should be avoided. |
It depends on |
|
|
Reduce the number of objects placed in the scene |
A large number of objects are placed in a scene |
Reduce the number of objects in the scene; if you do not want to reduce the number of objects to be displayed, you may be able to solve this problem by reducing the data of each object |
Large |
|
Reduce the weight of the material to the extent that the appearance and functionality of the work remains the same. |
Lighten the weight of materials to the extent that the appearance does not change |
Lighten the weight of the material to the extent that it does not detract from the look and feel of the work, often resulting in significant weight savings with little visual change. |
Medium |
|
If the above weight reduction measures do not improve your work, the following measures should be taken. |
|||
|
Reduce the load even if the appearance of the work is slightly reduced |
Reduce the weight of the material further |
Even if the appearance of the work is somewhat reduced, the load must be further reduced |
Medium |
|
Stop using features that have a high load |
|||
|
Significantly reduce the number of objects |
|||
|
Switch to feasible representations |
As a last resort, it is necessary to consider truncating the high-load expressions. current VR/AR technology inevitably has its limits, so it may be necessary to change the expression and content of the work so that it can be produced within those limits |
||
Review the number of objects to be placed
Reducing the number of objects to be placed is the simplest and clearest way to reduce weight.
However, there may be cases where you do not want to reduce the number of objects to be displayed due to the expression of the work. in such cases, it may be possible to solve the problem by reducing the data of each object, so we recommend that you first try to reduce the weight of the material.
<Tips> Objects that physically behave with Rigidbody
Rigidbody is a function that allows you to make objects in your scene behave according to the laws of physics in real life, simulating objects falling or colliding with each other.
If there are a large number of objects in the scene that are subject to physics using Rigidbody, the load on the scene tends to increase.
Lighten the weight of the material.
If you are new to Unity, the load can often be high due to improperly sized materials.
As a first step in weight reduction, check to make sure that the various materials are the appropriate data size.
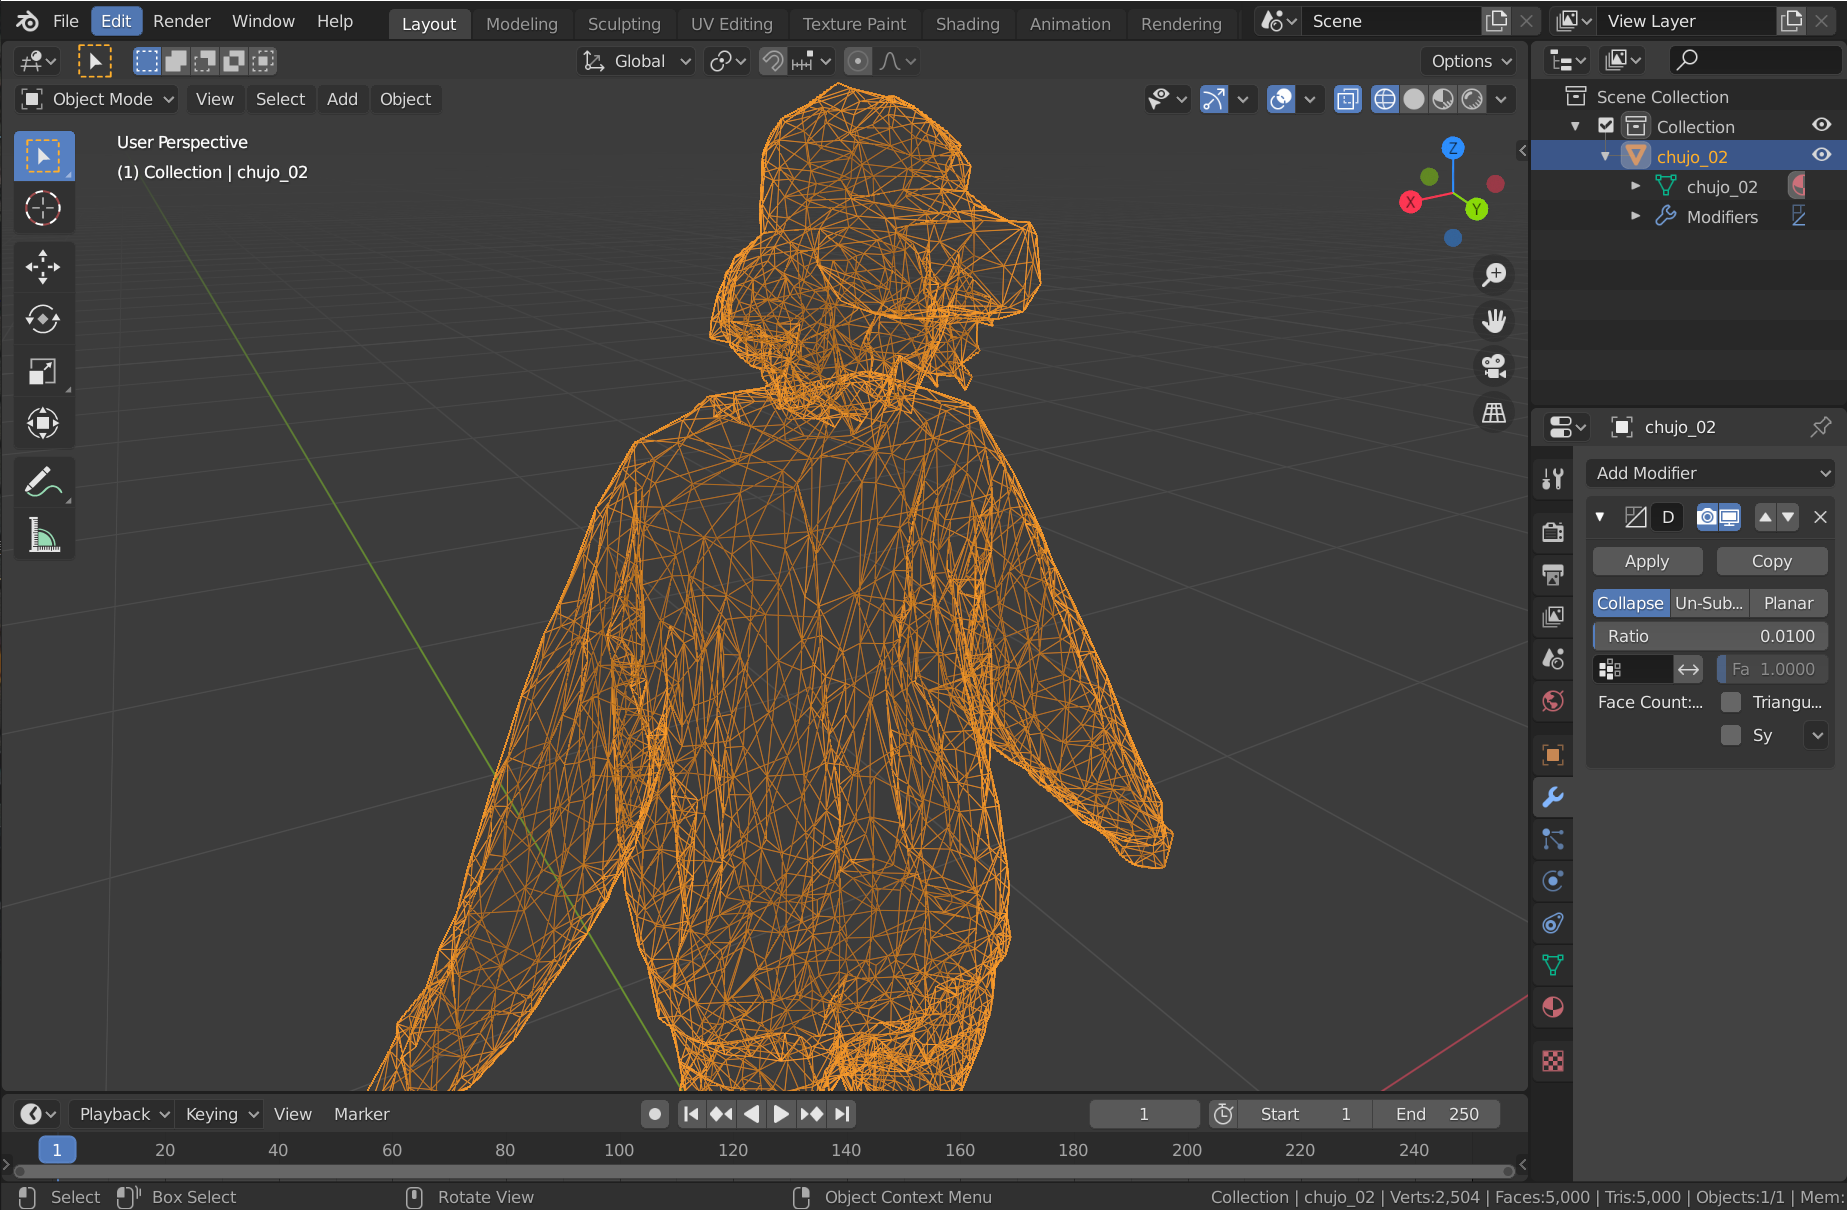
Mesh Lightening
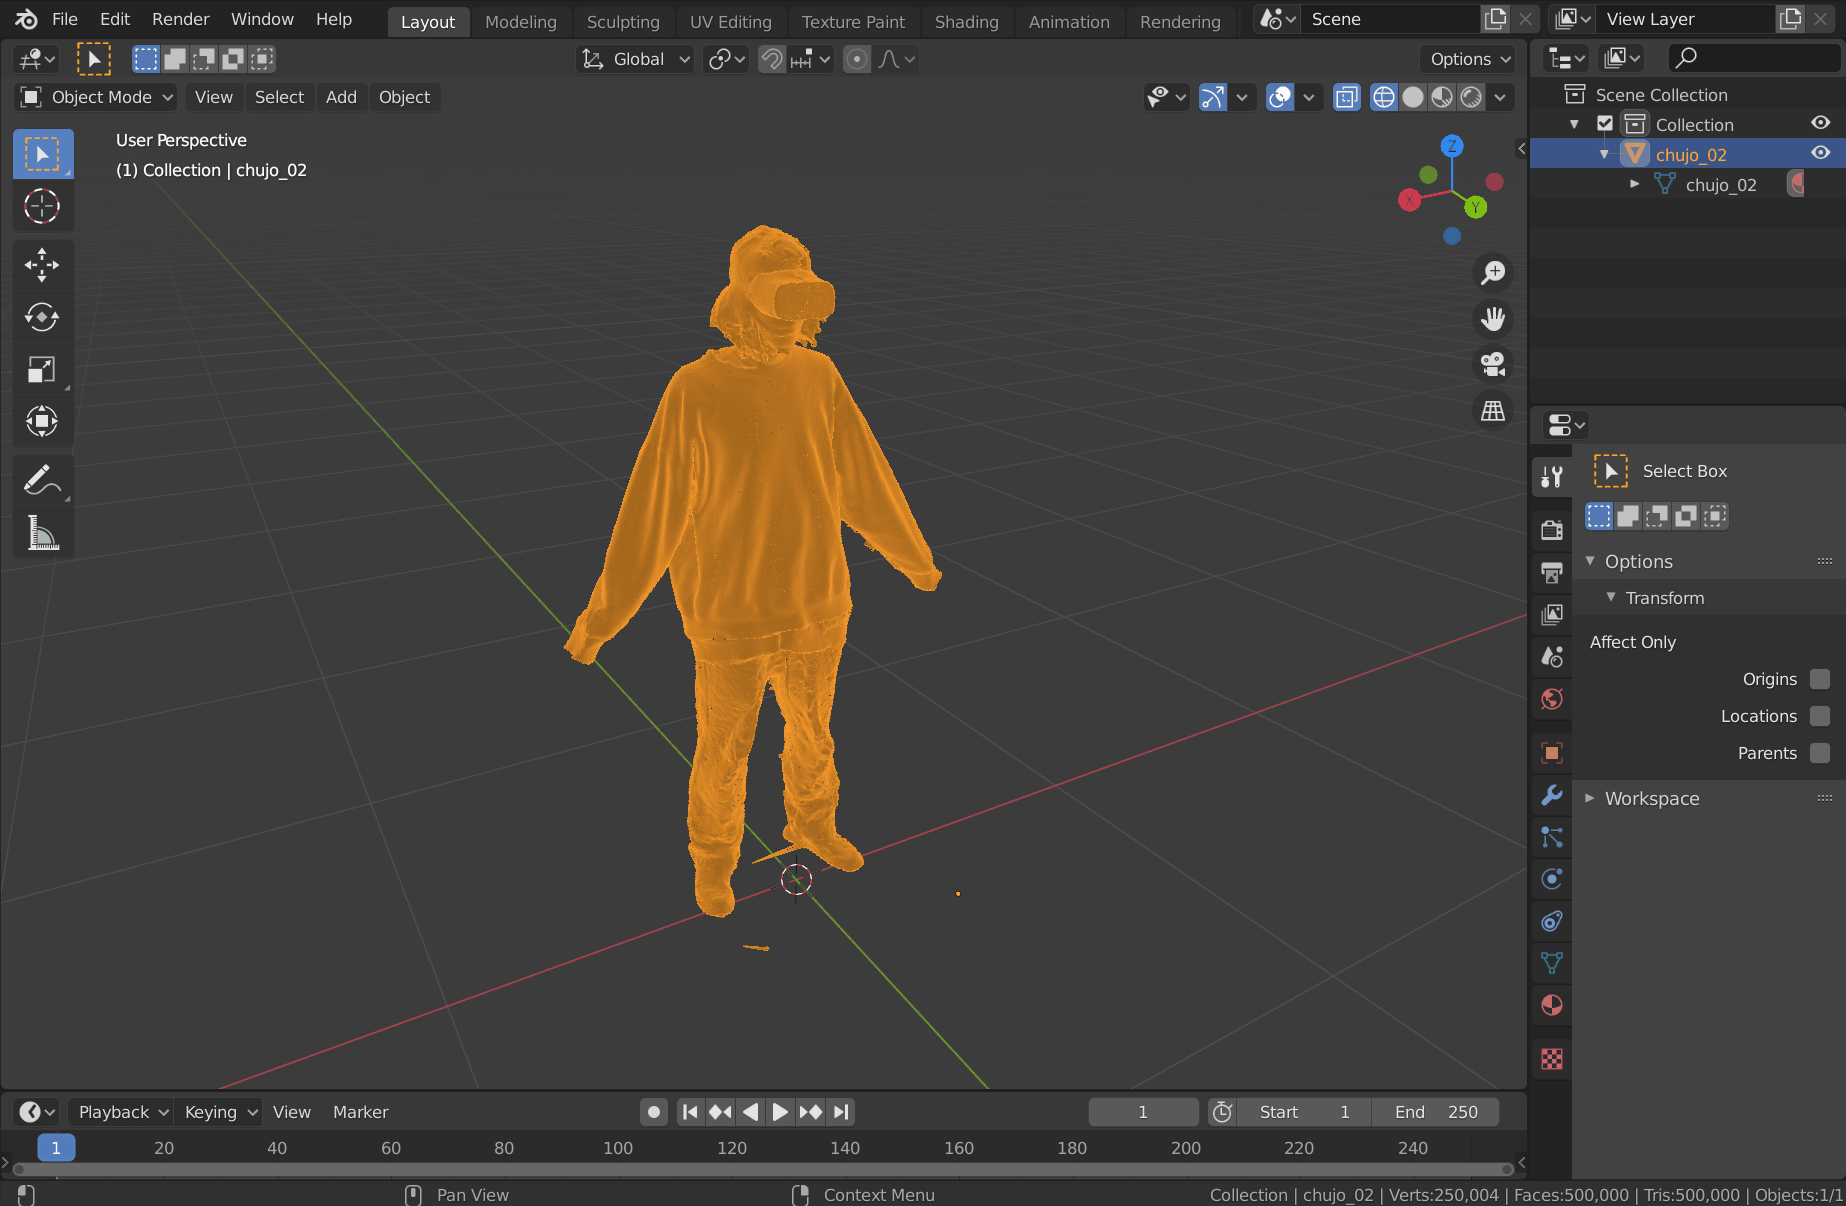
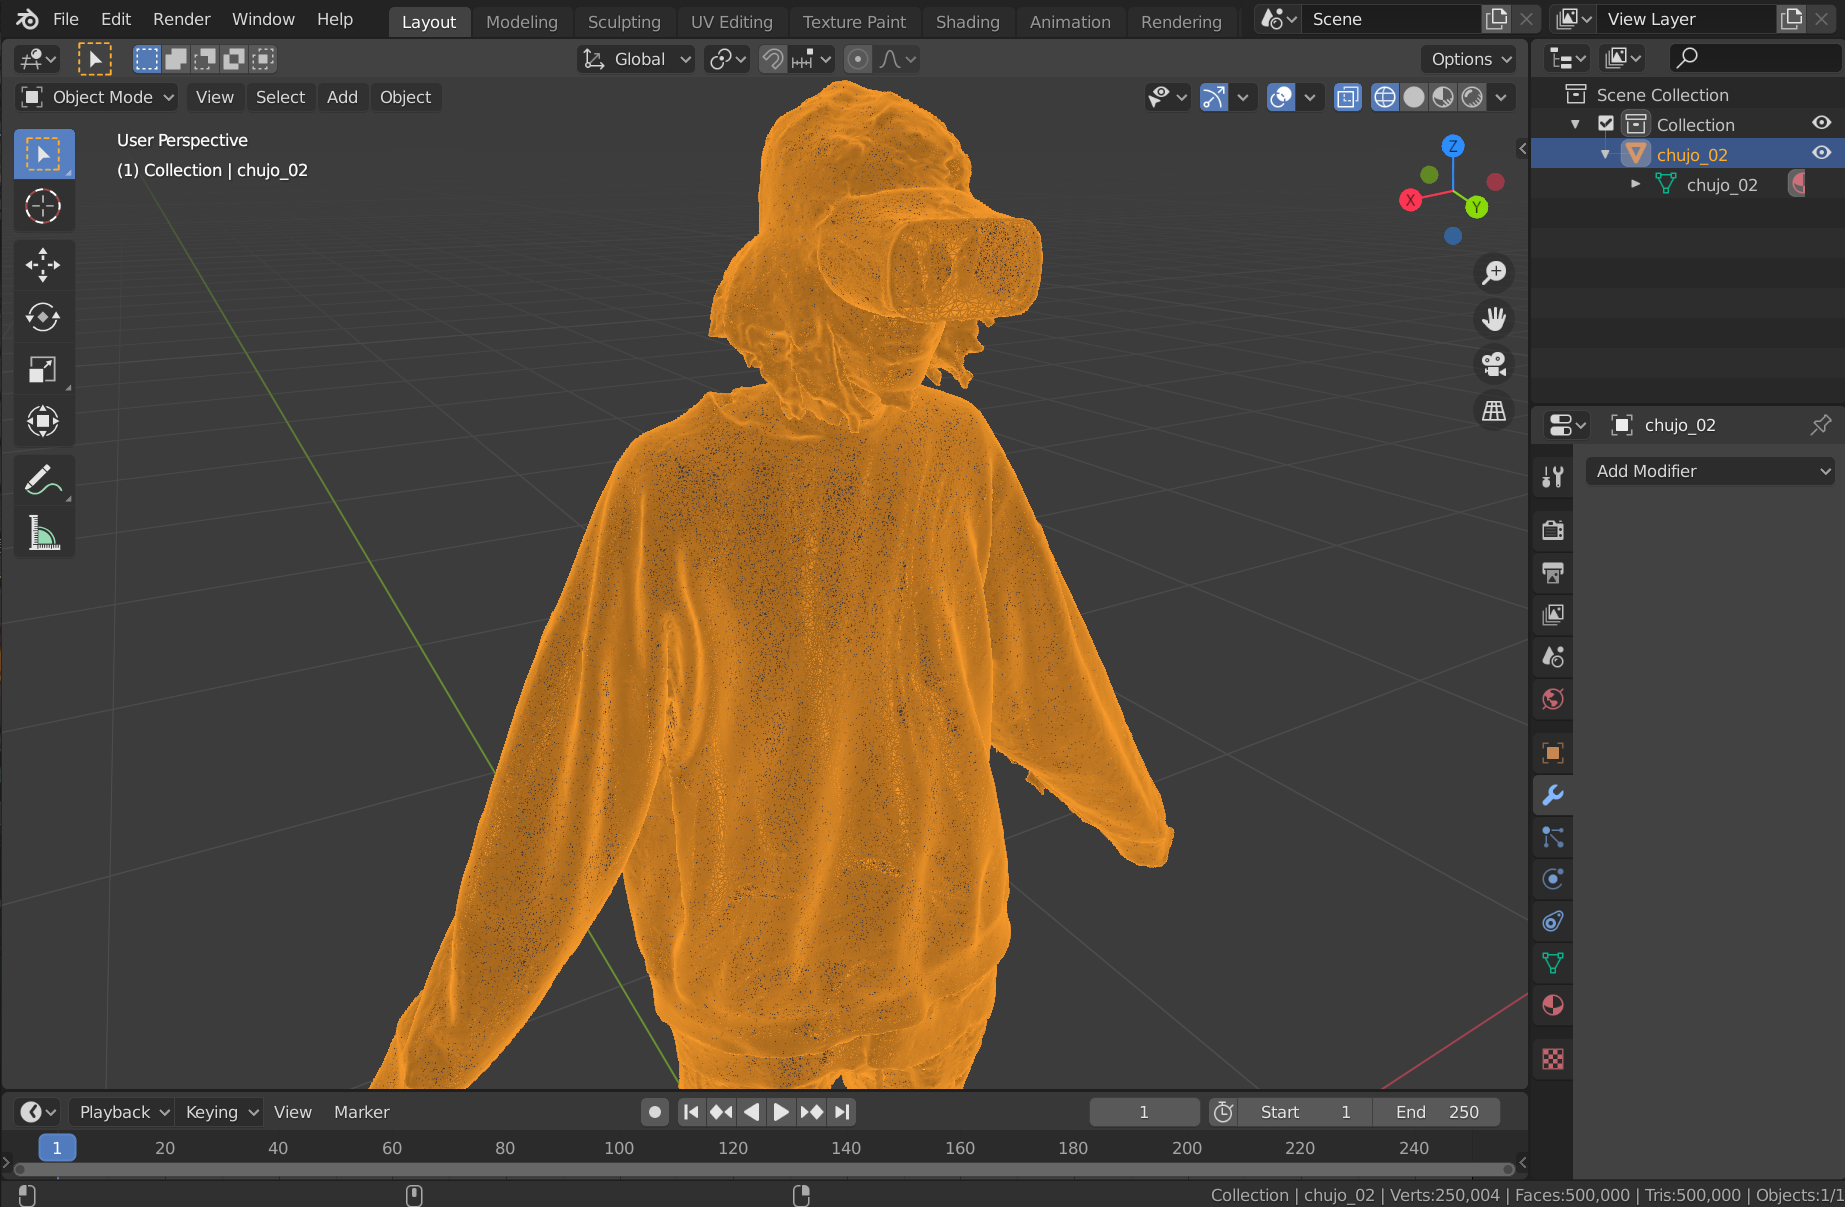
Mesh is a file that defines the shape of a 3D object, and the number of polygons is important when considering weight reduction.
The more polygons, the smoother the 3D model, but the larger the data, the greater the load on the scene.
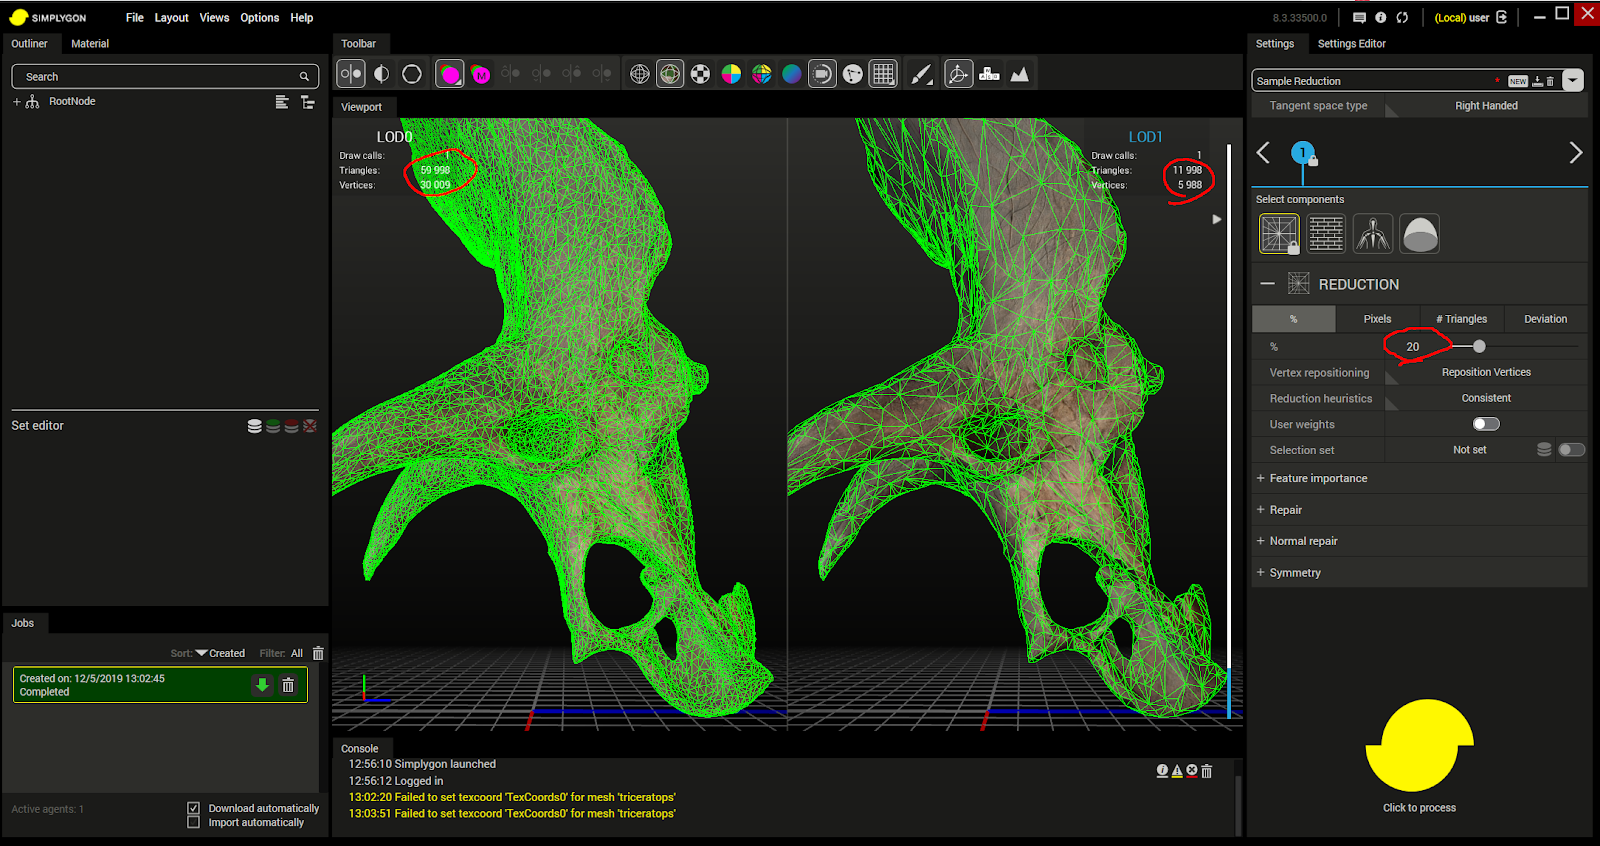
Left: Mesh data with high polygon count, Right: Mesh data with reduced polygon count
.
Since too many polygons will affect performance, it is necessary to reduce the polygon count as much as is acceptable for the work.
Lightening the mesh data (reducing the polygon count) cannot be done with the standard Unity functions; you must use external software such as Blender or Symplygon to lighten the mesh data (or there are Assets available in the Unity Asset Store that allow you to reduce the mesh data in Unity).
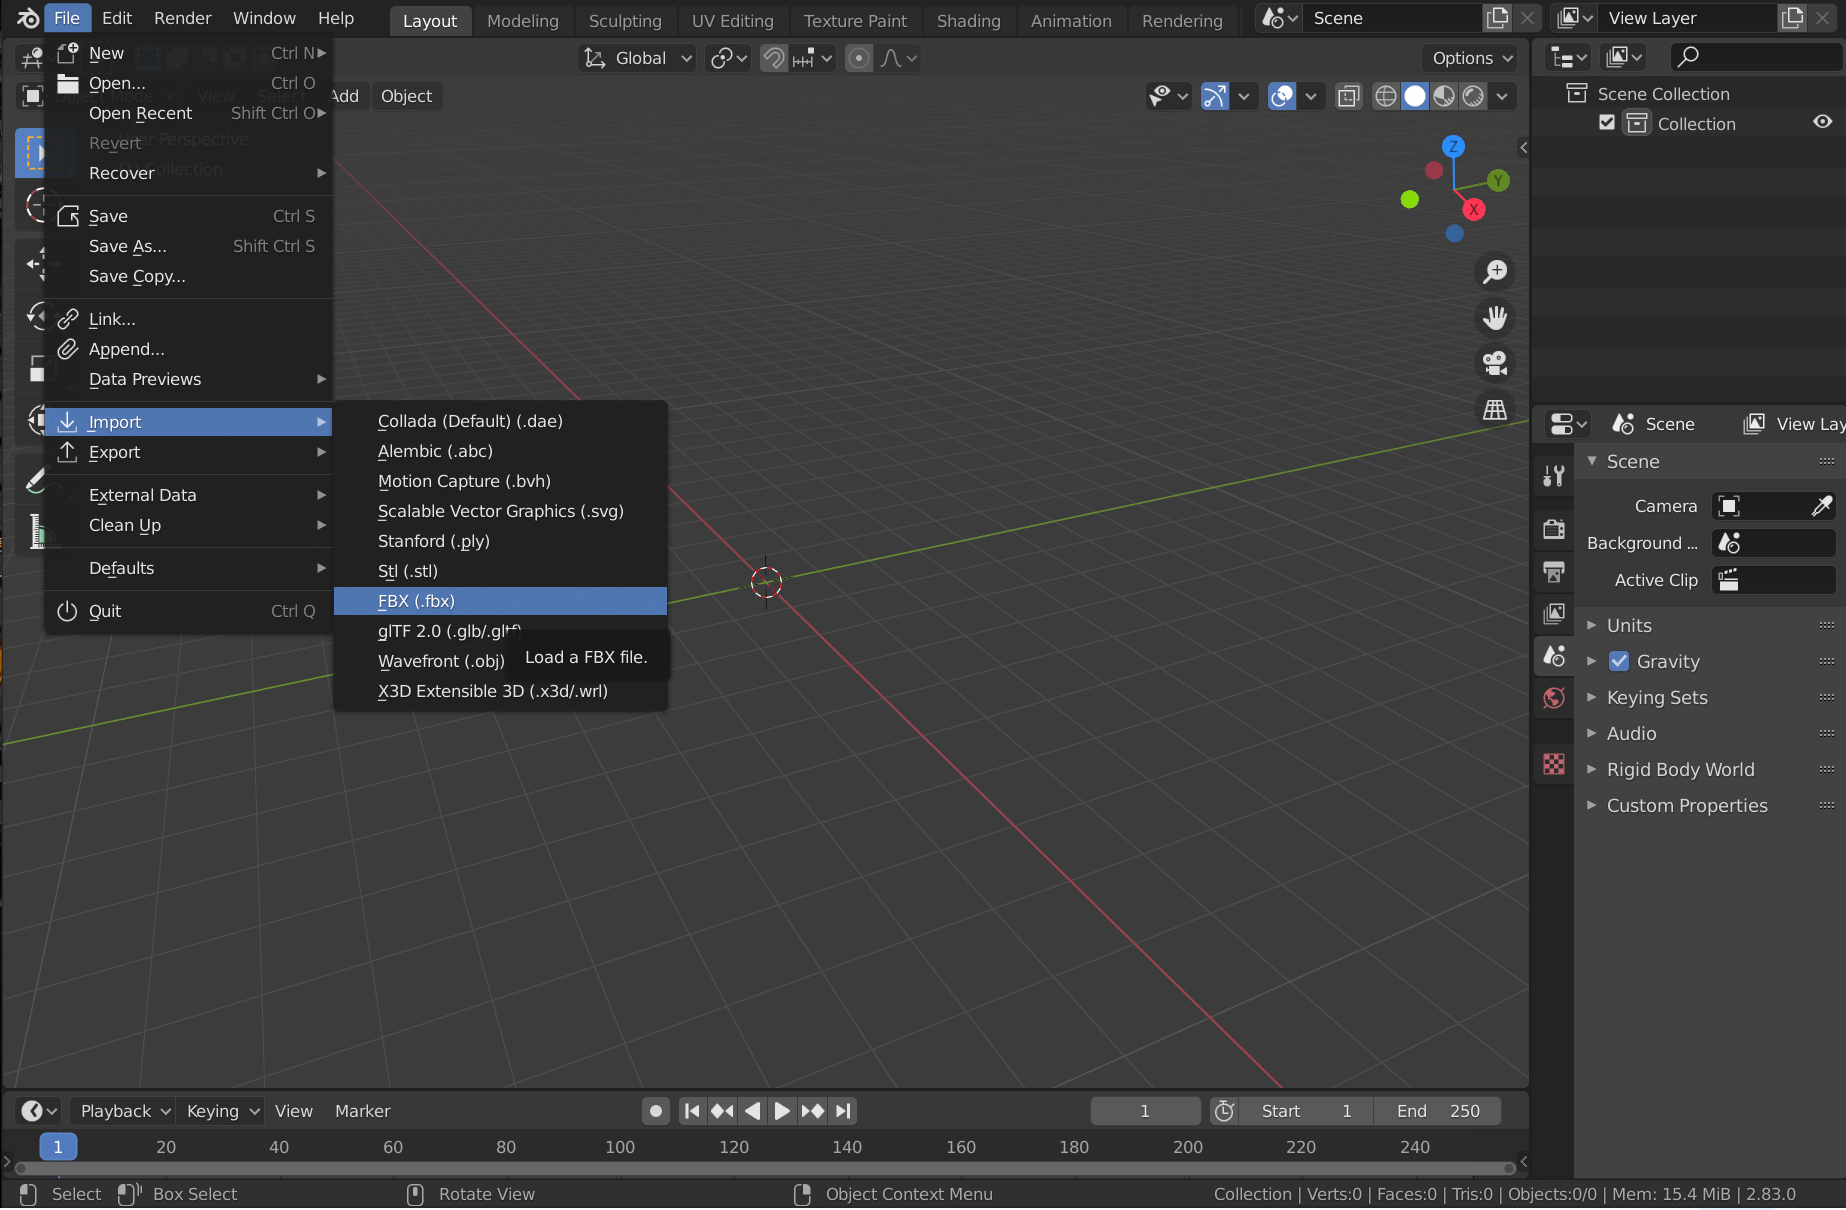
<Tips > Using Blender to reduce the weight of mesh data
Blender is a free 3D modeling tool that can be used to reduce the polygon count of a 3D model to make it lighter.
First, download Blender from the official Blender website.
After opening Blender, first delete unnecessary objects placed in the scene.
Next, import the 3D model whose polygon count you want to reduce.
Open File > Import and select the format of the 3D model to import.
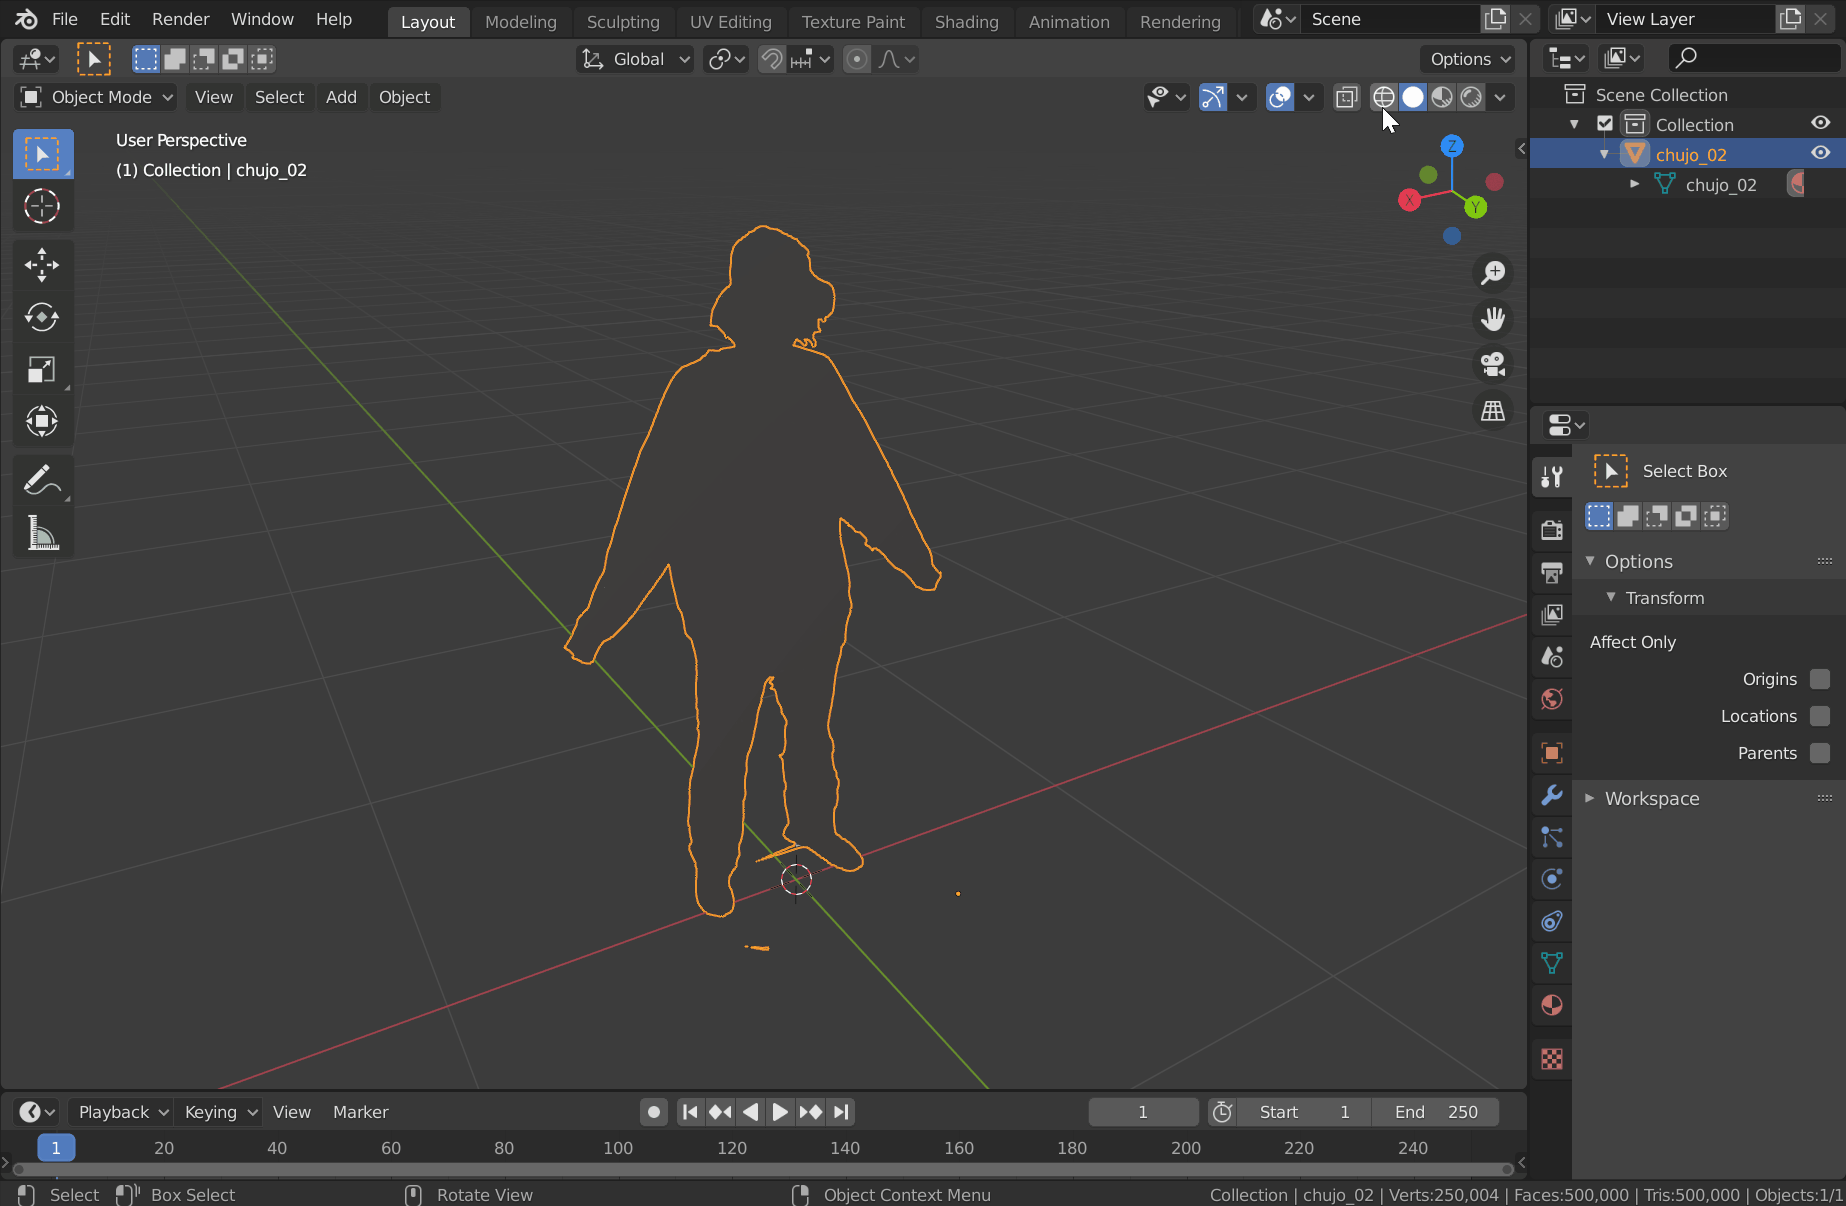
Once the 3D model has been imported, switch the display format to “Wireframe” to make it easier to work with.
Next, with the 3D model selected for editing, open the Modifier Properties in the Editor, open the Add modifier pull-down tab, select Decimate, and enter an appropriate value for Ratio.
Ratio 1.0 means 100%, and you can reduce the number of polygons by entering a smaller value.
(e.g.) Ratio 0.5 reduces the polygon count to 50%.
If Ratio 0.1, the number of polygons is reduced to 10%.
After a short wait, the process is finished and the polygon count of the 3D model is reduced.
If you look at the wireframe, you will see that the polygon count has actually been greatly reduced.
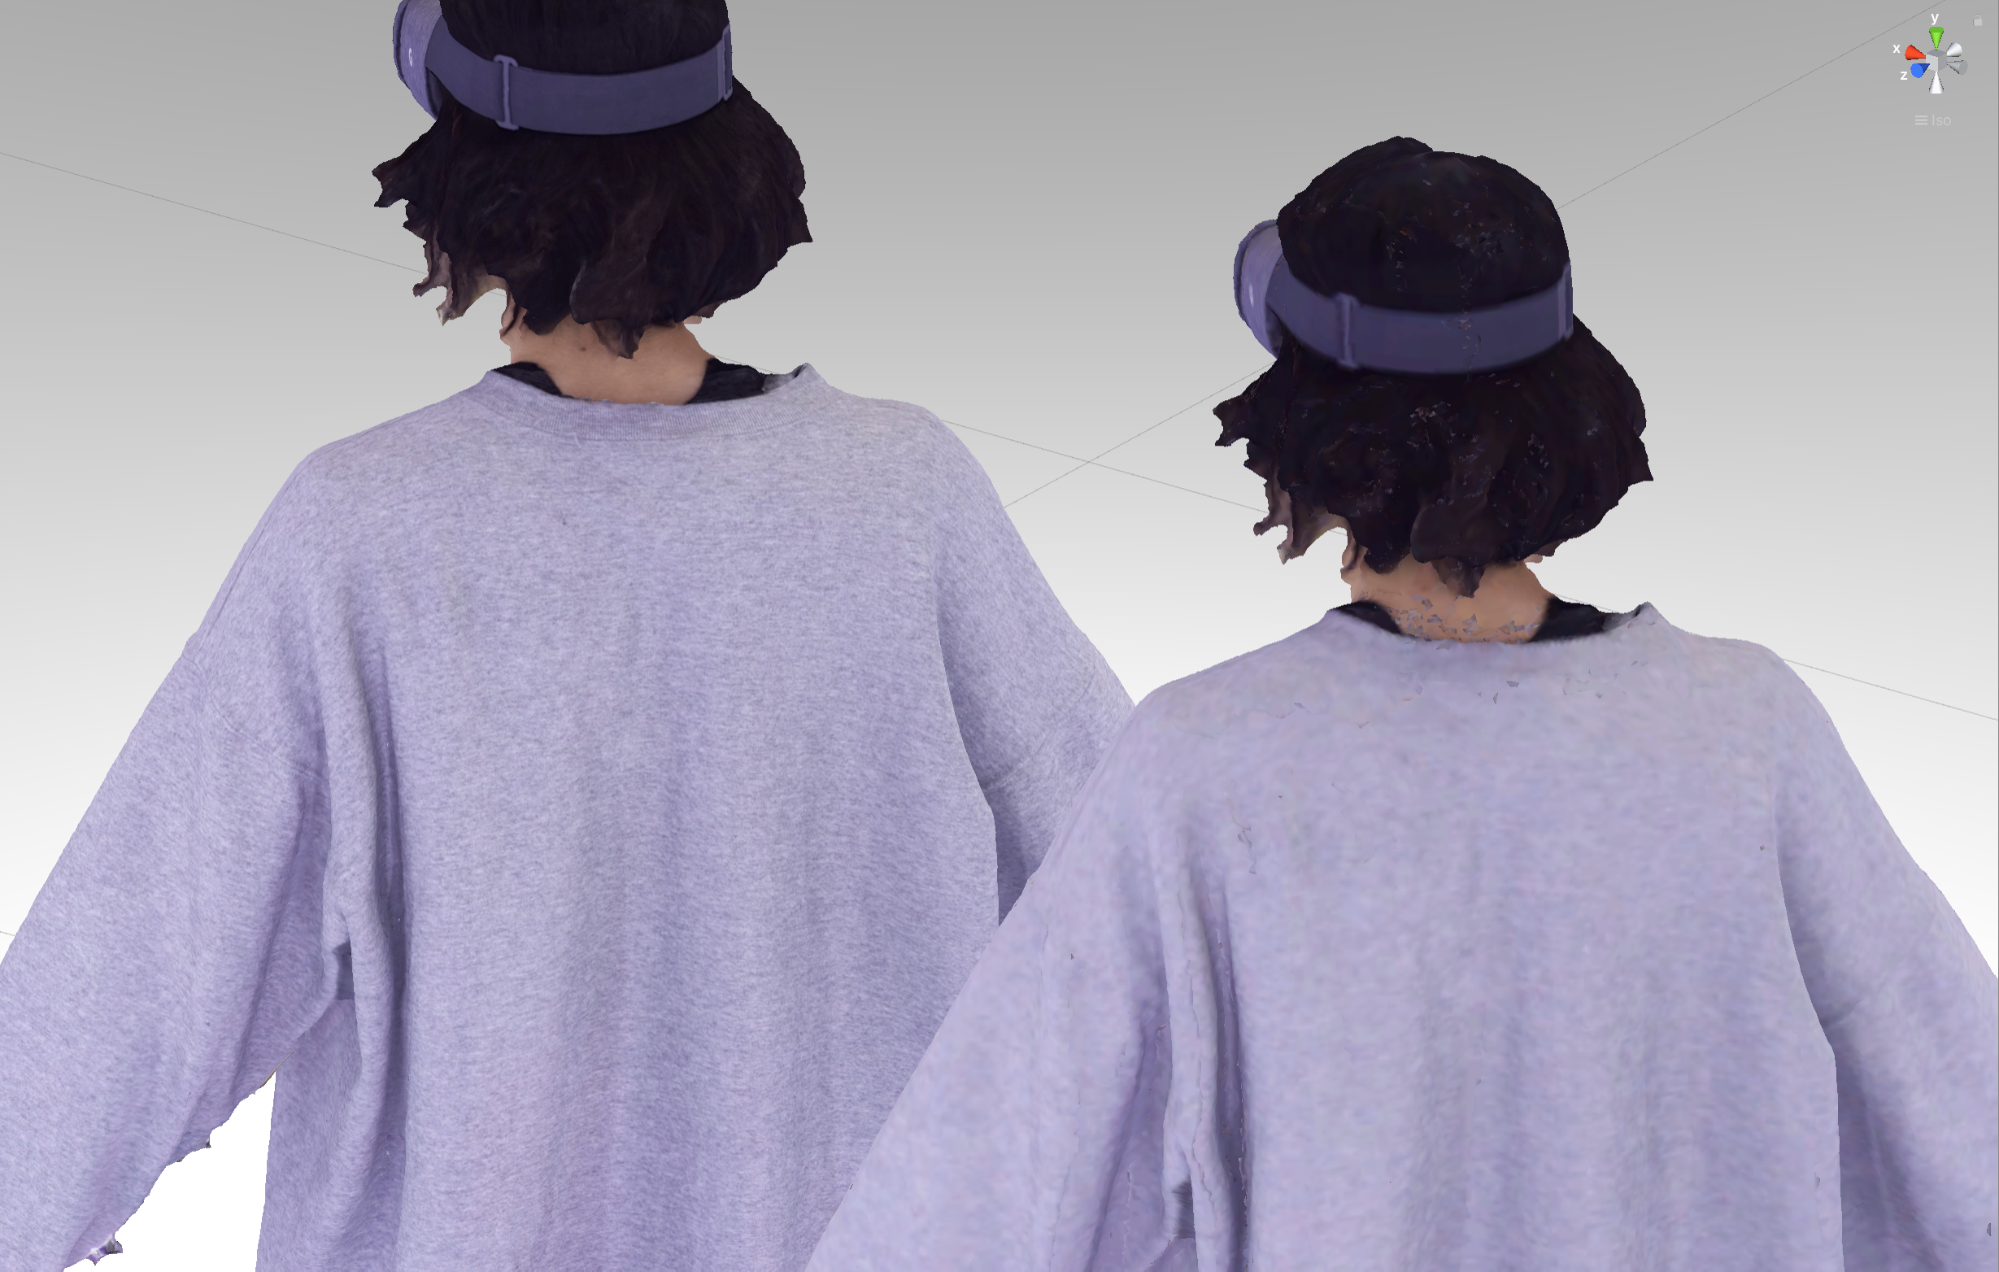
before reduction
After reduction
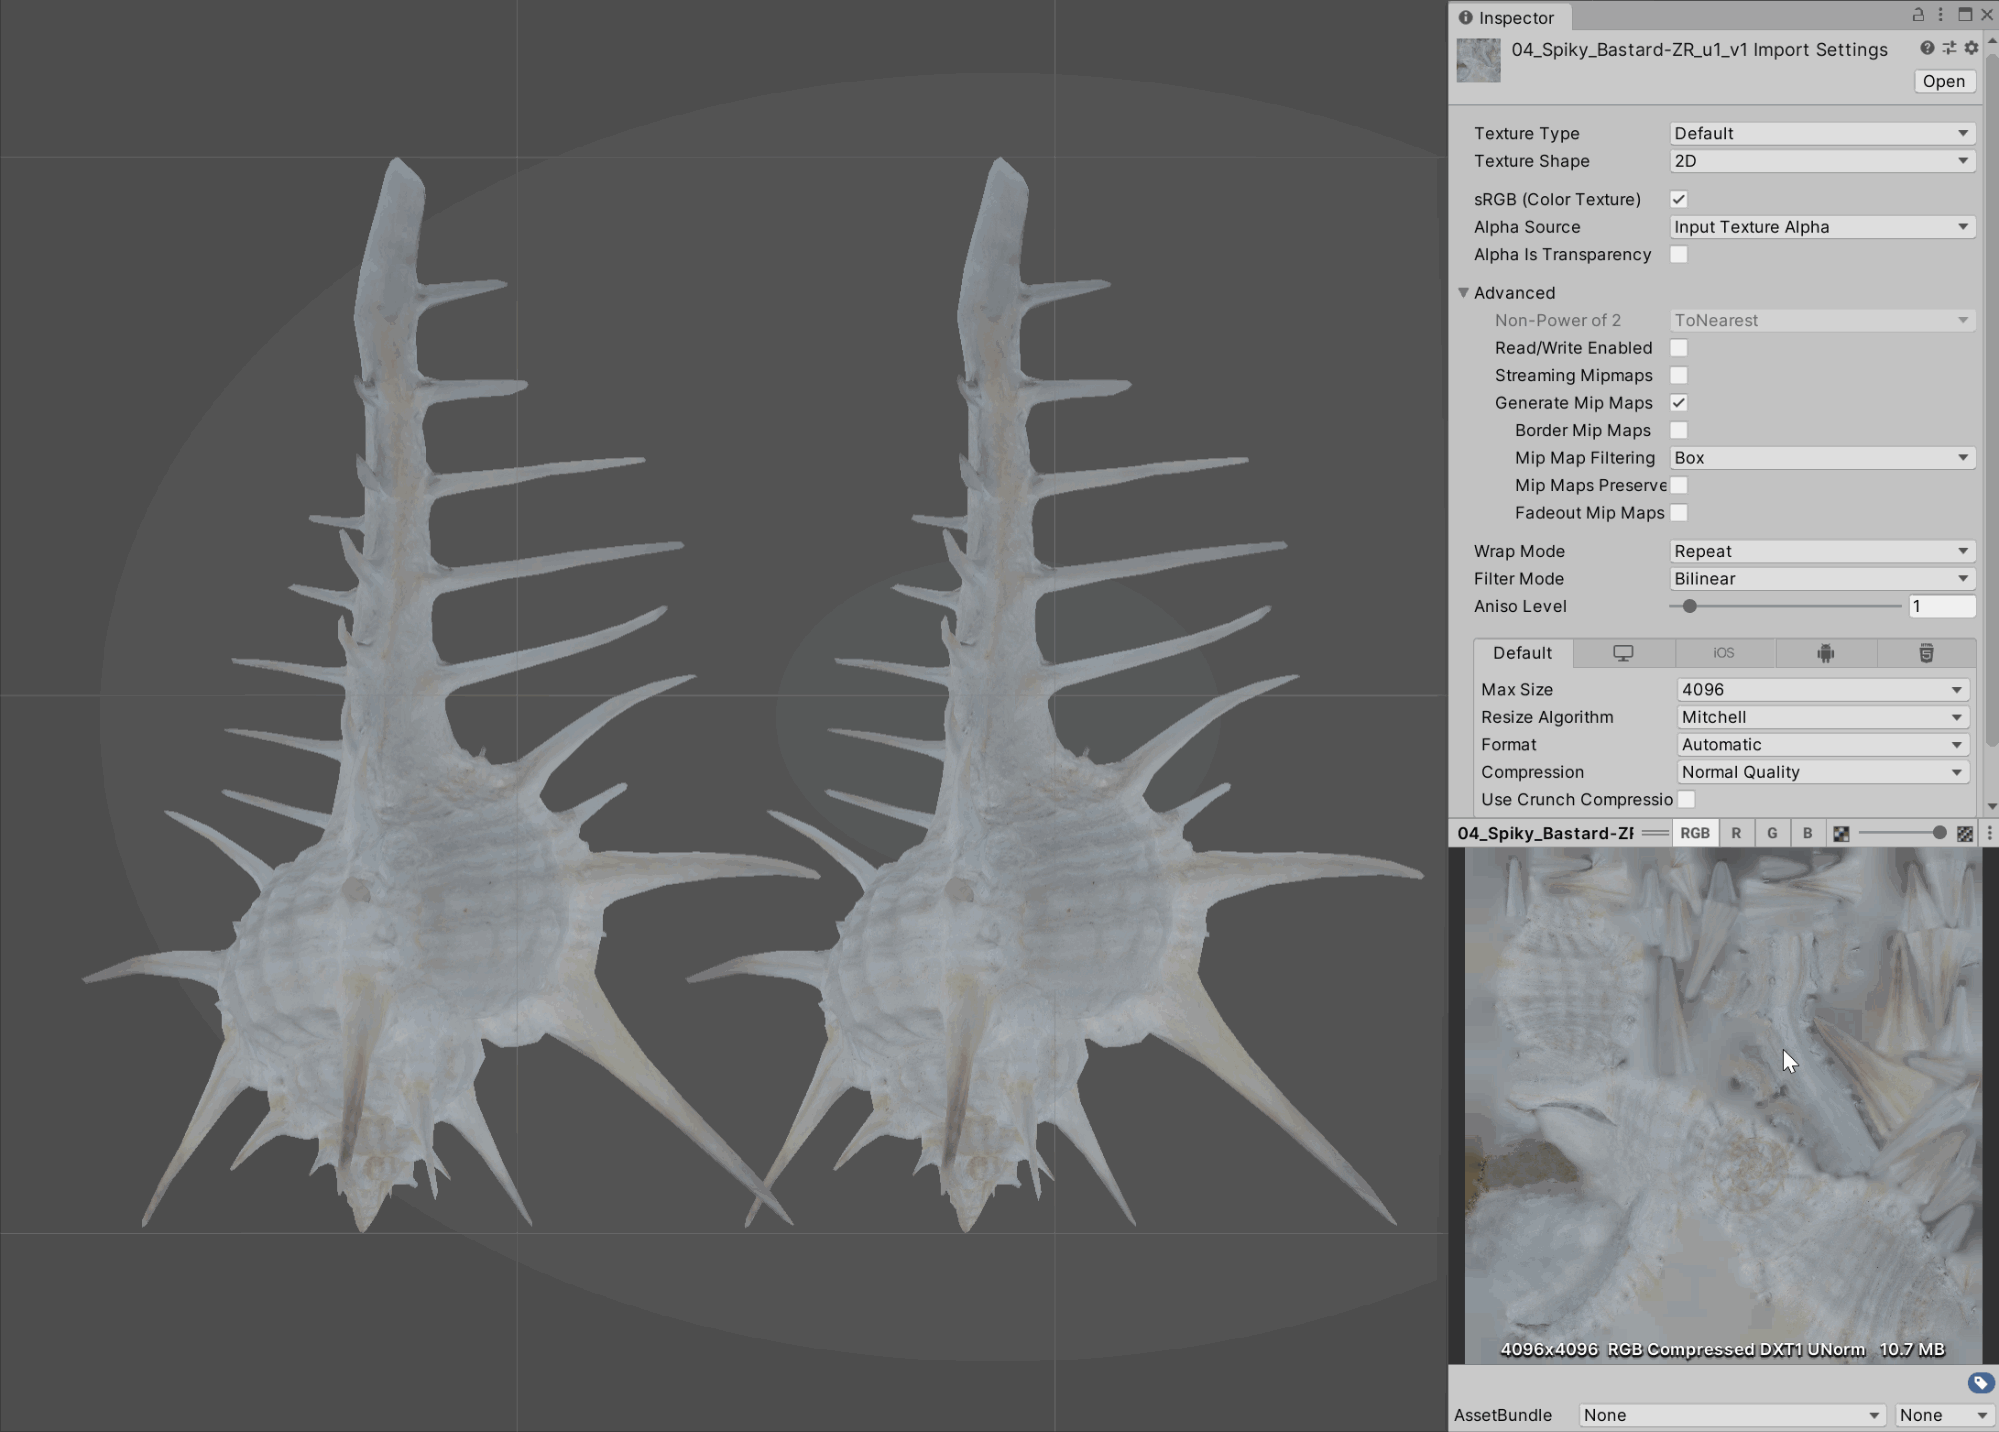
Lightweighting of texture data
Textures are image data that can be attached to 3D models or used to compose UI designs.
Naturally, the higher the resolution, the smoother the image, but too high a resolution can cause load.
Left: 8192*8192 (42MB) texture, Right: 1024*1024 (0.7MB) texture
However, when experiencing an artwork on a smartphone AR, for example, the screen is small to begin with, so whether the texture resolution is high or low may not make much difference to the appearance of the work.
In particular, when using assets purchased from an asset store, the texture resolution is usually set too high for the high end of the market, so it is necessary to change to an appropriate resolution.
Switching texture resolution can be done from the Unity Inspector Window (hereafter referred to as the Inspector).
There is a Max size item, so open the pull-down menu, select the appropriate resolution, and press the Apply button.

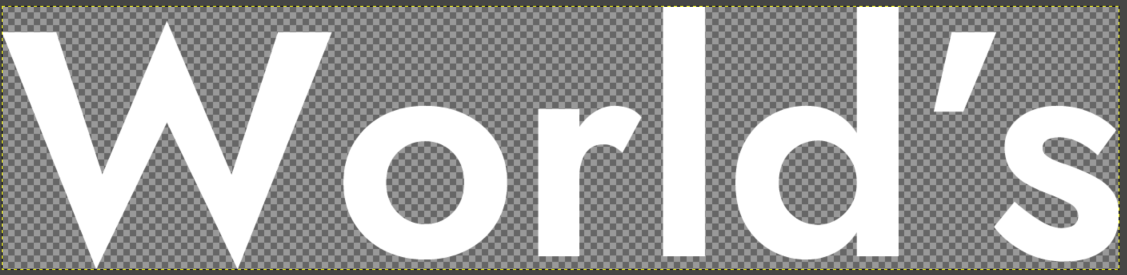
<Tips>Reduce the waste of textures
When using Unity for the first time and creating your own image data, it is easy to waste data.
For example, in the following transparent image data, there is waste in the blank space around the text.
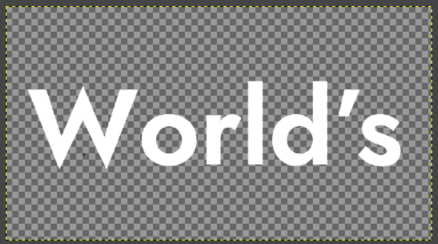
When creating texture data, try to minimize the amount of waste.
<Tips>Turn off the Mip Map setting.
Unity has a feature that generates multiple smaller versions of the original resolution texture and changes the resolution of the texture appropriately depending on the distance.
However, when rendering on a small screen such as in AR, the texture size is rather large, which can lead to a heavy load.
If you are not particular about this, you can turn off the Mip Map setting to save space.
The Mip Map setting can be done from the Unity inspector: select the Mip Map setting for the texture you want to change in the project window and open the inspector.
The checkbox for the item Generate Mip Maps is checked by default, so uncheck it and press the Apply button.
Review the use of Unity’s high-load features.
Unity offers a variety of features that can enhance the quality of your scene, but you should be aware that each of these features can increase the load on your scene.
Lights and Shadows
Lights and shadows are important elements that add realism to a scene, but they can be very expensive to use, especially when rendering shadows in real-time.
If you find that your lights are overloaded, you should review the following points
|
Category |
|
|
Number of lights |
Heavy use of lights results in high loads, so the easiest way to lighten the load is to reduce the number of lights you use. |
|
Use of Shadows |
Real-time shadow rendering can be very demanding. |
|
Use baking |
Real-time lighting can be very demanding, so Unity offers an option called baking. |
Review the use of PlayMaker.
Refrain from structuring the FSM in such a way that high-load actions run every frame.
This is an extreme example, but the FSM is structured to run the “Find Game Object” action over and over again, which is not very demanding if the number of objects placed in the scene is small, but creates a high load if a large number of objects are placed in the scene.
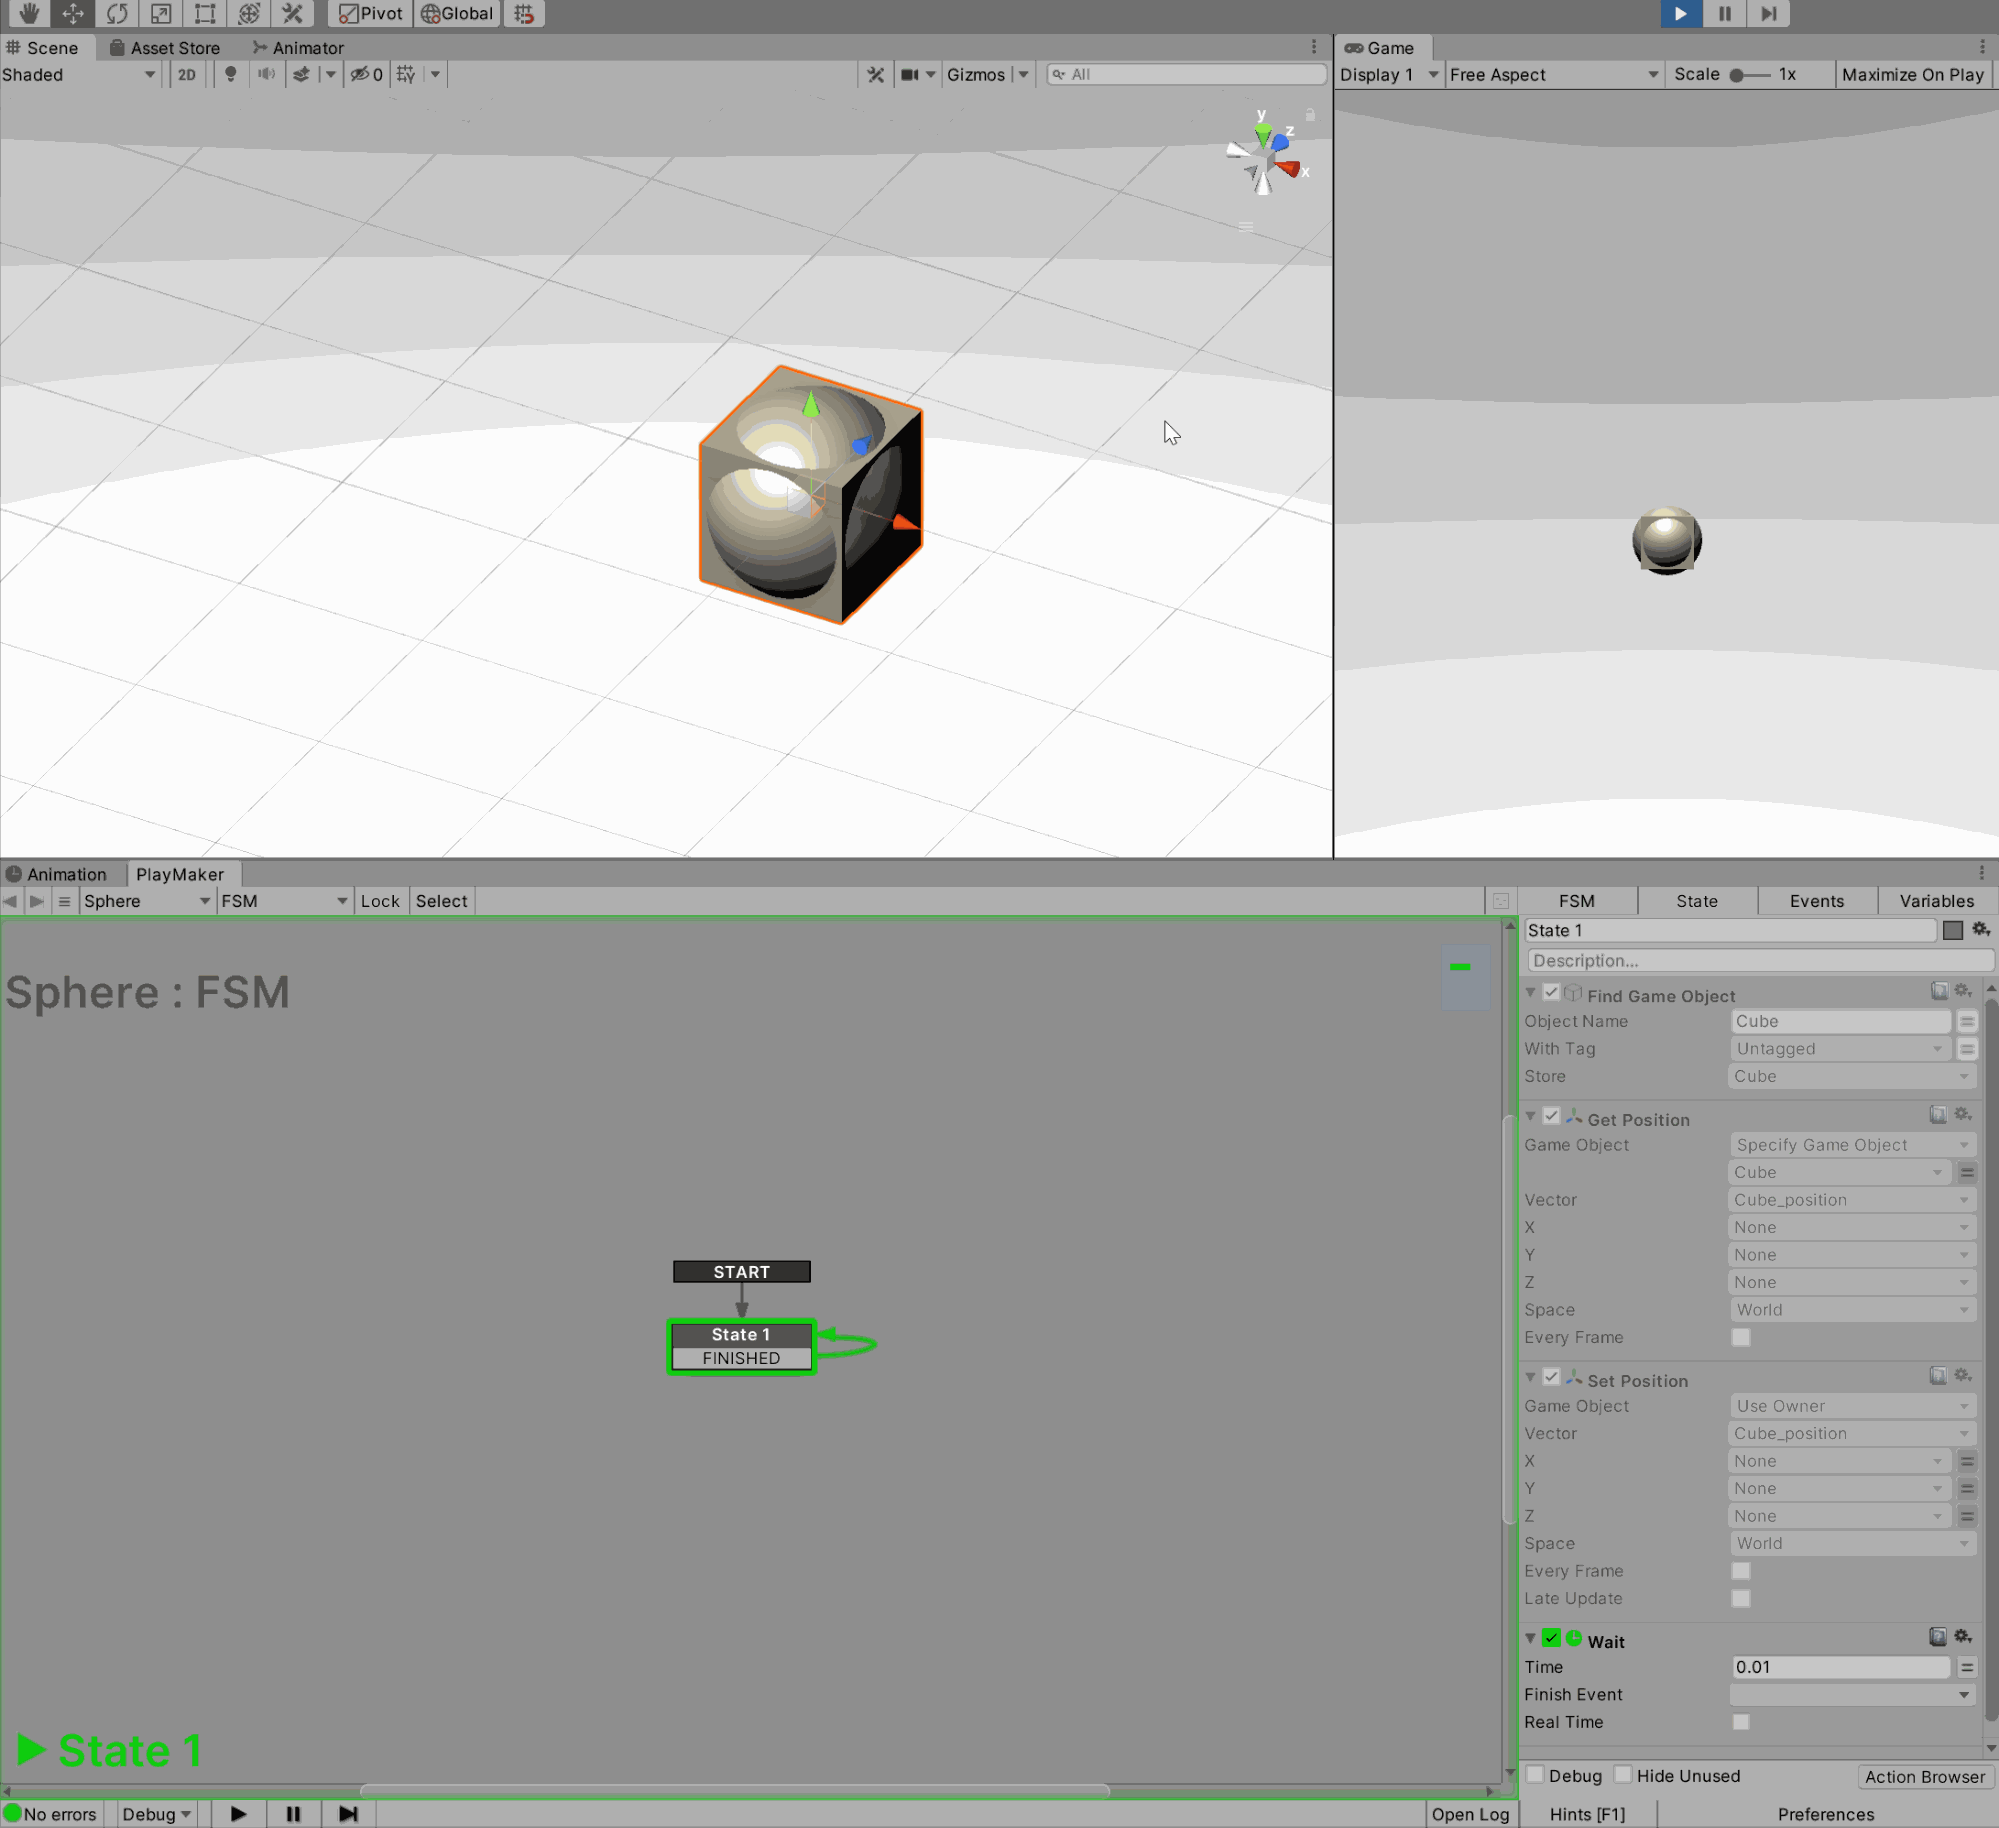
Sphere following Cube
This FSM structure can be modified as follows to reduce the load by reducing the execution of the “Find Game Object” action to a single run while producing the same result.
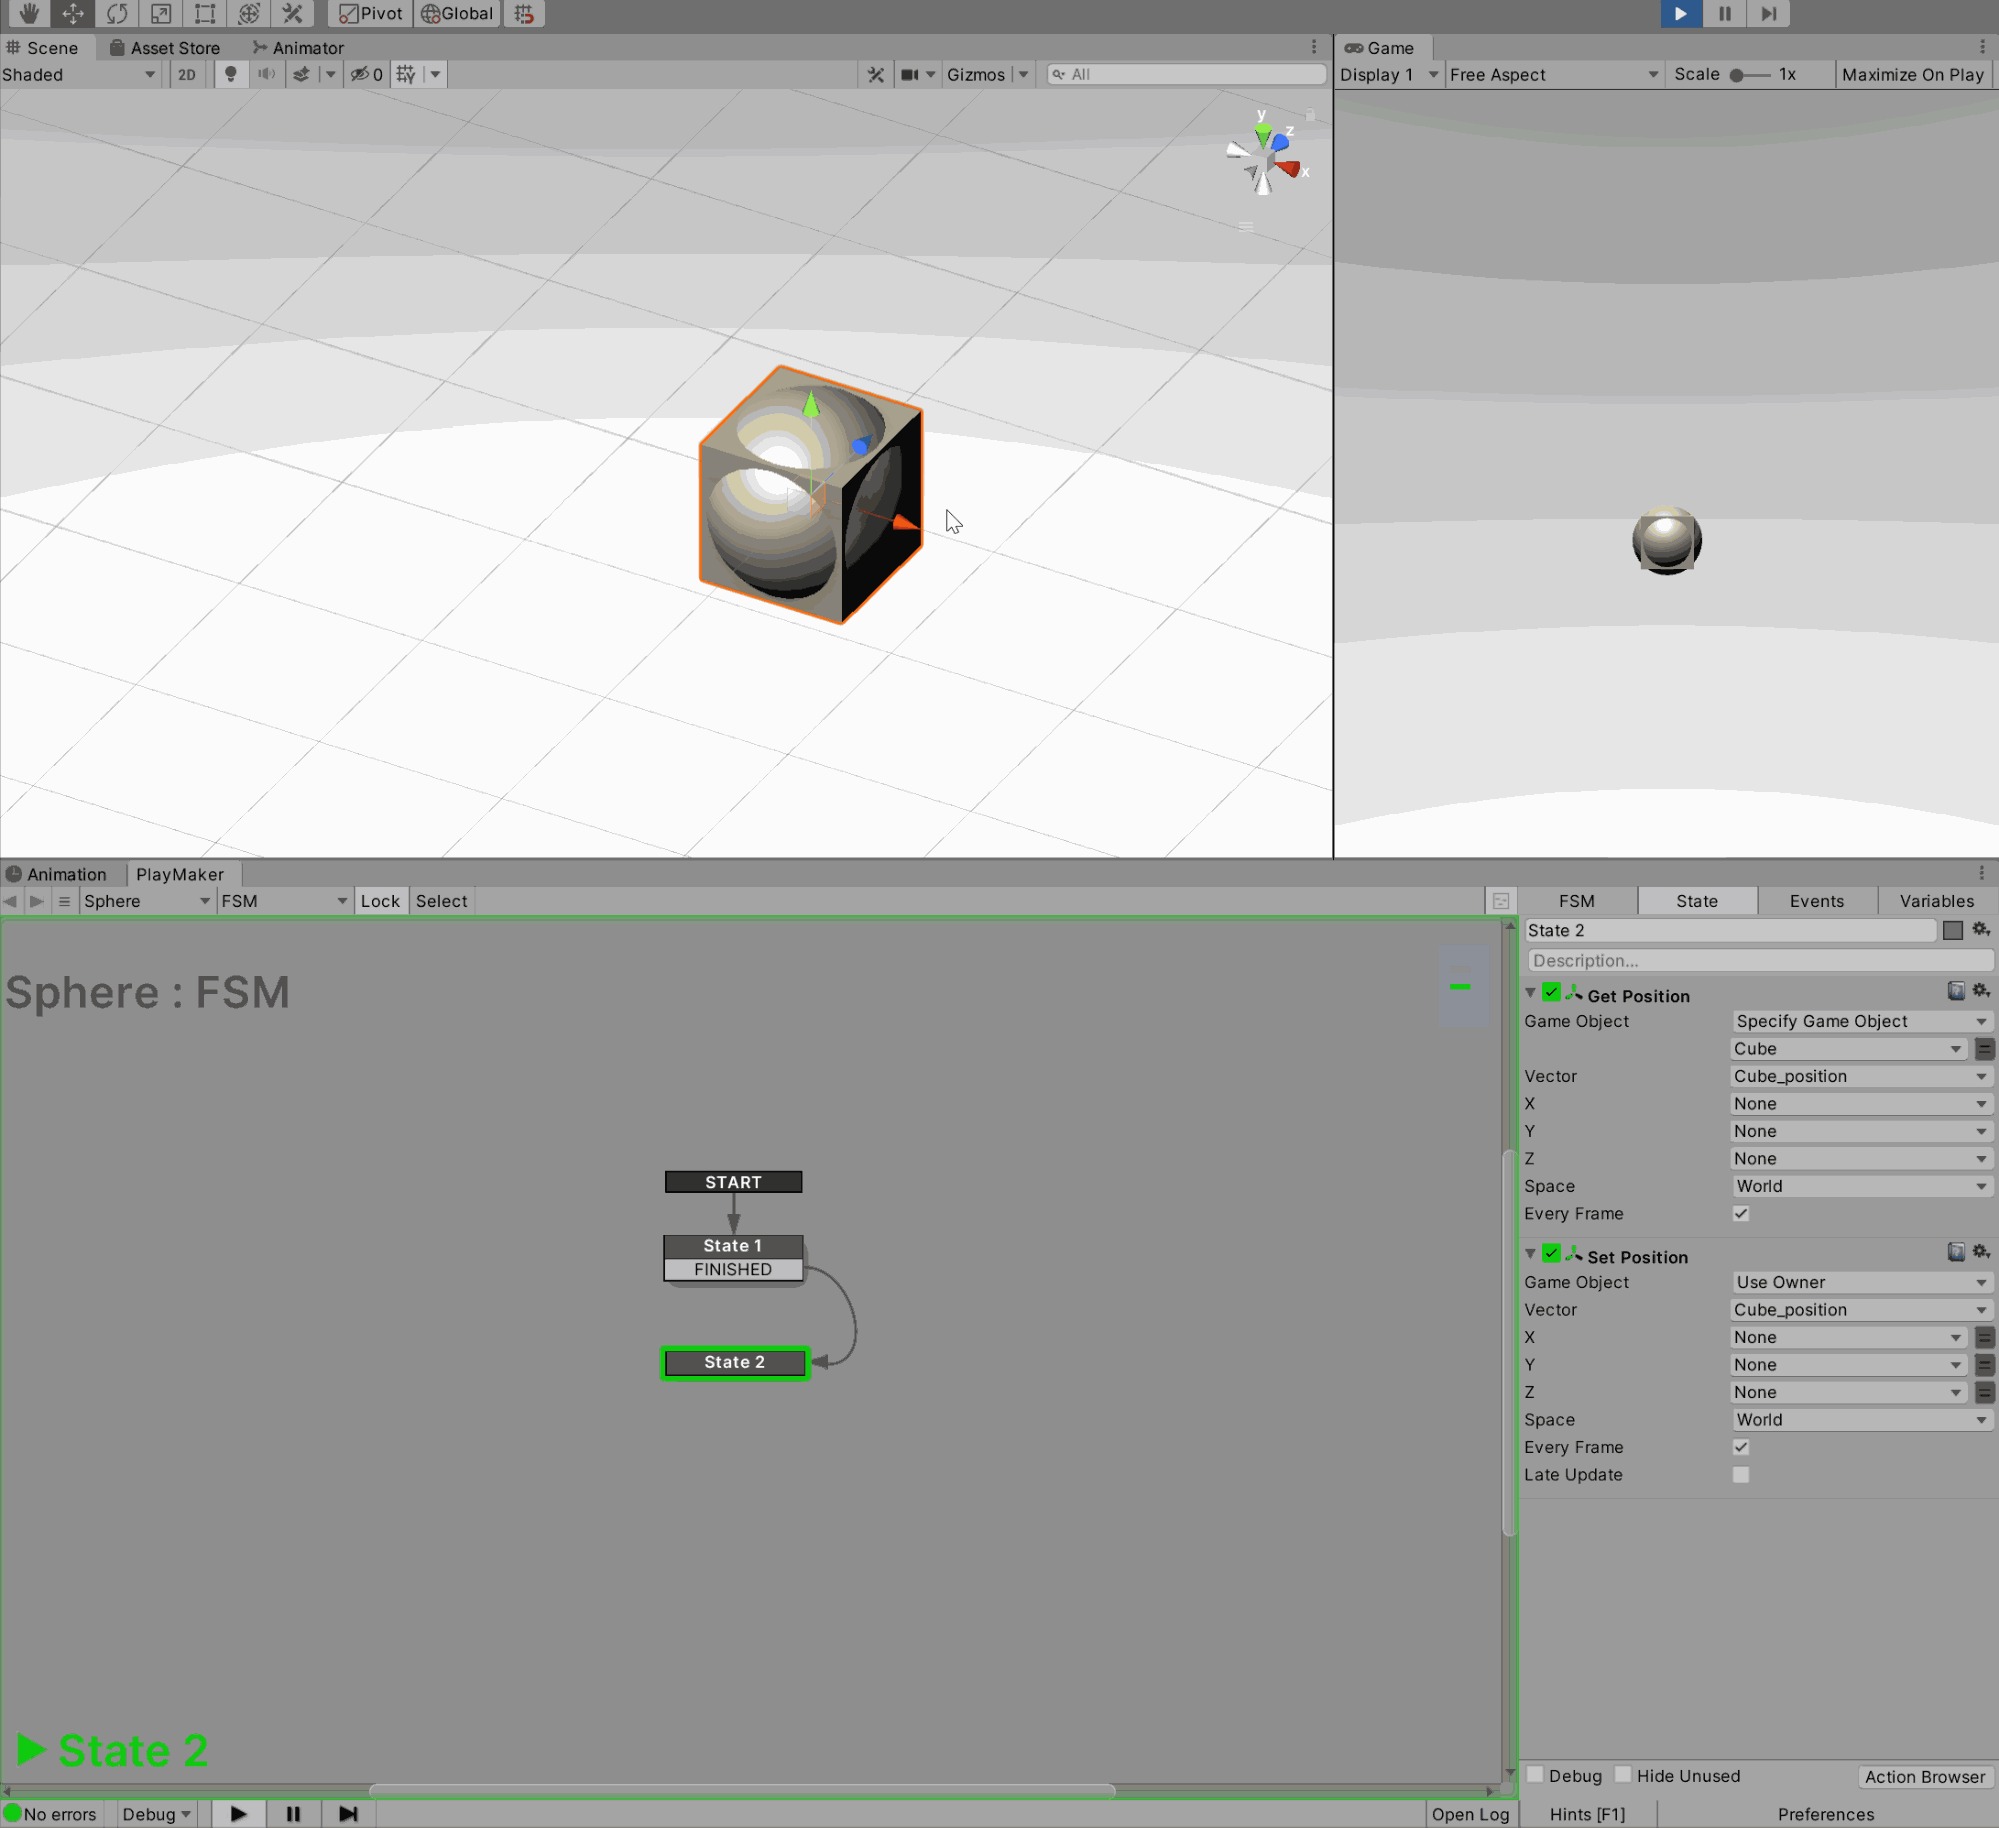
Sphere following Cube
When assembling an FSM in PlayMaker, it is necessary to keep in mind that each action creates a load and to keep a lean structure in mind.
An example of a high-load action
|
Category |
|
|
Create Game Object |
Create Game Object is an action that creates a new game object in the scene. For example, if you can replace it by placing the object in the scene beforehand |
|
Find Game Object |
Find Game Object is an action that searches for objects in the scene. |
This concludes the basic section on scene lightening.
By properly lightening your scenes, you can make your work more enjoyable to view, and although it may seem difficult at first, once you get the hang of it, you will be able to create lighter scenes without even thinking about it.
For more advanced content, links to the official Unity documentation are provided below.
If you read them and understand Unity’s rendering mechanism in depth, you will better understand the key points to be considered for scene weight reduction.
Optimizing Graphics Performance-
This is an official document that outlines techniques for improving scene performance
Rendering Statistics Window-
How much load is being placed on the scene?
This is a document about the Rendering Statistics Window, which allows you to check numerically how much load is being placed on your scene.