In this article, I will introduce the steps needed for rigging and setting animation using mixamo to 3D characters made from our company’s 3D scan, and uploading the data to STYLY.
In this example, we will be using obj format data, which you can also find and download from the site “Sketchfab” (which is something like the 3D model version of Youtube, really useful), and breath new life into 3D characters.
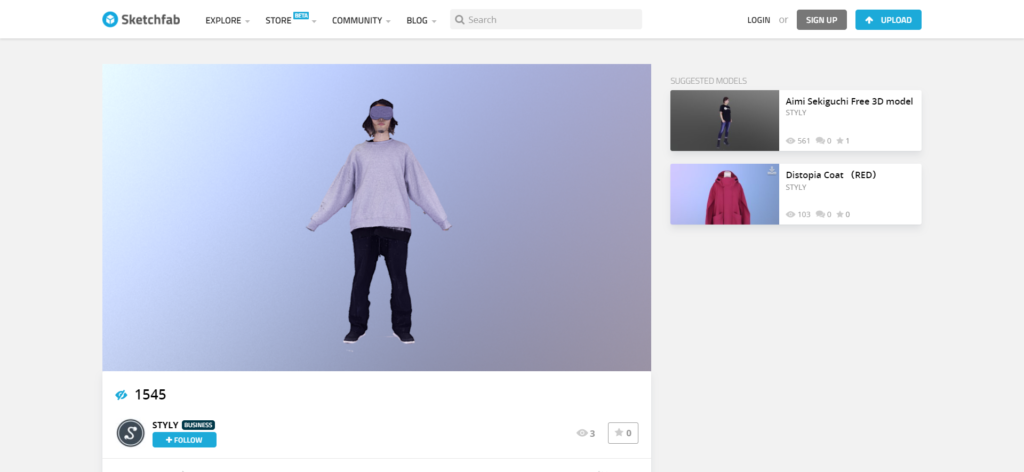
sketchfab screen
Preparation
First of all, we need two types of data.
- 3D character data(.obj)
- Texture image(jpg or png)
※ In order to move the 3D character data smoothly using mixamo, a T-pose like the one in the sketchfab screen above is recommended.
What is mixamo?
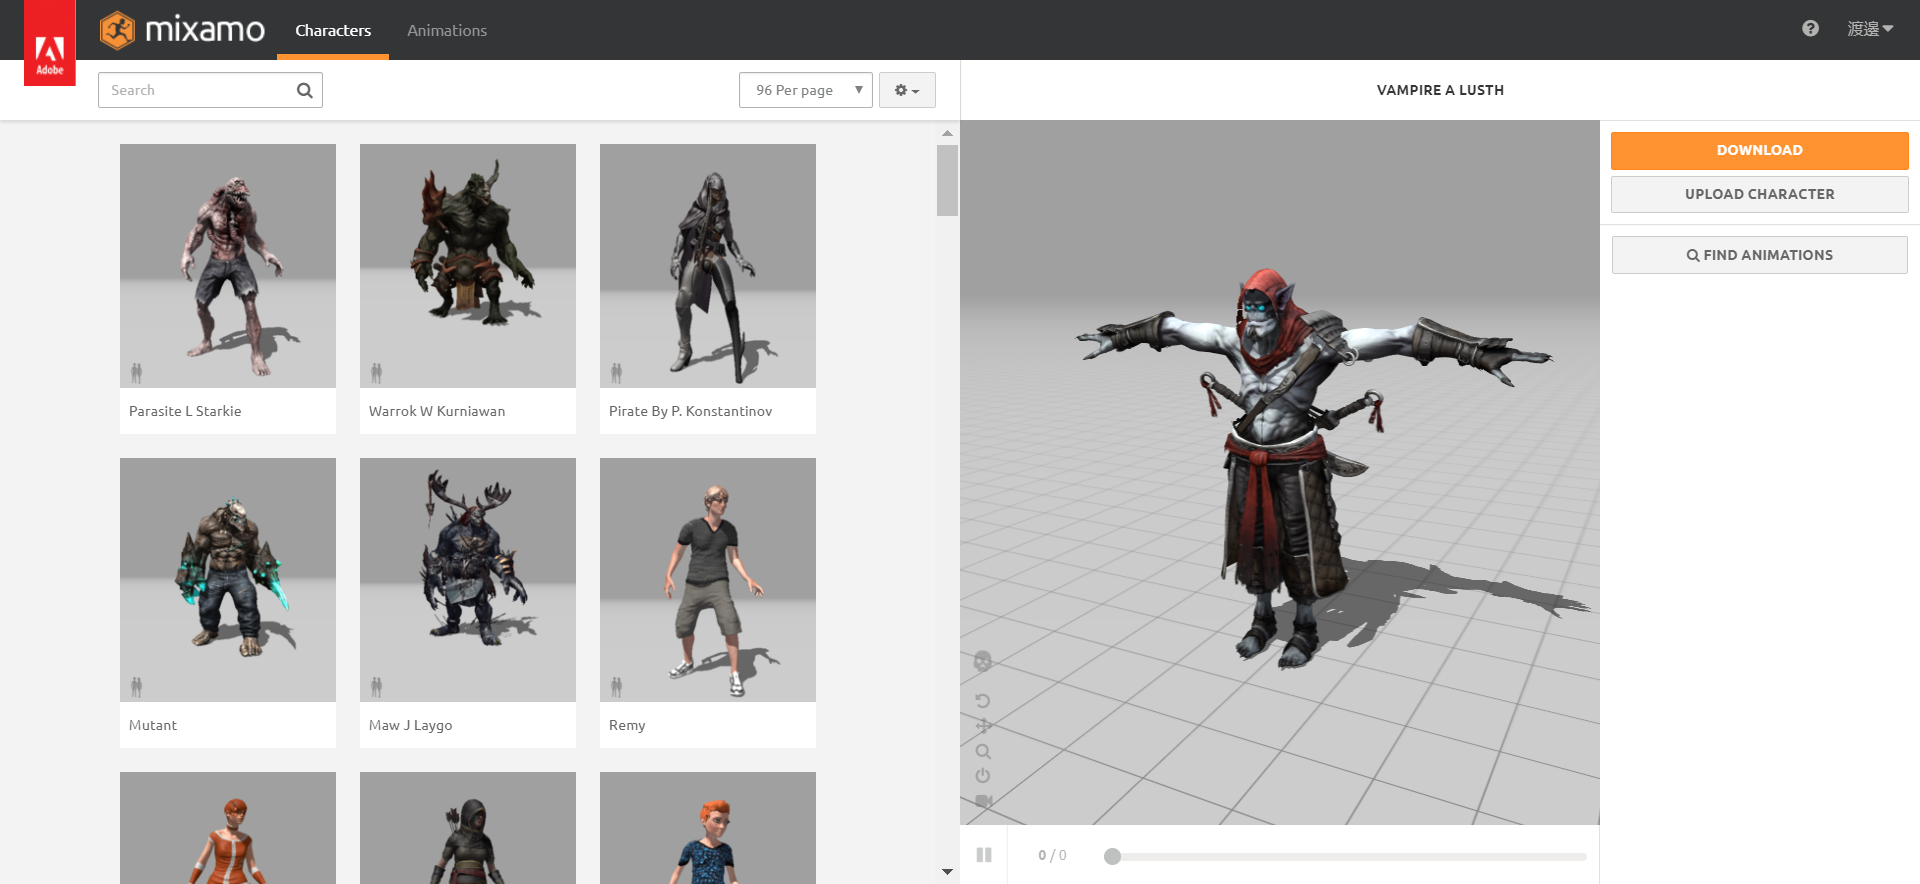
setting animations is easy with mixamo
Mixamo is a web service which you can use to customize and set animations to 3D characters. It was acquired by Adobe in 2015.
The user is able to perform rigging (process of creating bone structures of a 3D model) and setting animations such as running and dancing, sport animations to 3D characters, without needing to use special skills.
Using Blender for positioning, and converting to .fbx format
Blender is a free 3D creation suite, which can be used for modelling, rendering, animations, setting effects, and more. We will use Blender to move the 3D character data to the front, and convert it to .fbx format.
How to download Blender
- Access the Blender download page from here.
- Download the zip file suited for your environment.
- Unzip the file, and run “blender.exe”
※ To check your operating system information, select the Start button, then select Settings > System > About and check under Device specifications.
Positioning settings
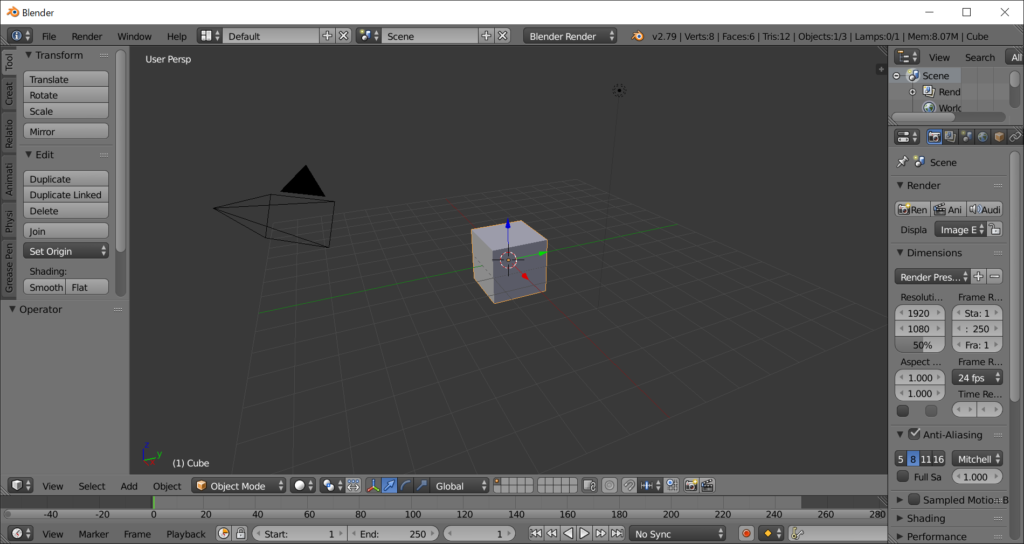
Blender screen
First, delete the cube object in the center of your screen. Next, go to File > Import > Wavefront(.obj)and import the 3D character data.
Once the import is completed, select the “+” button on the upper right, and open the Transform menu.
Blender screen
After that, make sure that the 3D character in the hierarchy list is selected, and change the values in the Transform menu, so that the 3D character position comes to the front.
- Rotation X: change from 90° to 0°
- Rotation Z: change to 215°
- Location X: change to 0.4° / Y: change to 0.4°
※ The values will depend on the 3D character, so use the above values as a reference, and change the values according to your character. As for the center, look at the bottom left on the screen , where you will find the X/Y/Z values, and make the character look at the X axis.
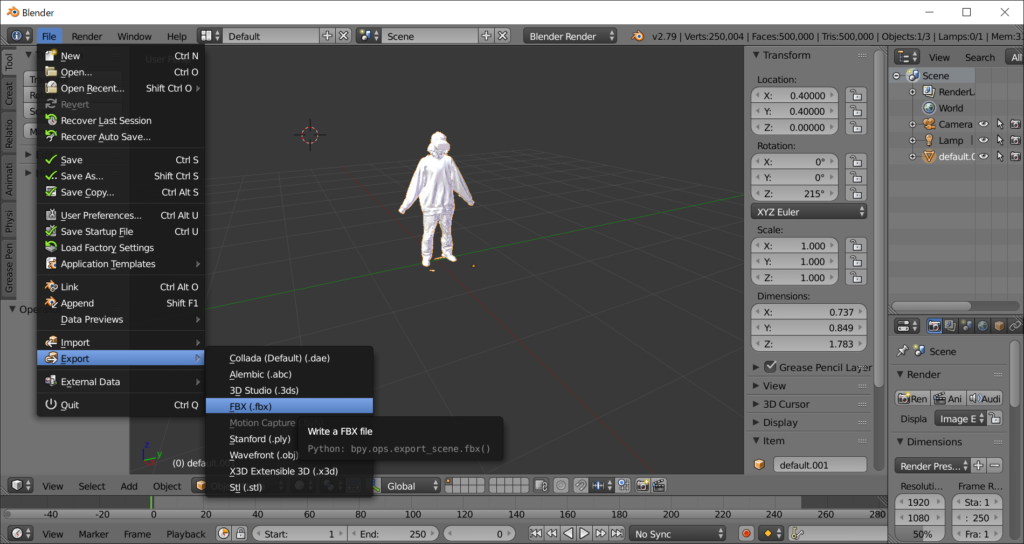
Zip the .fbx data and texture image data
Go to File > Export > FBX(.fbx)and export hte data as a fbx file. Next, put the fbx file and the texture image file (from the preparation step) in a folder, and zip it.
Rigging and setting animation with mixamo
We are done with the preparation, so let’s go to the next step, rigging and setting animation using mixamo.
Access mixamo, and click signup to make a new account, or click Login to sign in using your Facebook or google account.
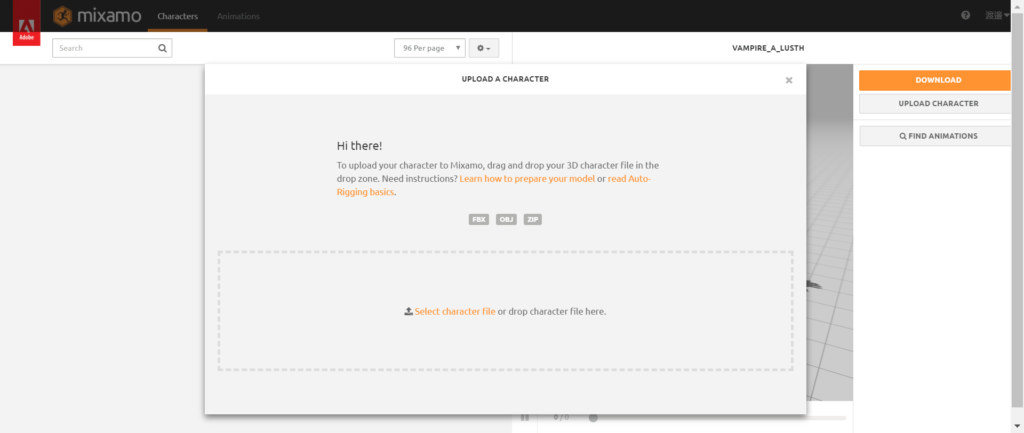
mixamo upload screen
After you login successfully, select the [UPLOAD CHARACTER] button. An UPLOAD A CHARACTER screen will popup, so drag in the zip file you created, and upload it to mixamo.
※ The upload process will take 1 – 2 minutes.
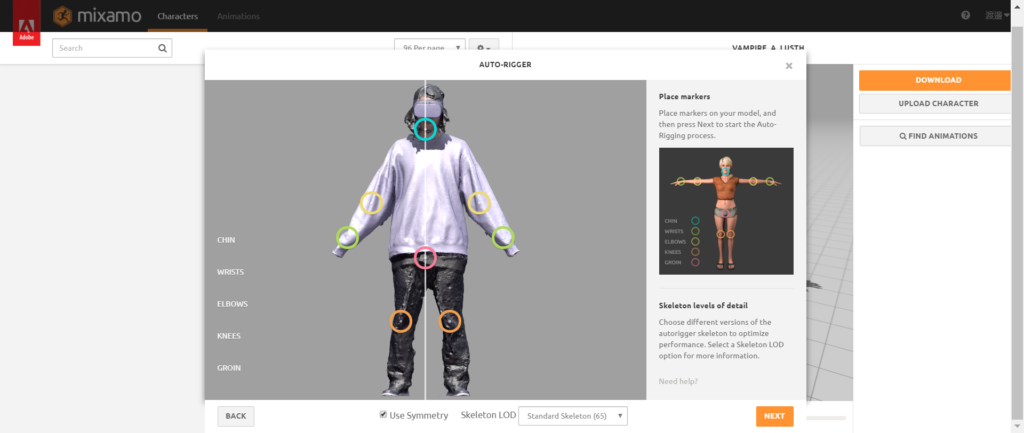
mixamo rigging screen
Once the upload is complete, the next step is rigging settings.
Refer to the above screenshot, and set the colored markers to appropriate positions for your 3D character. (Blue: Chin / Yellow: Elbows / Green: Wrists / Red: Groin / Orange: Knees)
If you need to move a mark singularly, remove the check from the Use Symmetry checkbox. Click NEXT when you’re done.
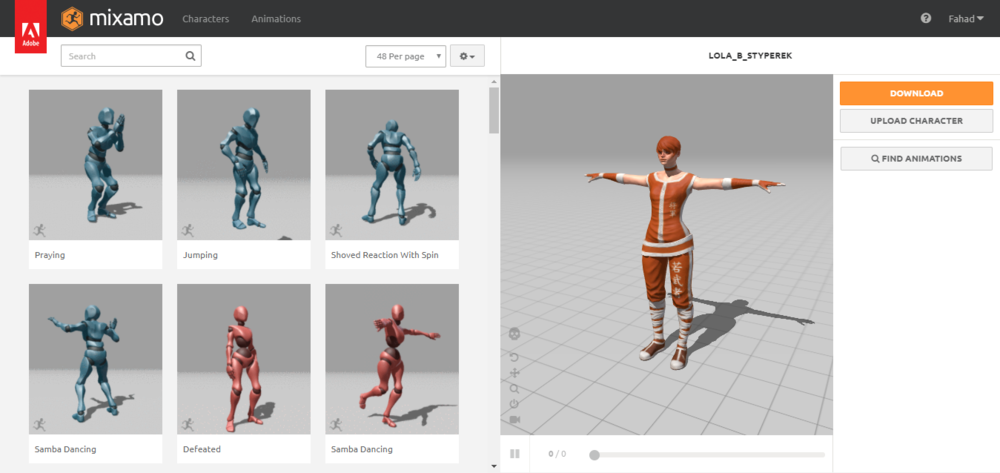
mixamo animation setting screen
The next step is to set animation to the 3D character.
Click “Animations” from the upper left, find an animation you like from the list of animations, and click it.
You can also search an animation from seven categories, from the Search bar.
If you don’t have a 3D character data with you, click the Characters button at the upper left to use the 3D character data uploaded by mixamo. You can add animations to the sample characters, just as you would to a character you uploaded.
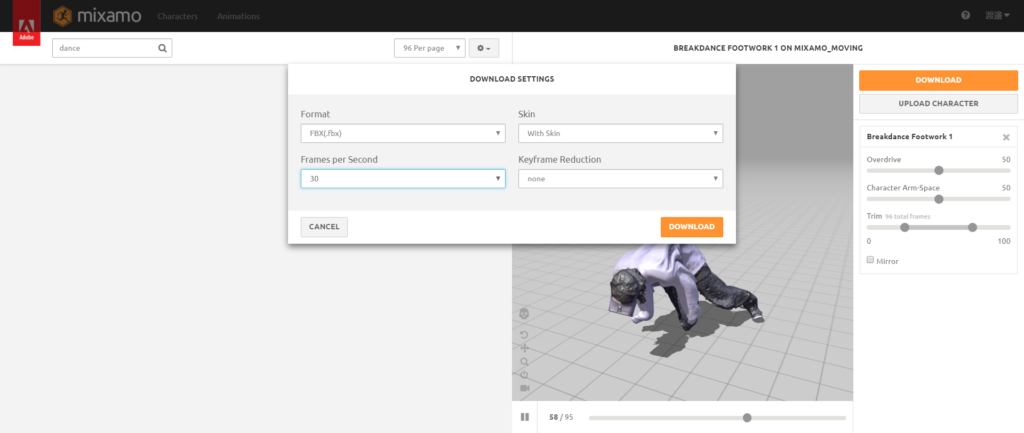
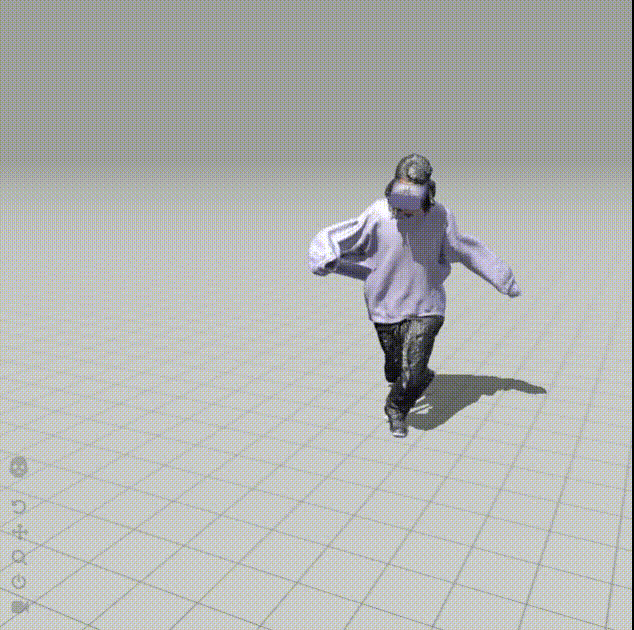
After you finish setting animations, click the DOWNLOAD button, and download the .fbx data file. If you want to import the data to Unity, select the FBX for Unity(.fbx) format. By importing to Unity, you can change and improve the texture quality of the 3D model.
※ There is no need to change the default download settings.
※For details about changing and improving the Mixamo texture data read this article:https://styly.cc/tips/styly-mixamo-texture/
Uploading to STYLY
Access STYLY, and launch the STYLY Editor.
※ How to make an account for STYLY:https://styly.cc/manual/styly-account-create/
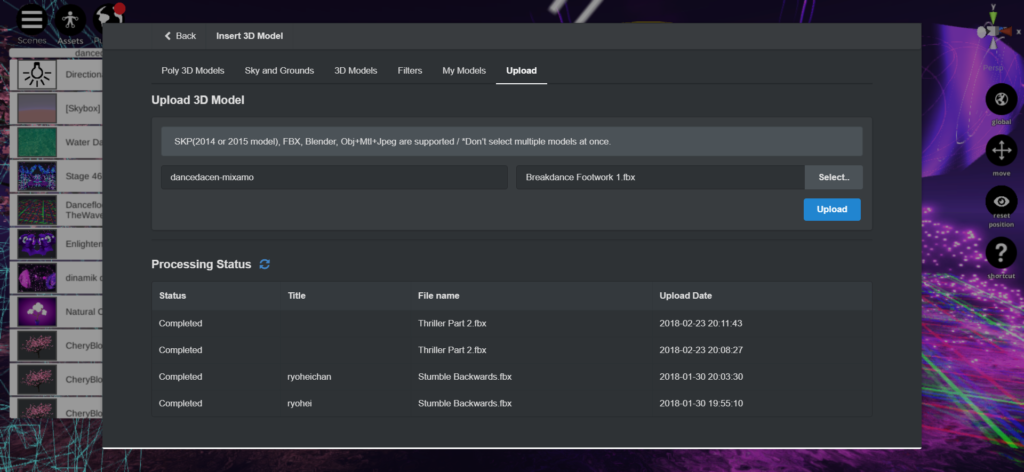
Go to Assets > 3D Model > Upload and upload the 3D character data you just made.
When the processing Status becomes Completed, the upload is finished.
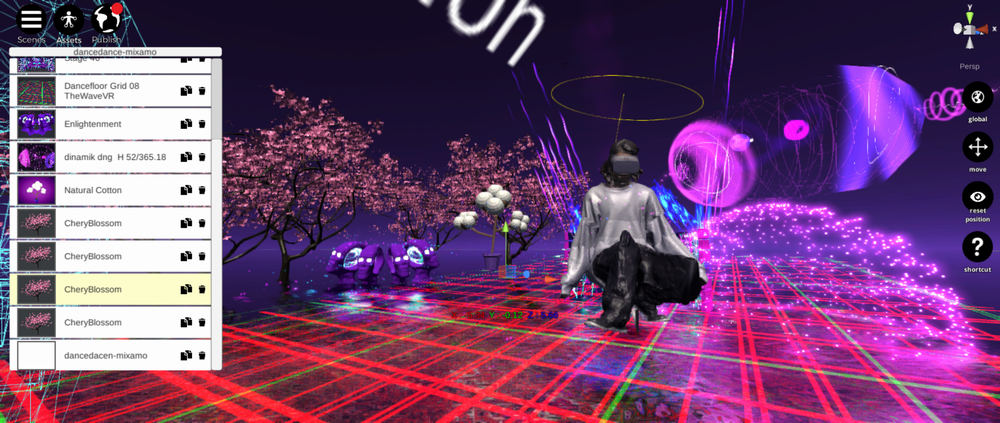
The uploaded 3D character data can be accessed in My Models, so click it to move 3D character around in STYLY.
※ How to create a Scene in STYLY:https://styly.cc/manual/scene-create-tutorial/
How about using mixamo and STYLY to create a VR music promotion video?