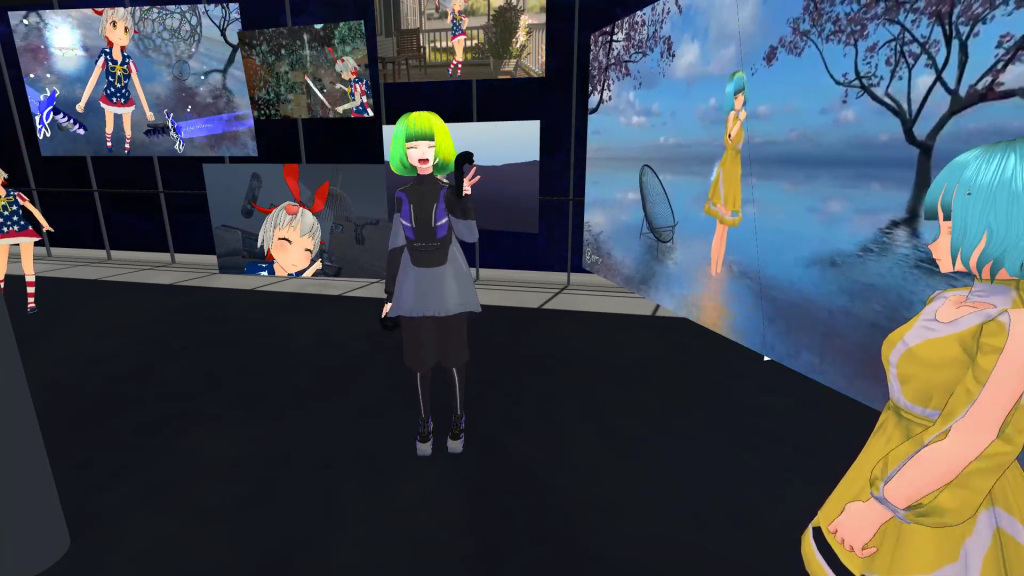
In this series, I will introduce how to overlay an avatar and STYLY space in Mixed Reality (MR) by using Virtual Motion Capture (hereinafter referred to as VMC) and LIV.
In this article, I explain the outline of LIV and the initial settings you need after the installation.
What I will show this time is based on my previous article, so please refer to it while reading this article. LIV requires a high-performance PC, so please be aware that it may not work smoothly depending on your PC environment.
▼Previous article

Introduction
VMC, which I introduced in the previous article, can be launched at the same time as a VR-game application.
By using this feature, you can control your avatar with VRC while running STYLY’s VR application.
Furthermore, by using a MR-overlaying tool called LIV, you can record the image as if your avatar entered the VR space by overlaying STYLY’s screen and VMC’s in a special way.
In this article, I briefly introduce LIV and the initial settings you need to do.
About LIV
LIV is a free MR-overlaying tool provided by LIV Inc.
When you apply MR to a VR game, you usually need to put the game screen into ‘Quadrant mode for MR’ in a special way and overlay each screen with the camera image (normally, it’s a real image with green screen in the background) with a tool such as OBS. However, LIV does most of those tasks, so it makes MR-overlaying easier than usual.
Having said that, the latest i7 CPU and GTX1080 graphics card are recommended for LIV, and the latest i5 CPU and GTX1070 graphics card are the minimum supported environment. So LIV doesn’t work sufficiently without a high-performance PC.
This time we record an MR-overlaying video with VMC and OBS running simultaneously, so I recommend using a PC with the performance higher than the recommended.
Install Virtual WebCam Driver (VMC)
Introduction
Before you install LIV on Steam, install ‘Virtual WebCam driver’ in VMC.
MR image for VR games is usually generated by combining the game screen divided in a special way and the camera image.
This time we want to use the rendered image by VMC as a replacement for the camera image, but LIV can recognize VMC’s screen only through ‘Virtual WebCam’. Therefore, we need to allow LIV to overlay VMC’s screen by using ‘Virtual WebCam’ built in VMC.
Procedure
First, launch VMC, then select the Settings tab in the control panel and click on ‘Setting’.
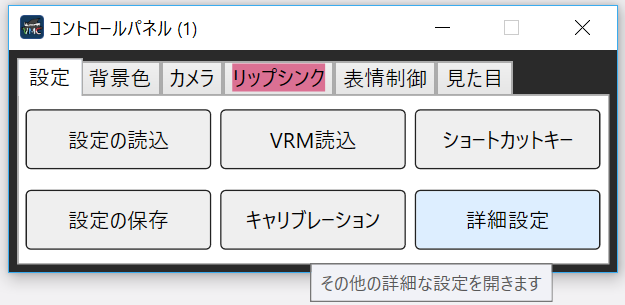
Select ‘Setting’
It opens the ‘Settings’ window, press the ‘Install’ button under ‘Virtual WebCam Install’ to start the installation.
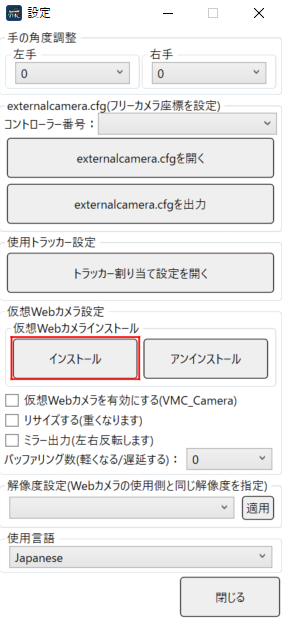
Install Virtual WebCam
Install LIV on Steam
After installing Virtual WebCam in VMC, install LIV on Steam.
If you have not installed Steam before, you need to install it first. You can also install STYLY from Steam, so if you do not have STYLY you can install this also.
▼You can install LIV from:
https://store.steampowered.com/app/755540/LIV/
▼About STYLY VR VIEWER:

Install Virtual Camera Driver (LIV)
After installing LIV on Steam, launch LIV and set it up. If VMC or Steam VR is running, close them just in case.
After launching LIV, press ‘Install’ under ‘Virtual Camera Driver’.
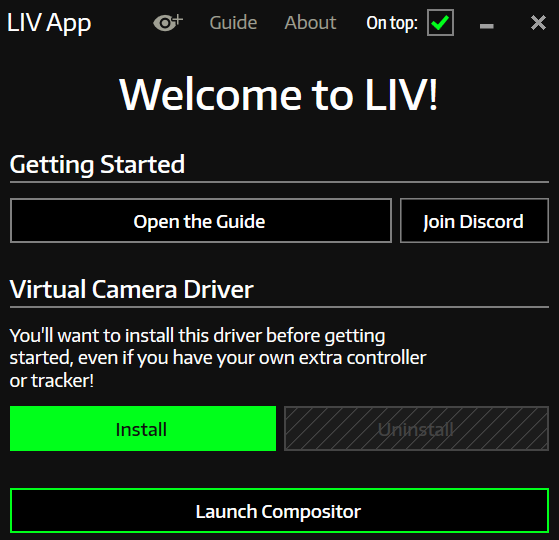
Install ‘Virtual Camera Driver’
When the installation is complete, the message ‘Success!’ will appear. Press ‘OK’.
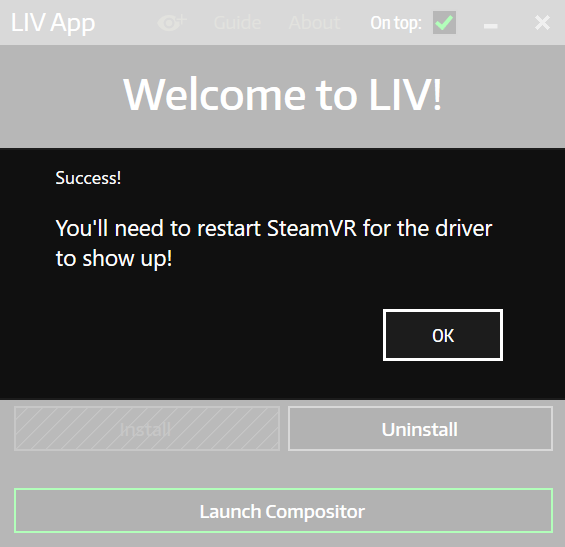
The installation has finished successfully!
Without ‘Virtual Camera Driver’ installed, you cannot progress to the next procedure, so do not forget to install this. Next, we will set up the ‘Virtual Camera’.
Set Up the Camera Profile (LIV)
After installing ‘Virtual Camera Driver’, press the ‘Launch Compositor’ button.
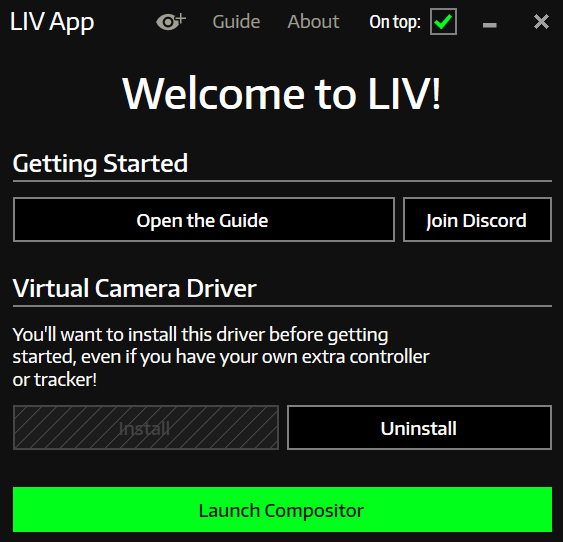
Launch Compositor
Create the Camera Profile
This brings up ‘Compositor’. Let’s set up the camera first. Press the ‘CAMERA’ button in the second row on the left side of the window. Then, press the ‘Add’ icon under ‘Camera Profiles’ to open the ‘Edit Camera’ window.
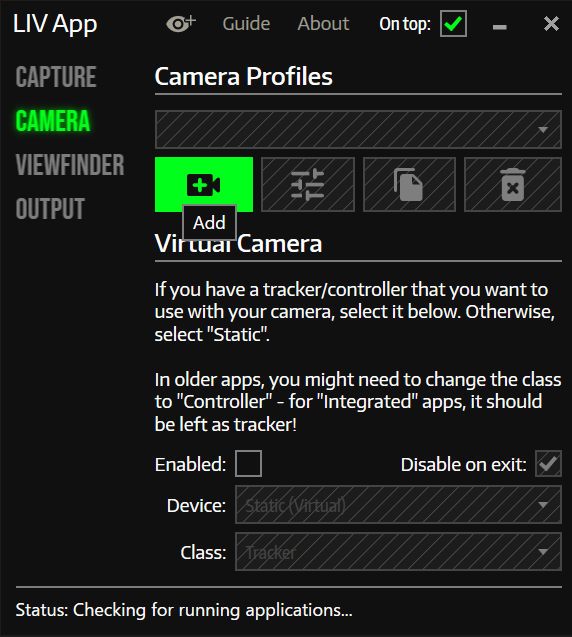
Add a camera profile
Select ‘DEVICE’ at the top left, select ‘VMC_Camera’ for ‘Device’.
If there is no ‘VMC_Camera’ on the list, go back to the procedure ‘Install Virtual WebCam driver (VMC)’ to install Virtual WebCam driver in VMC.

Select ‘VMC_Camera’
Then, select the output resolution for ‘Mode’.
This time select XRGB, 1920×1080.
There are identical selections with the same resolution and FPS. Choose the second one, which should work without problems.

Choose the second one if you see identical two resolutions listed.
Lastly, choose a Profile Name that is easy to recognize.
I recommend naming it as ‘VMC’ because it’s easy to remember when selecting. Once you complete all the settings, press ‘Save’.

Name it ‘VMC’
These settings will make LIV use the images from VMC as a camera image.
Set Up Virtual Controller
After creating the camera profile, set up the virtual controller, which will be the reference of the camera position, in the ‘Virtual Camera’ section.
First, check the ‘Enabled’ box below.
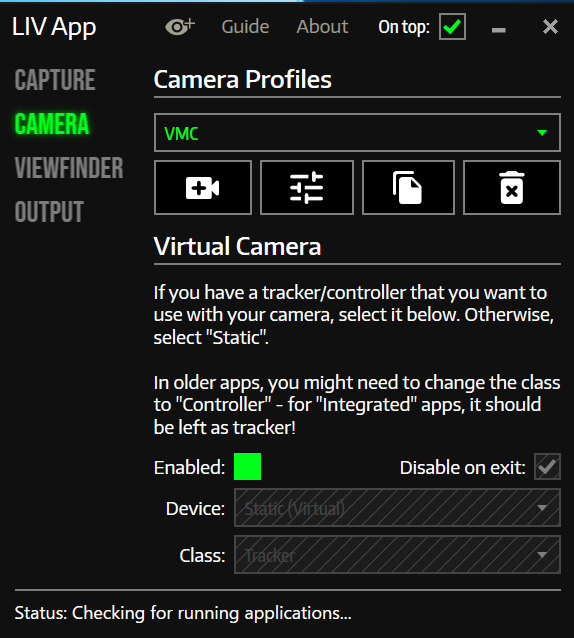
Check the ‘Enabled’ box
Set ‘Device’ to ‘Static (Virtual)’ and ‘Class’ to ‘Controller’.

This completes the setting for the virtual controller. When generating MR images, the camera position is determined by this virtual controller and the ‘externalcamera.cfg’ file. If it is set up incorrectly, you cannot set up ‘externalcamera.cfg’ so please make sure it’s been done correctly.
That’s all for the initial setup. Once you complete these initial settings, you can start next time from this point.
In the next article, I will explain how to create the ‘externalcamera.cfg’ file, which is essential for MR overlaying.
Creating ‘externalcamera.cfg’ is the most important and confusing task in the whole MR-overlaying workflow. I will try to explain this in as much detail as possible.