You can download hair assets from DAZ SHOP, but you can easily create your own original hairstyle by using an add-on called Hair Tool for Blender.
In this article, we will use this add-on to change the hairstyle of the human model that was previously made up.
![[DAZ Studio] (2) Customizing Human Body Textures in Photoshop](https://styly.cc/wp-content/uploads/2021/01/IMG_9201-2-160x160.png)
Alternatively, you can prepare a new human model in DAZ Studio.
- Create a human body model in DAZ Studio (see the previous and previous two articles)
- Export the human model to Blender, and create hair with Hair Tool for Blender. (Contents of this article)
- Export to DAZ Studio, register hairstyle and set movement
- Export to Unity
- Upload to STYLY
This is the process.
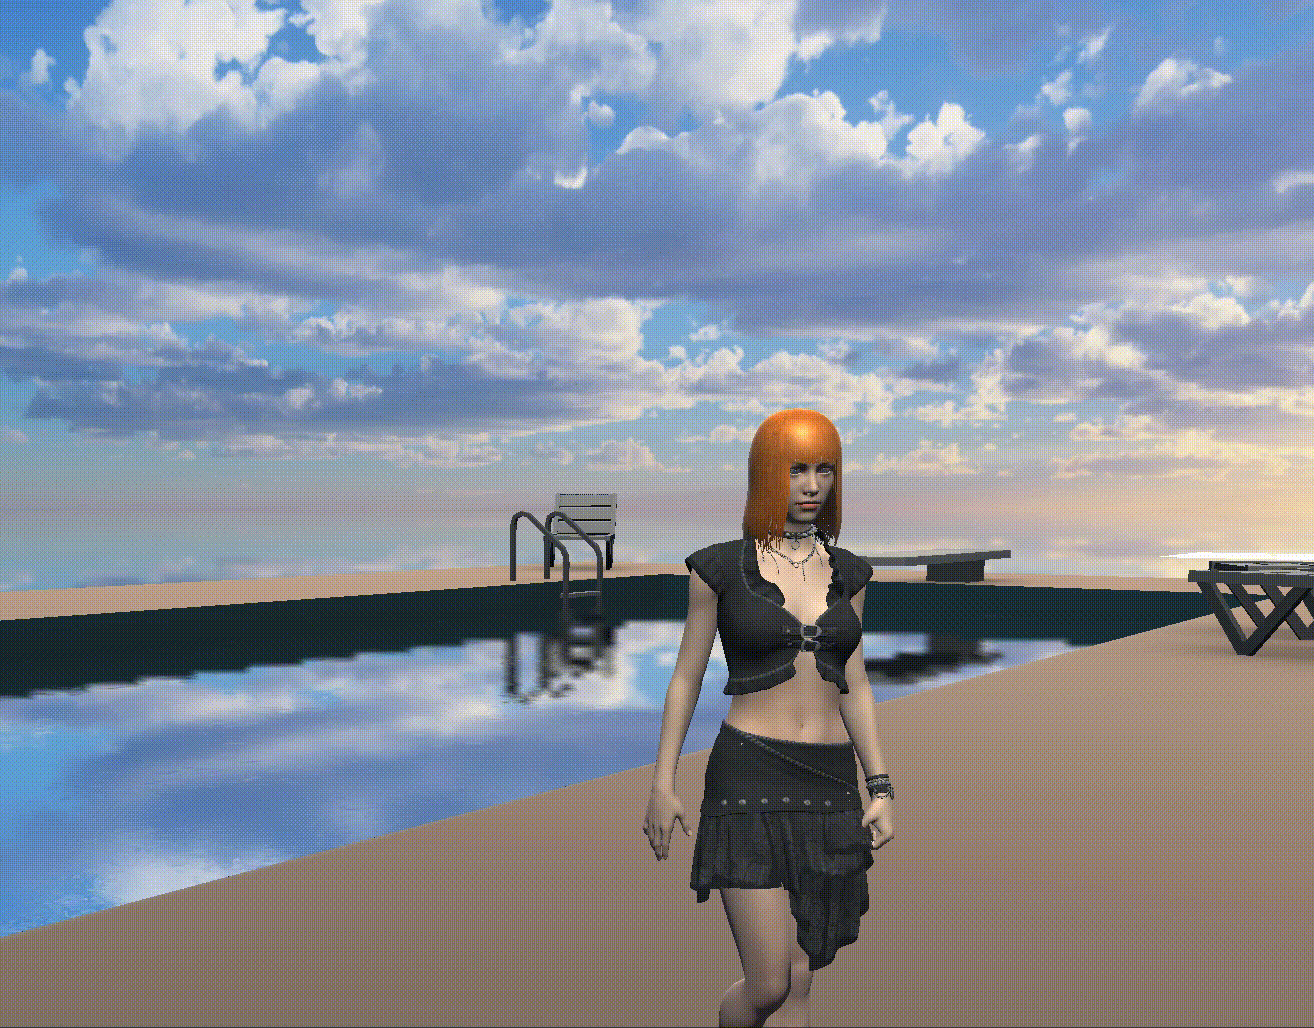
Completed image
Using Hair Tool for Blender
Download and install the add-on
Purchase and download from here.
It is compatible with version 2.83 and 2.9x of Blender.
If you downloaded all of them as a ZIP file, unzip it, but do not unzip hair_tool_2.25.zip because it will be added to the Blender add-on as is.
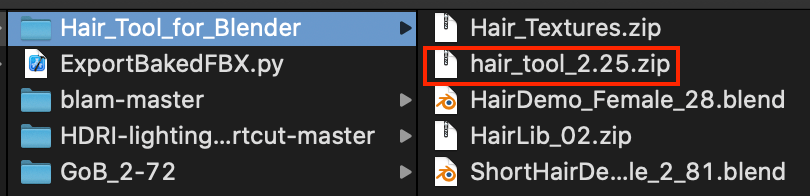
hair_tool_2.25.zip
After the download is complete, open Blender and go to Preferences from the top left icon.
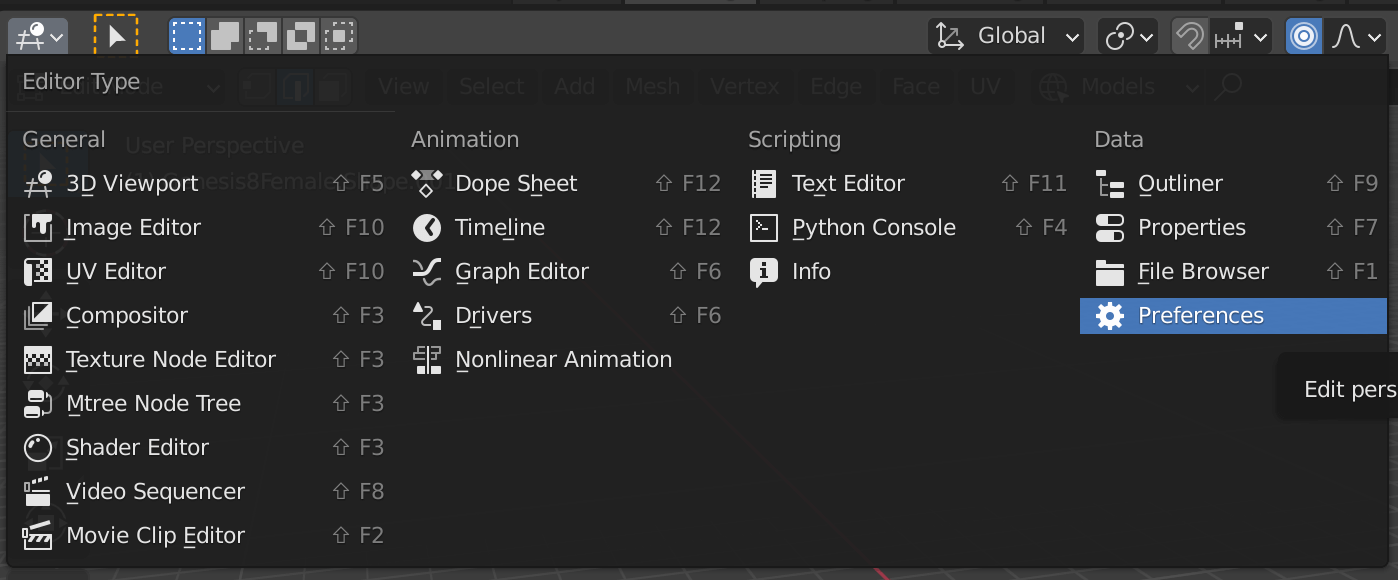
Preferences
Click Install and in the window that appears, select hair_tool_2.25.zip and install it.
Once completed, check the Hair Tool checkbox.
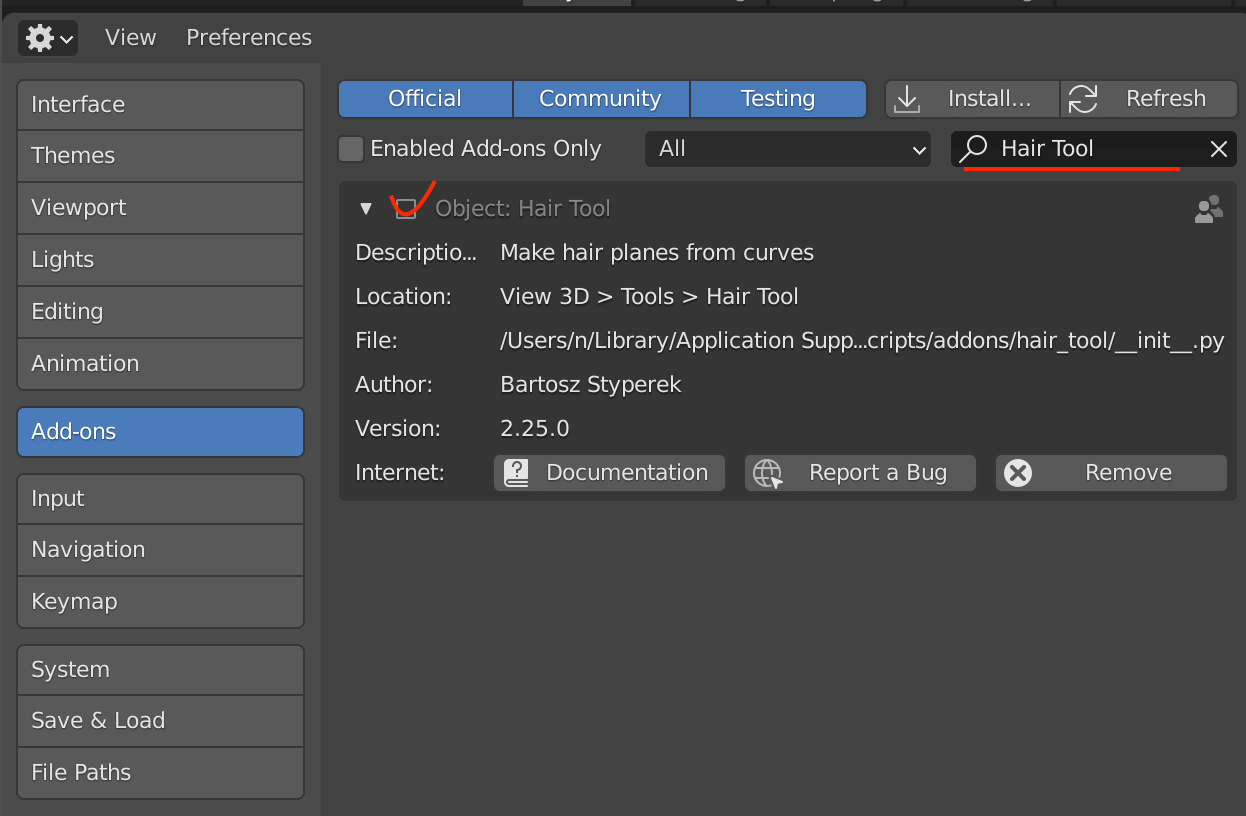
Hair Tool
Open Blender and import the human model
You can see how to import in the previous paragraph “Exporting”.
![[DAZ Studio] (1) How to download / Basic operation / Creating a human body model](https://styly.cc/wp-content/uploads/2021/01/IMG_9201-1-160x160.png)
When you save a human body model with animation from DAZ Studio as fbx and load it into Blender, you may encounter a bug where the bones get out of control, but I won’t cover it this time since it is used as a base for hair.
After importing the human model, select Genesis8Female.003 from the Scene Collection in Blender, and change the Skeleton from Pose Position to Rest Position.
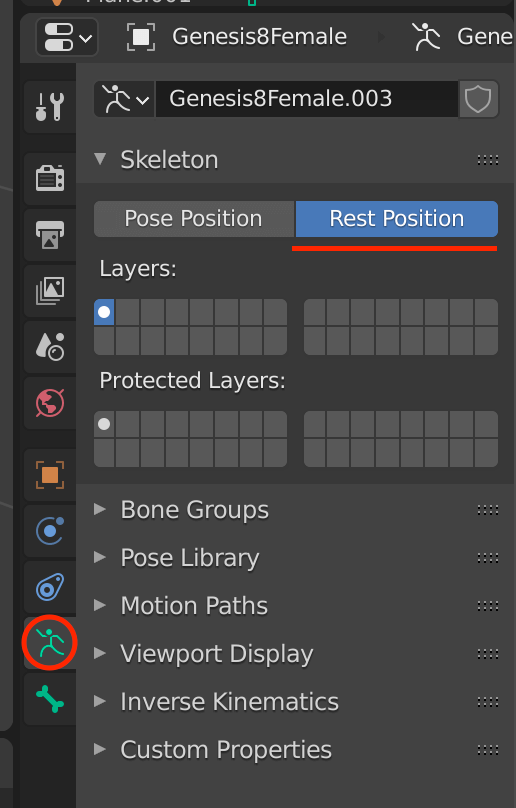
Rest Position

Rest Position
Click on the bone and press the [H] key to hide it.
Hide the original hair from the editor panel on the right side of the screen.

Click on the eye icon to hide it.
After deselecting with A again, create a new polygon with [Shift+A].
Split the viewport into three parts, with the smaller viewpoints being Top (or Left or Right) and Front, respectively.
Don’t move these two screens, but use the larger viewport on the left if you want to see the image from other angles.

Splitting the viewport
Prepare the polygons that will be the basis of the hairstyle.
Add a new Sphere and deform it to about the same size as the head.
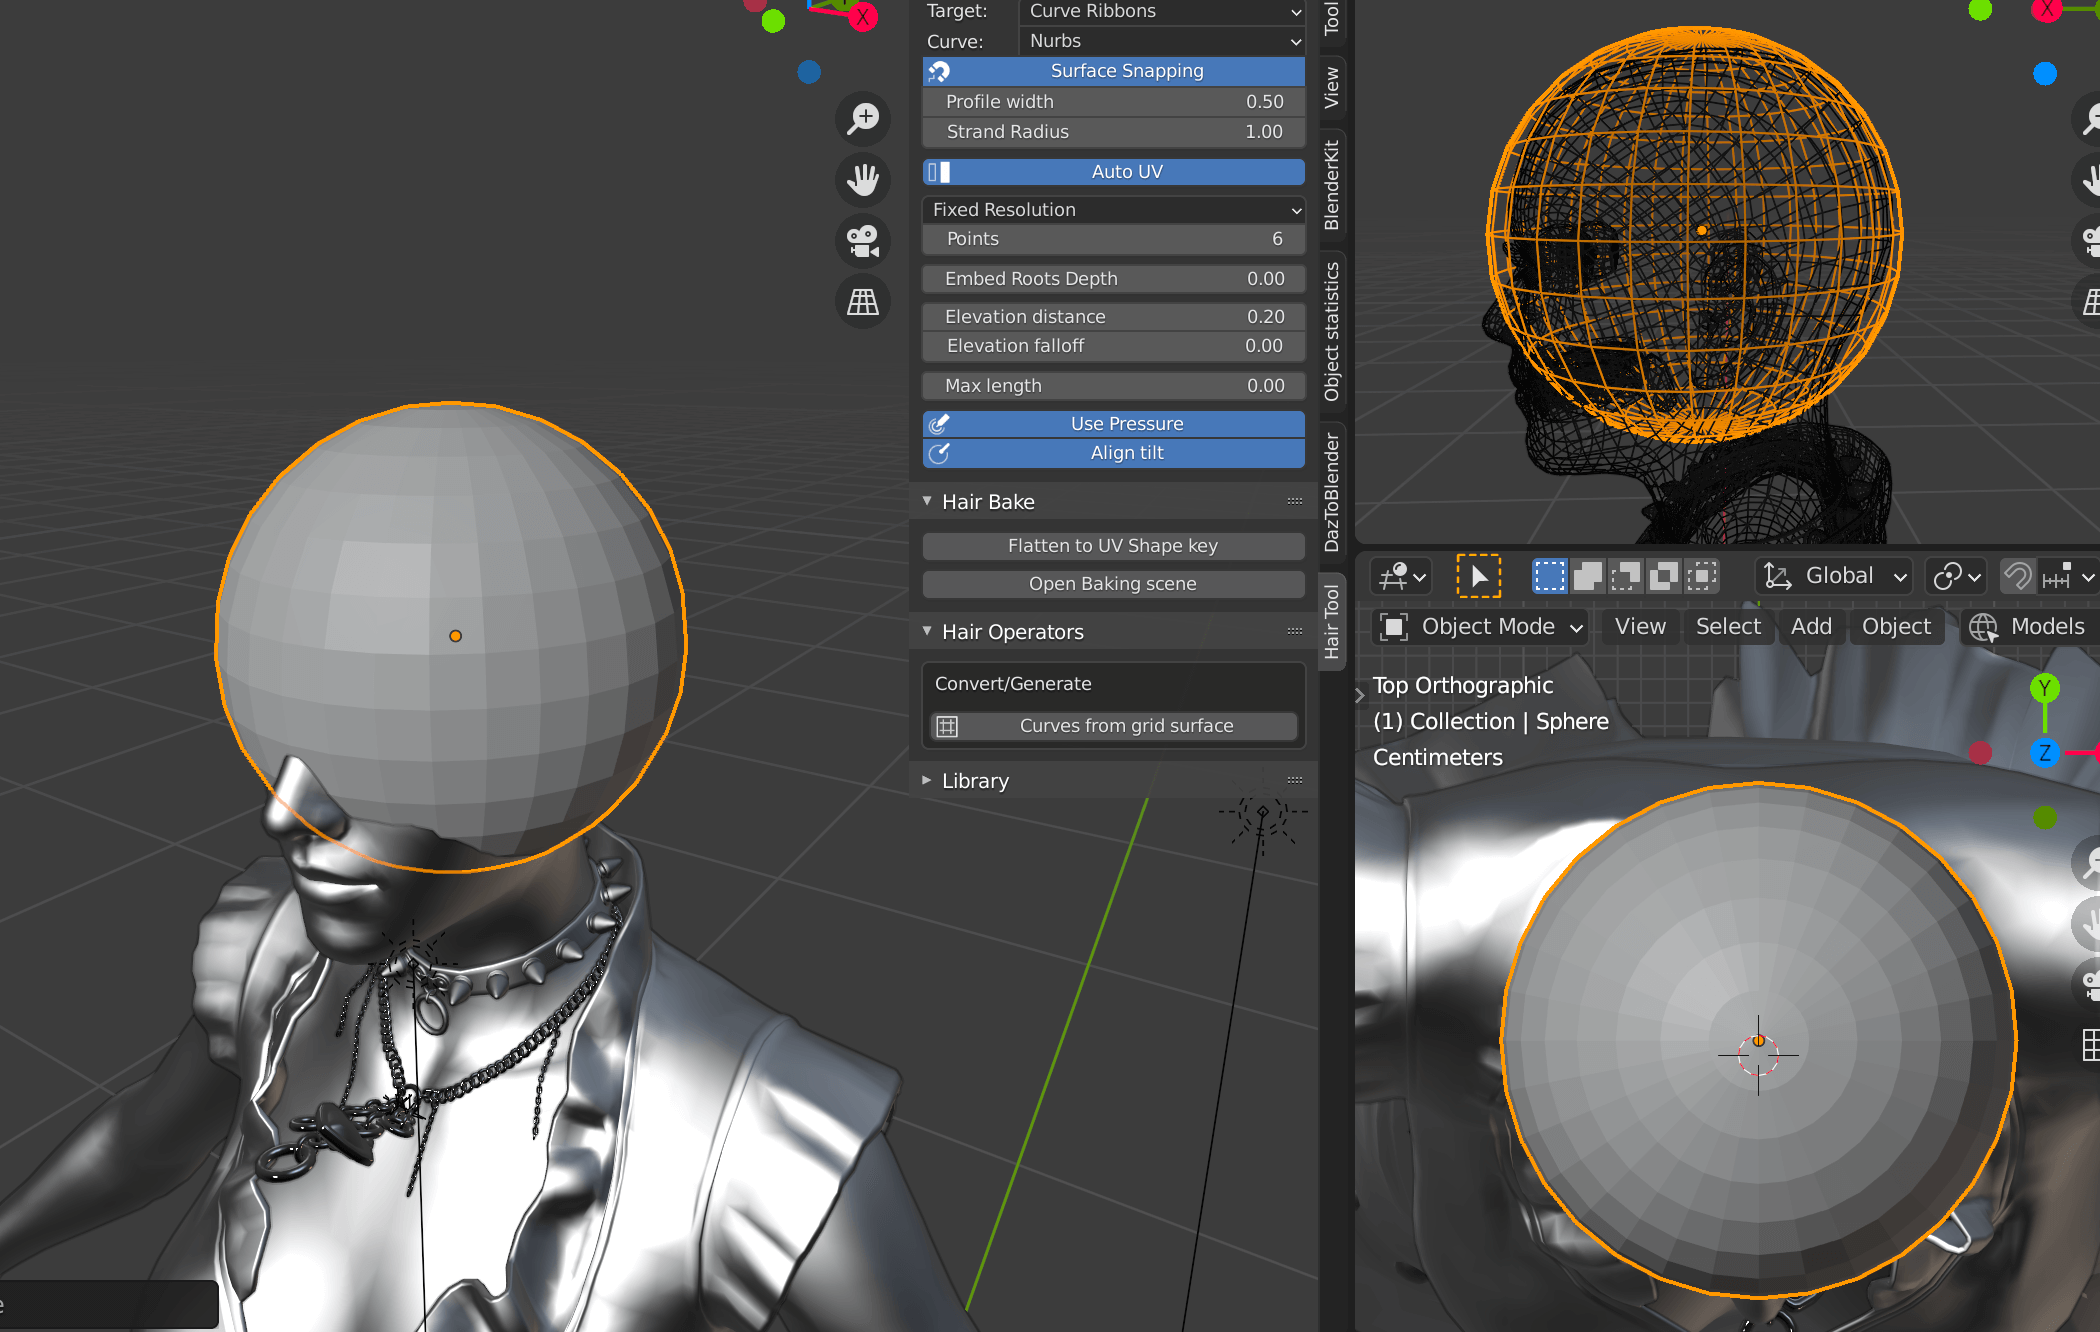
Add a new Sphere
Delete the bottom part.
This is where the ends of the hair will be.
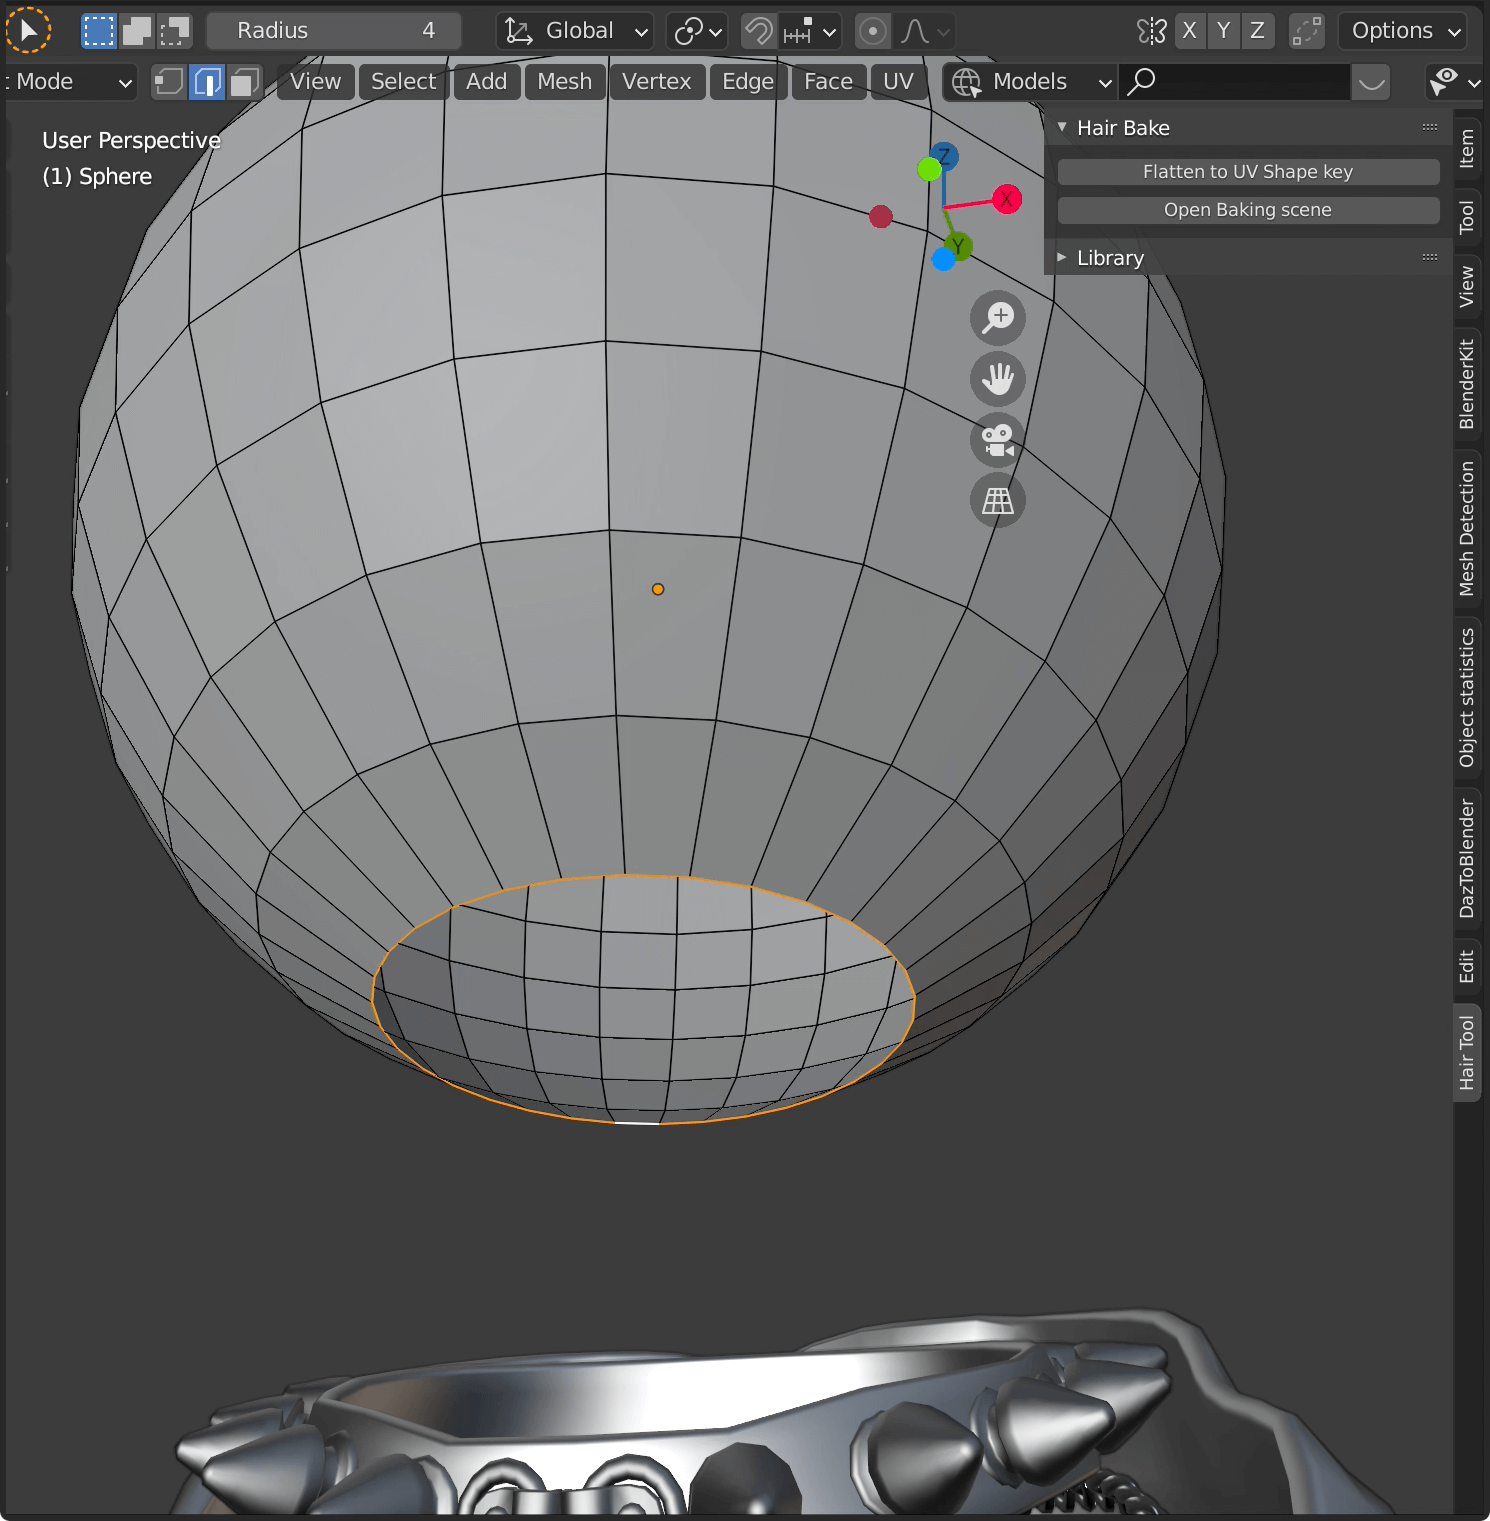
Delete the bottom part
Delete the top part of the head, which will be the hairline, and shrink the edges.
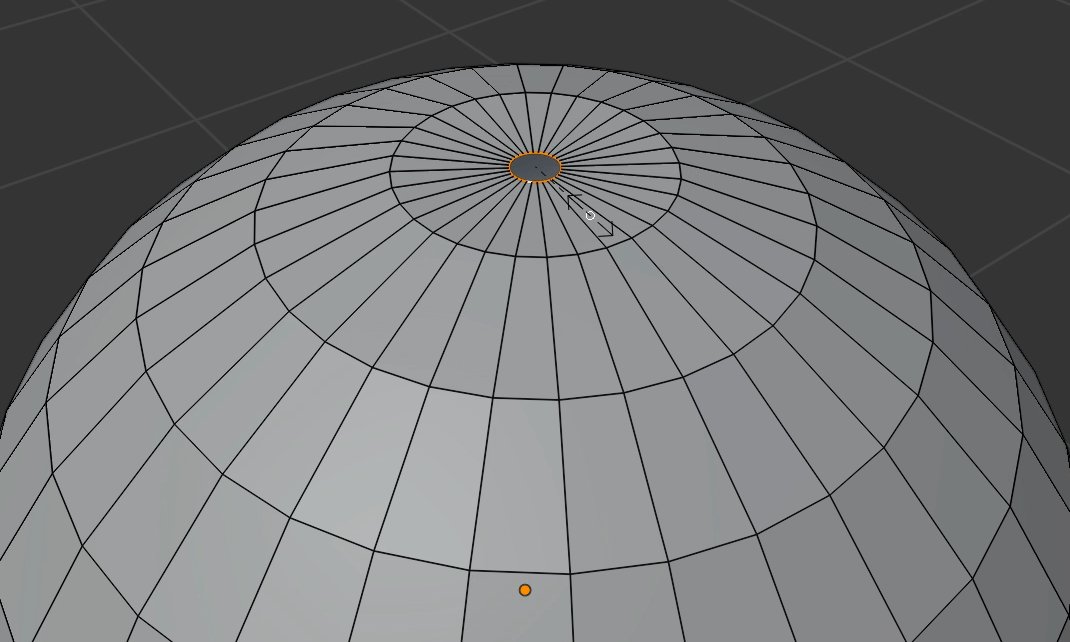
Shrink the edges
Make the reduced edge slightly concave and adjust the height around it to make it curved.
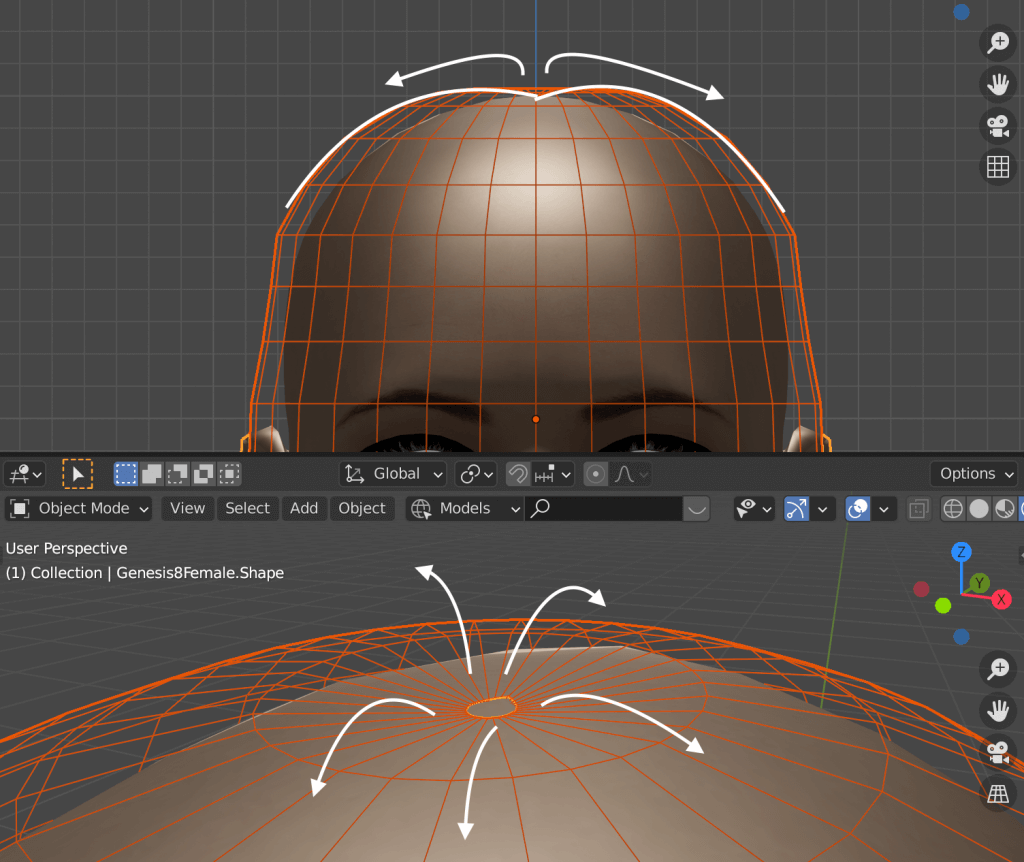
Make it slightly concave to make it look more natural.
Deform the other parts of the head to fit the shape of the head.
In this case, I assumed a semi-long haircut with bangs, so I made it look like this.
You can edit the length and position of the hair bundle later, but if you can create it nicely here, it makes the rest of the work easier.
The distance between the hair and the head is changed according to the volume of the hair.
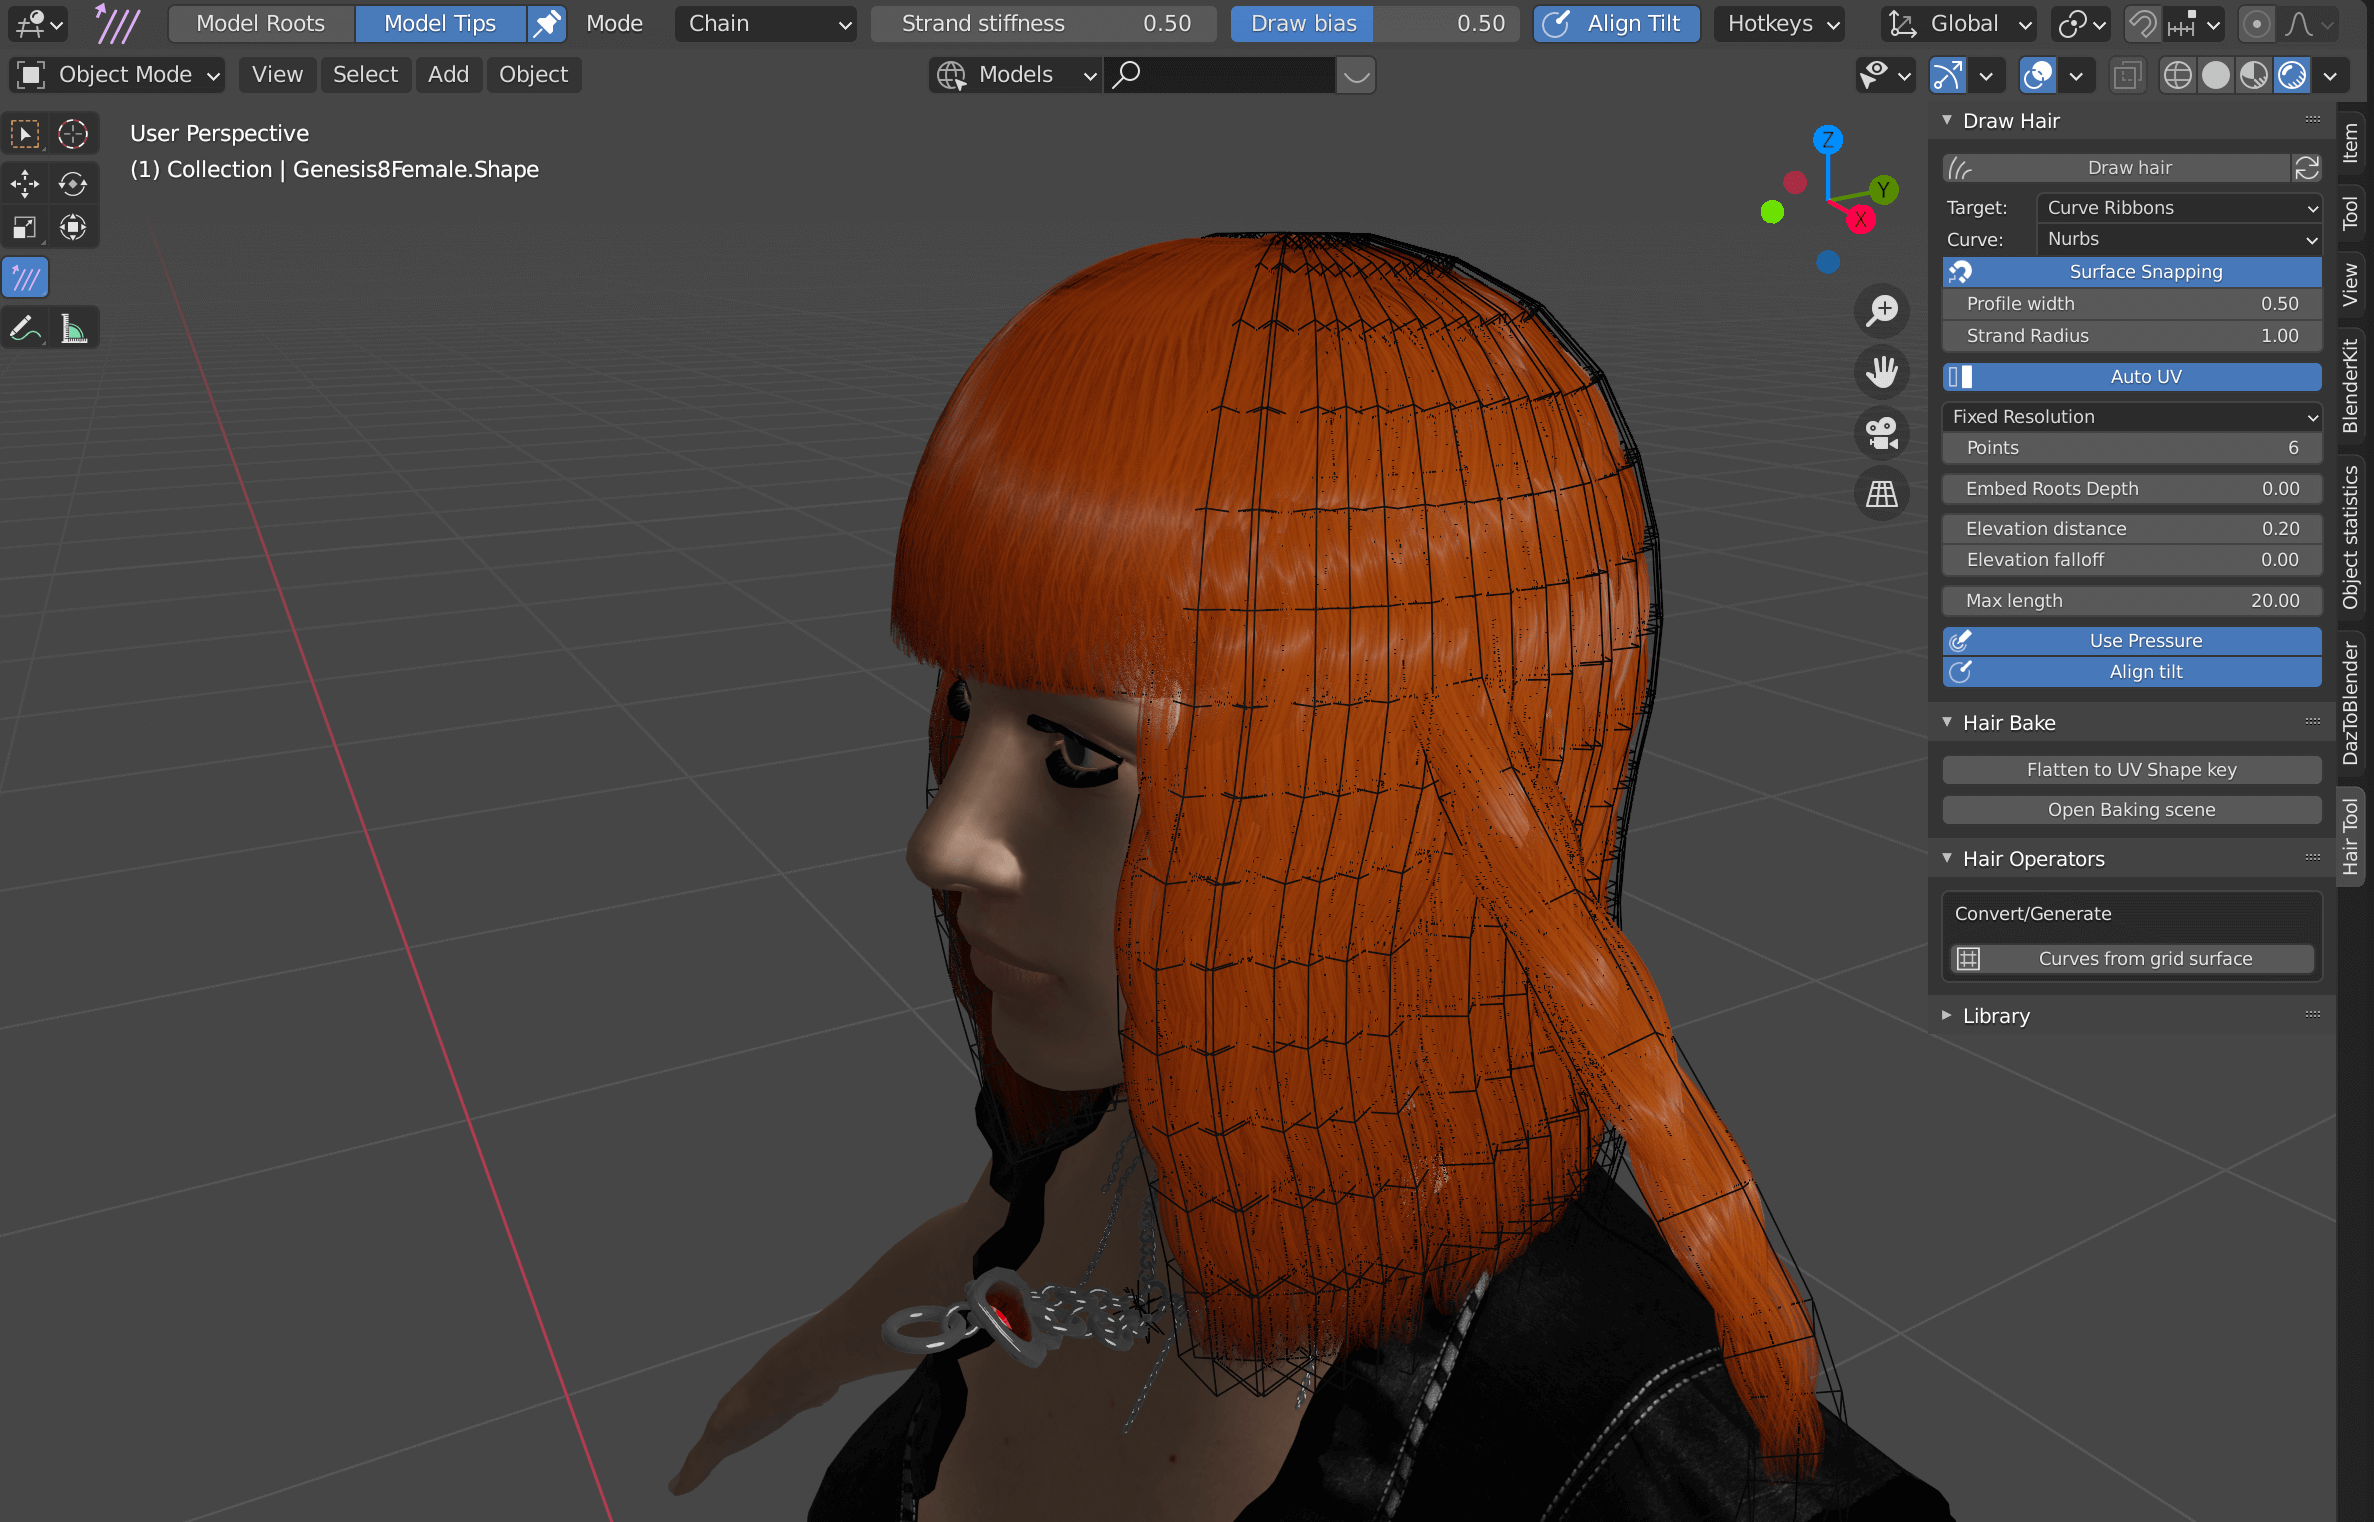
Growing Hair (Curves)
After confirming that the Hair Tool tab is displayed on the right side of the screen, select the edge you want to make hairline, right-click, and select Mark Sharp.
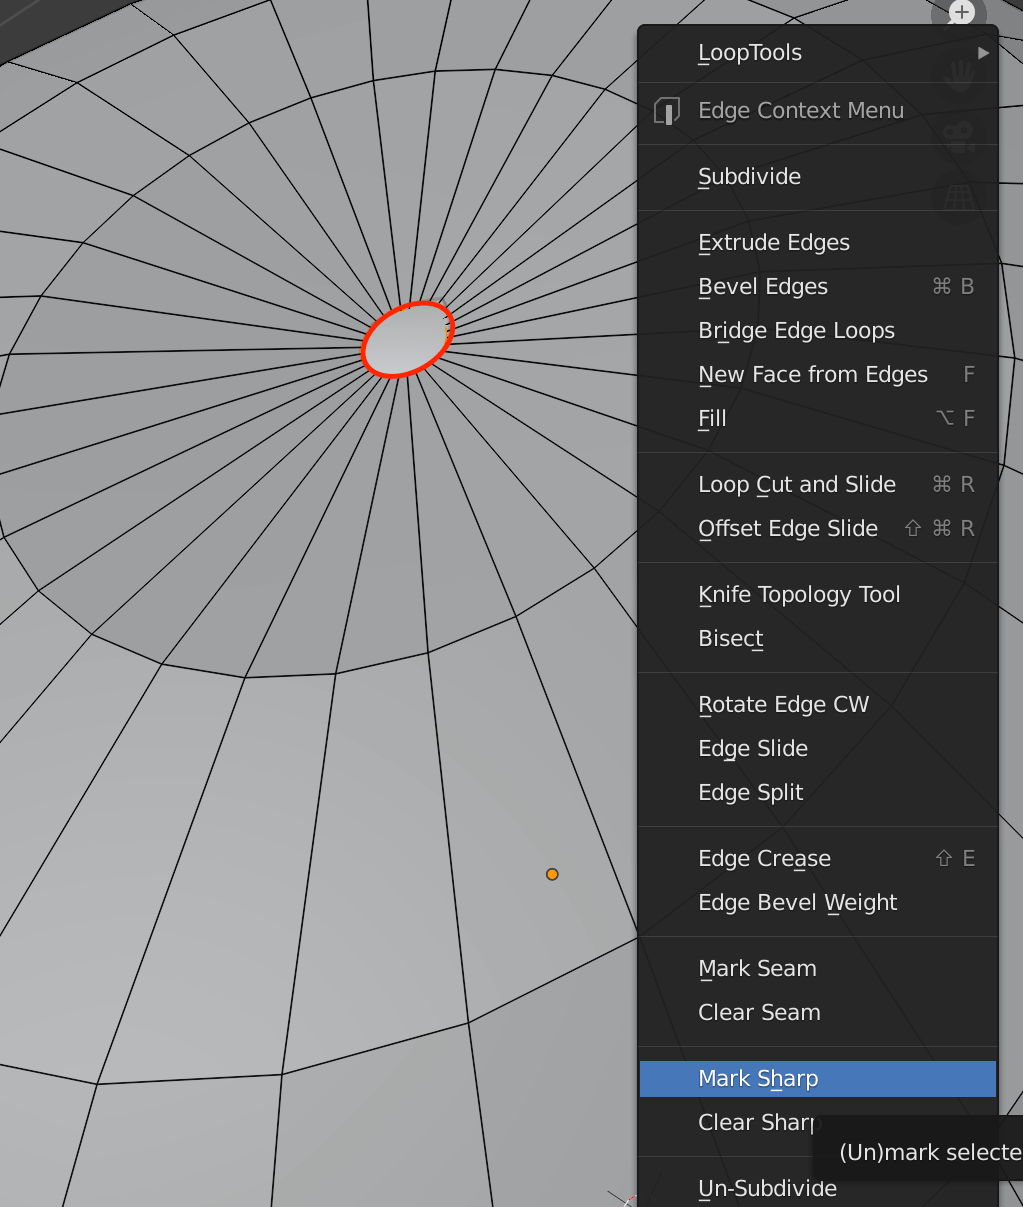
Mark Sharp
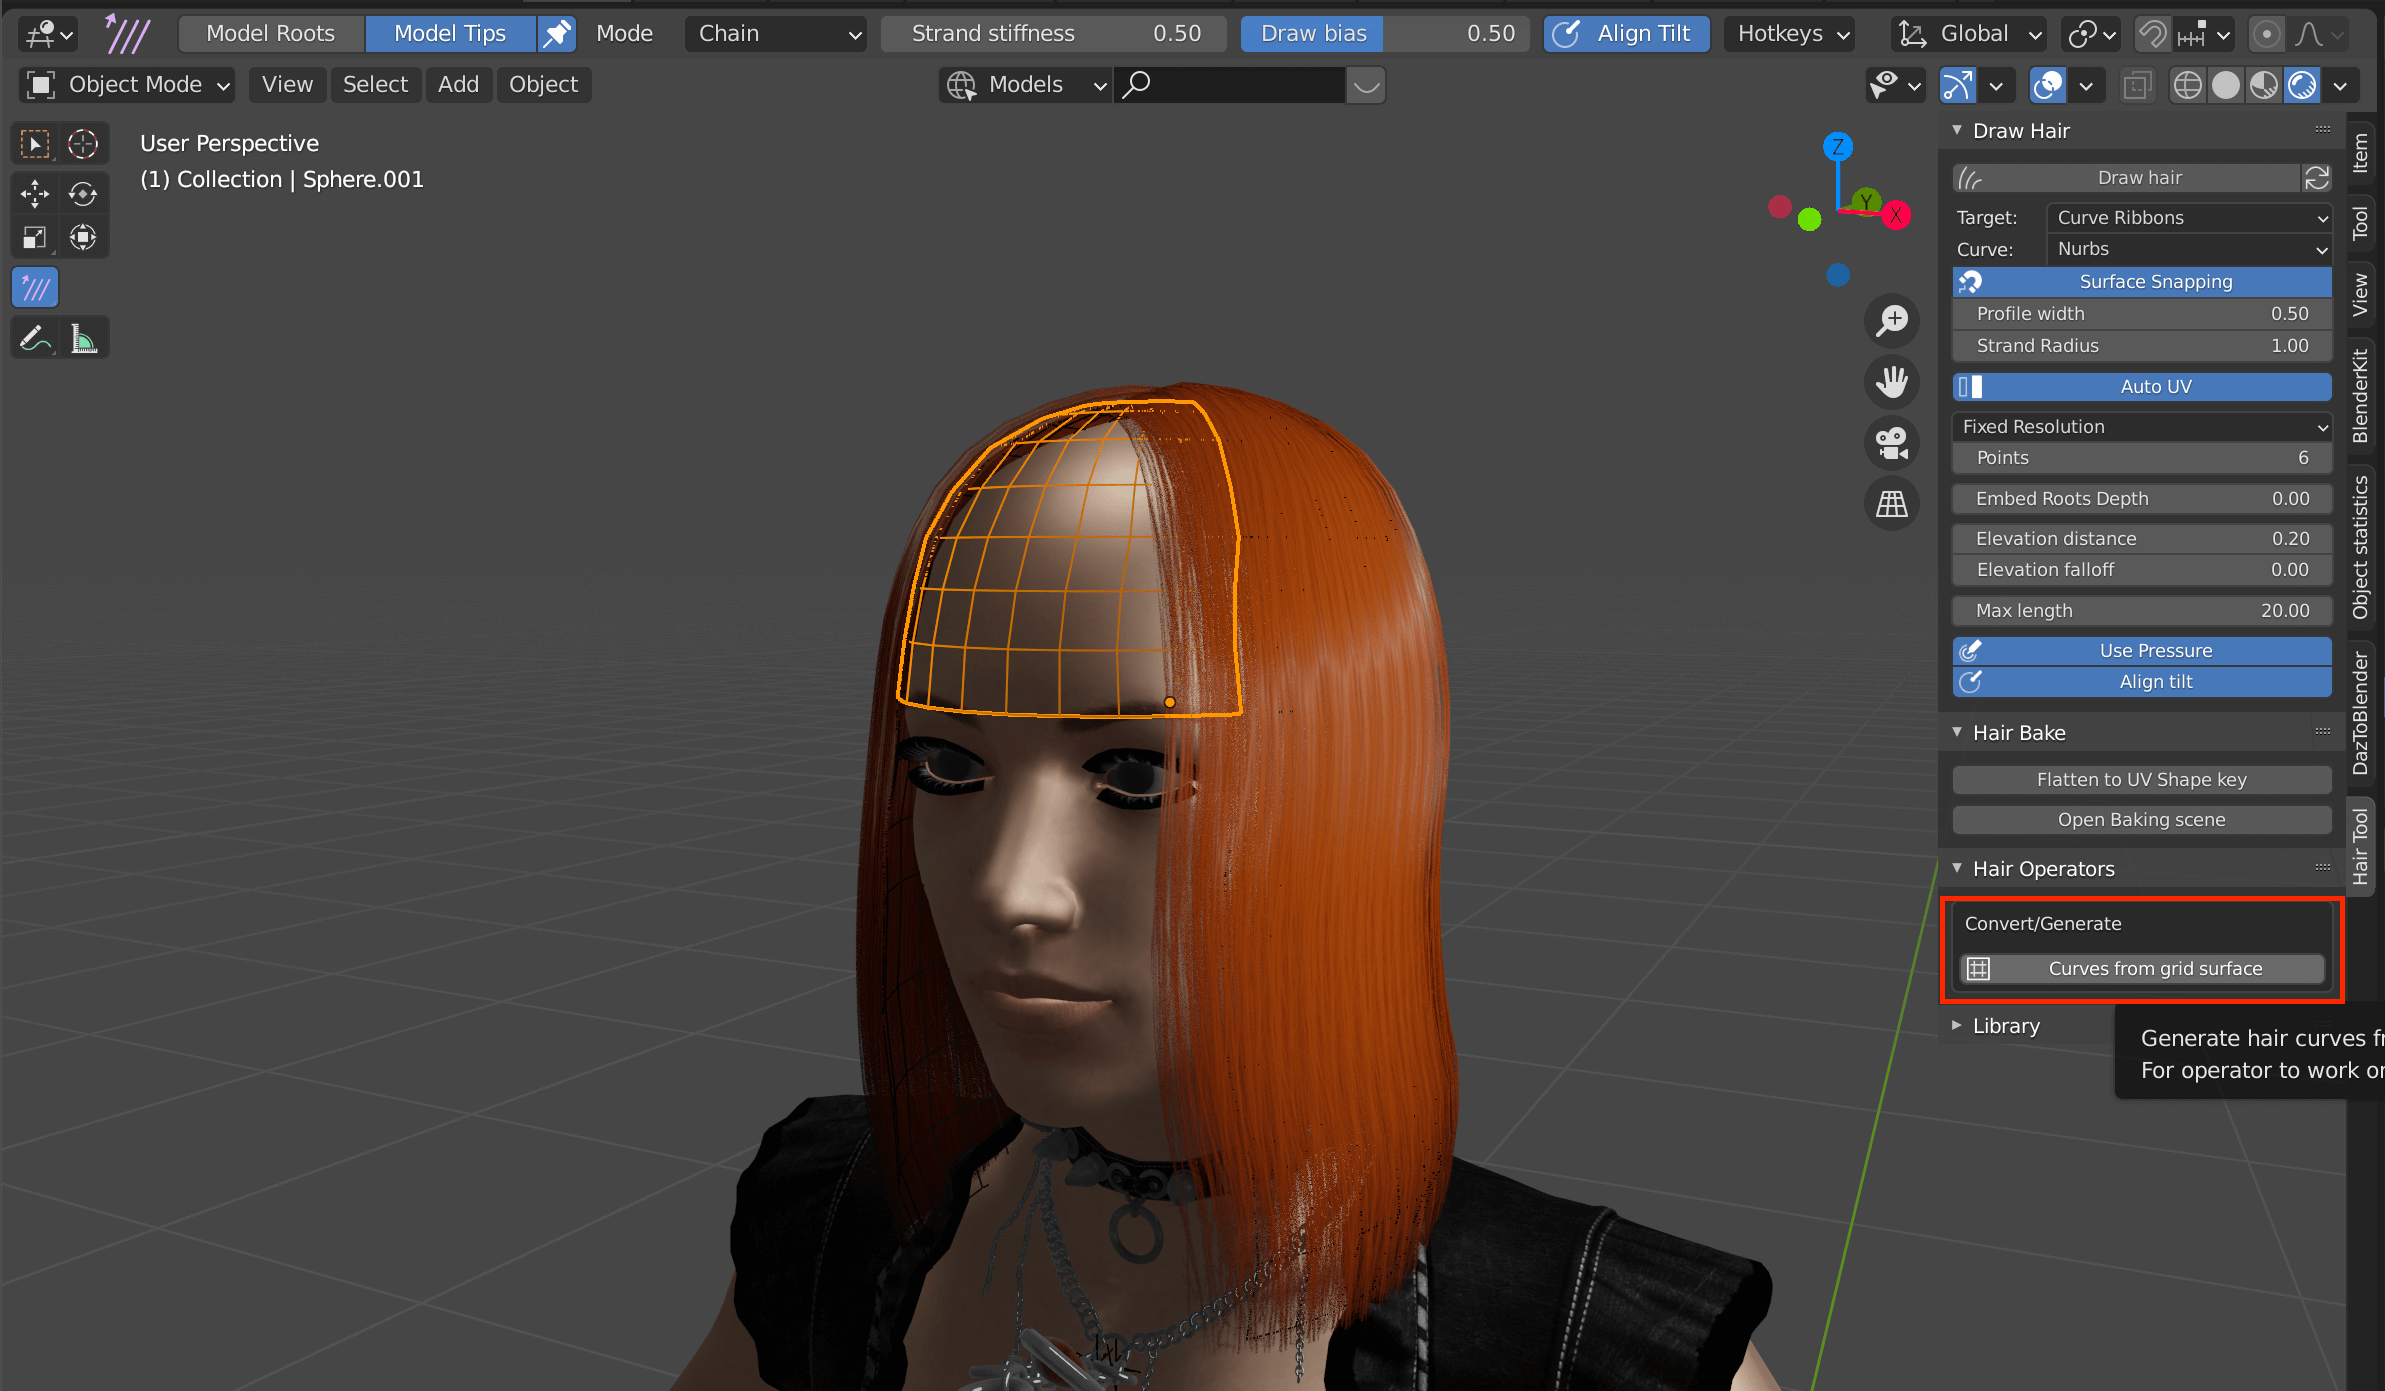
If the length of the hair in the front and back are different, separate the objects and create hair for each.
After selecting all the polygons for the front hair, right-click → Separate → Selection.

Right-click→Separate→Selection
If the hair type does not have bangs, delete the polygons that correspond to these bangs.
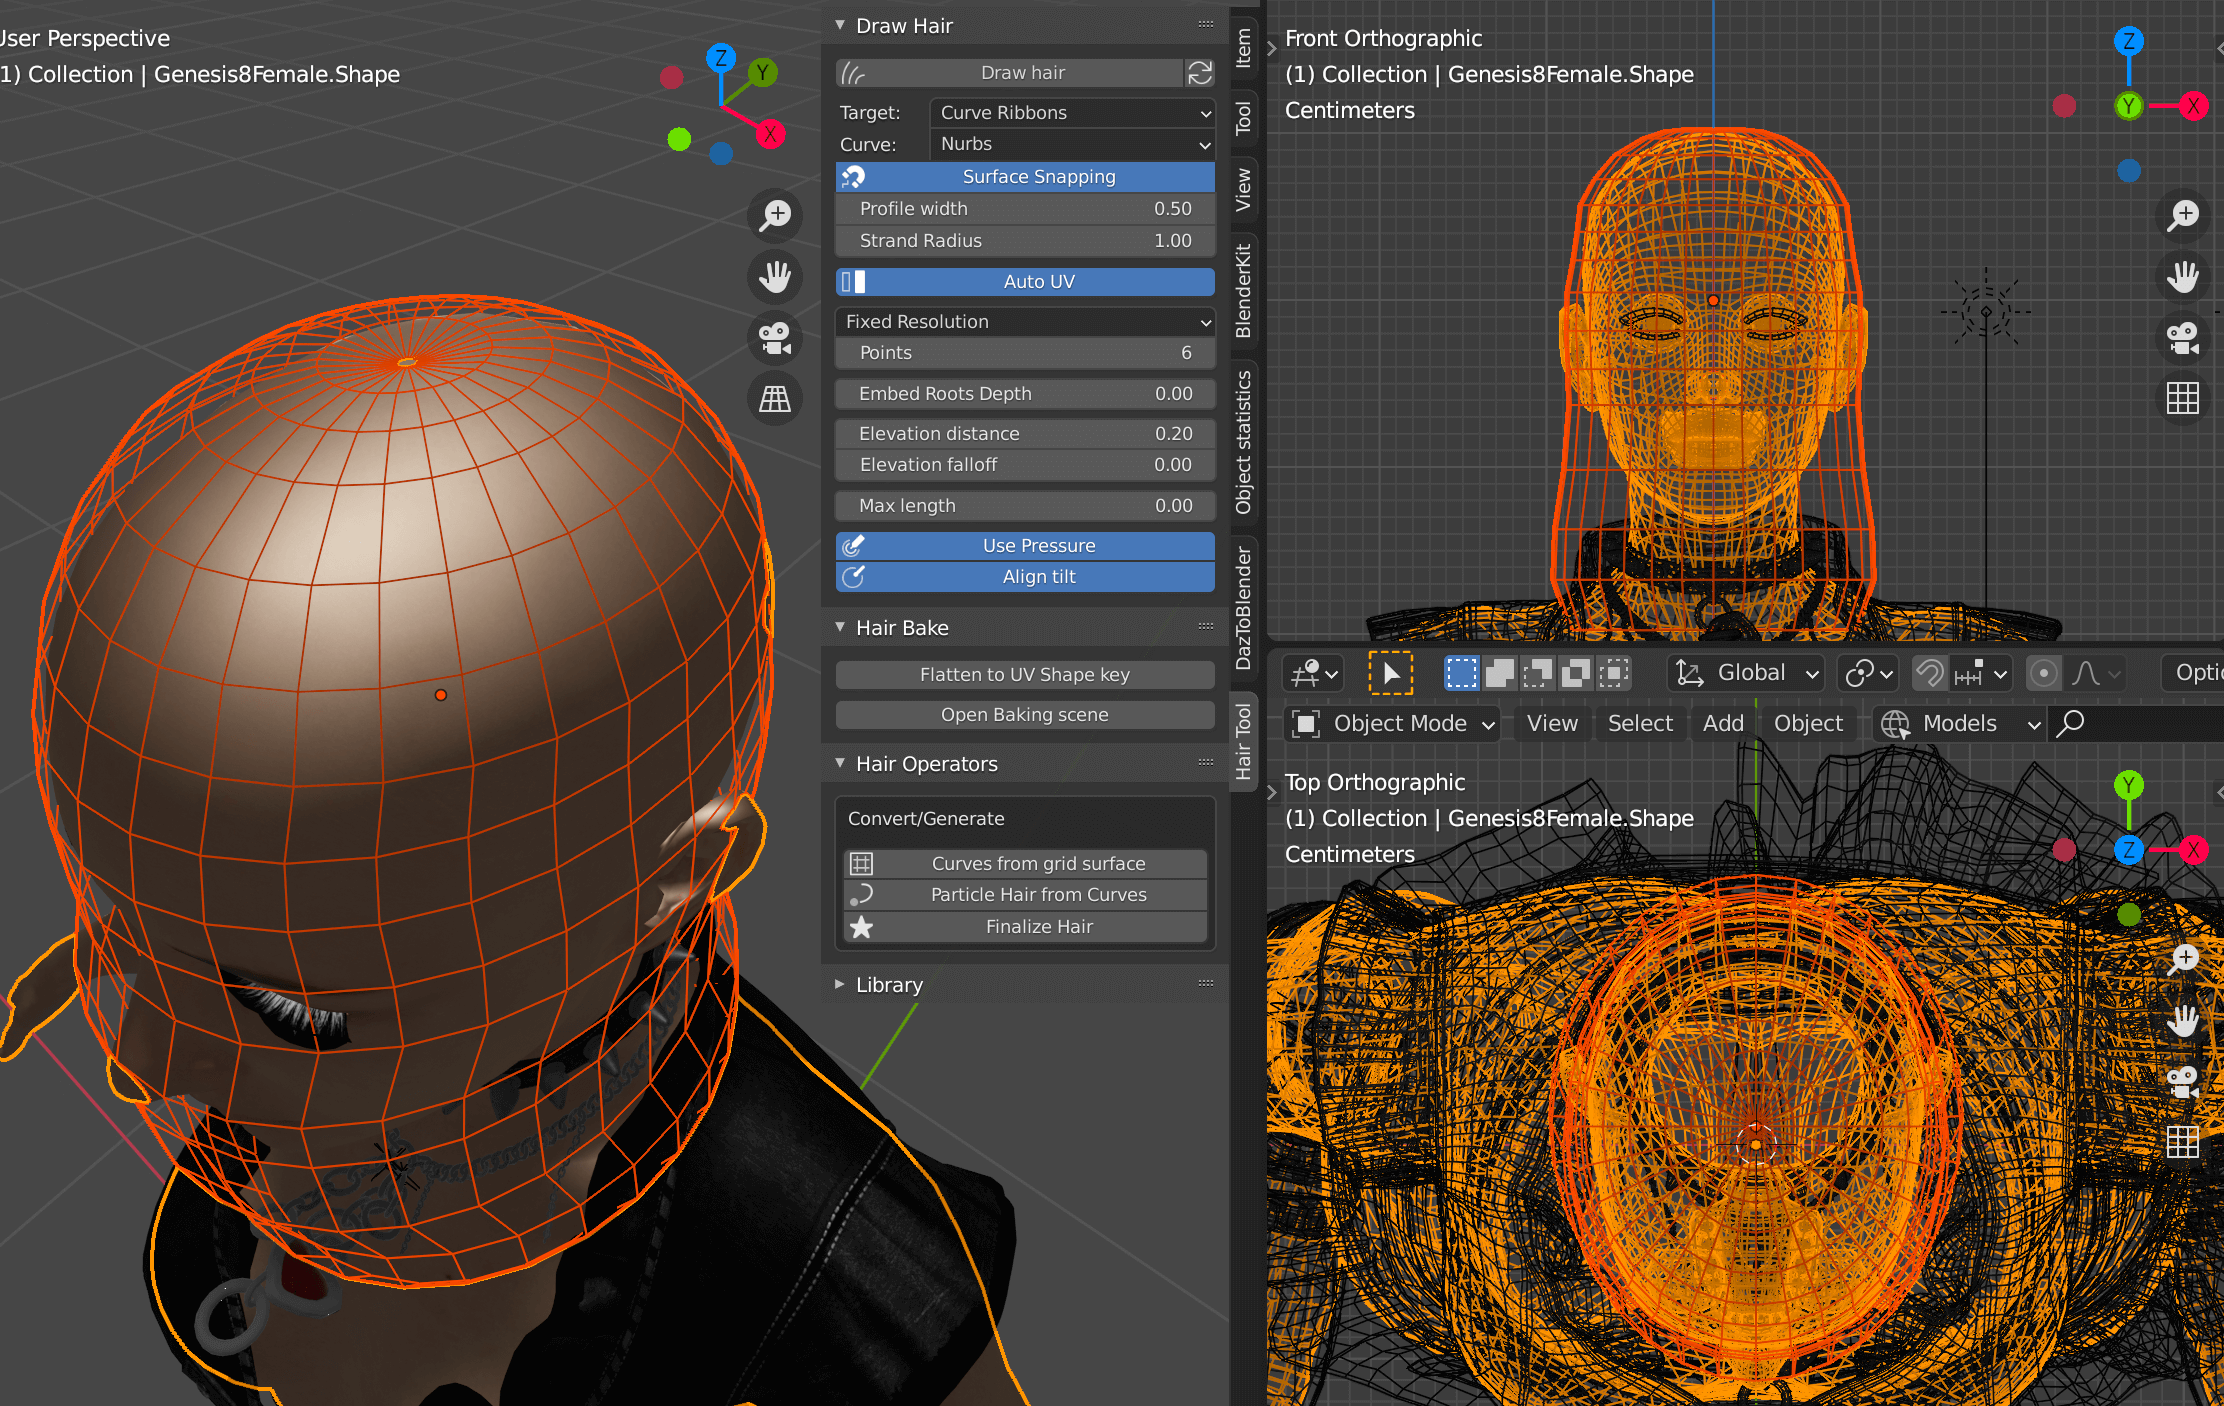
After that, switch to object mode and select Curves from grid surface on the right.
(How to change the hair color is explained in the next two paragraphs.)
Curves from grid surface
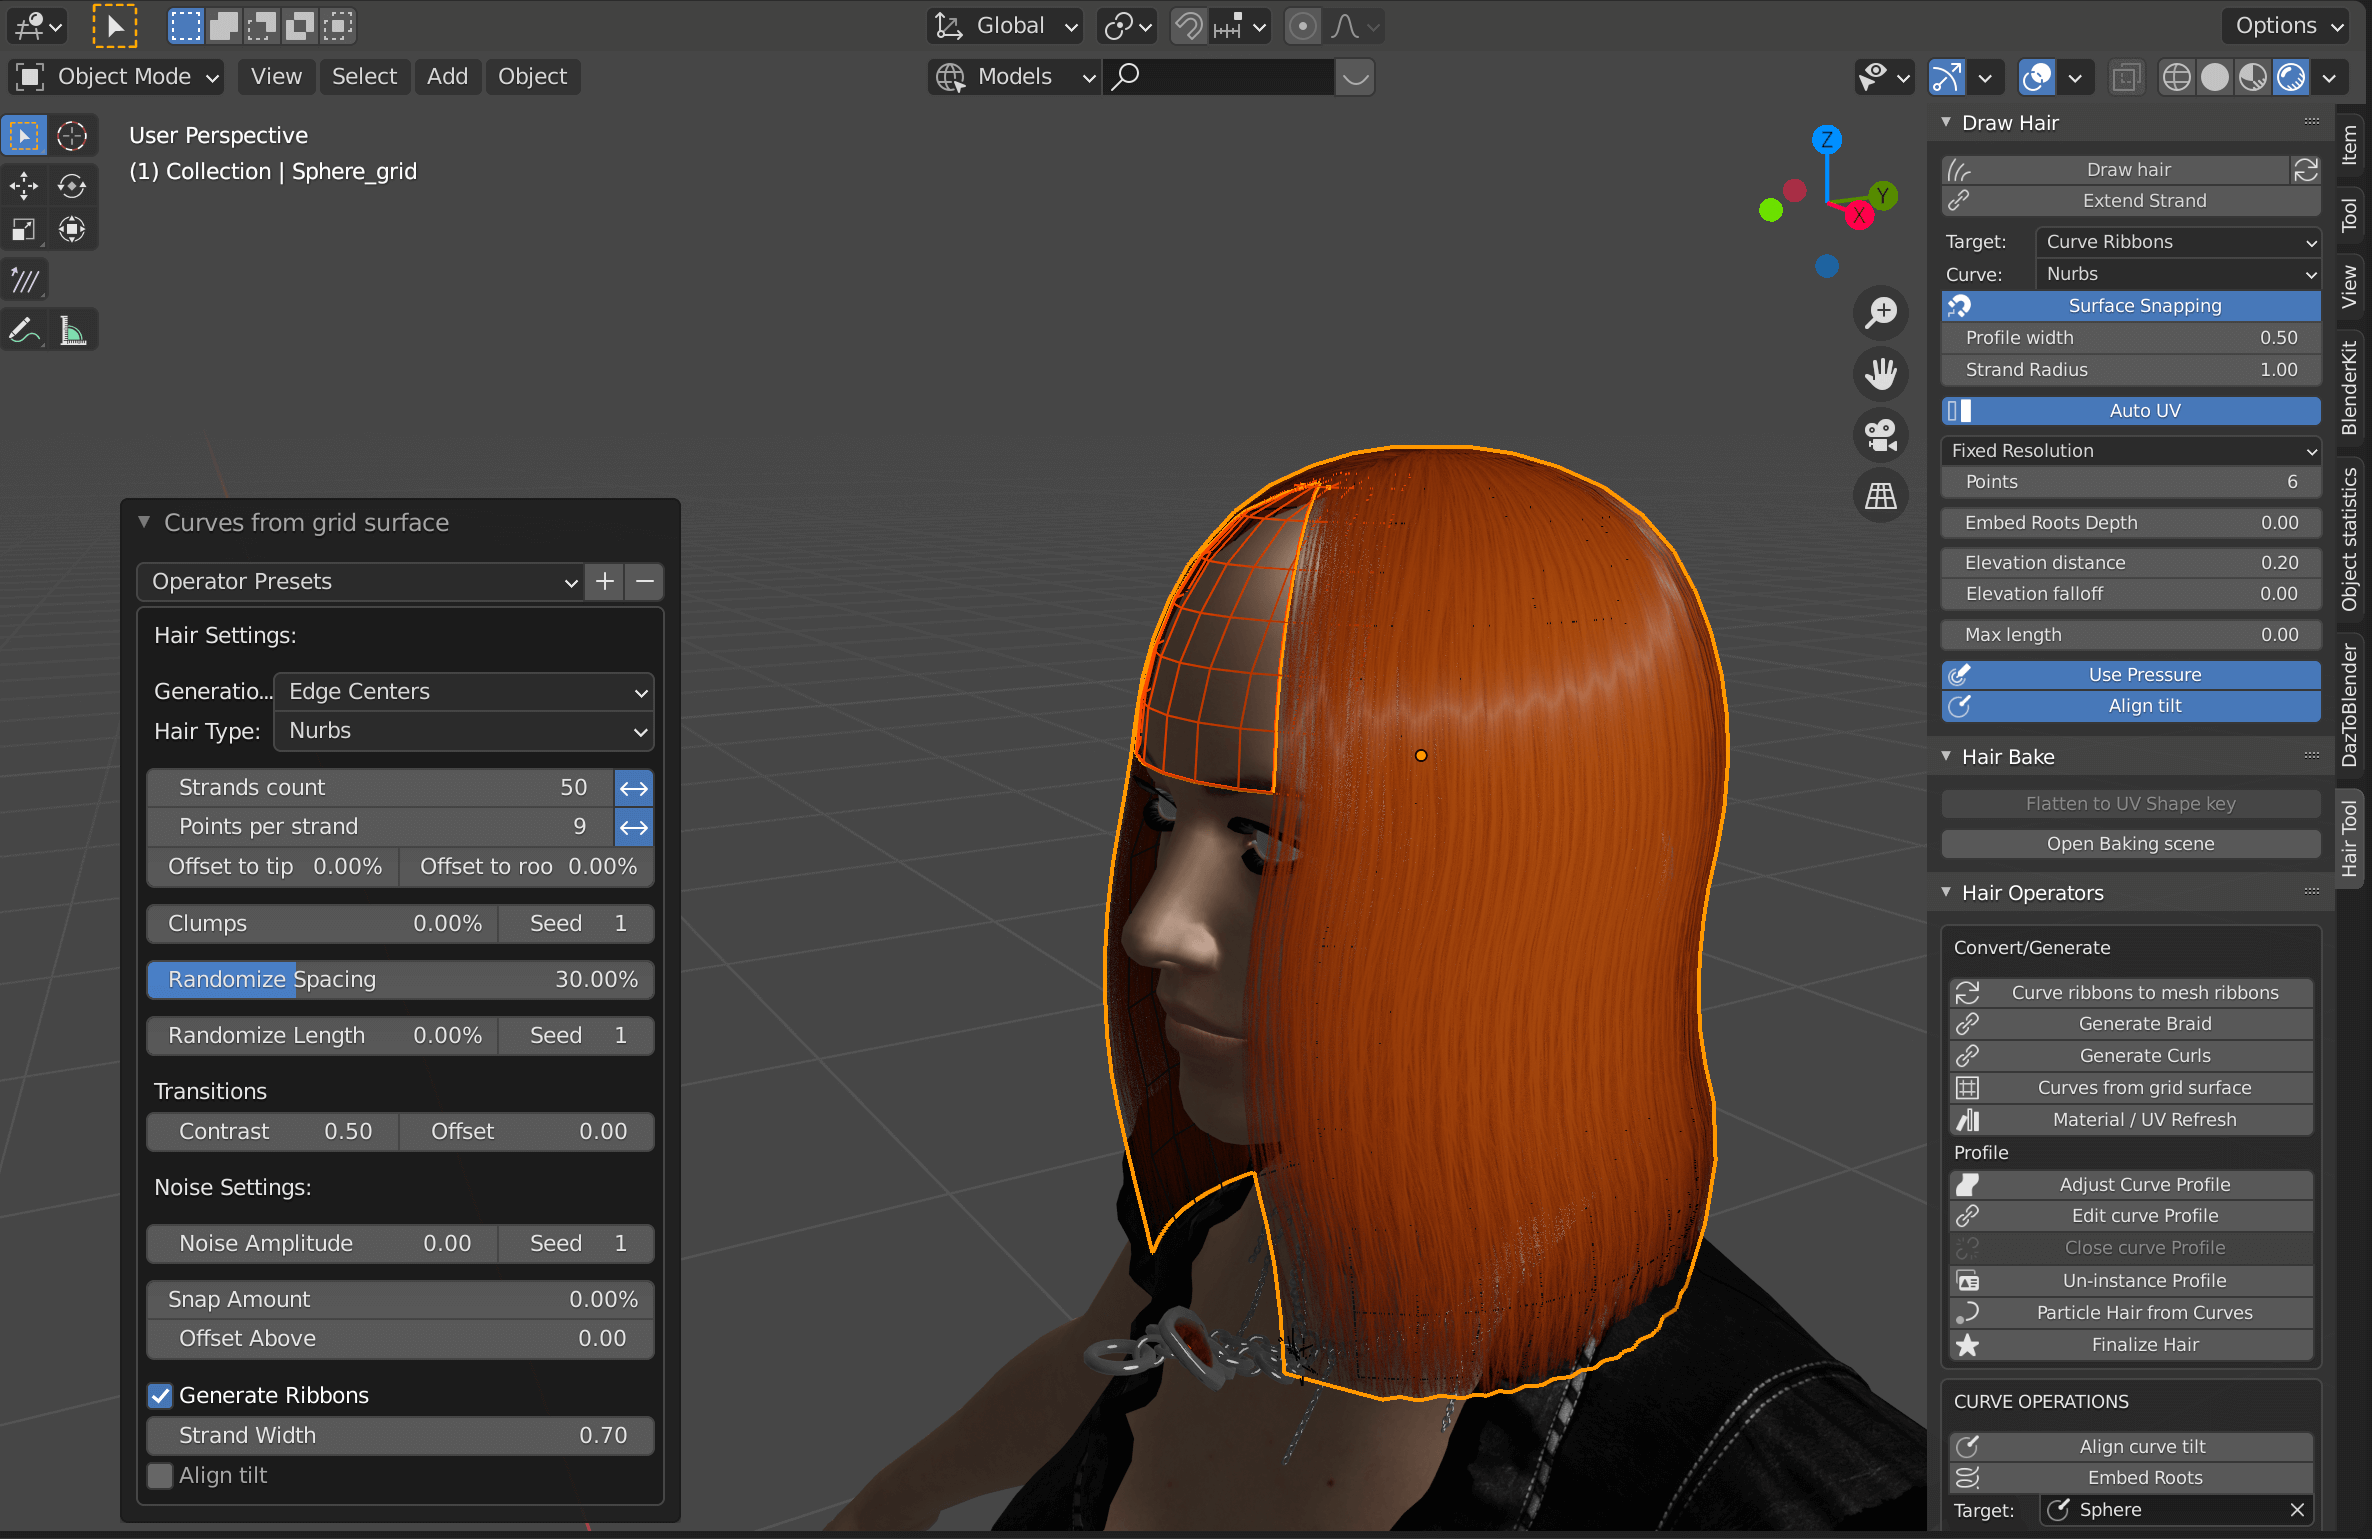
Curves from grid surface
Curves from grid surface after applying bangs
Adjust the length and density of the hair from the menu at the bottom left of the screen.
| Hair Settings: | |
| Generation Method | Vertex Position |
| Hair Type | Bundle type (polygon, Bezier curve, etc.) |
| Radius | Thickness |
| Strands count | Number of strands |
| Points per strand | Number of vertices per strand |
| Offset up to tip/root | Offset up to tip/root |
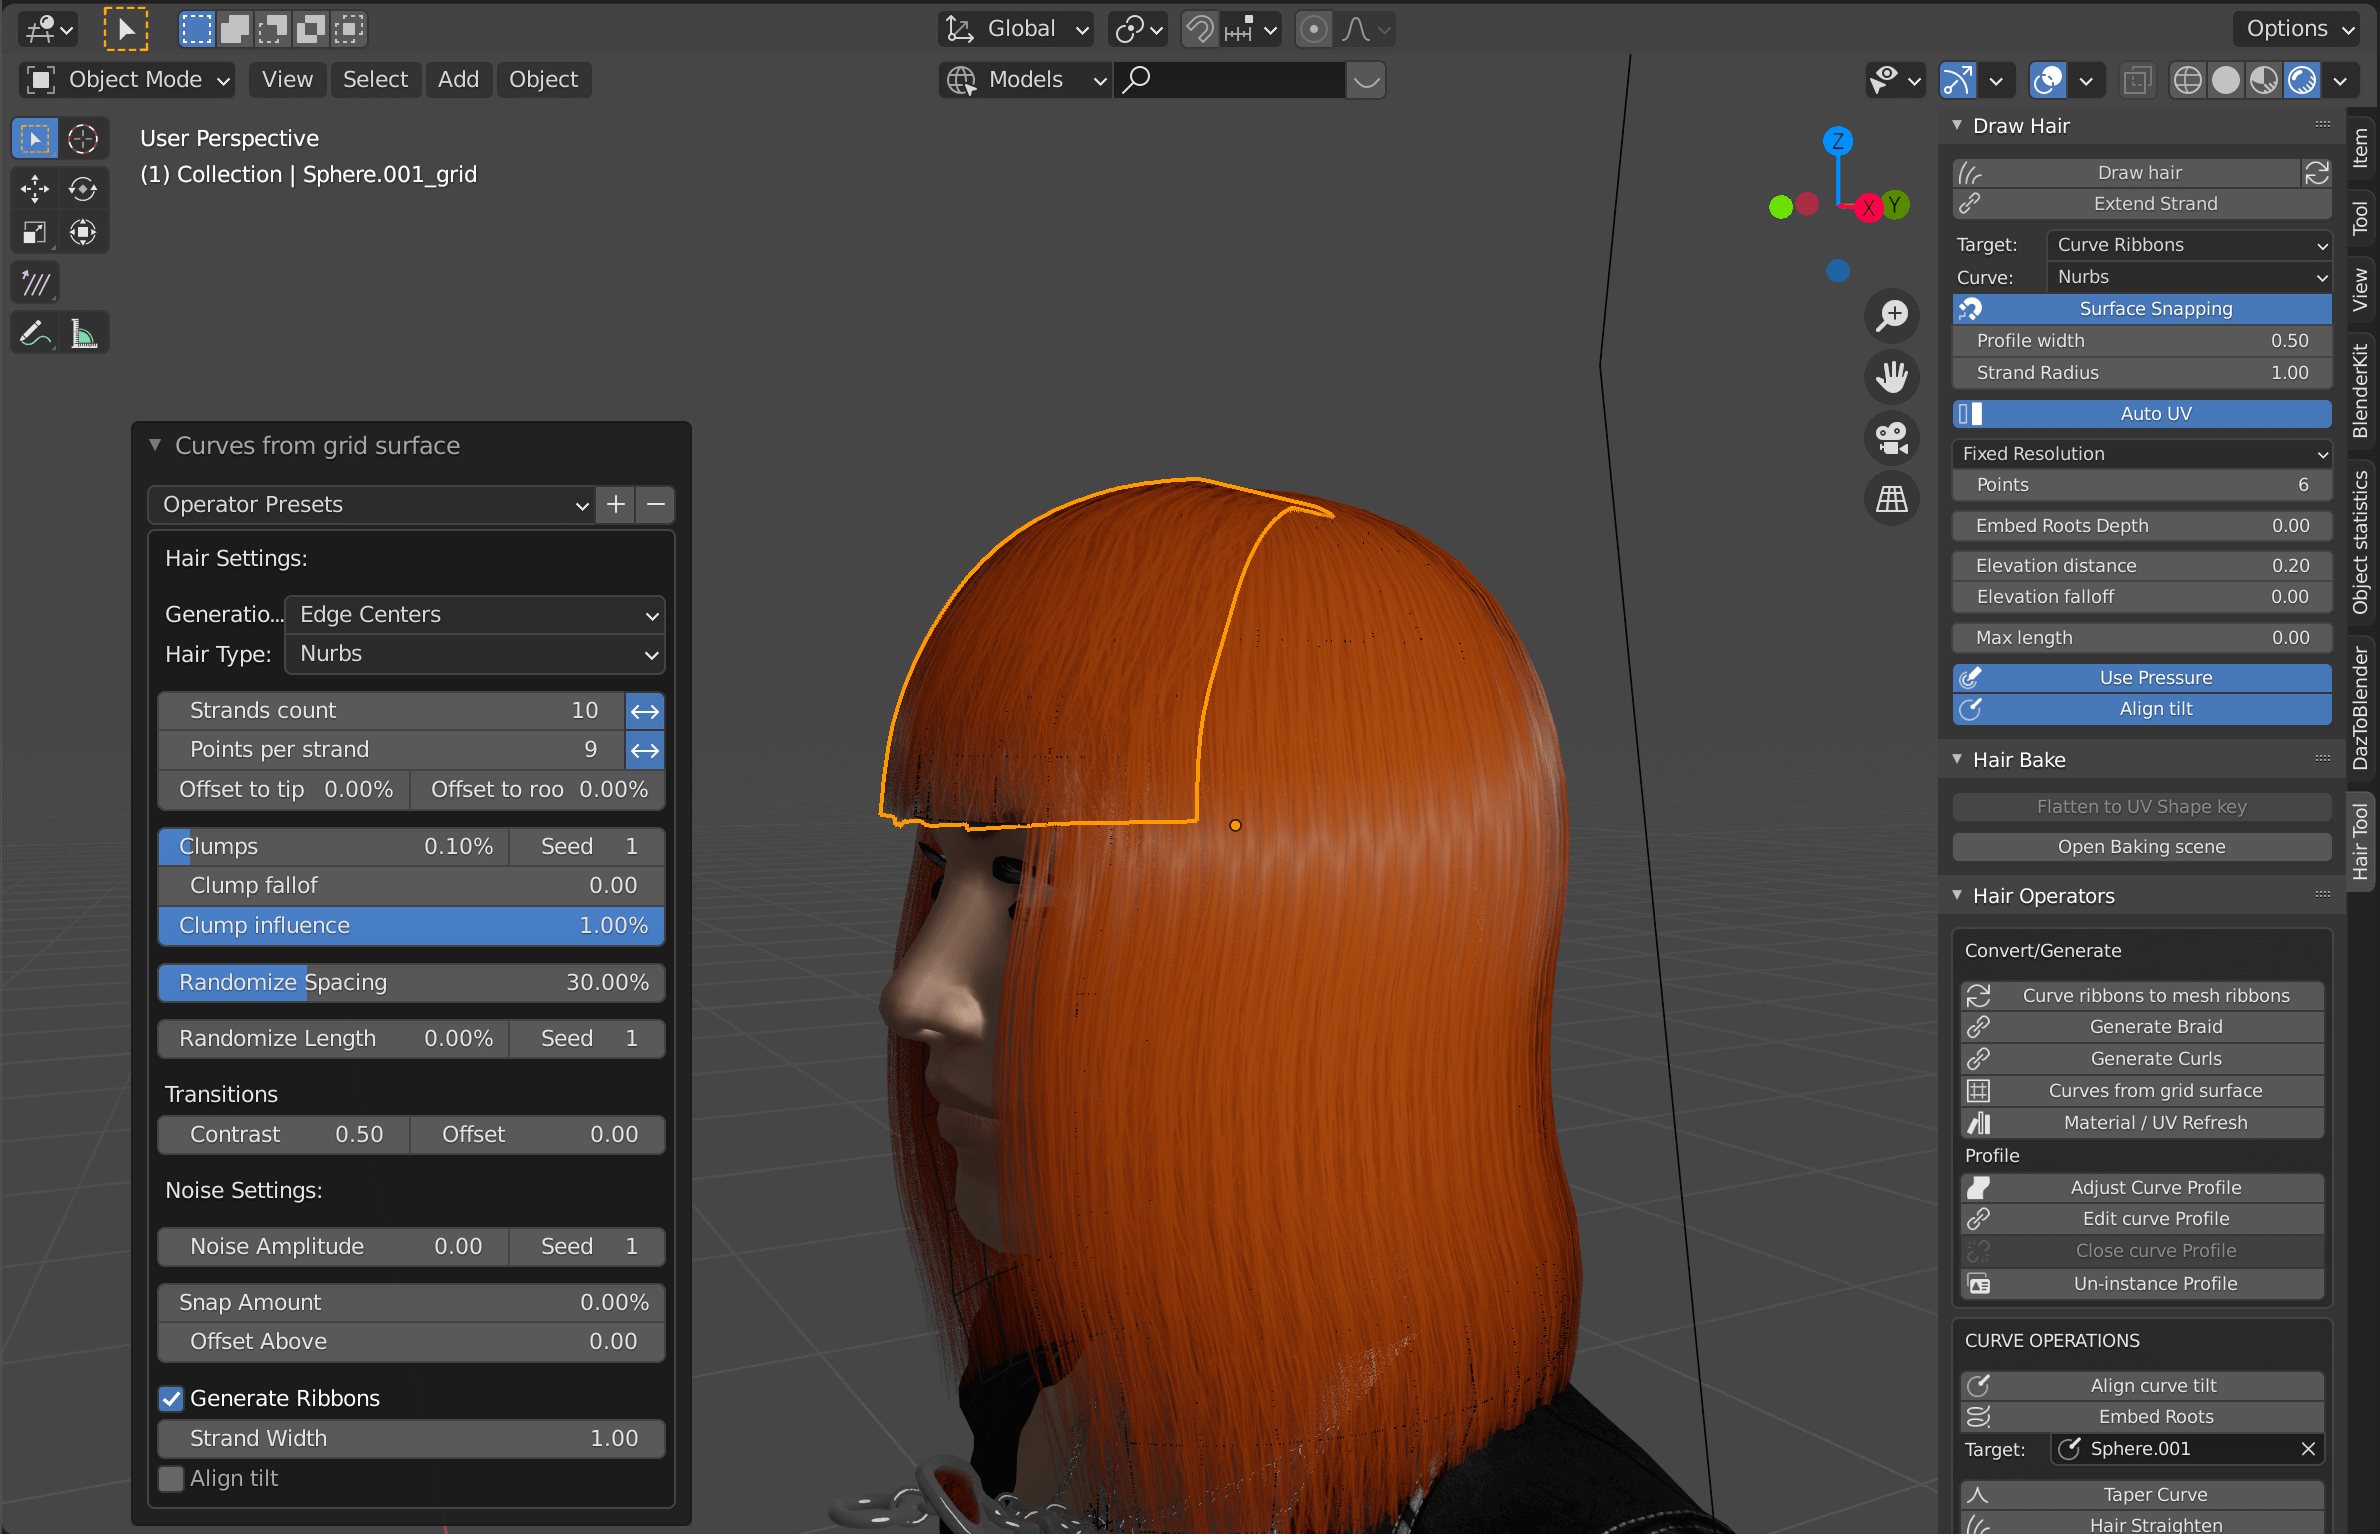
| Clumps | clamp |
| (Clumps falloff) | Clamp falloff |
| (Clump influence) | Clump influence |
| Randomize Spacing | Randomize the spacing between hair strands |
| Randomize Length | Randomize hair length |
| Transitions: | |
| Contrast | Contrast |
| Offset | Offset |
| Noise Settings: | |
| Noise Amplitude | Noise amplitude (to make hair stand up) |
| (Length Constrain) | Length constrain |
| (Noise frequency) | Noise frequency |
| (Per strand noise) | Noise per strand of hair |
| (Frequency) | Overall frequency |
| Snap Amount | Snap the tips of the hair |
Checking the Generate Ribbons checkbox will turn the tube-shaped curve into a ribbon-like shape.
The width can be changed using the Strand Width setting below it.
In the Hair Type setting, I chose Nurbs, but you can use polygons, Bezier curves, or whatever you are comfortable with.
Adjusting the hairstyle
From the Convert/Generate menu on the right side of the screen, let’s try to change the hair.
Convert/Generate
Click on Generate Braid to instantly create a bunch of braids.
Generate Braid
Click Generate Curls to give your hair a perm-like curl.
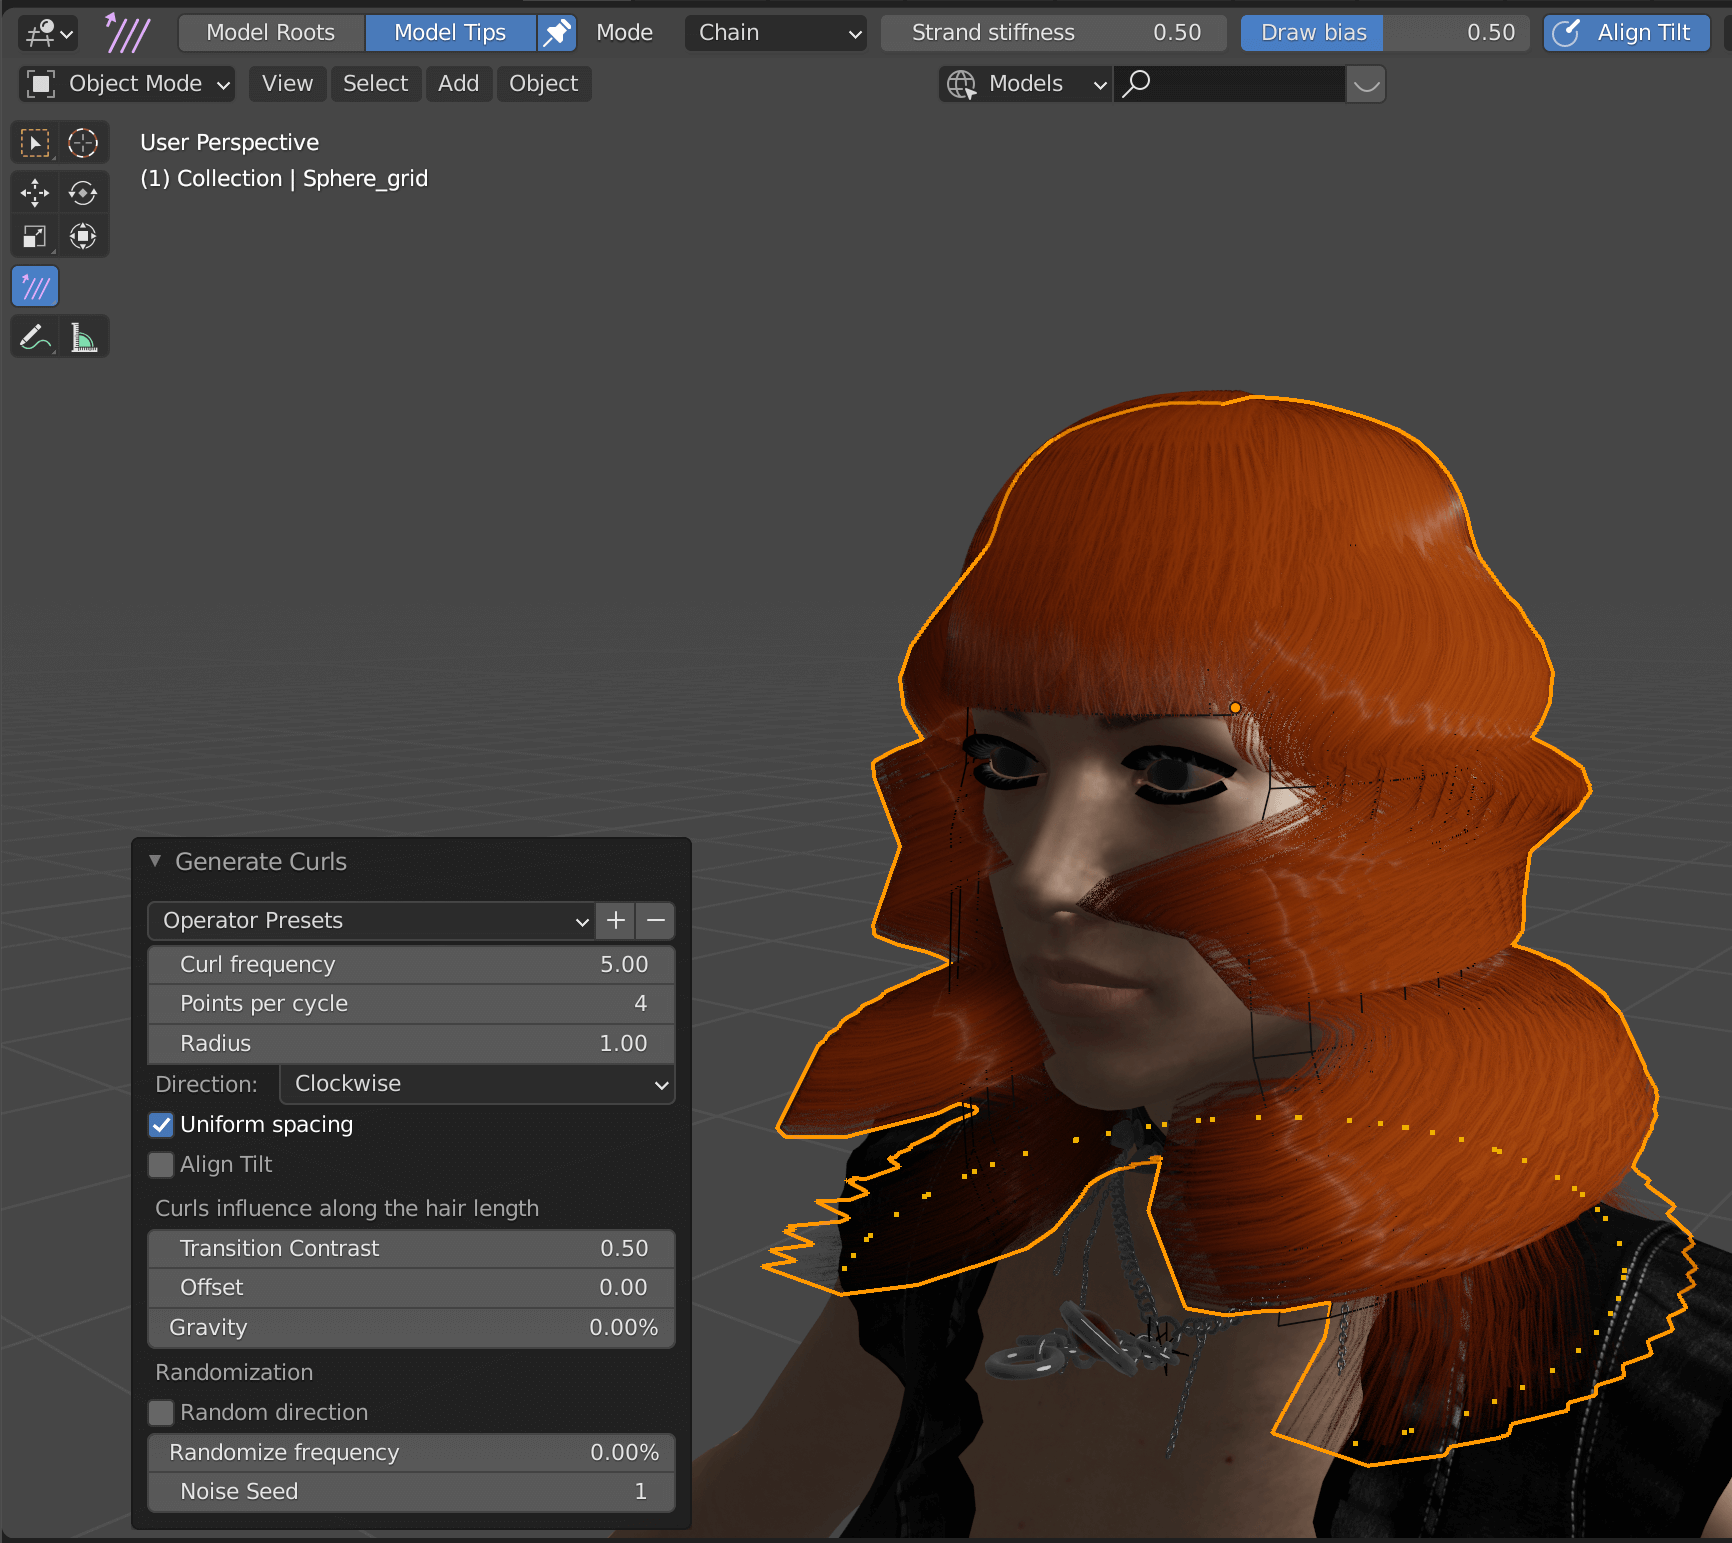
Generate Curls
You can adjust the parameters in the lower left corner of the screen.
After adjusting parameters
You can easily create a braided ponytail or twin drills by creating one or two strands of hair in advance and applying them to the hair.
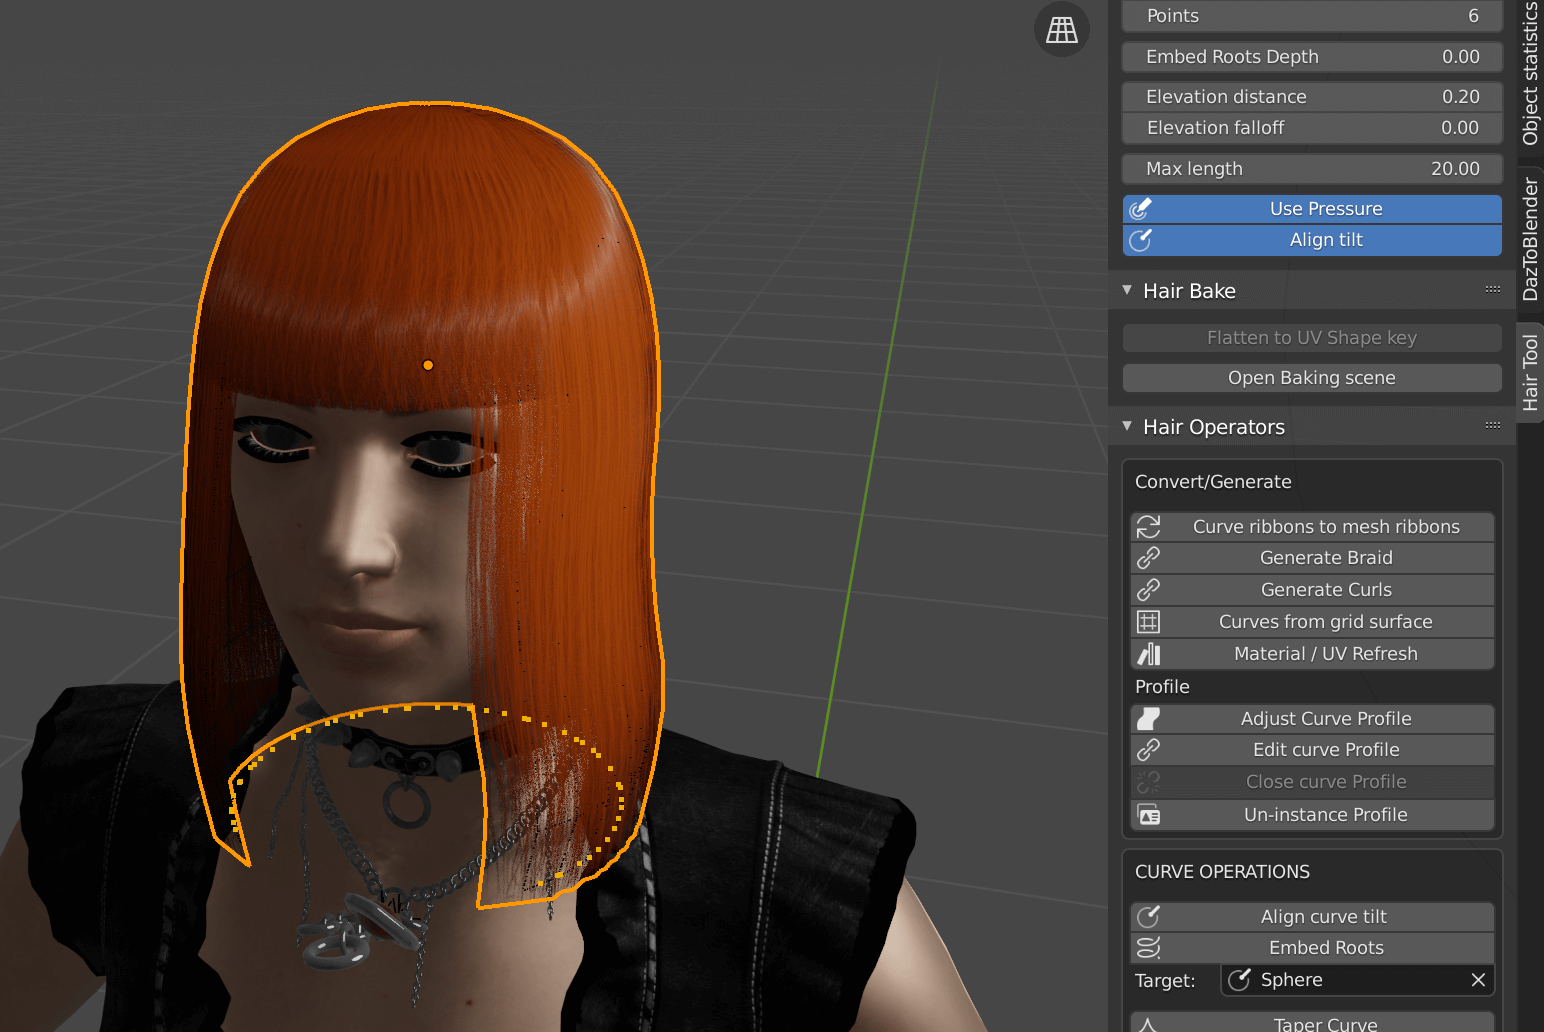
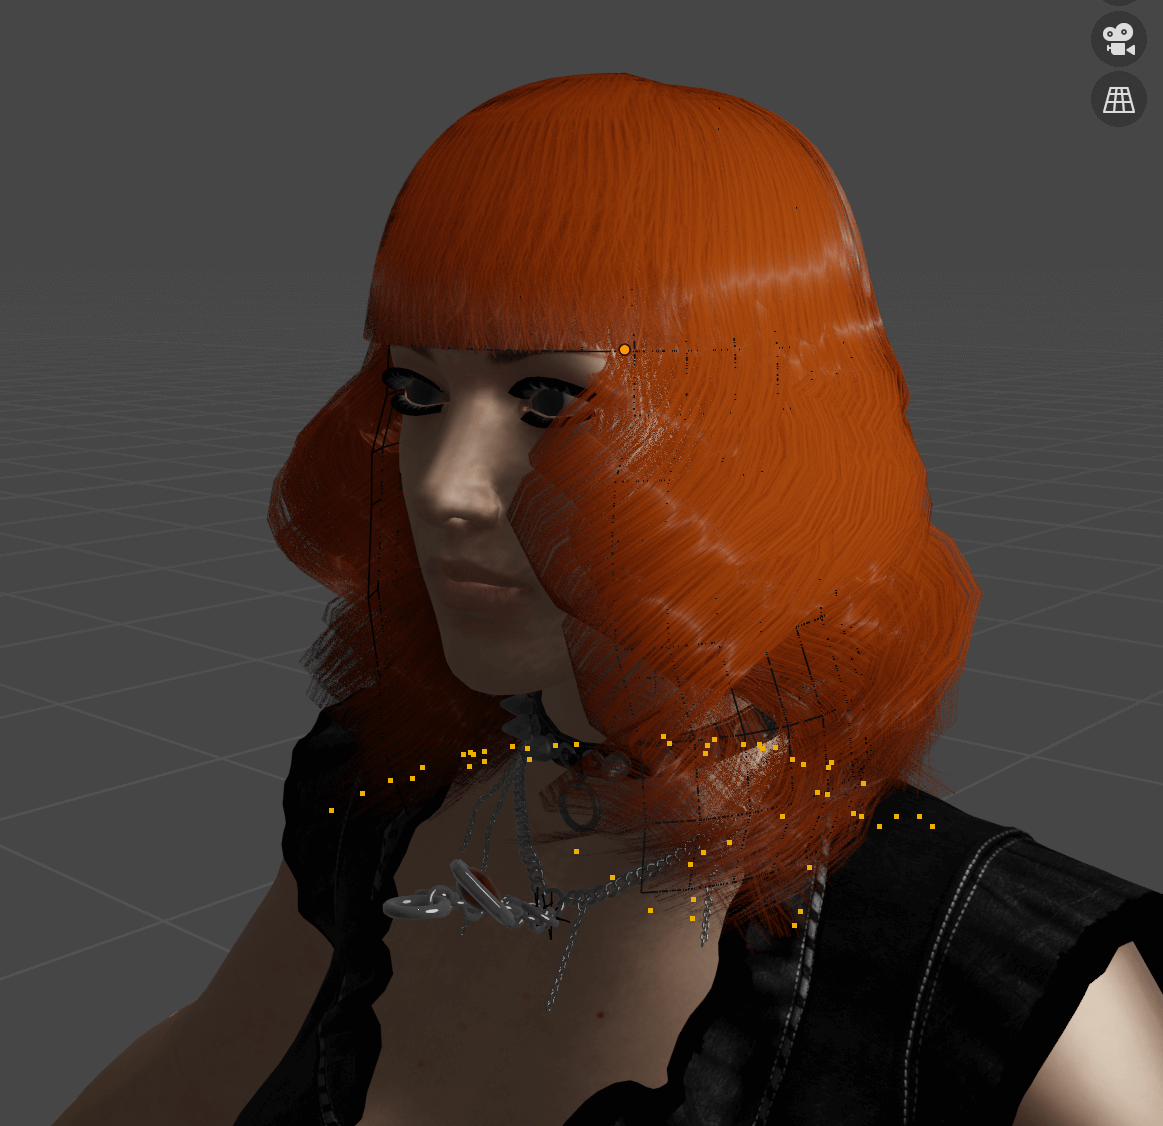
You can use the Taper Curve in CURVE OPERATIONS to change the combing and volume of the entire hair.

Change the curve -> OK, the ends of the hair are now lighter.
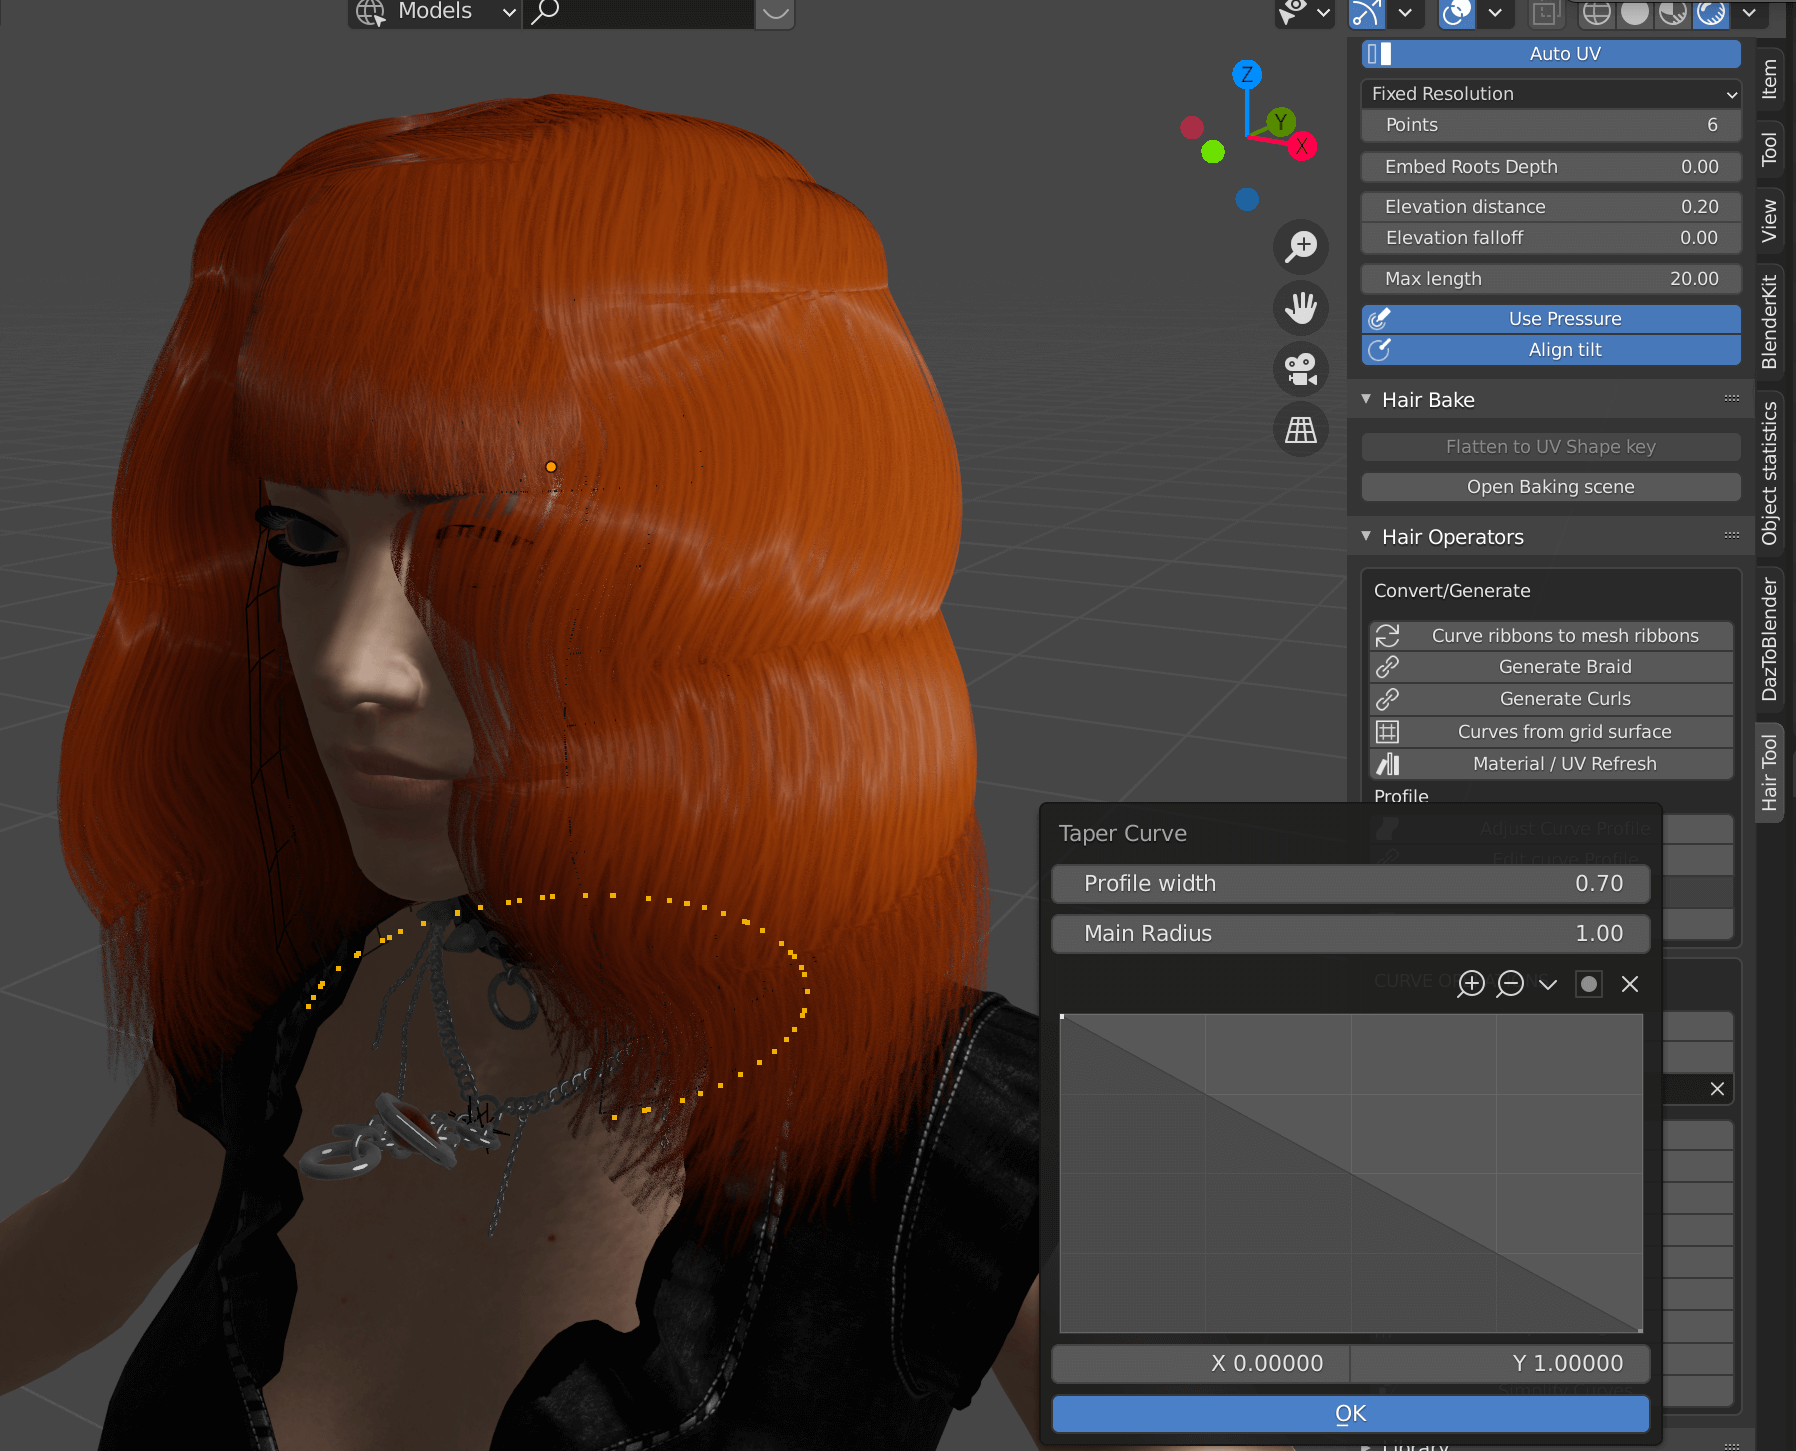
Be careful not to add too much volume, or the silhouette will become square.
The hair ends are buried in the shoulders, so adjust them slightly.
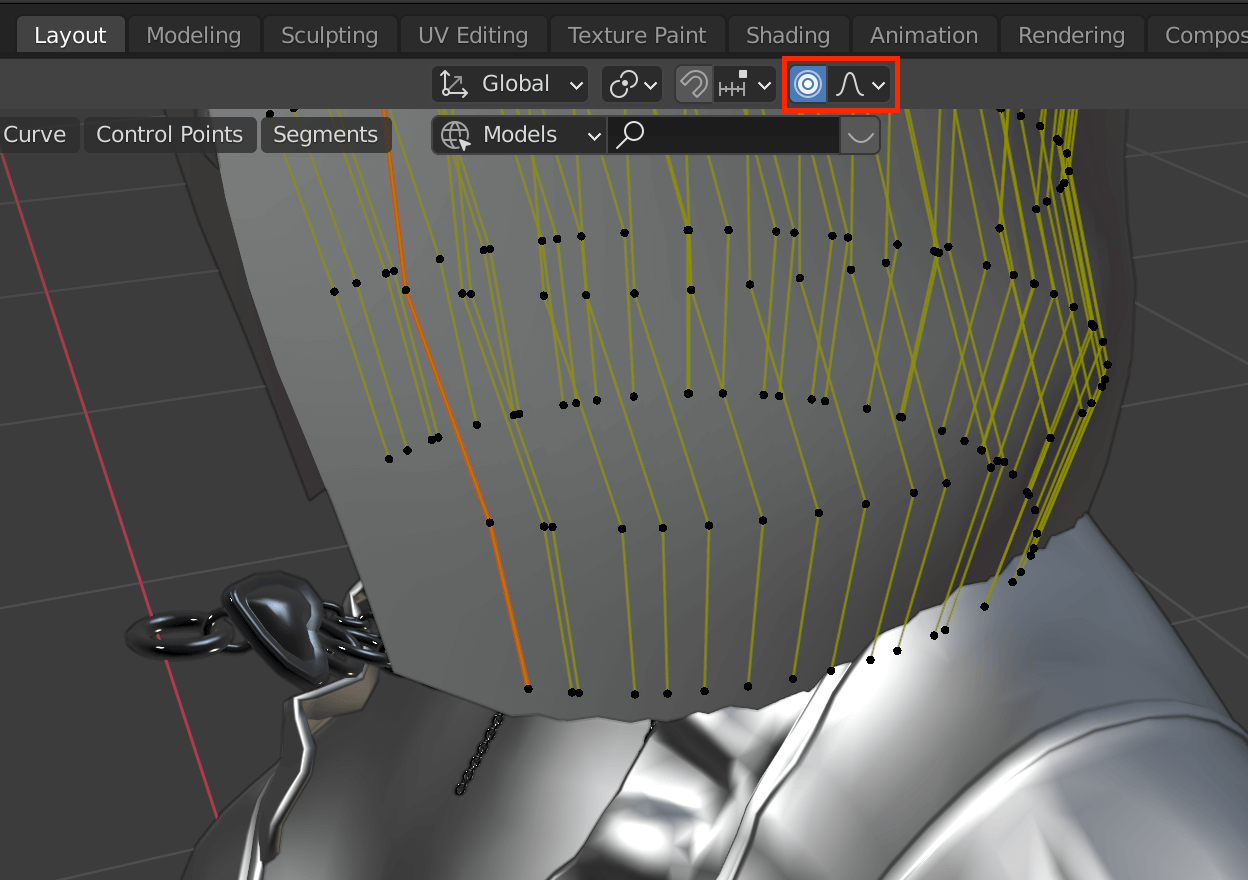
Activate Proportional Editing.

Use the size of the circle to determine the range of influence of the movement.

After adjustment
Change the color of the hair
This is reflected within Blender, and is useful if you want to simulate the hair color.
In DAZ Studio and Unity, you will need to set a new color.
Switch to the Shading tab and click on the upper right mark of the node “HairParameters” that appears when the hair is selected.
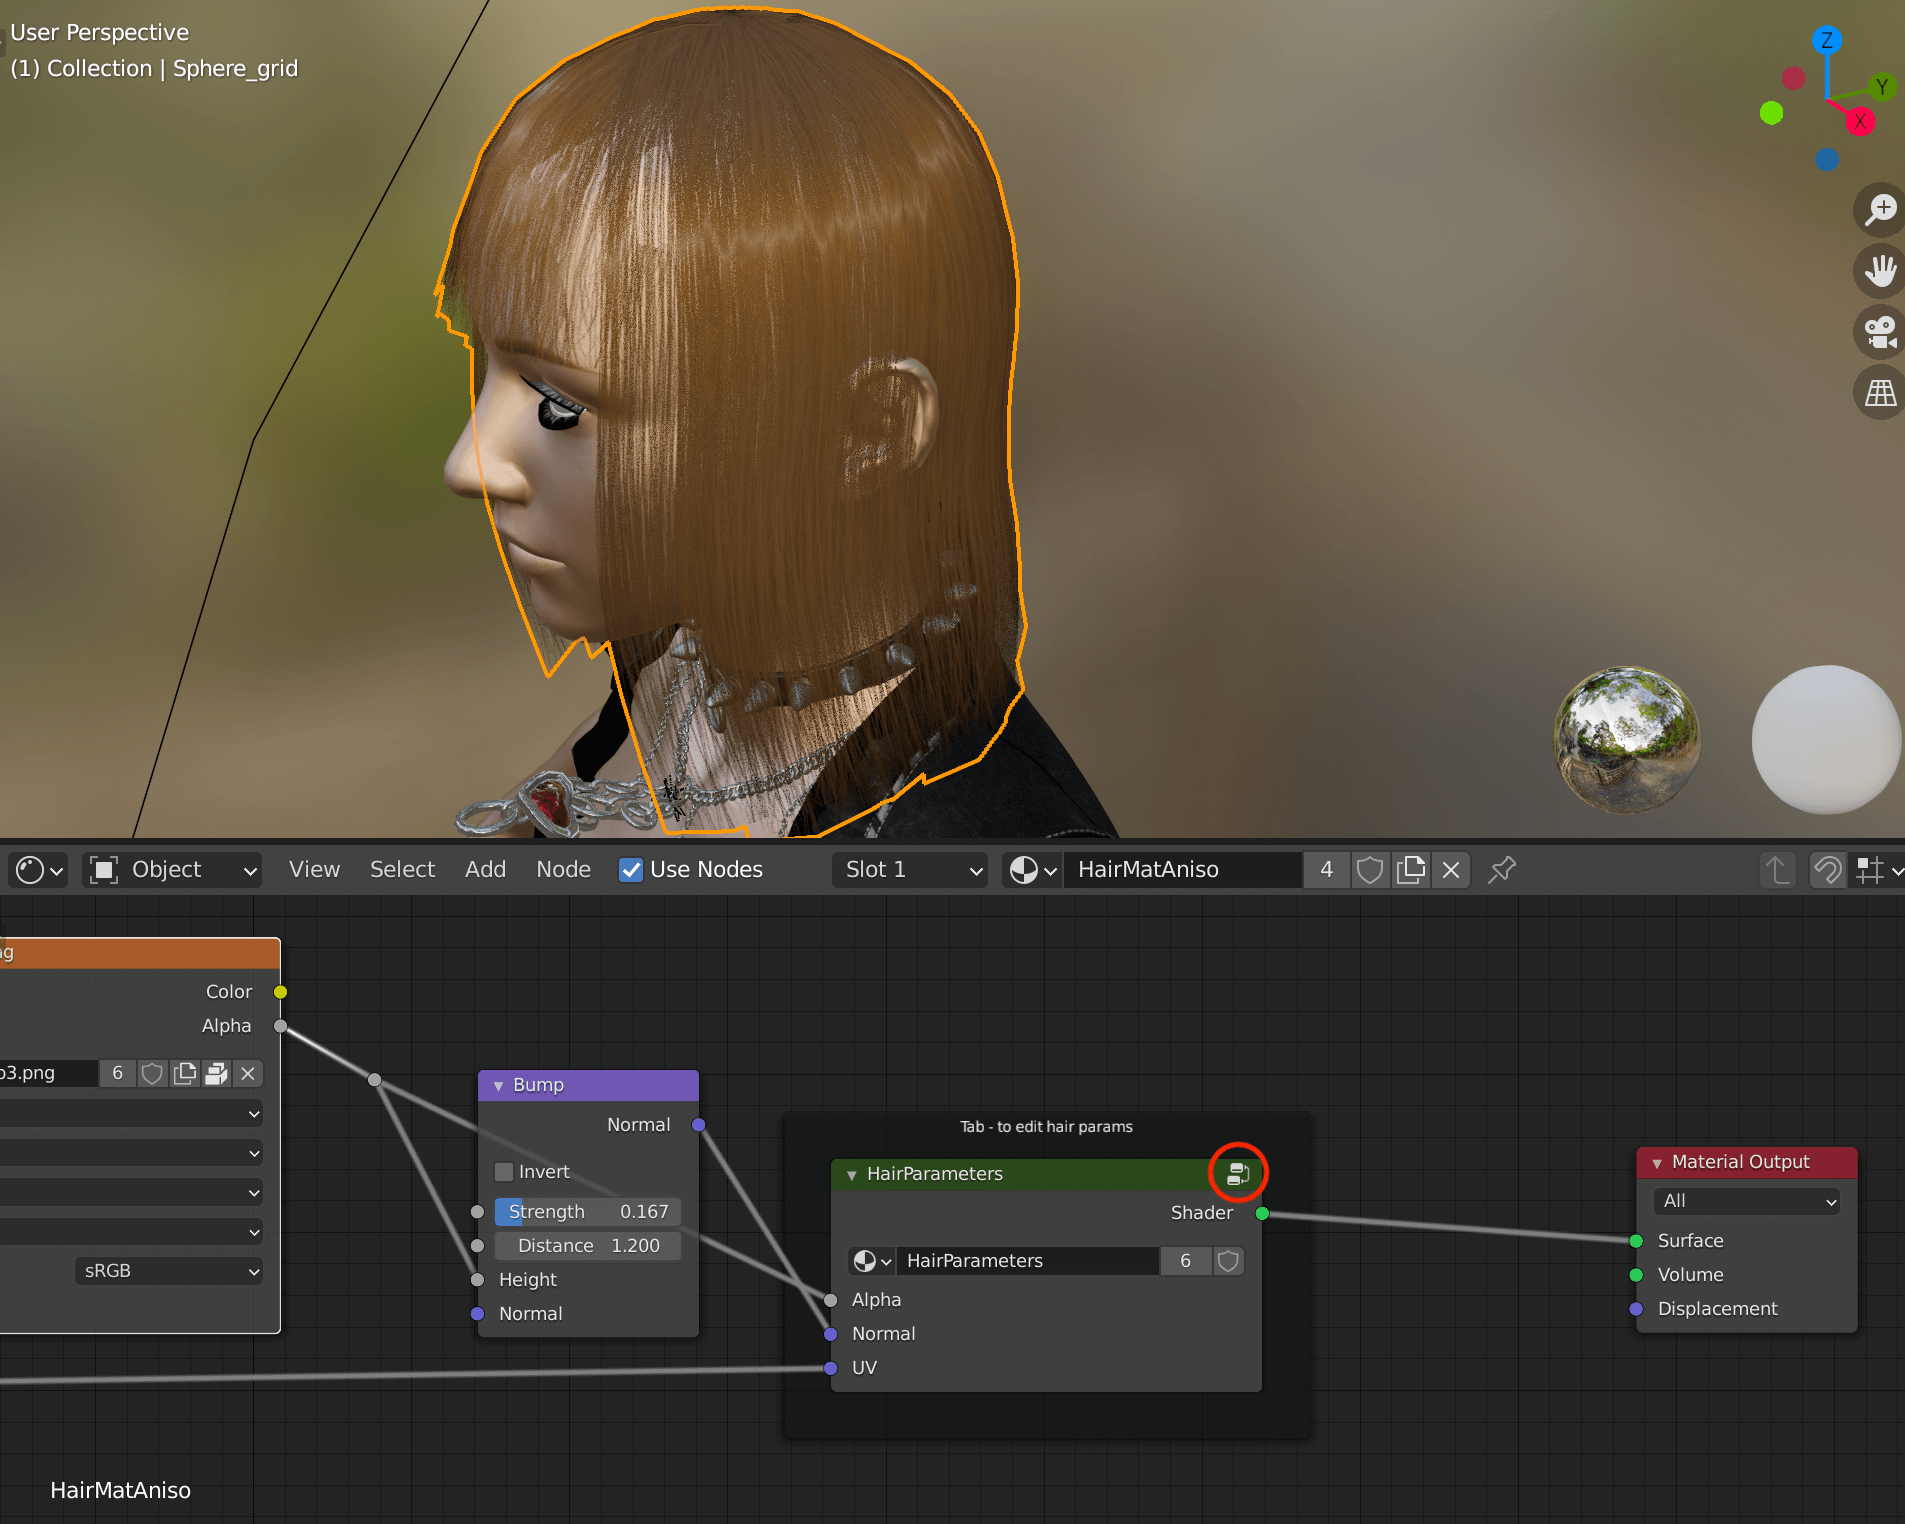
HairParameters
You can use the Color Ramp to change the color of the hair itself, and the Metallic Color to change the color of the hair when light is reflected on it.
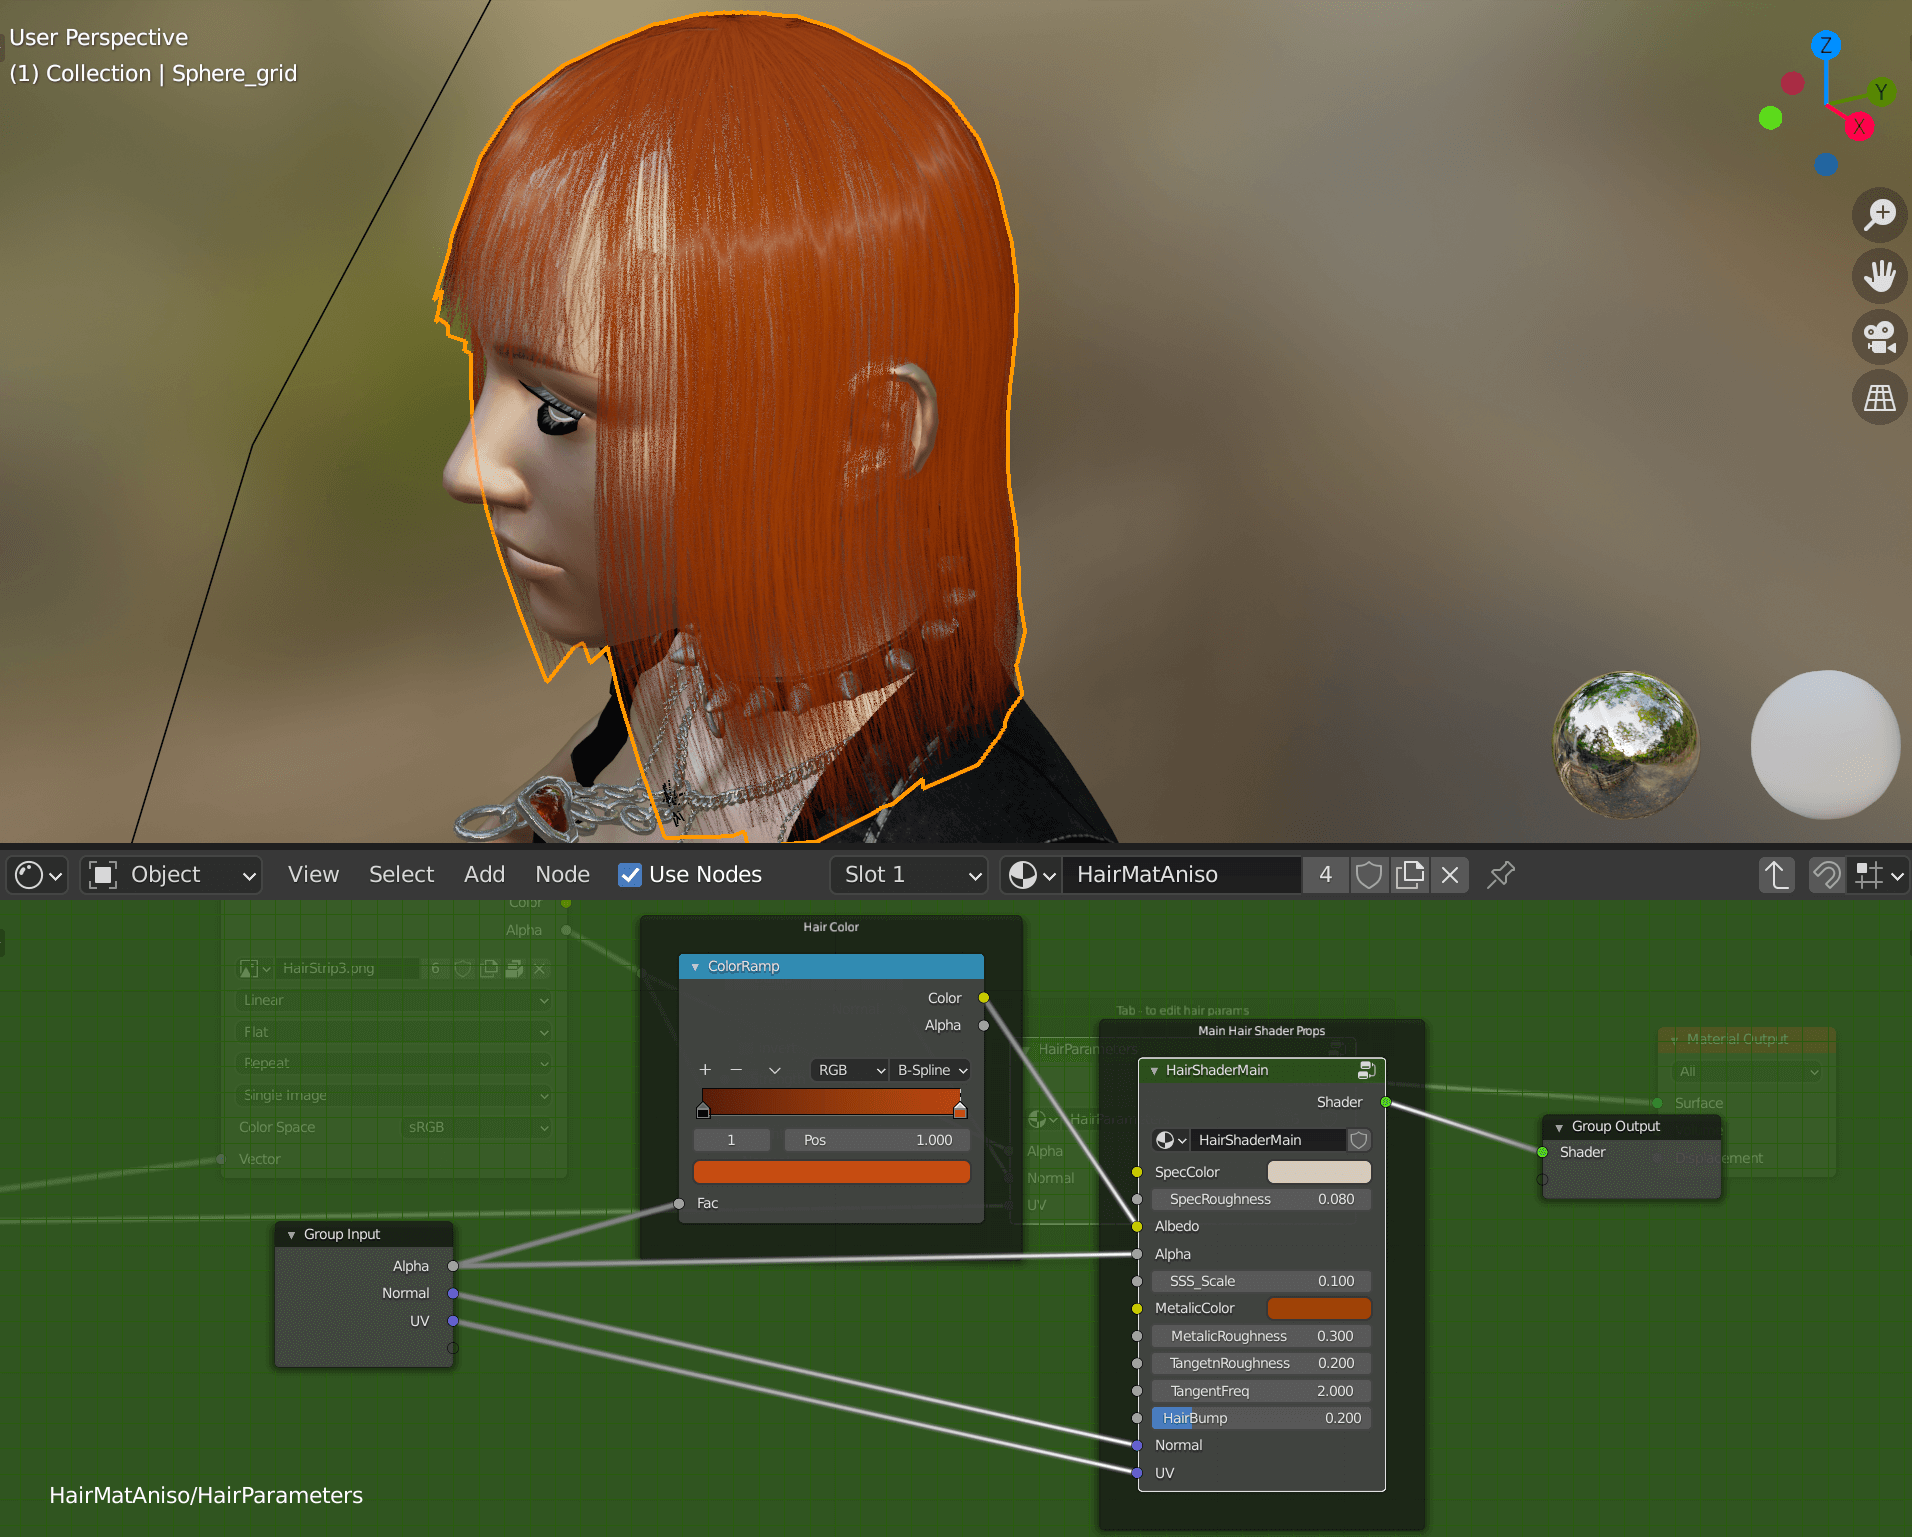
HairParameters
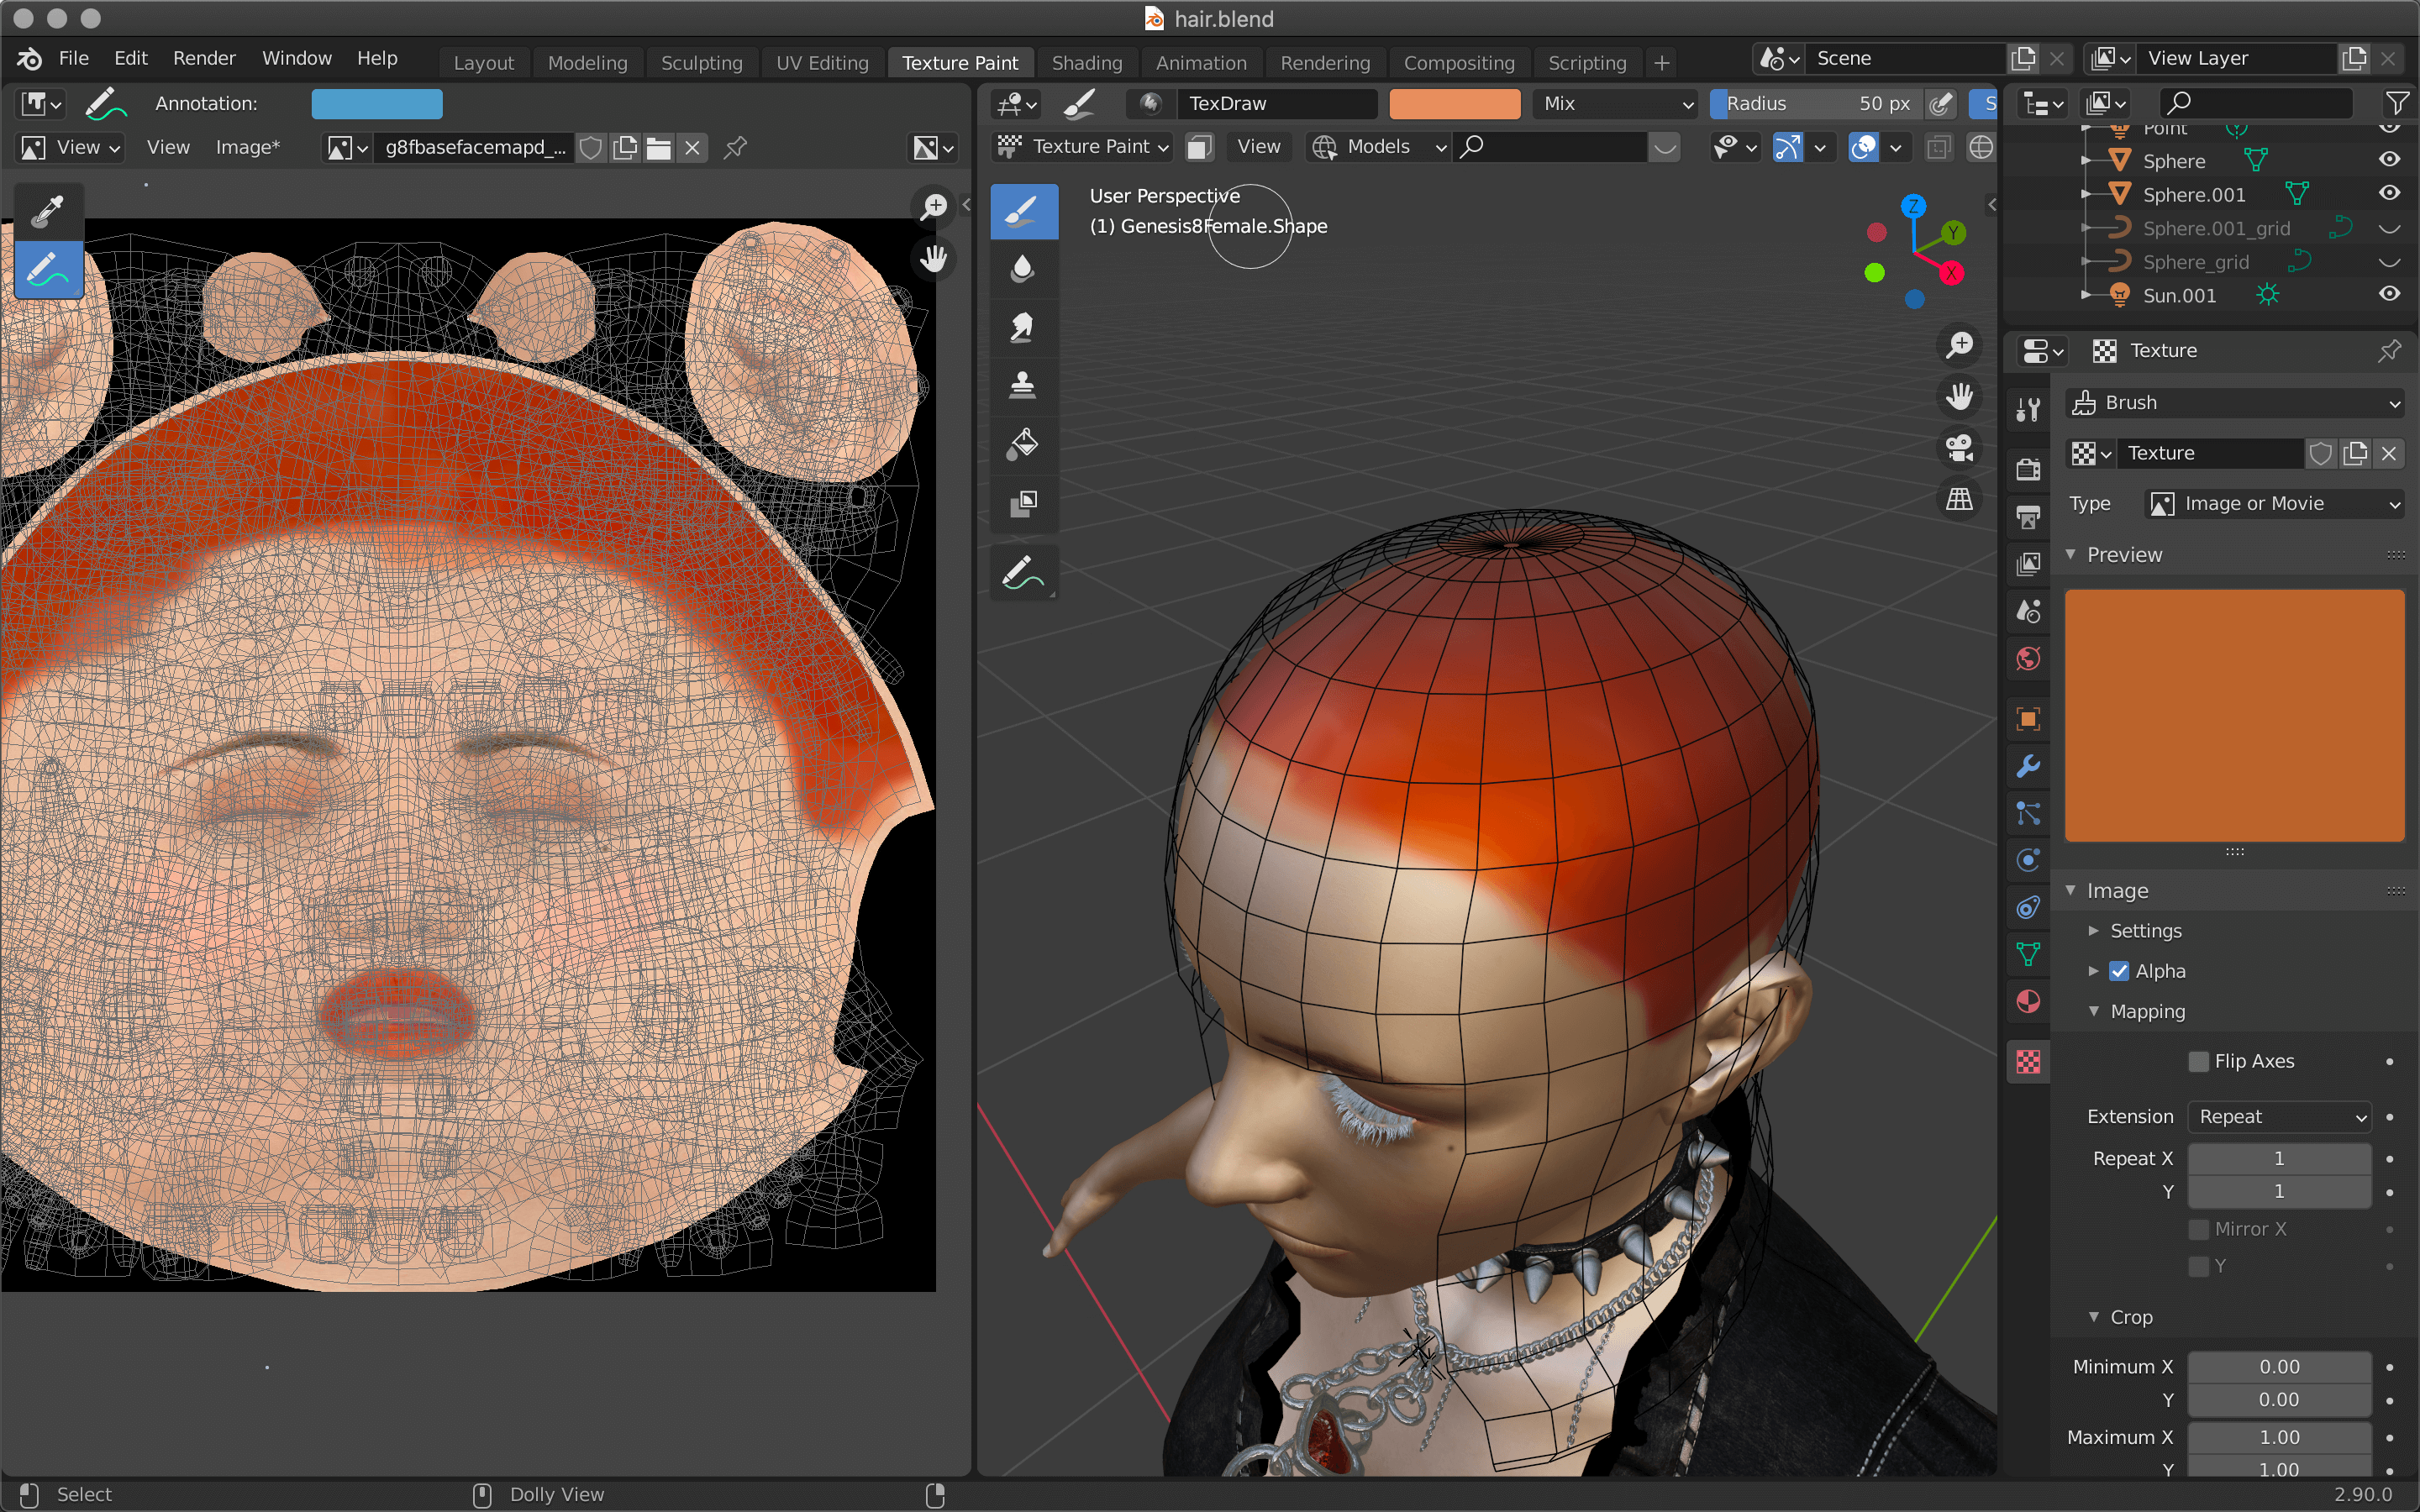
Painting the scalp color
To prevent the skin of the head from showing through the hair, texture painting is used to make it invisible.
Switch to the Shading tab, select the human model, and then select Face from the textures.
Click on the icon of the node where the texture is assigned in the shader editor and select Use file current directory.
When the file list appears, assign the made up texture created in the previous article.

Use file current directory
Switch to the Texture Paint tab and paint in the same color as the desired hair color.

Texture Paint
The border between the hair and the forehead is fine, but the top of the head will stand out if there is no color, so paint it well.
Texture Paint
DAZ Studio’s human body model has two separate textures, one for the front and one for the back, with the ears as the border, so we need to save both textures.
First, save the face texture by clicking Image→Save (or Save As if you don’t want to overwrite it) at the top of the Image Editor on the left.
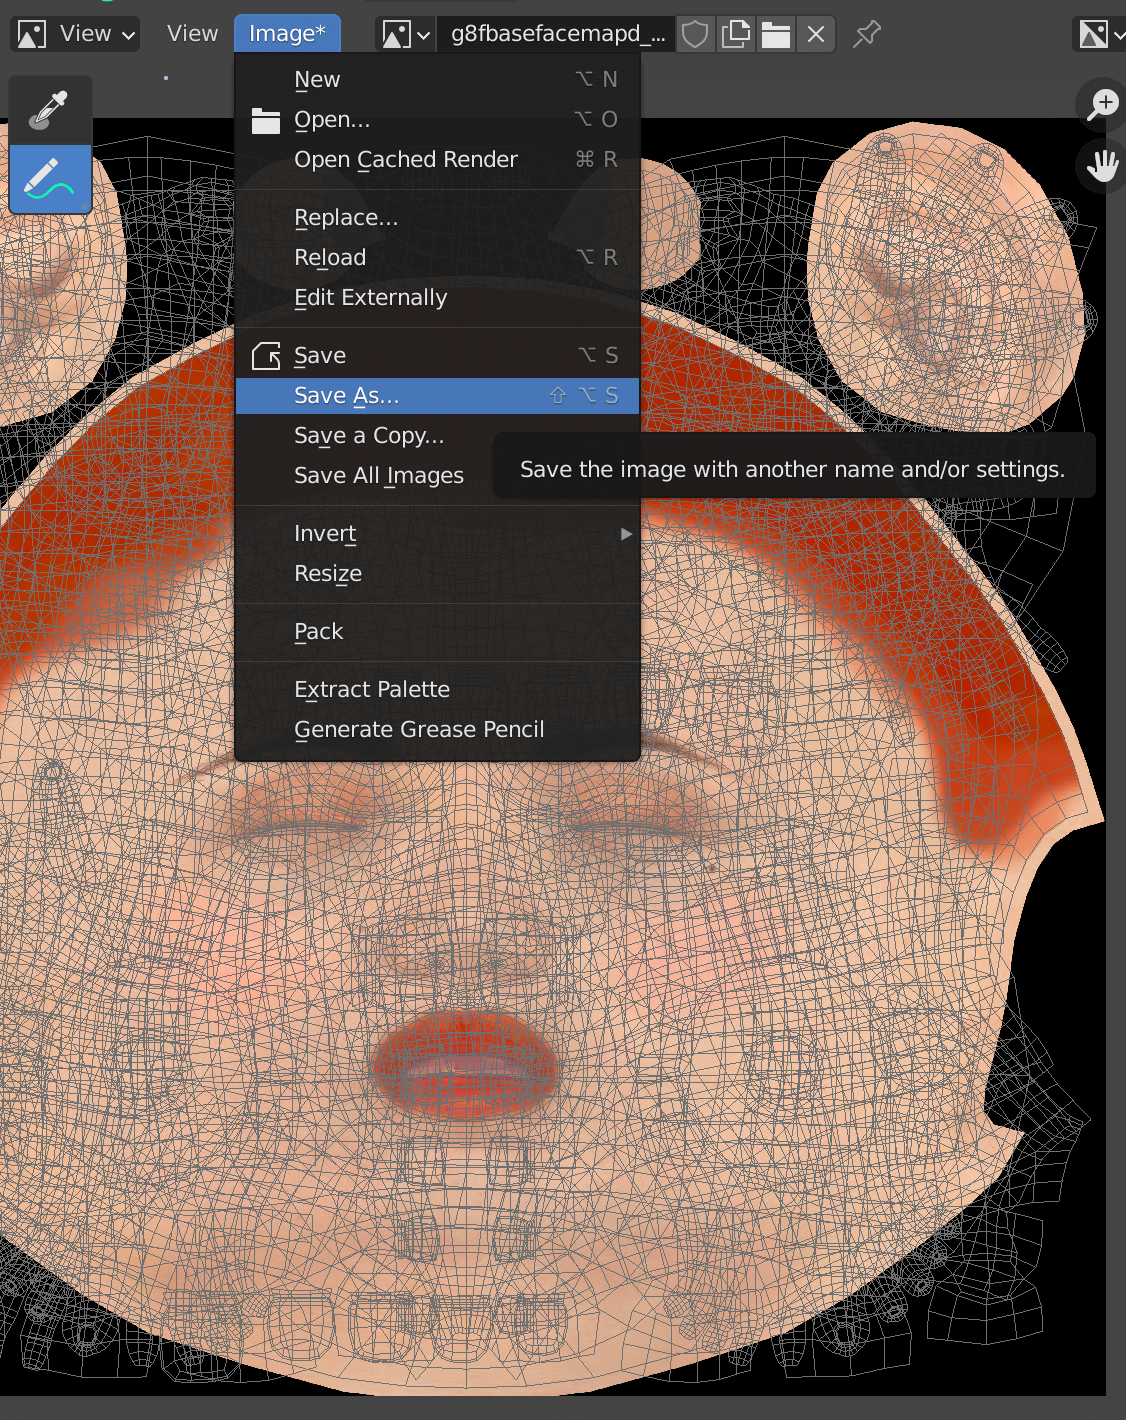
Save
After that, select the texture named Torso from the Texture Slots at the top of the Texture Paint, and when you are sure that it is well painted, save it using the same procedure as the face texture.

Torso→Save
Once you have the ideal haircut, click on Curve ribbons to mesh ribbons to change the curve to mesh.
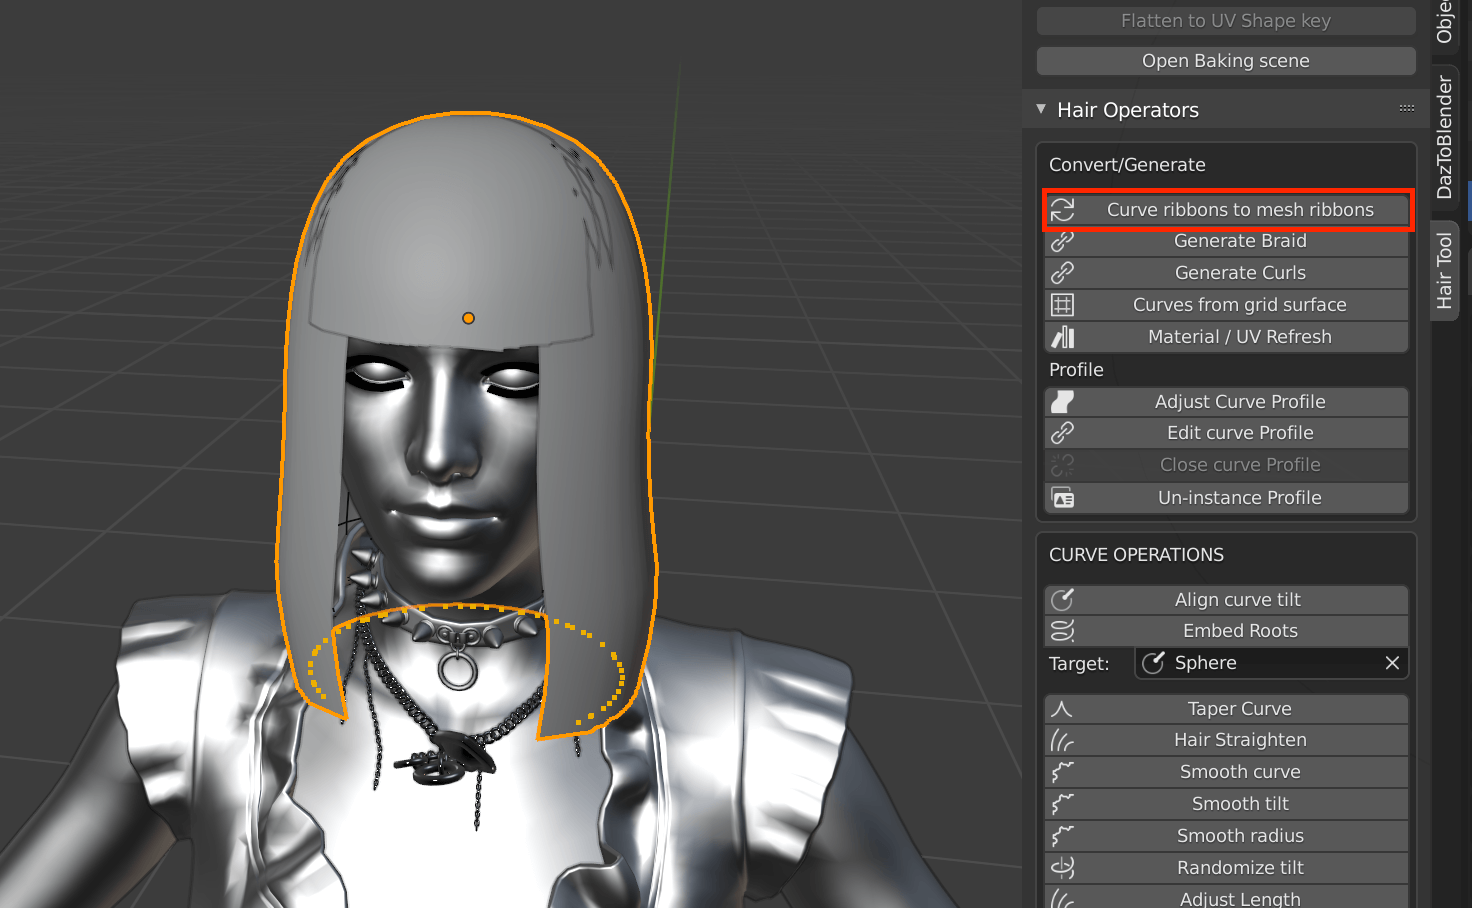
Curve ribbons to mesh ribbons
Wait a few seconds, then switch to edit mode to check.
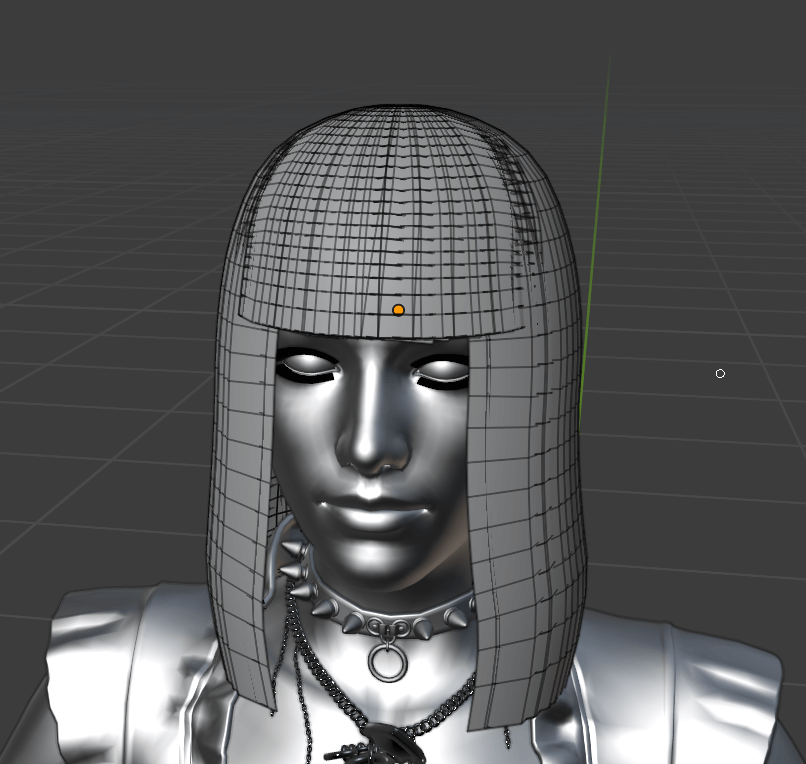
The curve has been converted to a mesh.
This is the end of the work for this project.
Thanks for your help!
In the next article, we will export the hair model to DAZ Studio, set up the movement and import it into Unity.
![[DAZ Studio] (3) Making hair with Hair Tool for Blender (latter half)](https://styly.cc/wp-content/uploads/2021/02/eyecatch_Ht2-160x160.png)
How to upload assets to STYLY
Click here to learn how to upload your created human models from Unity to STYLY.

Learn VR/AR content creation with no experience!
NEWVIEW SCHOOL ONLINE is an online learning site where you can learn the basics of Unity and PlayMaker required for VR/AR content creation, as well as the production process (and production techniques) of the attractive content distributed on STYLY!
- You can create VR/AR contents without writing programming code.
- Officially supervised Unity courses are available.
- Additional elements such as photogrammetric production methods and content weight reduction are available.
- You can learn how to think about creating VR/AR content.
