Continuing from the previous article, this article is the second half.
![[DAZ Studio] (3) Making hair with Hair Tool for Blender (first half)](https://styly.cc/wp-content/uploads/2021/02/eyecatch_Ht1-160x160.png)
I introduce step 3 and beyond.
- Create a human body model in DAZ Studio (refer to the articles ① and ②)
- Export the human model from step 1 to Blender, and create hair with Hair Tool for Blender (see the previous article).
- Export the model to DAZ Studio, register the hair style, and set the movement.
- Export to Unity
- Upload to STYLY
Exporting hair
Exporting the hair object itself
Select the hair object in object mode and export it in obj format.
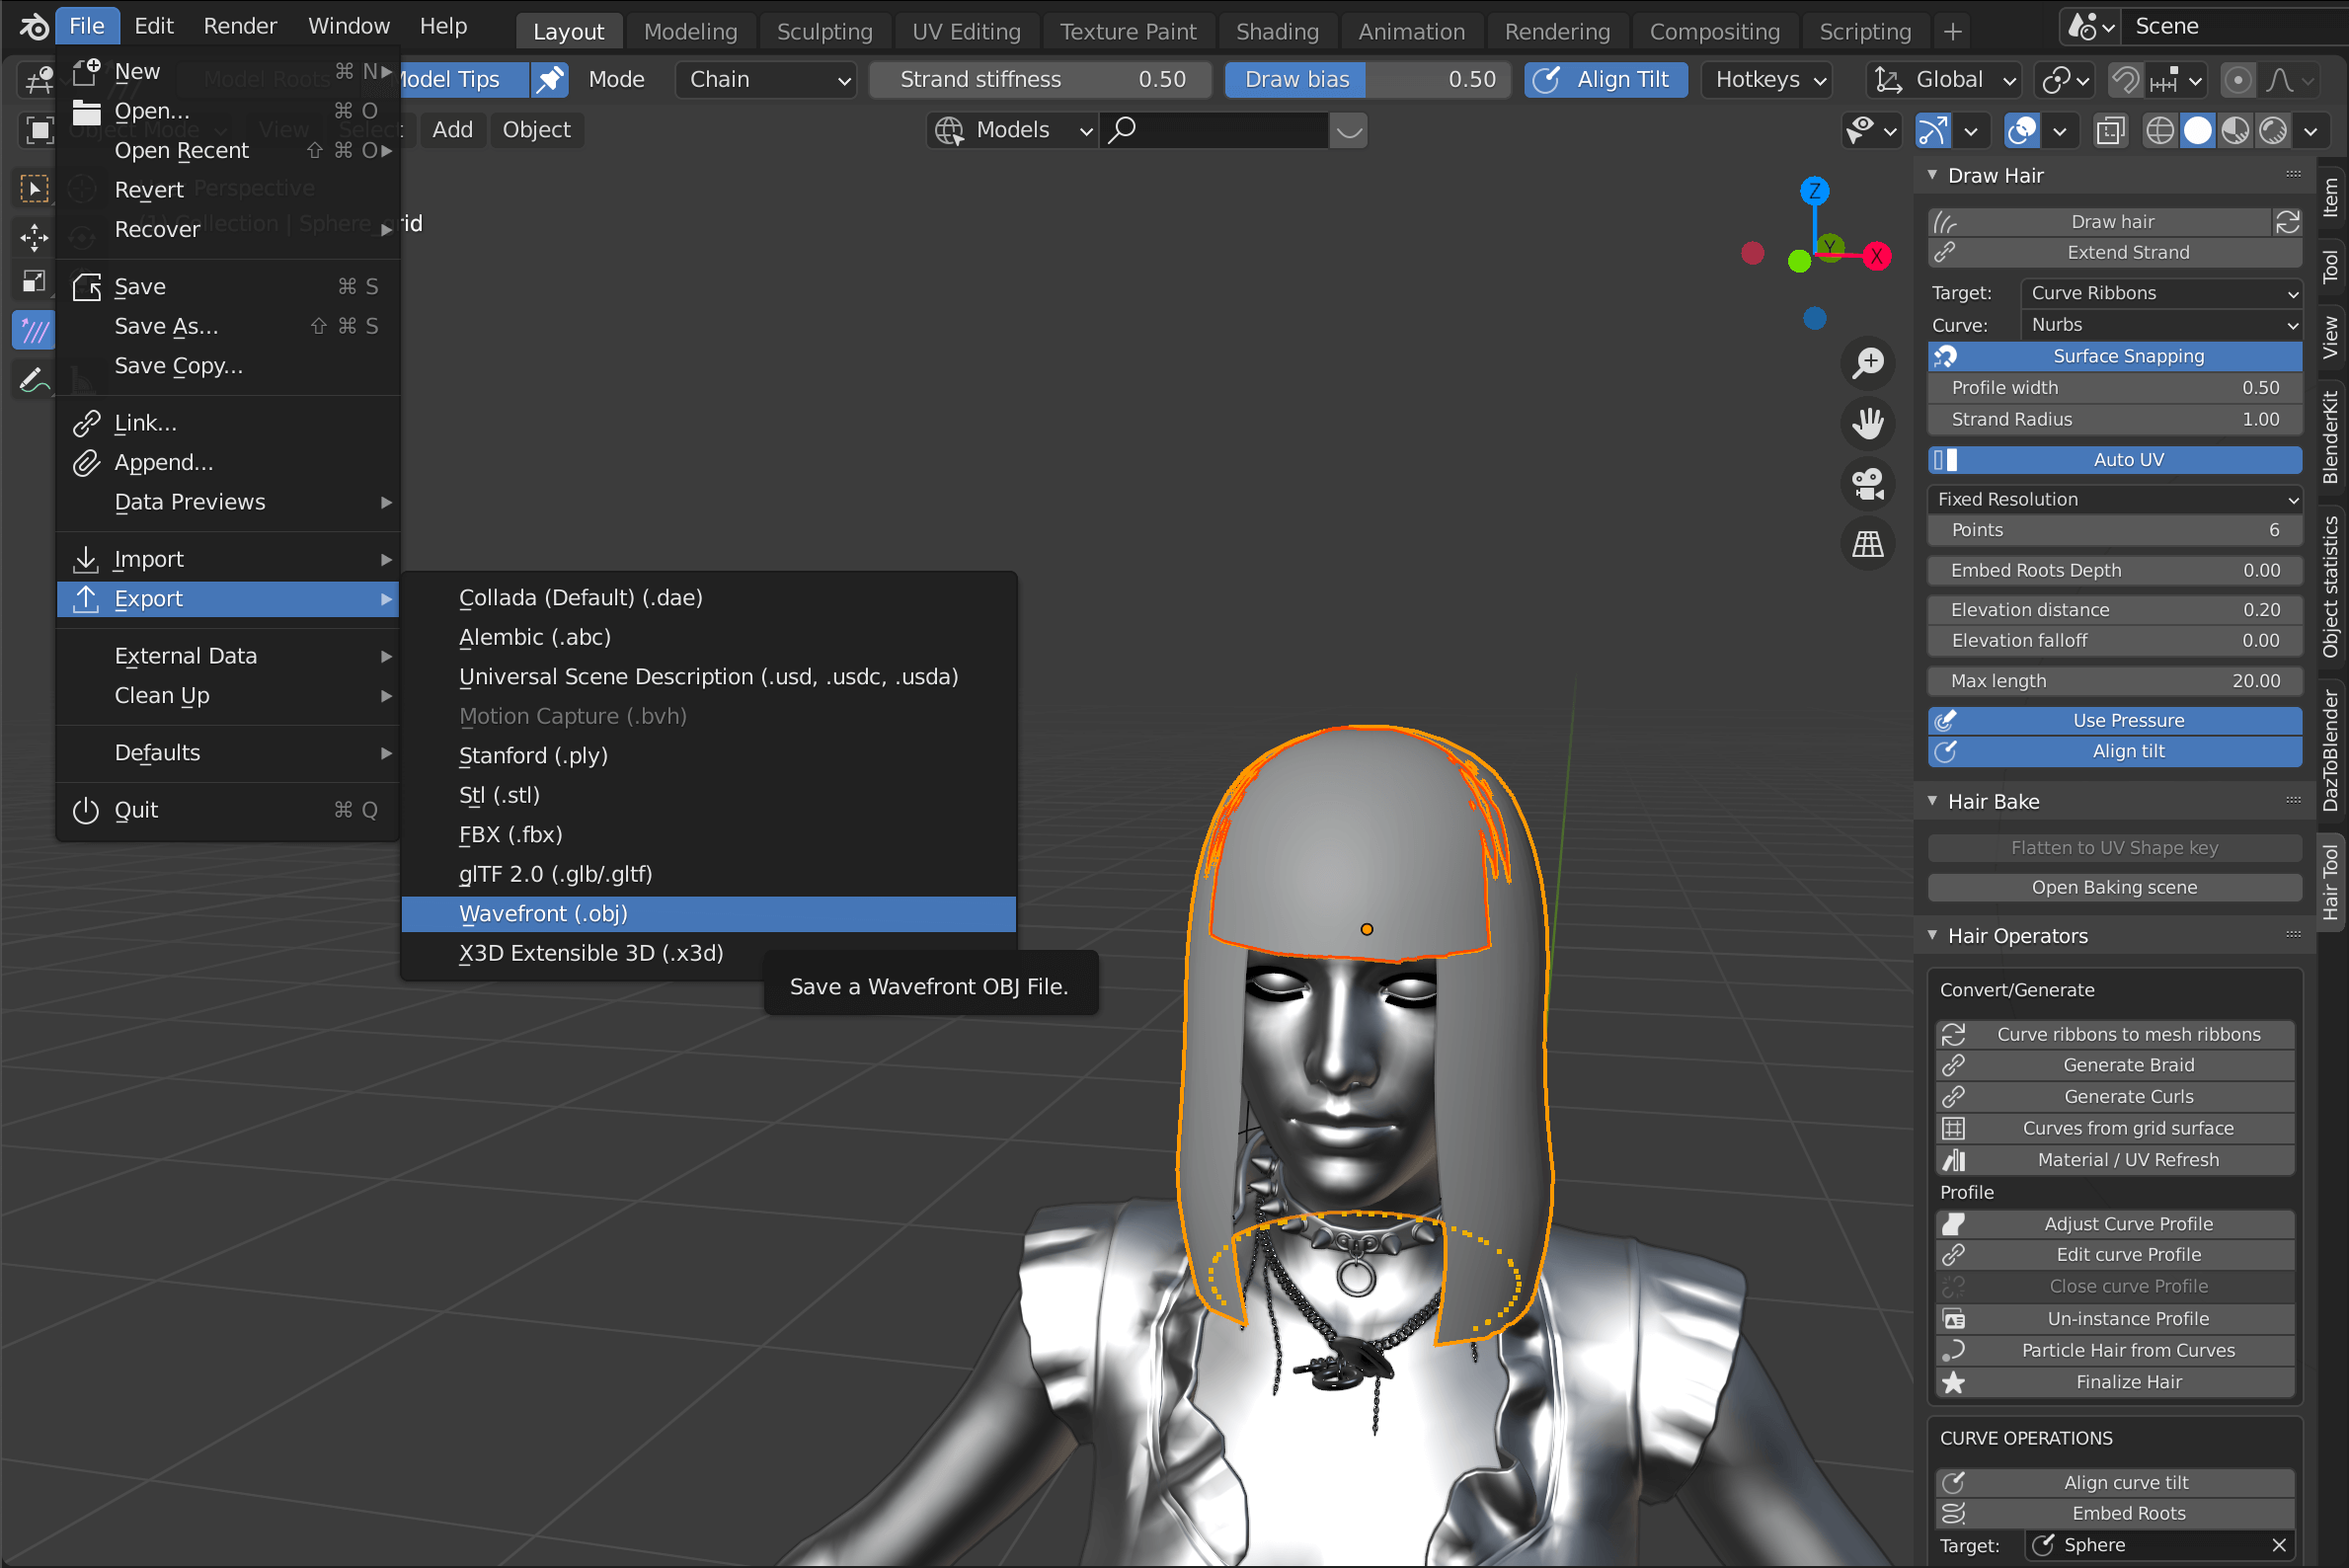
Export as obj format
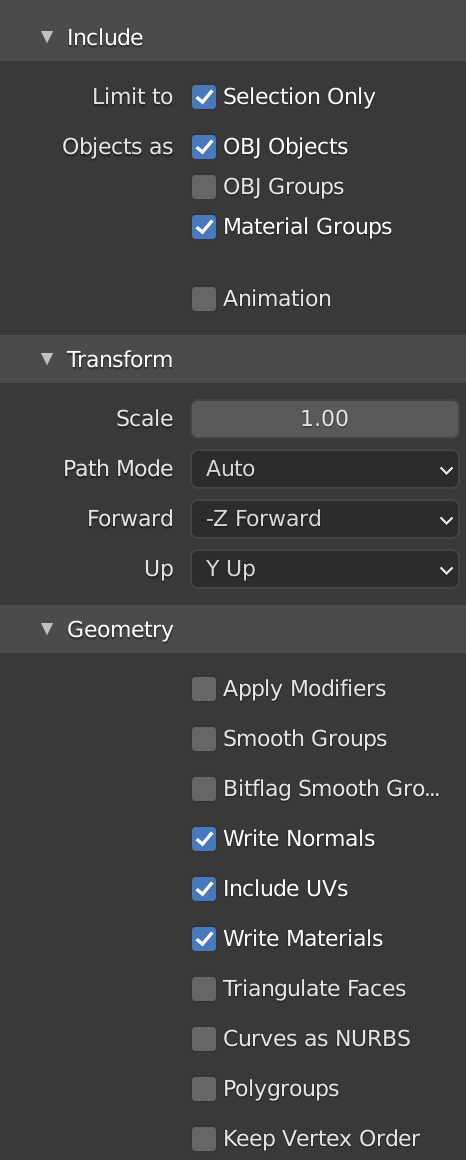
Check Selection Only, change to -Z Forward, Y Up
Bake the hair texture
After saving the object and Blender data, click Open Baking scene.
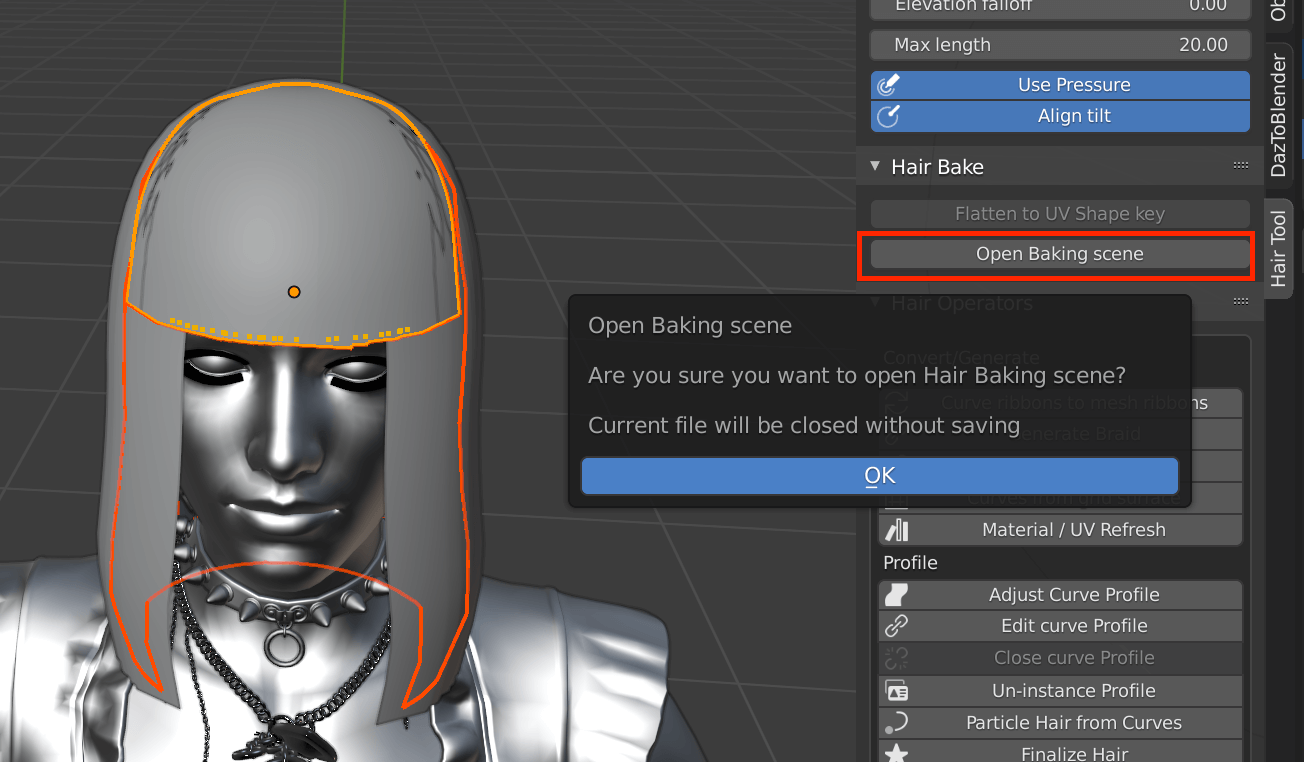
Since you have already saved the data, click OK.
The screen will change to something like this.
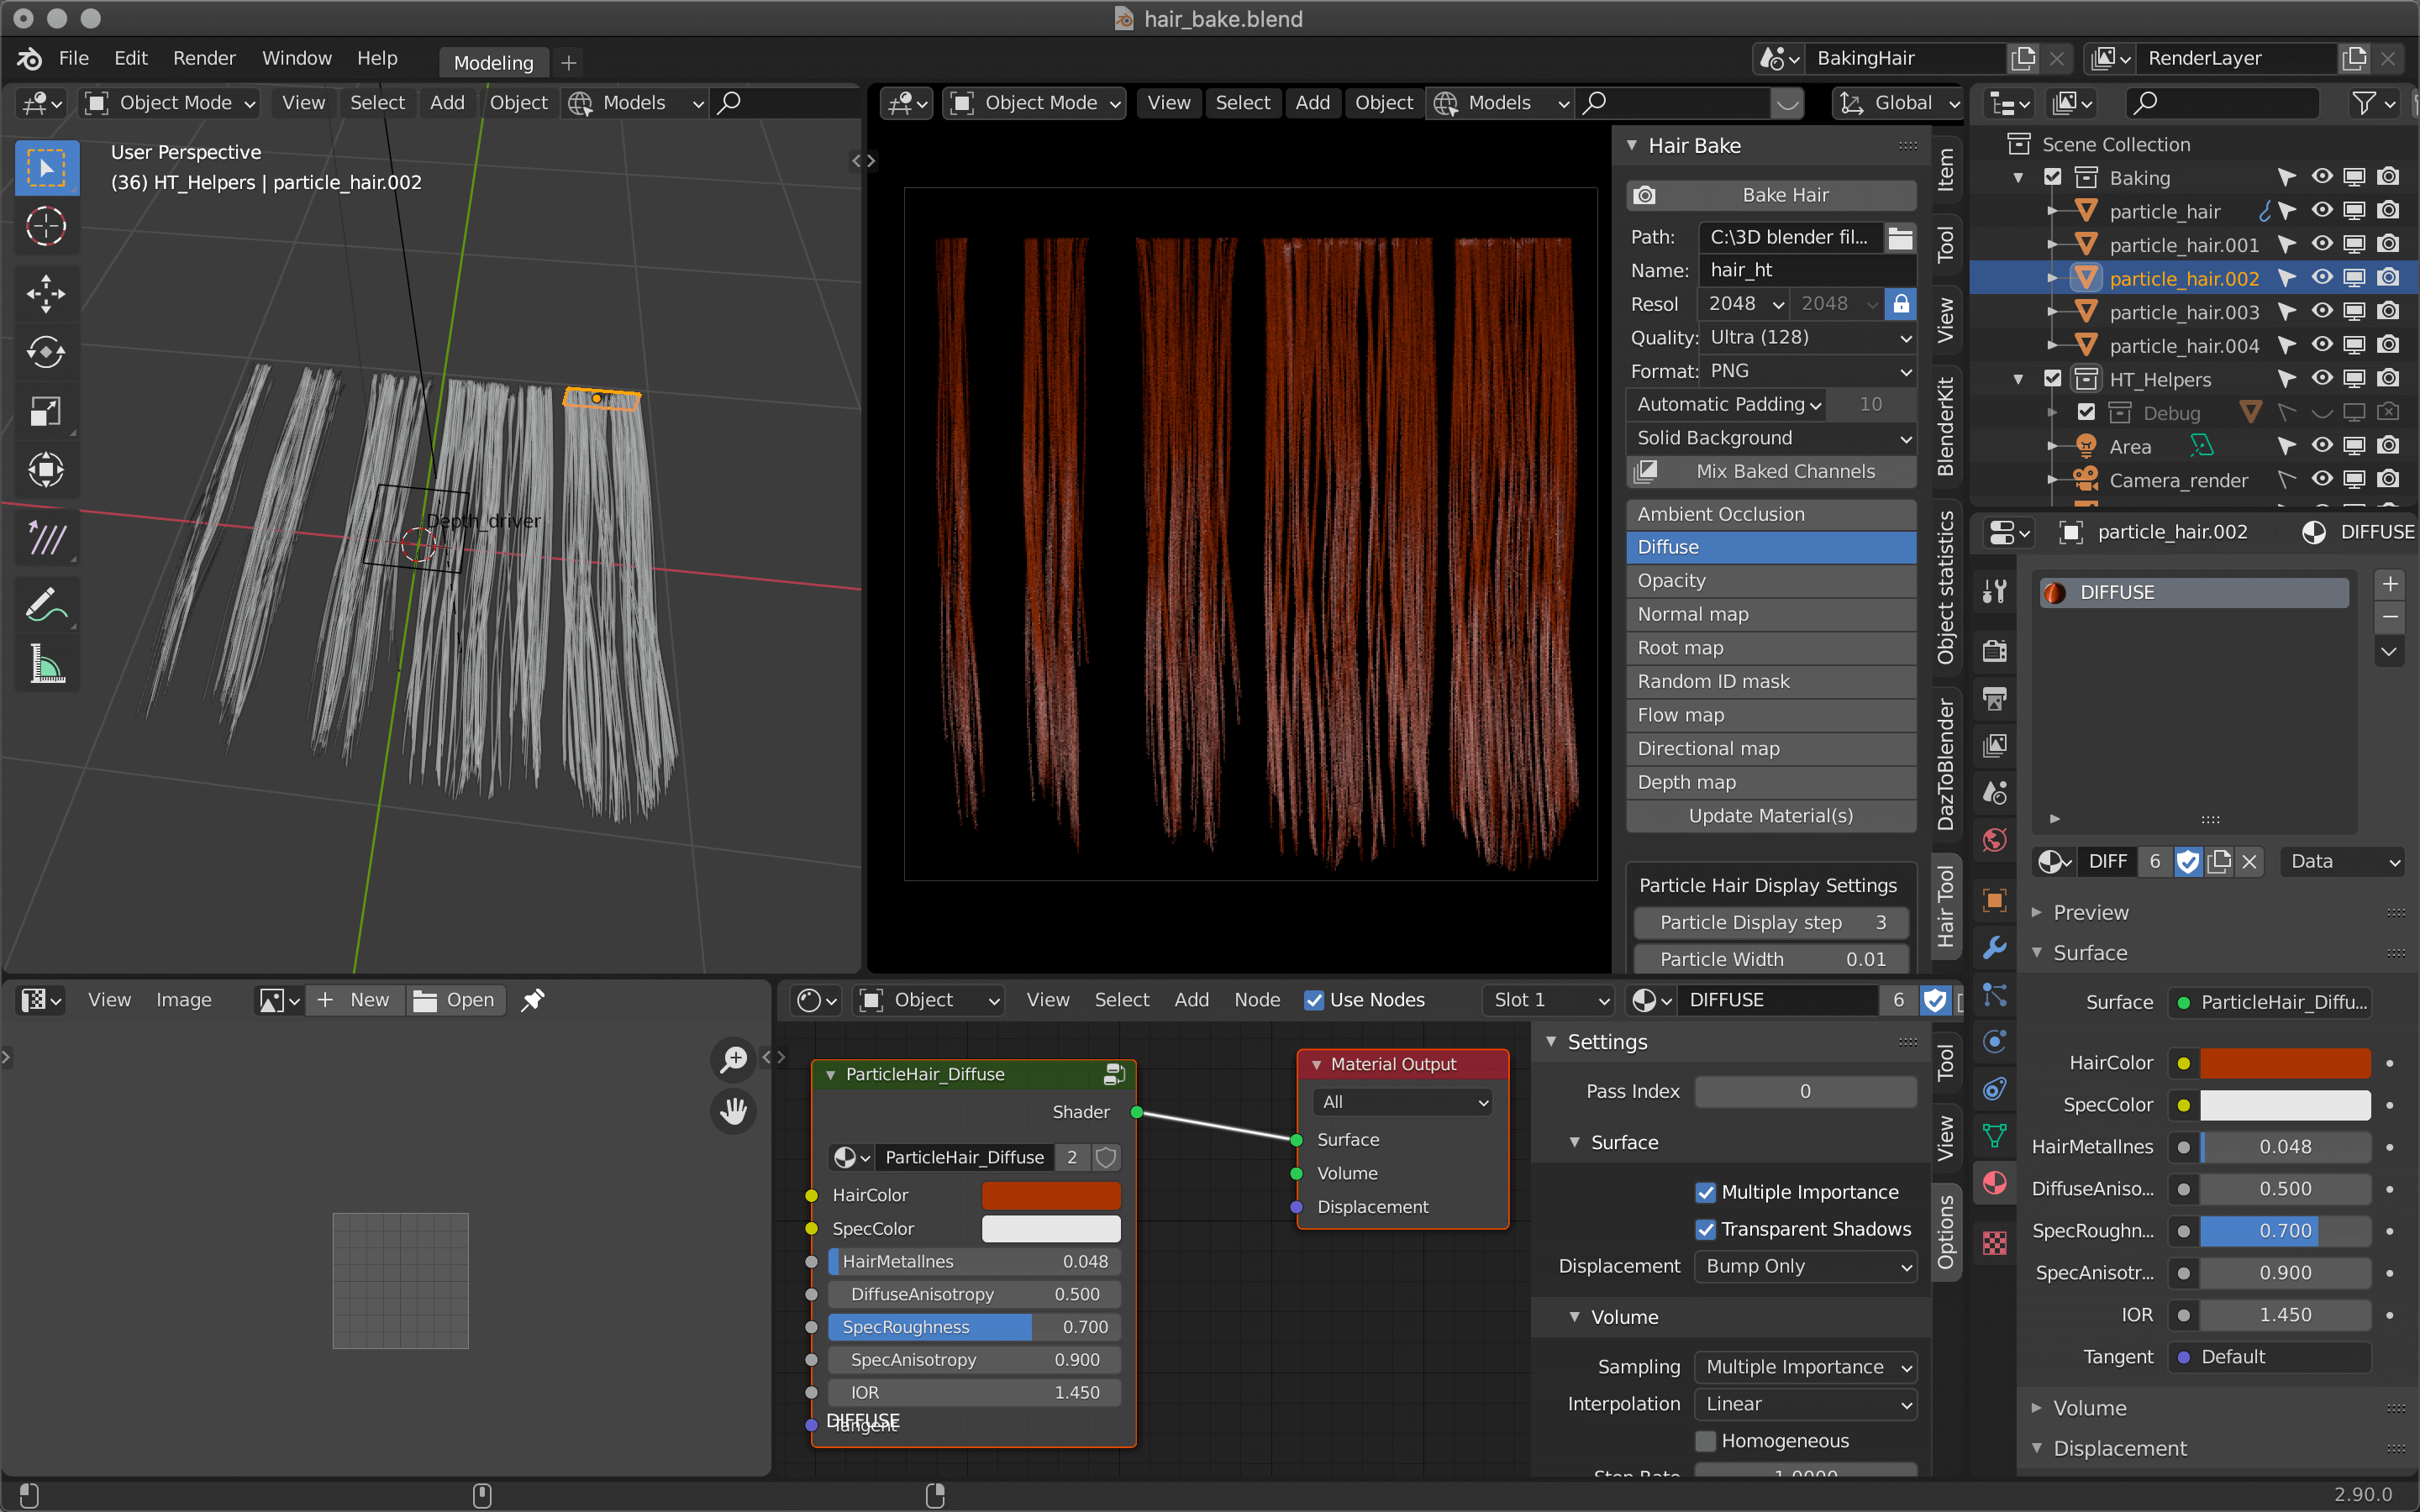
hair_bake.blend
Select Opacity (+Normal Map if you like) and set it to Transparent Background.
Finally, click Bake Hair to bake the hair.
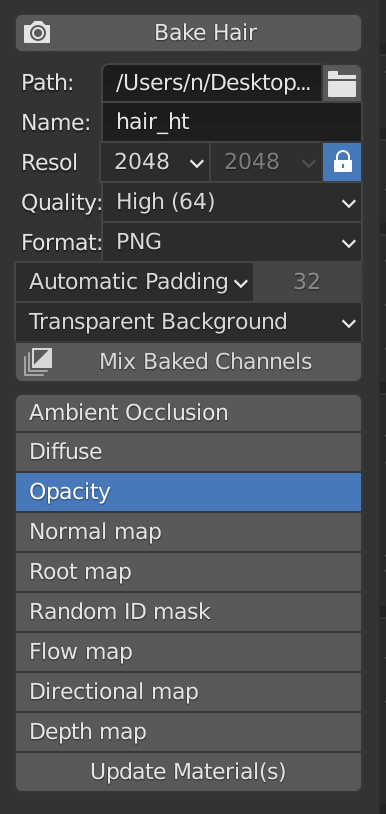
Bake Hair
Importing to DAZ Studio
After launching DAZ Studio and opening the previous human model data, select the icon in the upper left corner to load the hair object.
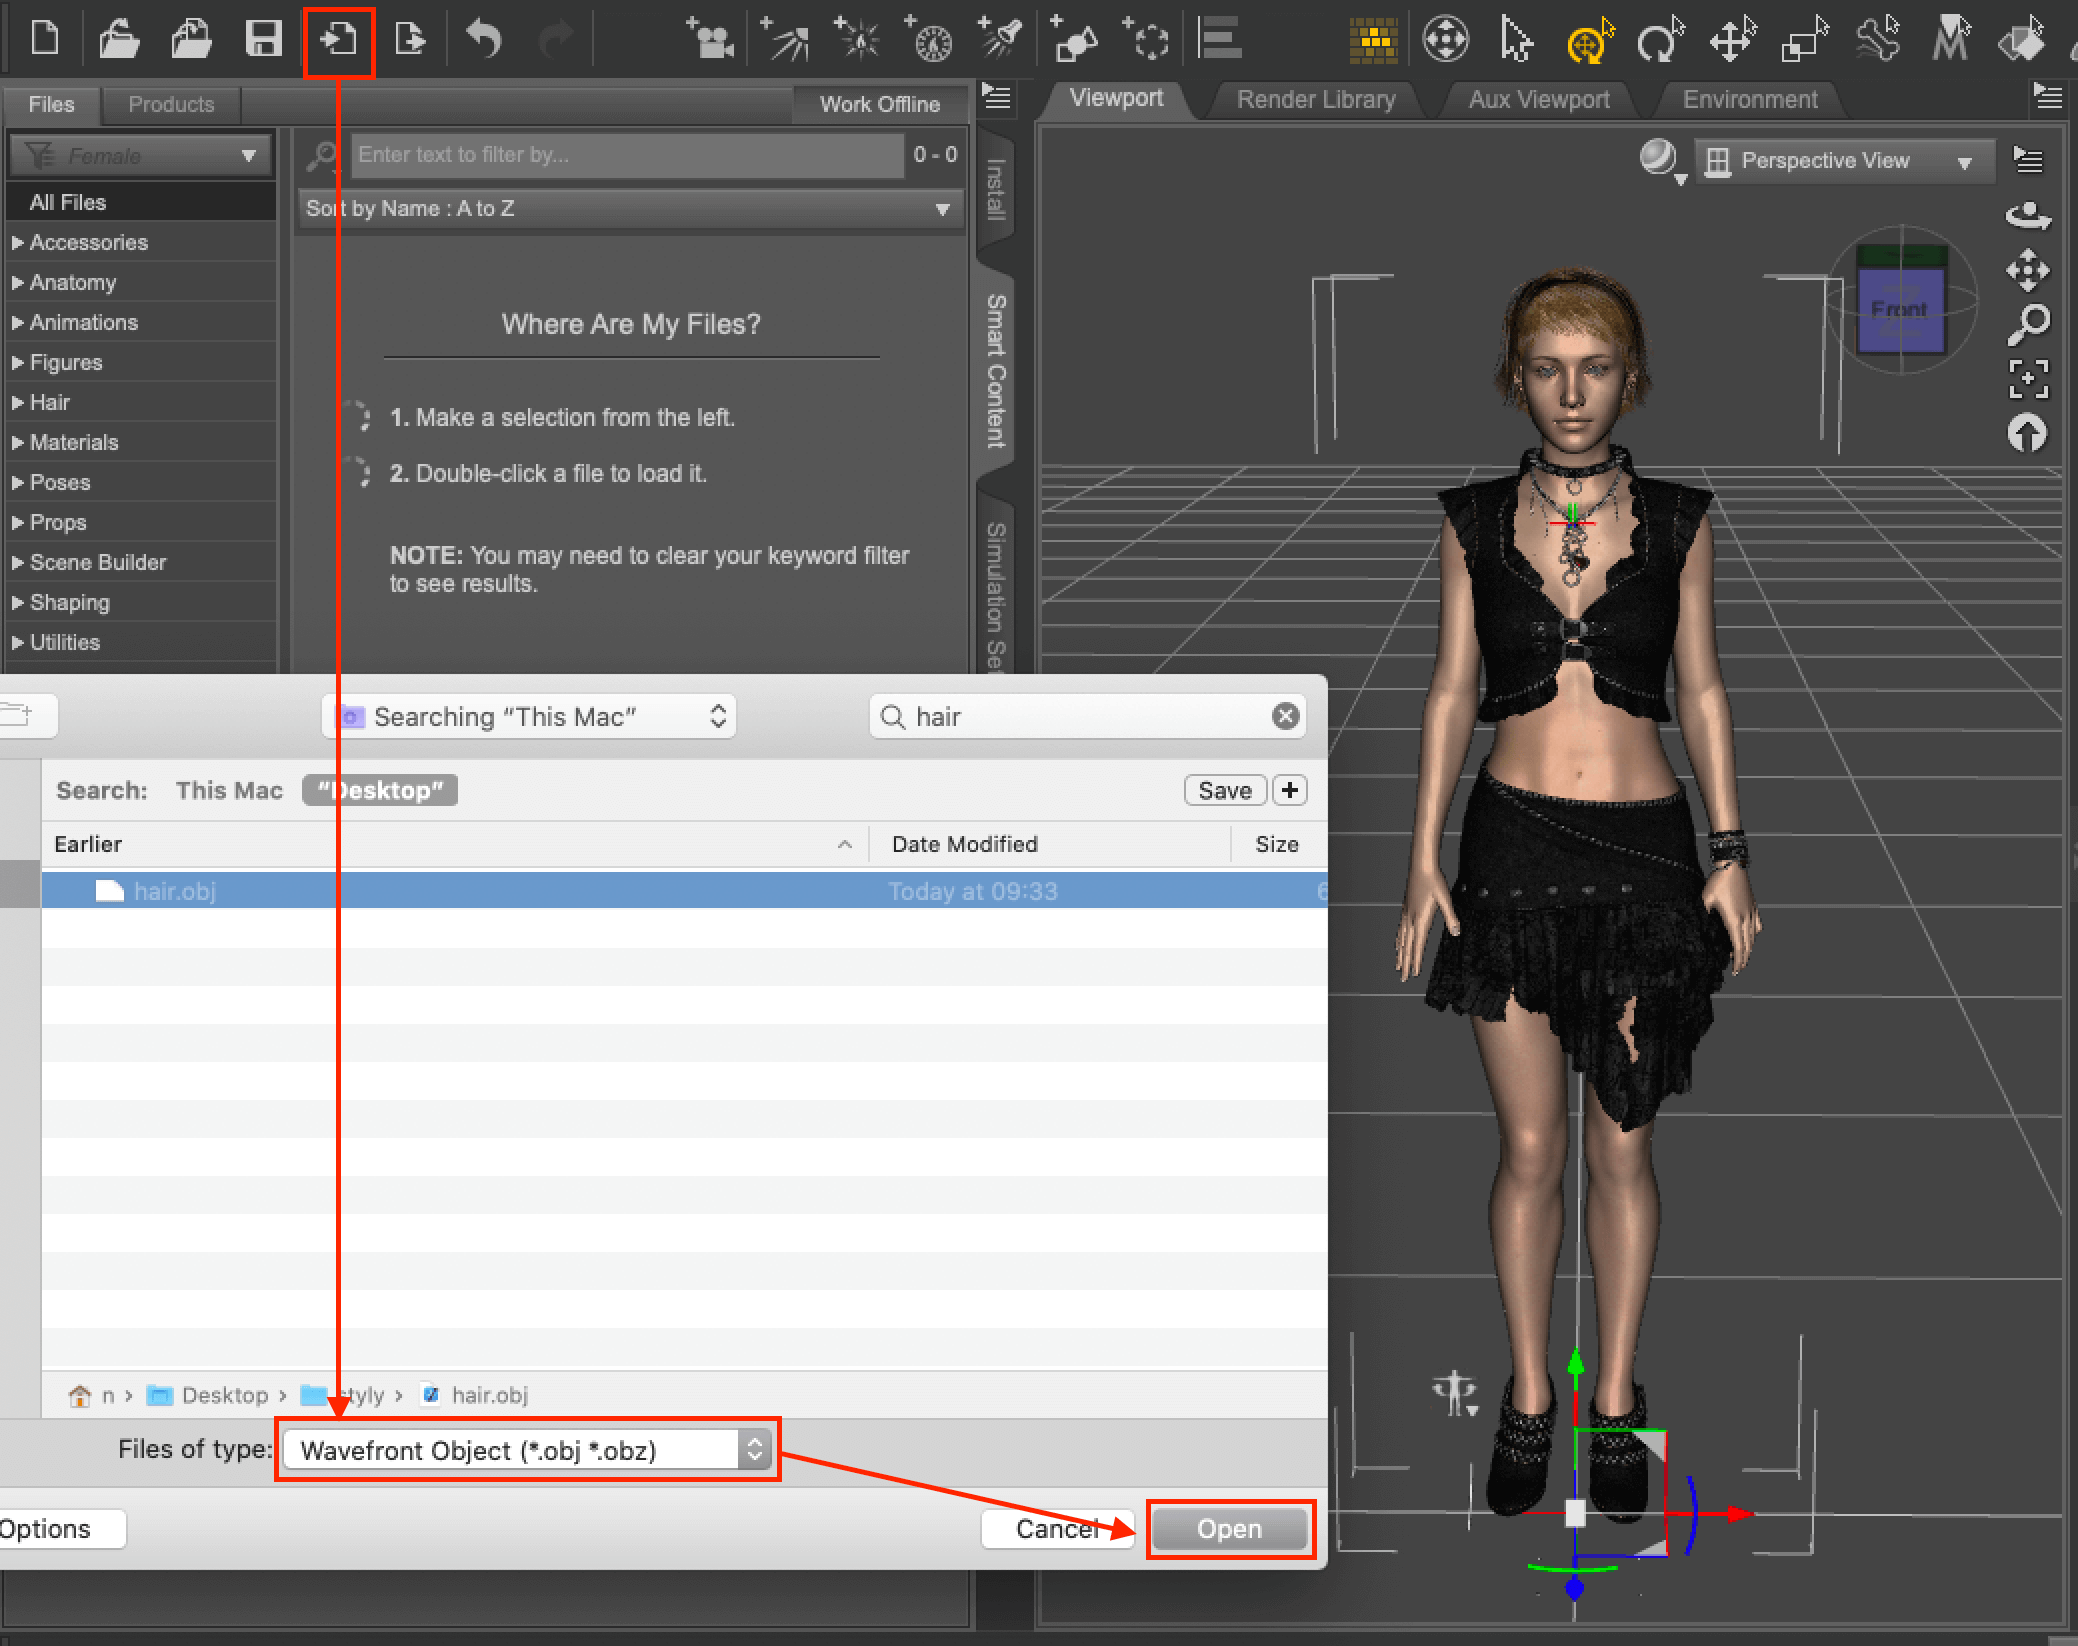
Open DAZ Studio and load the hair object
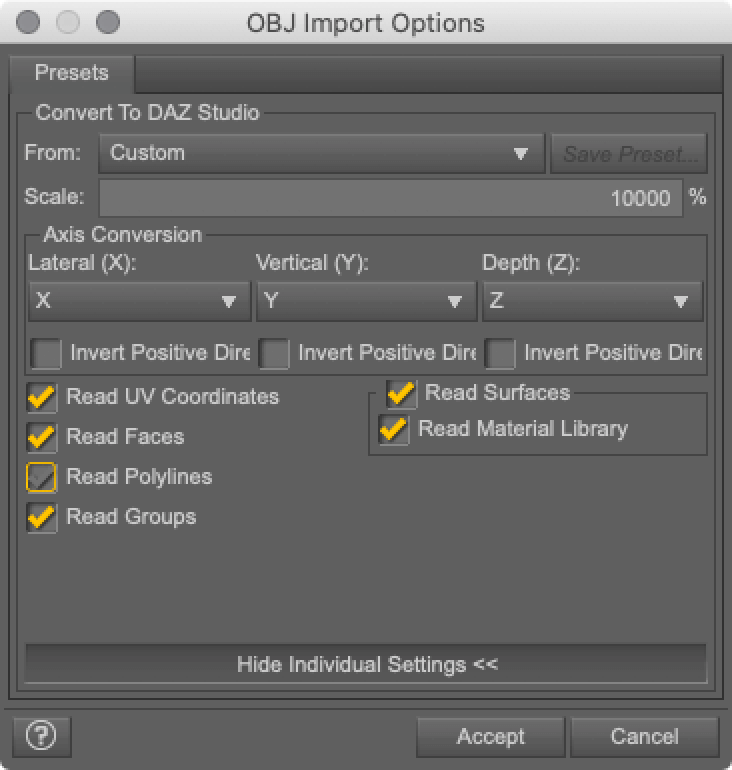
Change Scale to 10000%.
Delete the default hair and adjust the position of the imported hair object.
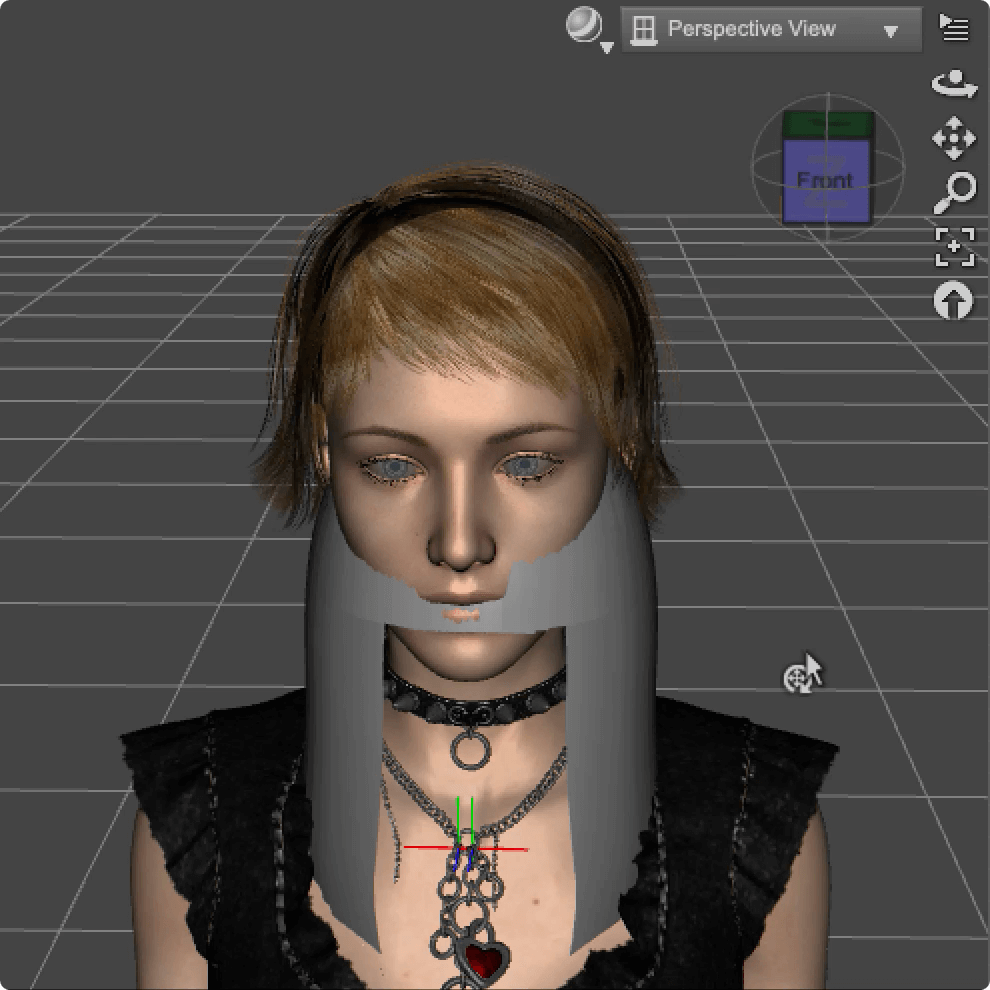
The heels are causing a shift in the height of the object.

Select -> right click to delete, arrow drag to reposition
Set the texture settings from the panel on the right of the screen.
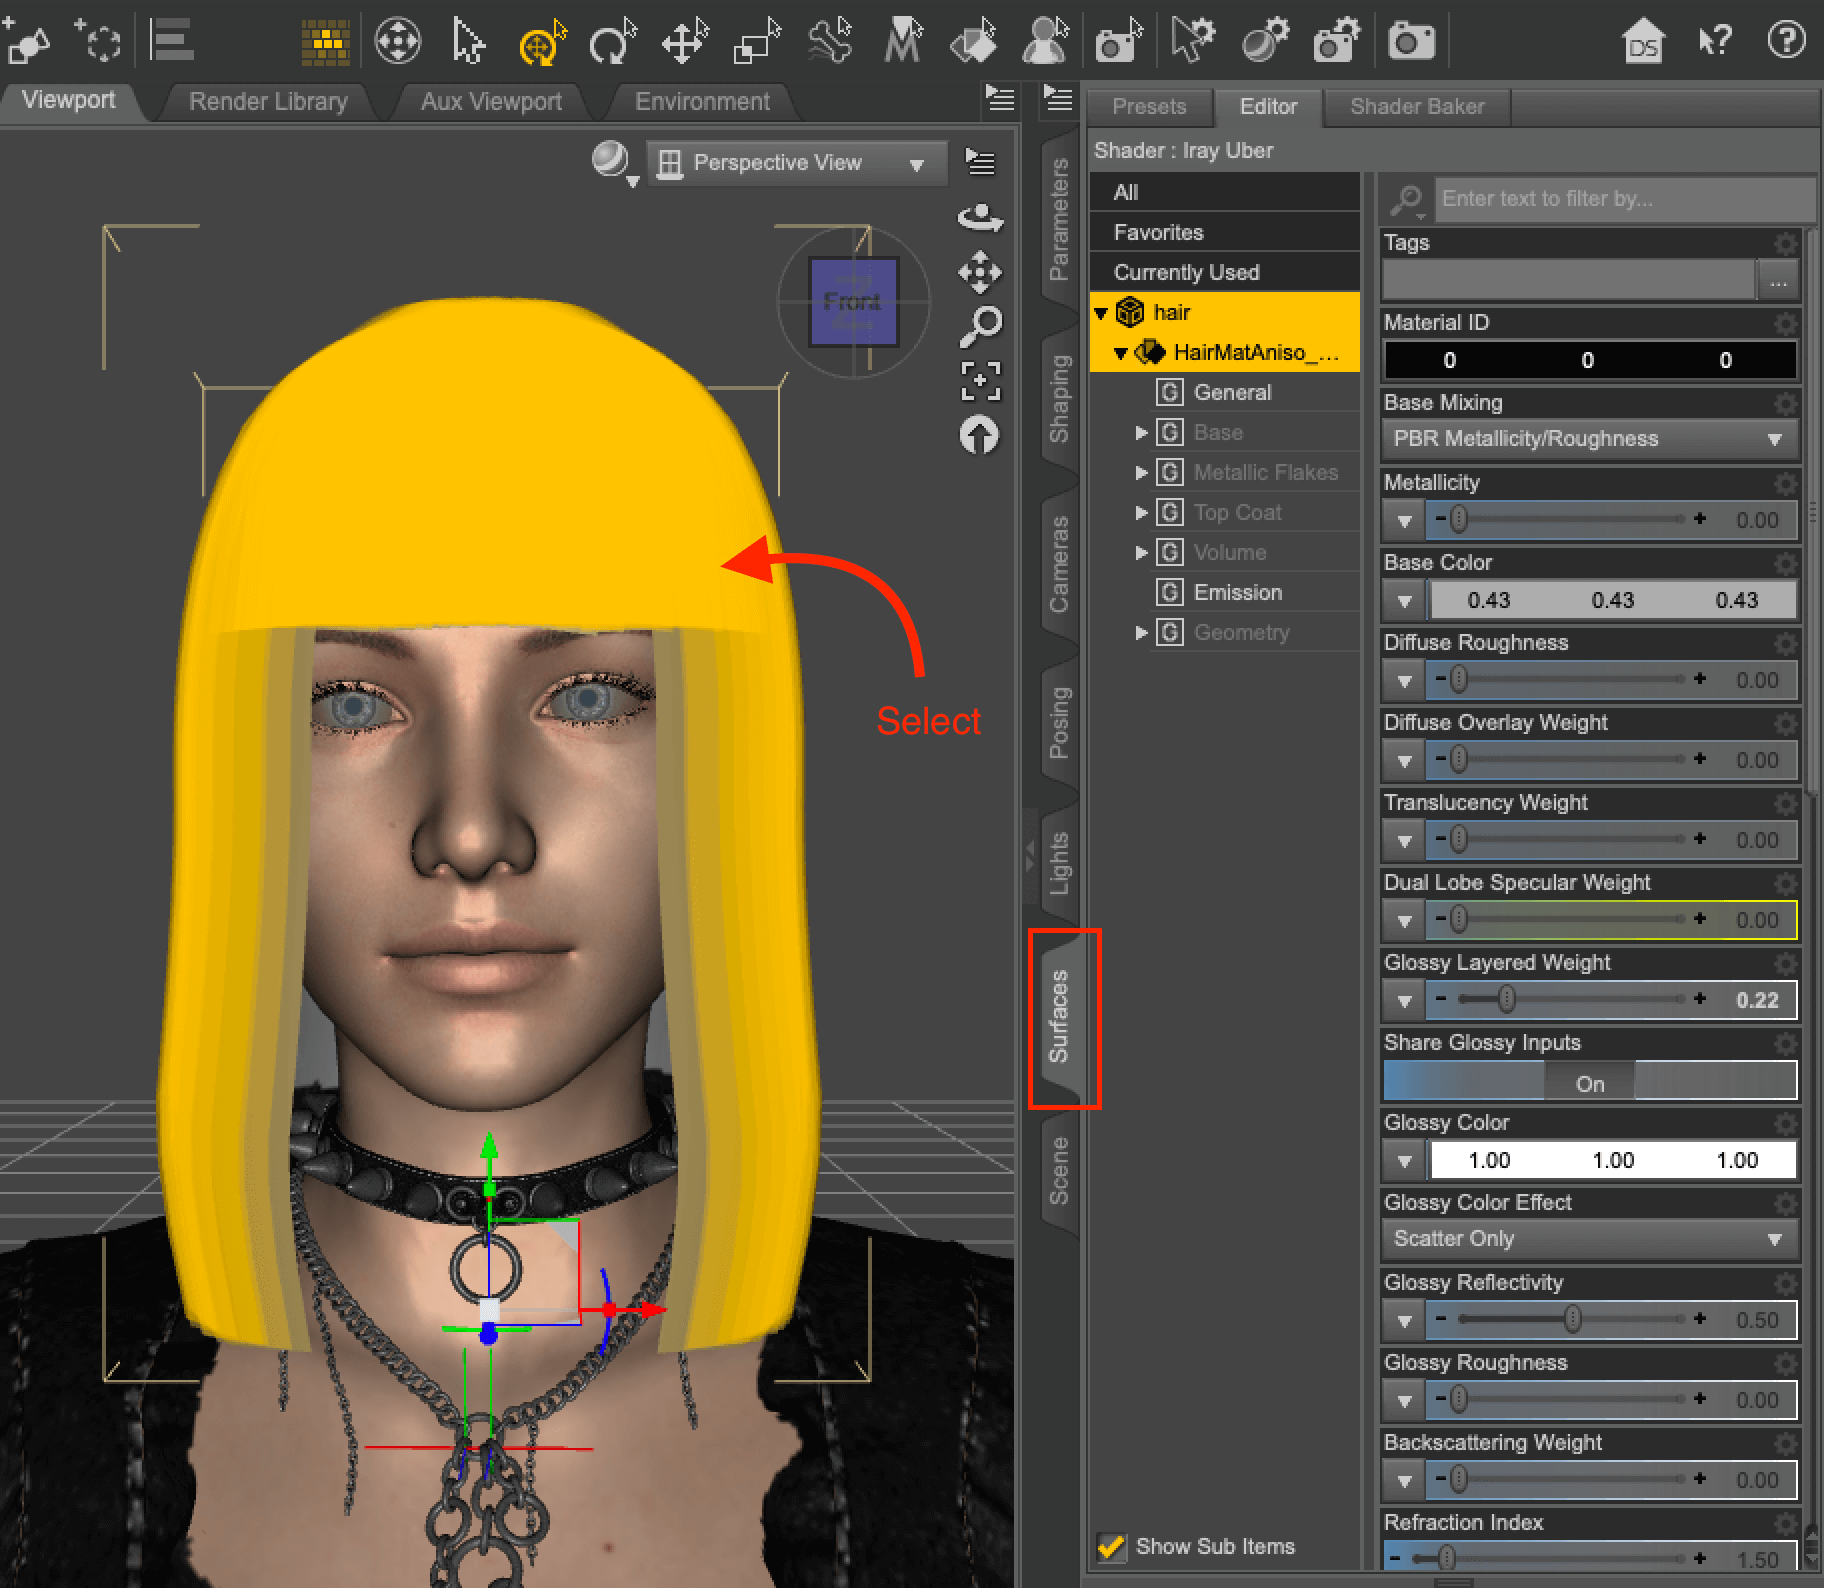
With the Surface tab displayed, select the hair.
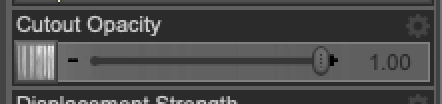
Assign hair_ht_opacity.png to Cutout Opacity.
Click ▼ and select Browse…. to load the texture.
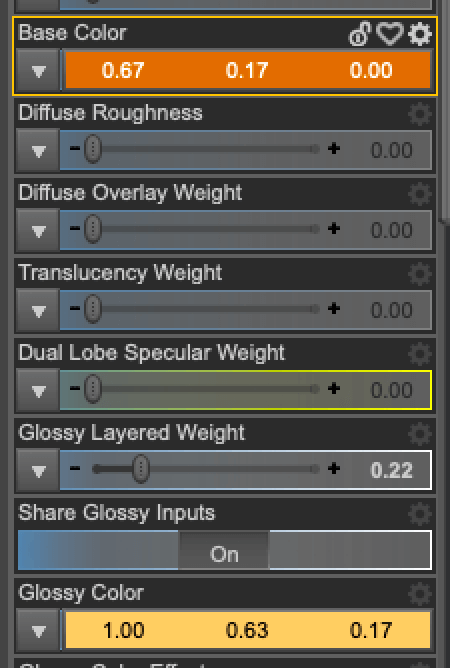
The color can be changed by clicking on the Base Color number.
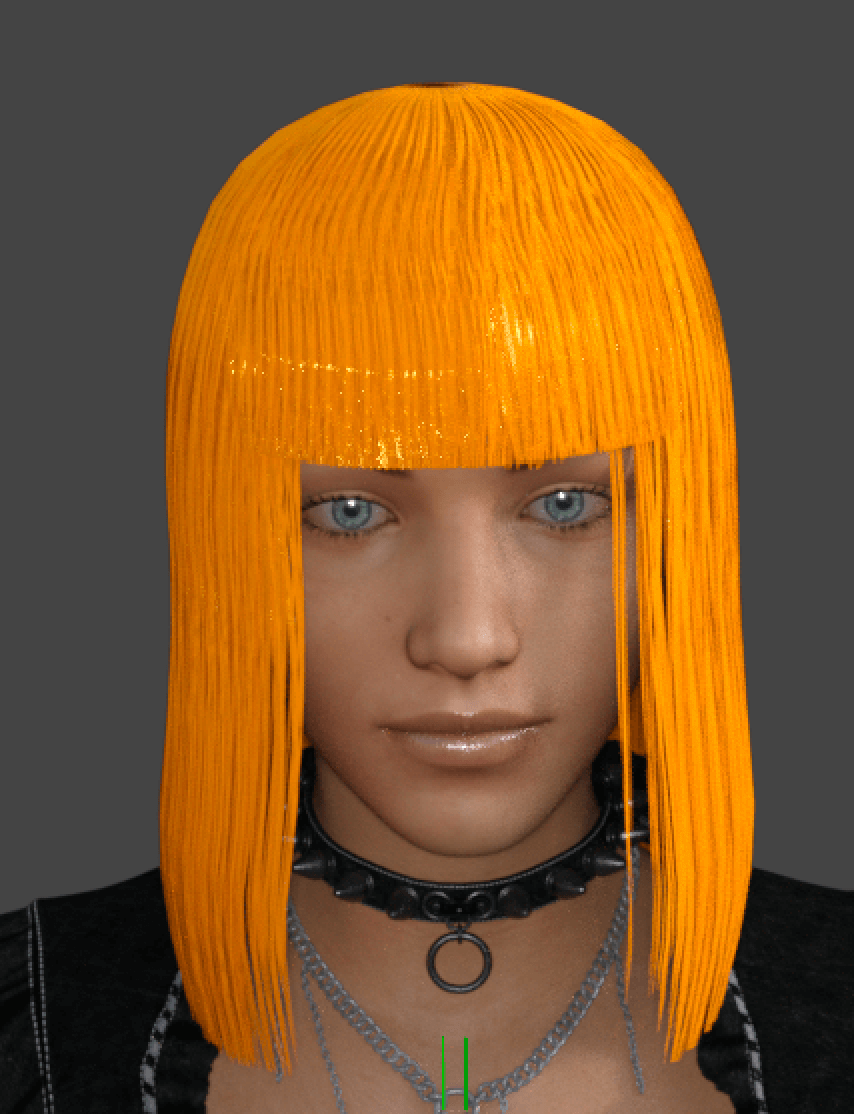
The texture is now applied.
Saving the hair animation asset in DAZ Studio
Now that the hair object is still loaded, the animation will not be applied.
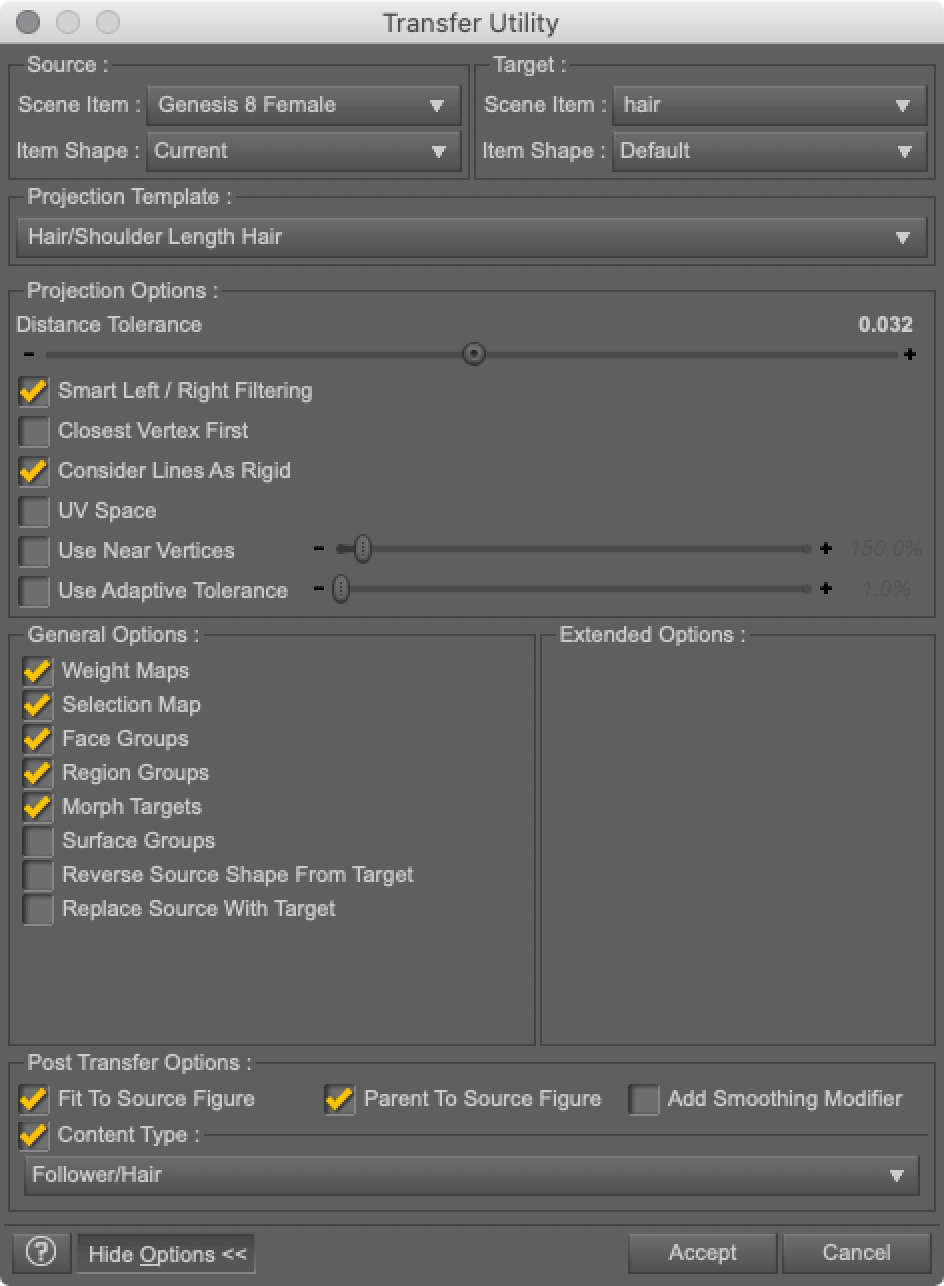
Select Transfer Utility from the top Edit.
Transfer Utility
Assign hair and human models to Source and Target respectively.
The Projection Template can be set after selecting the Content Type at the end.
Then click Accept.
Transfer Utility

The hair will now follow the human model.
To register hair to DAZ Studio assets, select File→Save As→Support Asset→Figure/Prop Assets.
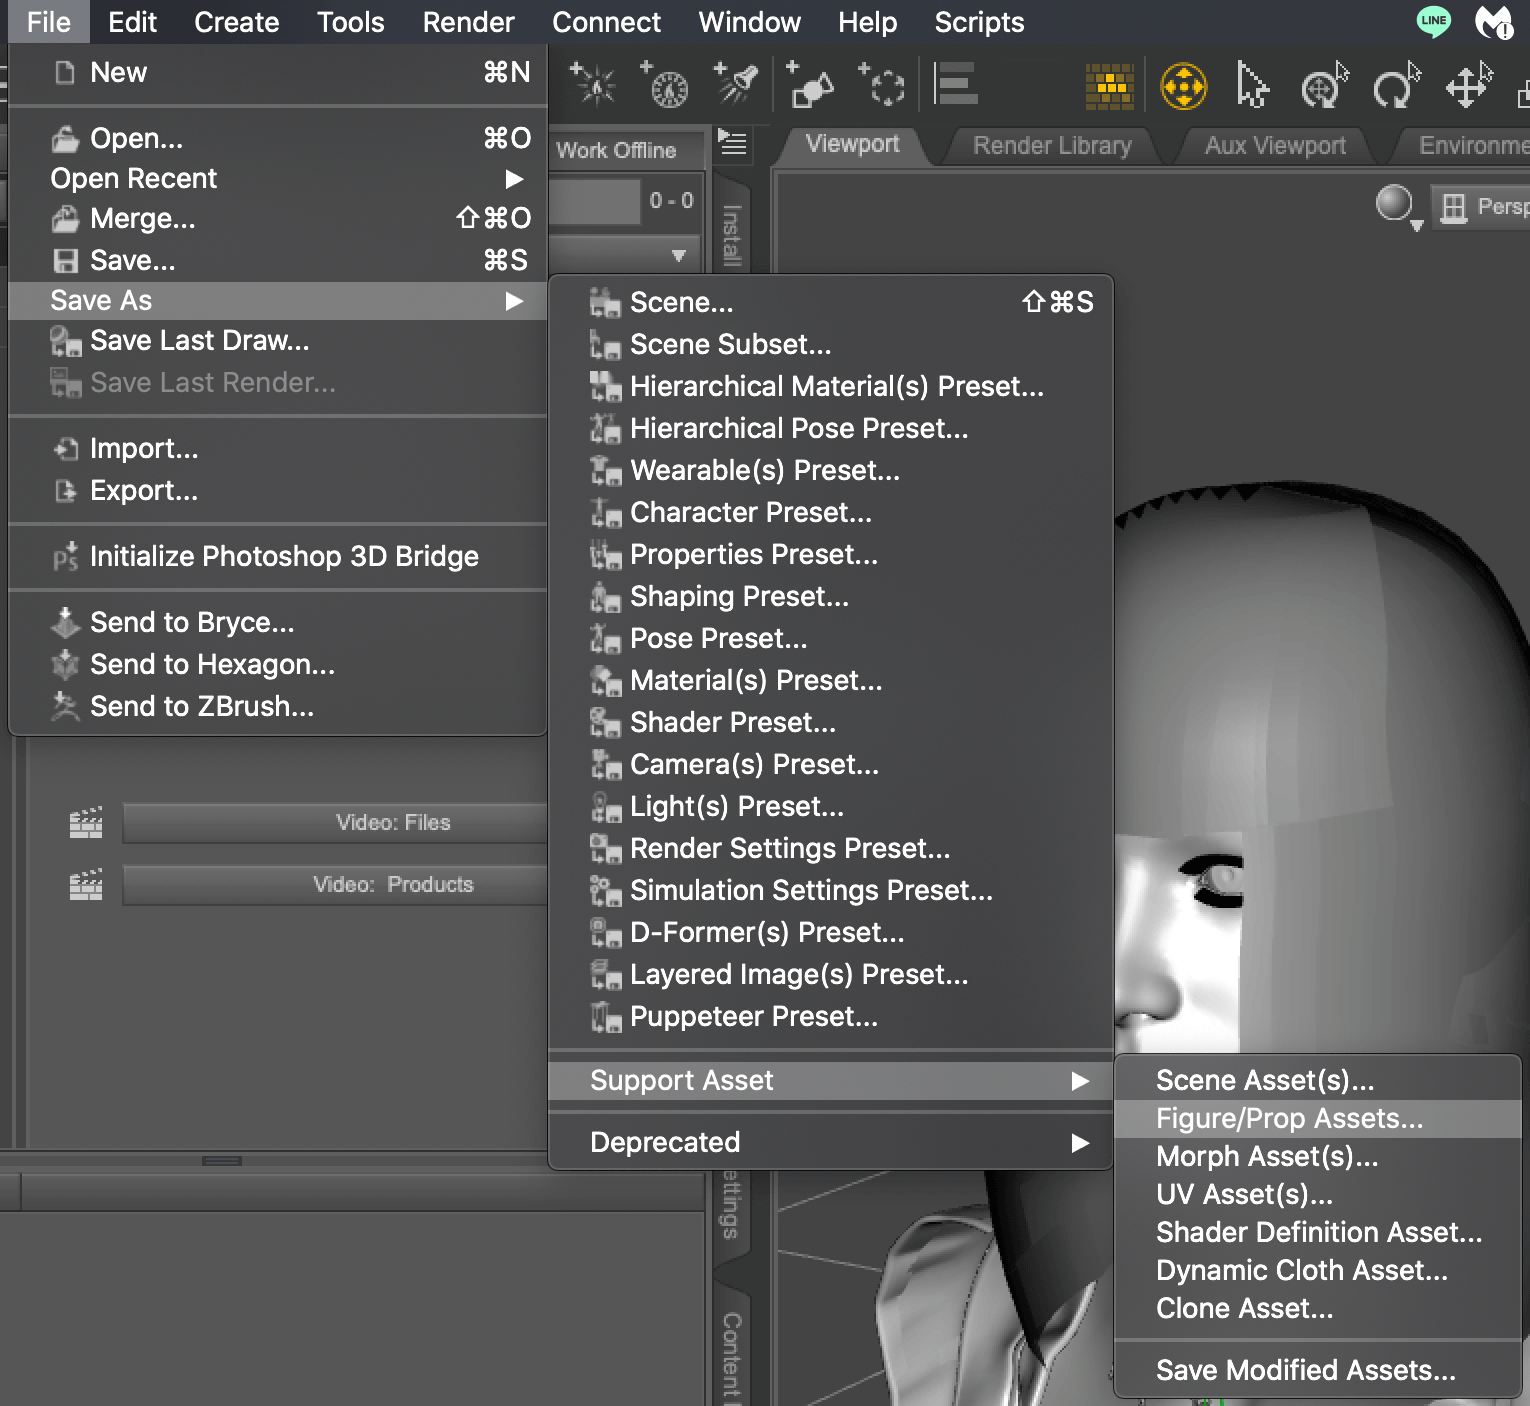
Figure/Prop Assets
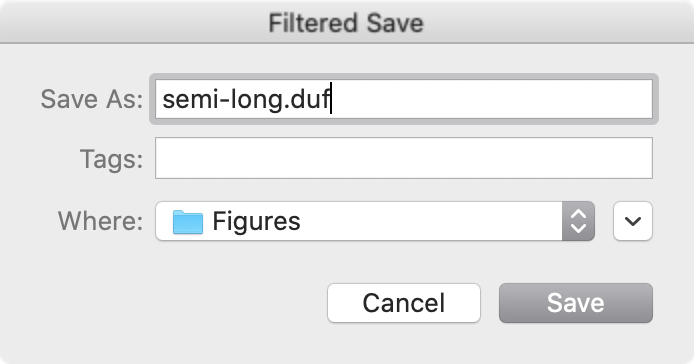
Filtered Save
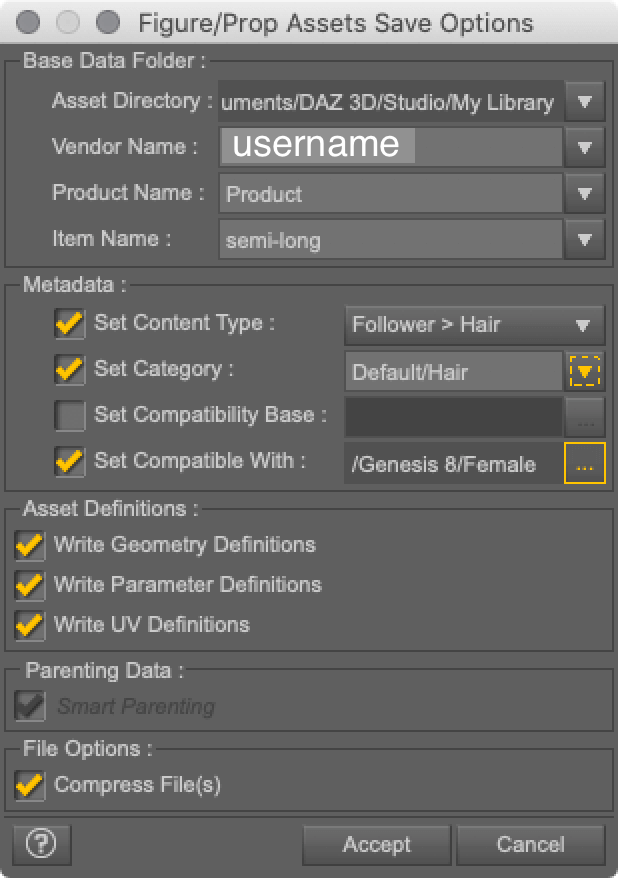
Select the Category and Accept
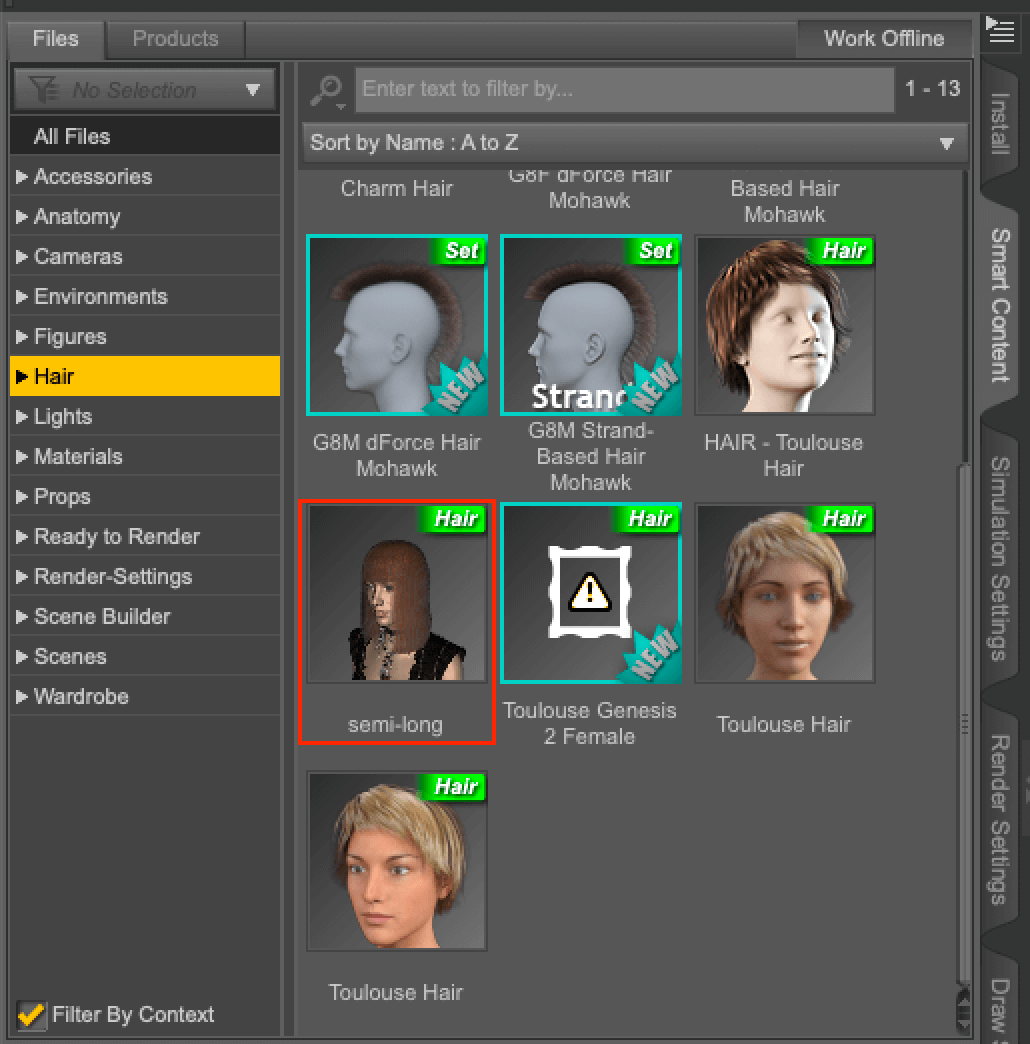
The file is added to the asset.
Reflecting the animation in Unity’s human body model
Once the animation settings are complete, upload the model to Unity.
For detailed instructions, please refer to the first article.
![[DAZ Studio] (1) How to download / Basic operation / Creating a human body model](https://styly.cc/wp-content/uploads/2021/01/IMG_9201-1-160x160.png)
Drag and drop the texture file you saved in Blender to the Unity assets.
Check the Alpha is Transparency checkbox and apply it.
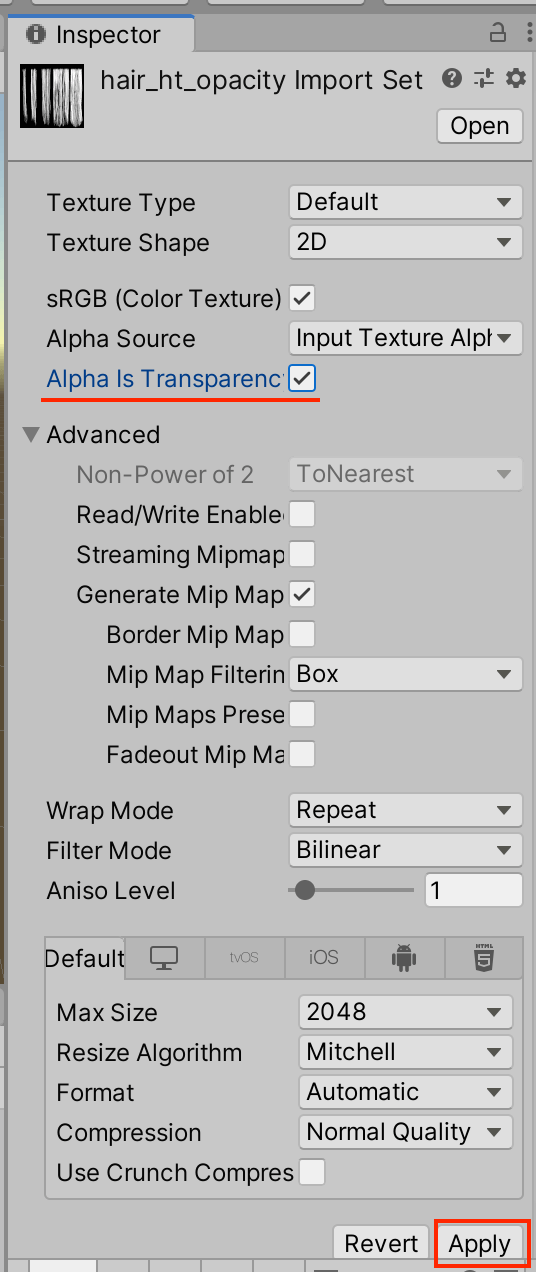
Alpha is Transparency
Once applied, assign the texture to the hair model and change the Rendering Mode to Cutout.
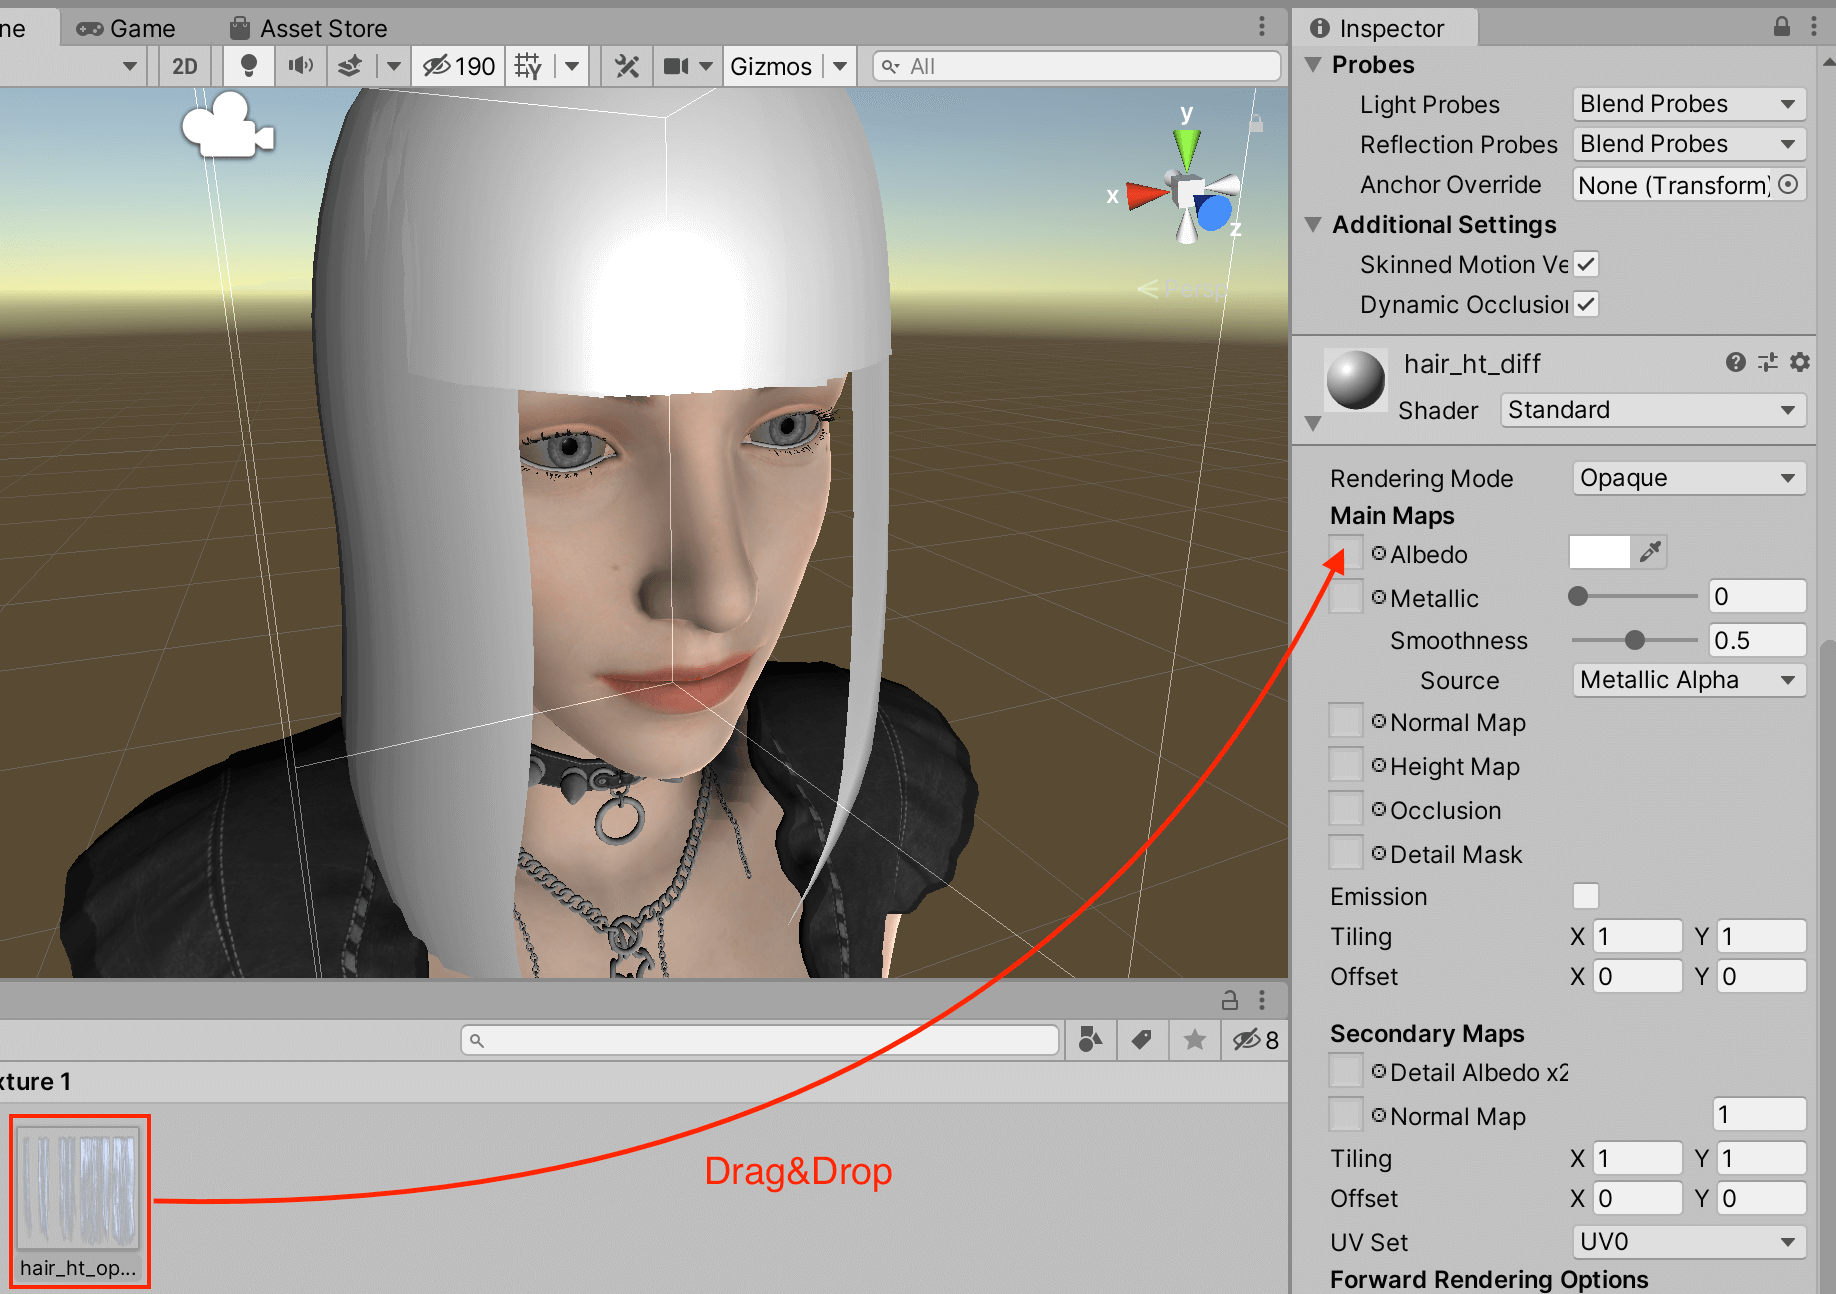
Drag and drop
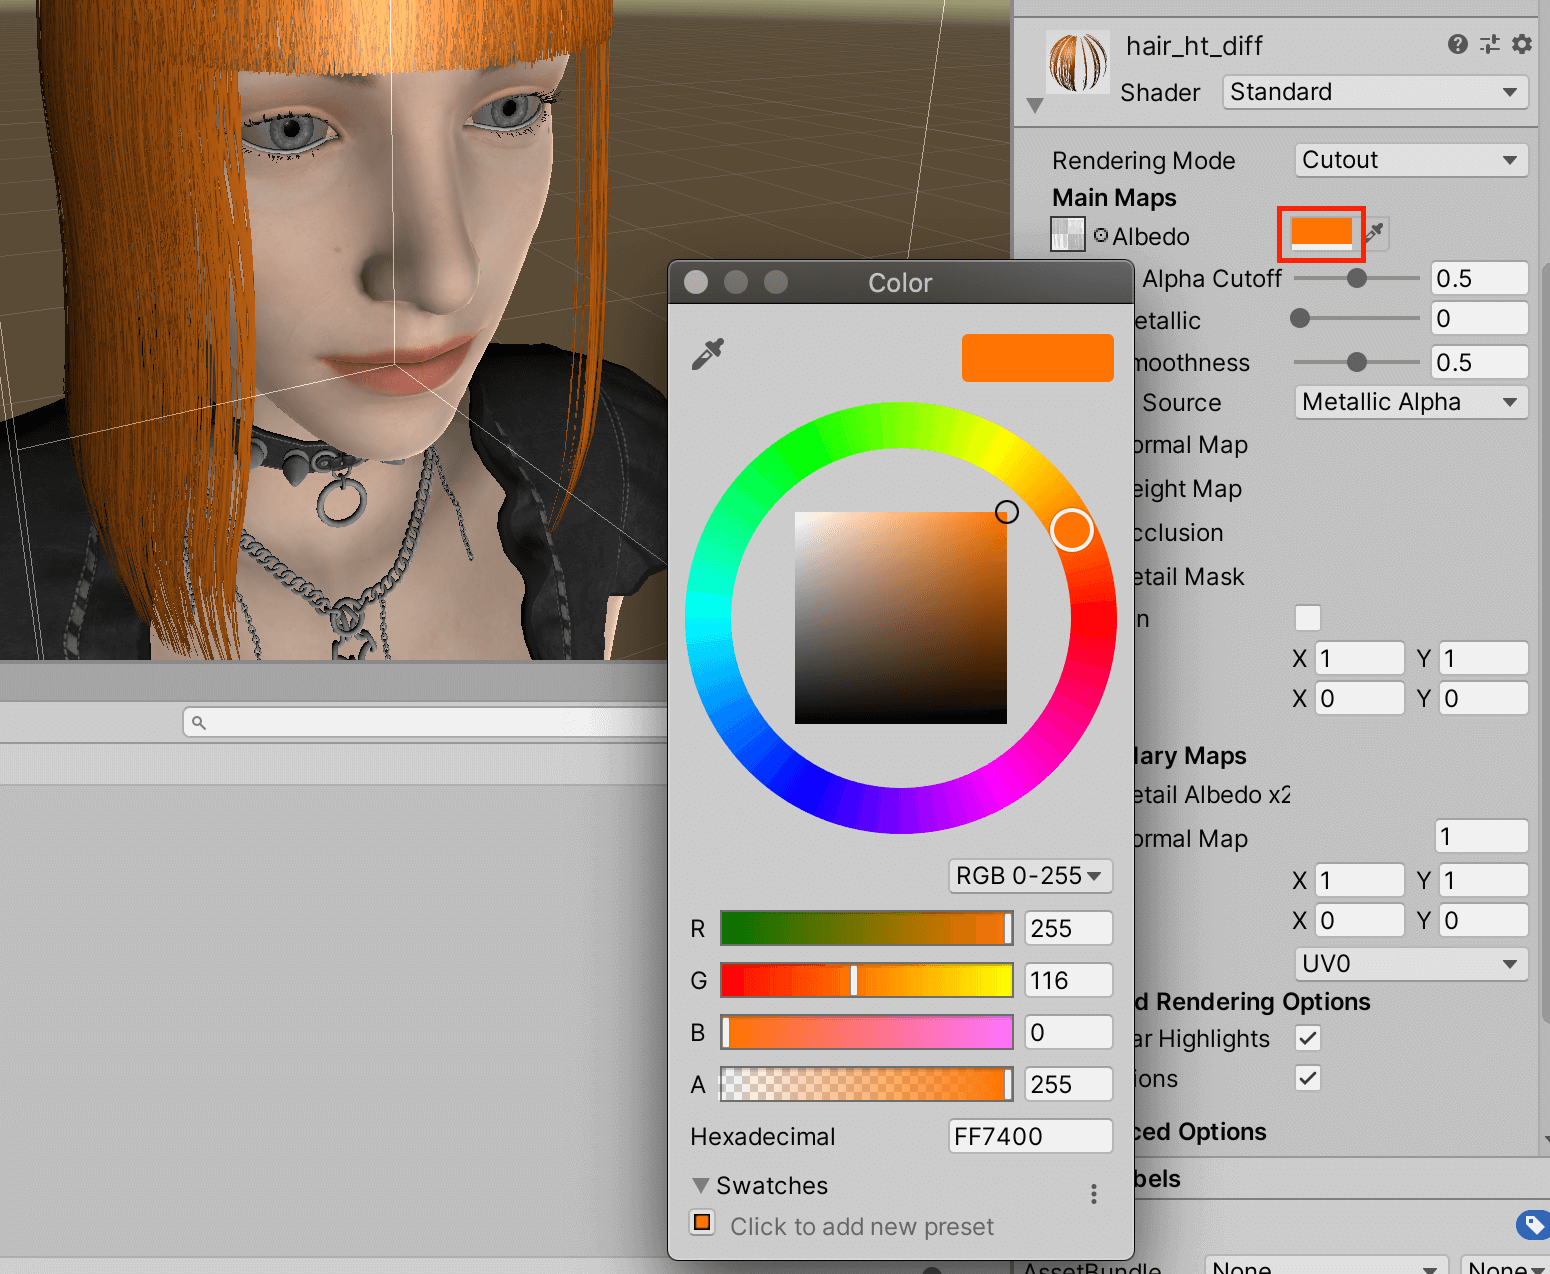
You can change the hair color from Albedo.
Change the shader since it is set to not depict the back of the texture.
Download the ZIP from the button on the right of the GitHub screen, unzip it, and drag and drop the Standard-2Sided.shader onto your Unity assets.
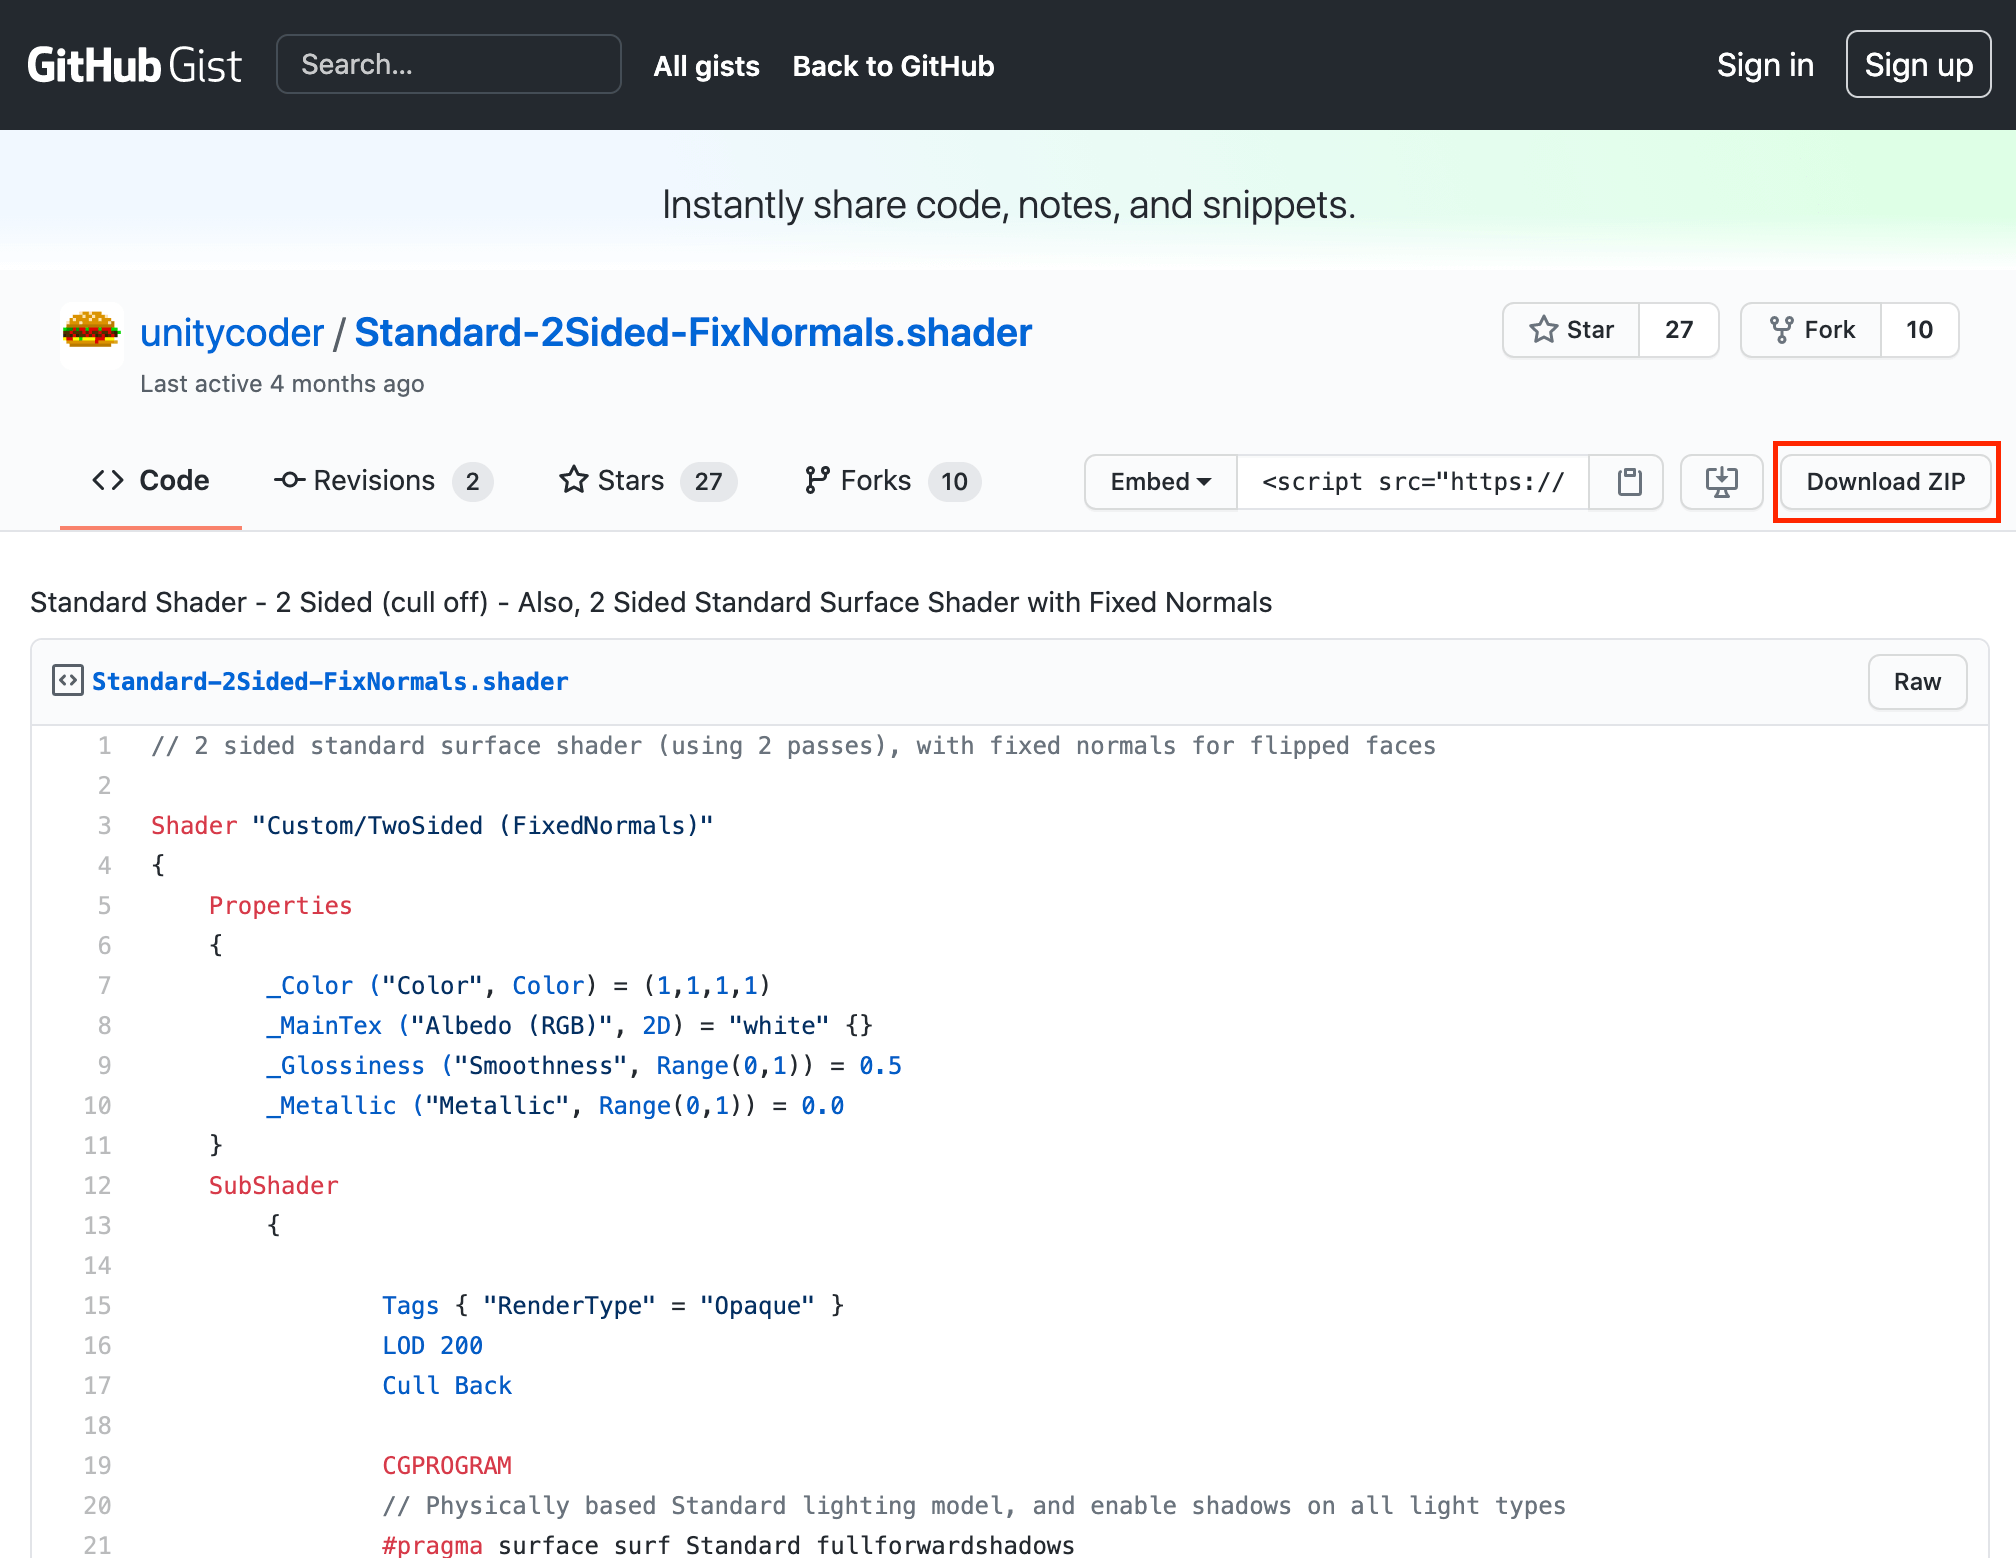
Download ZIP
Change the hair shader to Standard 2-Sided.
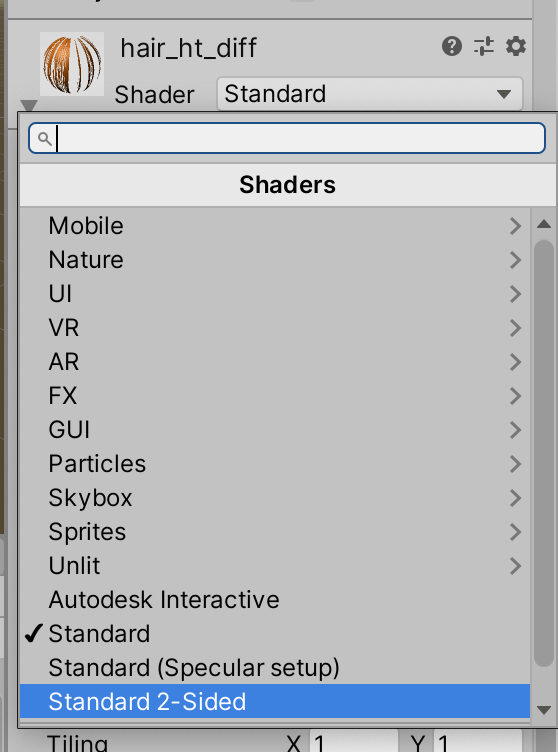
Standard 2-Sided

The back side is now visible.
How to upload assets to STYLY
Click here to learn how to upload your human model from Unity to STYLY.

Learn VR/AR content creation with no experience!
NEWVIEW SCHOOL ONLINE is an online learning site where you can learn the basics of Unity and PlayMaker required for VR/AR content creation, as well as the production process (and production techniques) of the attractive content distributed on STYLY!
- You can create VR/AR contents without writing programming code.
- Officially supervised Unity courses are available.
- Additional elements such as photogrammetric production methods and content weight reduction are available.
- You can learn how to think about creating VR/AR content.
