In this article, I’ll explain how to get controller information using Playmaker and how to collide and physically behave using Rigidbody and Collider.
The controller collides with a 3D model placed in space and implements the action of the 3D model moving.
Whenyou touch a normal object, the controller will pass through without doing anything in particular. In this state, it is unnatural as a space, so we implement an interaction in which the 3D model moves by collision when it is touched by the 3D model.
Experience it on STYLY
- 1 Advance preparation
- 2 Overview
- 3 Preparing a 3D model
- 4 Adding a “Collider” to a colliding 3D model
- 5 Adding a “Rigidbody” to a colliding 3D model
- 6 Create a “Collider” for the controller in the scene
- 7 Assigning a controller “Collider” to an object that has obtained controller information
- 7.1 Use the “Find game object” to find the controller in the scene
- 7.2 Get the spatial coordinates of the controller by “Get Position”
- 7.3 In the “Create Object” section, the Controller Collider created earlier will appear at the controller position in the scene
- 7.4 Set Parent” to make the Collider a child object of the controller and make it follow the controller
- 8 Upload to STYLY
Advance preparation
Install PlayMaker, a plugin for Unity, in advance.
![[Unity Tutorial] Creating a Game Using Playmaker ① From Basic Introduction to Installing](https://styly.cc/wp-content/uploads/2019/06/1200px-160x160.jpg)
If you are new using PlayMaker, please read the following articles for a better understanding.
![[Unity] Starting Playmaker from Scratch](https://styly.cc/wp-content/uploads/2019/09/PlaymaerCoreConcept-160x160.png)
Once installed, open the Playmaker Editor and store it on the screen.
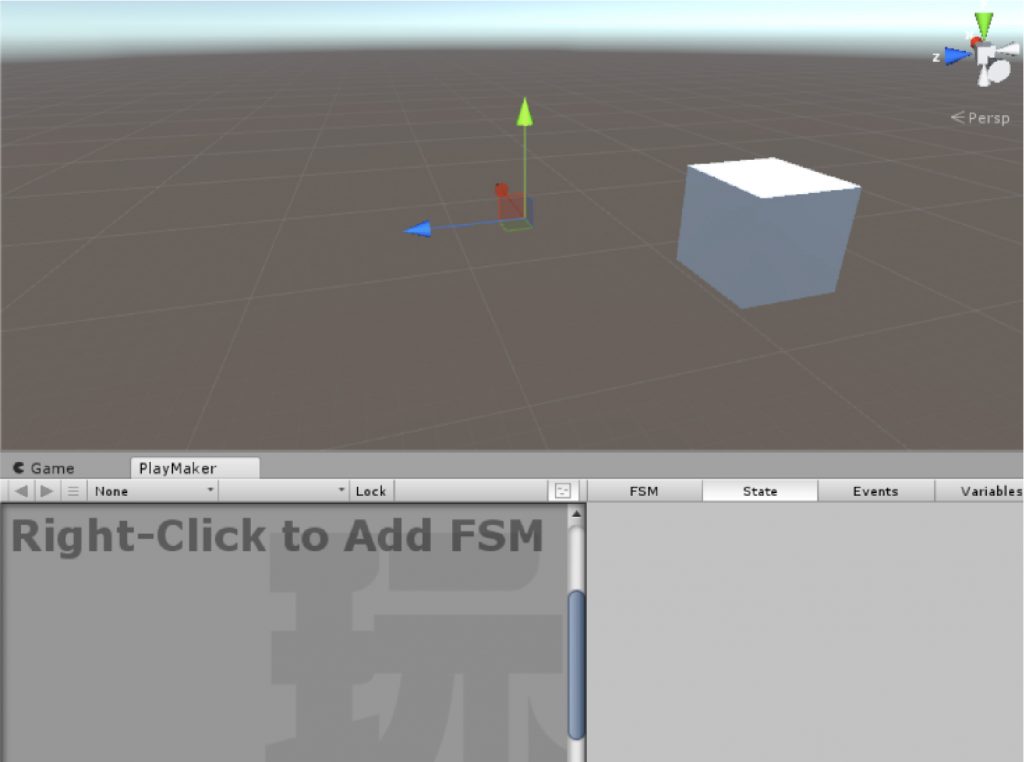
Store the Playmaker Editor
Overview
As a basic Unity information for objects to touch each other and cause the physical action of a collision to occur, you need the followings,
- Collider” is given to both of the colliding objects.
- “Rigidbody” is assigned to the object that generates the physical action.
In other words, you can create a physical action by setting a “Collider” on the controller and 3D model, and a “Rigidbody” on the 3D model.
The big takeaway at this time is the following.
- Preparing a 3D model
- Adding a “Collider” to a colliding 3D model
*This is not necessary if you are using a model that has been assigned in advance. - Adding a “Rigidbody” to a colliding 3D model
- Create a “Collider” for the controller in the scene
- Assigning a controller “Collider” to an object that has obtained controller information.
Preparing a 3D model
First, let’s create a 3D model to collide with. This time, we will make a model of the Cube.
In Hierarchy, right-click and select “Create > 3D Object > Cube” to create it.
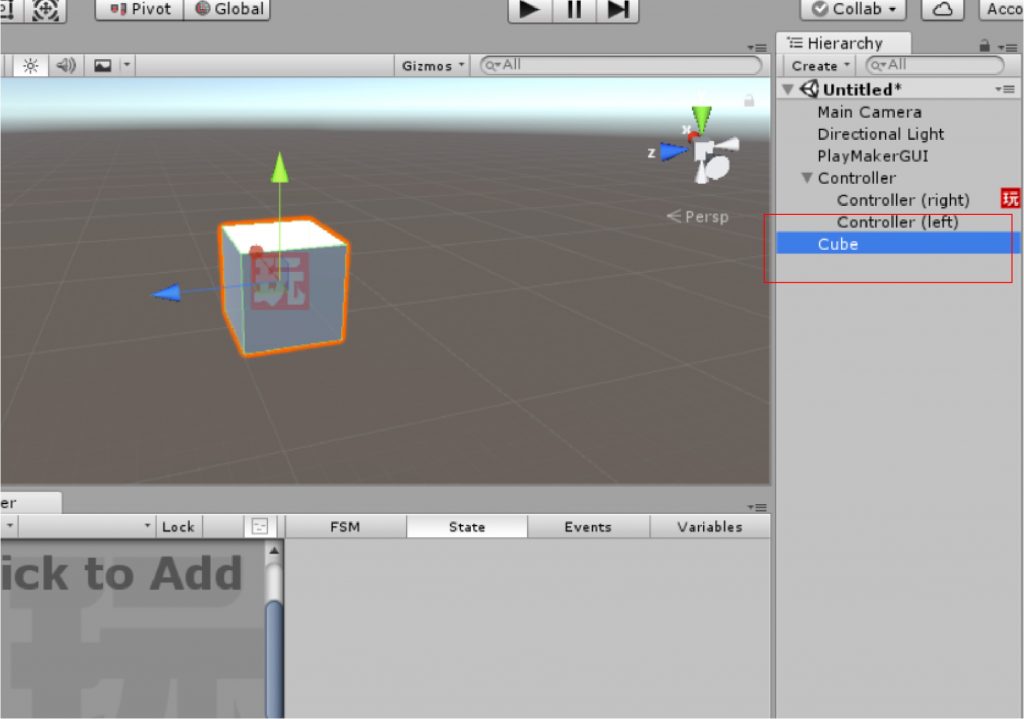
Create a Cube
As it is, the Cube doesn’t do anything, and even if the controller touches it, it will slip through.
For the physical action to occur, we need to add the “Collider” and “Rigidbody” components to the Cube.
This is how it works.
Adding a “Collider” to a colliding 3D model
[Colider]
Collider is a component that calculates the collision detection. By assigning this information to the target 3D model, the “collision” information will be obtained when it touches another 3D model.
Collider
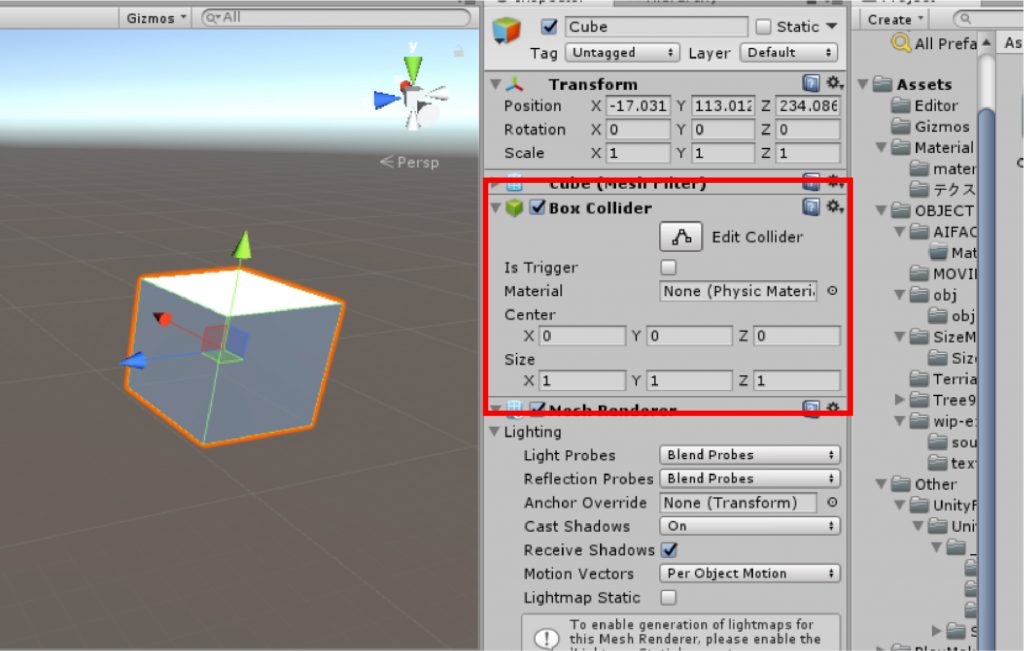
Normally, Cube and Sphere created on a scene in Unity are granted by default, but imported 3D models need to be granted.
If you want to add a component, you can do so from “Add Component” in the Inspector.
Select the Collider according to the shape of the model you want to give
The collider can now be added to 3D models for a collision detection.
Next, we add a Rigidbody to the 3D model to be collided.
Adding a “Rigidbody” to a colliding 3D model
[Rigidbody]
Rigidbody is a component that computes collision detection and performs physical actions. In other words, when a 3D model with Collider is collided with a 3D model, if Rigidbody is attached, the 3D model will be moved by the impact.
To add a Rigidbody, select “Rigidbody” from the Add Component menu.
Add Rigidbody
After giving Rigidbody, let’s remove the check mark of “Use Gravity” in the setting item.
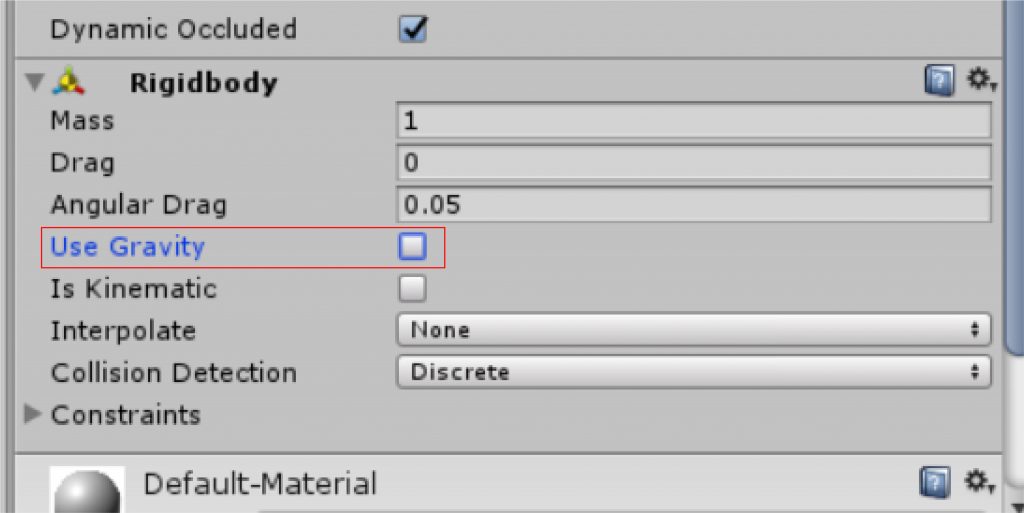
Uncheck “Use Gravity”
We now have a 3D model to collide with.
Create a “Collider” for the controller in the scene
It is not possible to set a collision on the controller object itself.
You can add collision settings to the controller by adding a “Collider” in the scene and making it follow as a child object of the controller.

image drawing
First of all, create an empty object in Hierarchy with “Create Empty”. Let’s name it “Controller Collider”.

Change your name
From Add Component, add Sphere Collider and set the Radius of Sphere Collider to 0.05.
Add Sphere Collider
Let’s pre-fabricate the Sphere Collider and remove it from the Hierarchy.
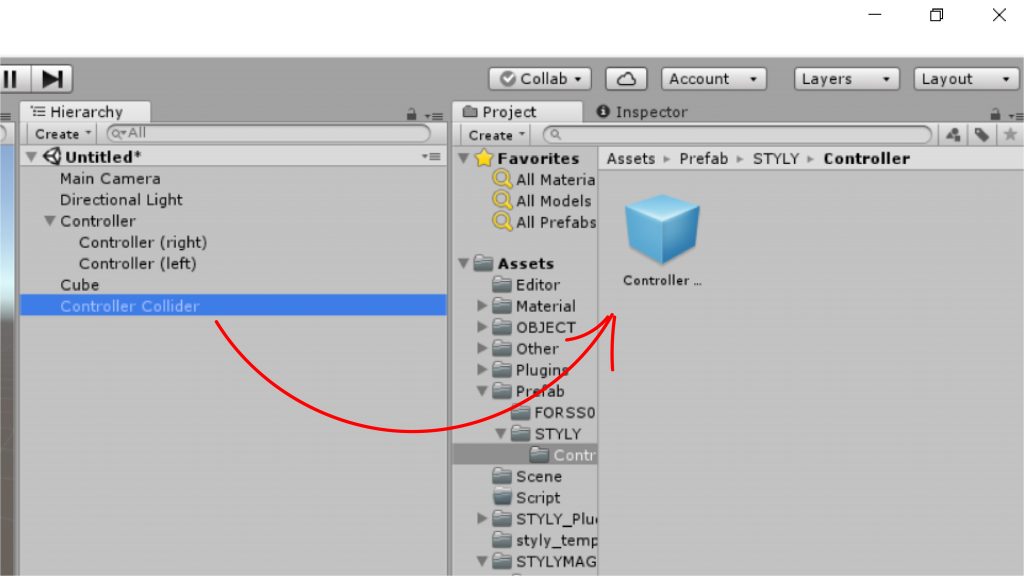
Prefabization
The next step is to set up the controller.
Assigning a controller “Collider” to an object that has obtained controller information
Create an object to get information about the controller.
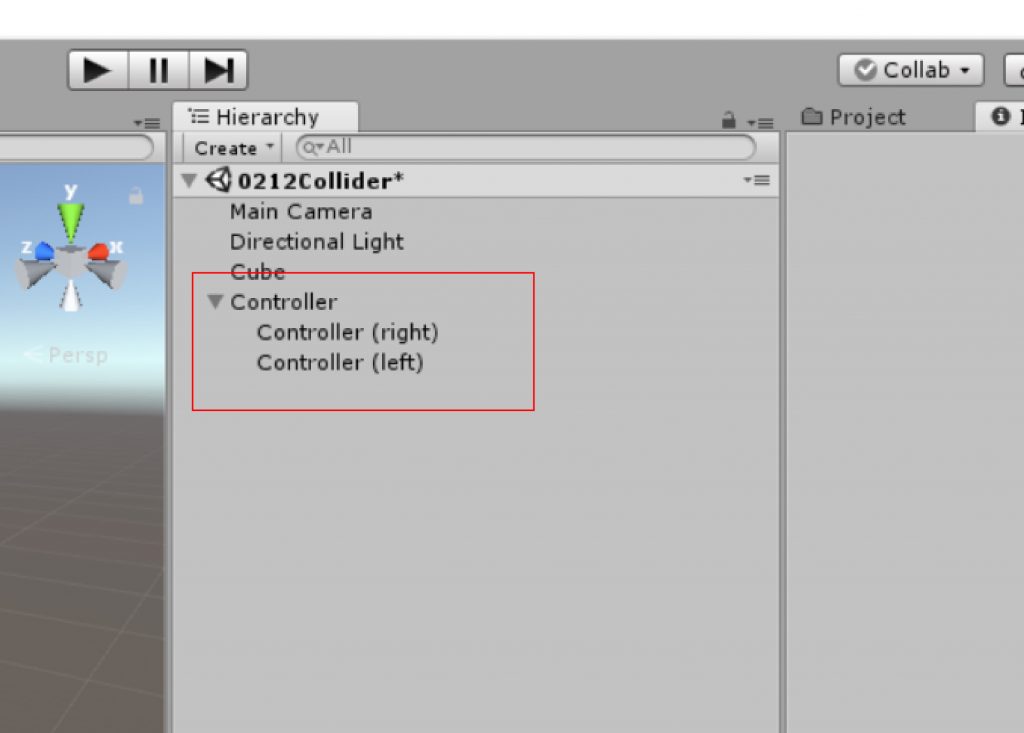
Let’s create an empty object in Hierachy with “Create Empty” and name it “Controller”.
Select “Controller” and create two objects within it, named “Controller (right)” and “Controller (left)”. At this time, a half-size space is placed between the controller and (right), and it will not work evenb with one single mistake,
Add an action in Playmaker to this Controller (right)/(left).
Controller (right)/(left)
Set the Controller (right).
The general flow of the process is as follows
- Use the “Find game object” to find the controller in the scene.
- Get the spatial coordinates of the controller by “Get Position”.
- In the “Create Object” section, the Controller Collider created earlier will appear at the controller position in the scene.
- “Set Parent” to make the Collider a child object of the controller and make it follow the controller.
In this case, the order of Playmaker’s actions is from the top to the
- “Find Game Object.
- “Get Position”
- “Create Object”
- “Set Parent”
Otherwise, Playmaker will not work properly. ’Be mindful.
Let’s add an FSM to the Controller (right).
With Controller (right) selected, right-click on the Playmaker Editor and select Add FSM.
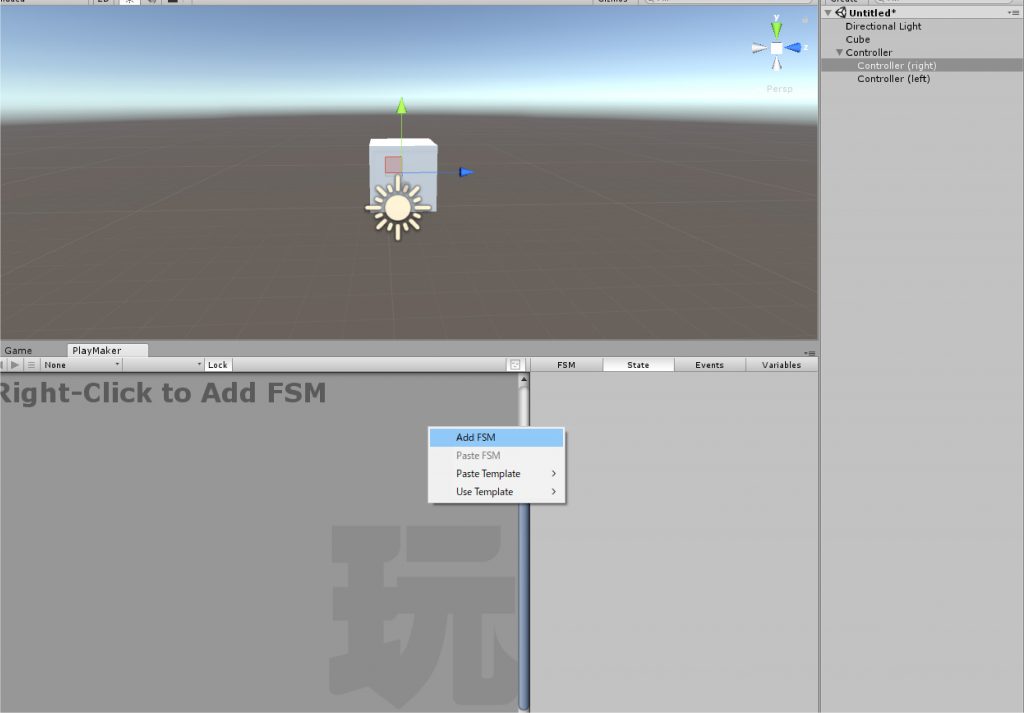
Add FSM
If you select Add FSM, State 1 will be added.
Select State 1 and open it by selecting “Action Browser” on the bottom right of the “State” tab.
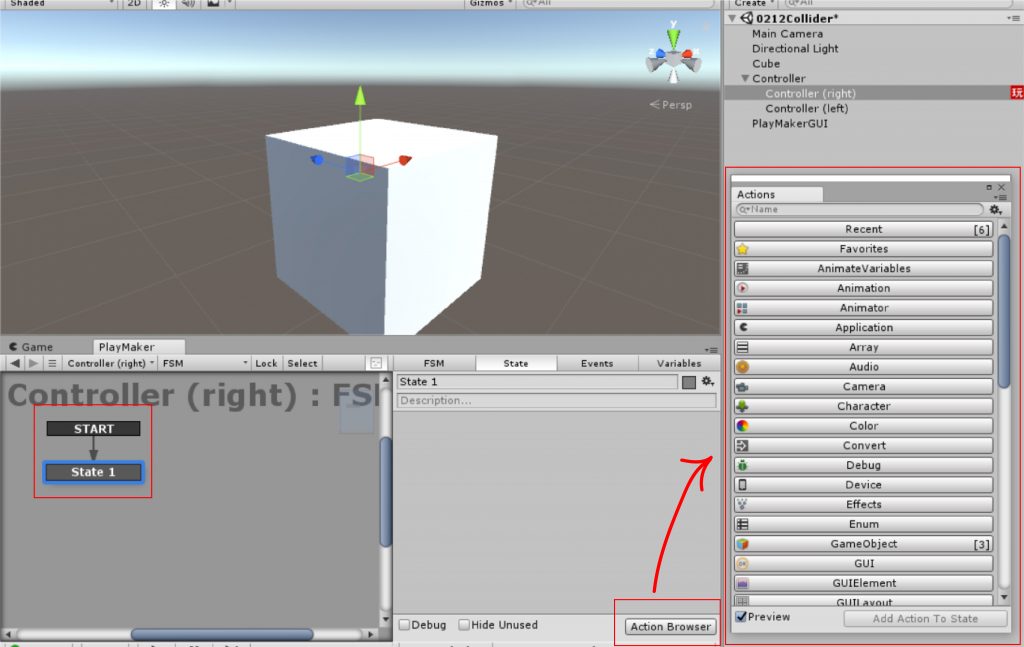
Open the Action Browser
Let’s add “Find Game Object”, “Get Position”, “Create Object” and “Set Parent” from Action Browser.
Notice the order in which you do this, which is from top to bottomas follows,
- “Find Game Object”
- “Get Position”
- “Create Object”
- “Set Parent”
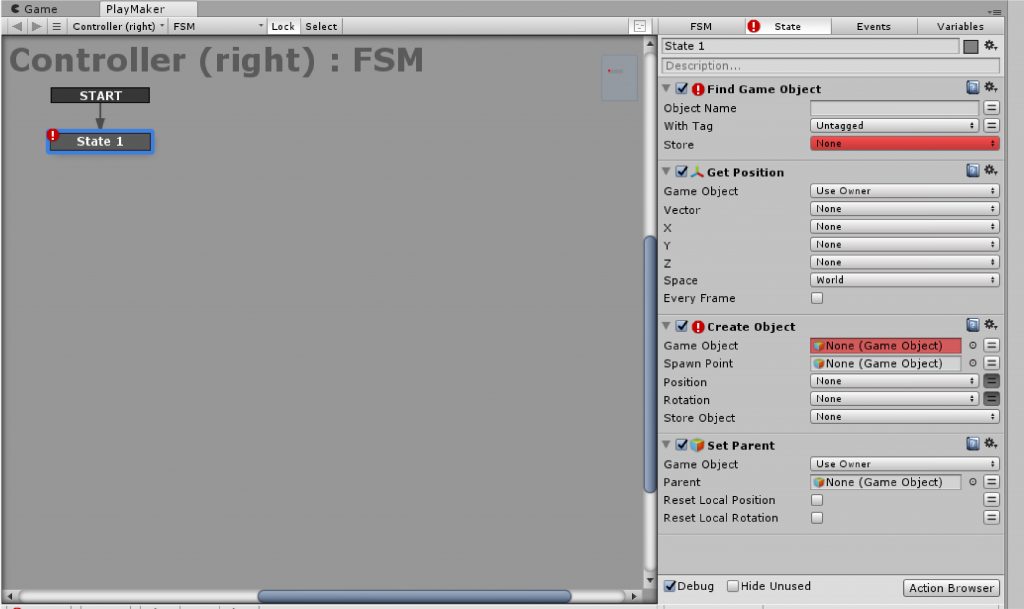
Four additional actions
Use the “Find game object” to find the controller in the scene
Set the Object Name to “Controller (right)”.
*Please copy and use the word “Controller (right)”.
*Be mindful that if you get the letters wrong, it won’t work properly.
To get the right controller: Controller (right)
To get the left controller: Controller (left)
Next, open the Store menu bar and select “New variable…” and name it as “Controller”.
Now, the right controller in the scene will be searched and stored in a variable called “Controller”.
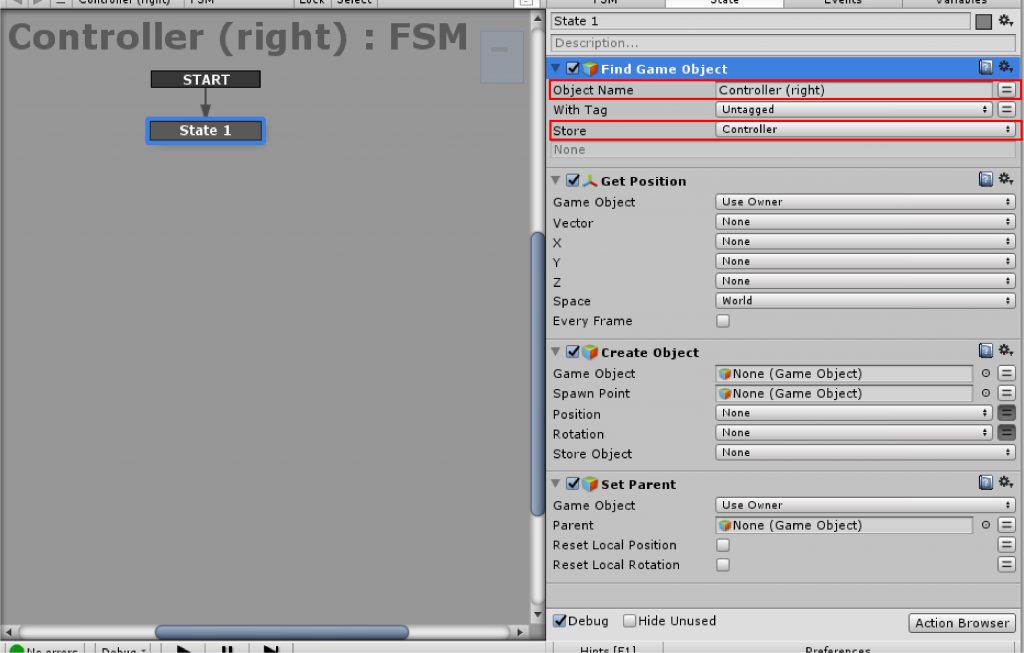
Find Game Object settings
Get the spatial coordinates of the controller by “Get Position”
Open the Game object menu bar and select “Specify Game Object”.
Press the two-line button on the right side of the menu bar and specify the “Controller” variable created with Find Game Object
Select [New variable…] from the menu bar of the Vector and name it [Controller Position].
Now the spatial coordinates of the controller in the scene will be stored in a variable called “Controller Position”.
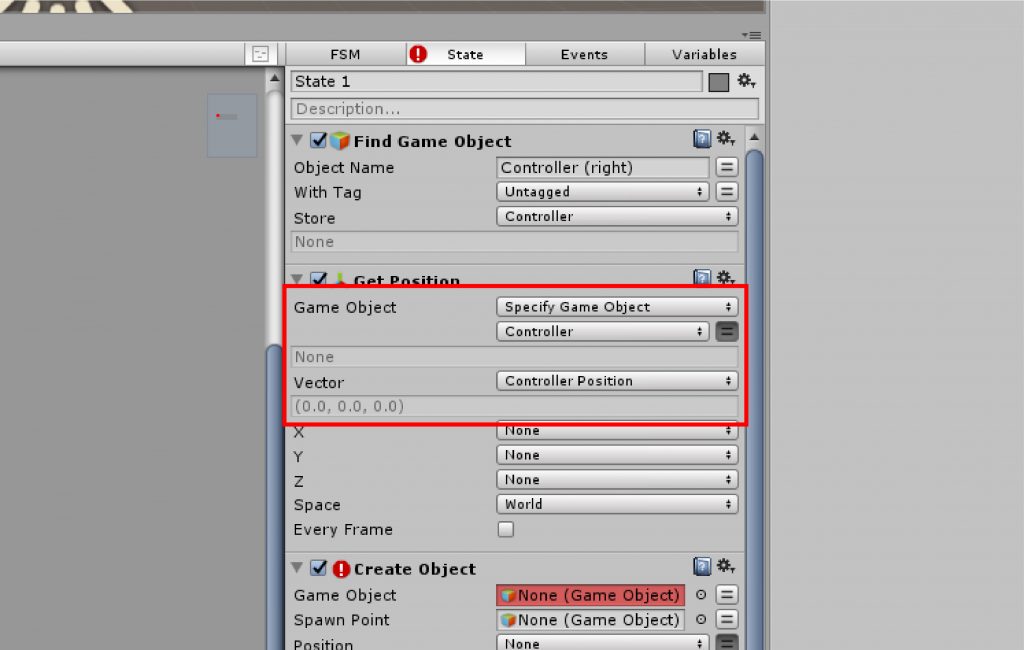
Set the Get Position
In the “Create Object” section, the Controller Collider created earlier will appear at the controller position in the scene
Drag a prefabricated “Controller Collider” to the Game object and add it.
Position specifies the variable “Controller Position” created with Get Position.
Open the Store Object menu bar, select “New variable…” and name it “Created Controller Collider”.
Now the Collider will appear at the controller’s position in the scene; it will be stored in a variable called “Created Controller Collider”.
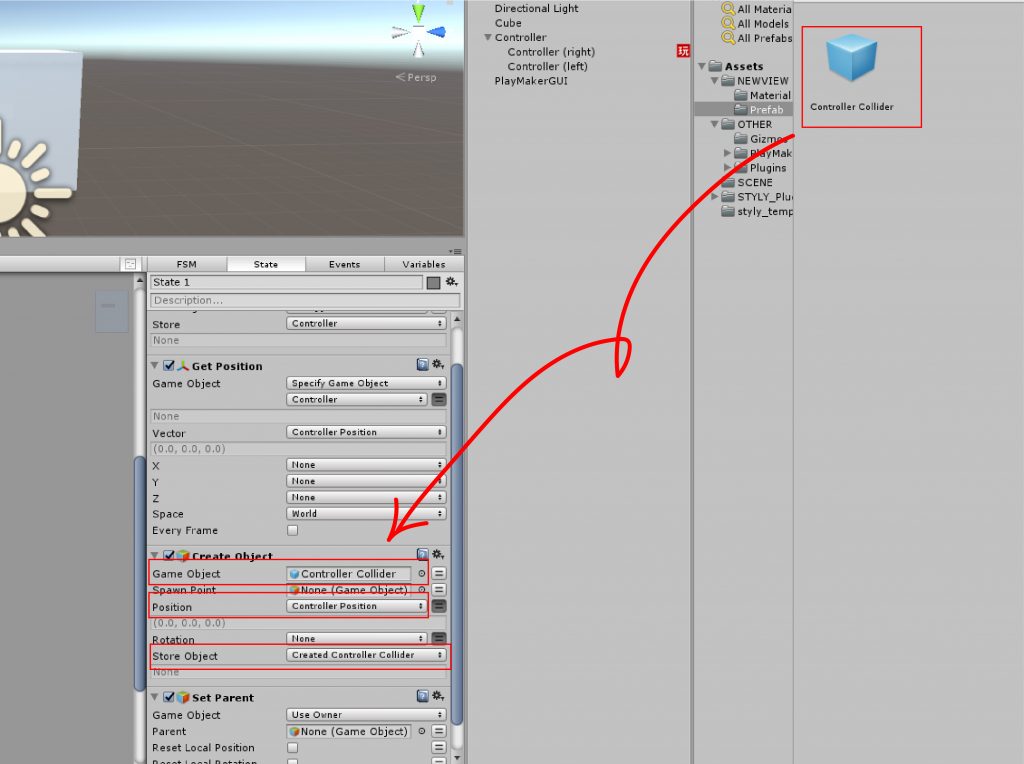
Set the Create Object
Set Parent” to make the Collider a child object of the controller and make it follow the controller
The Set Parent allows you to “make the Collider created in the scene a child object of the controller and make it follow the controller”.
Specify the “Created Controller Collider” variable created with Create Object for the Game object.
Select the Game Object menu bar and select “Specify Game Object”.
Press the double line button next to the item to switch to the variable you can specify and specify the “Created Controller Collider” variable you just created.
Set the Parent.
Press the two-line button on the right to switch to the variable you want to specify, and then select “Controller.
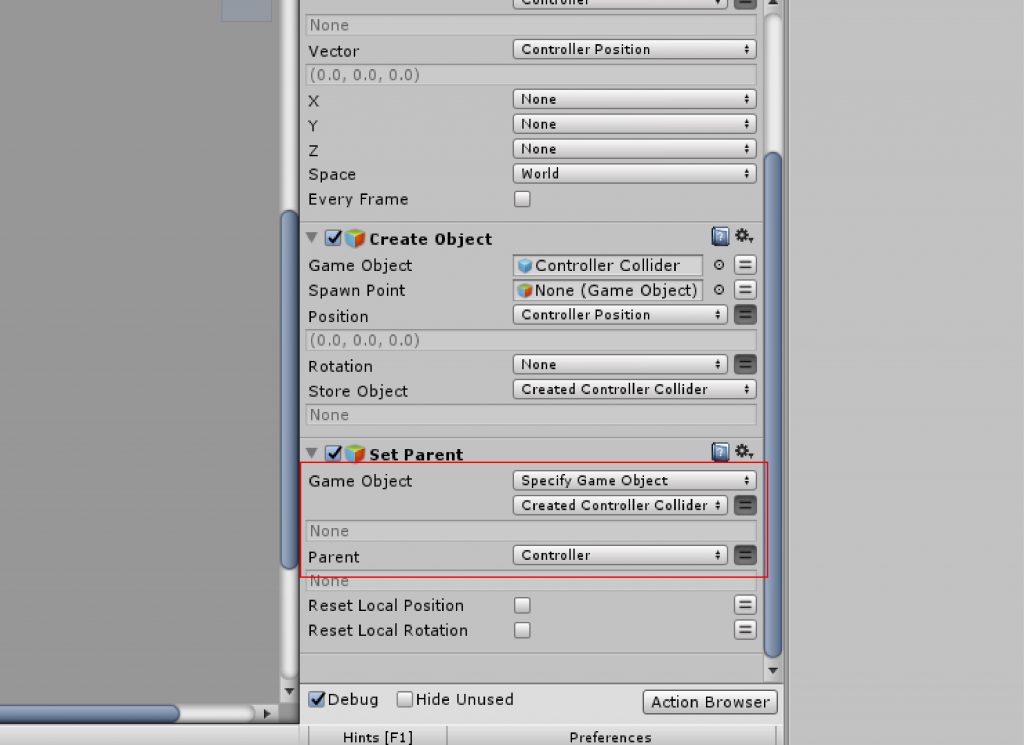
Set Parent
Now the Collider created in the scene becomes a child object of the controller and follows the controller.
Controller (right) is the controller setting on the right.
This is how to set up the interaction in TRIGGER EVENT.
This is how to collide the 3D model with the controller.
Finally, to recap my points
- Collider” is assigned to both objects that collide with each other.
- Rigidbody” is assigned to the object that generates the physical action.
is a prerequisite. Let’s use this idea and method to create a VR space where interaction is implemented!
Upload to STYLY
Let’s actually upload it to STYLY.
There is one caveat.
That is, instead of uploading to STYLY as a Prefab, it uploads to STYLY scene by scene.
Since STYLY automatically generates colliders for uploaded prefs, uploading them to STYLY as prefs may cause unexpected behavior.
If you upload it to STYLY as a scene, it will not automatically generate a Collider.
So, if you want to use Collider or Rigidbody to incorporate a physics simulation into your experience, uploading it to STYLY for each scene is the way to go.
Uploading to STYLY scene by scene is very easy.
First, make sure the scene doesn’t contain any extras and save the scene.
At this time, be sure to delete the Main Camera in your scene because it is unnecessary.
After saving, simply select your saved scene from the Project window and click “Upload Prefab or Scene to STYLY”.
Here’s what I actually uploaded.
Experience it on STYLY
How to create an account

How to upload to STYLY


Let’s create a work that is full of originality!