In this article, I’m going to show you how to interact with the controller using Playmaker.
This time, I will explain how an event can be triggered when a button is pressed while the controller is touching an object.
In this article, we can finally implement the following interactions.
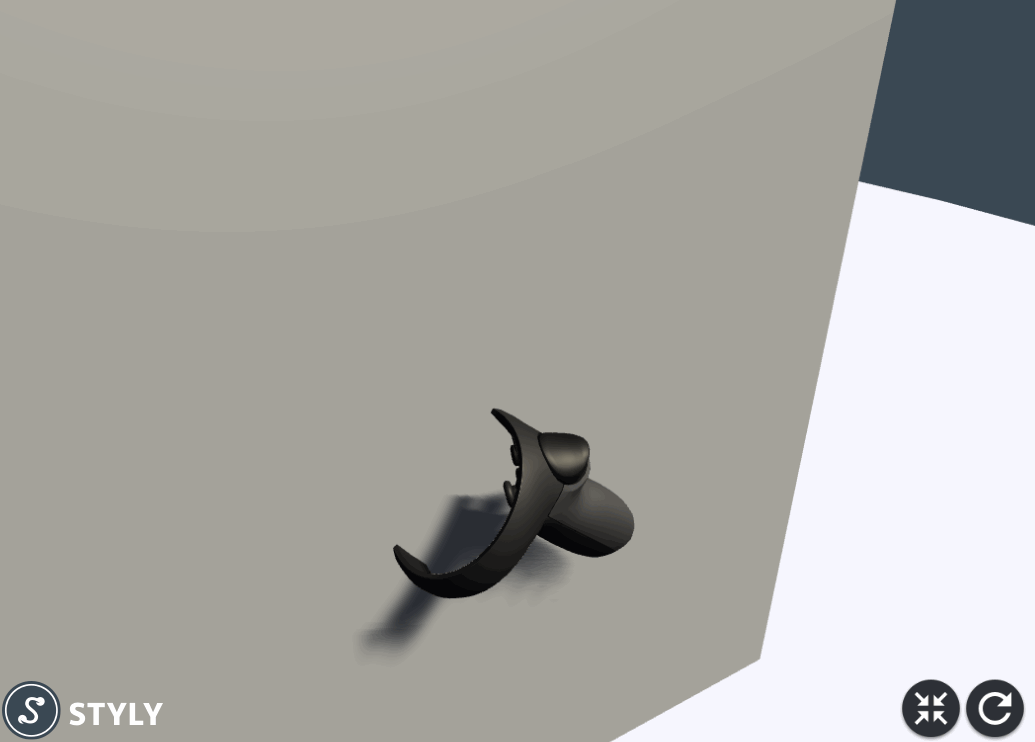
Touching the controller to an object and then pressing the trigger button will trigger an event
Advance preparation
Download the Playmaker here.
You should install PlayMaker, a plugin for Unity, beforehand.
![[Unity Tutorial] Creating a Game Using Playmaker ① From Basic Introduction to Installing](https://styly.cc/wp-content/uploads/2019/06/1200px-160x160.jpg)
If you are new to using PlayMaker, please read the following articles to get a better understanding of it.
![[Unity] Starting Playmaker from Scratch](https://styly.cc/wp-content/uploads/2019/09/PlaymaerCoreConcept-160x160.png)
Once installed, open the Playmaker Editor and store it on the screen.

Store Playmaker Editor
Overview
We implement a way for an event to be fired when the controller touches an object and enters a button.
Here’s how to implement it in Playmaker.
- Create a 3D model that implements the interaction.
- Interaction setting (TRIGGER EVENT / Global_TriggerPressDown_R(L))
Create a 3D model that implements the interaction.
Create a 3D model to implement the interaction.
Right-click in Hierarchy and create a Cube from Create.

Create a Cube
In this interaction, we will use the “TRIGGER EVENT” option because we want the controller to get information about the Cube when it is touched.
A TRIGGER EVENT is an event triggered by “touch”.
Go here, for more information about TRIGGER EVENT
![[Unity/Playmaker] How to Trigger an Event when the Controller Touches an Object (TRIGGER EVENT)](https://styly.cc/wp-content/uploads/2020/02/Controller-69-160x160.jpg)
How to prepare a 3D model to implement the interaction (click here)
Object with the following settings
- Granting Collider
- Colliderno
Interaction setting (TRIGGER ENTER / Global_TriggerPressDown_R(L))
With Cube selected, right-click on the Playmaker Editor and select Add FSM.
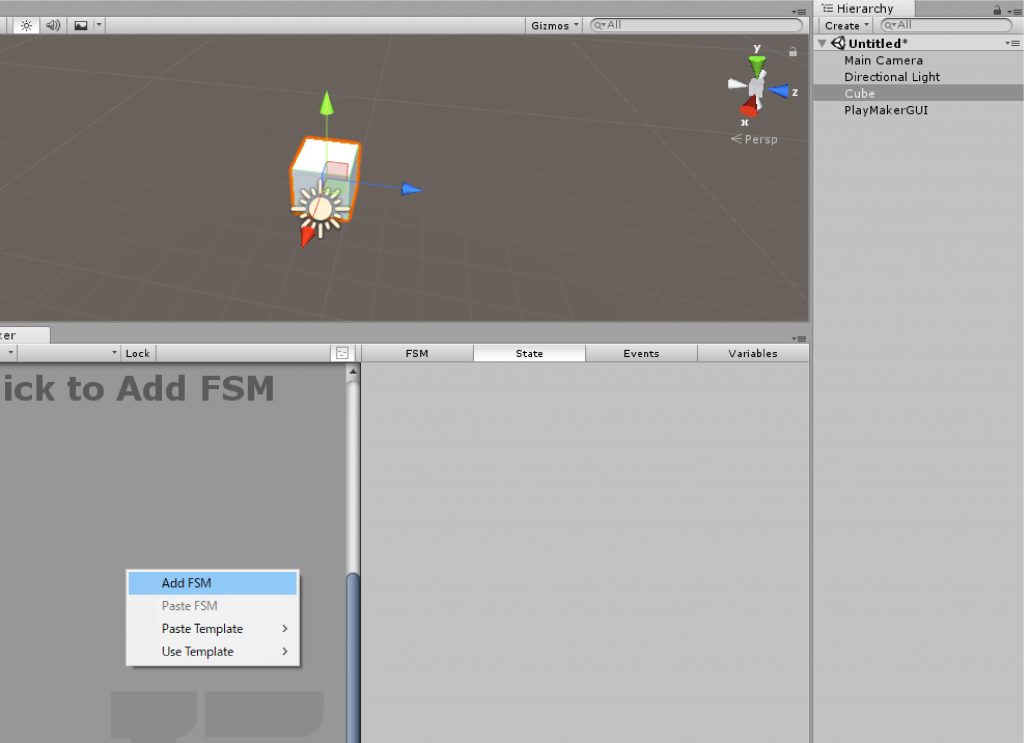
Add FSM
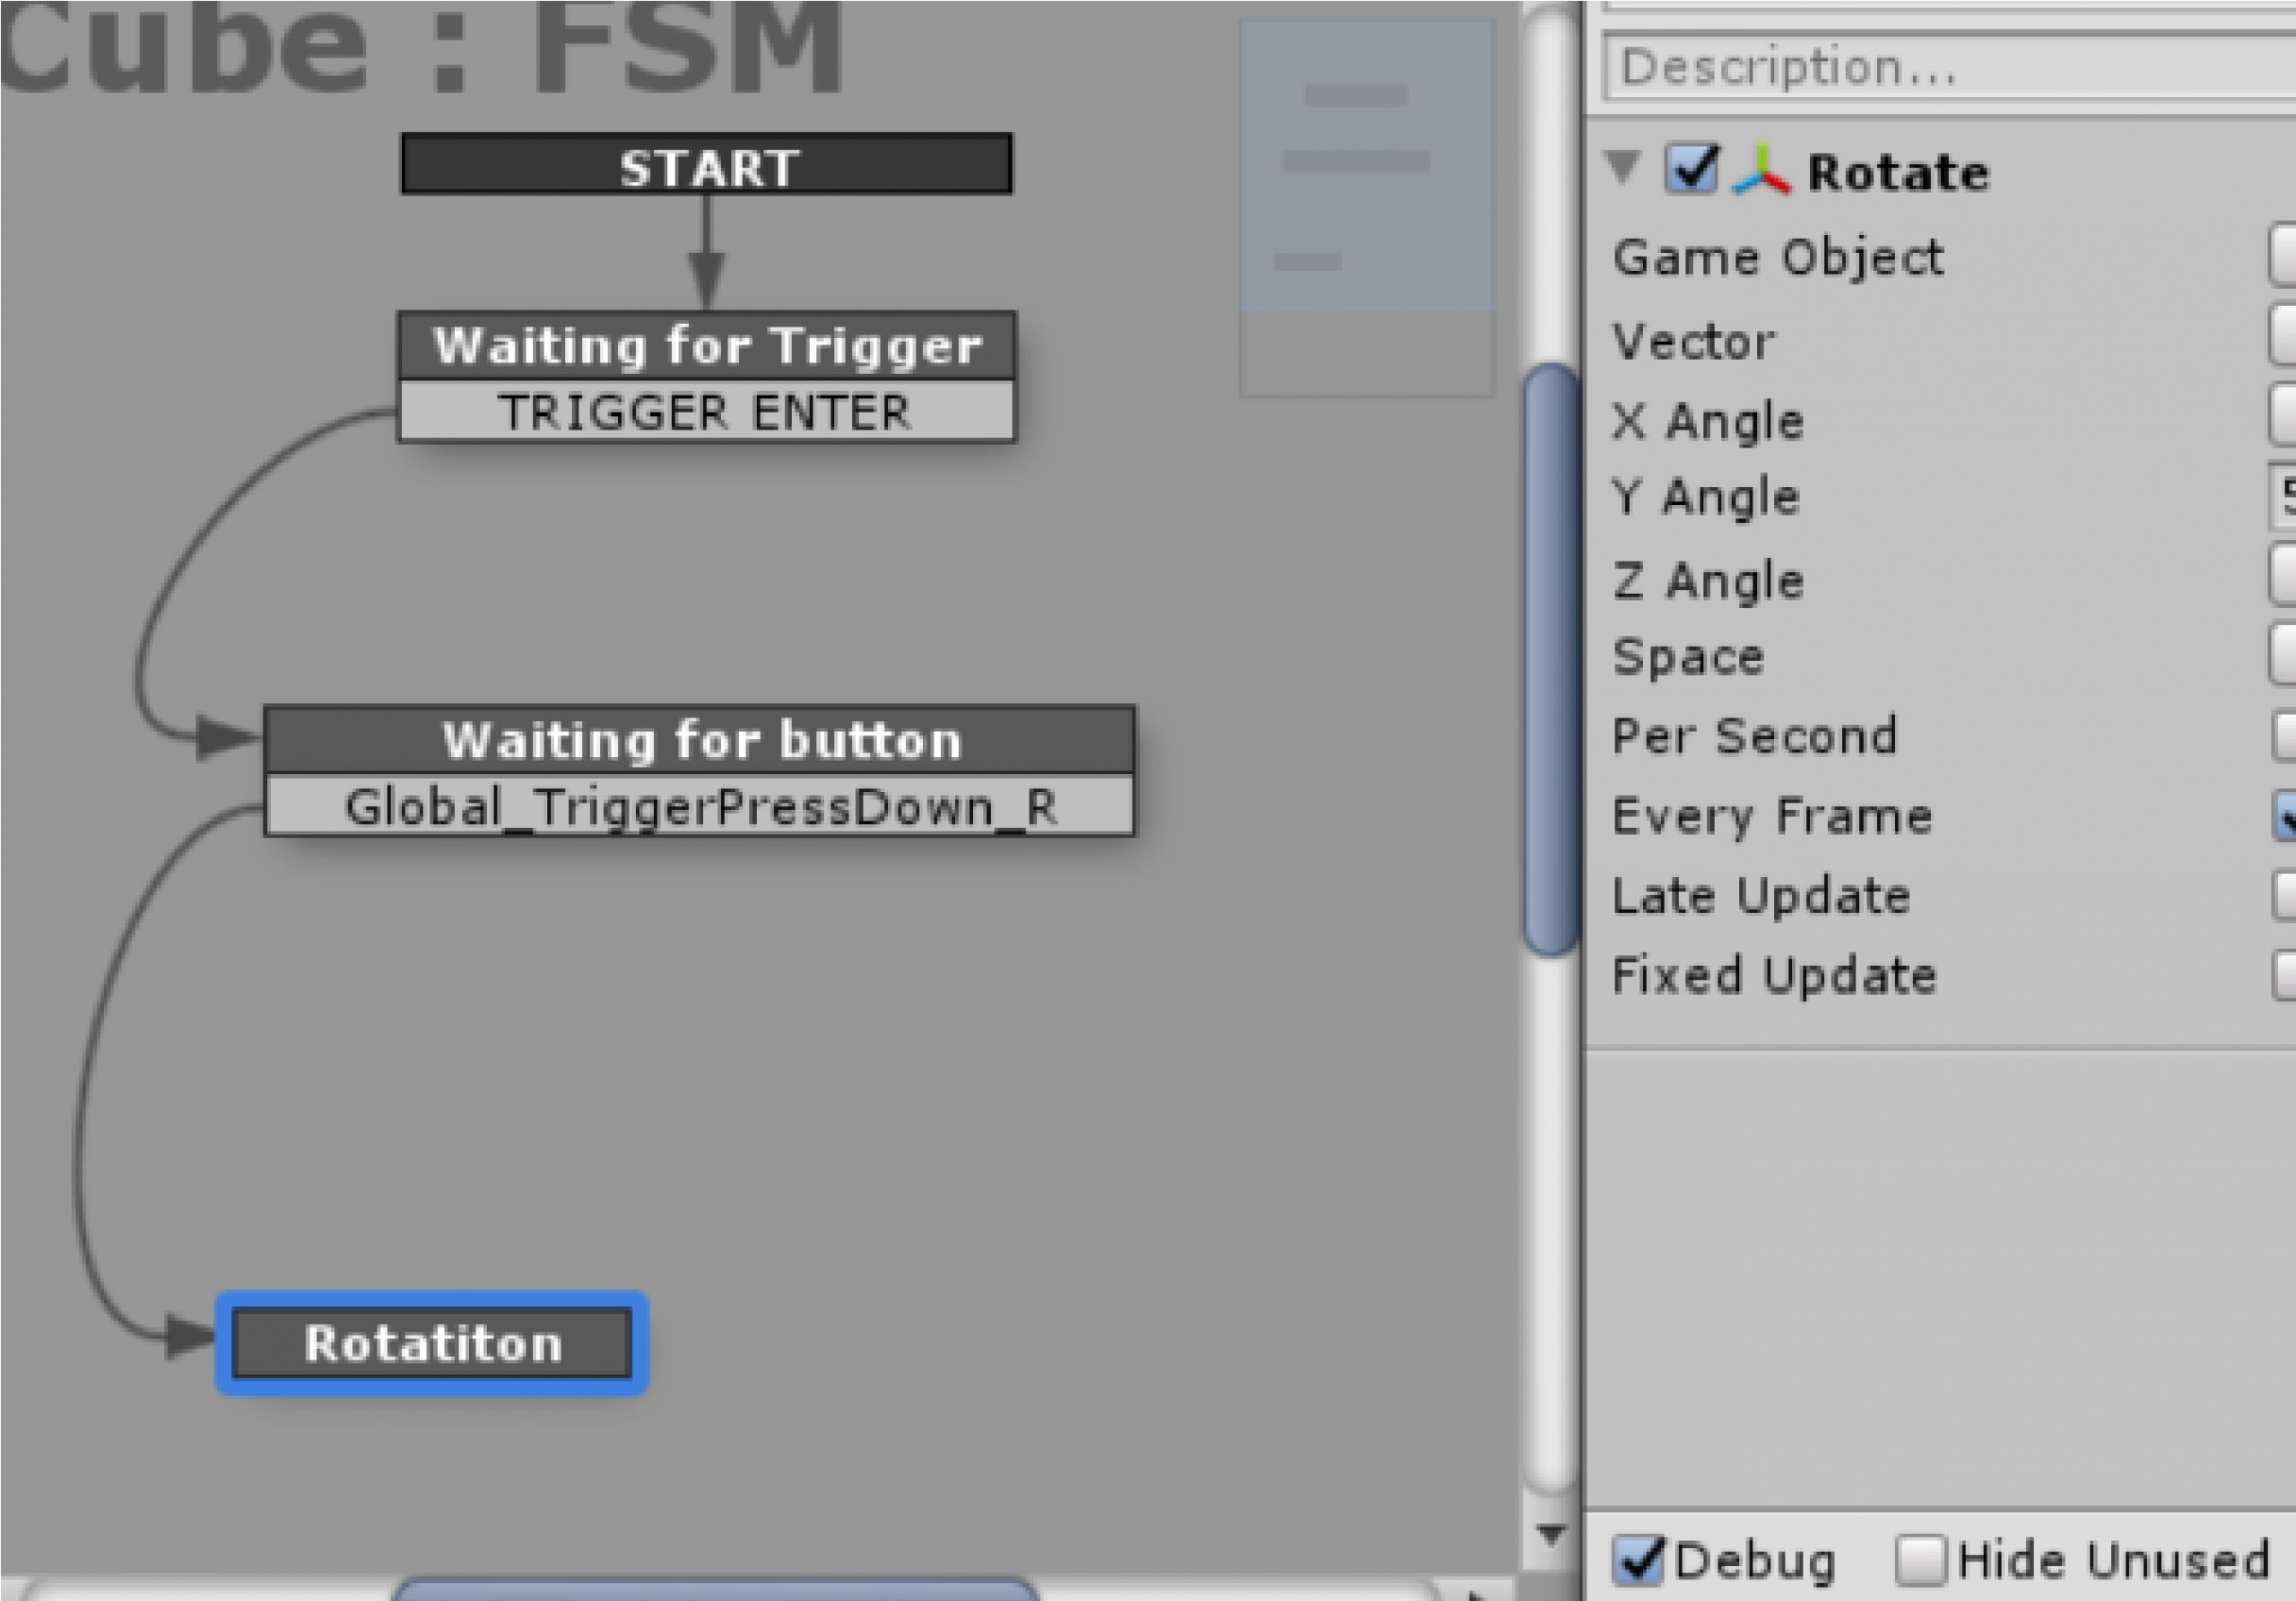
State1 is added; change the name of State1 to Waiting for Trigger.
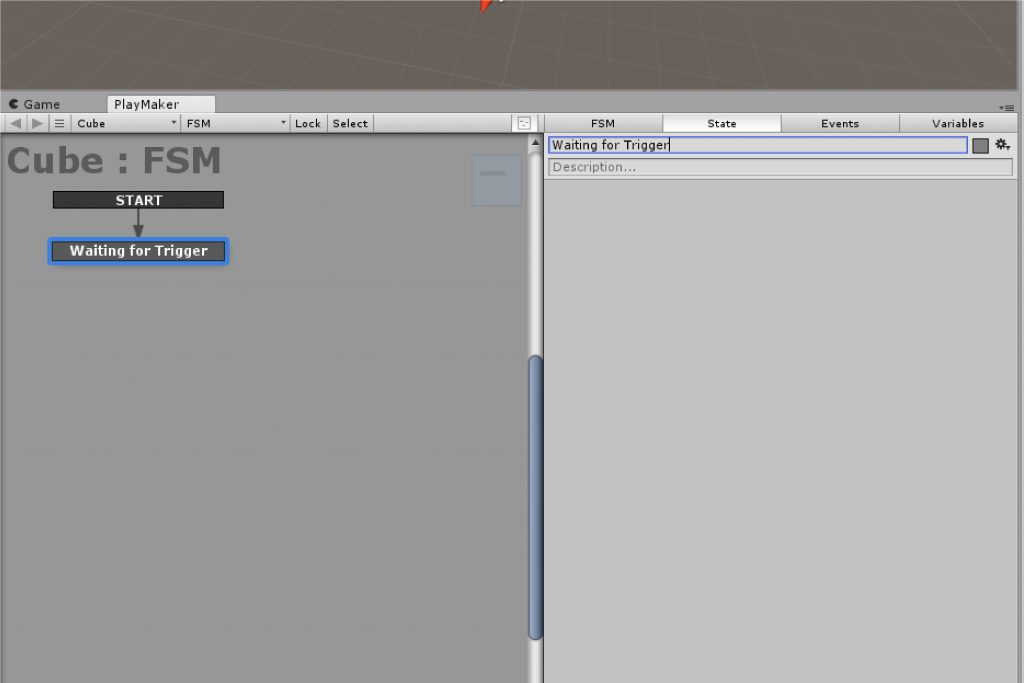
Change name
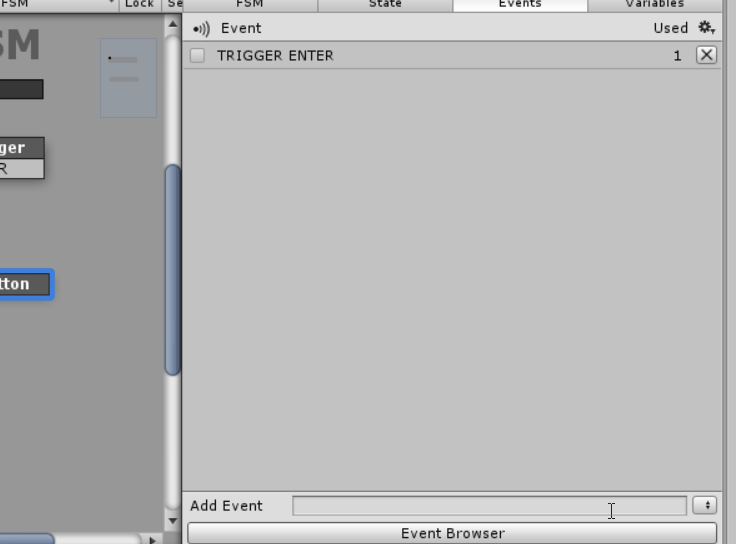
Next, let’s add a TRIGGER ENTER to the state of Waiting for Trigger.
With the State for Waiting for Trigger selected, right-click and select Add Transition, System Events, and then click TRIGGER ENTER.
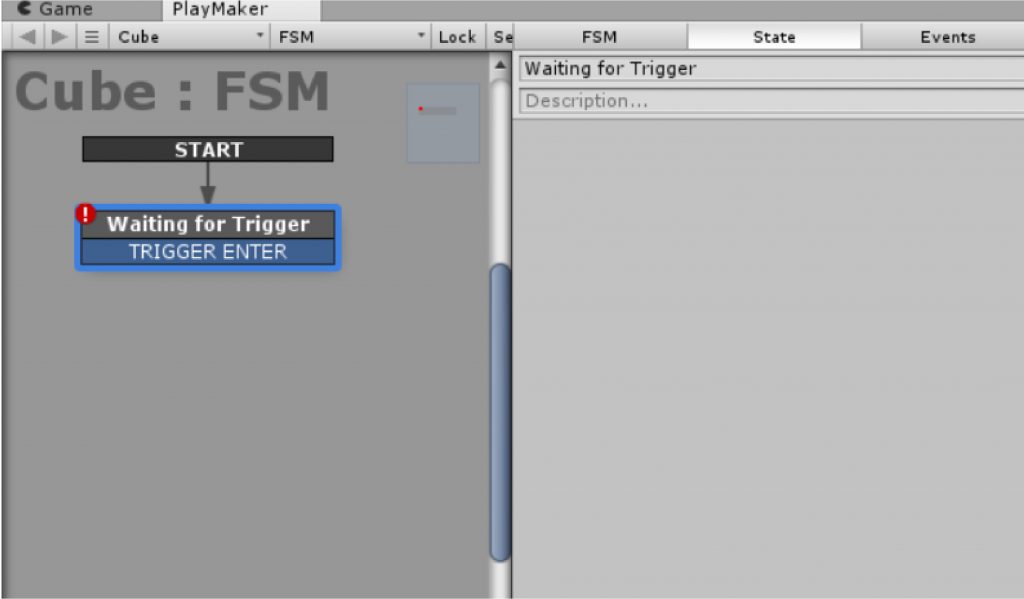
TRIGGER ENTER
This “Waiting for Trigger” state retrieves the information indicating that the controller touches the 3D model.
Next, set up the interaction where the controller touches and gets the information entered by the button.
Right-click on the Playmaker Editor and add “Add State”.
Change the name to Waiting for Button.
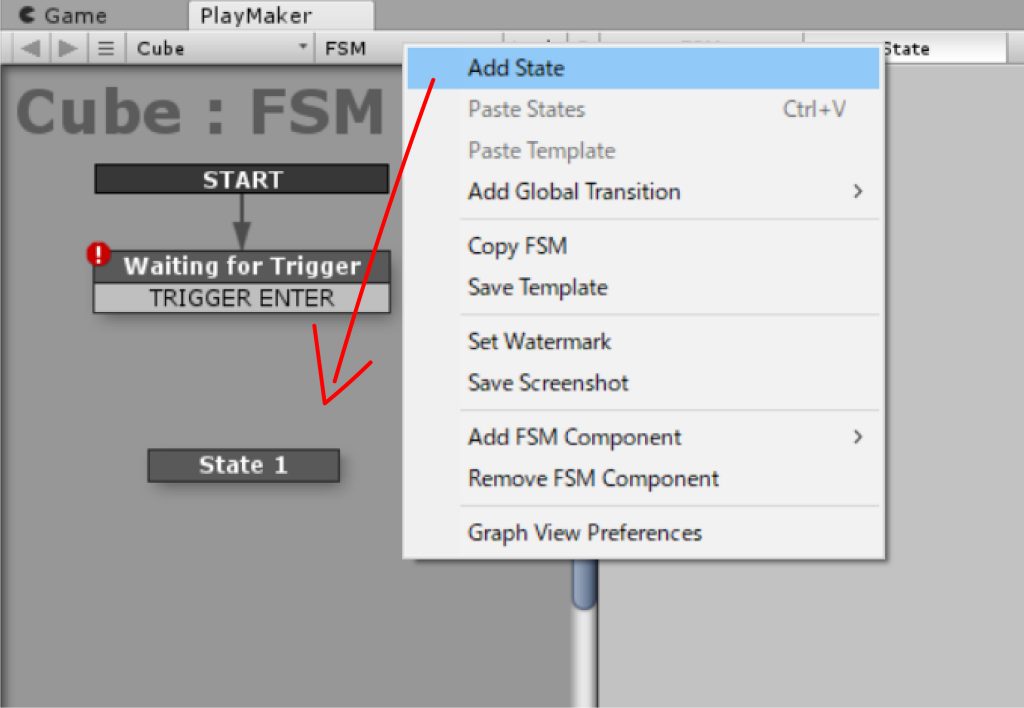
Add State
The event of Global_TriggerPressDown_R is given to this Waiting for Button. First, add an event by entering Global_TriggerPressDown_R / Global_TriggerPressDown_L in the Add Event at the bottom of the Events tab on the right.
This Global_TriggerPressDown_R/L will be the event that retrieves the controller’s trigger button information.
Add Global_TriggerPressDown_R
With Waiting for Button selected, right-click and select Global_TriggerPressDown_R for Add Transition.
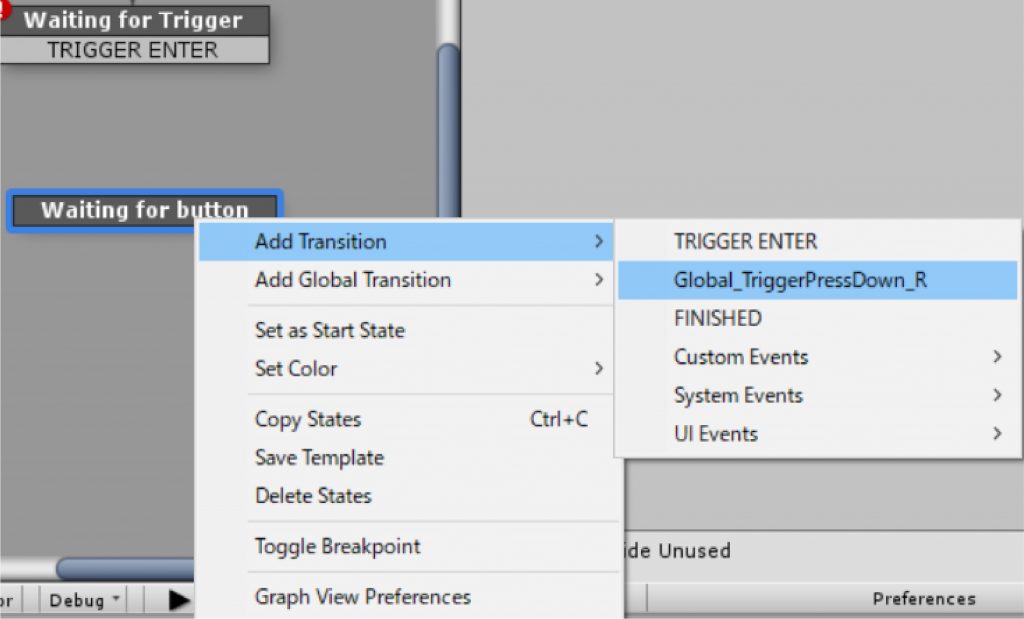
Add Transition
Connect Waiting for Trigger and Waiting for Button with arrows, and set the Transition.
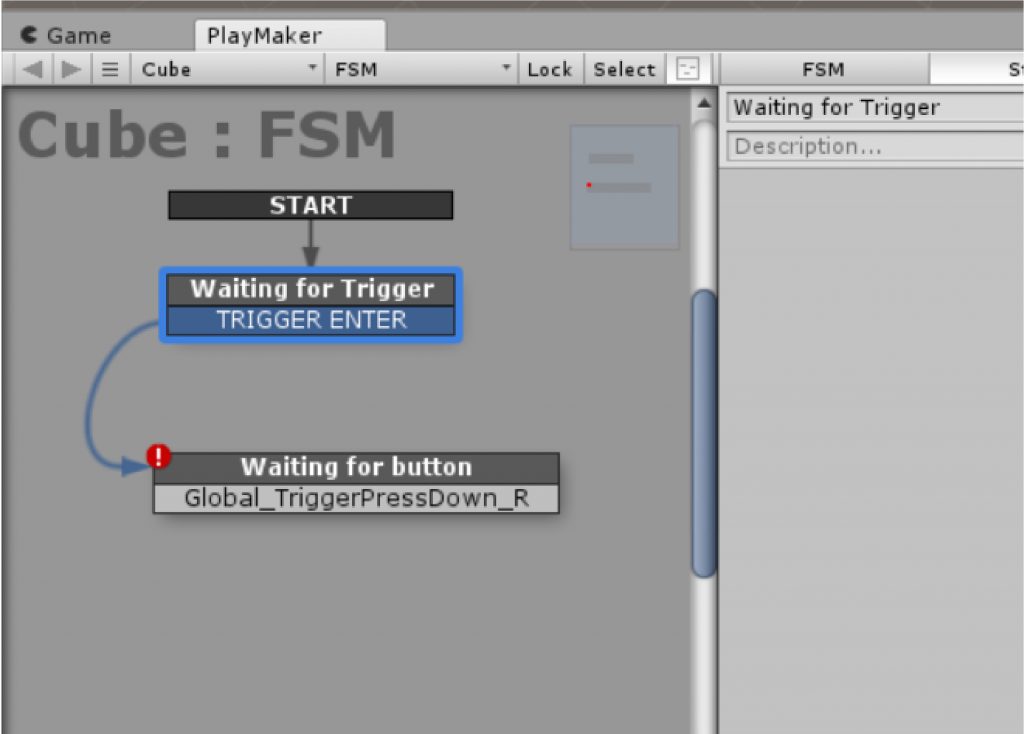
Setting of Transition
In addition to this, let’s add one more State: right-click on the Playmaker Editor and select Add State.
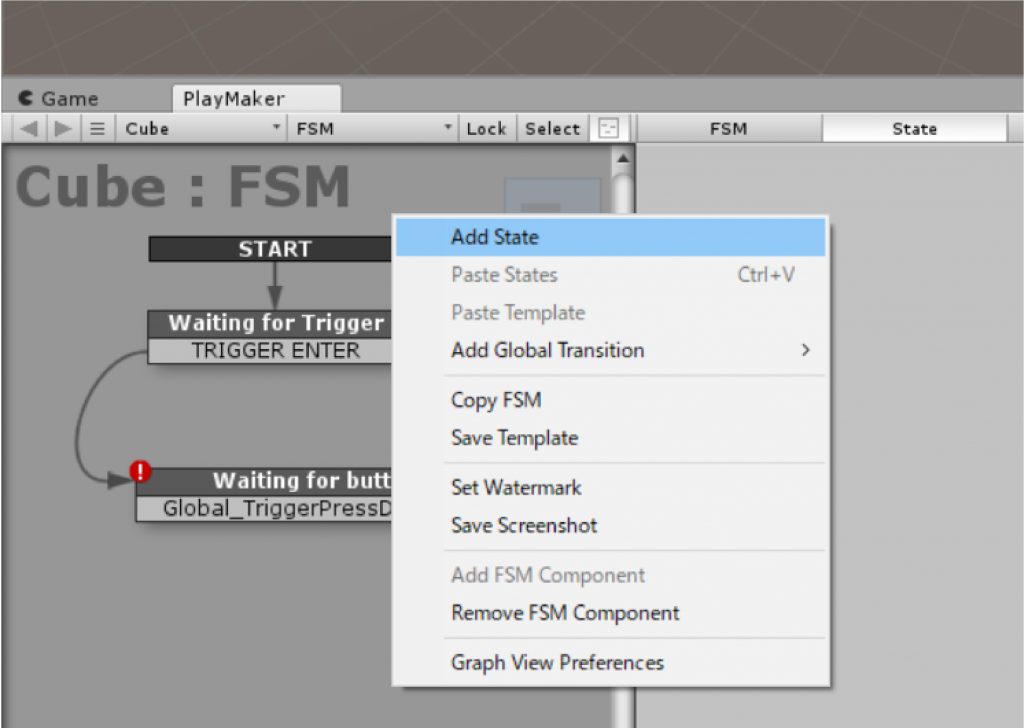
Add State
Change the name of State1 to Rotation.
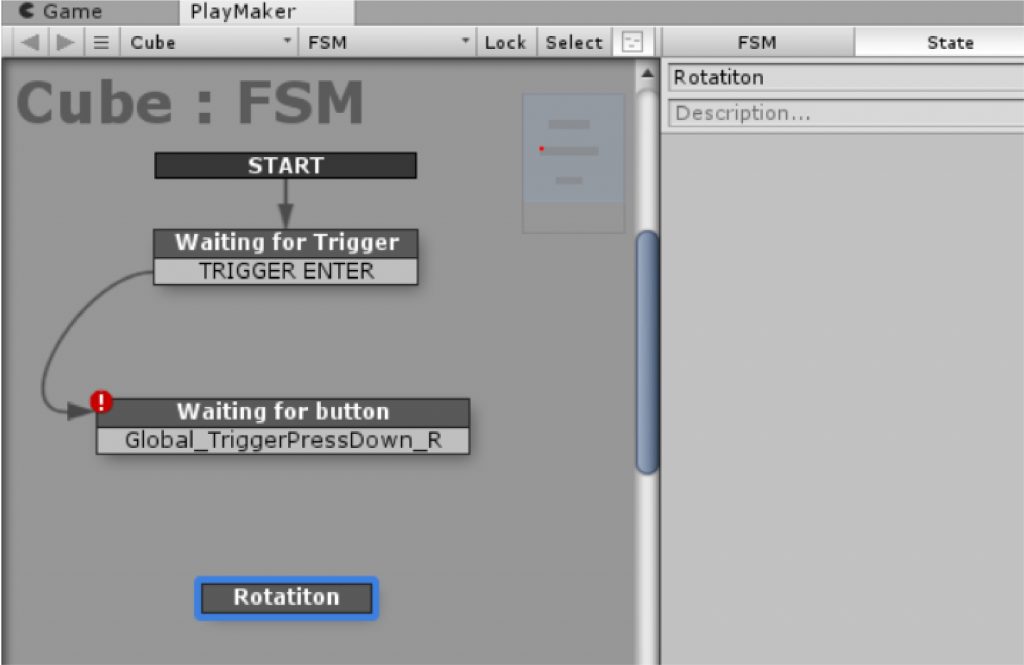
Change name
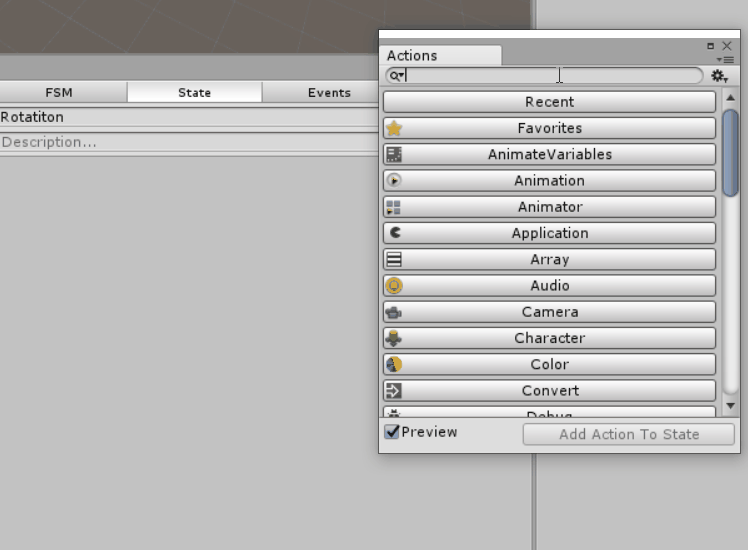
Add an action to Rotation; select the Action Browser at the bottom right of Rotation and open the browser.
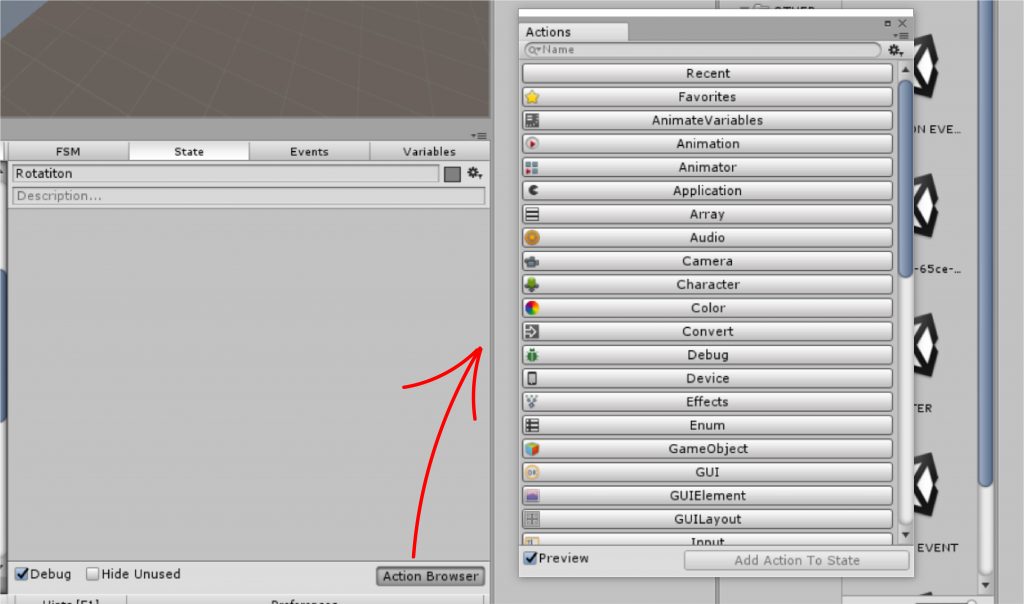
Open Action Browser
Select Rotate from the Action Browser.
Add Rotate
Correct the “Rotate” item in the action.
Set the value of Y Angle to 5.
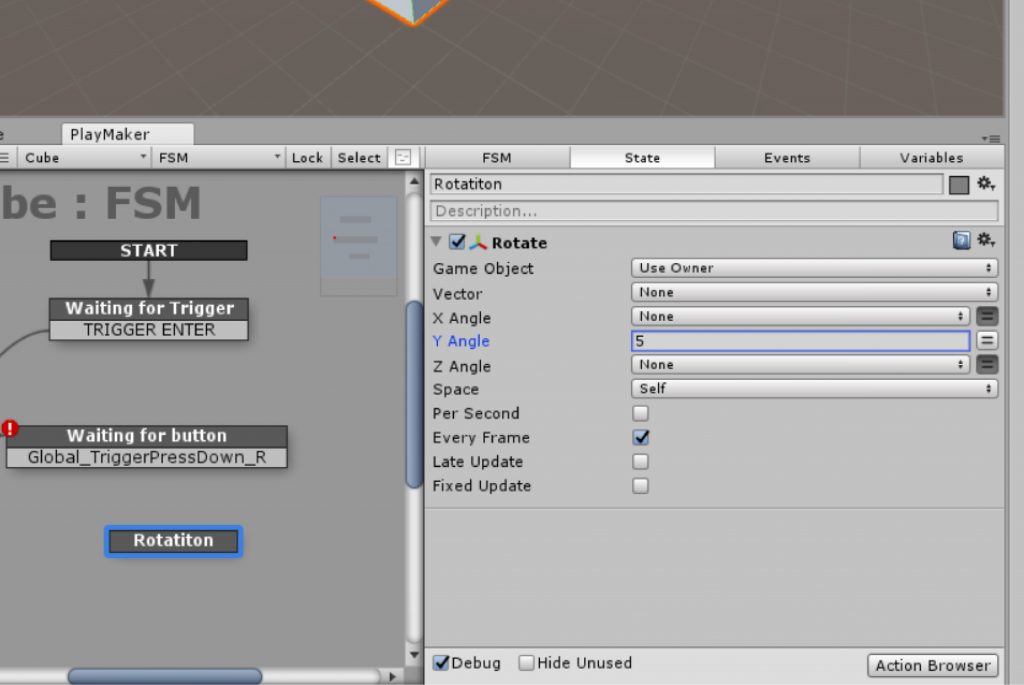
Setting of Rotate
You can now set up the action.
Finally, let’s connect the Waiting for Button and Rotation with arrows and set the Transition.
Setting of Transition
Now you can configure the interaction of Cube.
It is now possible to implement a way for events to occur when the controller touches an object and enters a button.
Finally, let’s upload it to STYLY.
Upload to STYLY
Let’s pre-fabricate your object and upload it to STYLY.
For more information on how to upload, please click here.

Sample Scene
You can check the operation here.
Let’s create a work full of originality!