In this article, I am going to show you how to implement slow motion and use the Vive controller in Unity’s Playmaker that I created last time.
the previous article
Samples
You can experience the sample space from STYLY GALLERY.
And, you can download the Unity project introduced in the Slowmotion_Sample article here.
Slowmotion_Sample project data does not include any plug-ins, so please install them yourself before using them. Playmaker SteamVR Plugin
Creating a controller prefab
We’ll create a Prefab to use the Vive controller and control it with Playmaker.
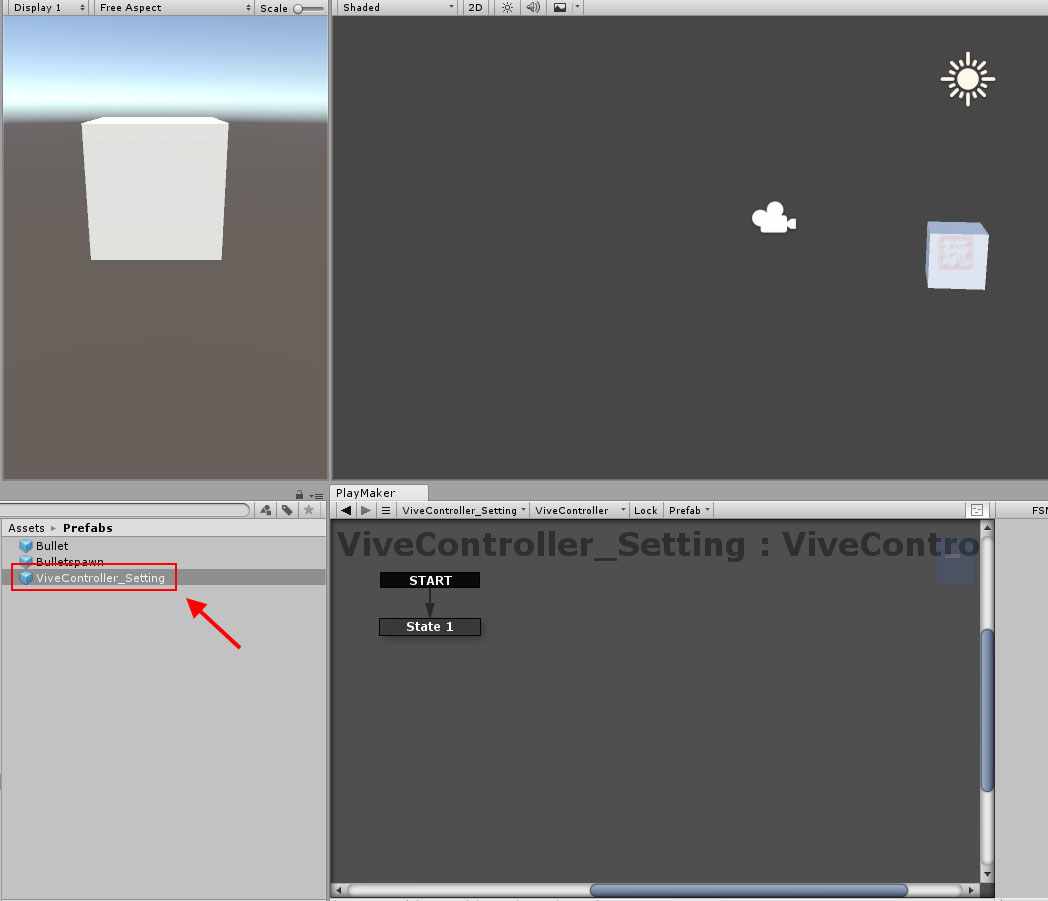
Create a Prefab with an empty object
First, I created an empty object and named it “ViveController_Setting”.
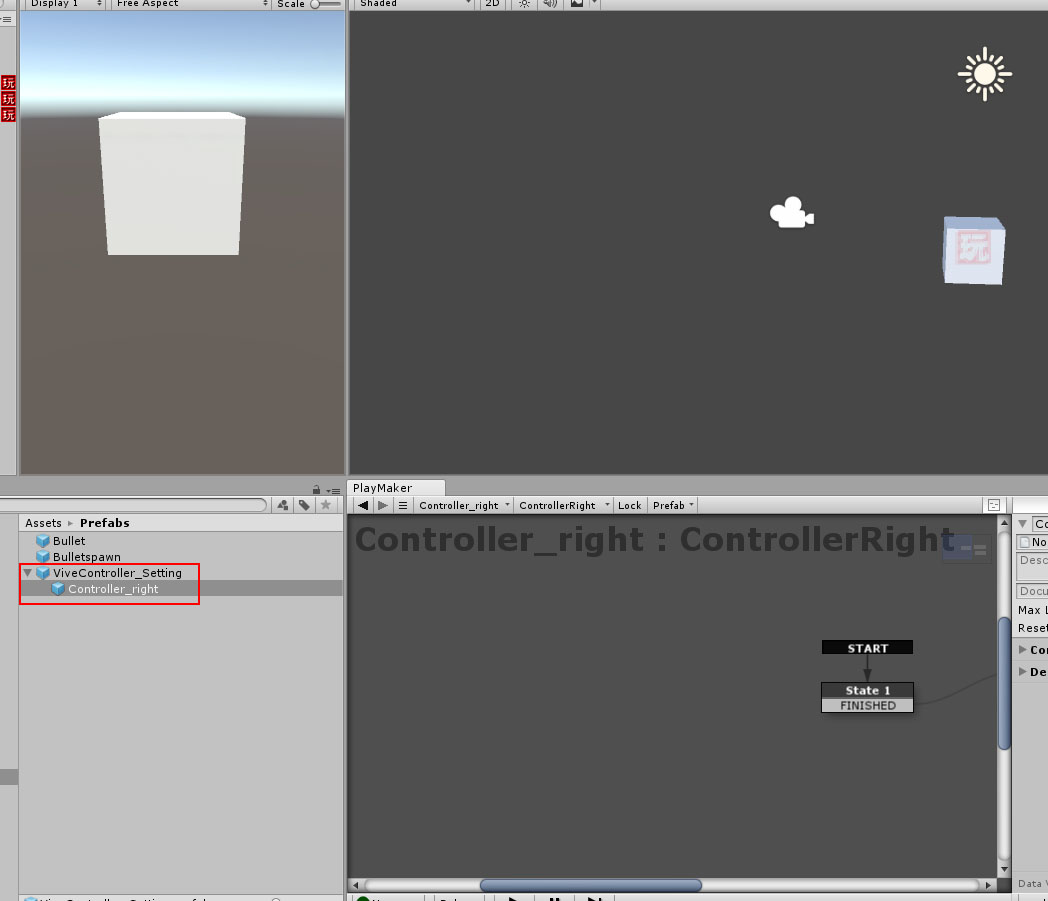
Add a child element
We then create an empty object in its child element and call it “Controller_right”.
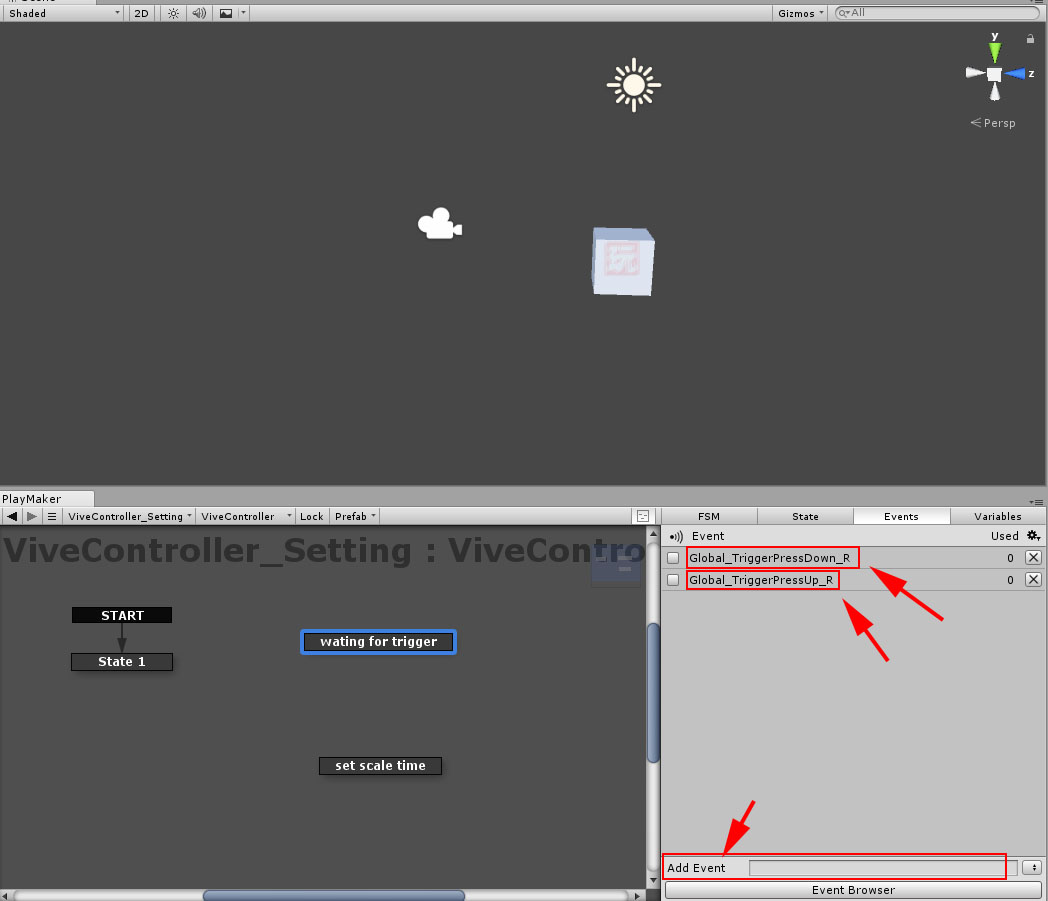
Adding an Event
Newly created two states “watching for trigger” and “set Scale time”. Two new events will also be added. Create “Global_TriggerPressDown_R” and “Global_TriggerPressUp_R”. I referred to this article and this video for setting up the Vive controller.
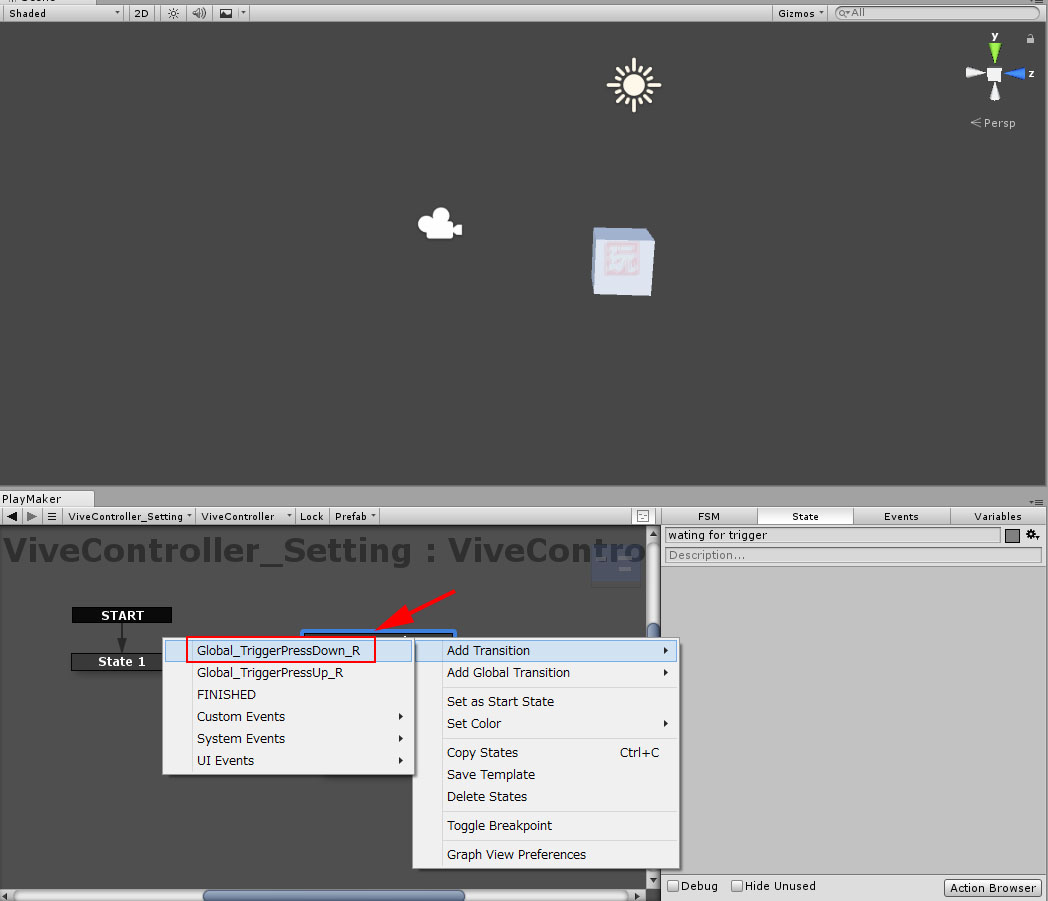
Setting the Transition
Specify the newly created event in the State to the Transition.
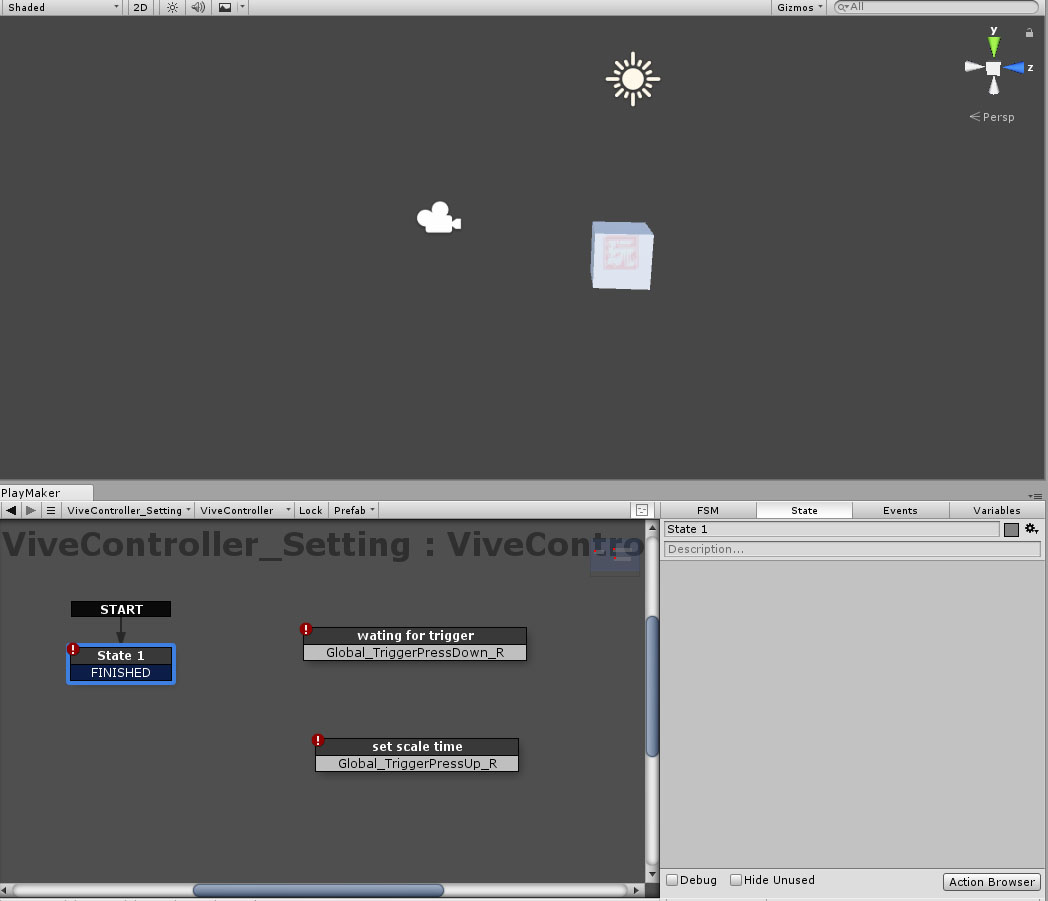
after setting
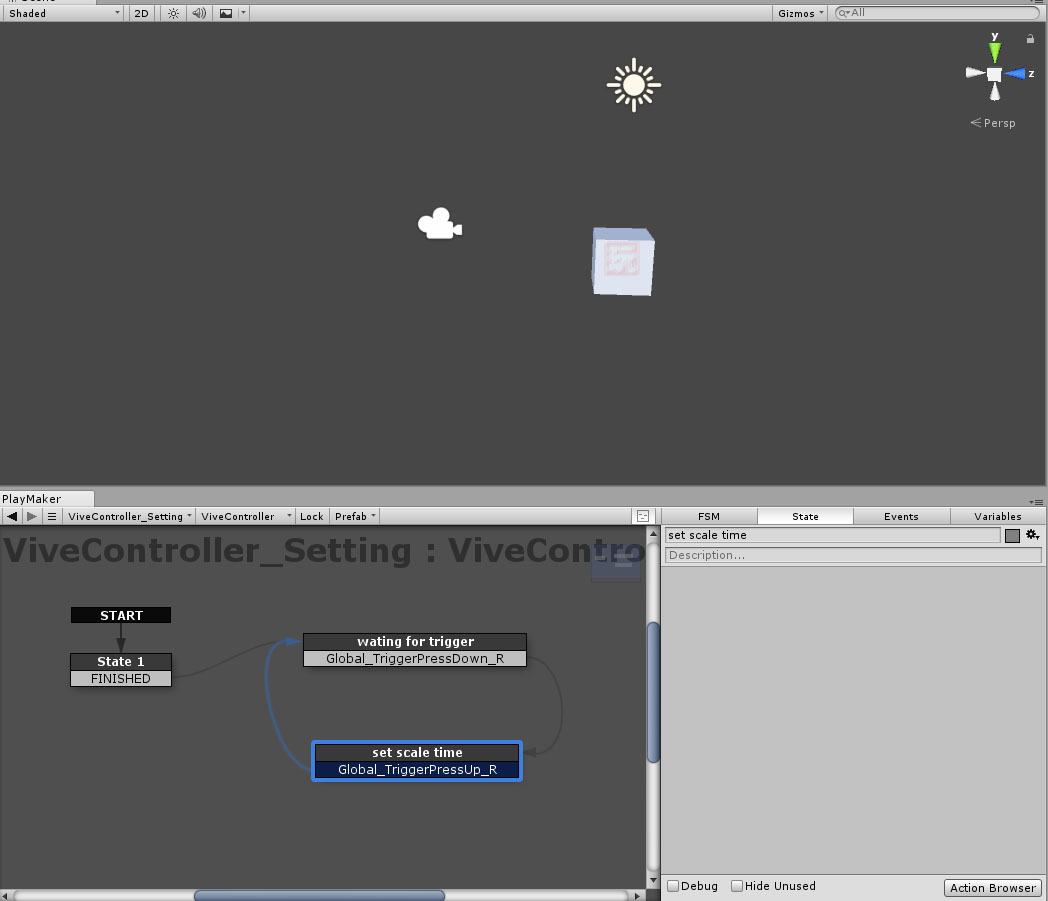
Connecting the States
We connect with each other. This time, you can also use the mouse.
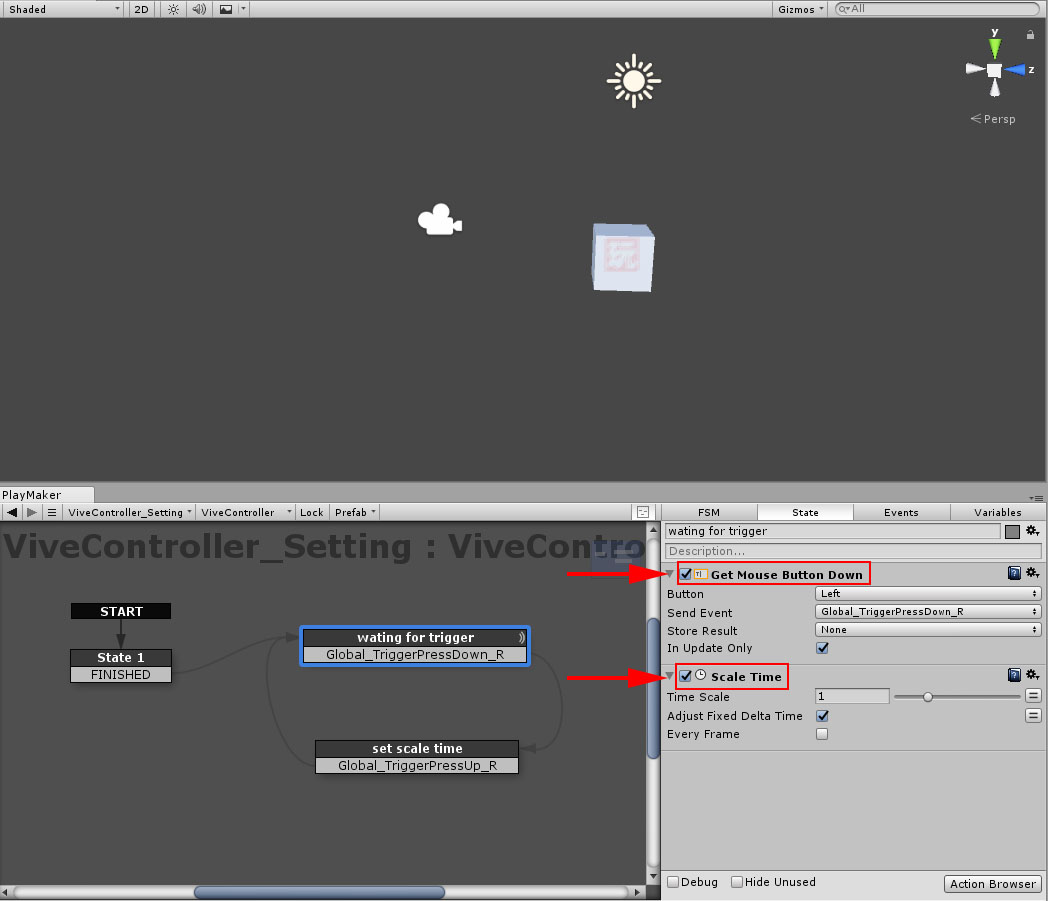
Adding an Action
Added Get Mouse Button Down so that it works with left click. To adjust the time, use Scale Time. The default setting is Time Scale 1.
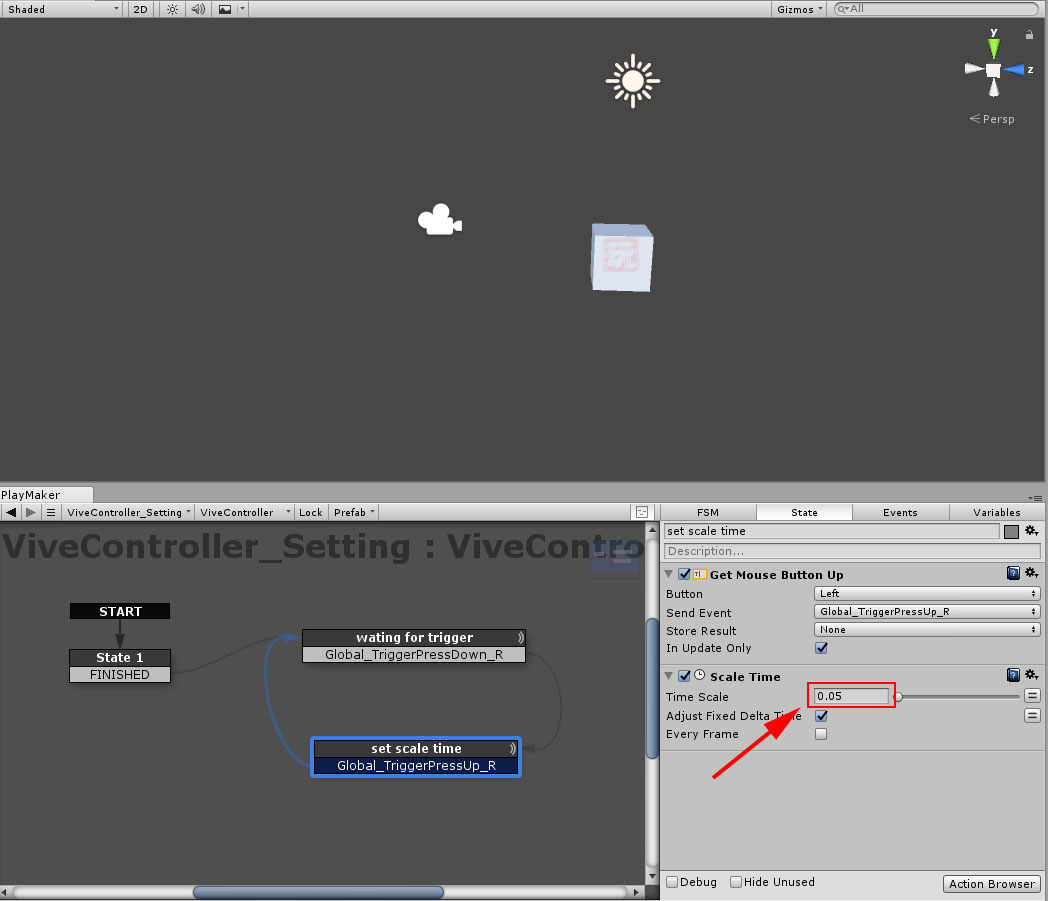
Setting the Scale Time
In this State, we add Get Mouse Button Up. Scale Time should also be added to make it o.o5. This is where the slow motion comes in.
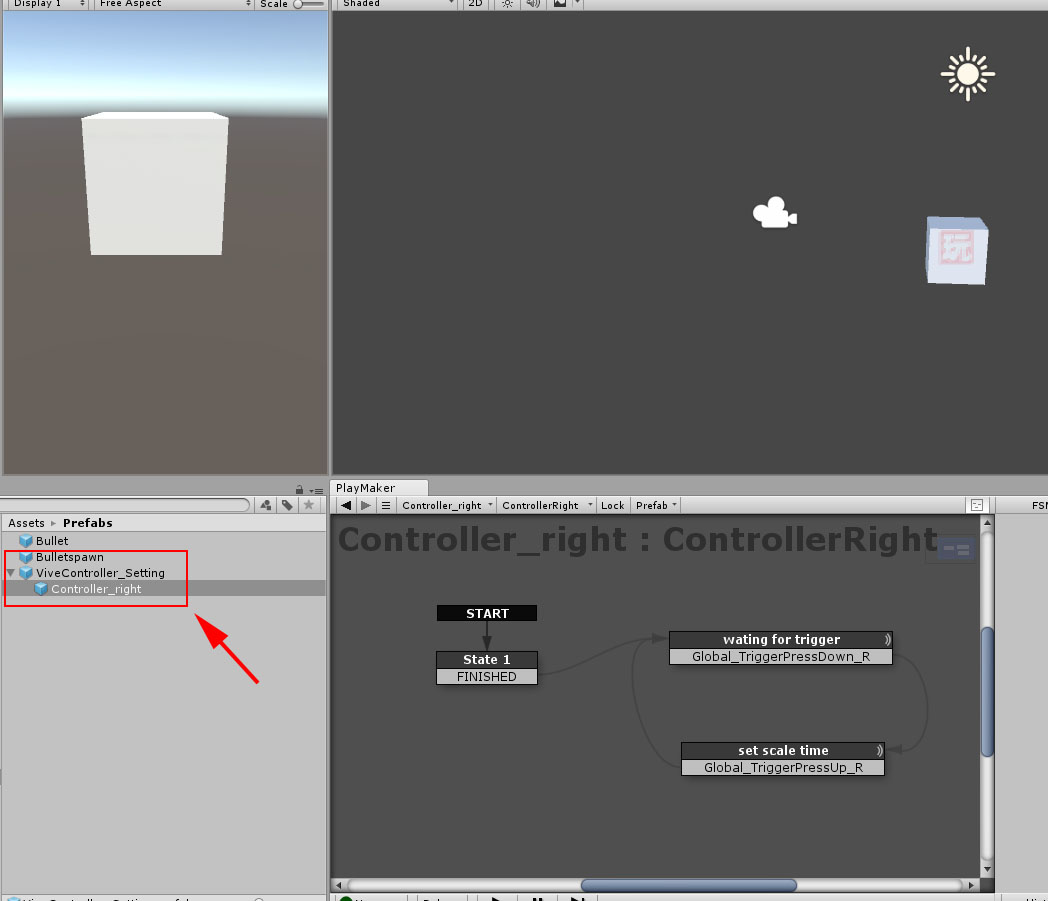
Upload Prefab
Now that you have the configuration, you can upload this Prefab to Styly and make it available. Place a Bulletspawn in the scene and from there the Bullets will fly towards the camera. The HTC Vive goes into slow motion while holding down the trigger on the right controller.
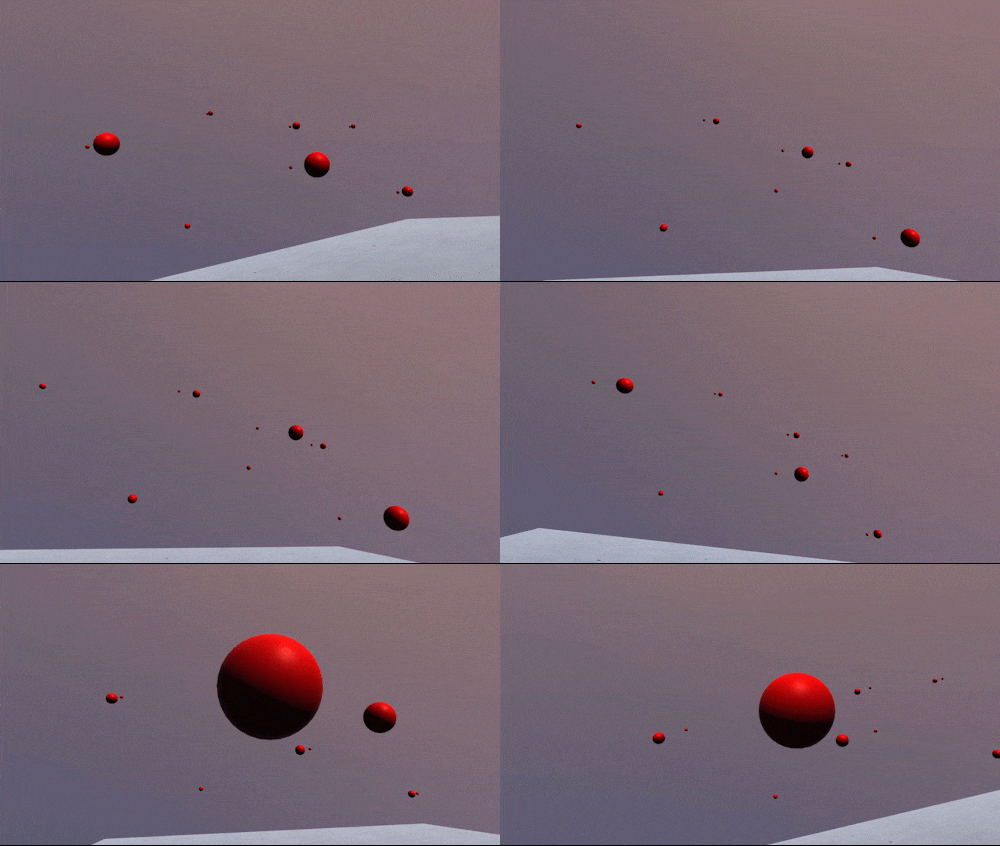
Play movie of the completed data
Try to dodge the bullets in a cool way. In this article I showed you how to create a slow-motion scene using Unity’s Playmaker. It can be used not only for slowing but also for speeding up, so it can be used for interesting expressions.
How to upload assets to STYLY from Unity
![[Unity/Playmaker] How to make a VR shooting game – Setting the gun controller](https://styly.cc/wp-content/uploads/2018/05/-2018-05-10-14.01.35-e1584421548660.jpg)
