This article will show you how to make slow motion in Styly’s VR space using Unity’s Playmaker. This is done with the clicksand the HTC Vive’s controller.
Play movie of the completed data
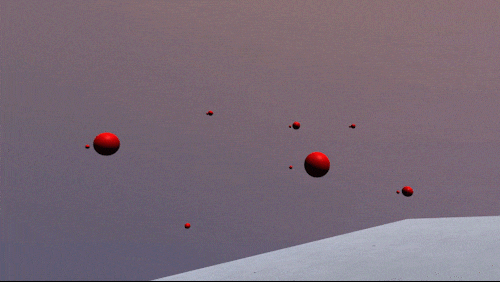
This is what the finished image looks like. Time goes into slow motion only when the trigger is pressed.
Sample
You can experience the sample space from STYLY GALLERY.
You can also download the Unity project introduced in the Slowmotion_Sample article here. Slowmotion_Sample project data does not include any plug-ins, so please install them yourself before using them. Playmaker SteamVR Plugin
Playmaker and Steam VR Plugin
Download each one from the asset store and make it ready to use in Unity.
Playmaker is a paid asset. Playmaker
Steam VR is free.
Creating a Bullet
Create a bullet as a moving asset to expericen the slow motion.
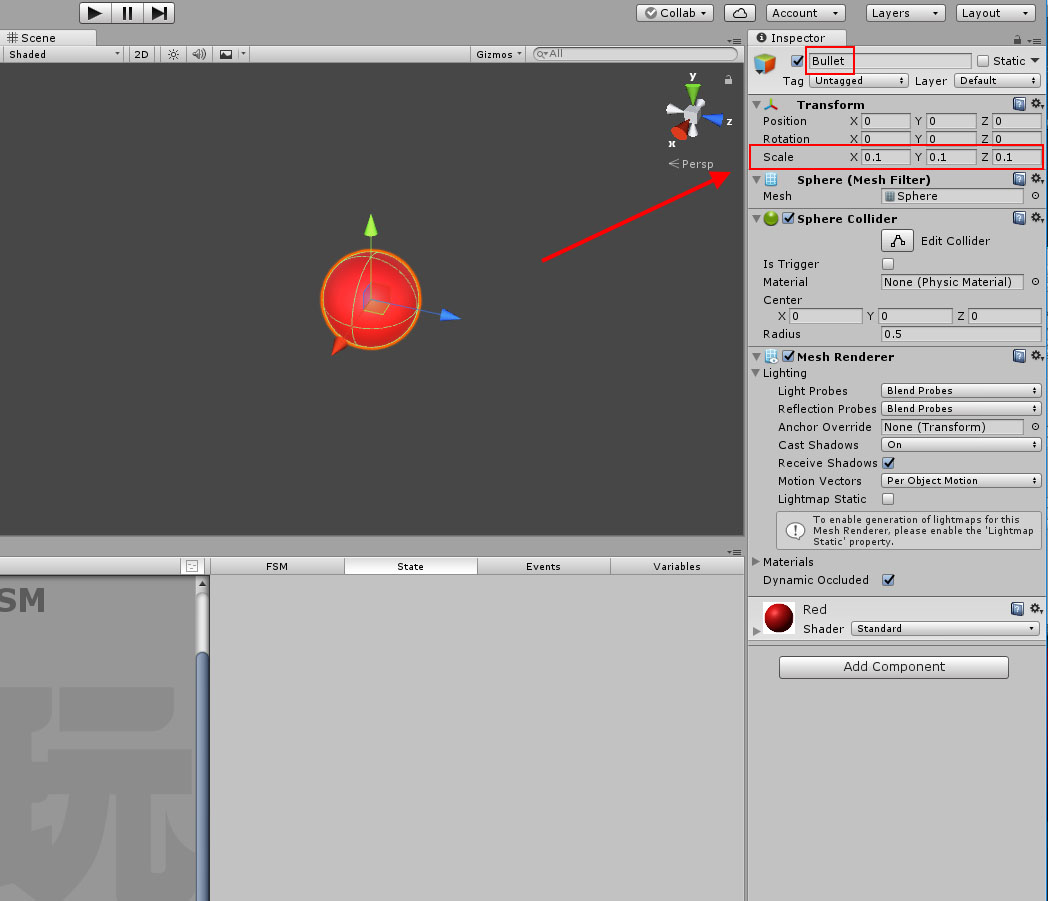
bullet Sphere
I changed the name of Sphere to “Bullet” and set the scale to 0.1 for each. Select “Bullet” and open the Playmaker Editor.
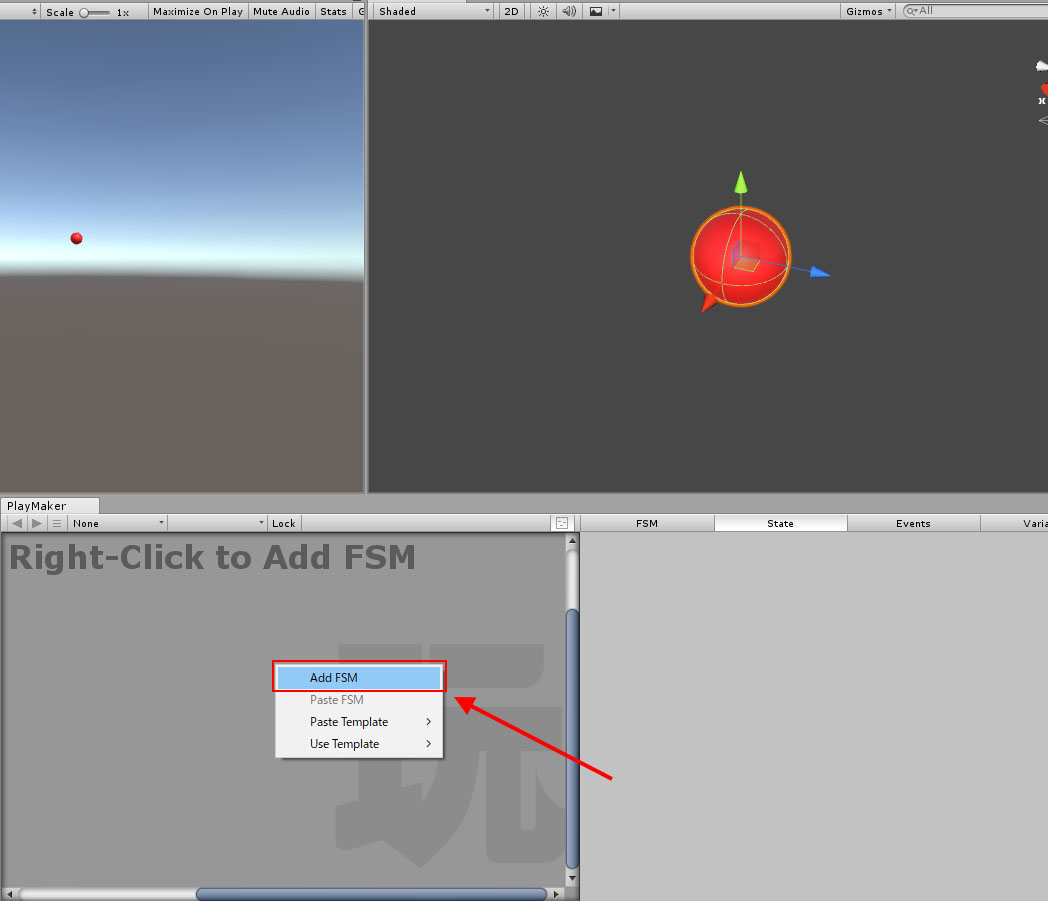
Adding an FSM
Right click and choose “Add FSM”.
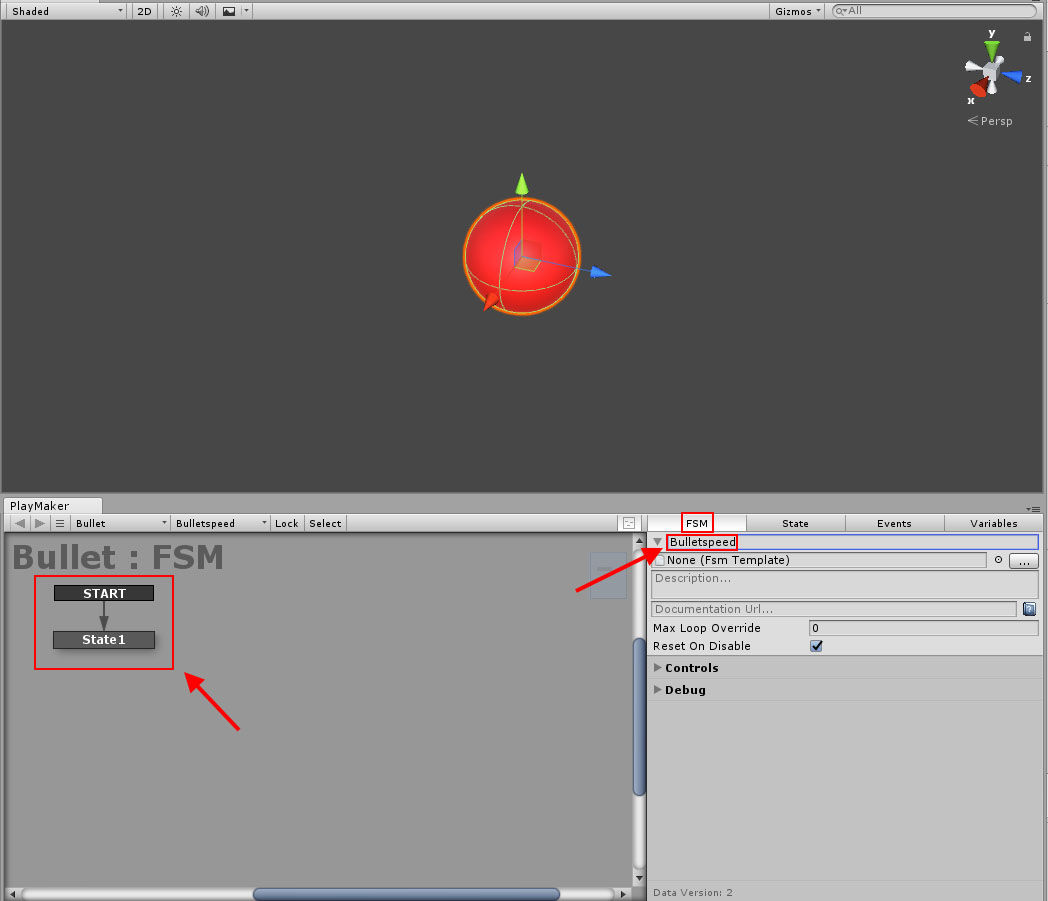
Rename the FSM
A new State has been created. Changed the name of FSM to Bulletspeed. Next, add an Action to the Bullet.
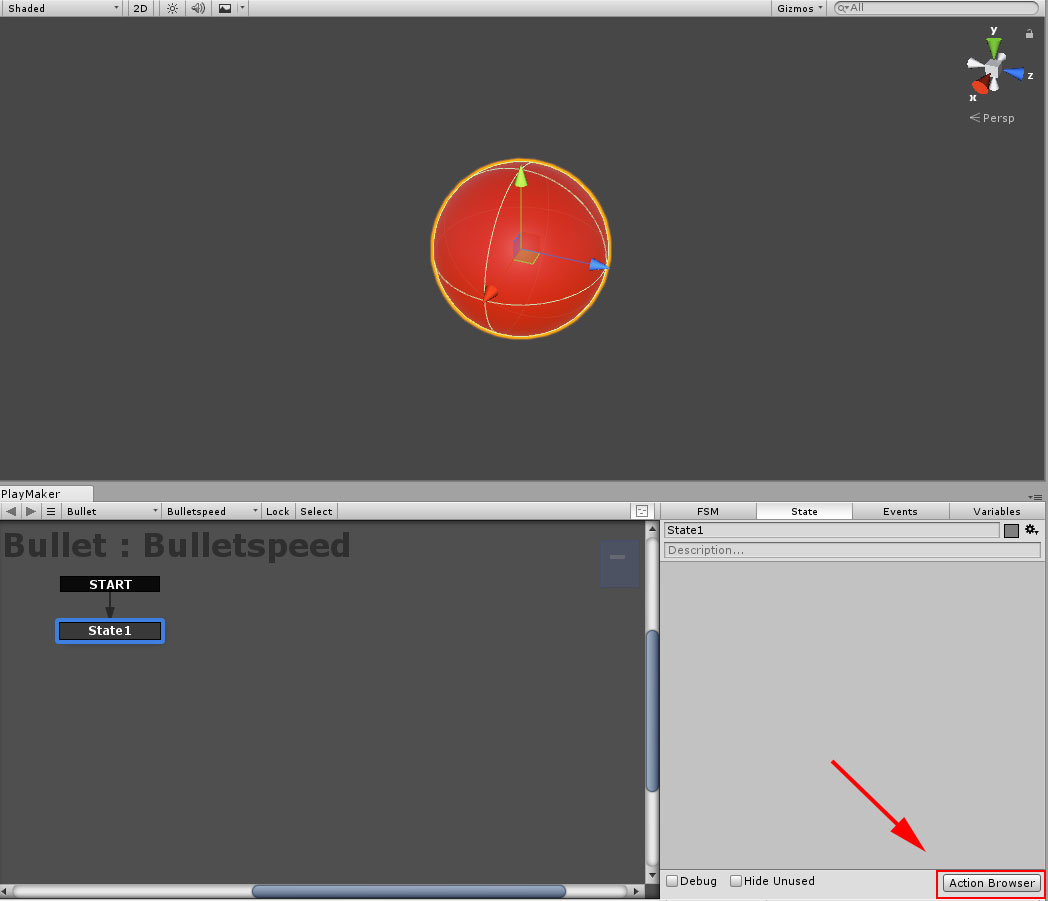
Add Action
Click on Action Browser
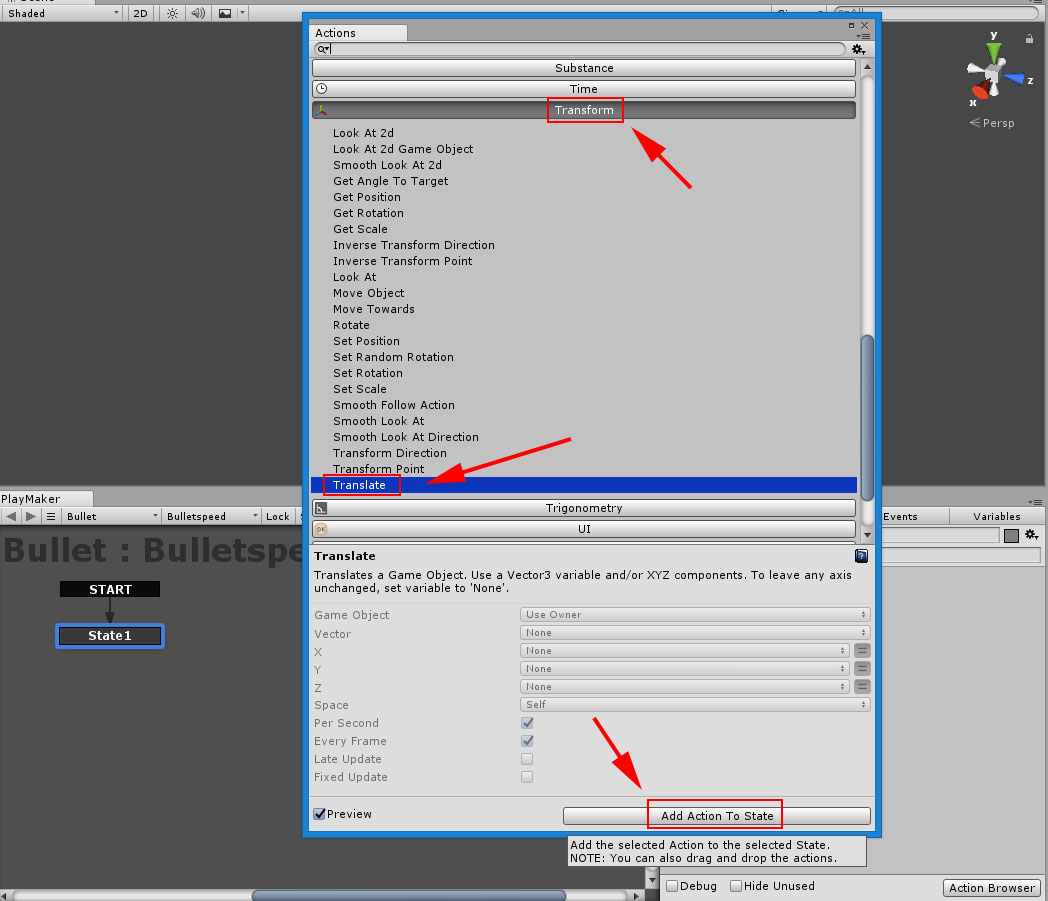
Select from the Action Browser
Select Transform Translate from the Browser and click Add Action To State. Action has now been added. Set the speed of the bullet.
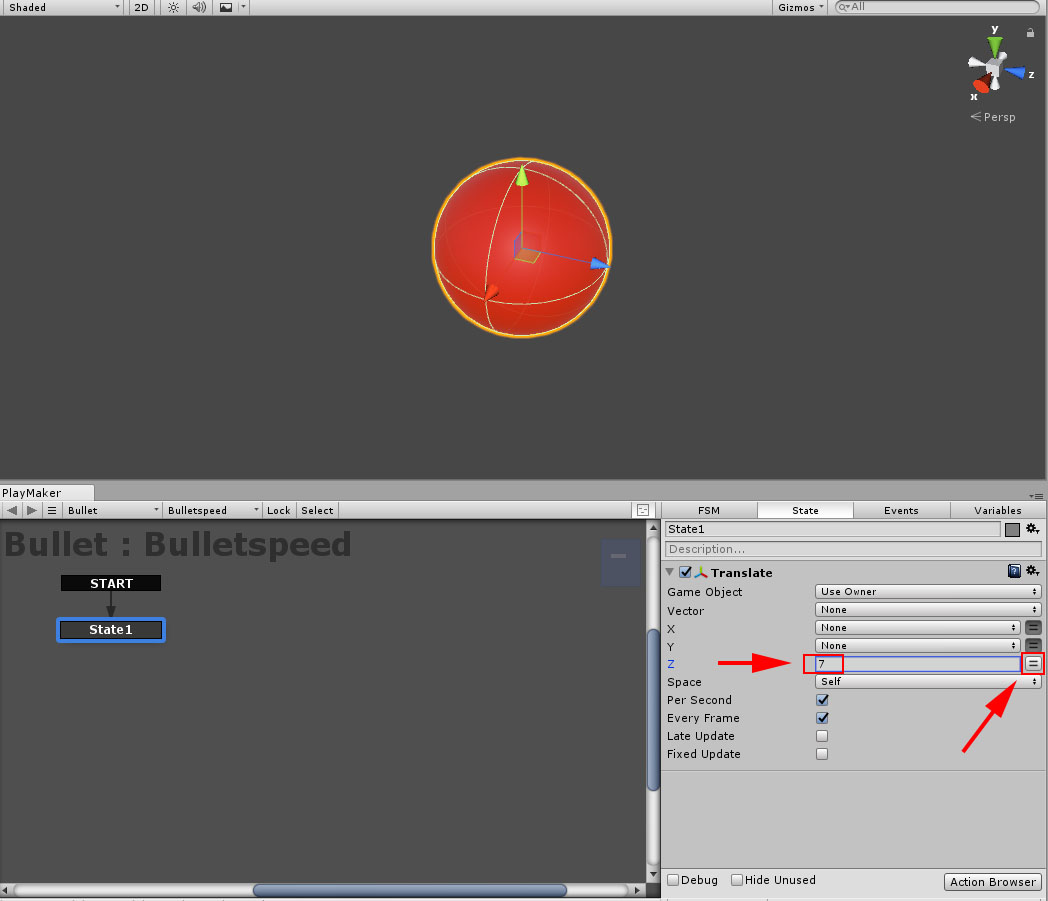
The setting for “Translate”
I set Z to 7 in this example.
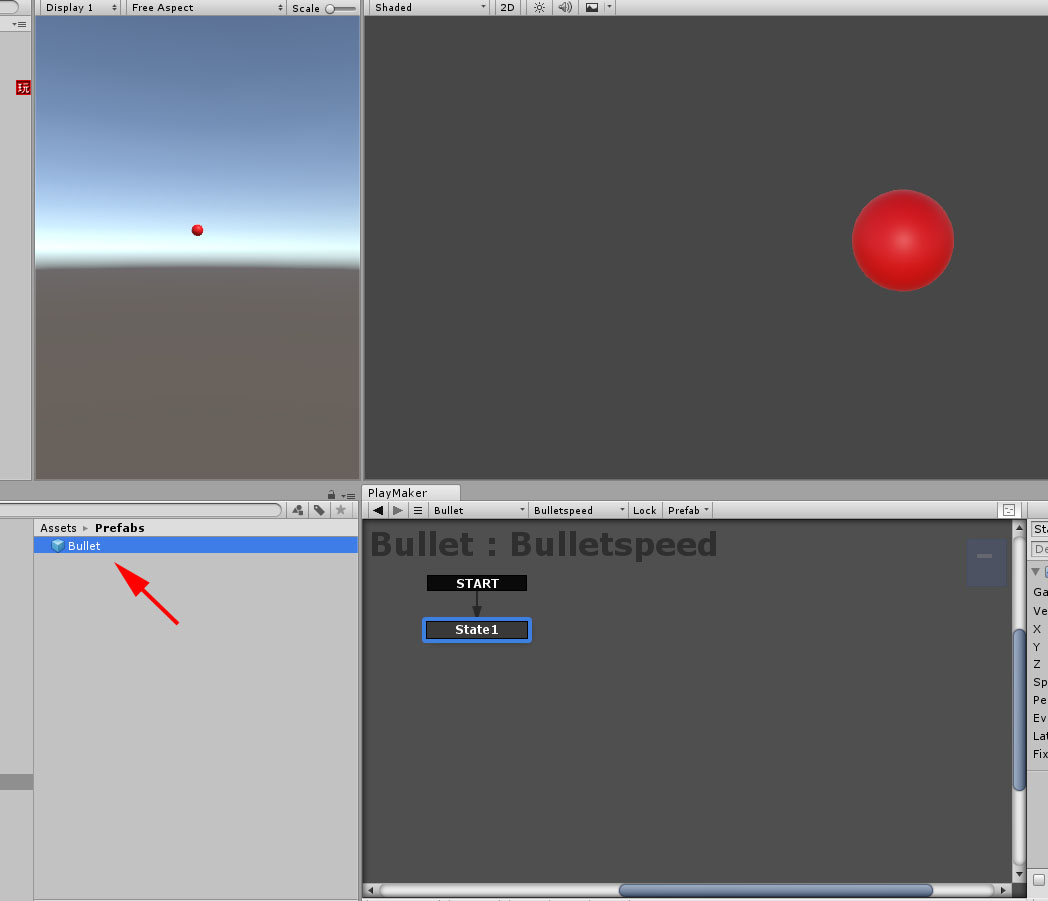
Make it a Prefab
Make it a Prefab.
Set a spawn point for the bullet
Make a cube with the name, “Bulletspawn”. Uncheck the box of Mesh Renderer.
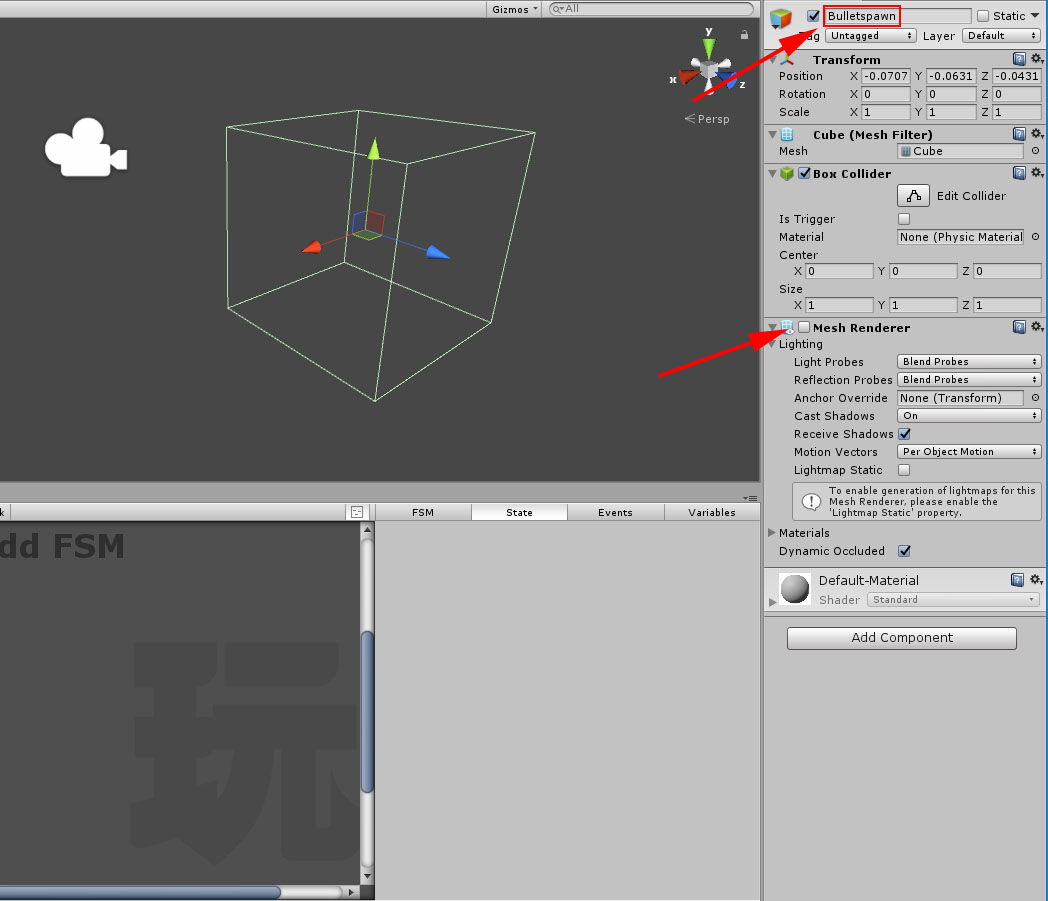
The setting for “Bulletspawn”
I also add an FSM to the Bulletspwan by Playmaker.
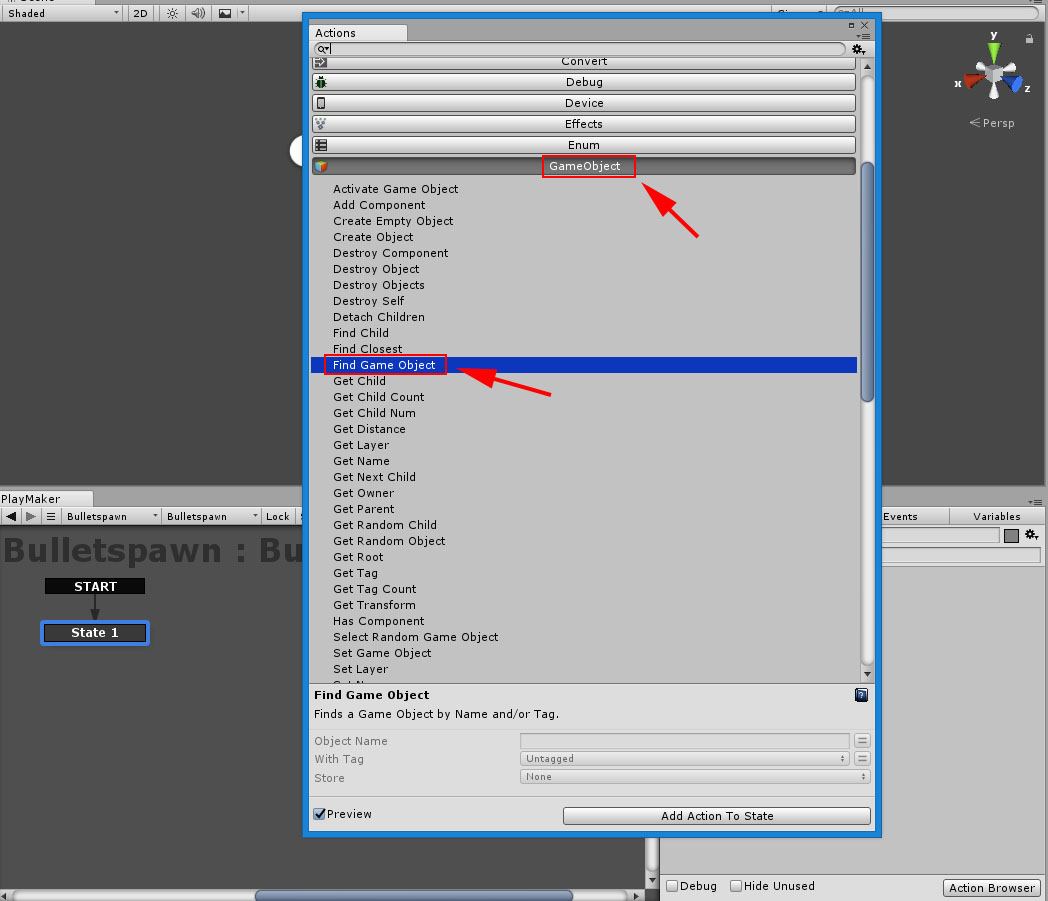
Action Browser for the Bulletspawn
Add “Find Game Object” by “Add Action”.
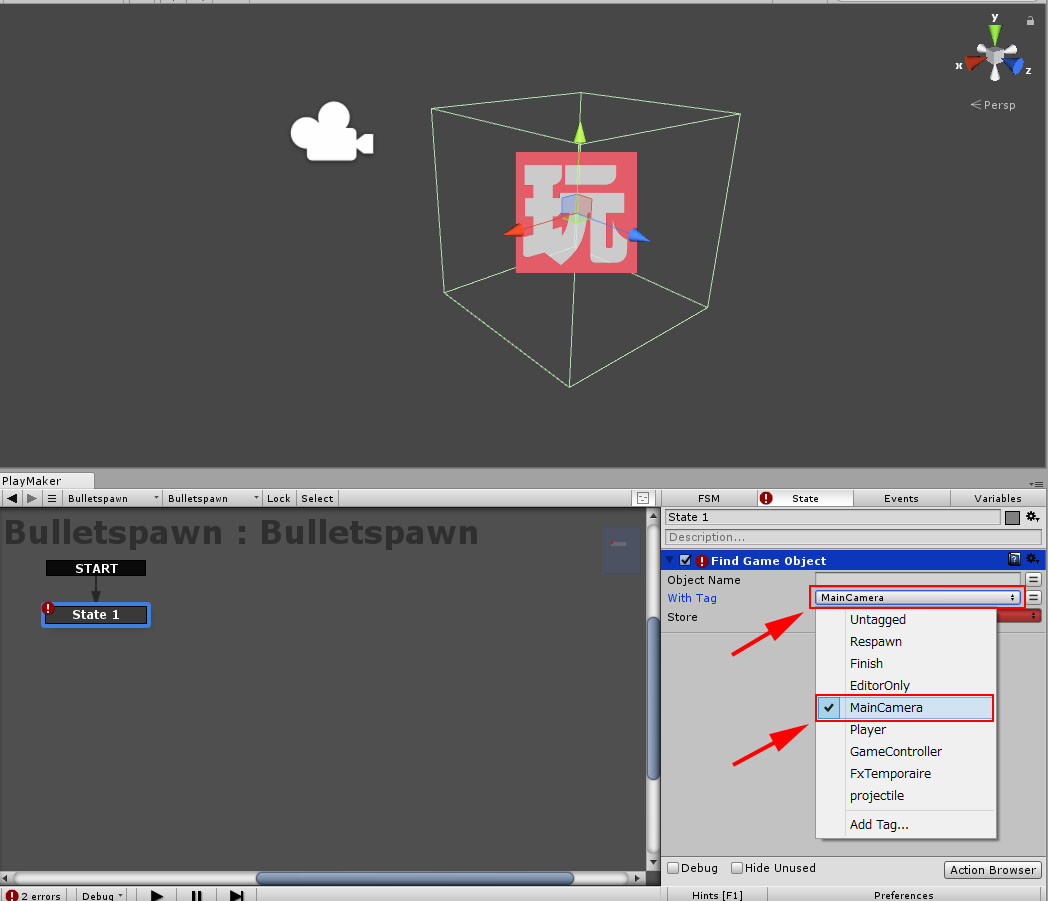
Find MainCamera
Select “Main Camera” from “With Tag” to find the objects with the tag, “MainCamera”.
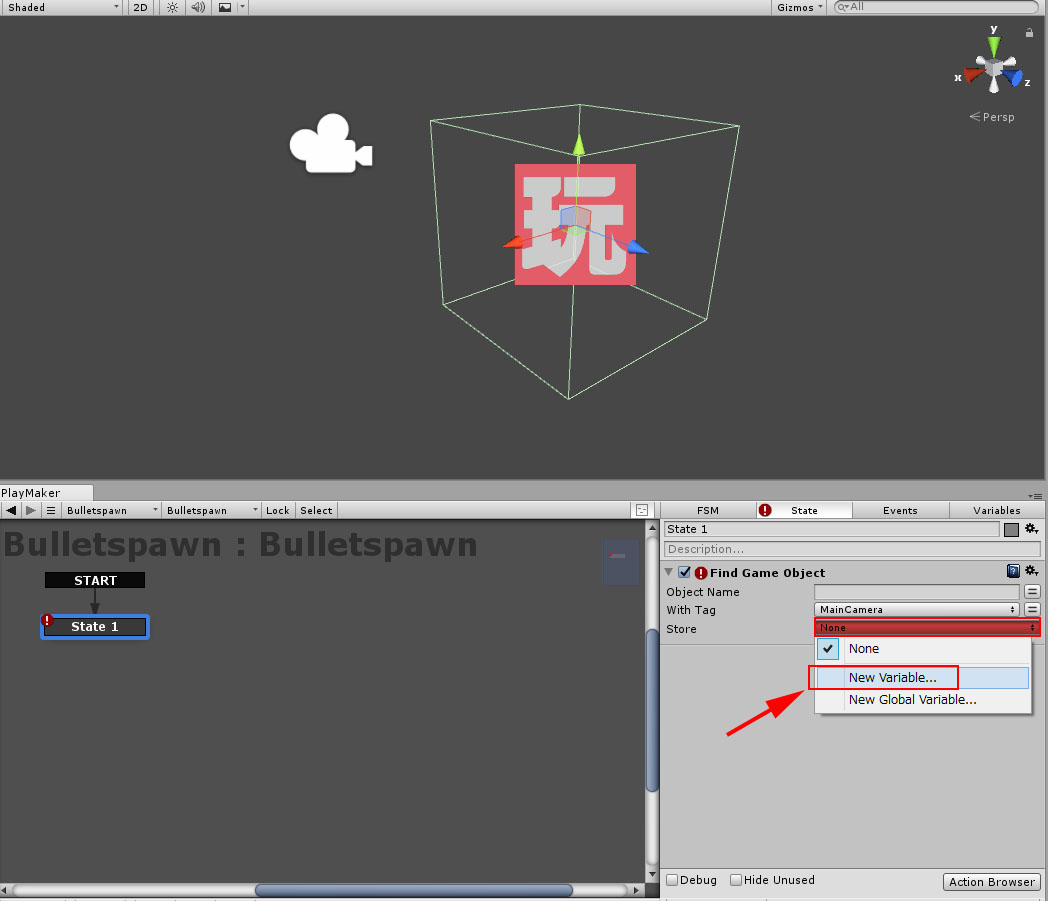
Create a new variable
Create a new variable by “New Variable” and store it to the found object.
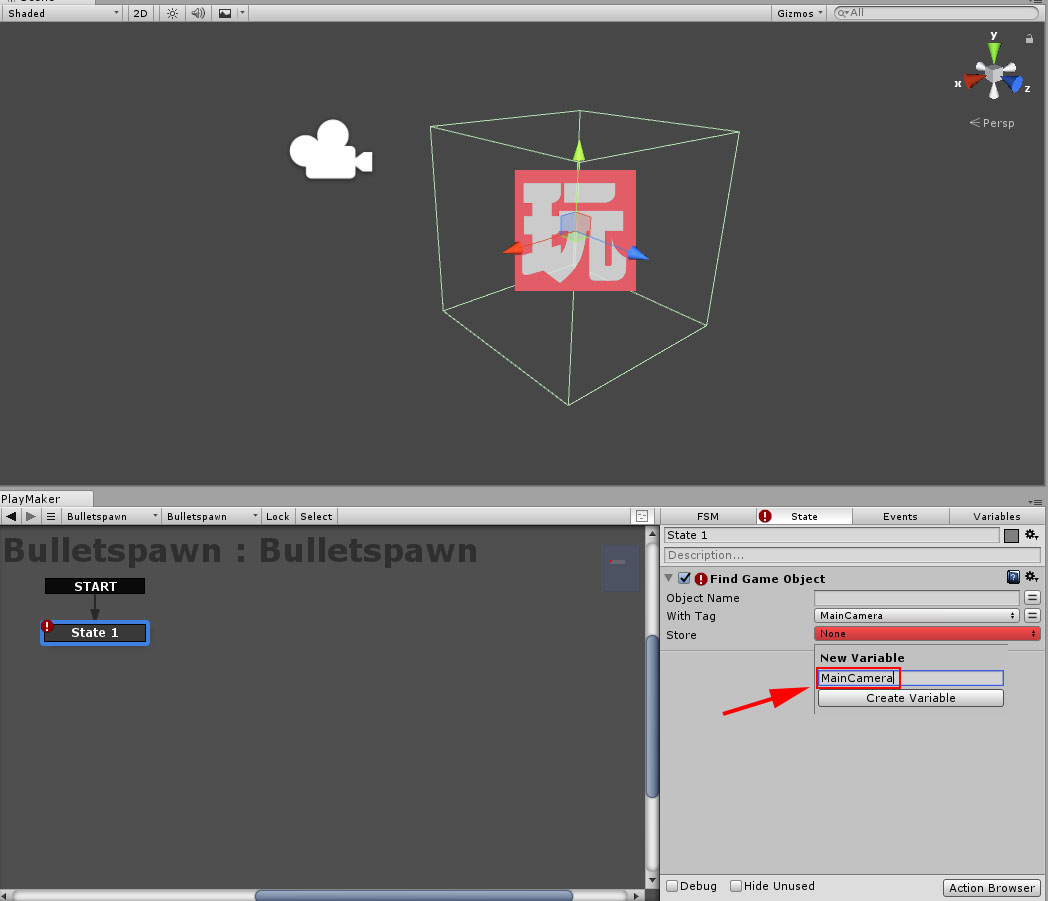
Create a variable and store it.
In this case, I named the variable mainCamera. Add State to create a new State.
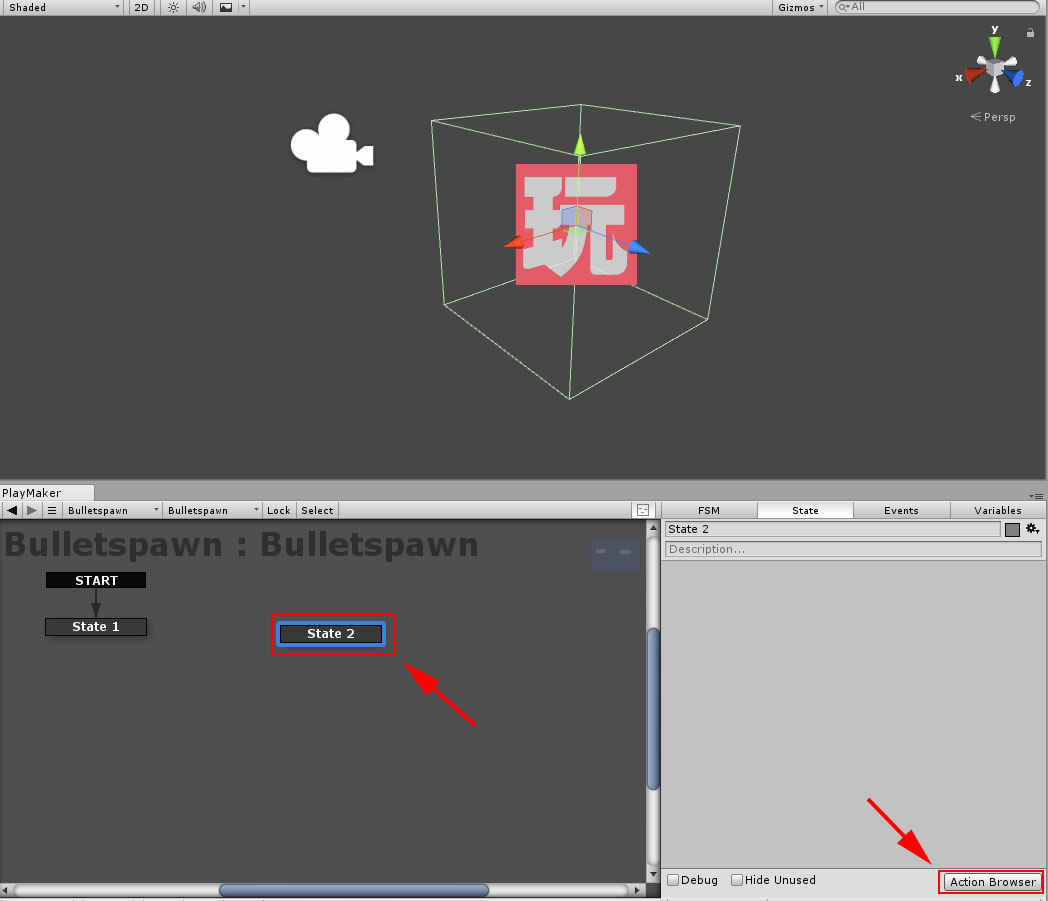
State2 is added.
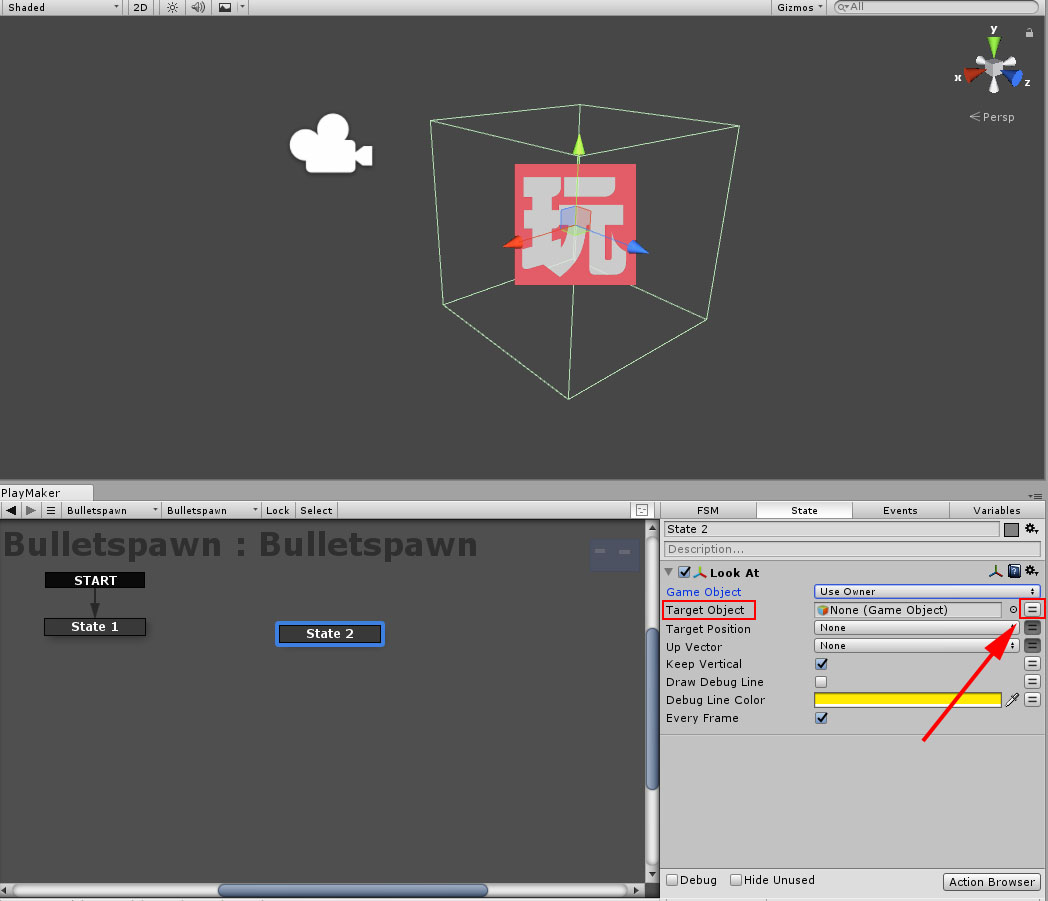
Add an action, “Look At” in “Transform” section.

Add a “Look At” action
Add a Look At from Transform
Add a Look At
Selecting a Target Object
Target to mainCamera
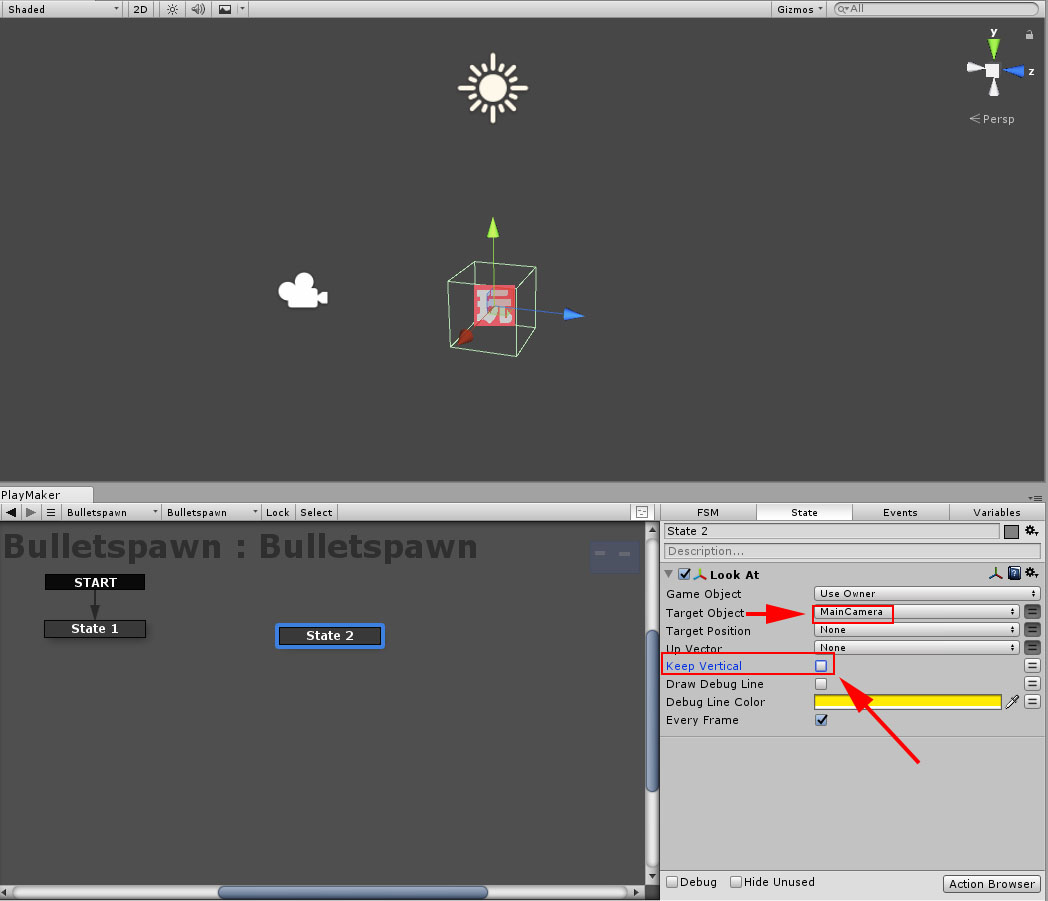
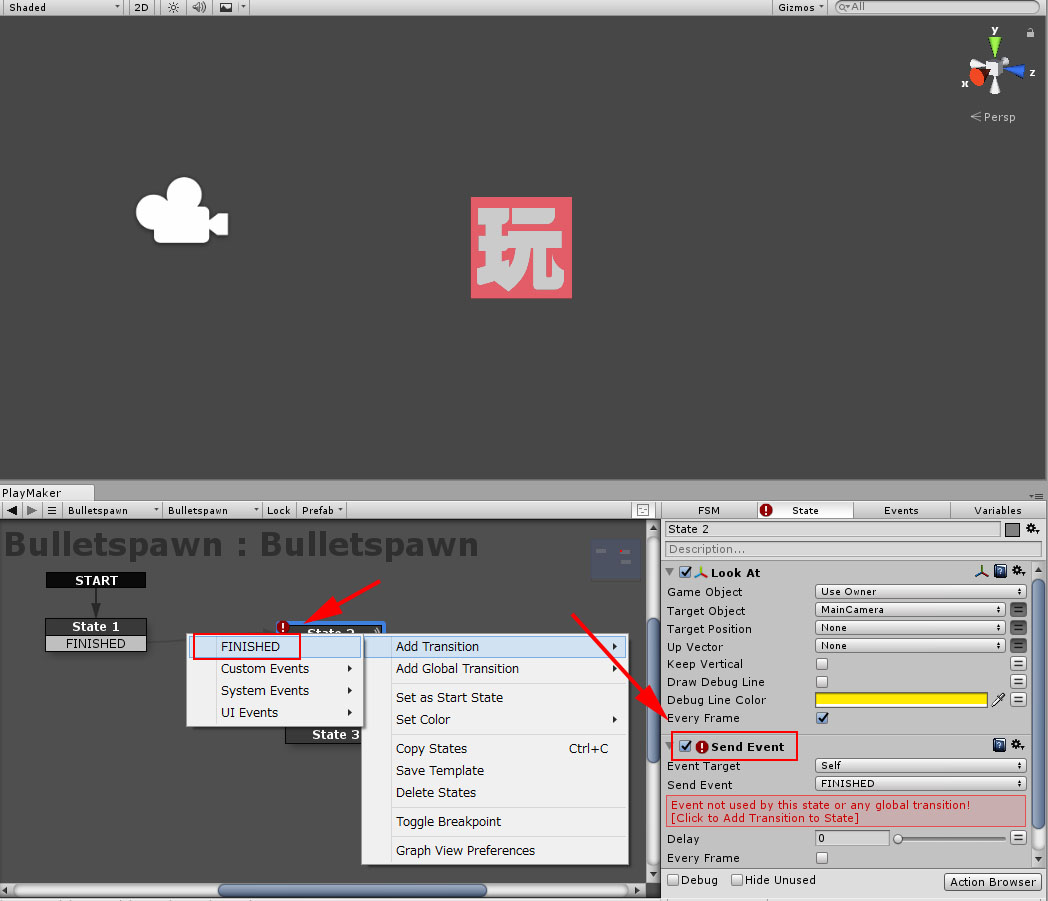
Set the Look At target to the MainCamera we just created and uncheck Keep Vertical. Set the Transition of State1 to FINISHED.
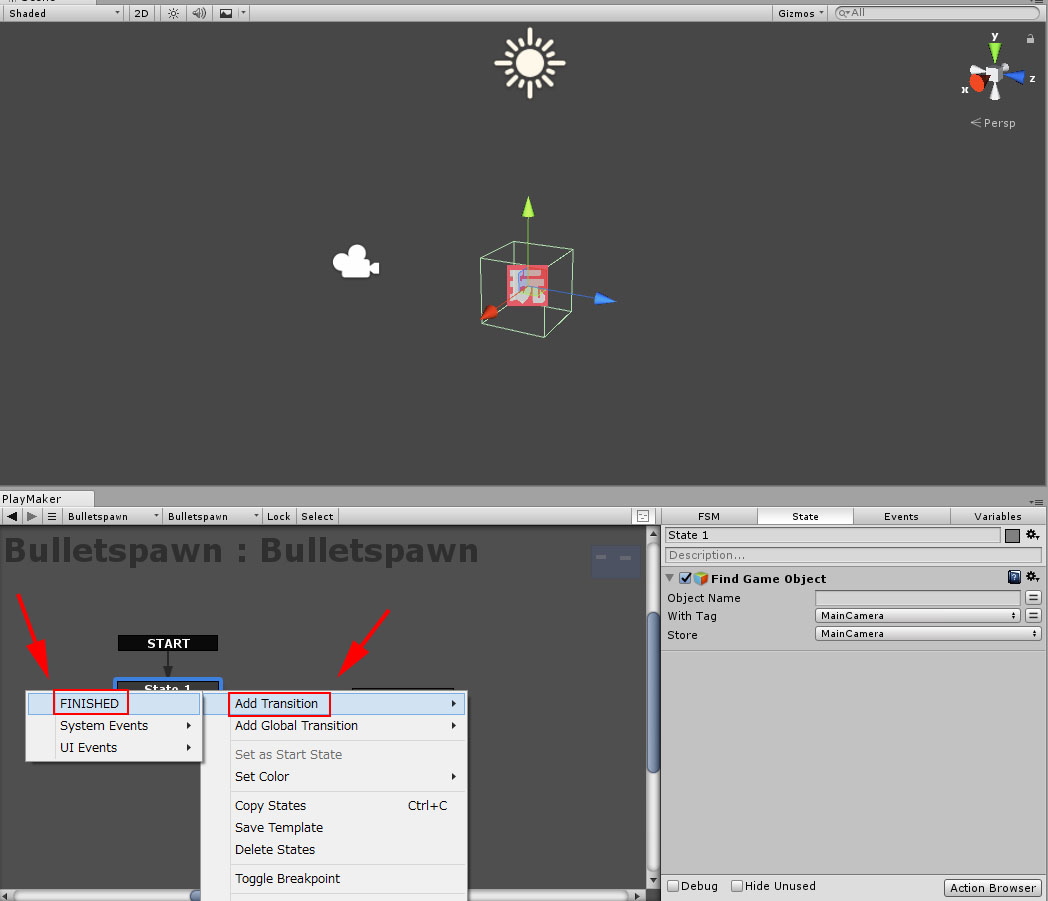
FINISHED the Transition.
From there, we will connect to State2.
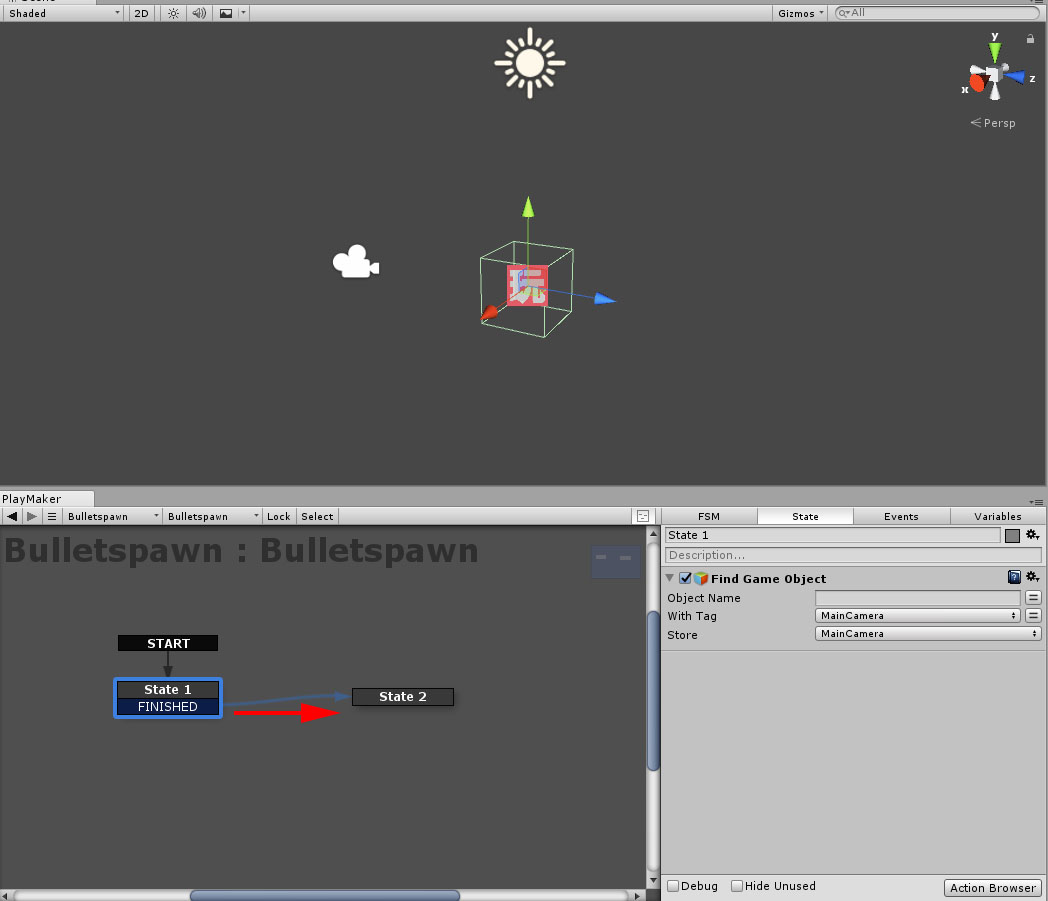
Connect to State2
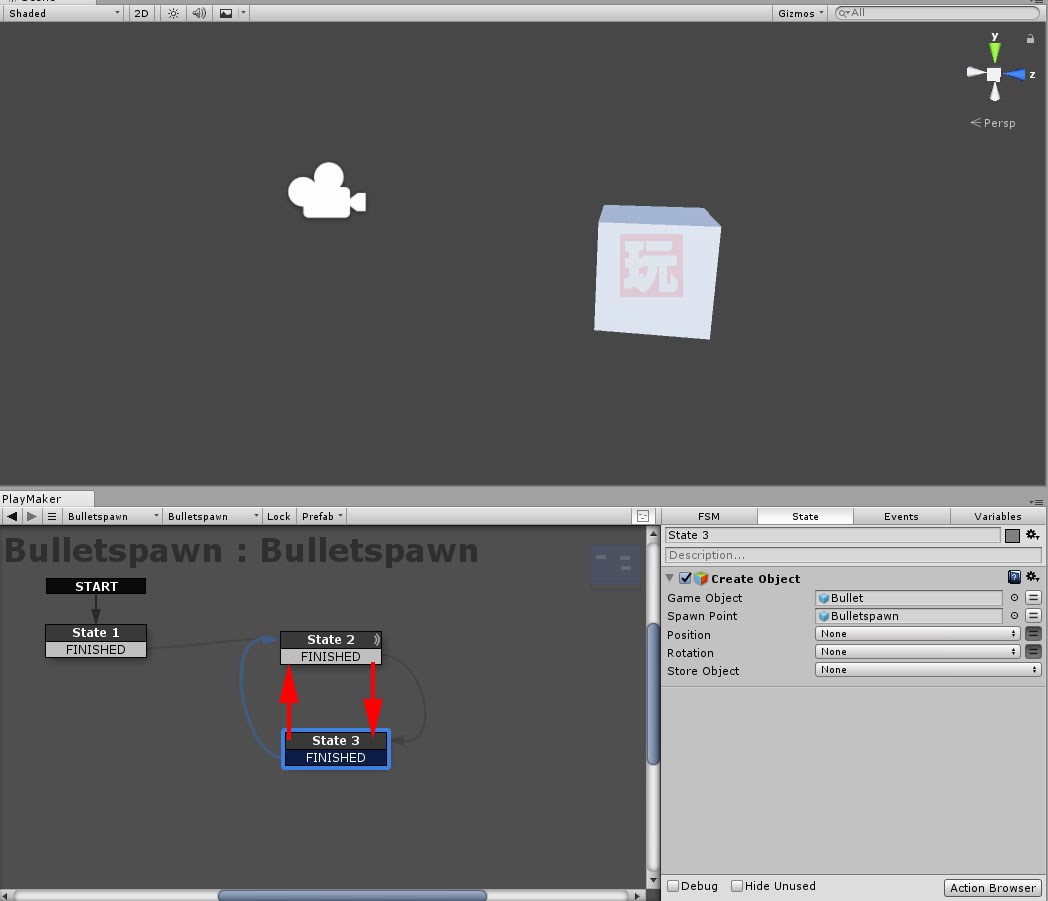
Next, create a State3 and add a Create Object action.
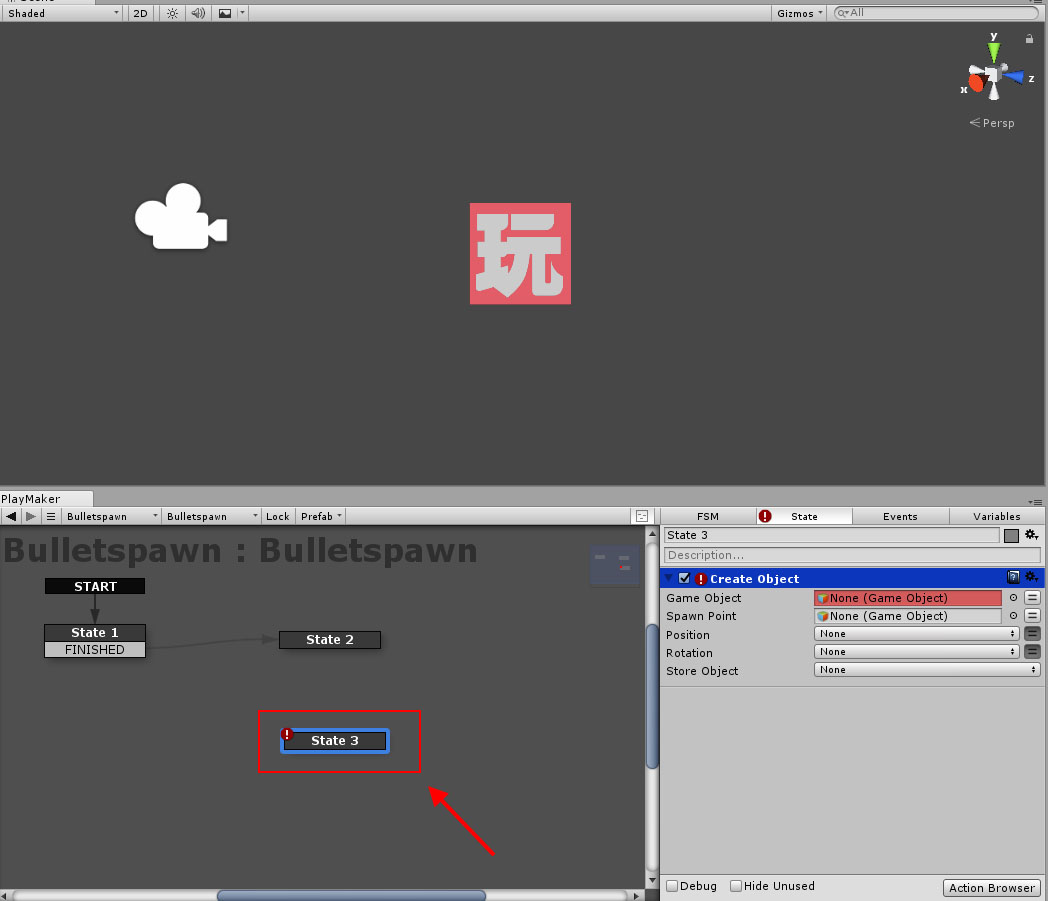
Added an Action for Create Object.
Specify the object to create.
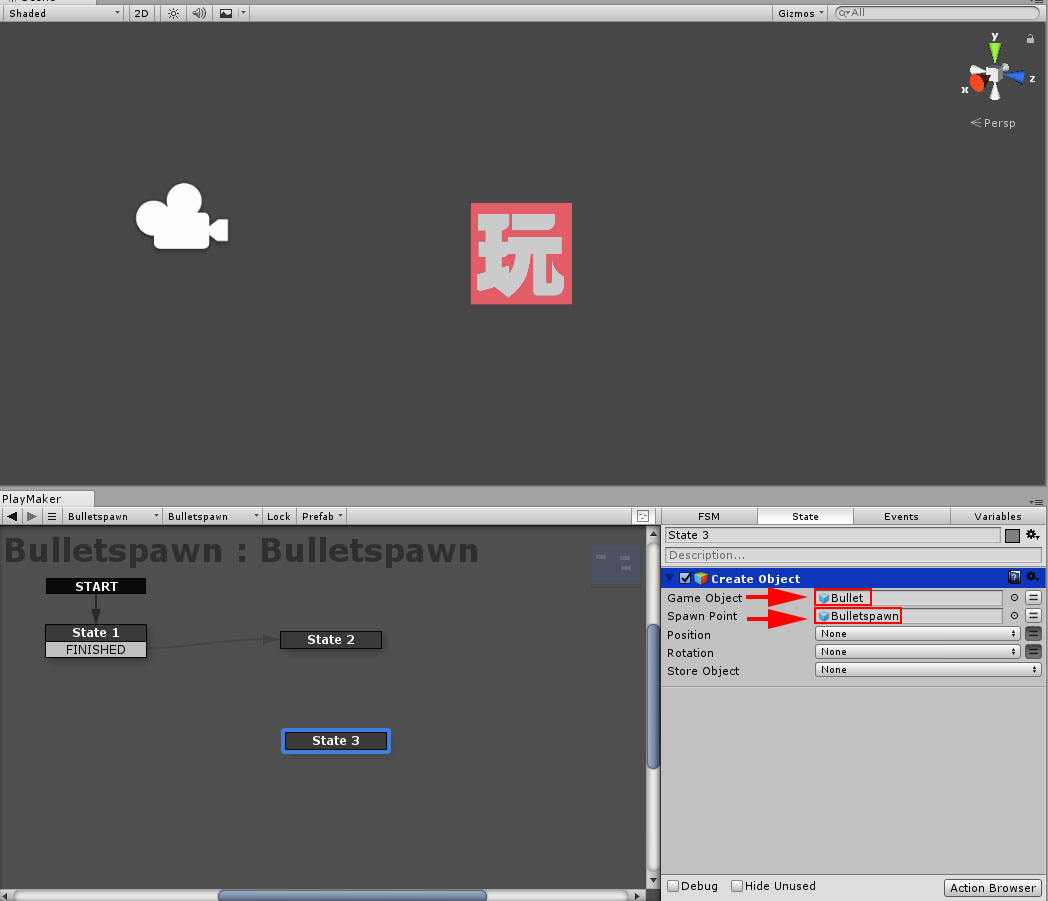
Adding Bullet and Bulletspawn
Specify “Bullet” for Game Object and “Bulletspawn” for Spawn Point.
FINISHED from Send Event
Add a Send Event Action and set the Transition to FINISHED. Connect State2 to State3.
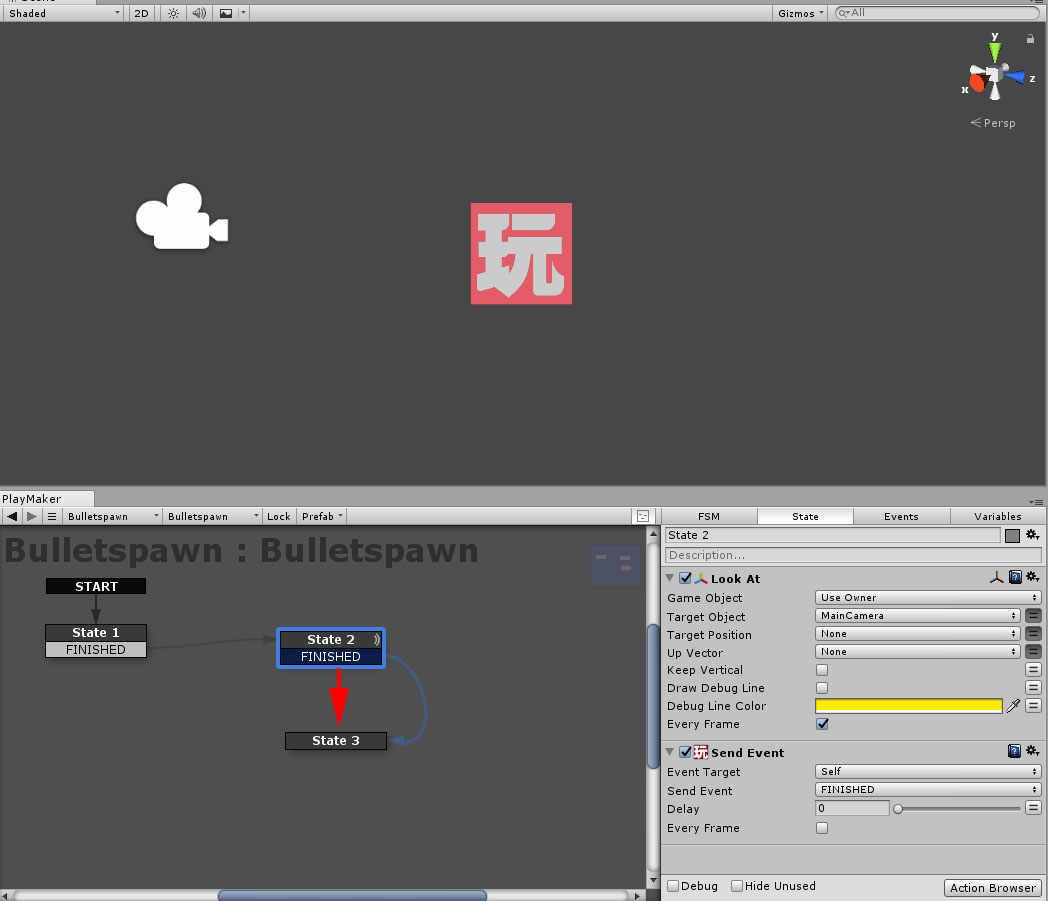
Connect to State3.
Connect State 3 to State 2 as well, as it is repetitive.
Connecting State3 to State2
Add Wait so that it fires every second.
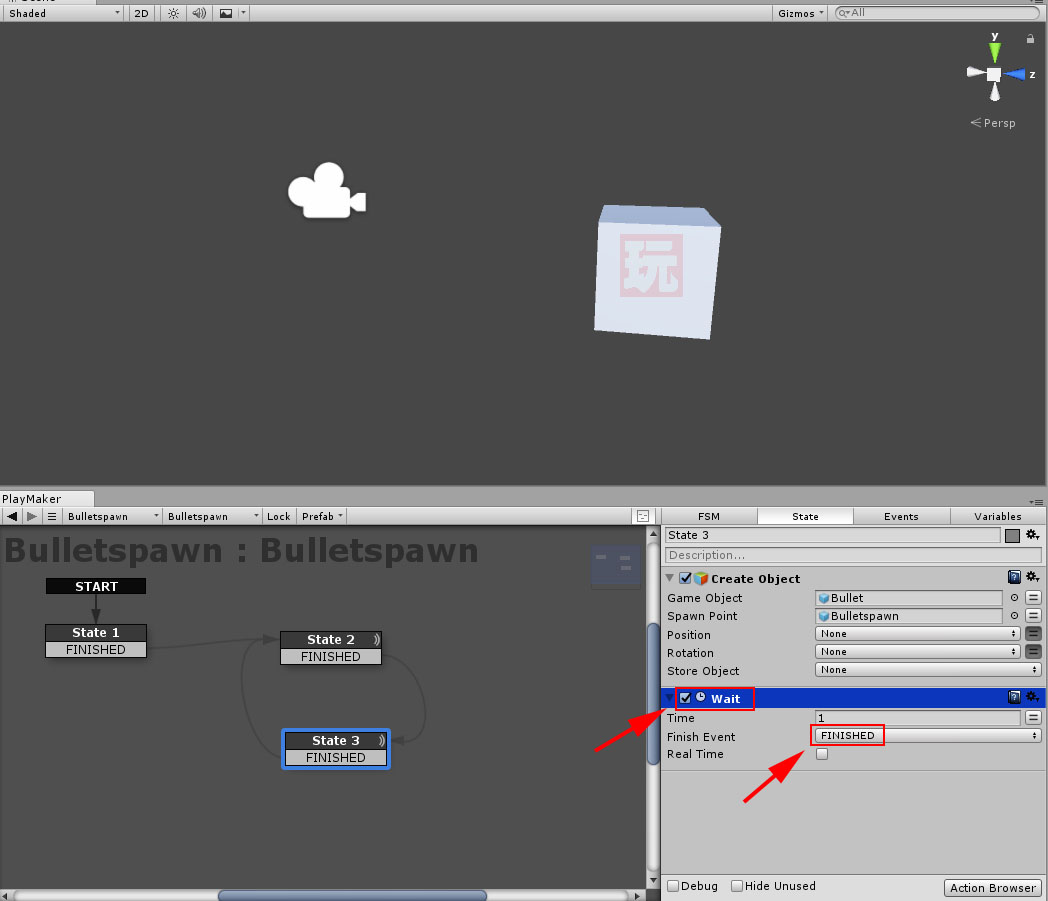
Adding a Wait
The time was set to one second. The Finish Event is set to FINISHED. If this is the case, bullets will continue to fly, so I’m going to Destroy at the appropriate place.
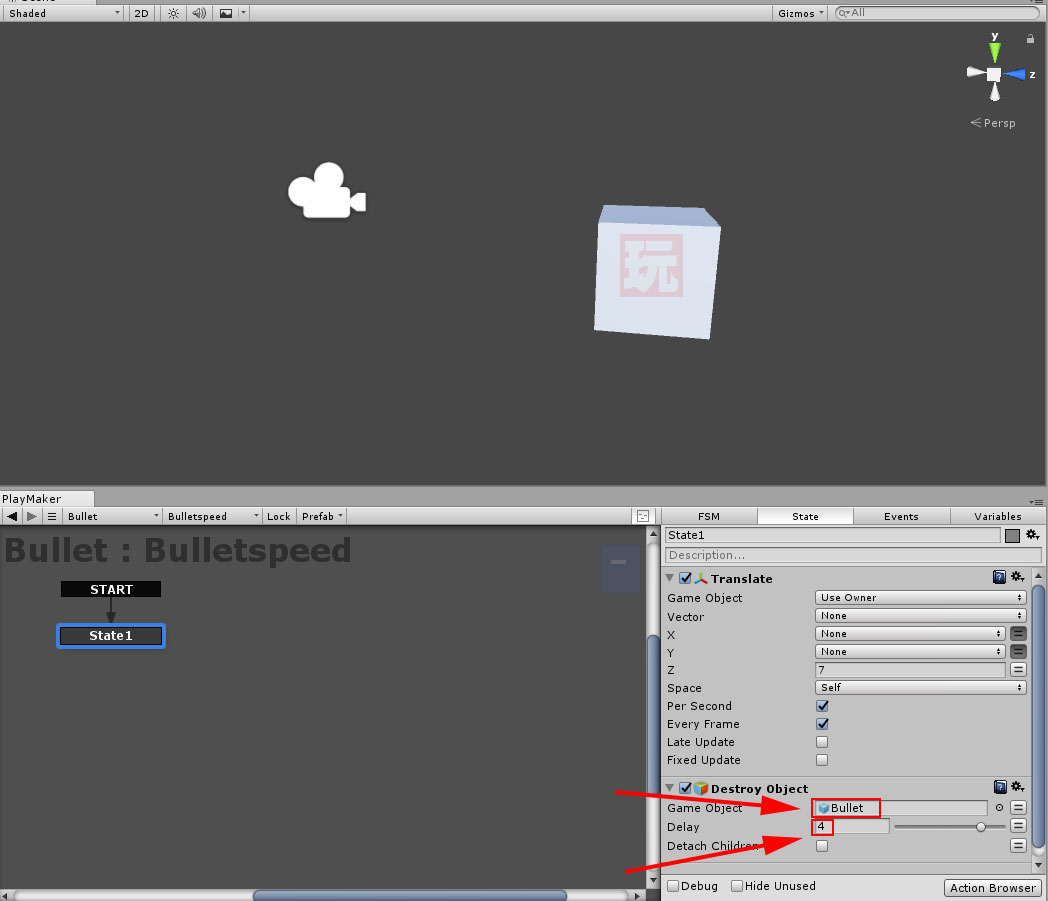
Time to Destroy and Delay
Changed the delay time to 4 seconds by specifying a bullet in Destroy Object. In this article, I showed you how to generate bullets automatically using Unity’s Playmaker. In the next article, I am going to show you how to make this bullet move in slow motion. Continue reading How to create a slow-motion scene in Unity’s Playmaker_vol.2
How to upload assets from Unity to STYLY Read the article

Set “Destroy Object” to Bullet and Delay to 4 seconds. This article introduced how to create bullets automatically by Playmaker for Unity. I will introduce how to implement a slow-motion effect on it in the next article.
Next article >>
How to upload an asset from Unity to STYLY