This article shows you how to create an underwater scene using Post Processing, shaders, and a particle system.
You can easily change the atmosphere of your scene by using Post Processing and other methods, so I hope this will be helpful to you in creating your scene.
Sample
In this example, I created a scene at the bottom of the ocean.
Expressing the sea with Post Processing

Changing colors in Post Processing
First, we will use Post Processing to change the color of the scene view itself to blue to make it look like the ocean.
Setting up Post Processing
In order to use Post Processing, you need to import it into Unity from the Package Manager. Please refer to the following article for an explanation.
![[Unity]Understanding the Basics of Post Processing](https://styly.cc/wp-content/uploads/2020/07/EYECATCH-1-160x160.png)
Once you have imported the Post Processing Stack v2, proceed with the following settings.
Edit the Color Grading to represent the inside of the ocean
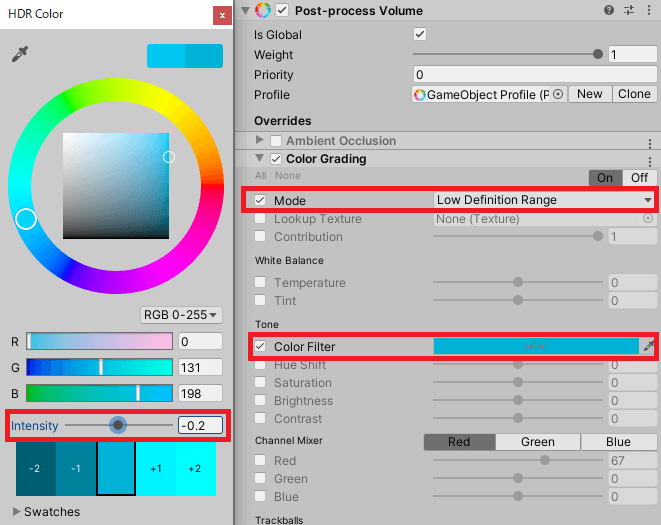
Editing the Color Grading (Image 1)
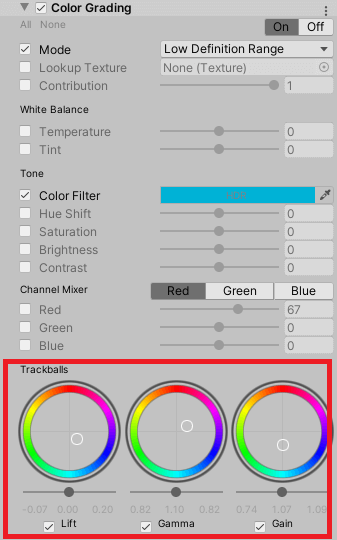
Editing the Trackballs of the Color Grading (Image 2)
Color Grading is an effect that modifies the brightness and luminosity of the colors on the screen, and since it plays a role in adjusting the overall color tone, we will use it to create an underwater look. The area to be edited is in the red frame of the screen shots (Image 1 and Image 2). The details are explained below.
- Mode…Allows you to select the type of Color Grading effect, and since HDR rendering is not usually supported in VR, select Low Definition Range.
- Color Filter…This is the setting for the color filter applied to the screen. Click on the color picker to open a window where you can set the color you want. You can also edit the Intensity (light intensity) in this window, so you can adjust the brightness by moving the bar. In this case, we will lower the Intensity a bit to make it look more like underwater.
- Trackballs…Allows you to fine-tune the colors you have edited so far. From left to right, you can adjust the color gamut from “Dark gamut,” “Medium gamut,” and “Light gamut. By editing here, you can make adjustments such as “making dark areas stand out more bluish” (as shown in image 2).
Creating cellular noise with shaders
Shader to be created
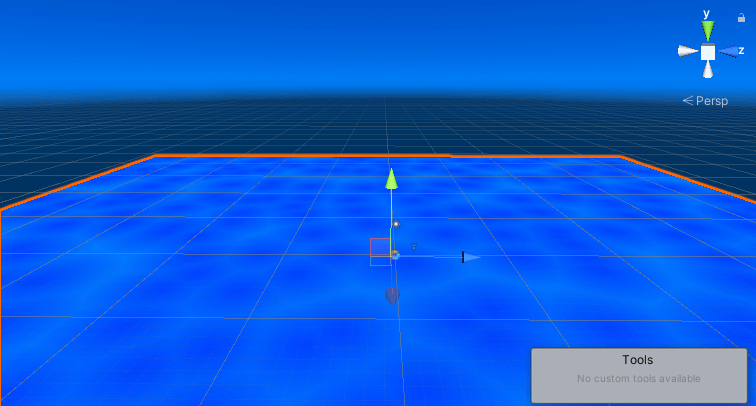
In order to create an ocean-like atmosphere, we will display the caustics, which can be seen on the surface of swimming pools, on a Plane that mimics the ocean floor.
In this case, we will use shaders to create cellular noise.
Creating a new shader
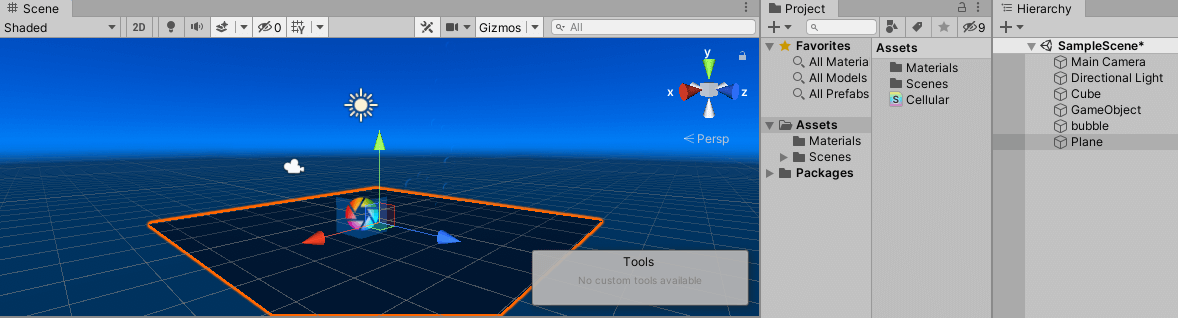
Creating a new Plane
First, let’s create a plane to which we will apply a material later.
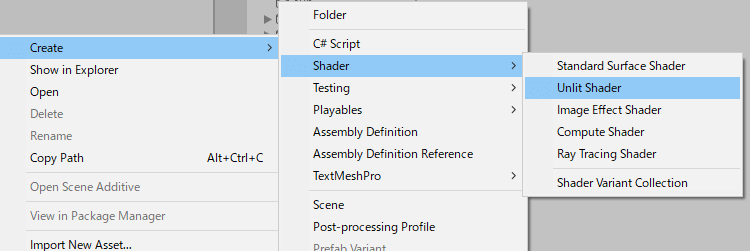
Create a new shader
We will create a shader in code. Right-click on the project window > Create > Shader > UnlitShader to create a new shader.
Shader "SeaCellular"
{
    Properties
    {
        _MainTex ("Texture", 2D) = "white" {}
    }
    SubShader
    {
        Tags { "RenderType"="Opaque" }
        LOD 100

        Pass
        {
            CGPROGRAM
            #pragma vertex vert
            #pragma fragment frag
            #pragma multi_compile_fog

            #include "UnityCG.cginc"

            struct appdata
            {
                float4 vertex : POSITION;
                float2 uv : TEXCOORD0;
            };

            struct v2f
            {
                float2 uv : TEXCOORD0;
                UNITY_FOG_COORDS(1)
                float4 vertex : SV_POSITION;
            };

            sampler2D _MainTex;
            float4 _MainTex_ST;

            v2f vert (appdata v)
            {
                v2f o;
                o.vertex = UnityObjectToClipPos(v.vertex);
                o.uv = TRANSFORM_TEX(v.uv, _MainTex);
                UNITY_TRANSFER_FOG(o,o.vertex);
                return o;
            }

            float2 random2(float2 st)
            {
                st = float2(dot(st, float2(127.1, 311.7)),
                            dot(st, float2(269.5, 183.3)));
                return -1.0 + 2.0 * frac(sin(st) * 43758.5453123);
            }


            float cellularnoise(float2 st, float n) {
                st *= n;

                float2 ist = floor(st);
                float2 fst = frac(st);

                float distance = 5;

                for (int y = -1; y <= 1; y++)
                for (int x = -1; x <= 1; x++)
                    {
                        float2 neighbor = float2(x, y);
                        float2 p = 0.5 + 0.5 * sin(_Time.y + 6.2831 * random2(ist + neighbor));
                        float2 diff = neighbor + p - fst;
                        distance = min(distance, length(diff));
                    }

                float color = distance * 0.2;

                return color;
            }


            fixed4 frag(v2f i) :  SV_Target{

                return cellularnoise(i.uv, 16) * float4(1, 2, -2, 1) + float4(0.1,0.5,1.5,1);
            }
            ENDCG
        }
    }
}
In this case, I used the following website as a reference to create the shader.
*These are written in Japanese. Please don’t worry it. I’ll explain in English.
【UnityShader】Unityで水面の模様を描画するシェーダ・セルラーノイズ
シェーダでノイズ3(セルノイズ) 空の缶詰 – Unity
Creating a new material
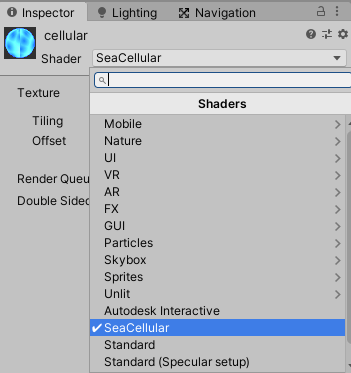
Applying the created shader to a material
To use the shader, we need to attach a material with the shader applied to the object, so we will first create a new material. Click on Shader in the material to select the shader you just created.
Applying the material
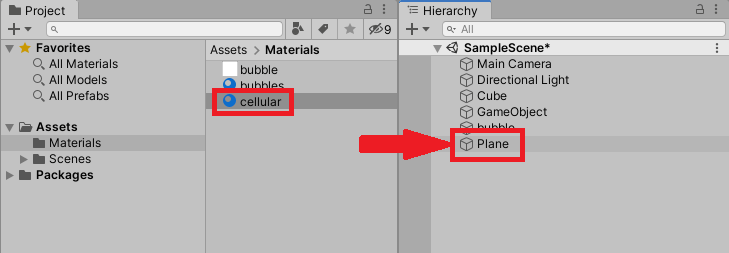
Attaching the Material to the Plane
We will now apply the completed material to the Plane that we created earlier. You can attach the material by dragging it directly onto the hierarchical plane.
Creating Bubble Particles
We will now use particles to create “bubbles”.

Generating Bubbles with Particles
We will create bubbles like this one, which will boil up.
Create a material for the bubble

Bubble texture (hard to see)
First, prepare a bubble texture to be applied to the material by creating an image file of a bubble of your choice in PhotoShop. A simple drawing of an outline and a few glossy lines will be enough to make it look like a bubble.
Keep the image file in the Unity project window.
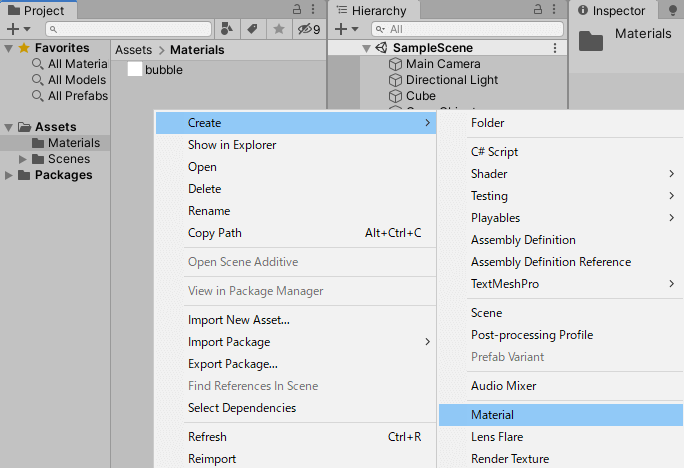
Create a new material
Create a new material by right-clicking on the project window and selecting Create > Material. Rename it to “bubble” for clarity.

Attaching a texture
You can also attach an image by Ctrl-clicking on the Albedo frame and selecting it, or by dragging the image directly onto the Albedo frame.
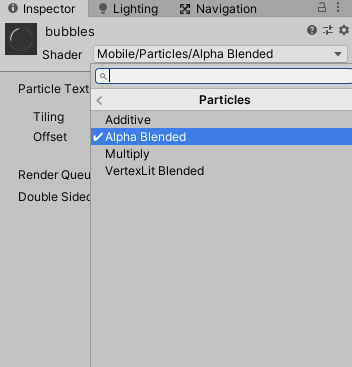
Changing the Shader
Change the shader. By default, it is set to Standerd, which means that the bubble image will not be drawn correctly because it contains transparency (Alpha). Click anywhere in the frame and select Mobile > Particles > Alpha Blended to set it. The image will now be rendered.
Create a new particle
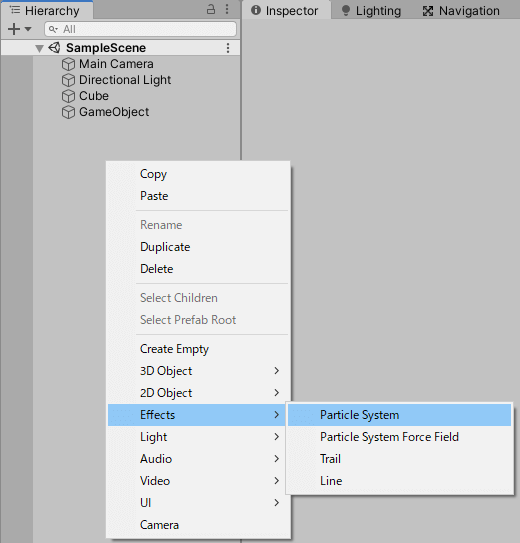
Create a new particle
Right-click on the Hierarchy window > Effects > Particle System particles to create a new particle.
Edit the Renderer module
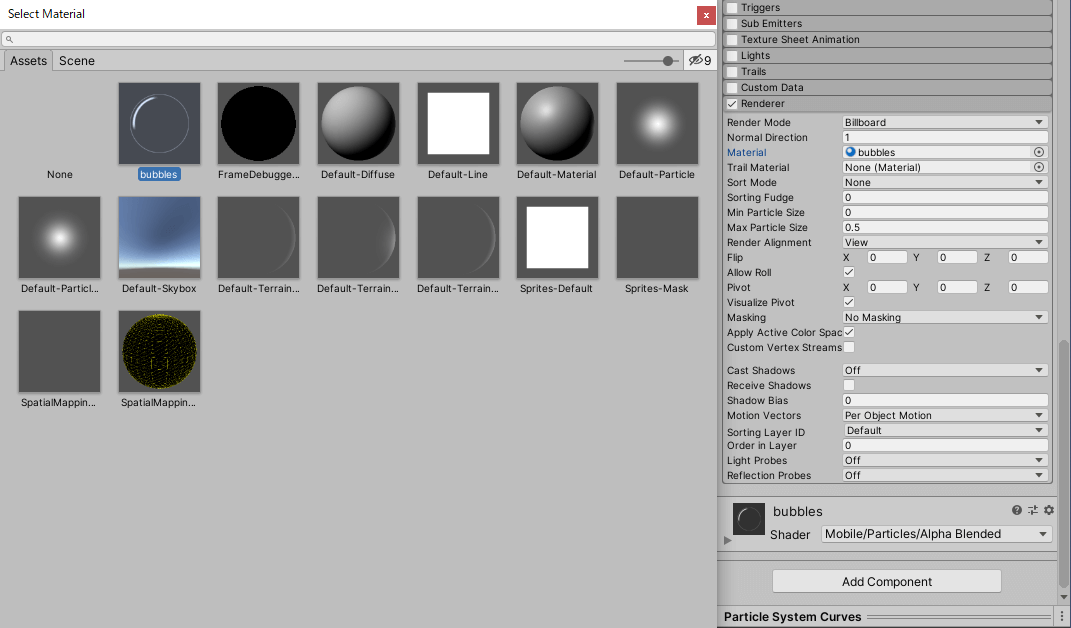
Edit the Renderer module
Since the Renderer module is located at the bottom, it is often edited last in the order, but since it is easier to understand if the appearance changes first, we will edit it first.
In the Renderer module, all we need to do is attach the material we just created to the Material. The bubbles will now be drawn on the particles.
Editing the Main Module
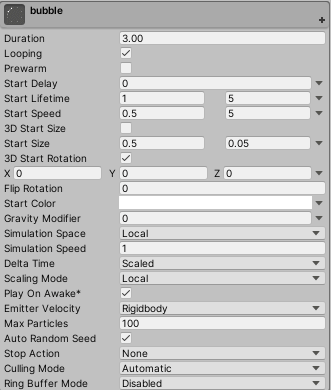
Editing the Main Module
In the Main module, we set the lifetime and rotation to random so that the bubbles will be generated in a certain degree.
See below for where to change the parameters.
| Parameters | Value |
|---|---|
| Duration | 3.00 |
| Start Lifetime | 1/5 |
| Start Speed | 0.5/5 |
| Start Size | 0.5/0.05 |
| Max Particles | 100 |
- Duration…The amount of time the particles will last.
- Start Lifetime…The lifetime of the particle from the time it is generated until it disappears. By selecting Random Between Two Constant from the right triangle, you can set a random number between any two numbers.
- Start Speed…The speed at which the particles move. The higher the number, the faster the speed. By selecting “Random Between Two Constant” from the right triangle, you can set a random number between any two numbers.
- Start Size…The size of the particles. The larger the number, the larger the particles will be. By selecting Random Between Two Constant from the right triangle, you can set a random number between any two numbers.
- Max Particles…The maximum number of particles that will be displayed. The higher the number, the more particles will be displayed.
Editing the Emission Module
The Emission module can be left as default, so make sure the checkbox is checked and edit the following items.
Editing the Shape Module
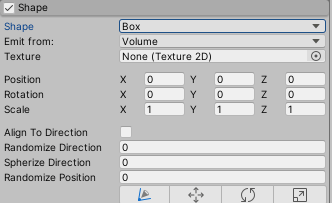
Editing the Shape Module
The Shape module allows you to set the shape of the particles. In this case, we want the bubbles to rise from the bottom to the top, so select Box. There is no need to edit any other parameters just to change the shape.
Editing the Size over Lifetime Module
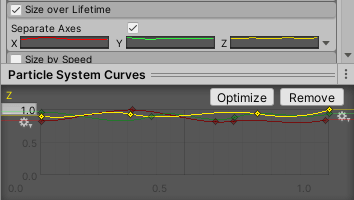
Editing the Size over Lifetime Module
Size over Lifetime module allows you to set the size of the particles to change depending on their lifetime, and by checking the Separate Axis checkbox, you can set the X (width), Y (height), and Z (depth) axes separately on the graph. This time, we will use the naturally occurring In this case, we want to imitate naturally occurring bubbles, so we have only added a little strength to the graph. Check the scene view and adjust the settings to your liking.
Setting up the scene
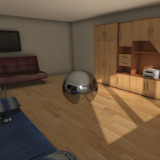
In addition to the contents introduced in this article, I placed sunlight shining on the seabed and sea creatures.
Click here for the article I referred to.
![[Unity] Using the particle system to express a God Ray](https://styly.cc/wp-content/uploads/2021/02/thumb-160x160.png)
Click here to see the assets I used.
Uploading to STYLY
Let’s upload the scene to STYLY and use it.
In this case, we will upload the Unity scene directly to STYLY, so please refer to this article.
How to create a STYLY account

You can use STYLY FORUM to solve the problem. STYLY FORUM is a place where people can discuss a service or technical issue on STYLY, or provide bug reports on STYLY.
https://en.forum.styly.cc/support/discussions