In this article, I will introduce a software for Windows called “VMagicMirror”.
VMagicMirror (VMagic) is a great way to become a Vtuber on a single PC without using VR equipment.
There are other applications that allow you to become a Vtuber using VRM (a file format for handling humanoid 3D avatar data), but VMagicMirror is recommended for beginners in terms of its ease of use and feel.
In this article, I will explain how to become a Vtuber using VMagicMirror and STYLY space.
Sample
This is a sample image that I created.
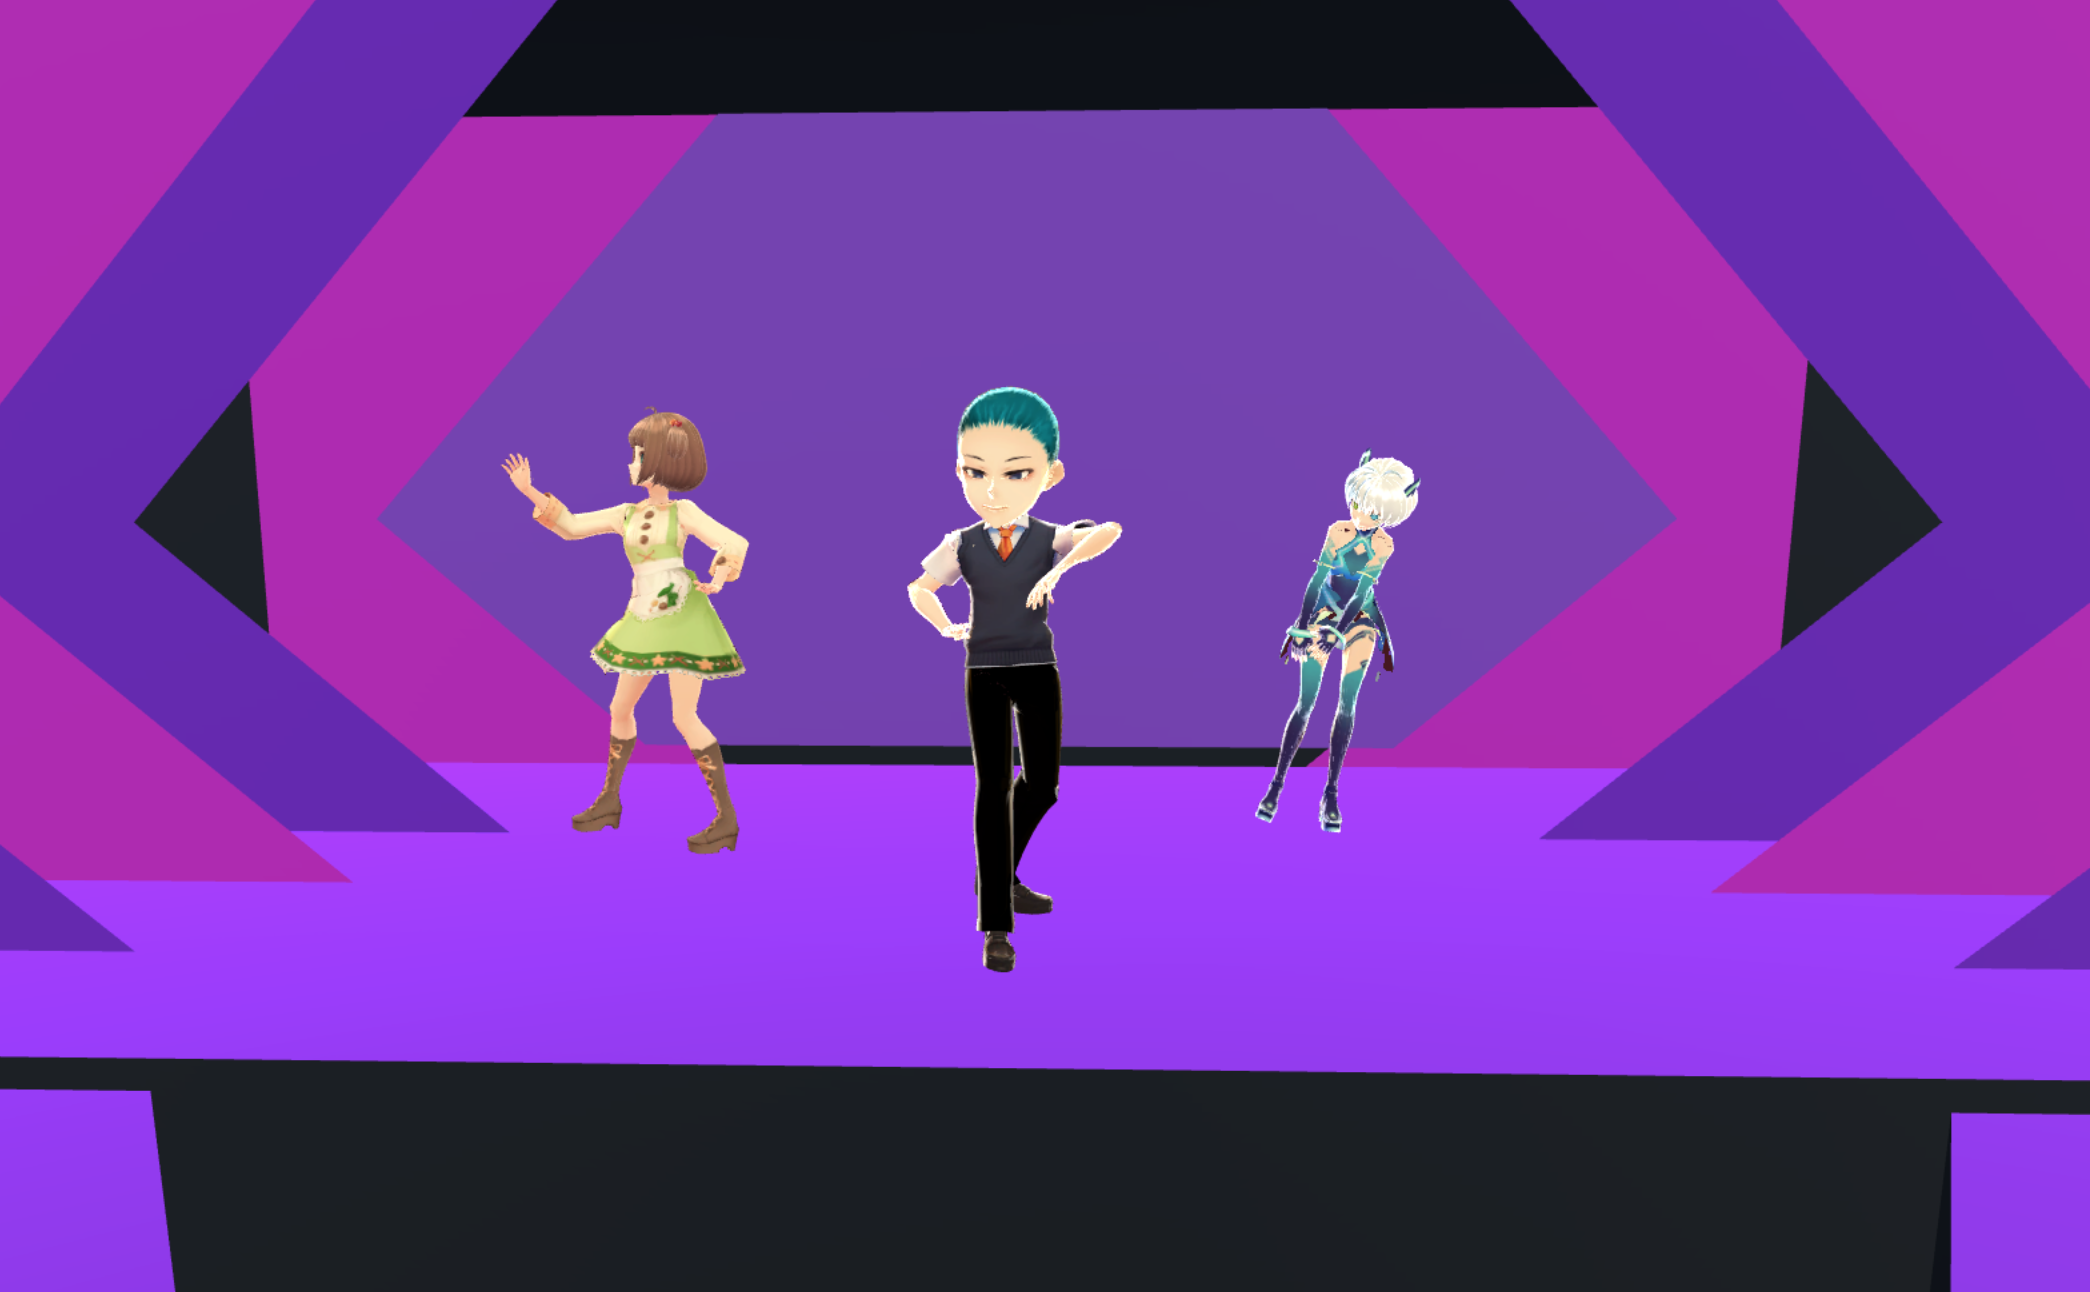
As you can see, by combining VMagic and STYLY, you can add depth to the background, and by using your own 3D space as the background, you can become a Vtuber with more originality.

Finished sample
What is VMagicMirror?
VMagicMirror
VMagicMirror is a software for Windows developed by BakuSuta that allows you to control 3D characters without VR equipment for VRM.
The best feature of this software is that it can control characters as long as you have a keyboard and mouse, and it also supports face tracking if you have a Face ID compatible iOS device.
Vtubers often need a variety of equipment, but with this software, you can easily become a Vtuber with just a computer and an iPhone.
Preparing in advance
Now let’s get ready to become a Vtuber.
The basic prerequisite is to prepare a 3D model.
Preparing VRoid
This time, I will use Pokari-chan, which I created with VRoid.
If you have created the model using VRoid, you can upload it to VRoidHub to synchronize with VMagicMirror, so you can load the model without having to output VRM.
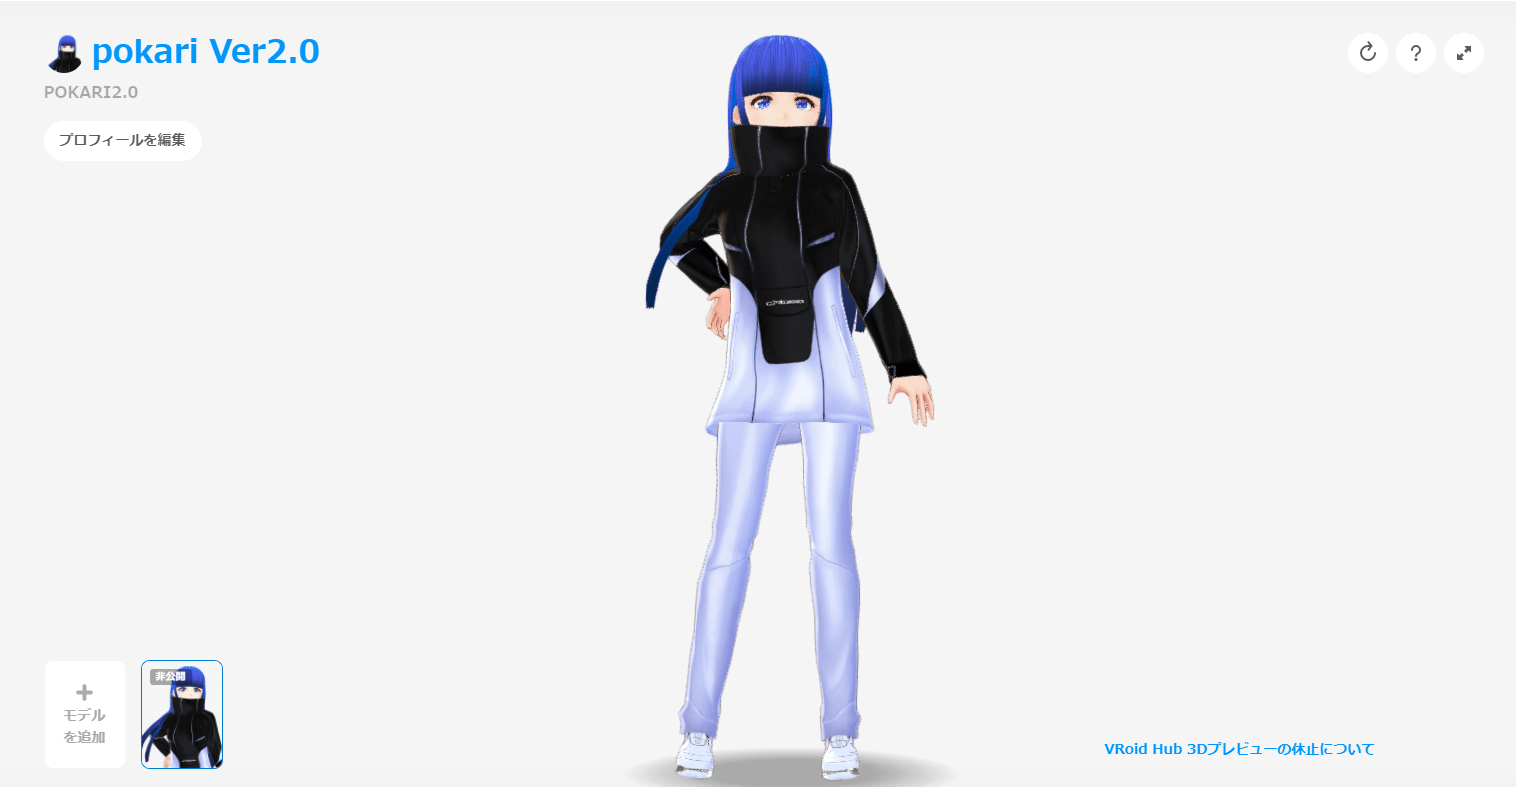
Characters to be used in this project
Please refer to this page for the process of creating a model with VRoid.
How to upload the model to VRoidHub
After creating the model, upload it to VRoidHub.
By doing this, when you create multiple avatars, you can easily change them on VMagic.
When you have finished creating the avatar, select “Shoot/Export”.
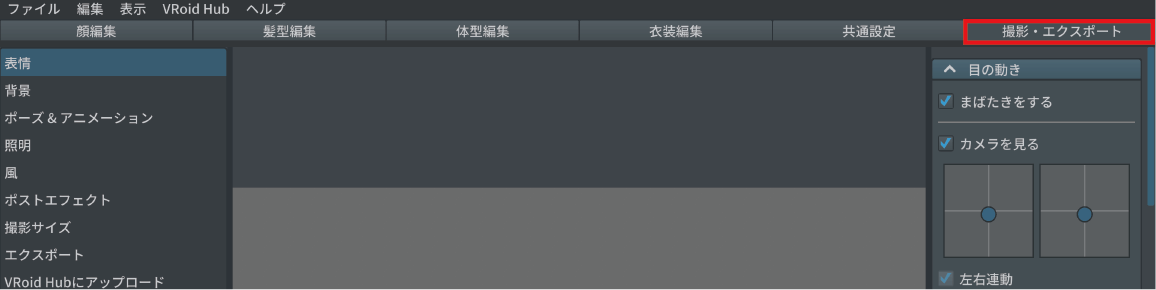
Select Shooting and Exporting
After making your selection, select “Upload to VRoid Hub” from the menu list on the left.
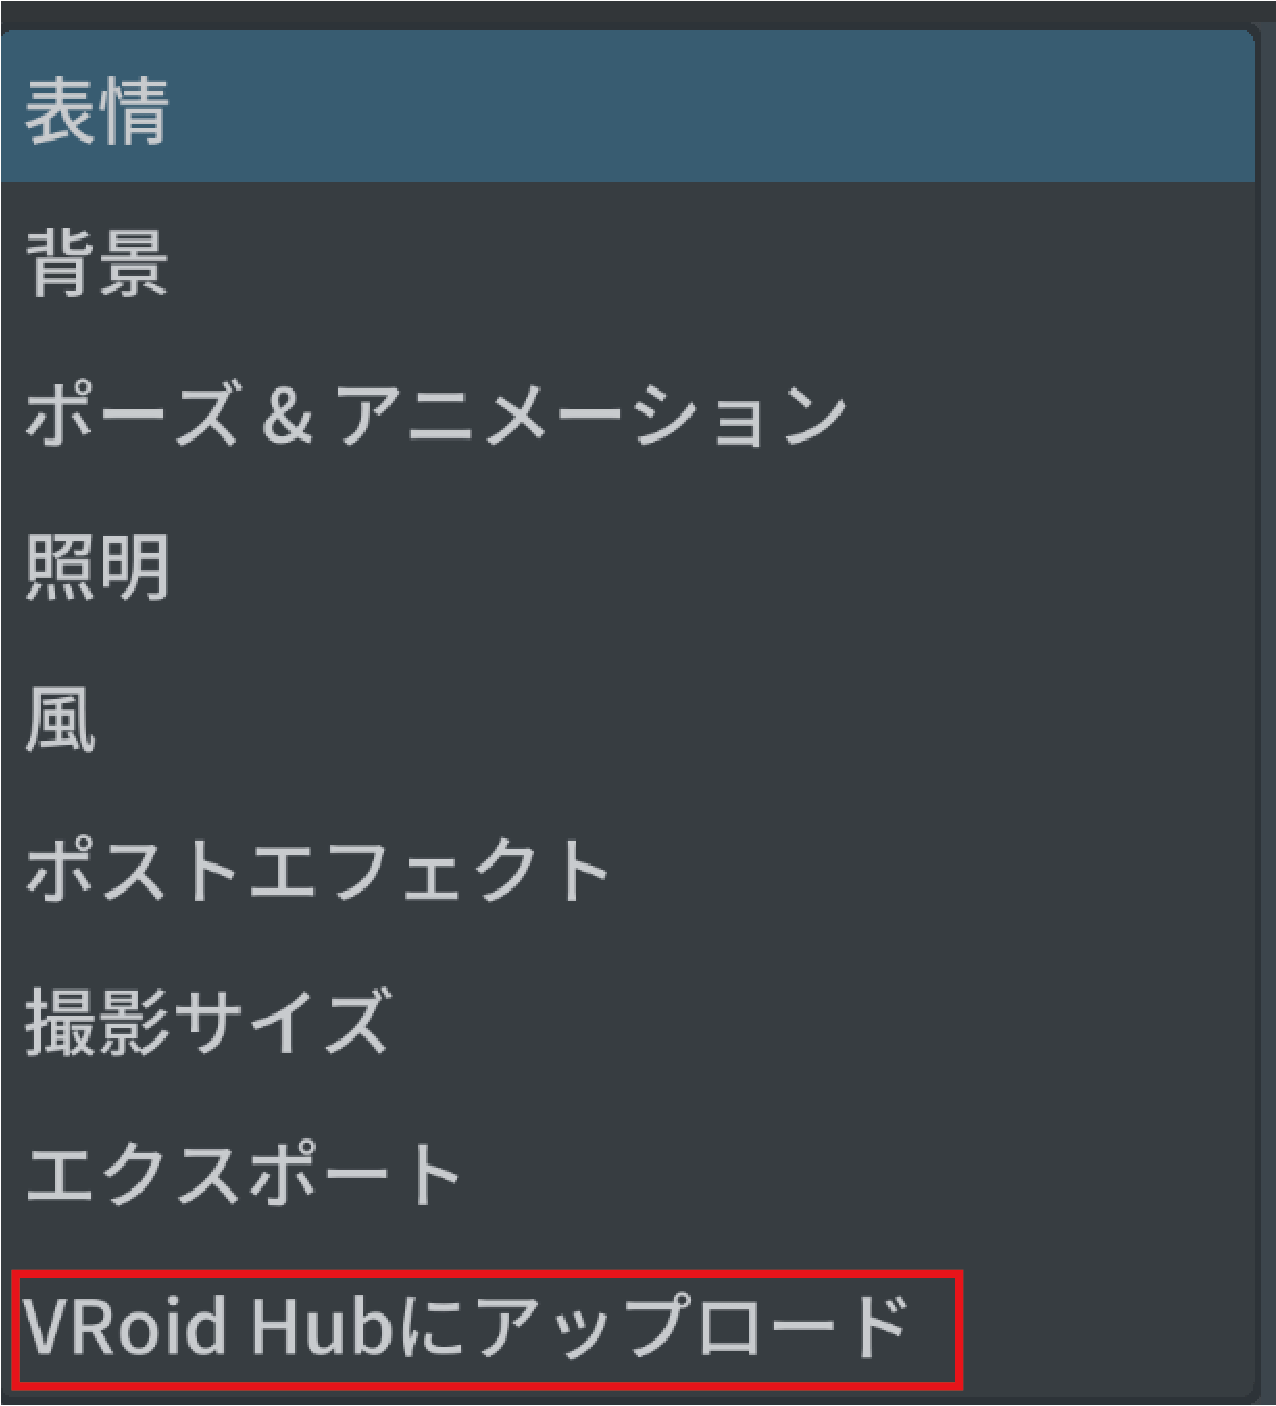
Select Upload to VRoidHub.
After that, select the new character.
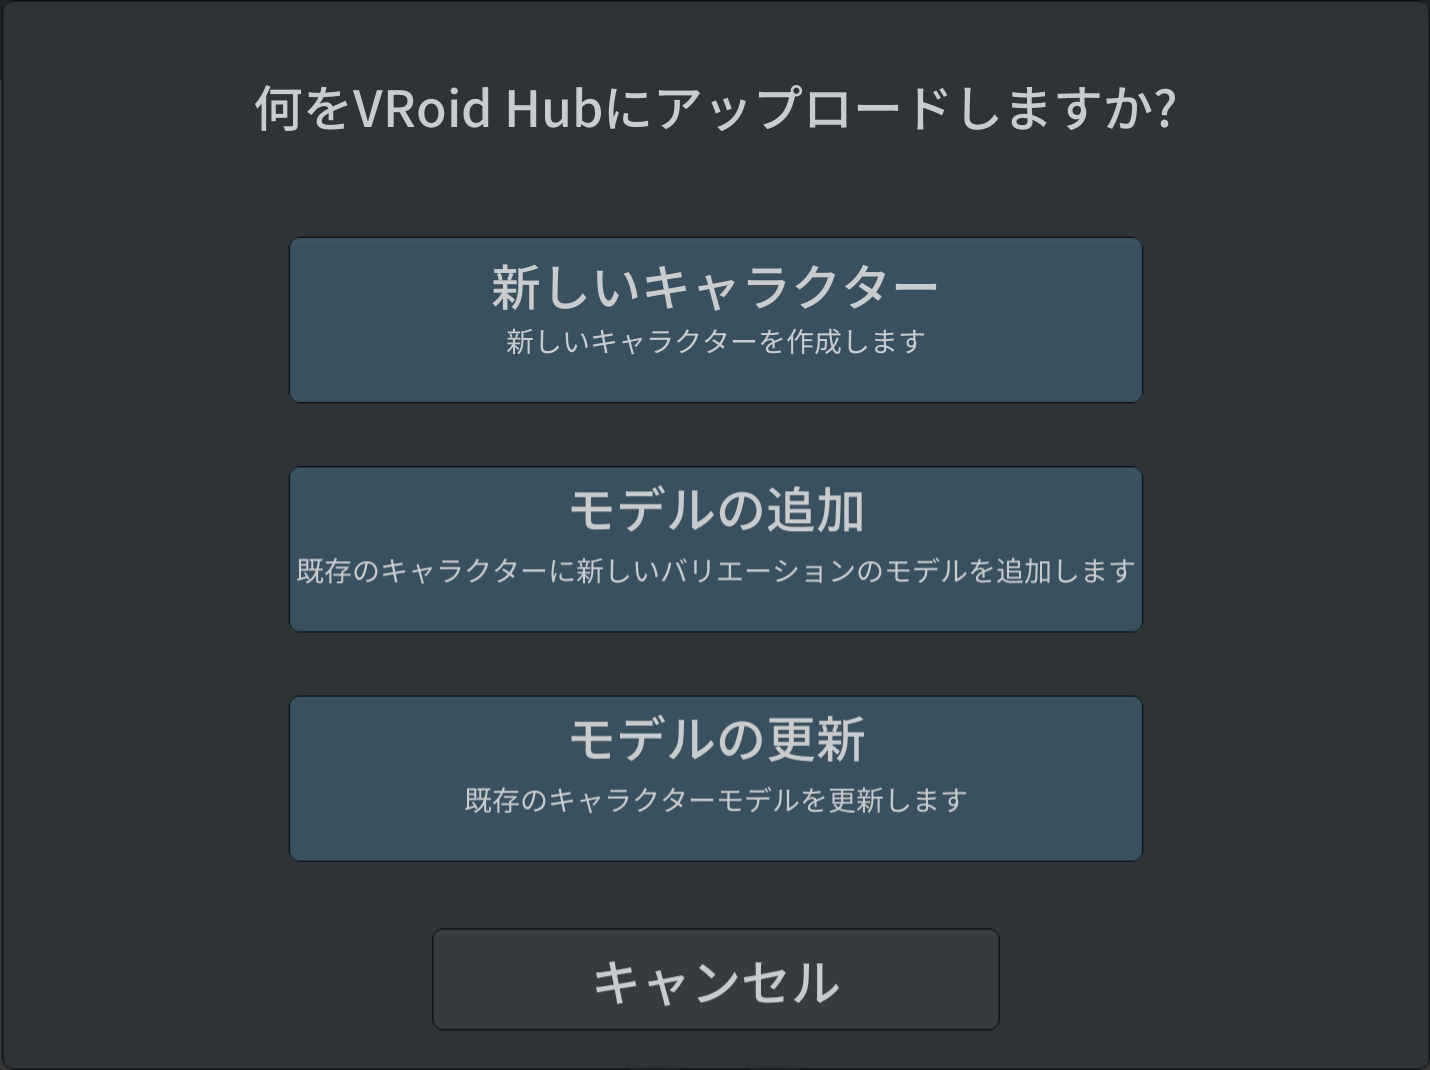
Select a new character
Then, follow the step-by-step instructions to enter the name and take an image of the character, and then select Upload.
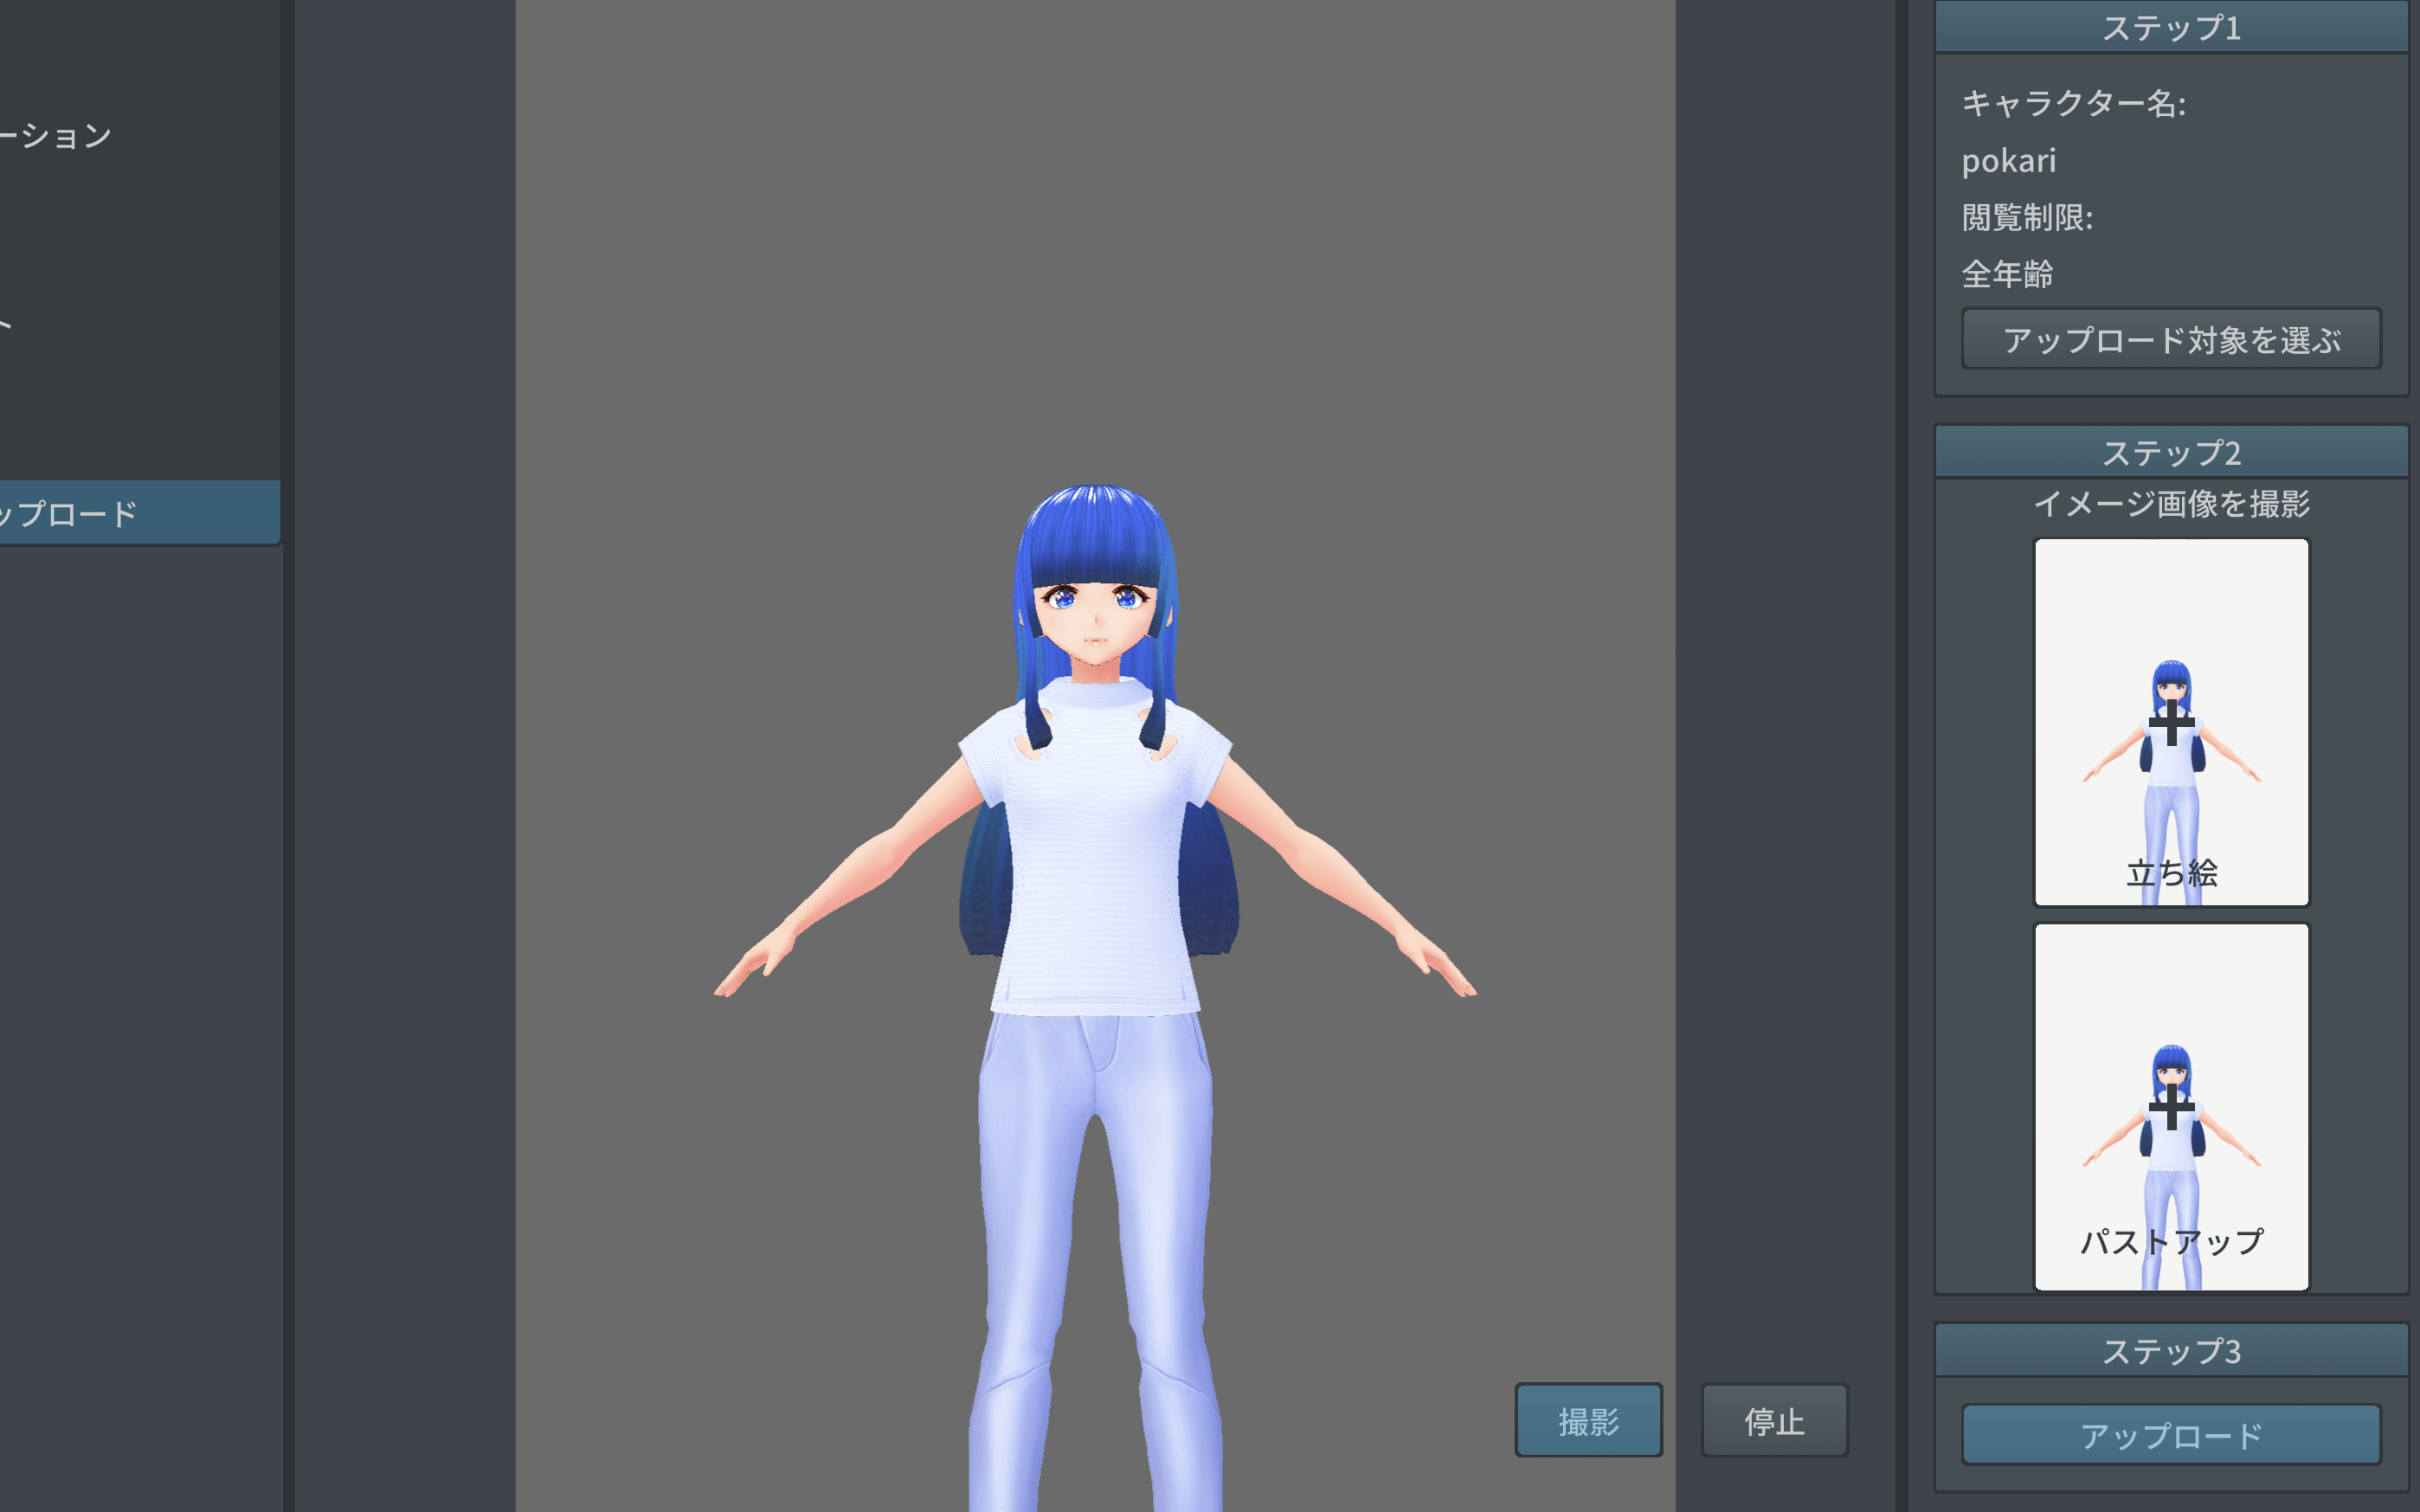
Step by step progression
Finally, when you select Upload in Step 3, you will be automatically redirected to VRoid Hub, so log in, enter the model data, and click the Register button to complete the preparation for VRoid.
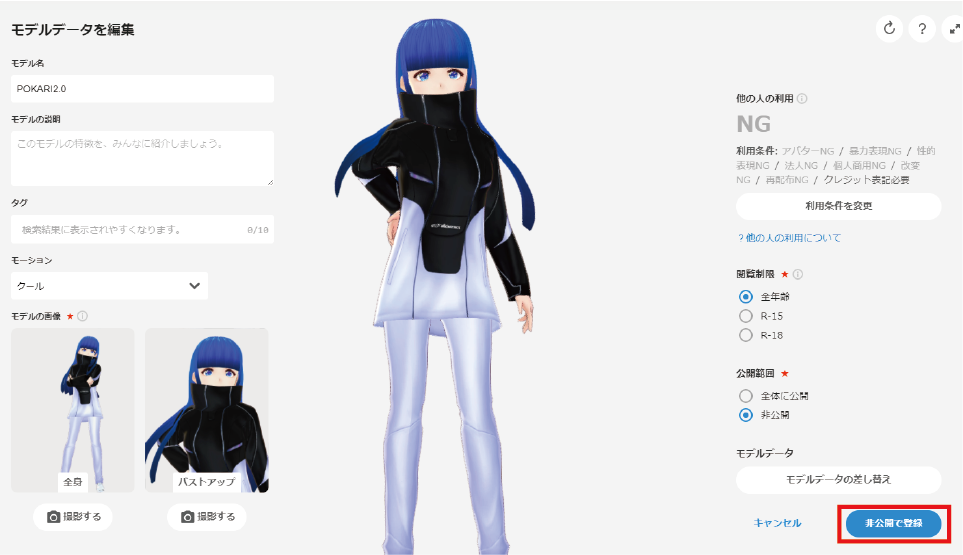
After entering the model data, select the Register button.
Download VMagicMirror and other software
Please download the software from the following URL.
VMagicMirror : https://booth.pm/ja/items/1272298
OBS : https://obsproject.com/download
If you want to use face tracking, please search for “iFacialMocap” in the App store of your Face ID compatible iOS device and download the app.
iFacialMocap: https://apps.apple.com/app/ifacialmocap/id1489470545
If you want to know which devices support Face ID, please refer to the following
https://support.apple.com/ja-jp/HT209183
Launch VMagicMirror
Now let’s start VMagic.
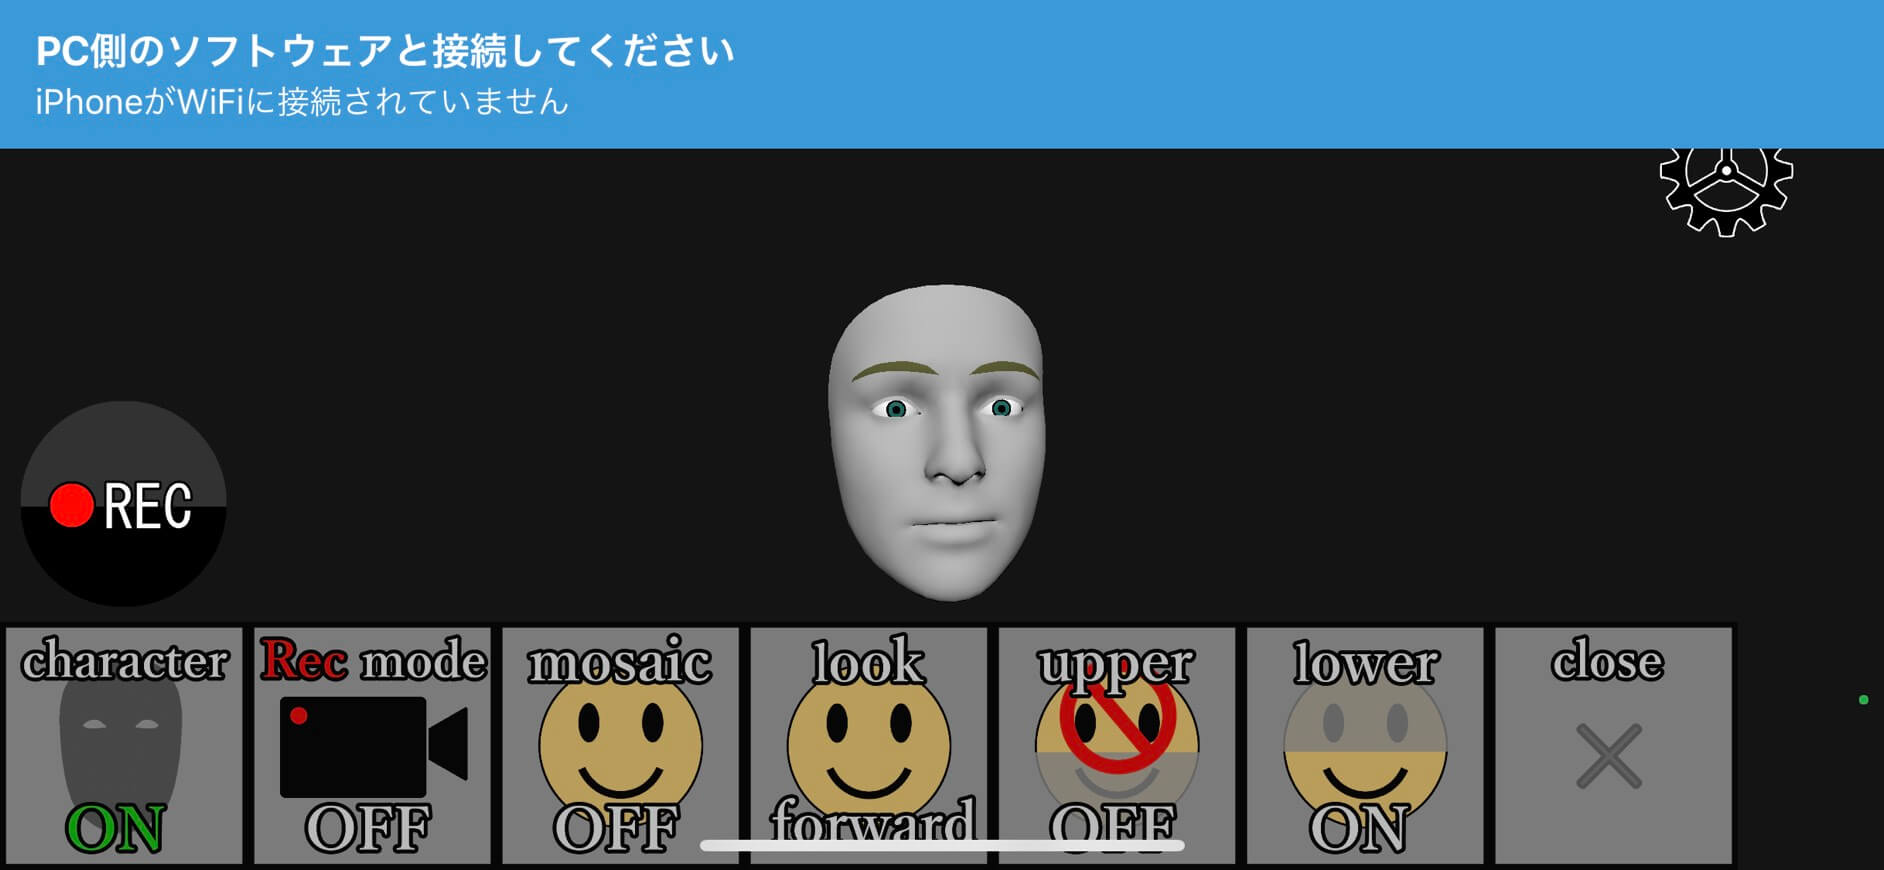
When you launch VMagic, the settings screen will appear.
Basically, you can adjust the 3D model, face tracking, camera position, etc. by using this setting screen. Select “Load from VRoid Hub” to open the model list.
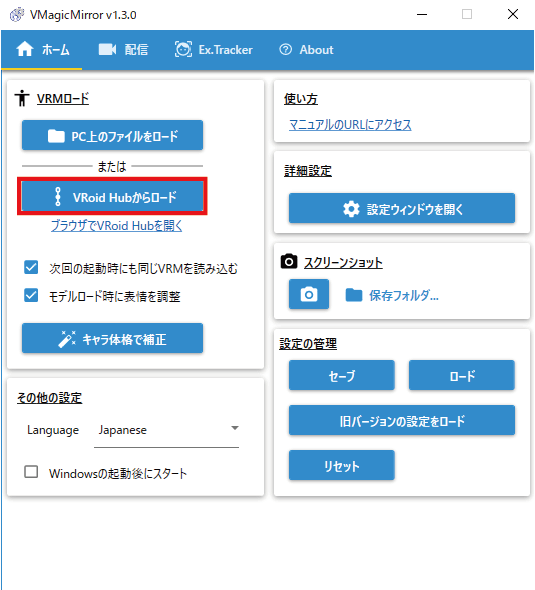
“Select “Load from VRoid Hub.
When the list is displayed, select the character you like and load it.
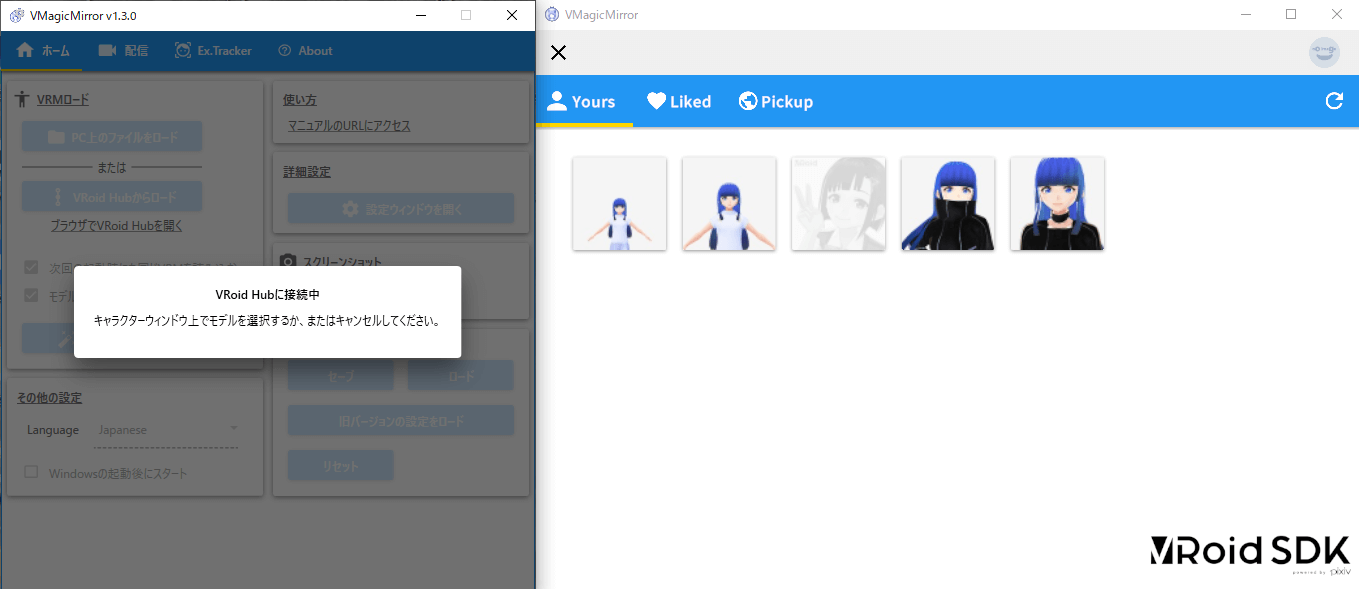
Select a model
The model will look like this after loading.
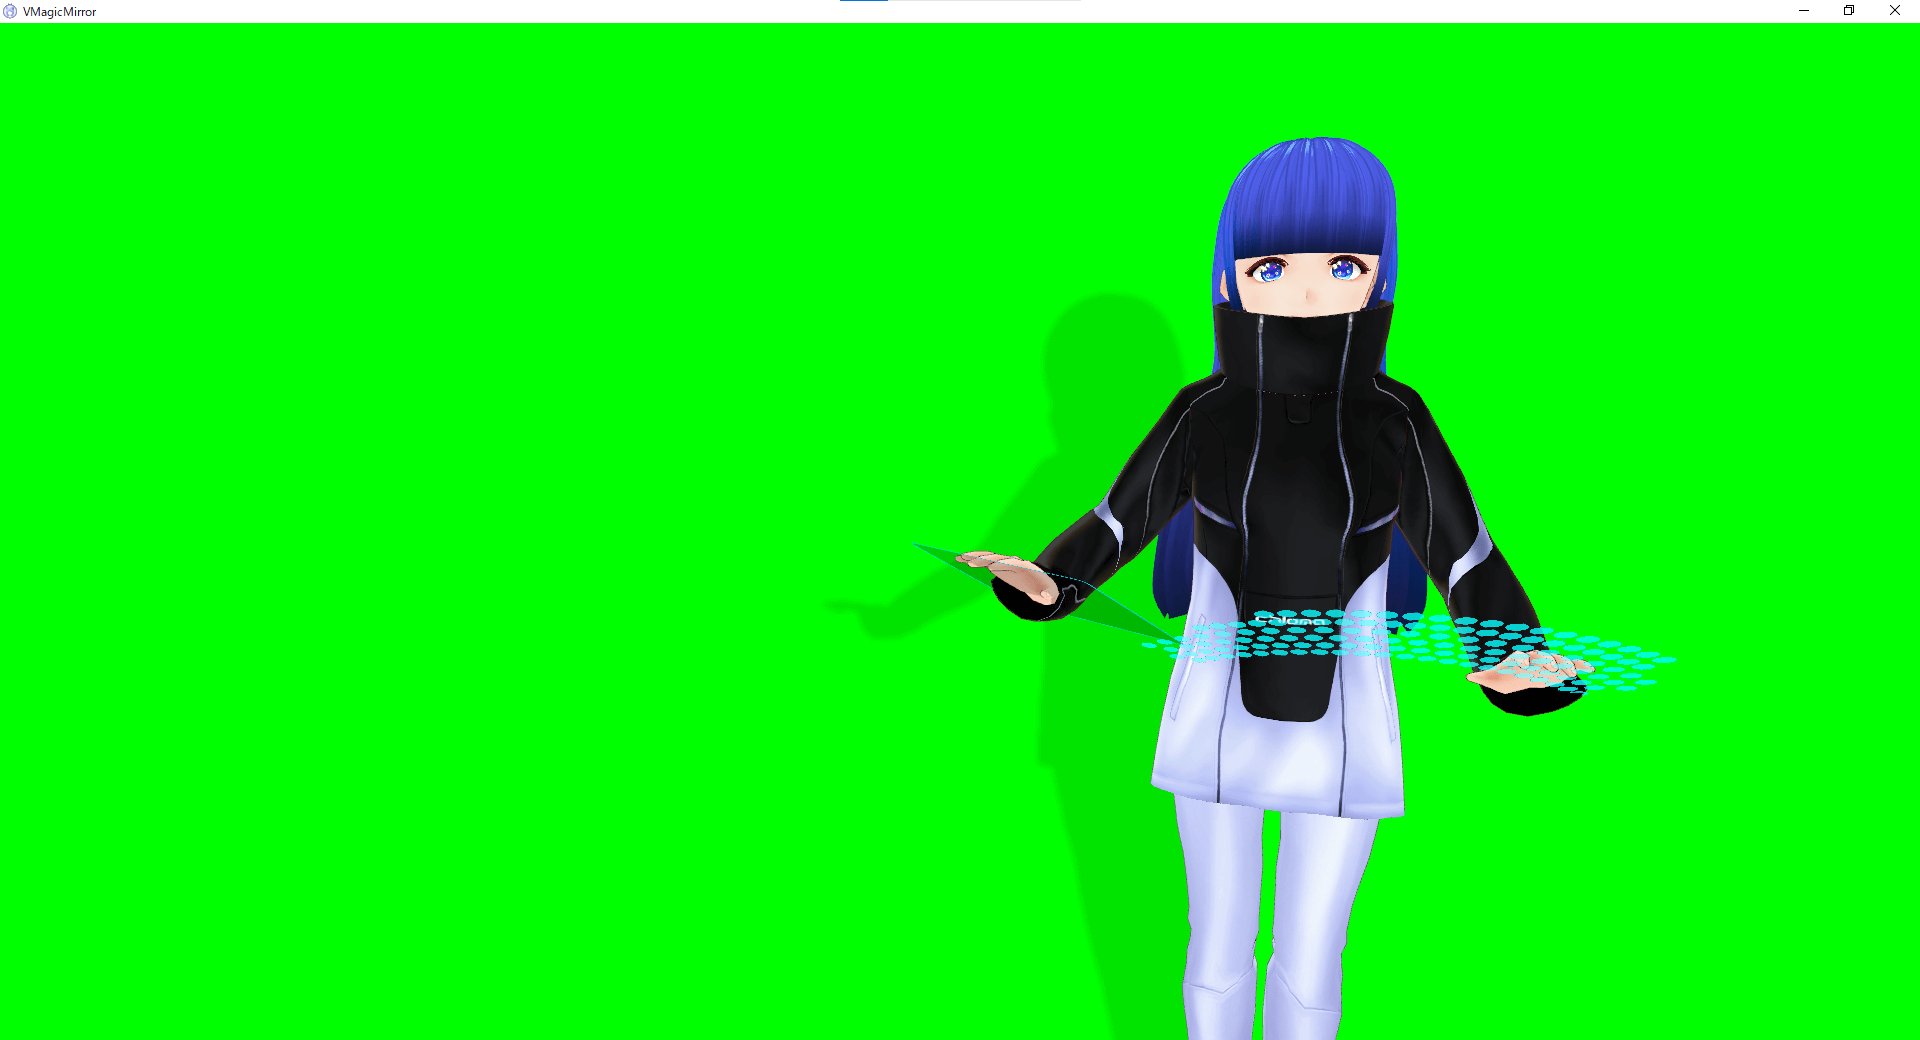
After loading the model
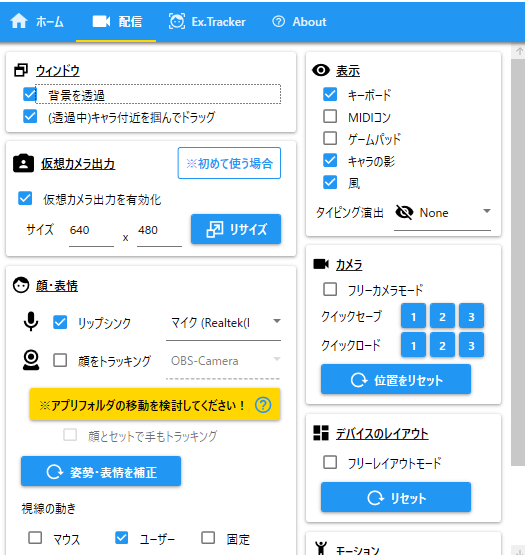
Setting screen
Now that the models have been loaded, let’s take a look at the settings screen.
There are two types of settings in VMagic: simple settings and advanced settings.
Let’s open the settings window to open the advanced settings screen.
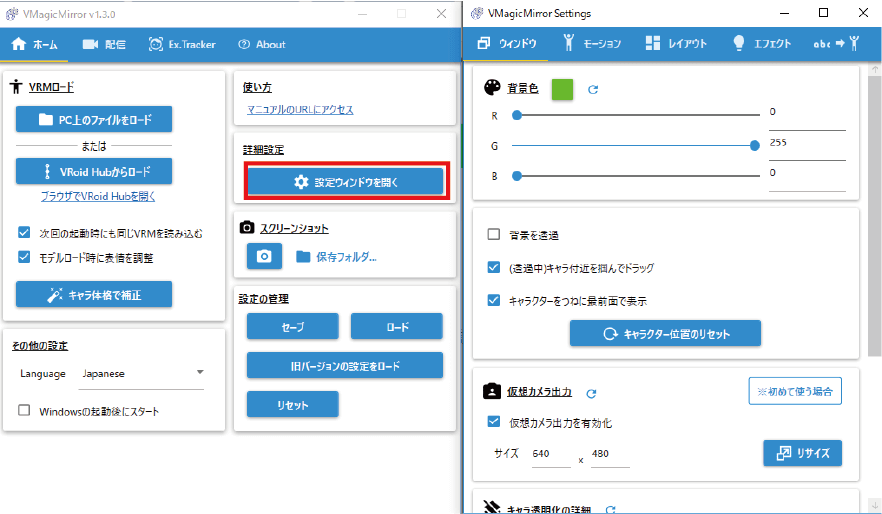
Select Open Configuration Window
This section explains each menu.
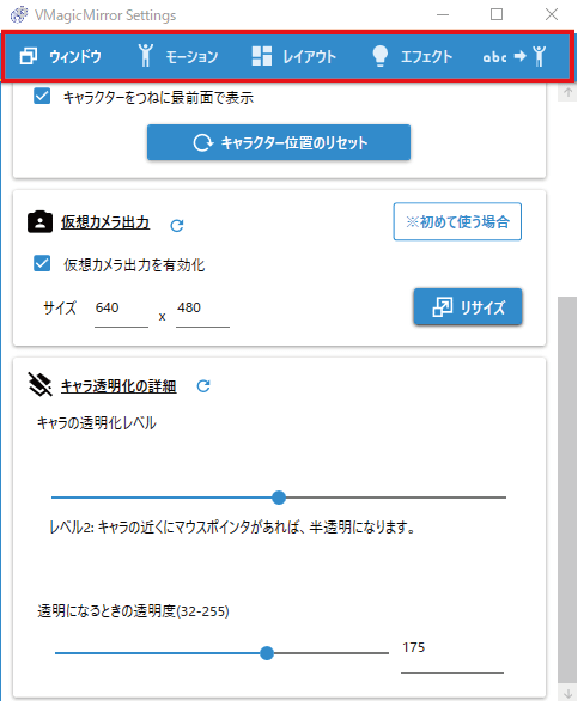
Settings Window
- Window: Allows you to set the background color of the character and the transparency of the background
- Motion: Set lip-sync, microphone and elbow positions, hand movements, etc.
- Layout: Set the camera angle, keyboard and mouse positions, gamepad display, etc.
- Effects: Adjust image quality, lights, shadows, etc.
- abc mark: Allows you to assign motion to each key.
How to do face tracking
After downloading iFacialMocap, connect to the same Wi-Fi as your PC and launch the application.
iFacialMocap
The IP address will be displayed, so please check if it is correct.
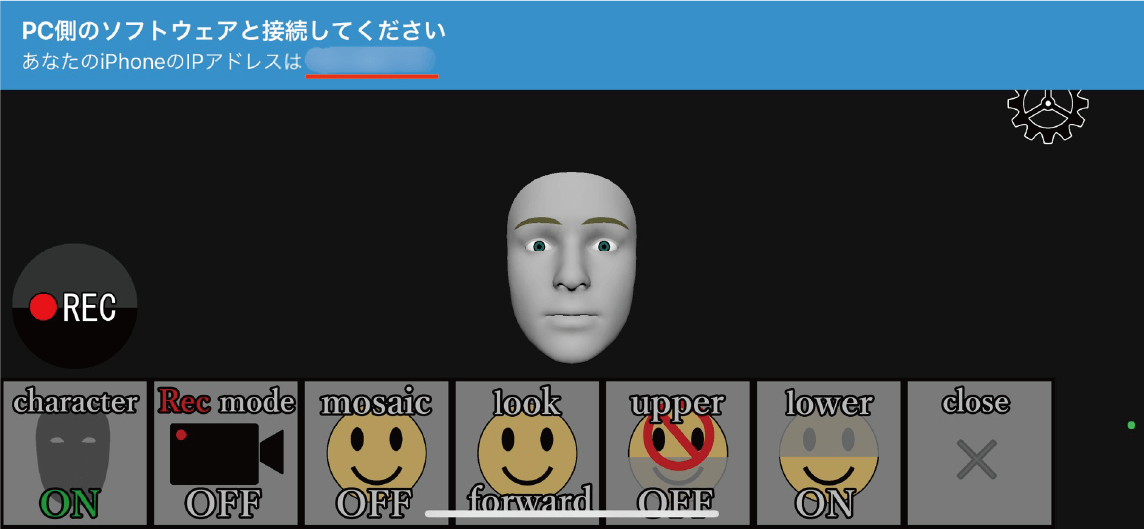
Confirm the IP address
After confirming the IP address, select “Ex.Tracker” in the VMagicMirror settings screen and check “Enable External Tracking”.
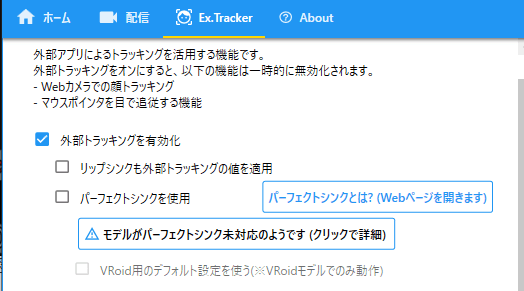
Select “Enable External Tracking
After checking the box, enter the IP address and select Connect to enable face tracking in conjunction with the app.

Select Ex.Tracker and enter your IP address
Prepare your space with STYLY
Let’s prepare a space of your choice in STYLY.
In this case, we will be using a space created in STYLY as a background, so it doesn’t matter if it’s a hollow space.
I wanted to create a futuristic feeling, so I placed a floor with animation.
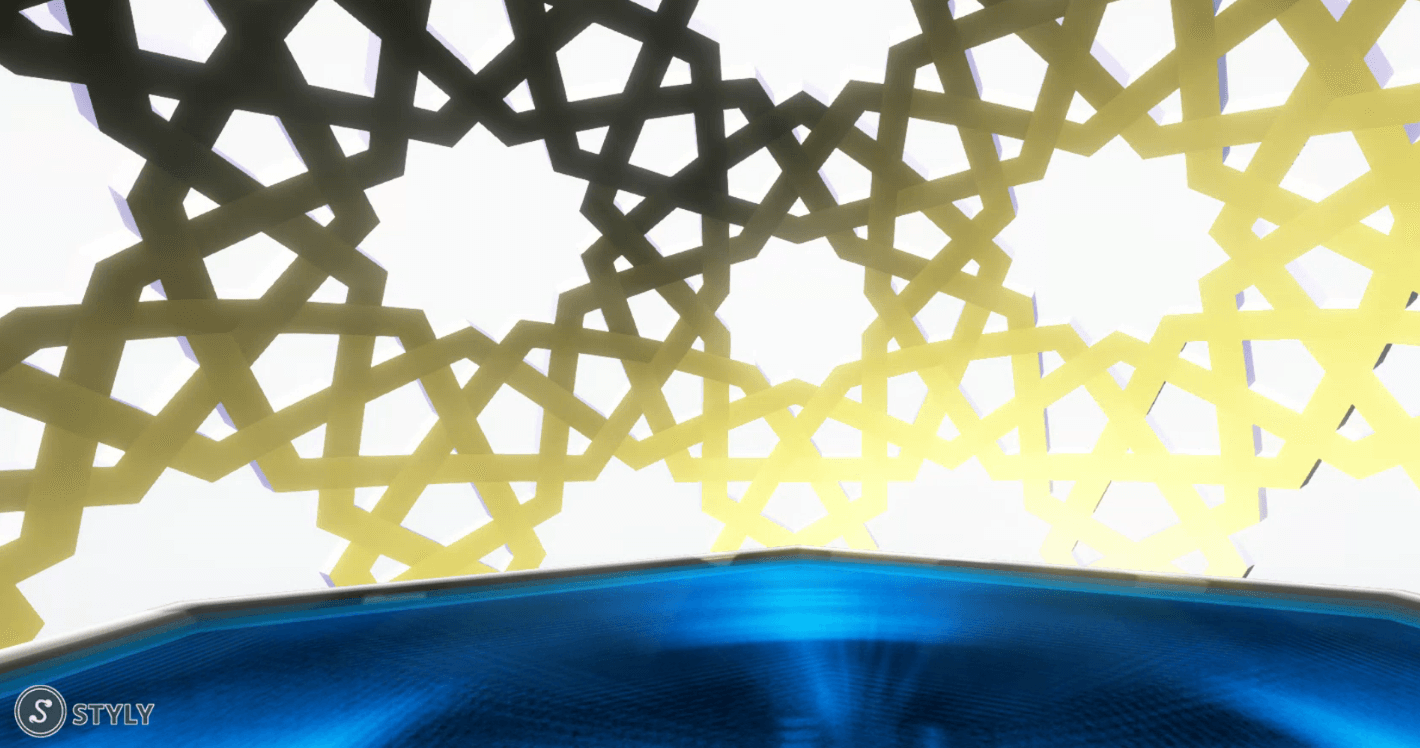
Space created with STYLY
Let’s combine the character and the space
The last step is to combine the characters with the screen recording of the scene created in STYLY STUDIO.
This time we will use the distribution software called OBS Studio.
First of all, check the “Transparent background” checkbox in the “Distribution” section of the Vmagic settings window.
Select “Transparent background” in the “Delivery” section.
Start OBS Studio and add a screen-recorded video to the source.
Press the “+” button at the bottom of the source.
Select “Media Source” from the menu, or “Image” for images, and select OK.
*Check the Repeat checkbox if it is a video.
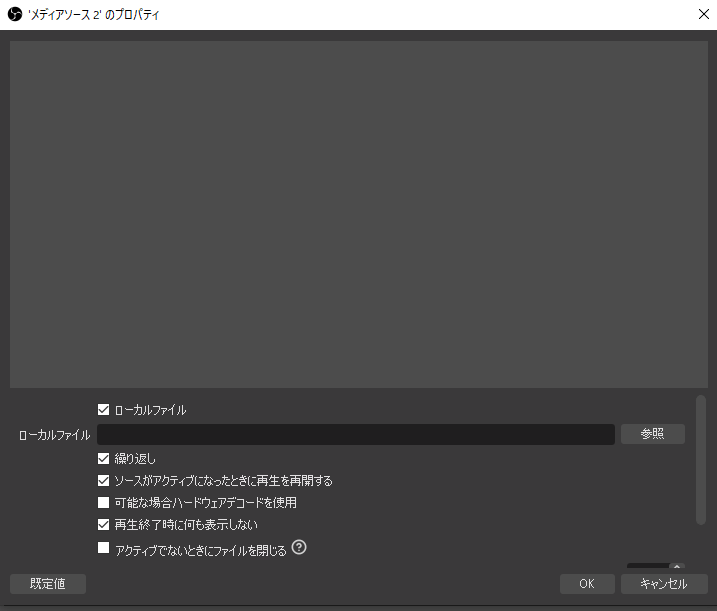
Select a file from the browse and OK
Your background is now ready.
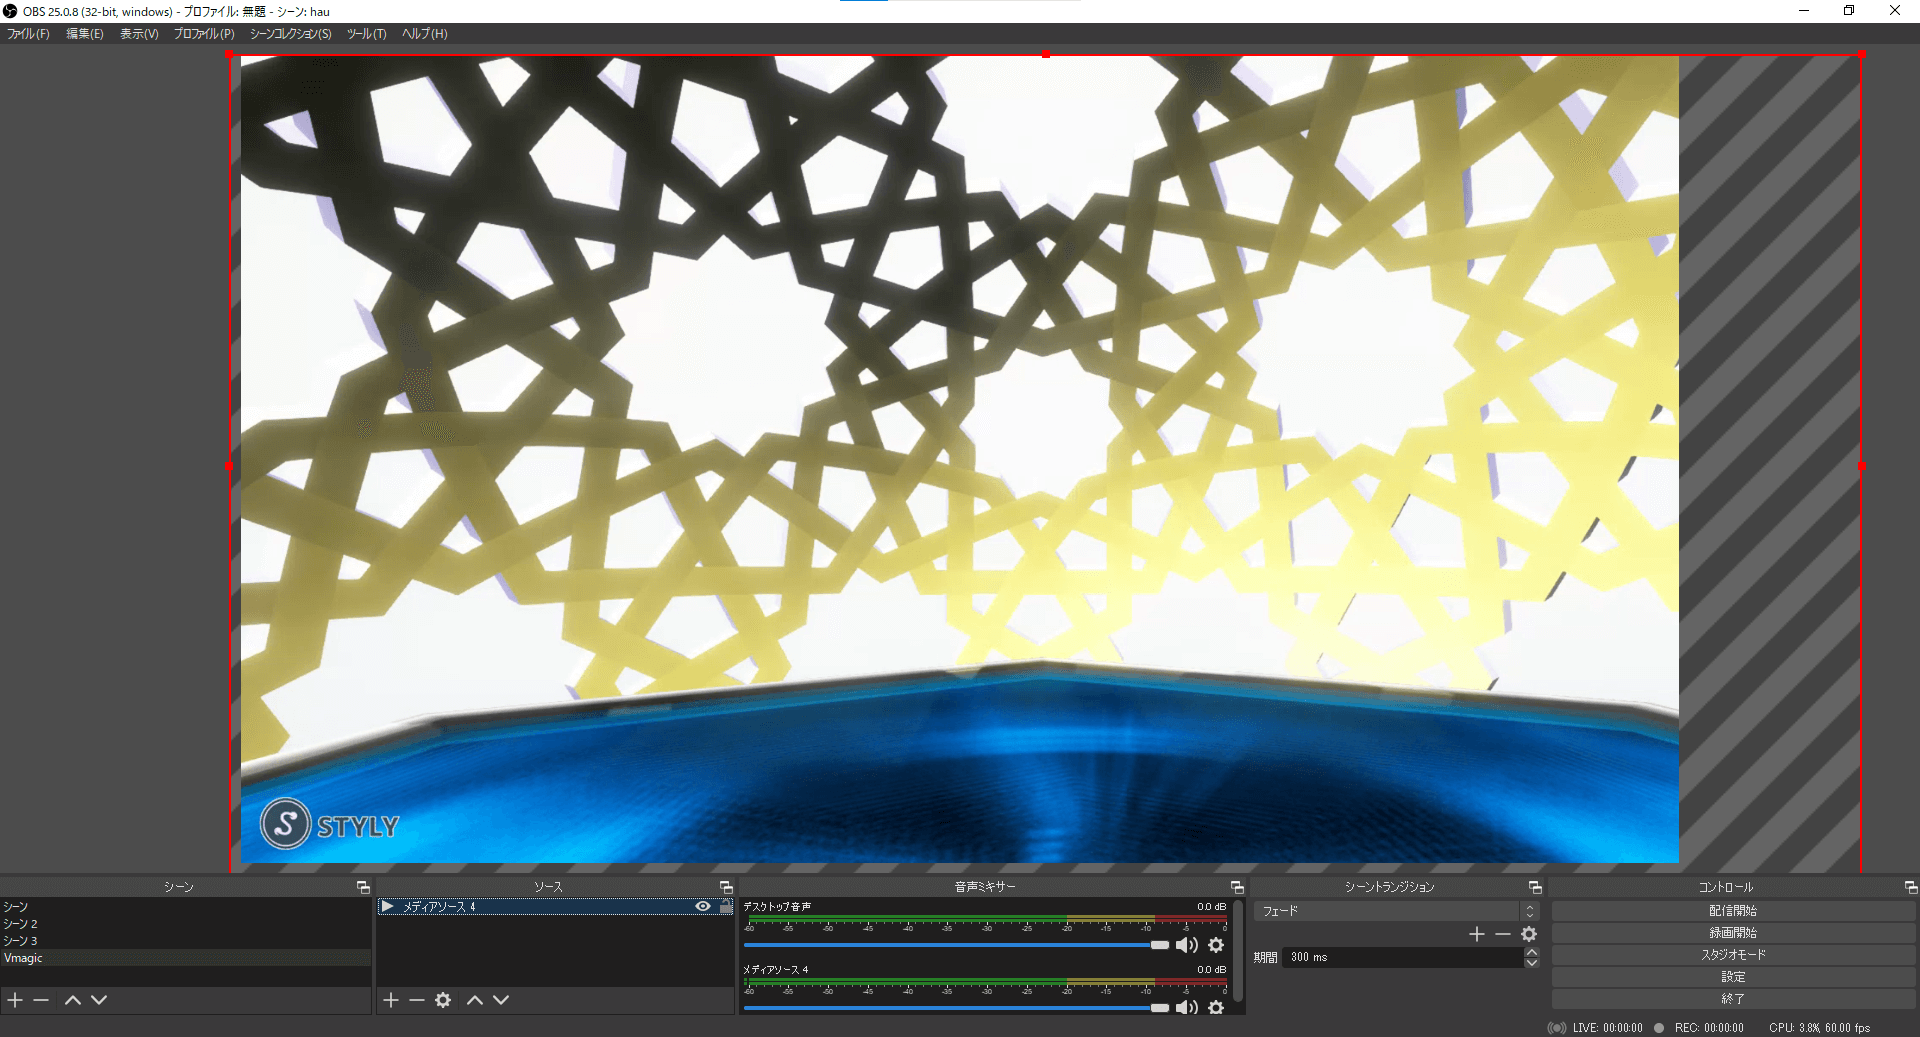
Background is complete
Next, let’s compose the character.
Press the “+” button at the bottom of the source.
Select “Game Capture” from the menu.
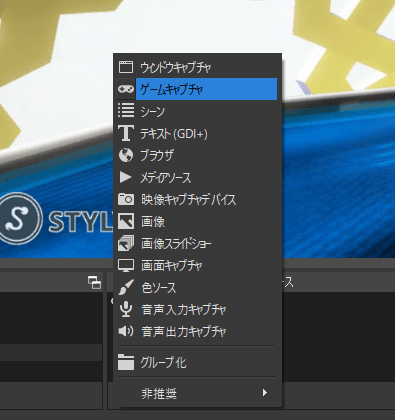
Select Game Capture
Change the mode to “Capture Specific Window” and select VMagicMirror from the window below it.
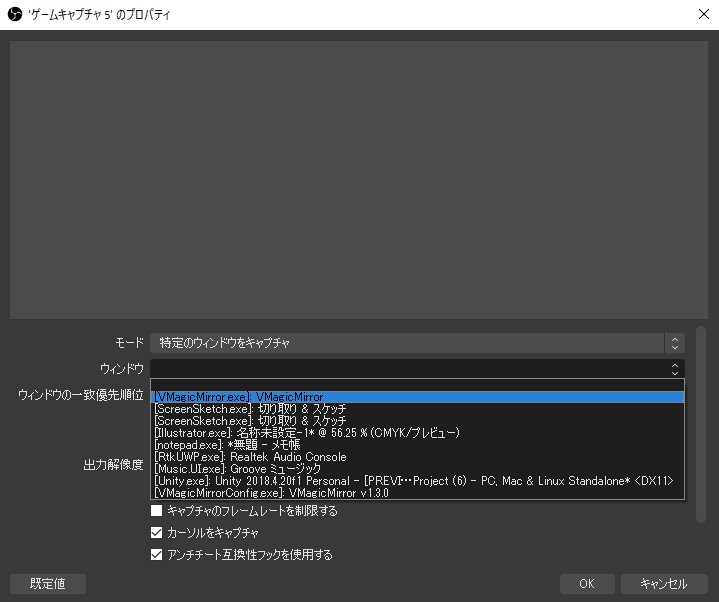
Select VMagicMirror from the window
Once selected, place a check mark in the “Allow transparency” box further down.
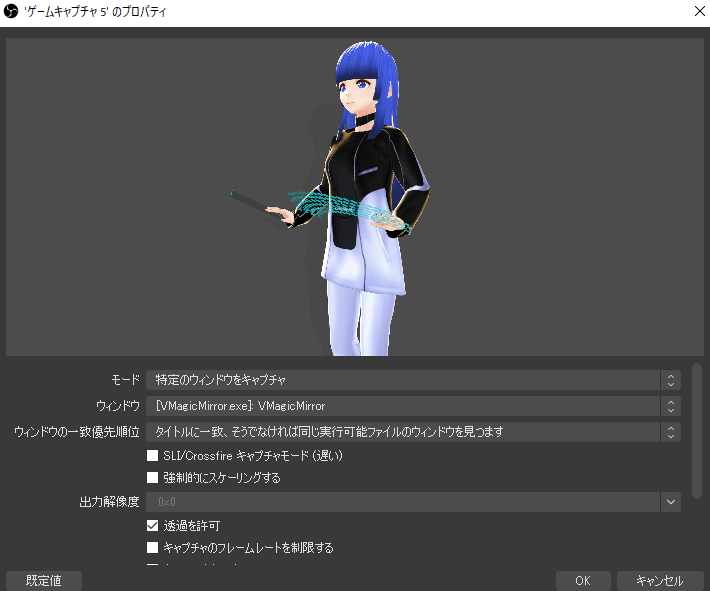
Check the box to allow transparency.
Then the model will appear.
Of course, since the model is linked to VMagic, you can go straight to the settings screen to make detailed settings and change the layout instantly.
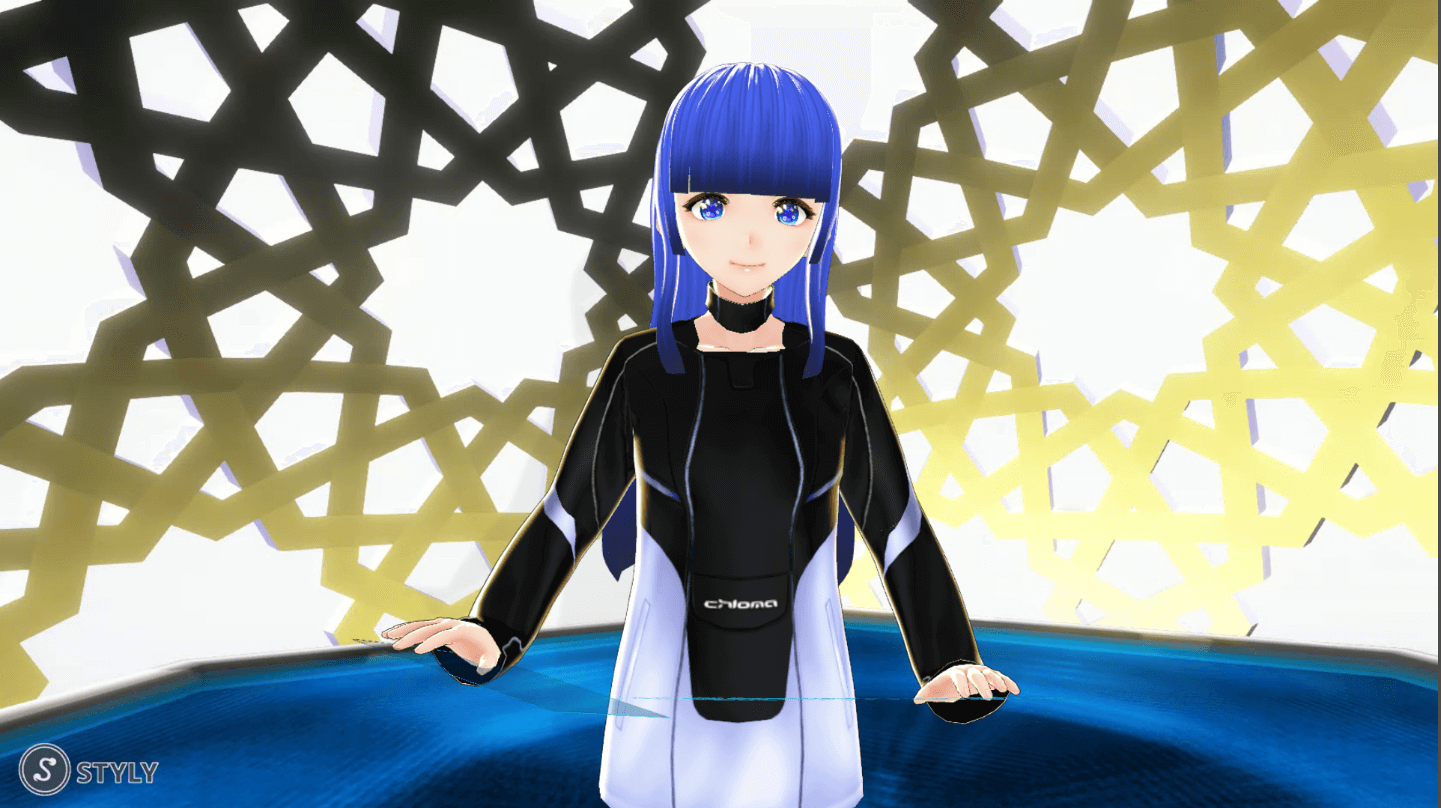
Finished!
Good job!
In this article, I introduced the basic usage of VMagicMirror.
With this, anyone can easily transform into a video distributor or Vtuber, so if you’re interested in Vtuber or VR, please try it out.