In this article, I will show you how to use the “Unity Recorder” Package to save your model’s animation in the Animation Clip format and upload it to STYLY.
Unity Recorder
Normally, we cannot upload script-controlled animations (e.g., advanced physics) to STYLY because C# scripting is not available on STYLY.
However, by using the Unity Recorder to record animations in the Animation Clip format, we can upload script-based animations to STYLY.
Script-based Animation
In addition to the Animation Clip format, mp4 and Gif formats are also supported, so it will make you more comfortable when you record Unity screen.
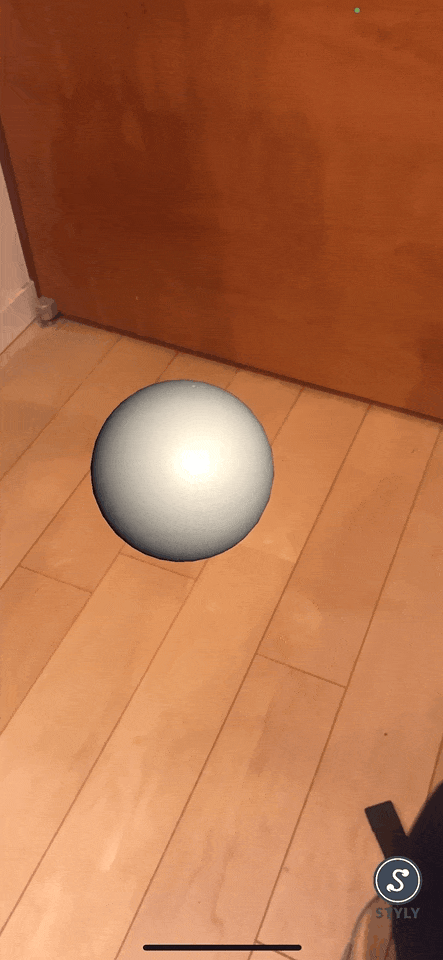
Sample
The following scene shows a sample of an actual animation created with physics assets playing.
Incidentally, this scene was created with using the Ray Fire asset.
It produces very realistic expressions of destruction, so if you are interested, please check it out.
(It is a bit pricey, so I recommend purchasing it while it is on sale.)
From Installation to Start of Use
First, install the Unity Recorder.
Open the Package Manager from Window > Package Manager in the Unity top menu.
Select “All packages” in the upper left corner of the Package Manager and “Show preview packages” in the Advanced section.
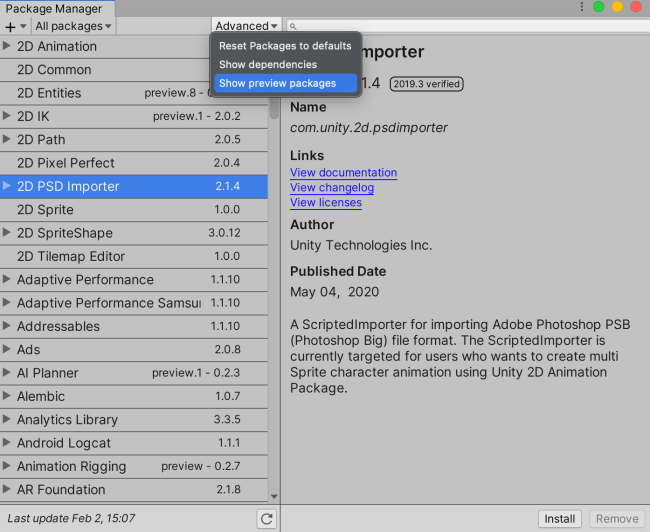
Package Manager
Then search for Unity Recorder in the search field and install it from Install in the lower right corner.
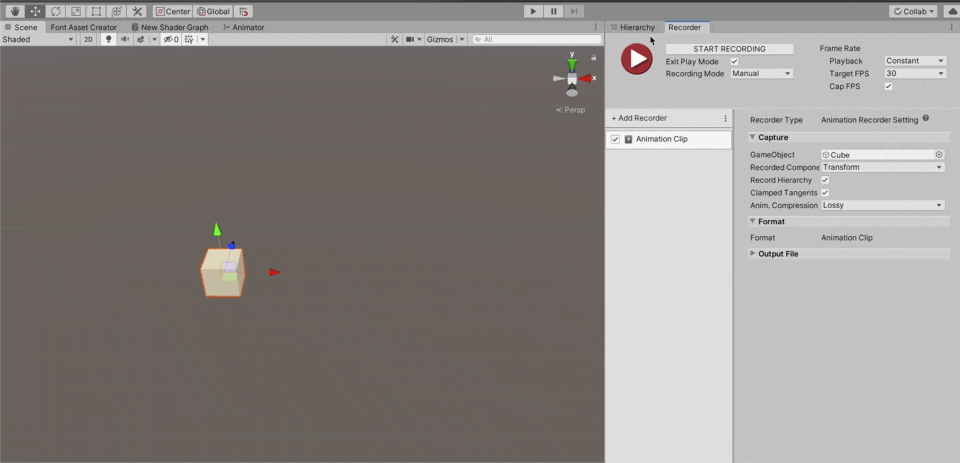
About the Recorder Window
After installation is complete, open the actual window.
Open the Recorder window from Window > General > Recorder > Recorder Window.

Recorder Window
The various setting items are as follows
- Exit PlayMode : Whether editor playback is also stopped when recording is stopped.
- Record Mode : Recording Method
- Manual : Press the button to start recording and press it again to record.
- Single Frame : Record for a specified period of time.
- Frame Interval : Specify start and end frames to record.
- Time Interval(sec) : Specify the start time and end time (in seconds) for recording.
- Play back : Frame rate setting for recording
- Constant : Fixed frame rate
- Target : Fixed frame rate value
- Variable : Set the frame rate variable (same as the game)
- Max : Maximum frame rate value
- Constant : Fixed frame rate
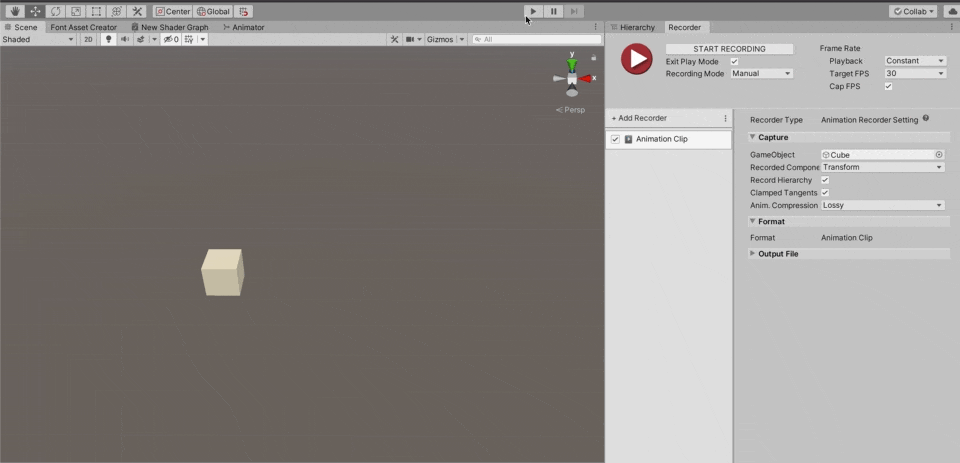
Next, add a Recorder.
Add a Recorder for the Animation Clip from Add Recorder > Animation Clip.
After adding a Recorder, create a GameObject in the scene and set it as a recording target by dragging and dropping it into Capture > GameObject.

AnimationRecorder
The following are the settings for the Animation Clip’s Recorder.
Capture
- GameObject : GameObject to record animation
- Record Hierarchy : Whether or not to record changes in the child objects of the object being recorded.
- Recorded Components : Components to record
- Clamped Tangents : Whether to prevent curve overshoot when animation data is discontinuous
- Anim Compression : Degree of animation compression
- Lossy : Compressed against the whole (smaller in size instead of less accurate)
- Lossless : Compresses only the straight parts of the animation curves (if the curves have many curves, the file size will increase).
- Disabled : No compression
Output File
- File Name : Name of the generated file
- Path : Path where the file will be generated
- Take Number : Number to be used as the file name
Recording Animation
Now, let’s actually record an animation.
First, create a folder in the location specified in Output File. By default, the animation is automatically saved by creating a folder named Recordings directly under Asset.
Set Recording Mode to Manual, Exit Play Mode to On, and click START RECORDING or the red play button.
Unity changes to play mode and you can move the object freely.
After moving the object, exit Play Mode or click the Recording button to stop recording.
Recording Animation
Open the Recordings folder and an animation should be generated.
Apply Animation Clip
Drag and drop the generated animation onto the object to apply it and play it back.
If the object behaves the same as when it was recorded, it is successful.
Playing back the recorded animation
It is also possible to apply the animation to other objects if it is simple, such as saving only the Transform.

It can be applied to other models.
Upload to STYLY
Save the object with the generated animation applied as a prefab and upload it to STYLY.
How to create a STYLY account

How to upload 3D models to STYLY

How to upload from Unity to STYLY

You can use STYLY FORUM to solve the problem. STYLY FORUM is a place where people can discuss a service or technical issue on STYLY, or provide bug reports on STYLY.
https://en.forum.styly.cc/support/discussions
Applied Usage
In this time, we recorded a simple animation, but you can apply this usage to upload script-based animations to STYLY by following the steps below.
- First, animate the model using a script.
- Record the animation with the Unity Recorder.
- Apply the generated Animation Clip to the model, delete the script, and prefabricate it.
- Upload the prefab.
However, if you should note that the following points are taken into account.
- Animations that deform the Mesh itself cannot be applied.
- Recording can be very heavy with a large number of child objects and may not be possible.
Other Uses
Unity Recorder can also record in mp4, Gif, and sequential number formats, which I was unable to introduce here, and can also record only specified portions using timeline.
The Unity Recorder has many useful functions, so I encourage you to take advantage of it.