In How to Build a VR Shooting Game, I’ll show you how to build a VR shooter using Unity and Playmaker, upload it to STYLY, and publish it.
In this article, we’ll show you how to set up your gun controller for the game.
- Advance preparation
- Gun Controller Settings
- Setting up the bullets
- How to generate enemy characters
- Enemy Character Settings
- BGM and SE Settings
- How to upload to STYLY
Part.1-7 continues, so let’s read and make it to the end!

In the previous article, we introduced the setup of Playmaker and the preliminary preparations for importing game materials into Unity.
Controller Settings
Setting of gunController_R
We will set up the controller to recognize the position and rotation required for VR games.
First, we create an empty child object in the Playmaker Tutorial Game and name it “gunController_R”. This will be the right hand gun.
The left hand gun controller will be made at the end of this tutorial.
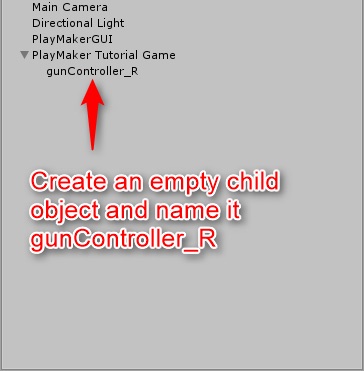
Create gunController_R
Next, with gunController_R selected, right-click in the Playmaker editor and select “Add FSM” to add an FSM to the object.
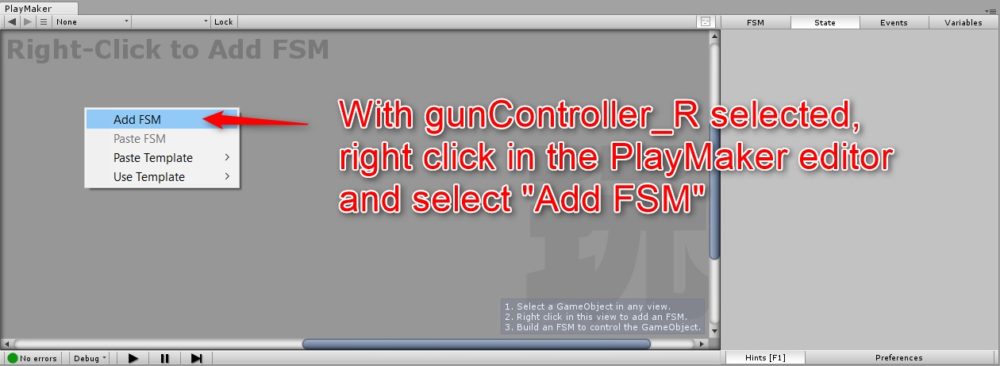
Add an FSM to an object
Right-click again and select “Add State” from the menu to add a state to your game. The name of the state should be “Setup”.
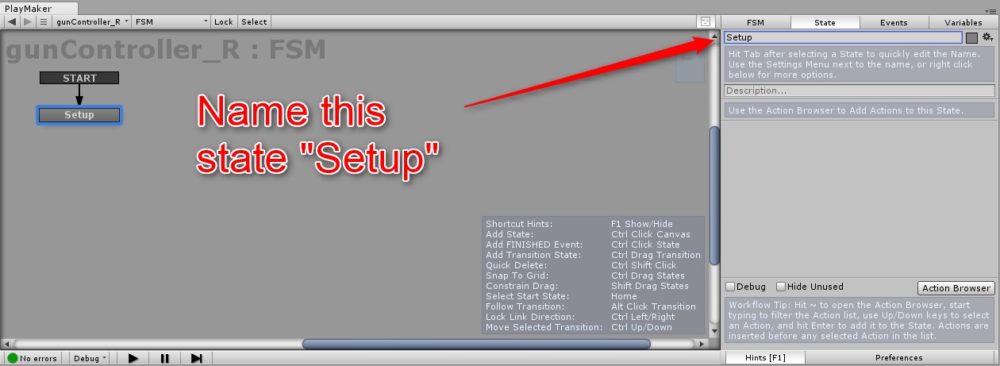
Add a state
This will perform the initial configuration of the gun controller object.
Find Game Object action settings
Go to the Actions window and search for the “Find Game Object” action and click on it to add it to the Setup state.

Added the “Find Game Object” action
Next, enter and search for the “Controller (right)” you want to find in the Object Name, and save it in a new variable called “controller”.

Set the “Find Game Object” action
This action finds the appropriate controller in the scene, stores the variables to be used in this FSM, and executes the specific action there.
Setting the Get Position action
Next, we’ll add a “Get Position” action to the controller variable we just stored and set the object to get the controller’s position in the scene.

Added the “Get Position” action
This will be the right hand controller. This position will be stored in a vector variable called “controllerPosition”.
Setting the Get Rotation action
Next, add an action called “Get Rotation” to get the rotation of the controller.
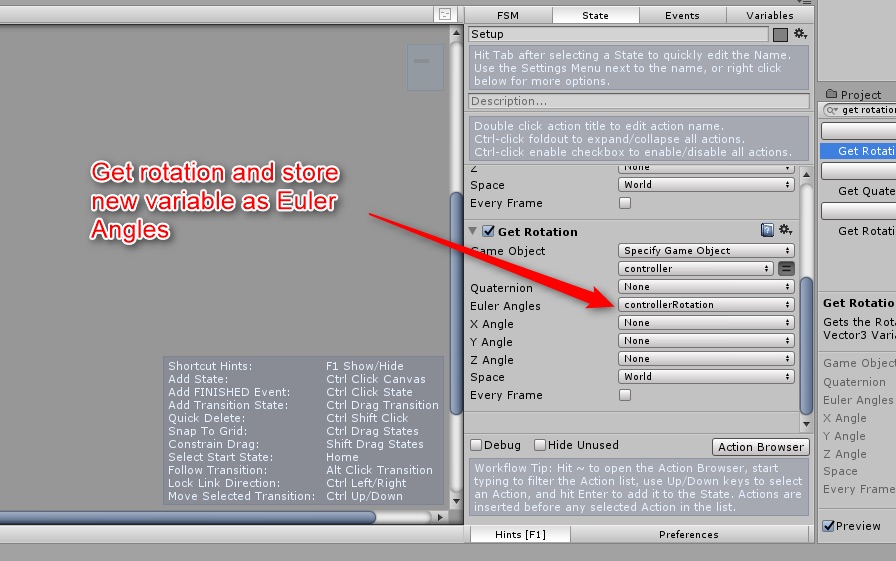
Added the “Get Rotation” action
To store the rotation angles in the x, y and z directions, we will use the “Euler Angles” option and store these angles in a new variable called “controllerRotation”.
Prefabrication of gun objects
Configure the gun object in the downloaded asset and prefabricate it.
Find the “RainbowCrossbow” asset from myUnityAssets > FPL_ISBIT > WeaponsPack > 3D and drag it into the Scene Hierarchy.
This allows you to prefabricate after changing the settings within the Unity Scene Editor.
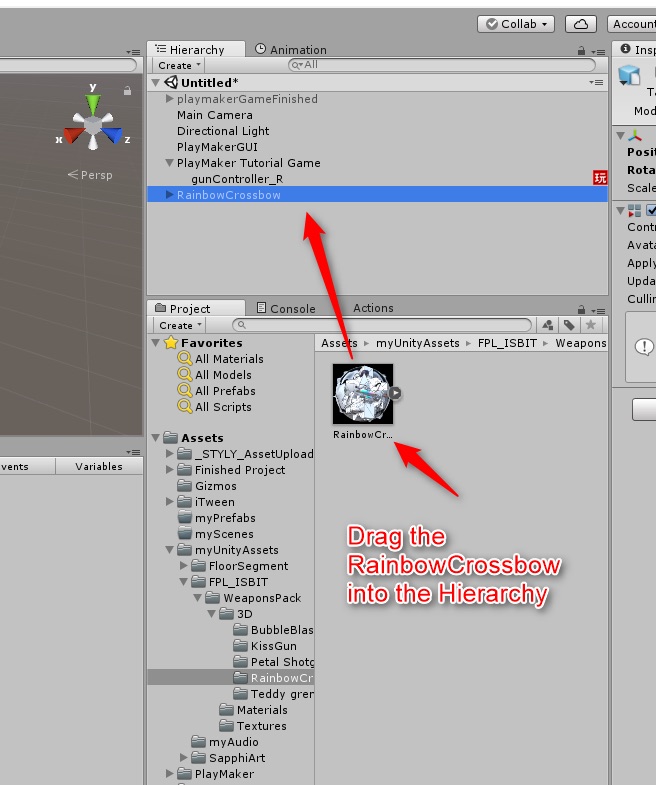
Dragging a gun object
Set Rainbow Crossbow’s Scale to 0.2, 0.2, 0.2, and 0.2 to get the correct size in-game.
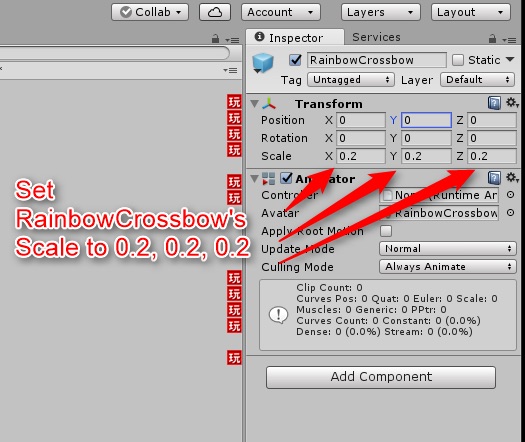
Change Scale
Create a “Sphere” in the child object of RainbowCrossbow.
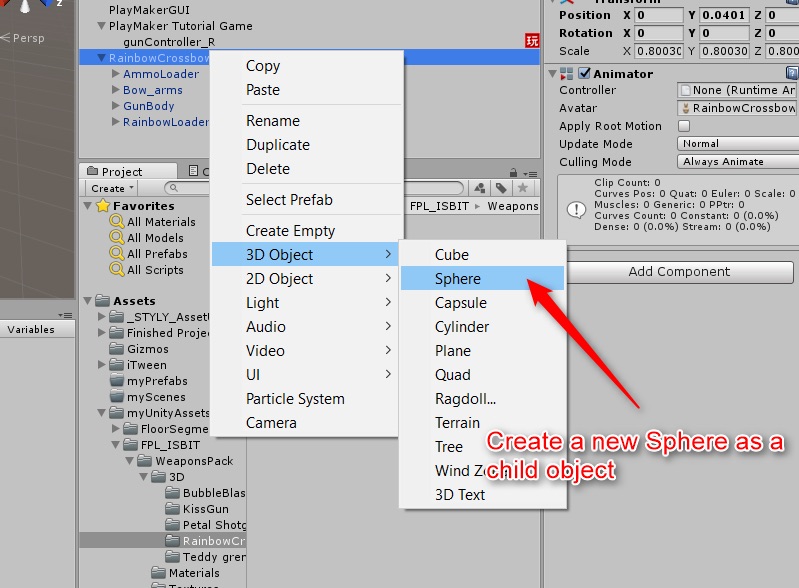
Add Sphere
This can be the source of the bullet.
Move this sphere to the tip of the bow gun and uncheck the box in the inspector to disable the “Mesh Renderer”.
Now you have a bullet source on the end of your gun.
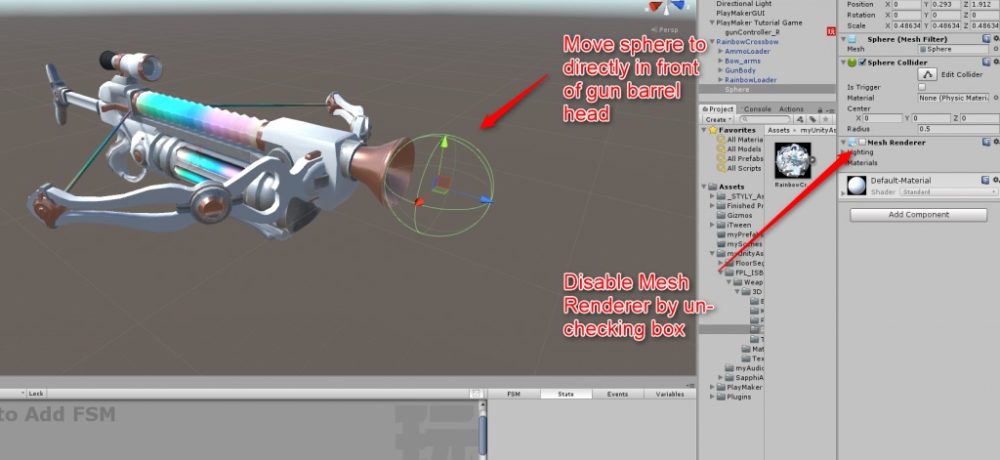
Disable Mesh Renderer
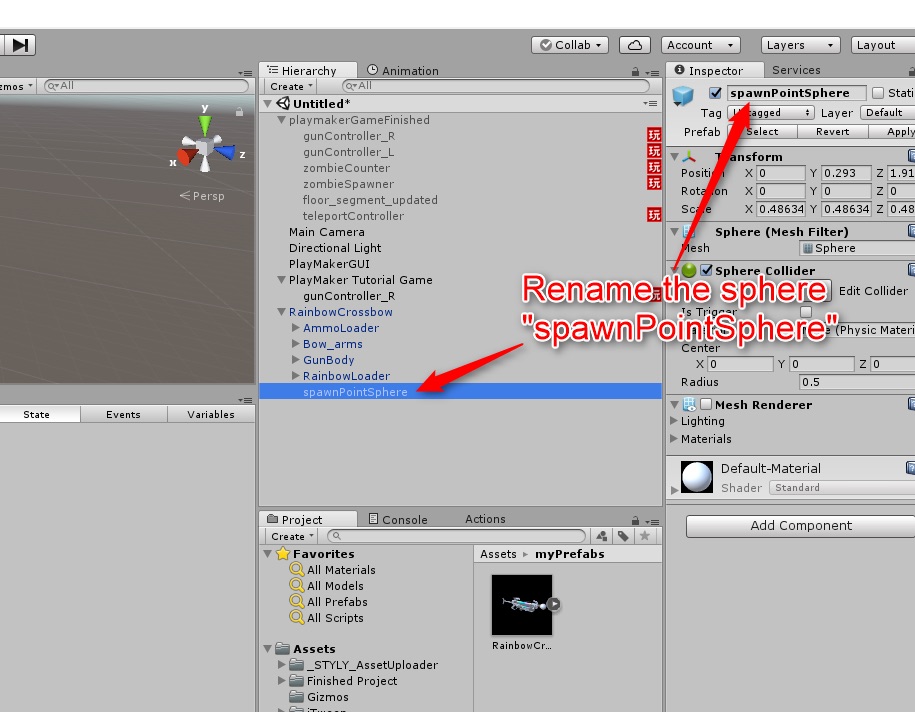
Rename the sphere
Let’s name the sphere spawnPointSphere at the end. It makes it easier to find them in the scene.
Drag the entire RainbowCrossbow object into the myPrefabs folder to make it a single prefab.
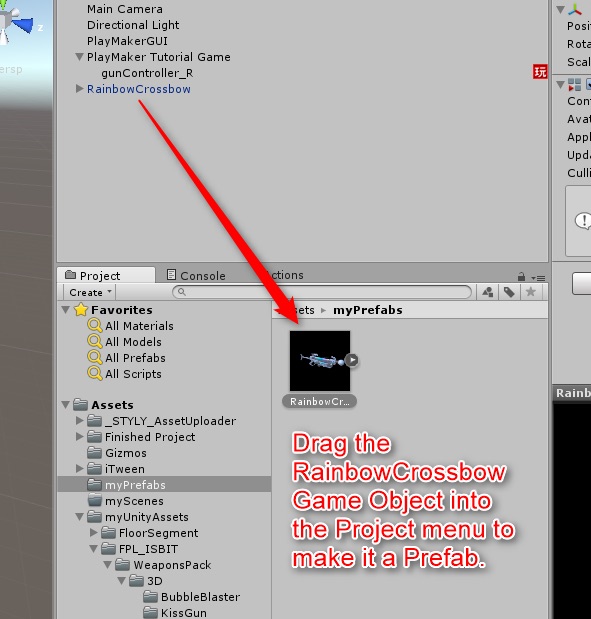
Prefabricating a gun object
Now we have the first prefab to use for this game!
Once prefabricated, you can edit it directly by selecting prefab without returning it to the Scene Hierarchy.
Once the prefab is complete, RainbowCrossbow will be removed from the Scene Hierarchy.
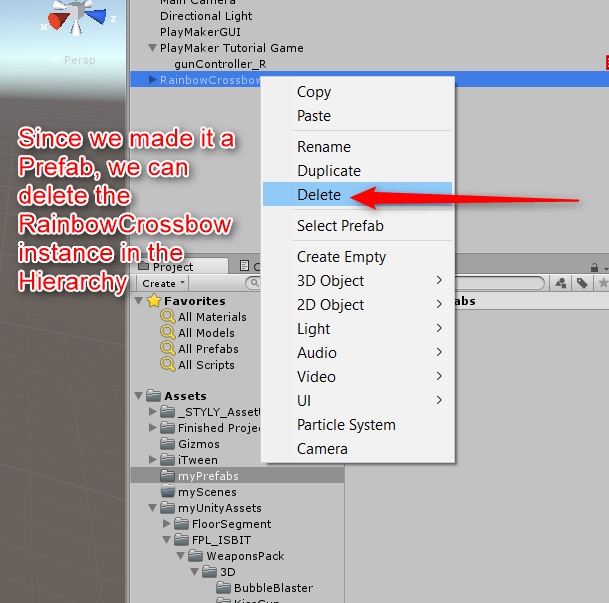
Deleted RainbowCrossbow once
Create a gun controller
Adding the Create Object action
Next, create a gun controller by linking the RainbowCrossbow prefab and gunController_R.
With gunController_R selected, move to its FSM and add the “Create Object” action.
Drag the RainbowCrossbow prefab to the Game Object to set it.
By setting this gun object to controller position and rotation as well, it will face the exact same direction.
This uses the “controllerPosition” and “controllerRotation” variables used in setting up the controller.
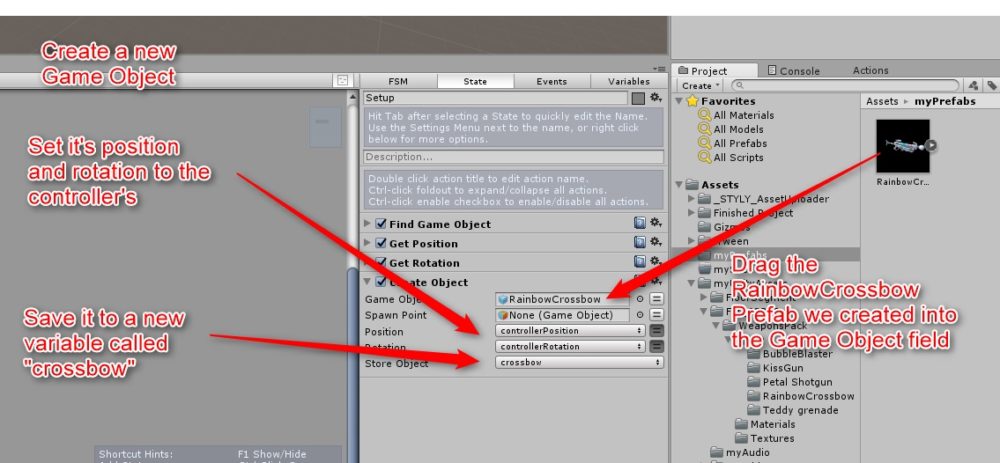
Add the Create Object action
Finally, save this as a new variable called “crossbow”.
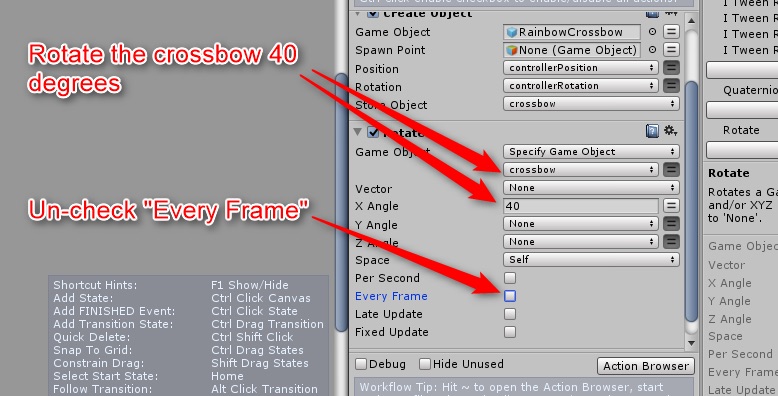
Adding the Rotate action
To hold the VR controller in the form most comfortable for the user to hit a bullet, the RainbowCrossbow was found to be most parallel when rotated 40 degrees on the x-axis.
Therefore, add the “Rotate” action from the Action Browser and set the angle of rotation as shown in the figure.
Uncheck the “Every Frame” checkbox because you don’t want the rotation to happen once.
Unchecking Every Frame
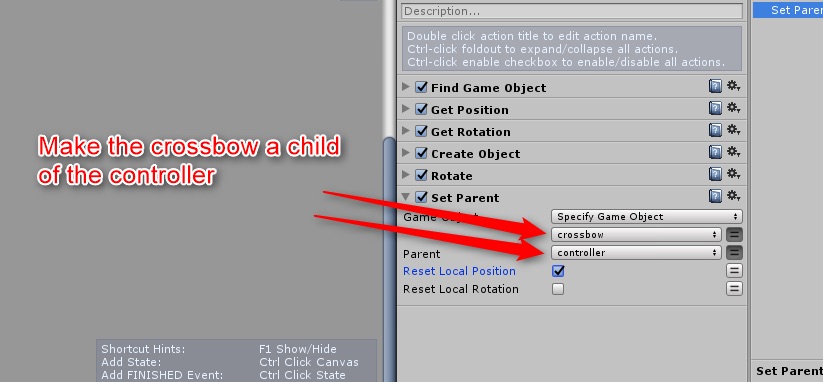
Adding the Set Parent action
Next, create a “Set Parent” action and set the RainbowCrossbow’s parent to be the controller.
Adding a Set Parent
This will cause RainbowCrossbow to move about the controller.
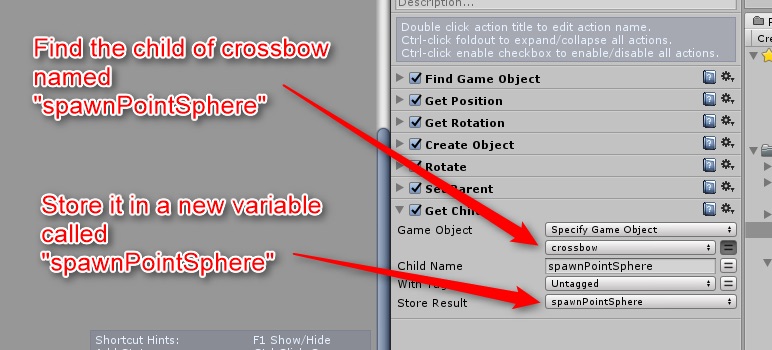
Adding the Get Child action
Add the “Get Child” action to find the child of the RainbowCrossbow object we just created, spawnPointSphere.
Adding the Get Child action
We store this child element in a new variable called “spawnPointSphere” for easy reference later.
FSM settings for the gun controller
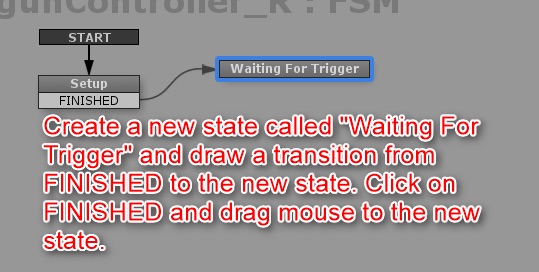
Creating a Waiting for Trigger state
Next, set the FSM of the right hand gun controller.
We create a new state called “Waiting for Trigger” and also create a transition called FINISHED in the Setup state that leads to that state.
Set the FSM for the gun controller
This can be done by right-clicking on the Setup, choosing Add Transition > FINISHED from the menu, and left-clicking and dragging the arrow from FINISHED to the new state.
Creating a global event
The next step is to use the controller’s trigger to set the bullet to fire.
First, we add two global events from the event list, named “Global_TriggerPressDown_R” and “Global_TriggerPressUp_R”.
This name must always be spelled exactly the same and will be linked to STYLY when you upload your game.
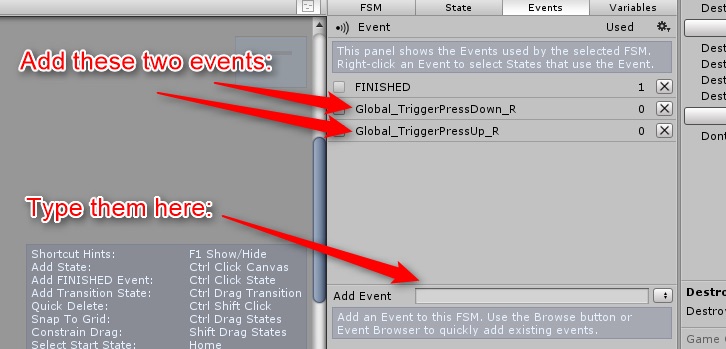
The addition of two global events
Add Global_TriggerPressDown_R as a transition in the Waiting for Trigger state.
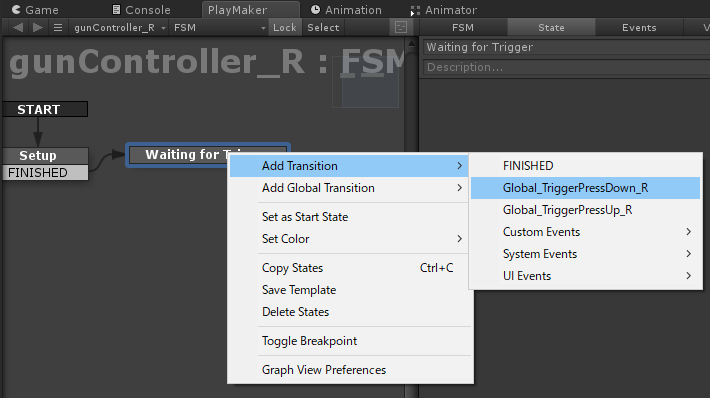
This trigger will be used to hit a bullet when the user presses it.
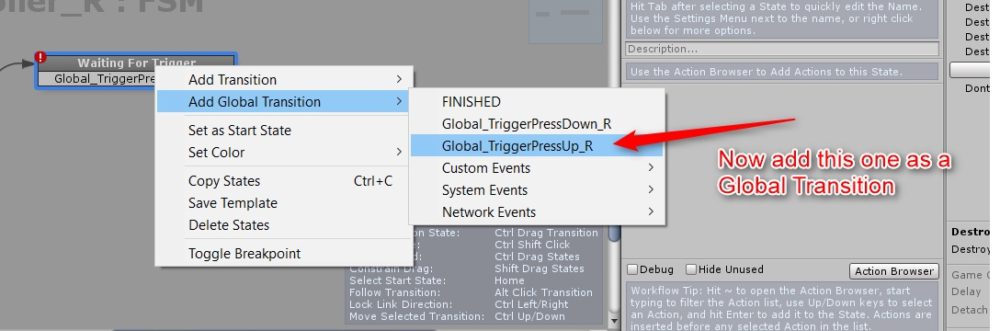
Add Global_TriggerPressUp_R
Add Global_TriggerPressUp_R as a global event from the Add Global Transition menu below.
Adding it as a transition as a global event like this will make the bullets stop hitting when you release the trigger.
Setting Spawning Bullet State
Next, we create a new state called “Spawning Bullet” and connect it to Waiting for Trigger through the Global_TriggerPressDown_R transition.
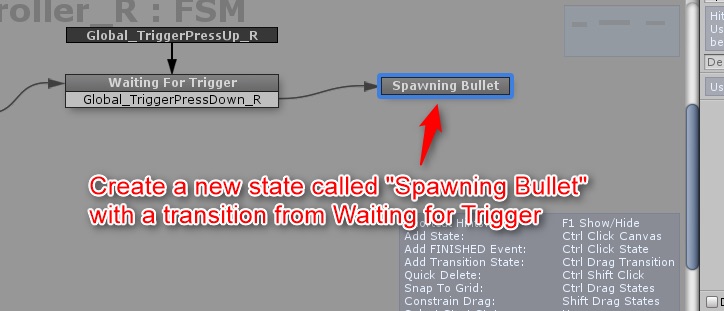
Add Spawning Bullet state
The first thing you need to do in the Spawning Bullet state is to get the rotation of the spawnPointSphere and point the bullet in the same direction as the axis of the spawn point sphere.
This is essential to know the exact direction of the force required to cause this movement when striking a bullet directly from a gun.
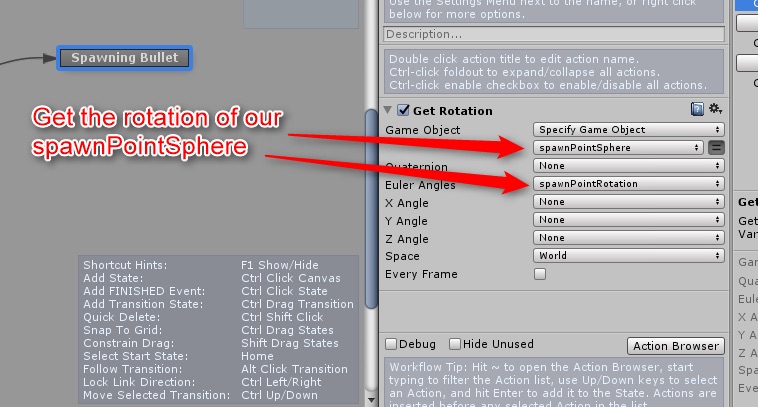
Added the GetRotation action
This can be done by adding the “GetRotation” action from the Action Browser and filling in the fields shown in the following figure.
Next, we need a “Create Object” action that actually produces a bullet.
Set the spawnPointSphere and rotation to spawnPointRotation, which is the source of the bullet.
This rotation is a rotation of the source obtained with the previously added action.
For now, I’ll leave the Game Object field blank since the bullet prefab hasn’t been made yet, but I’ll come back to fill it in the next article.
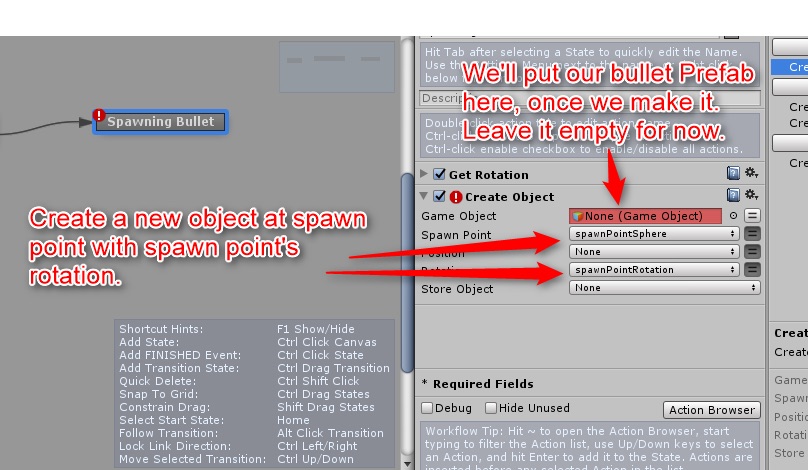
Adding a Create Object action
Playmaker puts a red warning mark on the state to let you know about incomplete actions. It will be easier to find later.
Add waiting time
When the Spawning Bullet is over, make time to wait before hitting the next bullet.
For this, it is better to create a separate Waiting state with a wait action.
We can create a state like the one shown in the following figure and have it return to the Spawning Bullet state at the end
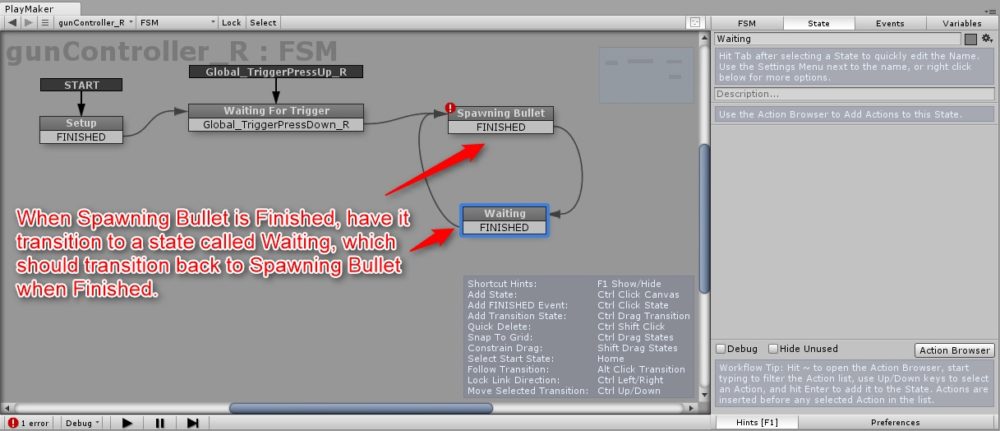
Creating a Waiting State
Make sure that the Spawning Bullet state also leads to the Waiting state when it ends.
Add a “Wait” action in the Waiting state to make it wait 0.2 seconds.
Under the Wait action menu, place the finish event in FINISHED and check the “Real Time” checkbox.
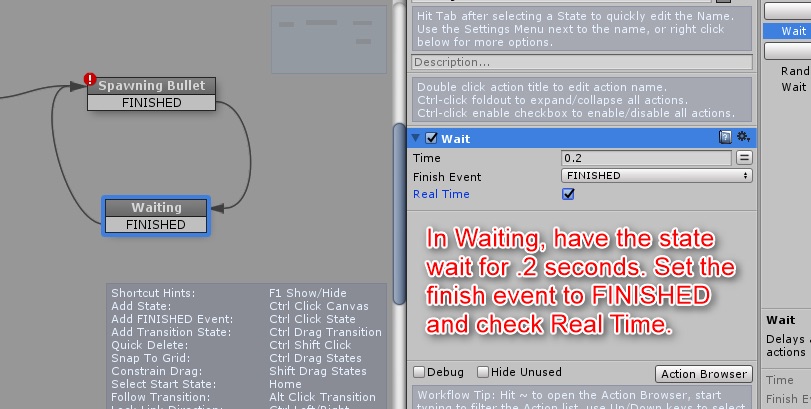
Set the waiting time
This puts 0.2 seconds of real-world latency between each bullet.
You are now set up with the gun controller. In the next article, we’ll look at setting up the bullet.
Sample Scene
You can try out the sample game in the STYLY GALLERY.