In ZBrush, we add the details to the low-poly mesh modelled on Maya in the previous article.
To make the normal map and etc., we make a high-poly mesh here.
Depends on the subject, making a high-poly model on ZBrush from the beginning is sometimes easier. But, in this case, I found it easier to make a base shape by a DCC tool such as Maya and etc., and then send it to ZBrush.
Import the data in ZBrush
Unfold the UV mesh of the model in Maya.
Export it as an obj file.
Import the obj file in ZBrush.

Tydy up the topology by ‘ZRemesher’
To add the details, we want to use ‘Divide’ to make a high-poly mesh. But, the current topology won’t work well as the vertices are concentrated at the centre.
Not to mess up the mesh when adding the details, tidy up the topology beforehand.
There is a useful tool called ‘ZRemesher’ in ZBrush. So let’s use it.
Although it allows you to set the polygon count and control the topology flow in a finer manner, use ZRemesh with the default settings as it doesn’t really matter this time.
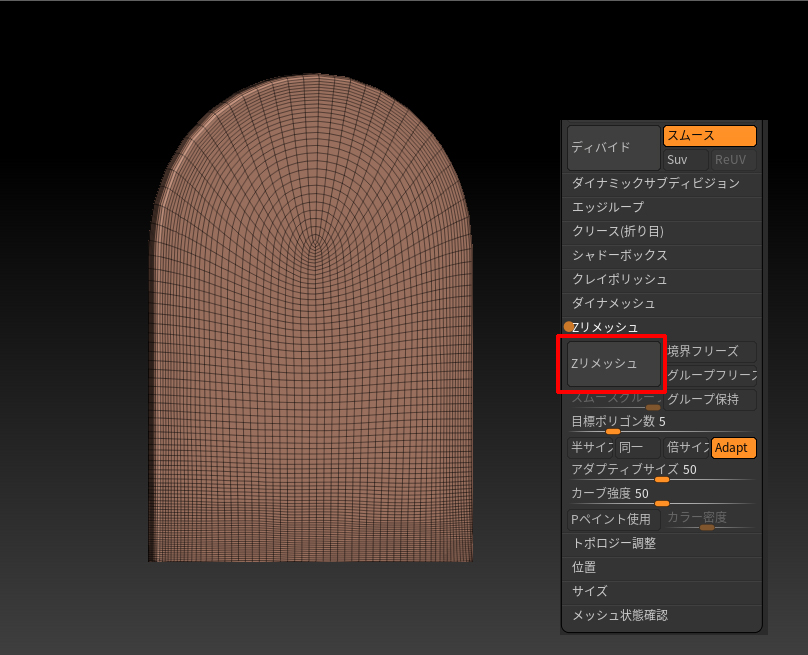
Now you got a clean topology.
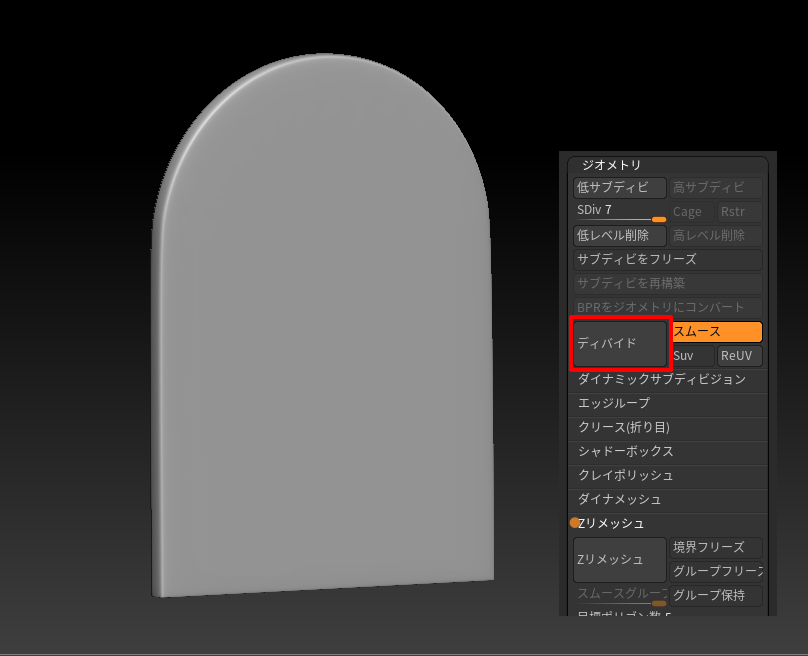
Apply ‘Divide’ to make the mesh finer
To add the finer details, apply ‘Divide’ to increase the polygon count more and more.
Said that, stop it at a certain point and start Sculpting to check if the density of the mesh is relevant. Otherwise, it terribly slows down the following task.
Sculpting
Sculpt this high-poly object.
Firstly, smooth the edges to make the shape look like an aged stone.
I sculpted the edges with the ‘TrimDynamic’ brush.

Sculpting in a rough manner gives a good taste rather than doing it in a fine and ‘polite’ manner.
Sculpt by Alpha image
You can carve a pattern on the surface by using a greyscale image.
This time, I converted the logo of STYLY into a greyscale image and used it in ZBrush.
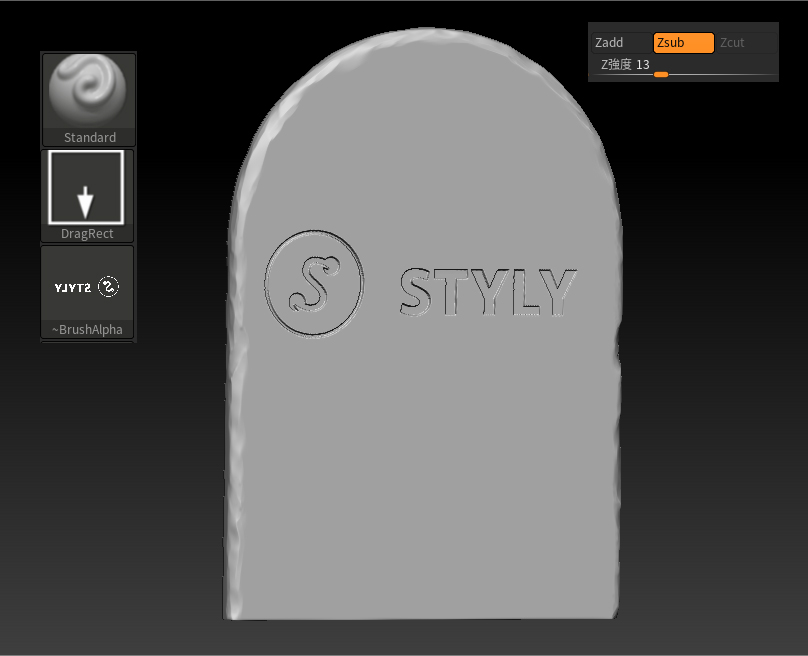
It’s difficult to make a precise shape by manual sculpting, but you can make a neat carving easily by using the image created by Photoshop and etc.
In this article, I explained the workflow to import the object created in Maya to ZBrush and ‘sculpt’ it to add realistic details.
There are tasks suitable for Maya, and similarly, Zbrush deals with some other tasks better. Taking it into consideration, sort the tasks for those two platforms to improve your working efficiency.
In the next article, I will show how to add various details more.