This article explains how to use one of Unity’s components, “Cloth”, to represent the mesh of a 3D model as cloth.
We will start with how to use the component and explain the basic usage.
Let’s understand the physical representation and apply it to our VR creation!
Creating a Cloth Simulation Sample
Sample
This is a simulation of a Plane with a Cloth component attached colliding with a Sphere.
Let’s see what we can create.
Preparation
Let’s start a Unity project and create a new scene.
In this scene, we will create a Plane to which we will attach the Cloth component and a Sphere that will collide with it.
Right click on the Hierarchy window and select 3DModel > Plane and Sphere to create them.
The Transform of Plane is as follows.
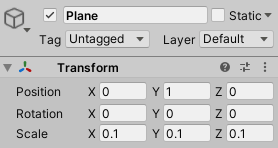
Plane Transform
The Sphere Transform should look like this
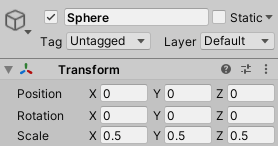
Sphere Transform
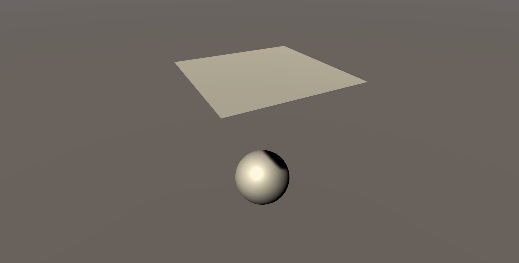
The scene window should look like the following.
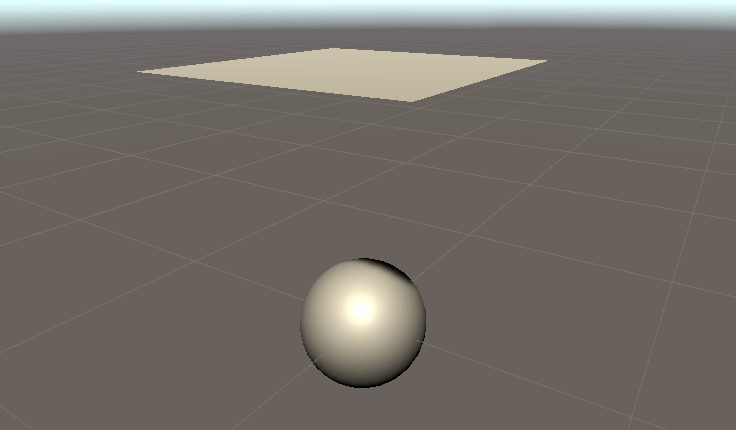
Scene Window
Now we are ready.
Cloth Component
Let’s add a Cloth component to the Plane.
With the Plane selected, select “Cloth” from “Add Component” in the Inspector window to add it.
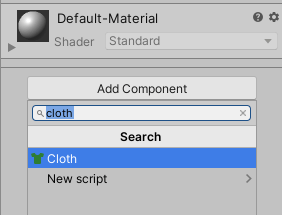
Select Cloth
Now we have added the Cloth component.
Looking at the component, you can adjust various properties.
Properties
Each property and function of the Cloth component is shown below.
| Properties | Function |
| Stretching Stiffness | Sets the stretch rate of the cloth. |
| Bending Stiffness | Sets the bending stiffness of the cloth. |
| Use Tethers | Applies a restriction that prevents moving cross particles from moving too far away from fixed particles. |
| Use Gravity | Applies a gravitational acceleration to the cross. |
| Damping | Sets the damping factor for the motion. |
| External Acceleration | Sets a constant external acceleration to the cross. |
| Random Acceleration | Sets the acceleration to be applied randomly to the cross. |
| World Velocity Scale | Sets how much the character’s movement in world space will affect the cross vertices. |
| World Acceleration Scale | Sets how much the character’s acceleration in world space will affect the cross vertices. |
| Friction | Sets the coefficient of friction of the cross when it collides with the character. |
| Collision Mass Scale | Sets how much the density of the colliding particles will be increased. |
| Use Continuous Collision | Allows you to enable continuous collision to improve collision stability. |
| Use Virtual Particles | Adds one virtual particle per triangle to improve collision stability. |
| Solver Frequency | Sets the number of solver iterations per second. |
| Sleep Threshold | Sets the cross sleep threshold. |
| Capsule Colliders | Sets the array of capsule colliders that the cross instance will collide with. |
| Sphere Colliders | Sets the array of sphere colliders that the cross instance will collide with. |
Properties: Taken from the Unity manual “Cloth”.
https://docs.unity3d.com/ja/2019.3/Manual/class-Cloth.html
The detailed settings for each item will be adjusted when representing clothing and other items.
We will omit them this time since we are just trying to learn the basic usage.
Colliding a Plane with a Sphere
Let’s try to collide a Plane and a Sphere as a basic usage.
The Cloth component will activate Gravity even without attaching a Rigidbody.
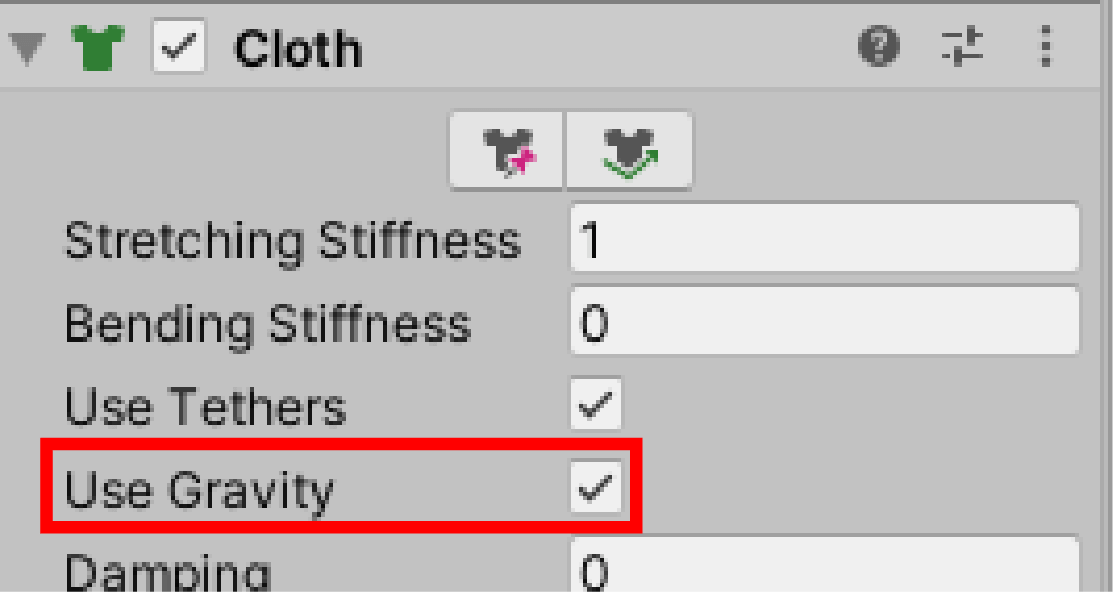
Use Gravity is ON
Let’s play the scene in this state.
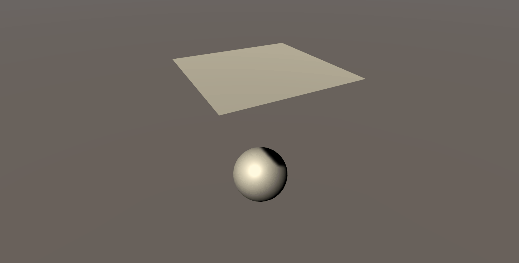
During playback
The Plane and the Sphere do not collide with each other, but pass through each other when played in this state.
Set the properties of the Cloth component to make them collide.
Sphere Colliders
A typical way to make a 3D model with a Cloth component attached collide with another 3D model is to use the Sphere Colliders of the Cloth component. Here is an explanation.
With the Plane selected, check the Cloth component in the Inspector window.
You can set the property “Sphere Colliders” to collide.
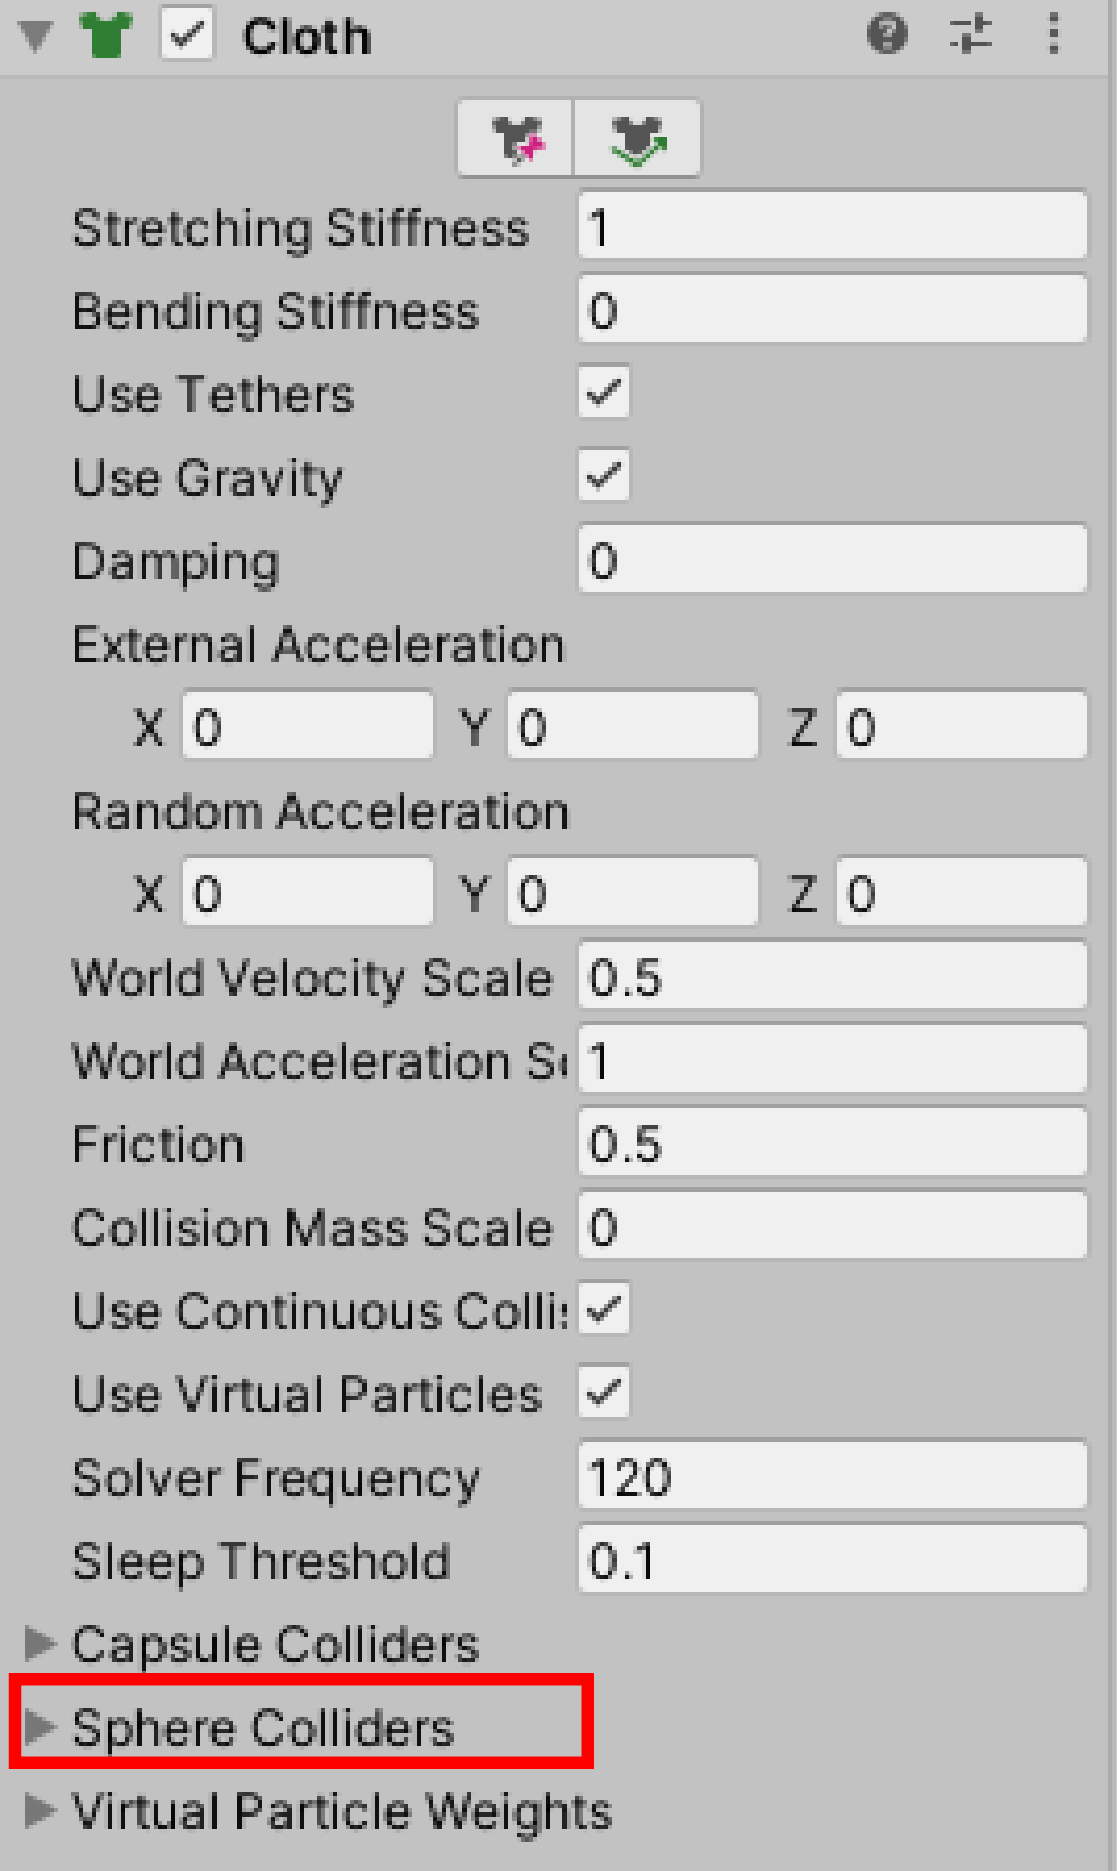
Sphere Colliders
Click on the left ▶ to display the menu.
When the menu appears, a property labeled “Size” will appear.
The value of “Size” is the number of Colliders that will be used to set the hit detection for the Cloth component.
Currently, it is set to “0”, which means that the number of colliders that will be set to collide is zero (because the Sphere is not set to collide), so no collision will occur.
Set the Sphere Colliders to the Spheres in the scene.
Set the Size value of the Sphere Colliders to 1.
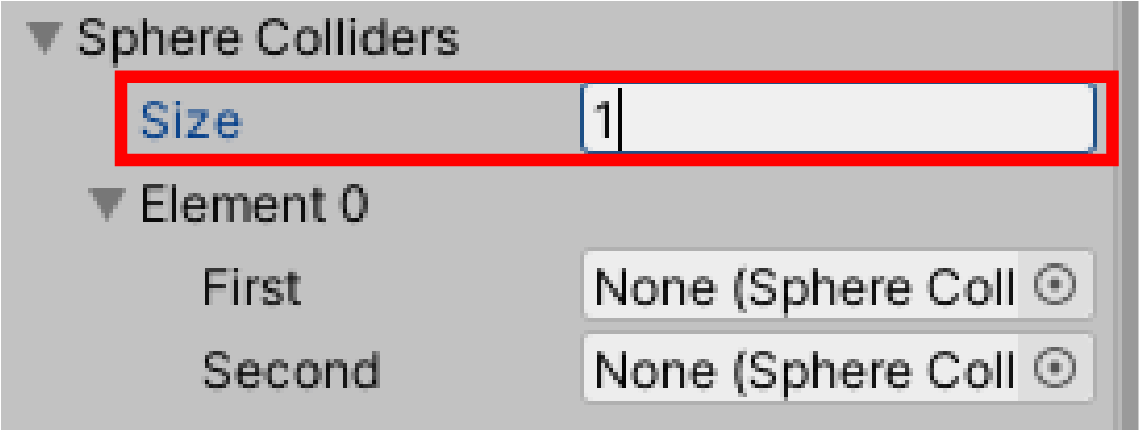
Set Size to 1
You will now see a new property called “Element 0”.
There are First and Second properties, but we will only use First.
Drag and drop the Sphere in the Hierarchy window to the empty space in the First property.
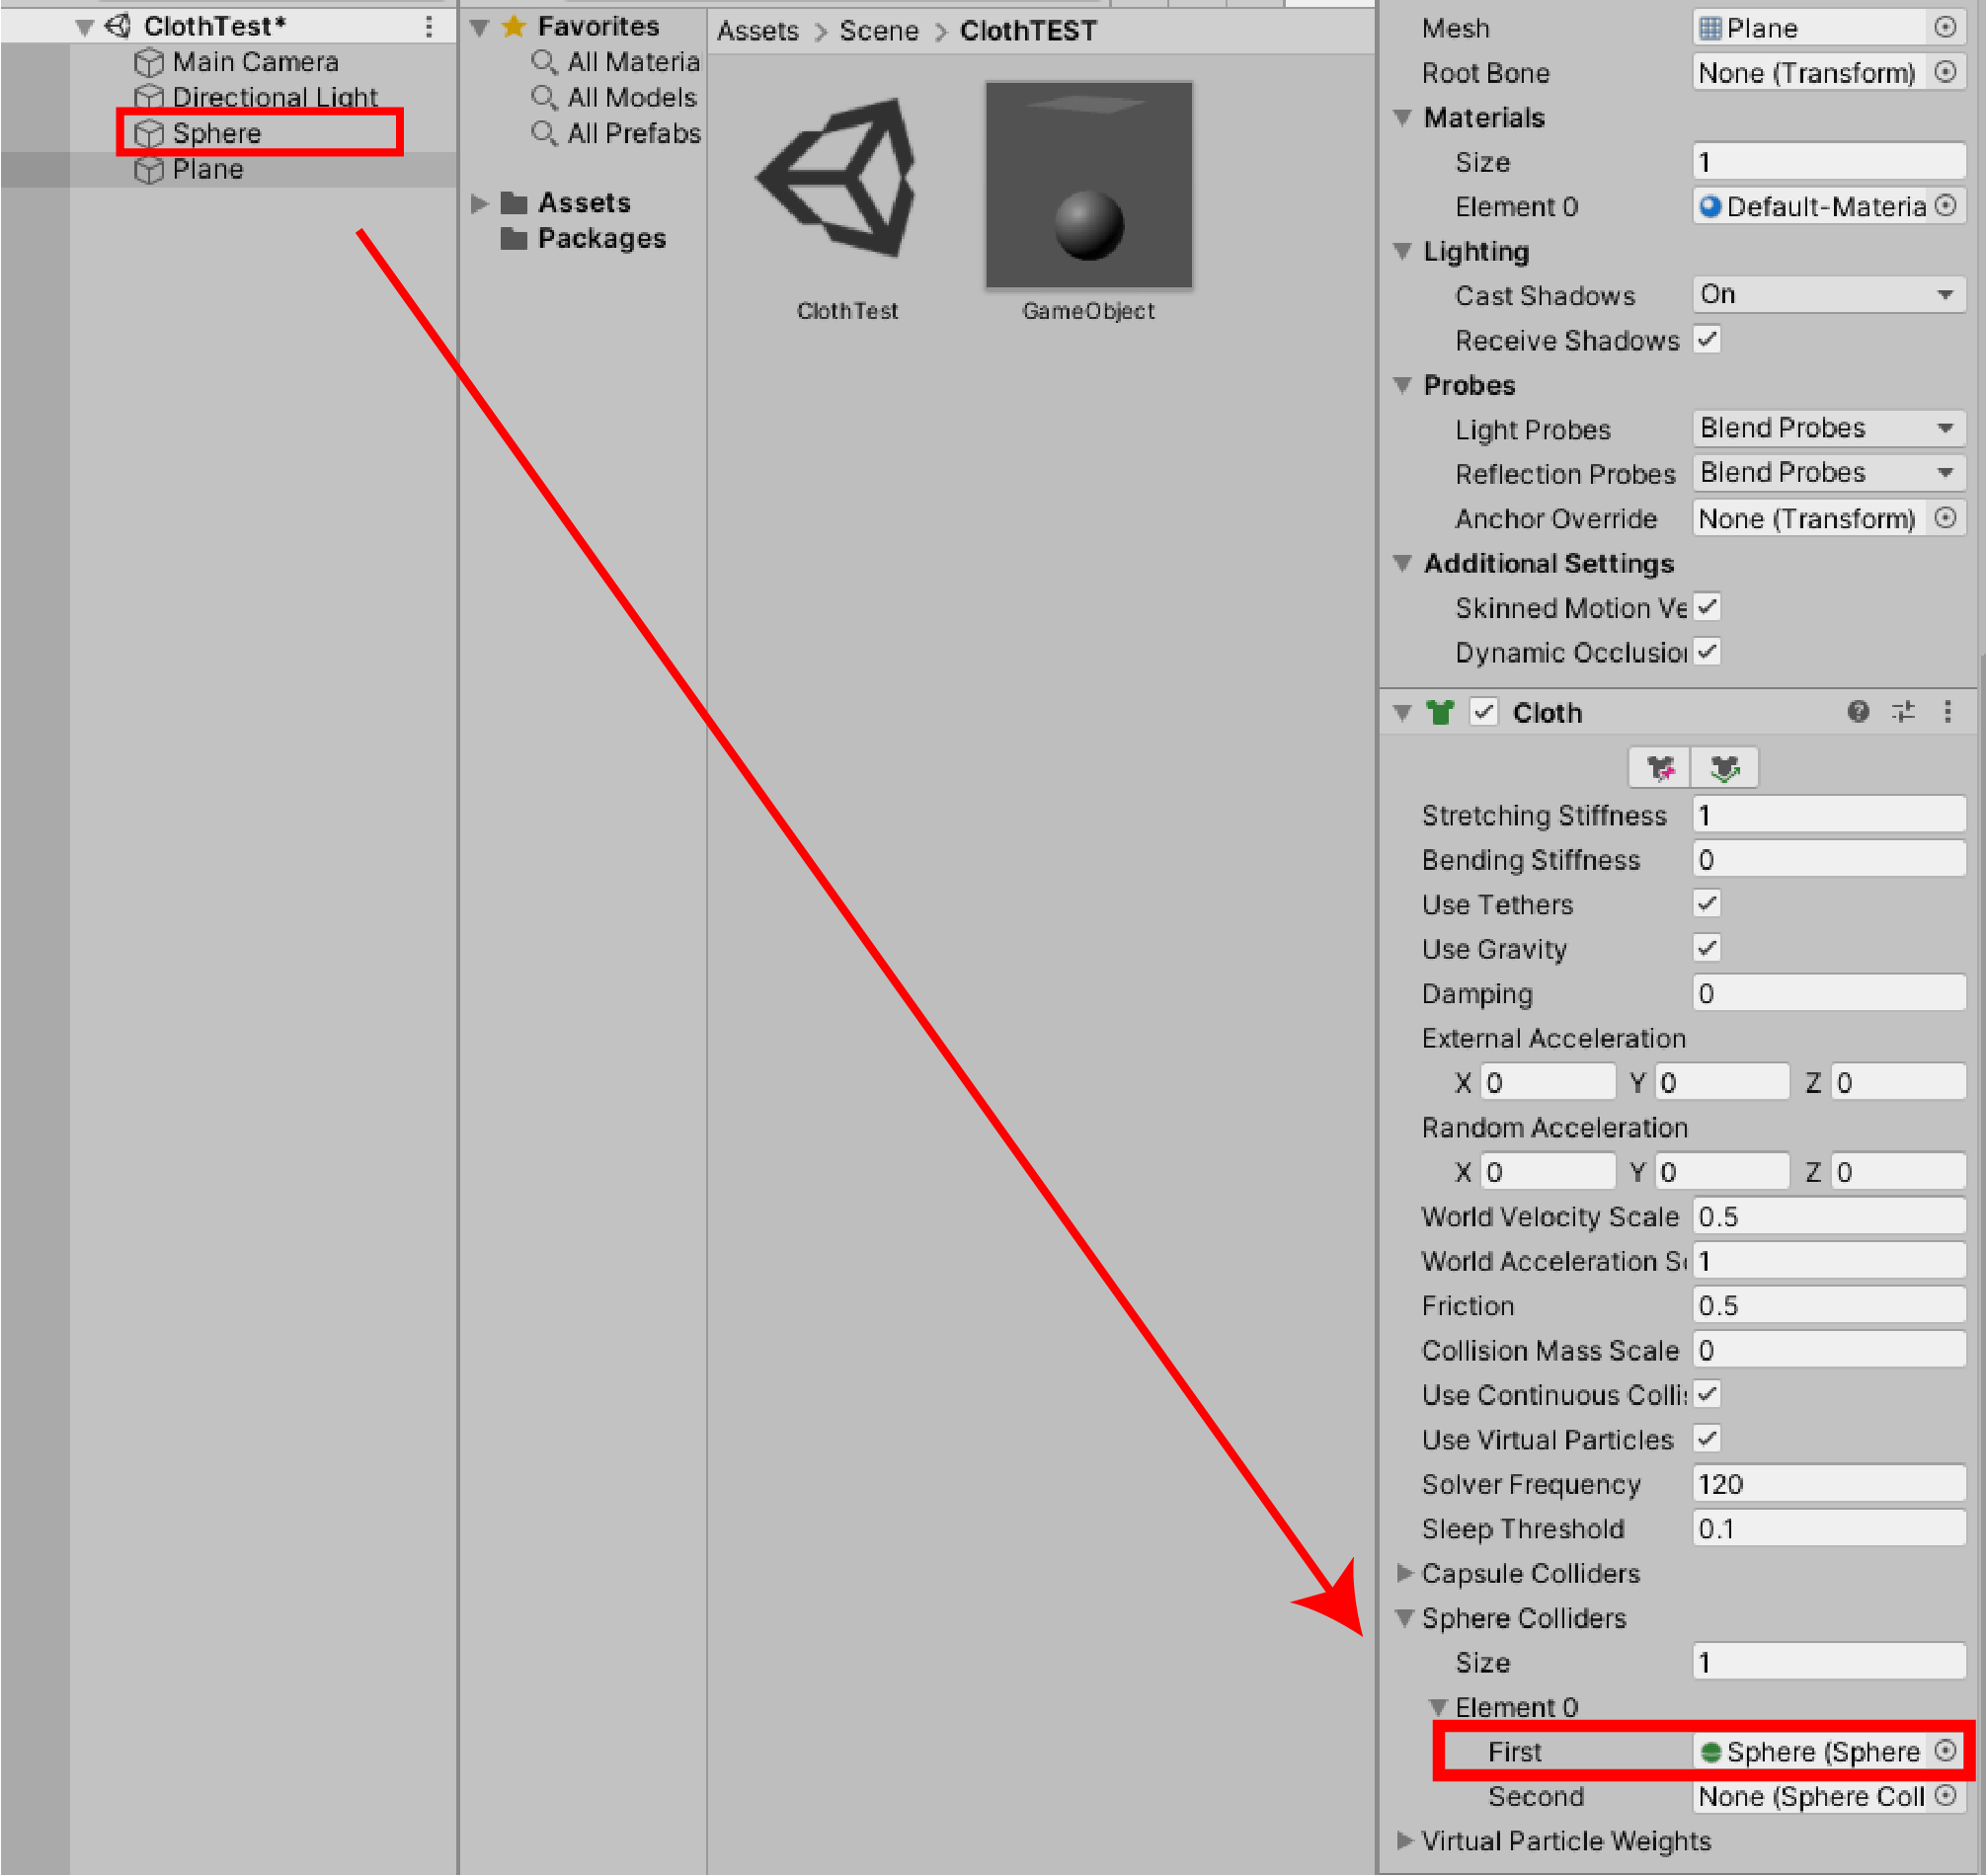
Setting the Sphere
The Sphere in the scene is now set to be a hit point for the Plane (Cloth).
Let’s try playing the scene.
Cloth collision
The Sphere actually collided with the Cloth, and the Cloth-like movement was expressed.
If you want to create another Sphere and collide it, set the Sphere Colliders of the Cloth component in the same way again.
In addition, “Capsule Colliders” on the properties can be used to set the collision detection for the Capsule Collider in the same way.
Use Capsule Colliders when you want to set the hit detection for people, etc.
Uploading to STYLY
Let’s apply these cloth expressions to create various artworks!
By pursuing the cloth expression, you can simulate real objects such as clothes, flags, etc.
In this article, we’ve only covered the basic usage, but in another article, we’ll be able to create clothes, flags, and more!
Finally, let’s upload the file to STYLY. Finally, let’s upload to STYLY.
This time, let’s upload it as a prefabricated Game Object. When uploading as a prefabricated Game Object, make the Sphere and Plane empty Game Objects, then prefabricate the Game Object and upload it.

Putting together a Game Object

How to create a STYLY account

Introduction to NEWVIEW SCHOOL ONLINE
NEWVIEW SCHOOL ONLINE is now open! Learn the basics of Unity and PlayMaker, necessary for creating VR/AR content, and learn the process (and creation techniques) for developing attractive content available on STYLY.
- Create VR/AR content without writing any programming code.
- Professionally supervised Unity courses available.
- Explore additional elements, such as photogrammetric production methods and content lightening.
- Learn the concept of creating VR/AR content.
