In this article, we will discuss the basic lighting settings for scenes created in Unity.
By setting the ambient light appropriately, you can create the impression you want to give. In this article, we will basically explain what you can do using the settings in the Lighting window + alpha. This is recommended when creating a scene that assumes a natural environment.
Sample
This is a sample that reflects the content explained in this article.
In STYLY STUDIO, you can create a STYLY scene by uploading a prefab or scene from Unity. by uploading the entire scene from Unity, you can use the lighting of the entire scene as a STYLY scene, allowing you to create a production that is more in line with your intentions. Create an object.
Create an object
To see how the scene will look, we will prepare a simple object.
If you already have an object that you want to upload to STYLY, you can skip this paragraph.
Create a 3D object
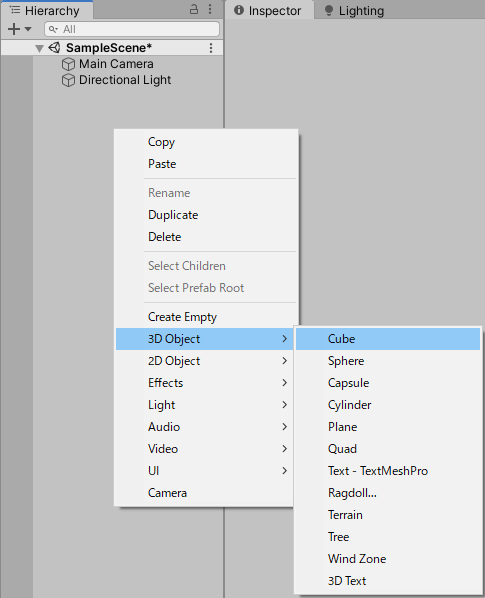
Right click on the Hierarchy window and select 3D Object to create a Plane and a Cube.
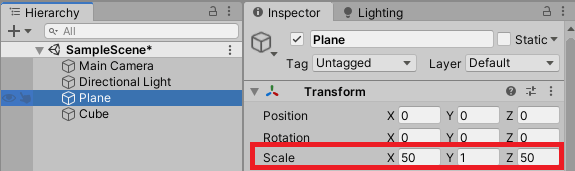
Set the Scale of the Plane
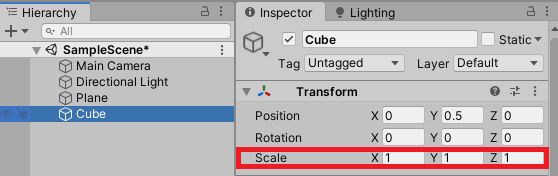
Setting the Scale of a Cube
We will create a simple cube placed on a wide horizon.
Creating a Material
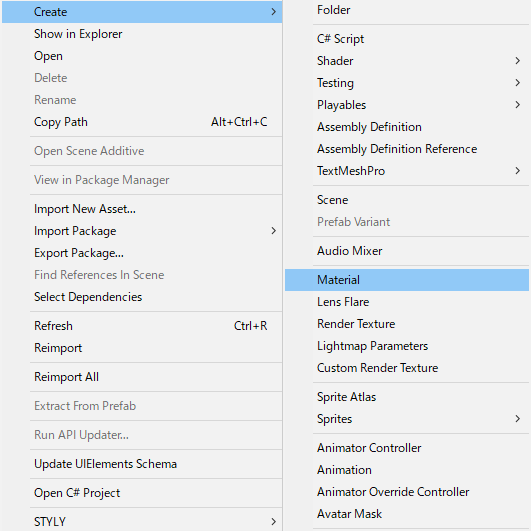
We will also create a material to check the reflective settings later on. Right-click on the project > Create > Material.
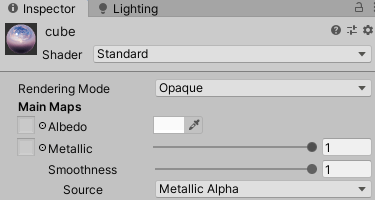
Set up the material
Set Metalic to 1 and Smoothness to 1. Rename the material for clarity. Since we will be applying it to a cube, we will use cube.
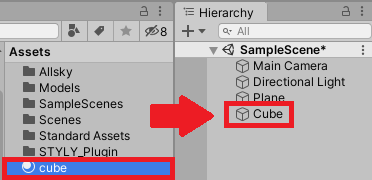
Applying the created material to the cube
Drag the material you created onto the object you want to apply it to (the Cube). This will allow us to set reflections only on the cube later.
Setting up the Skybox
There are several Skyboxes available in STYLY STUDIO, but in Unity, you can choose from a wide variety of Skyboxes.

A variety of Skyboxes
Changing the Skybox can change the overall atmosphere of the scene, and can also be used as a source of lighting.
How to set up a Skybox
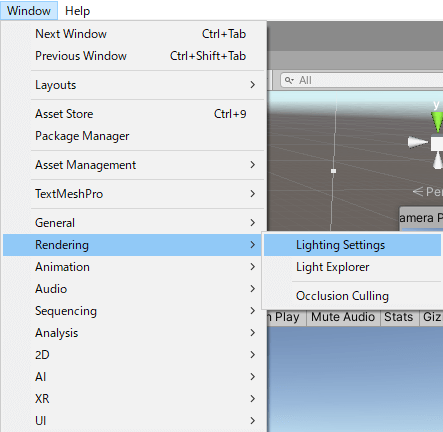
Display the Lighting window
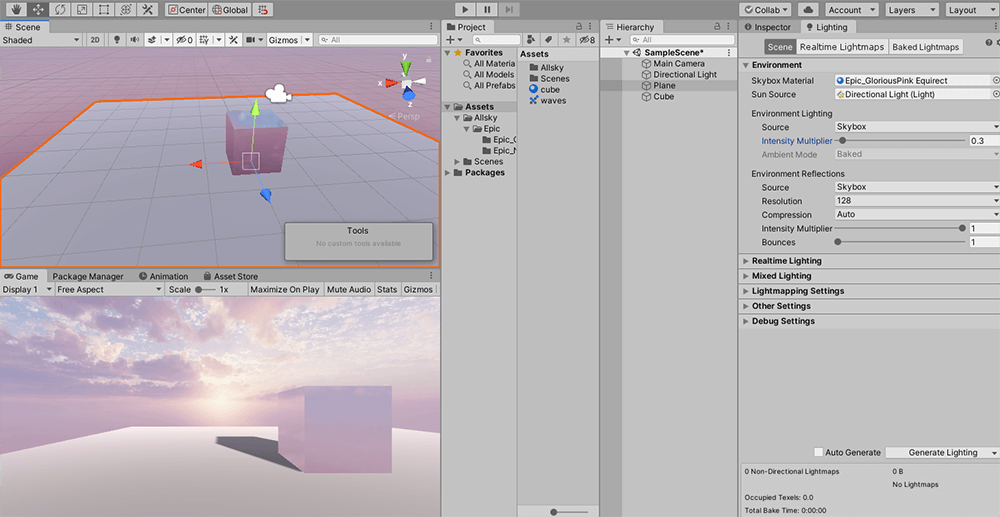
Skyboxes can be configured in the Lighting window, which can be found by selecting Window > Rendering > Lighting from the navigation bar if the Lighting window is not already on the screen. You can place the window anywhere you like, but it is easier to use if it is next to the Inspector window.
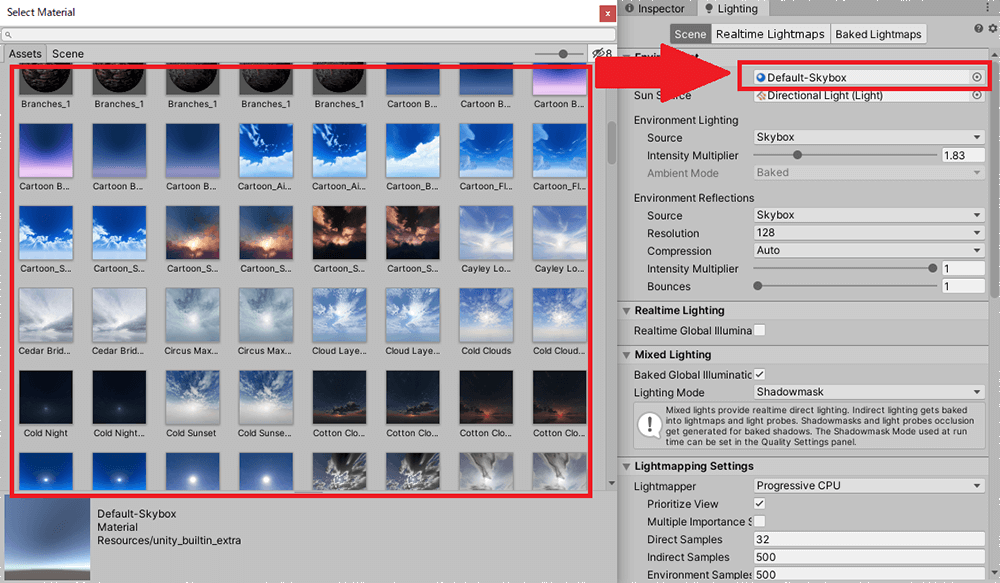
Setting up the Skybox
You can set up any Skybox by dragging it to the Skybox Material under Environment.
Skyboxes can be obtained from the asset store or you can create your own, but it is recommended to look for them in the asset store first. Some are free, but “All Sky” is a convenient package of 200 high quality Skyboxes for $10.
Please read this article for an explanation of All Sky, if you want to use it.
![Recommendation of Unity Assets you can use in STYLY [AllSky] Sky](https://styly.cc/wp-content/uploads/2018/11/cf0d44c8-6afb-4ed8-94f3-6baeb6912c67_scaled.jpg)
All Skyboxes in All Sky are available in two versions, one with the name as it is and the other with “Equirect” after the name. In this article, I will use “Epic_GloriousPink Equirect” from All Sky, but you can use any one you like. You can check it out by simply dragging it around, so try different ones to find the right Skybox for you.
(Note that All Sky is a heavy asset, so if you know which Skybox you want to use in advance, it is recommended to import only that one.)
Lighting settings for ambient light
Let’s proceed with the lighting settings related to ambient light.
Setting up ambient light in Lighting
In addition to the Skybox, the Lighting window allows you to set the lighting settings for your scene.
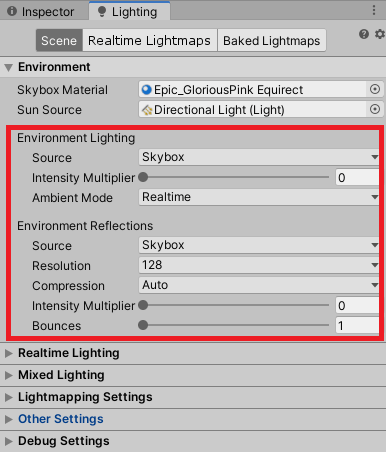
First, let’s take a look at Environment Lighting and Environment Reflections, which are used to set the ambient light settings.
Environment Lighting
These settings are the source of the lighting for the entire scene. Select the source light in Source, and set how bright it should be in Intensity Multipiler.
You can select from three types of Source: Skybox, Gradient, and Color.
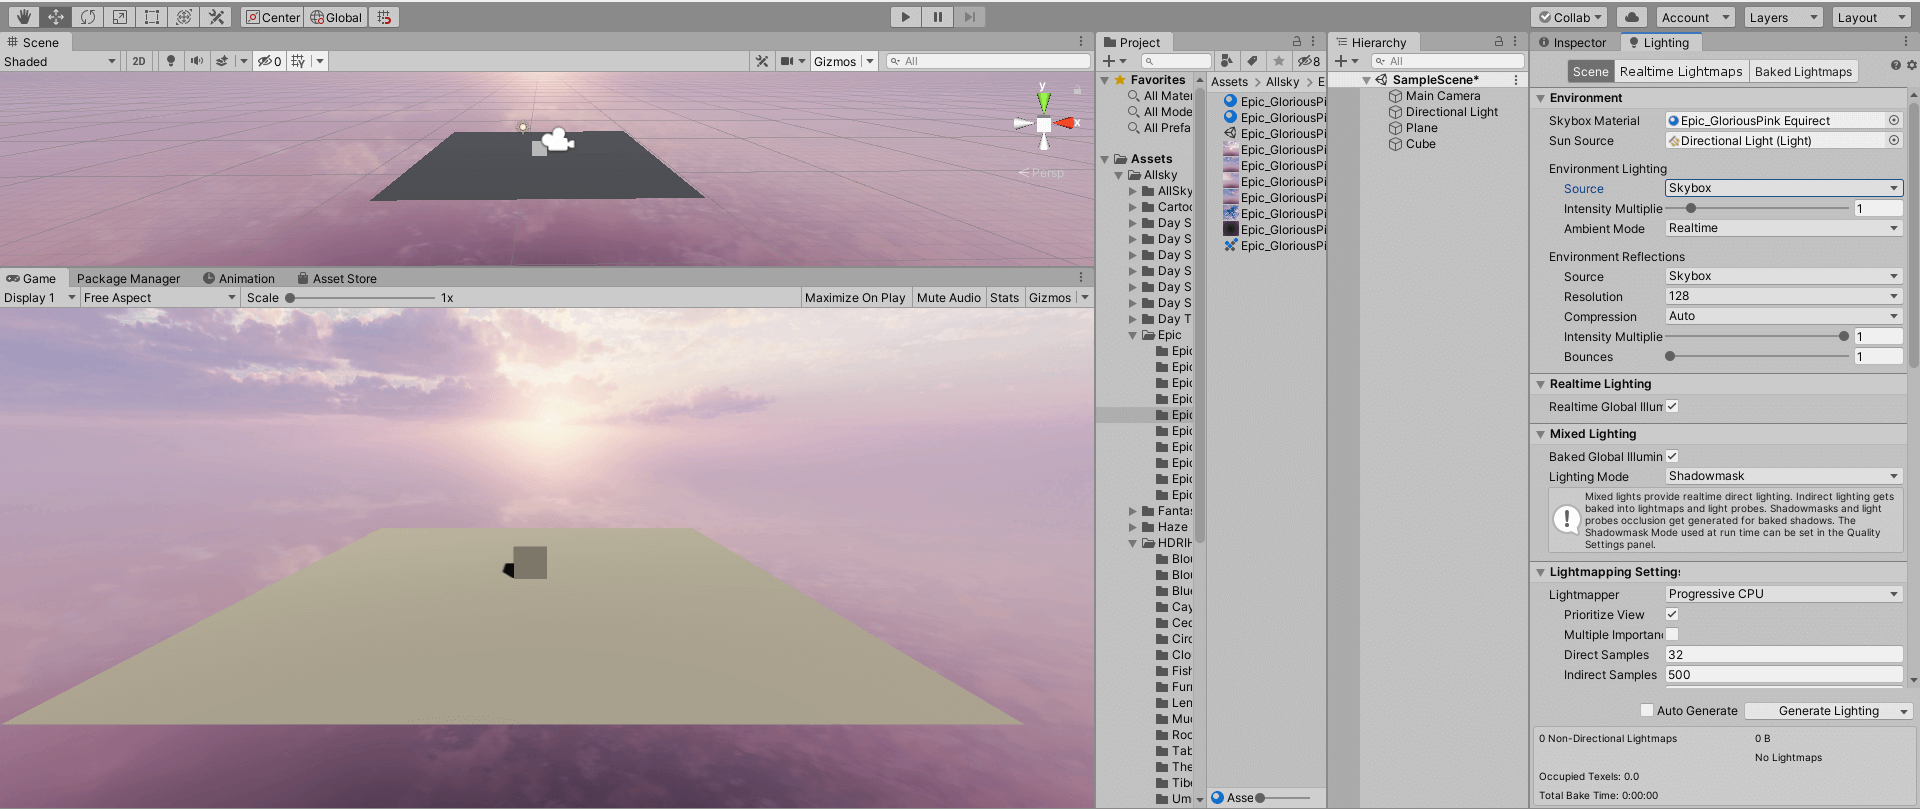
Skybox settings
The default setting is Skybox, which is the source of the ambient light, so the colors will look natural.
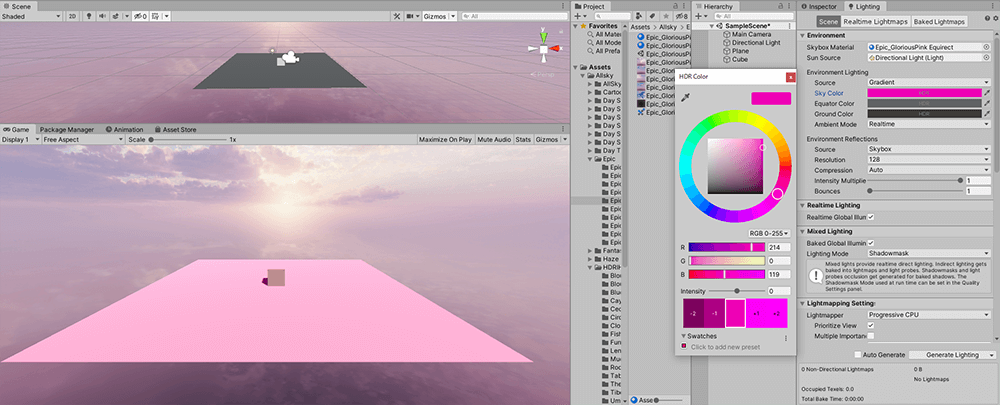
Gradient settings
Gradient is an ambient light source that uses a gradient to represent the colors of the three light sources: sky, air, and ground. You can create scenes with a strong impact.
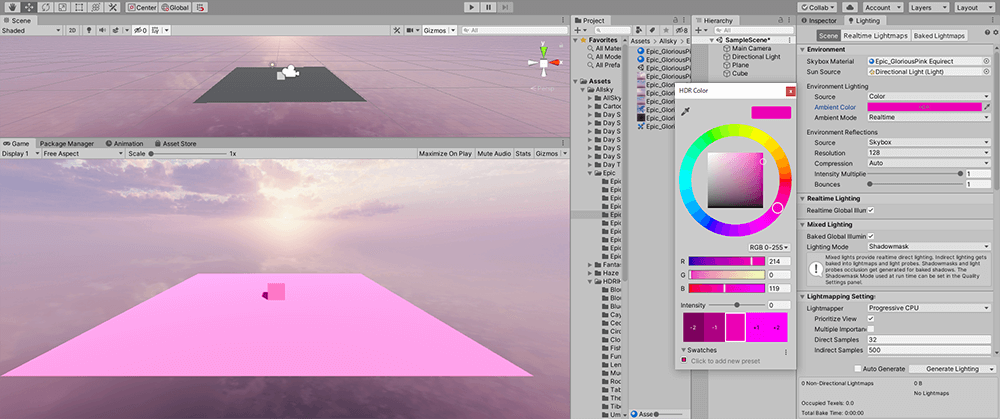
Color settings
Color expresses ambient light in a single color, so it can create a very vivid impression.
The basic setting is Skybox, but depending on what you want to express, you can create a more distinctive scene by setting it to Color.

Changing the brightness with the Intensity Multipiler
With the Intensity Multipiler, you can set the degree of brightness by increasing or decreasing the slider. The higher the value, the brighter the scene.
Environment Reflections
Set Skybox as Source
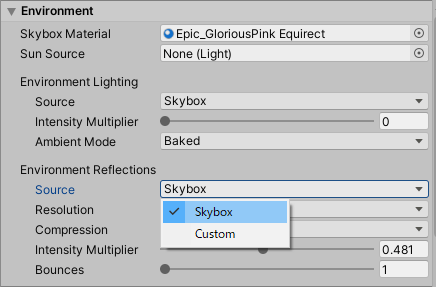
This is a setting for the reflection of light in the entire scene. Roughly speaking, you can select either Skybox or Custom as the reflection effect in Source, and set the brightness of the reflected light in Intensity Multipiler.
Setting the Source to Skybox
When the Source is set to Skybox, the Skybox will be reflected, because the Plane reflects the color of the Skybox lightly and the material applied to the Cube is set to be reflected, so the Cube will be reflected more clearly.
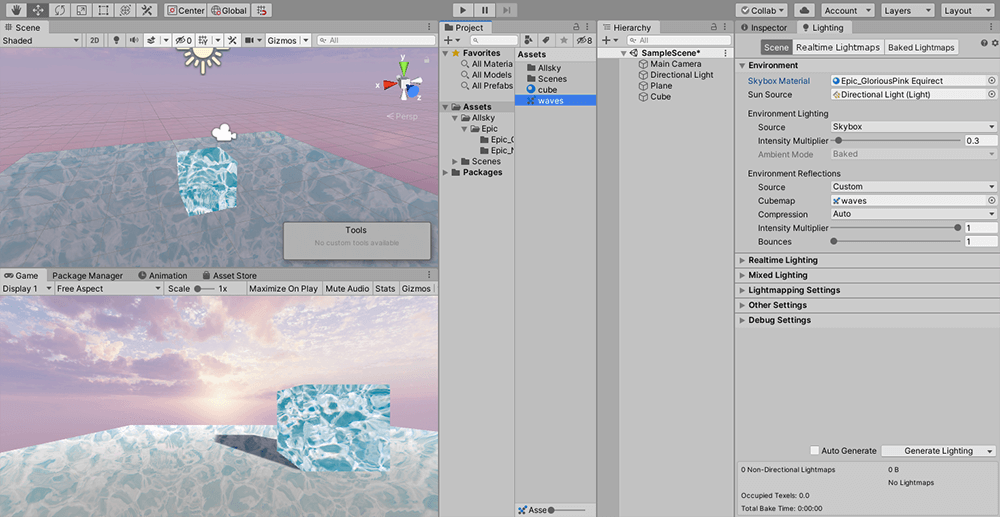
Setting the Source to Custom
If you set Source to Custom, a new setting named Cubemap will appear. By dragging any Cubemap to this item, you can reflect your own effect.

Changing the brightness with Intensity Multipiler
By increasing or decreasing the value of the Intensity Multiplier slider, you can set the degree of reflection.
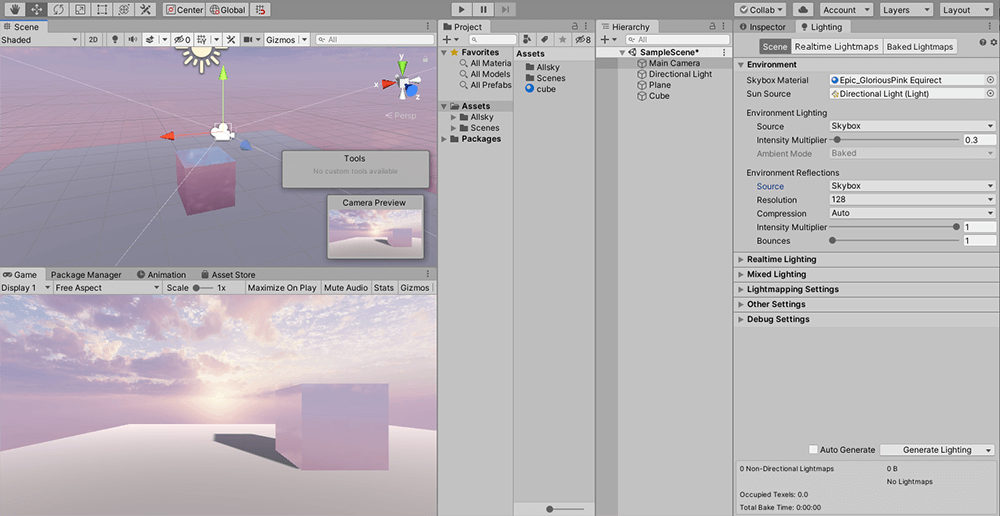
Default Lighting Settings
The Environment Reflections Intensity Multipiler is set to 1 by default, which is why the scene is not completely darkened when the Directional Light is turned off. This is why turning off the Directional Light does not completely darken the scene; you can set it to 0 if you want to darken the scene completely, and to 1 normally. In the GIF above, the slider was moved with Directional Light turned off so that you can easily see the effect.
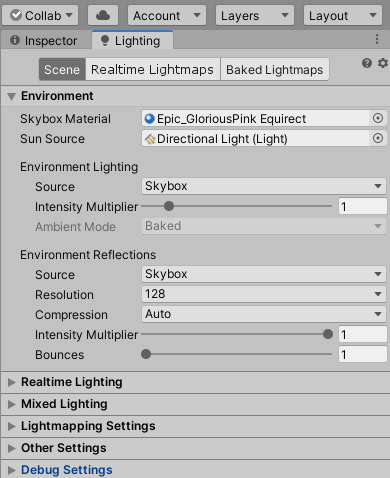
With Directional Light turned back on and Intensity Multiplier set appropriately
With Directional Light turned back on, the Environment Lighting brightness set to 0.3, and the Environment Reflections brightness set to 1.
Setting Other Settings
Here are the settings for Fog, Halo, and Flare, which are classified as “Other” in the Lighting settings.
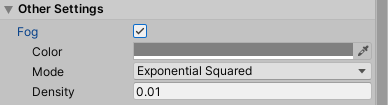
Fog Settings
When the Fog checkbox is checked, the Fog settings will appear.
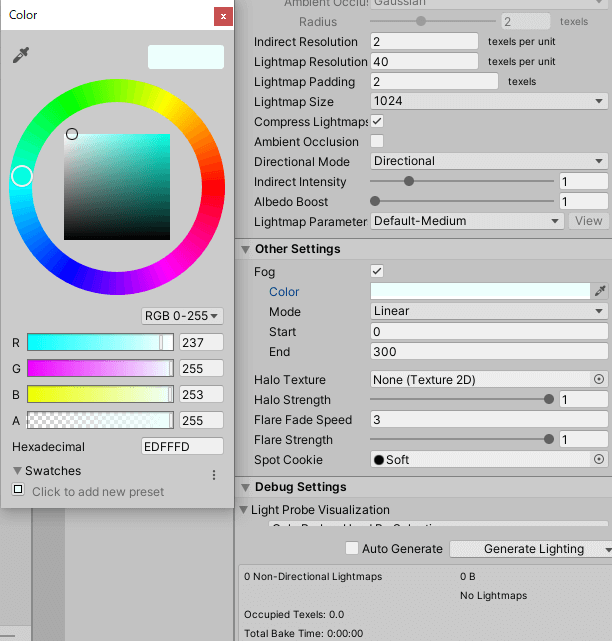
Color setting for Fog
Color allows you to set the color of the fog.

Mode setting for Fog
Mode is the setting for the density of the Fog, and there are three modes available: Liner, Exponential, and Exponential Squared.

Mode setting for Fog (Liner)
Liner is a mode in which the fog is drawn in a straight line. This mode can be set by entering a numerical value for the distance at which the fog is generated (Start) and the distance at which it disappears (End).
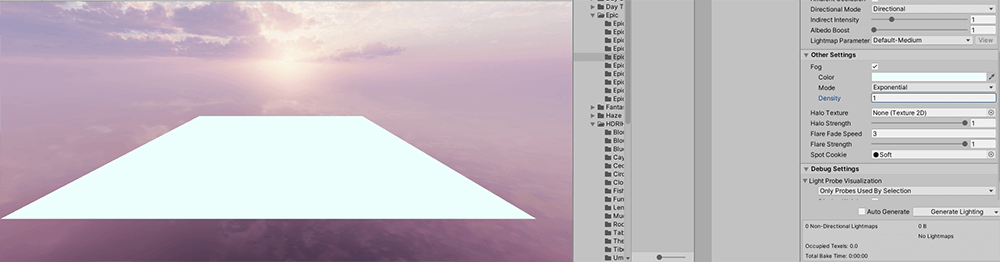
Set Density to 1
The Exponential and Exponential Squared modes increase the density of the fog exponentially by increasing the Density slider between 0 and 1.
In this case, I set it to 0.05.
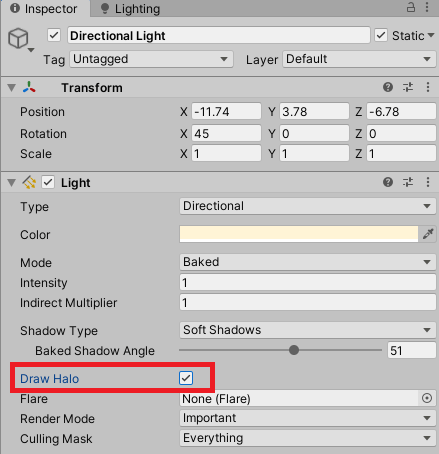
Check the Draw Halo checkbox.
Halo is the setting for the halo around the sun. To use this setting, first check the “Dawn Halo” checkbox in the Light Inspector and apply it.
Fixing the Halo
Increase the Halo Strengh slider from 0 to 1 to increase the size of the halo drawn around the light.
Create a Game Object
Flare” is the setting for lens flare. The lens flare can be rendered in the scene by creating a Game Object to generate the flare and adding a component to the Main Camera, so if you want to use it, you need to set it up first.
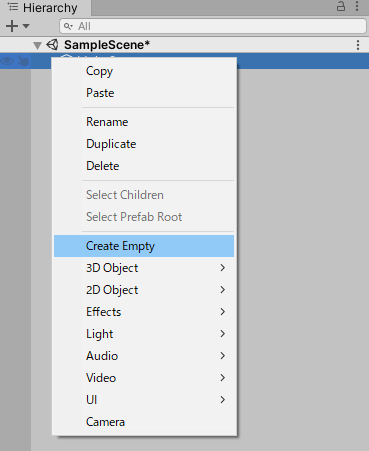
In the Hierarchy window, right-click > Create Empty to create an empty Game Object. Rename the Game Object to “flare” for clarity.
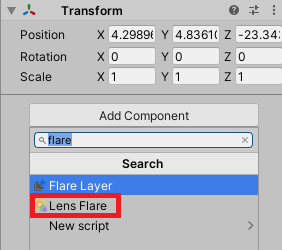
Add the Lens Flare component to the Game Object
Select Add Component from the Game Object inspector and add the Lens Flare component. You can find it easily by typing “flare” in the search bar.
With Flare, you can select the lens flare you want to set. Click the button next to the selection bar to display a list of flares that can be set. In this case, I selected “Sun” from Standard Assets.
Since the flare will not be drawn in the Game View as it is, we will add a Flare Layer component to Camera.
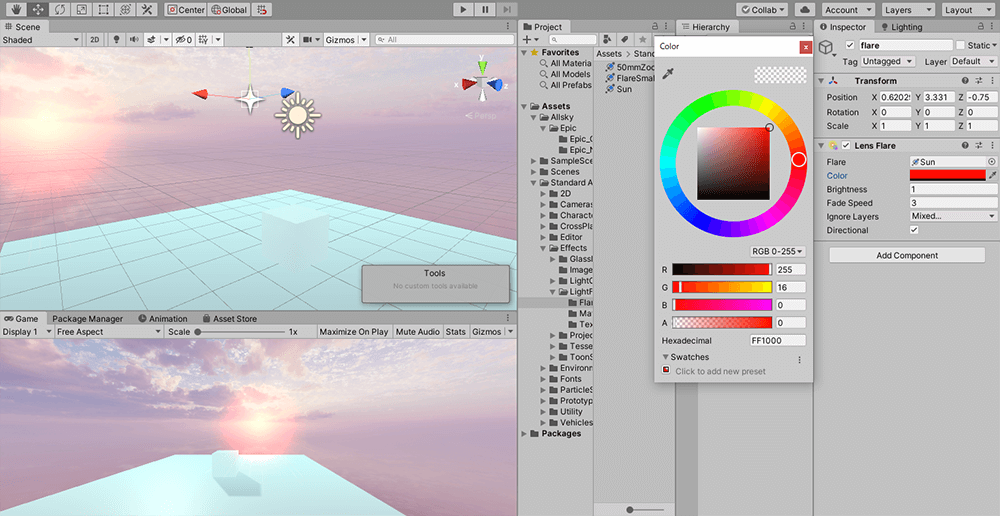
Changing the Color of the Flare
You can change the color of the flare in Color. Click on the red frame to display the color palette, and set the color to your liking.

Modify the Brightness of the flare
Brightness allows you to change the brightness of the flare. The default setting is quite bright, so you may want to set it to about 0.1. The following items, Fade Speed and Ignore Layers, can be left as they are.
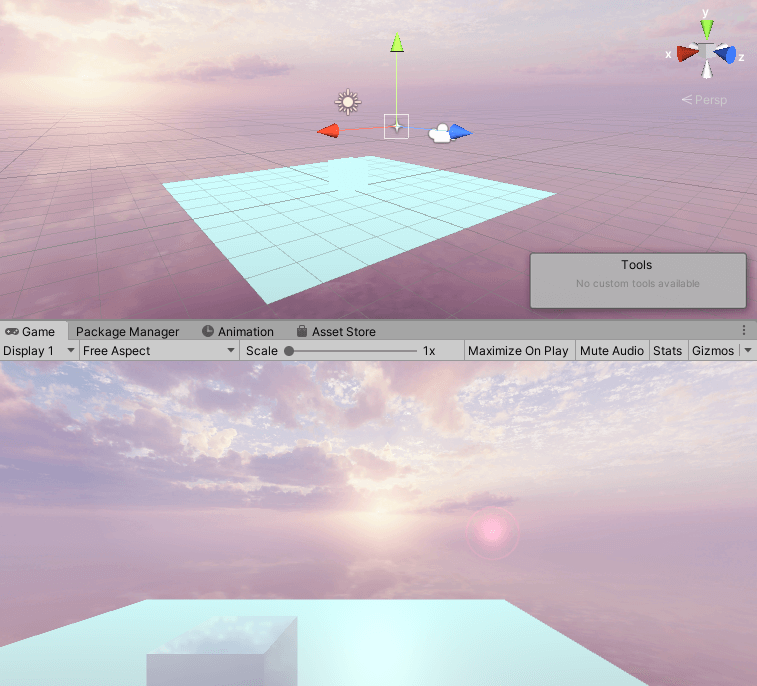
Flare will be drawn from the point where the Game Object is located.
If you uncheck the Directional checkbox, the lens flare will be generated from the point where the Game Object is located.
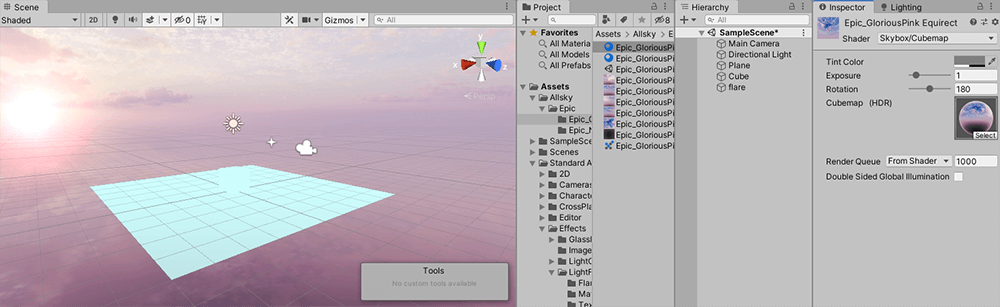
Changing Rotation of Skybox
When Directional is checked, the lens flare will be positioned at infinity, so it will look more natural. If the position of the lens flare is different from that of the Skybox, you can change the Rotation in the Skybox inspector to align the lens flare with the position of the sun drawn in the Skybox to make it look more natural.
That’s all for now, let’s upload the image to STYLY and check it.
Upload to STYLY
Let’s actually upload the scene to STYLY and use it.
This time, we will upload the Unity scene directly to STYLY, so please refer to this page.
Also, as mentioned in the related article, the lights used in the Unity scene will not reflect the shadows on the web, only in the VR view.
How to create STYLY account

Introduction to NEWVIEW SCHOOL ONLINE
NEWVIEW SCHOOL ONLINE is now open! Learn the basics of Unity and PlayMaker, necessary for creating VR/AR content, and learn the process (and creation techniques) for developing attractive content available on STYLY.
- Create VR/AR content without writing any programming code.
- Professionally supervised Unity courses available.
- Explore additional elements, such as photogrammetric production methods and content lightening.
- Learn the concept of creating VR/AR content.
