In this article, I am going to introduce how to create many rubber balls in Unity, and how to import that setup to a scene in STYLY.
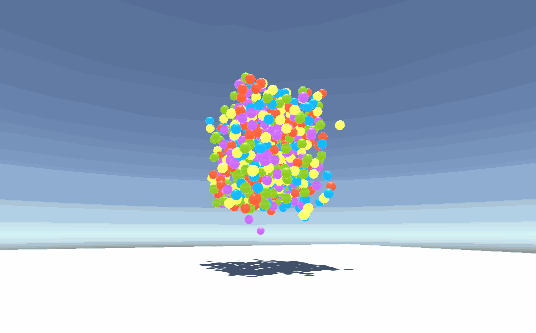
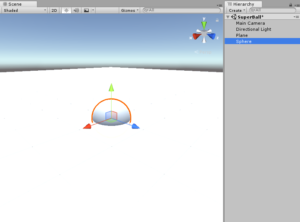
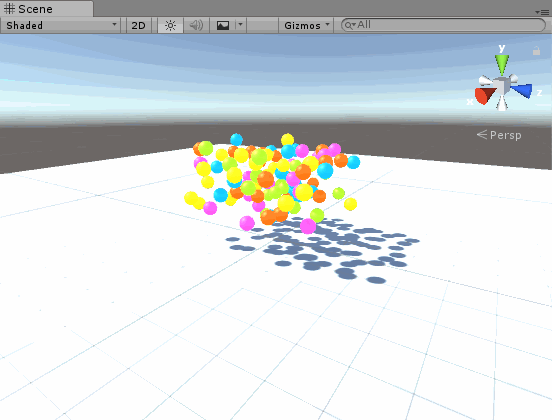
The sample scene we are going to create in this tutorial
- 0.1 Sample
- 0.2 Preparation
- 0.3 Placing a object in a random position
- 0.4 Changing the material of an object
- 0.5 Repeating a certain process using event transitions
- 1
- 2 Create a floor
- 3 Creating a rubber ball
- 4
- 5 Make a Prefab from the ball
- 6 Create balls with PlayMaker
- 7 Create 100 balls
- 8 Set the ball color randomly
- 9 Set the balls to fall down
- 10 Set the balls to bounce
- 11
- 12
- 13 Uploading to STYLY
Sample
You can see what the scene looks like in STYLY from the URL below.
The sample project in Unity https://github.com/styly-dev/STYLY-Unity-Examples/tree/master/Assets/STYLY_Examples/SuperBall
Preparation
In this tutorial, we are going to use Playmaker to create the rubber balls.
https://assetstore.unity.com/packages/tools/visual-scripting/playmaker-368
What you can do with PlayMaker
In this article, we use Playmaker for the following settings. ・Placing a object in a random position ・Changing the material of an object ・Selecting a material randomly ・Repeating a certain process using event transitions
Placing a object in a random position
You can place a object in a random position each time you execute an action by using Playmaker.
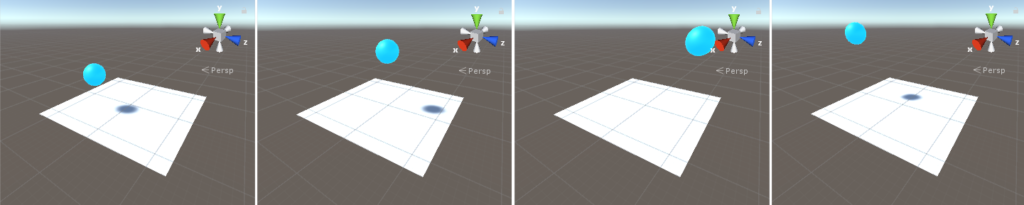
Placing a object in a random position
I used the following Playmaker actions
- Create Object
- Random Float
- Set Vector3 XYZ
Changing the material of an object
You can change the material of an object randomly by using Playmaker.

Changing the material of an object
I used the following Playmaker actions
- Set Random Material
Repeating a certain process using event transitions
You can repeat a process by using Playmaker.
Repeating a object creation process
I used the event transition fucntion of Playmaker for this process
Create a floor
First, let’s create a floor.
The floor we are going to create
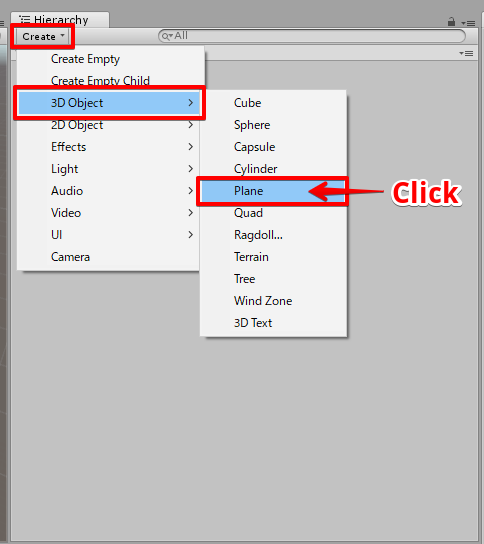
Create a Plane object
Click the Create button in the Hiearchy, select 3D Object > Plane, and create a Plane object.
Creating a Plane
Set the Plane scale to (4,4,4).
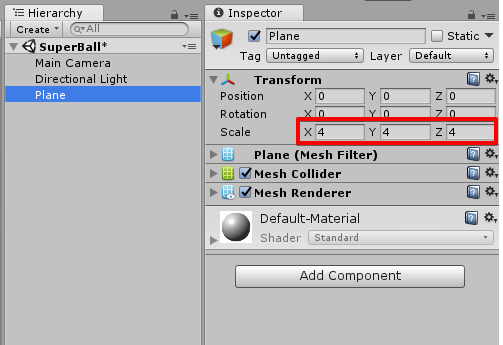
Changing the Plane scale
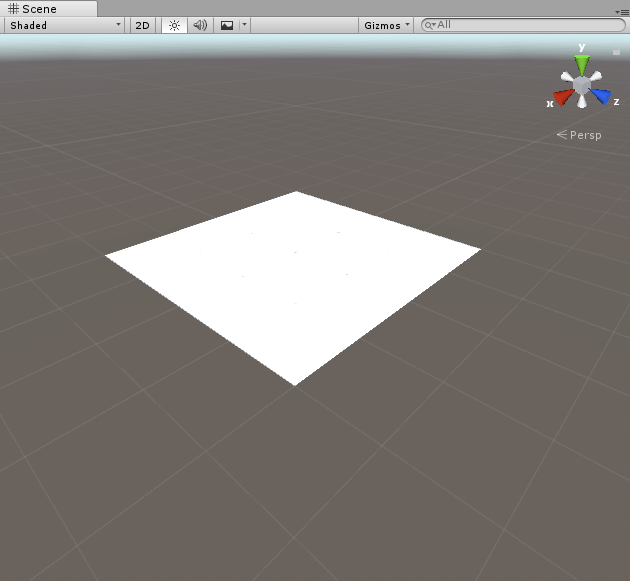
The creation of the floor is complete!
The created floor
Creating a rubber ball
Next, let’s create a rubber ball.
The ball we are going to create
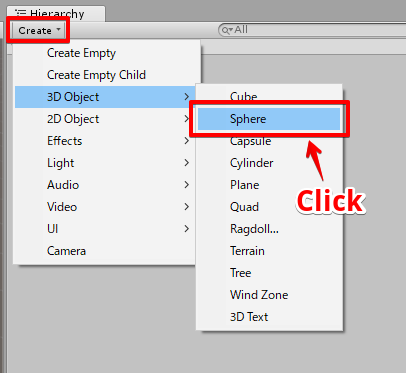
Create a Sphere object
Click the Create button in the Hiearchy, select 3D Object > Sphere, and create a Sphere object.
Creating a Sphere
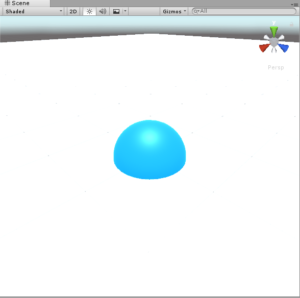
A white Sphere object is created.
The created Sphere
Setting a color to the ball
To set a color to the ball, let’s create a material. By using a material, we can set a color to the ball.
The colored ball we are going to create
Right click in the Hierarchy window, and select Create > Material.
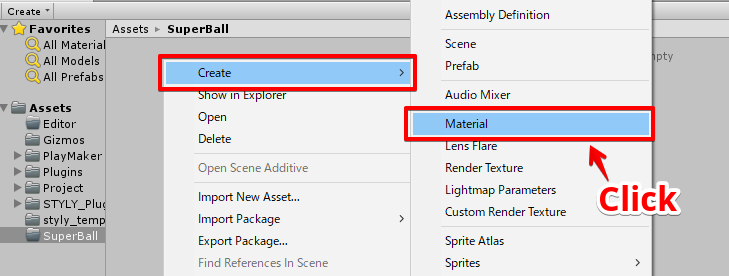
Creating a material
First, we are going to create a material for a blue ball, so let’s name the material “Ball_Blue”.
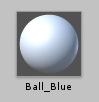
The created material
Setting the material color to blue
The created material is white by default, so we need to change it to blue. Select the Ball_Blue material, and check the Emission checkbox in the Inspector window.
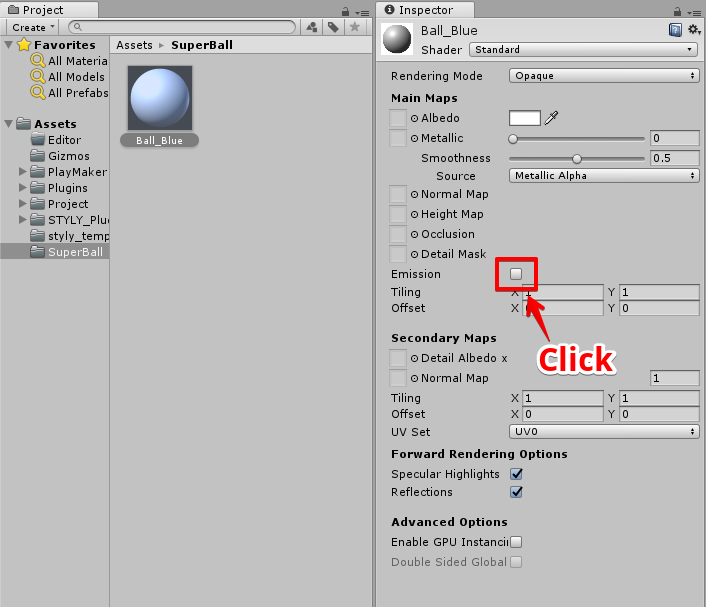
Check the Emission checkbox
A color setting option will appear, so click it and set the color.
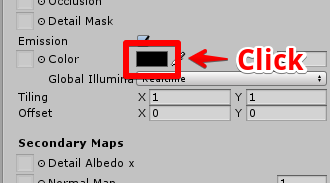
Click the Color
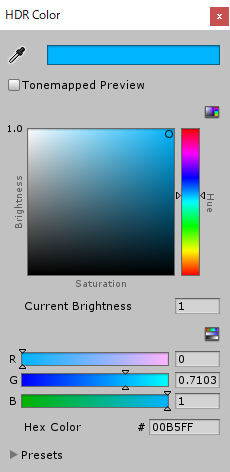
Color settings
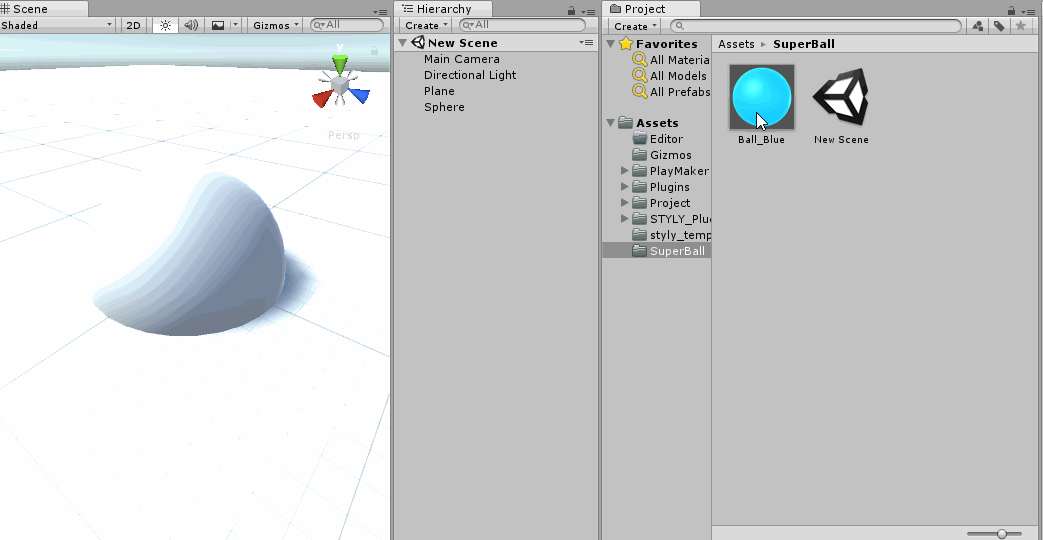
A blue material is created.
Check the material
Drag and drop the material to the Sphere, and check how the ball looks like with the material attached.
Setting the material to the ball
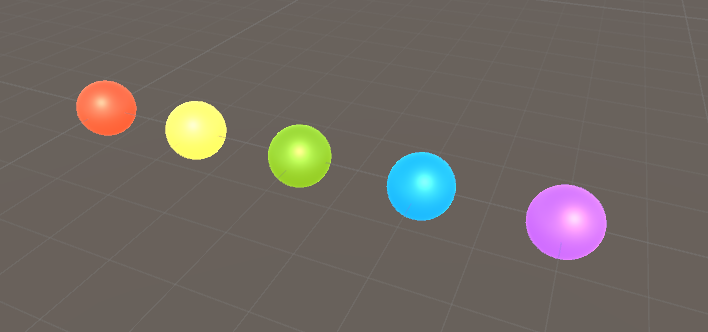
Preparing 4 more color materials
Repeat the process and create 4 more different color materials.
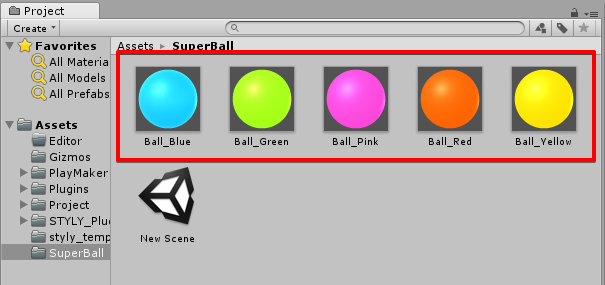
Create 4 more materials
I created a blue, green, pink, red, and yellow material for this tutorial.
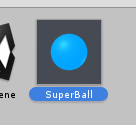
Make a Prefab from the ball
In order to use the ball with Playmaker, we need to create a Prefab from the ball. Drag and drop the Sphere from Project to Hierarchy, and create a Prefab.

Prefab作成
Change the name to SuperBall.
Change the name of the Sphere to SuperBall
Set the SuperBall scale to (0.4,0.4,0.4).
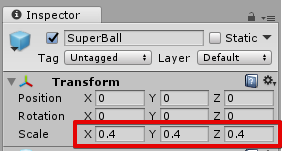
Set the scale to (0.4, 0.4, 0.4)
The Prefab editing is done! Let’s move on to PlayMaker.
Create balls with PlayMaker
Next, let’s create balls with PlayMaker.
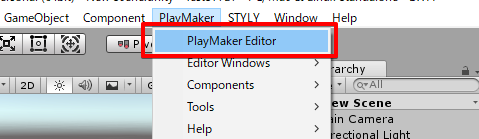
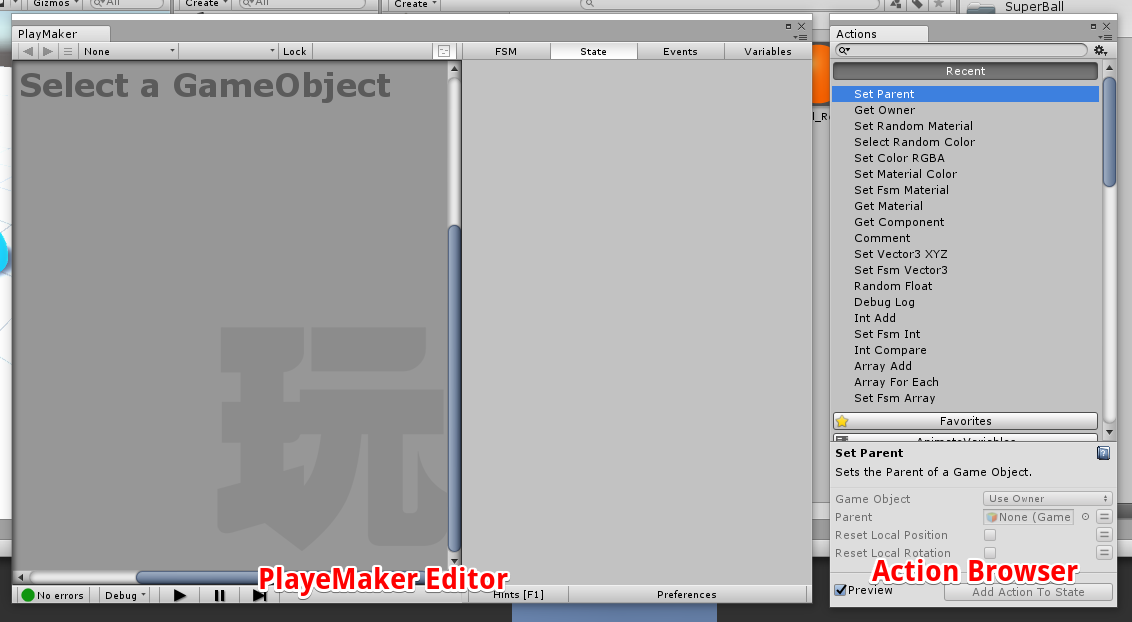
Open PlayMaker
Choose PlayMaker / PlayMaker Editor from the menu, and open the PlayMaker editor.
Opening the PlayMaker editor
Open the Action Browser too.
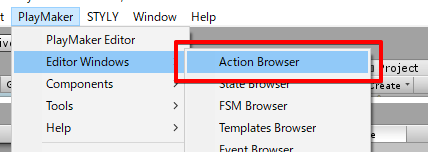
Opening the Action Browser
I tend to place the windows like below for accessiblity.
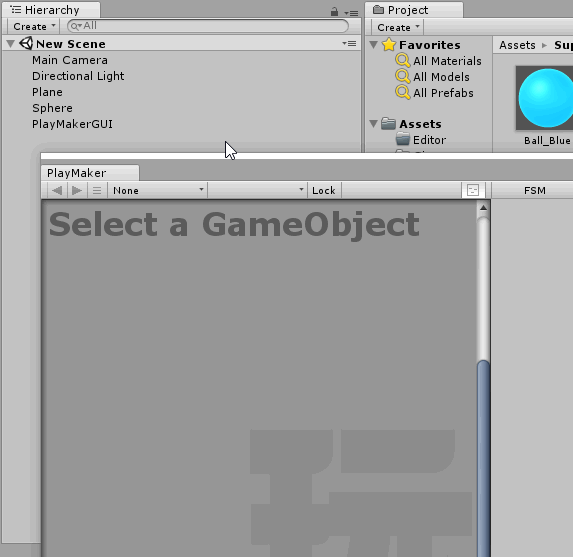
Add a FSM
Select the Plane in Hierarchy, right click once in the PlayMaker window, and click “Add FSM”.
Add FSM
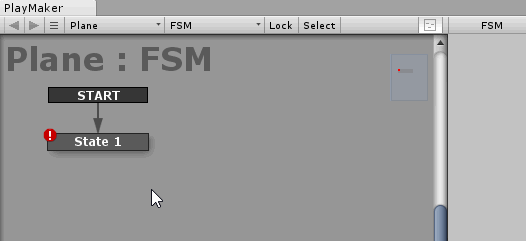
A FSM is created. An FSM is needed to run processes in PlayMaker. It starts from the START state, then moves on to State 1, and so on.
Set a Create Object Action
For this tutorial, we are going to add a “Create Ball” process to State 1. When you want to add a process to create an object (for this tutorial, a ball), we use the “Create Object” action. Select State 1, and drag and drop the Create Object from the Action Browser to the State tab.
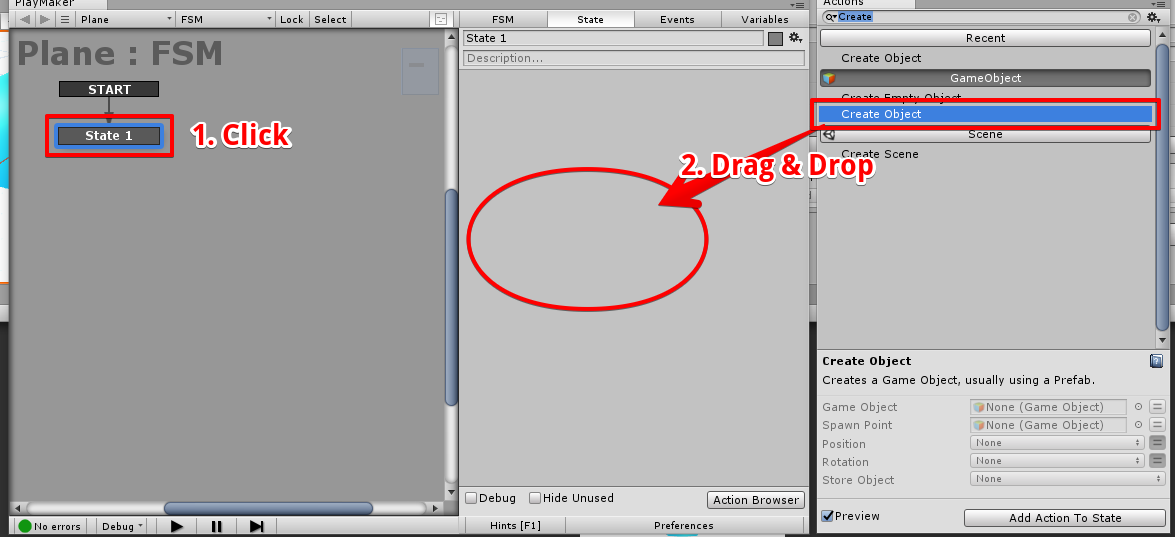
Add a Create Object action
The Create Object action is registered to State 1. 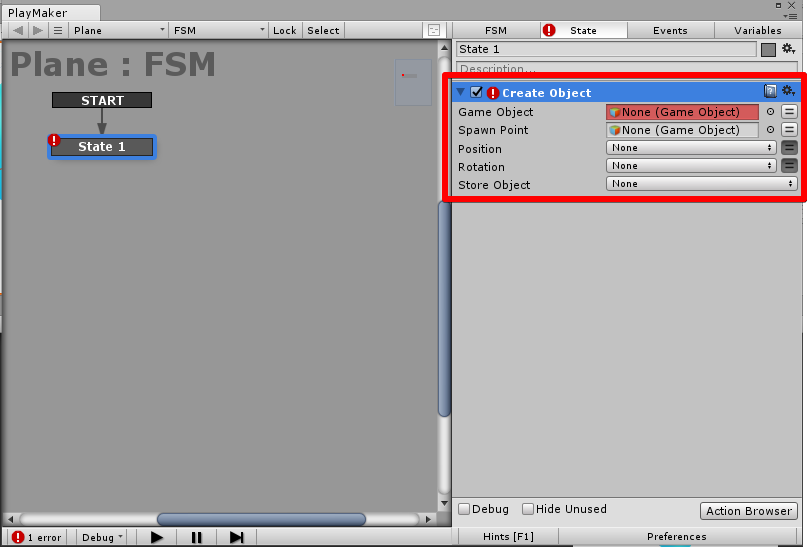 This Create Object action will become a “create object” process.
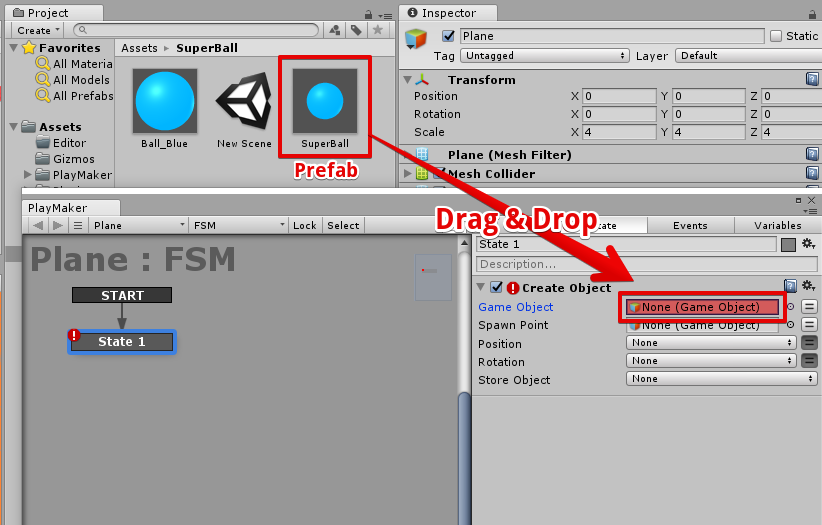
Set a Prefab to the Create Object action
A Create Object action is added now, but we also have to register what object we want to create with the action. Drag and drop the SuperBall prefab from the Hierarchy to the GameObject box, and register it.
Registering the SuperBall to the CreateObject action
When we play the scene after we register the SuperBall prefab, a SuperBall object is created. The created object name will become the Prefab name + “(Clone)”.

The SuperBall that is created
Changing the spawn position
Next, let’s try to move the spawn position of the ball upwards.
Prepare variable “pos”
Drag and drop the “Set Vector3 Value” from the Action Browser to the space above Create Object.
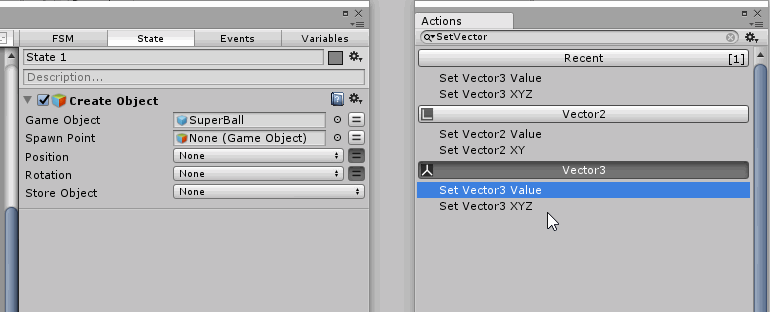
Registering the Set Vector3 Value
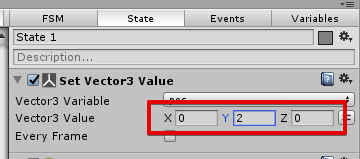
Next, let’s create a variable named “pos” to store the 3-dimention position value.
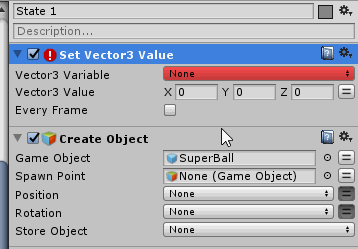
Creating value pos
The pos variable is going to be used to store the position value (x, y, z) of the ball.
Set up the pos value
Next, add (0,2,0) to pos.
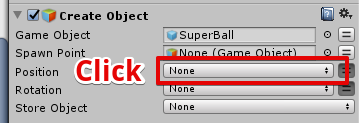
Set the ball spawn point to pos
Click the Position in the CreateObject action, and choose pos from the popup menu.
Click Position
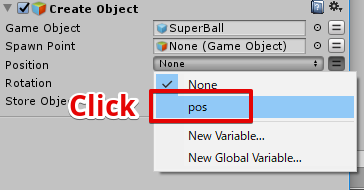
Choose pos
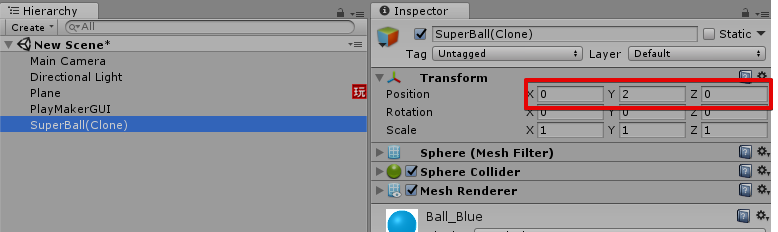
Now, the ball is set to be created at the pos position(currently 0,2,0).
Check that the ball is correctly created at (0,2,0)
Click the Play button, and check the spawn position of the ball.
Set the spawn point to random
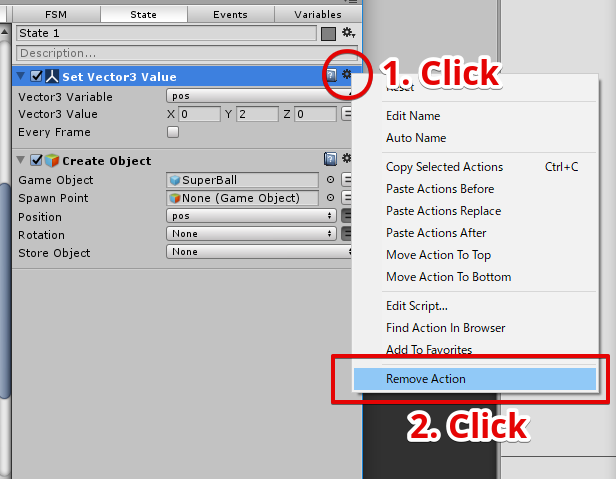
Next, let’s change the ball spawn point to be chosen randomly. The Set Vector3 Value action we just created is no longer needed, so delete it.
Adding a Random Float action
Add a Random Float action by drag and drop from Action window. Repeat this process 2 times (Create 3 Random Float actions).
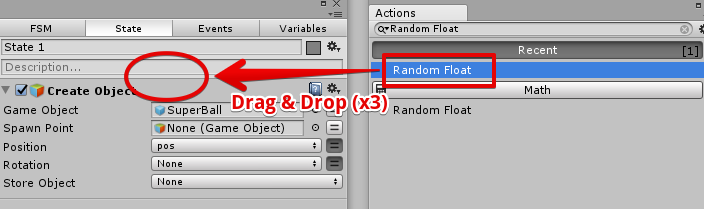
Create 3 Random Float actions
Random Float action is a process that creates a value by random.
Add a Set vector3 XYZ action
Next, add a Set Vector3 XYZ action in between RandomFloat and Create Object.
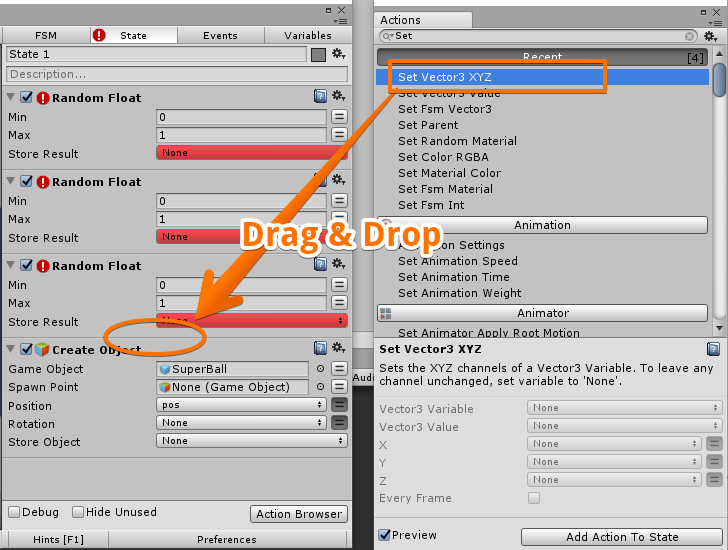
Add a Set Vector3 XYZ action
The Set Vector3 XYZ action is a process that sets the position to (X, Y, Z).
Check the registered actions
Check that your actions line up as below.
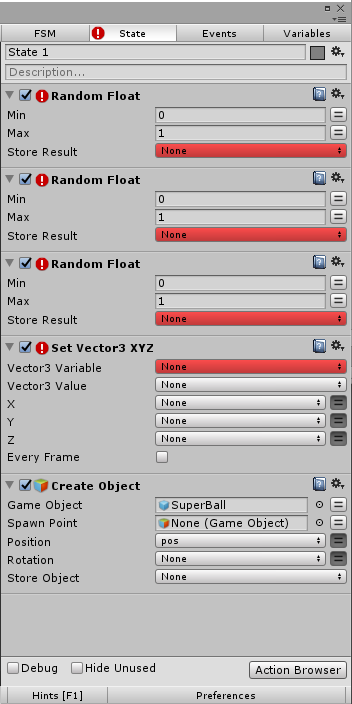
The registered actions
Set up the Random Float action
Set the RandomFloat action as below. Variable X, Y, Z does not exist, so we need to create the variable by clicking “New Variable…”.
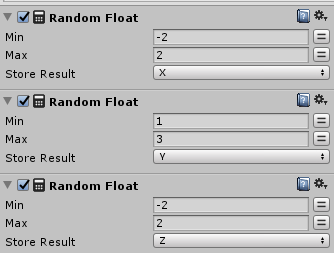
Random Float Settings
Set up the Set Vector3 XYZ action
Set the Vector3 XYZ action as below.
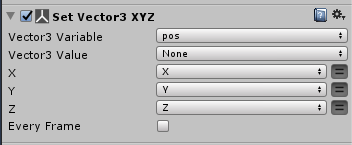
Set Vector3 XYZ settings
A position pos with random parameters is created. Variable pos is used by the CreateObject, so the created ball will now appear in the position pos(a random position).
Check that the ball is created in a random position
Click the play button and check that the ball is created randomly. Each time you click the play button, the ball should appear in a random position.
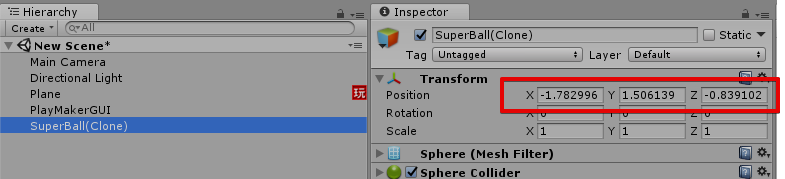
Check that the ball is created in a random position
Create 100 balls
We completed setting up the “Create ball” process with PlayMaker. By repeating this process 100 times, we can create 100 balls in random positions.
Sort and close the states
Sort and close the states so you can easily see the states you have created.
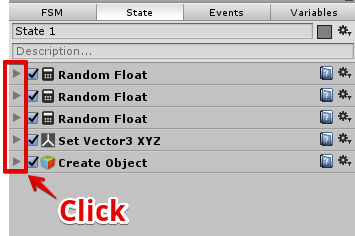
Click the triangle icon to close the states
Implement the repeat process
The steps to repeat the processes
STEP1. Create a counter with a 0 value STEP2. Add 1 to the counter STEP3. Create a ball STEP4. If the counter is smaller than 100, return to STEP2 STEP5. END the process if the counter is equal to 100 In programming, a for loop is used for repeating processes. We will create a similar process with PlayMaker.
Creating a counter variable
First, select the “Variables” tab in the PlayMaker window. Select New Variable, and create a variable and name it “loop_counter”, and set the Variable Type to Int. By pressing the Add button, an Int variable loop_counter is created.
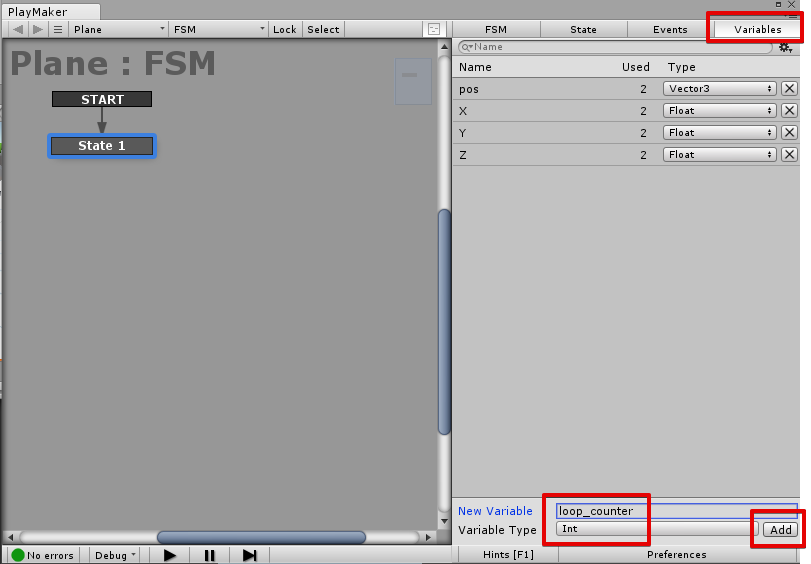
Adding a counter variable
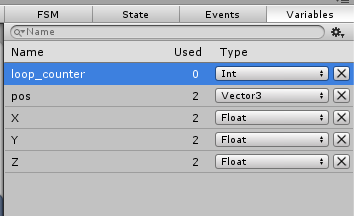
Check the registered variable
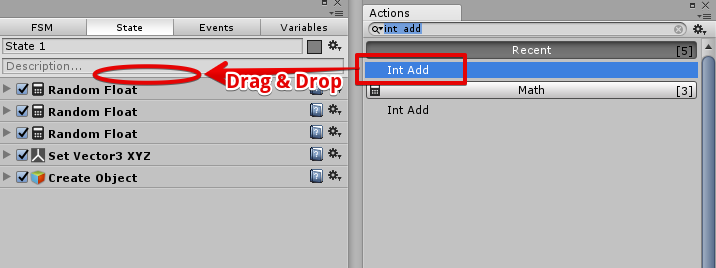
Create an action that adds 1 to the counter
We will use the Int Add action to add 1 to the counter. Drag and drop the Int Add action to the State tab.
Register Int Add
Set “loop_counter” to Int Variable, “1” to Add.
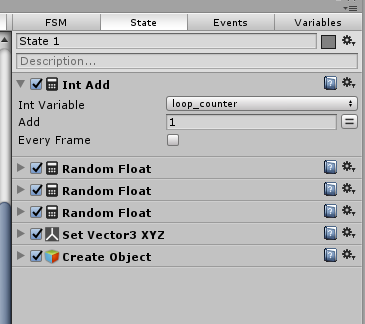
Settings after loop_counter is registered
We have completed the process to add 1 to loop_counter.
Adding an event transition
Next, let’s add a event so that if the counter value is smaller than 100, the process returns to the START state. Events are used to set up how the process moves on depending on the conditions. Click the Events tab in the PlayMaker window, type “スーパーバール作成”(or Create Ball) to the Add Event text box, and press Enter.
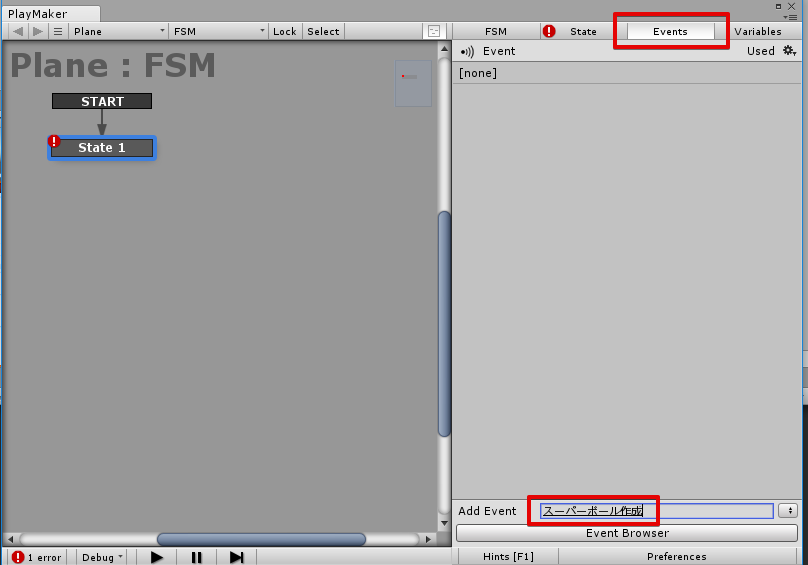
Add an Event
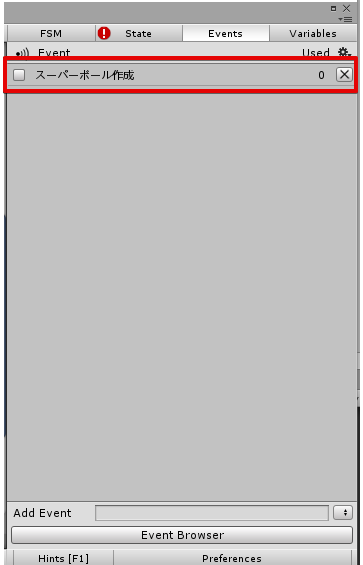
An event will be added to the Events list.
Next, right click State 1, select Add Transition > スーパーバール作成, and add a Transittion.
Adding an event to State 1
Drag the スーパーボール作成 to State 1, and a arrow will appear.
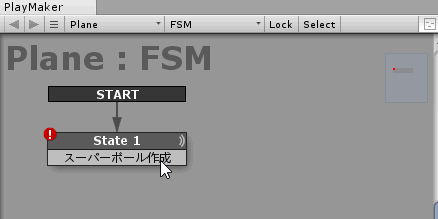
Transition setting
Now, whenever the “スーパーボール作成” event is called, the process returns to State 1. We will use this event to choose which transition the process follows.
Create a repeat process
In order to create a repeat process, we will setup the following. ・If the loop counter is smaller than 100, the process returns to the first ・If the loop counter equal to 100, the process finishes We use the Int Compare action to create this transition. This action is similar to the if or if else function in programming.
Add an Int Compare action
First, drag and drop the Int Compare action from the Action browser.
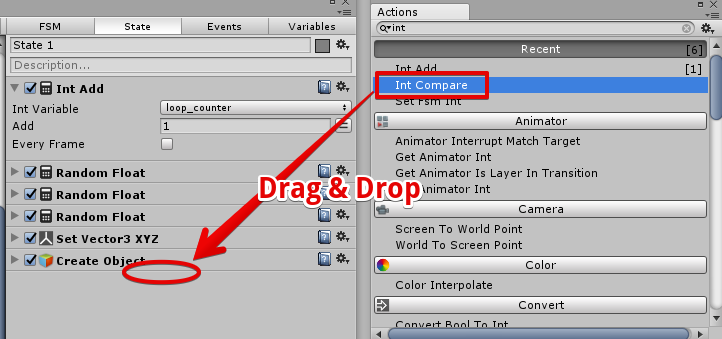
Register the Int Compare action
Next, let’s set up the Int Compare action. For Integer 1 set “loop_counter”, for Integer 2 set 100, for Less Than set “スーパーボール作成”.
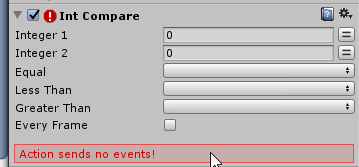
Int Compare settings
The repeating process is complete now! The process returns to State 1 if loop_counter value is smaller than 100, and will not (and stops) if not.
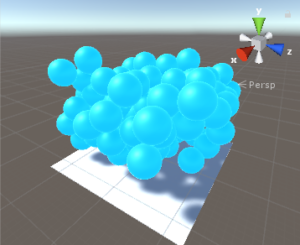
Check that 100 balls are created in the scene
Check that 100 balls are created when the play button is pressed.
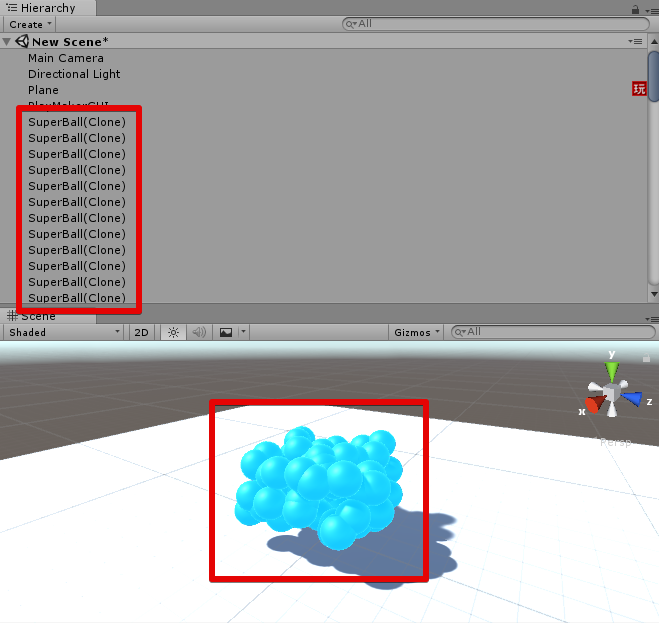
Check the created balls
Set the parent of the ball
The objects will get messed up if they are created directly under Hierarchy, so let’s use the SetParent action to set a parent. Set the ball to StoreObject, and set the parent by setting the Game Object in SetParent.
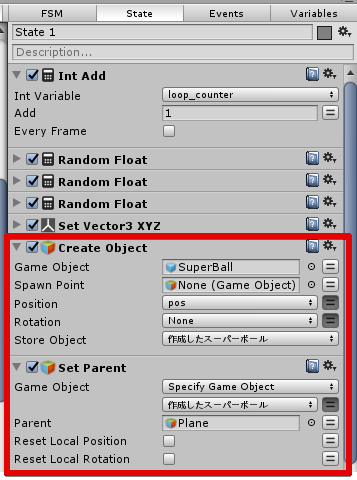
Set Parent
Click the play button, and check that the created balls are created under Plane.
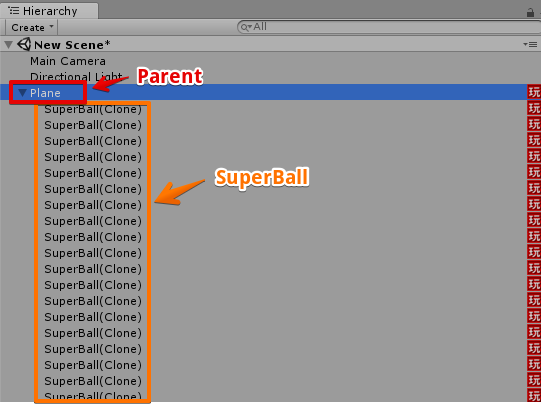
Balls are created under Plane
Set the ball color randomly
Next, let’s set the ball material randomly and make it colorful.
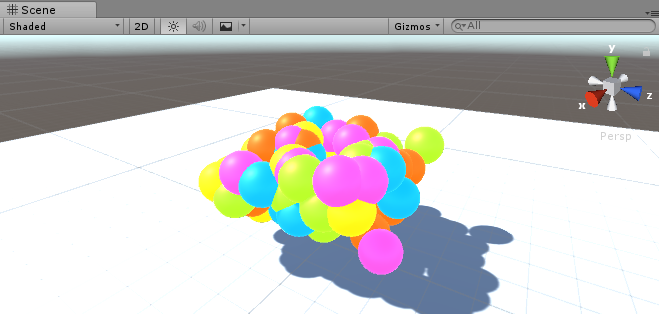
Balls with random materials
Add a FSM to the balls
Select the ball Prefab, and right click in the PlayMaker window, choose Add FSM.
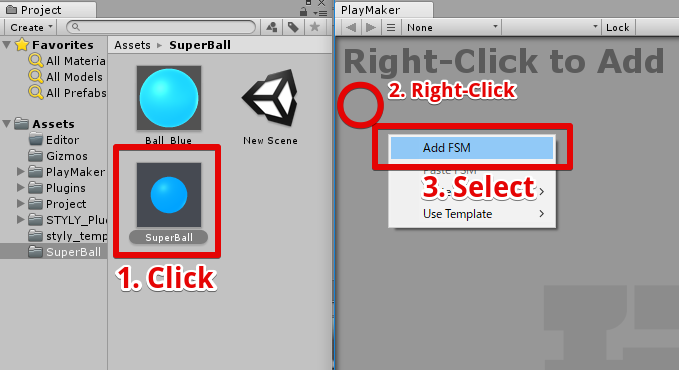
Add a FSM to the SuperBall prefab
Select State 1, and register a Set Random Material action. The Set Random Material action selects a material randomly and sets the model’s material to it.
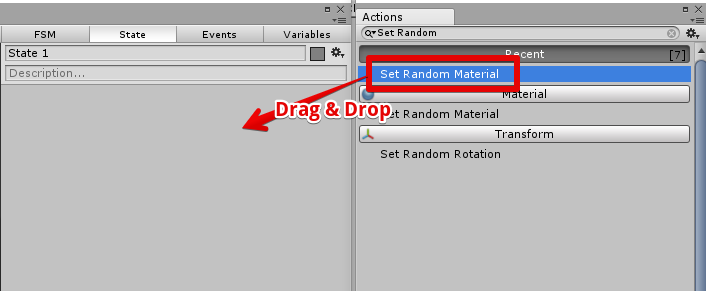
Set Random Material action
Register materials to the SetRandomMaterial action.
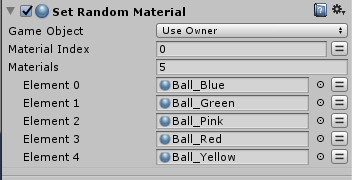
Registering materials
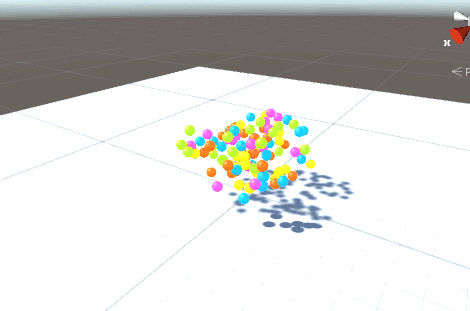
Check that the ball colors are set randomly
Click the play button and check the ball colors.
Executed result
Set the balls to fall down
By attaching a Rigidbody component to the balls, the balls will fall down according to gravity.
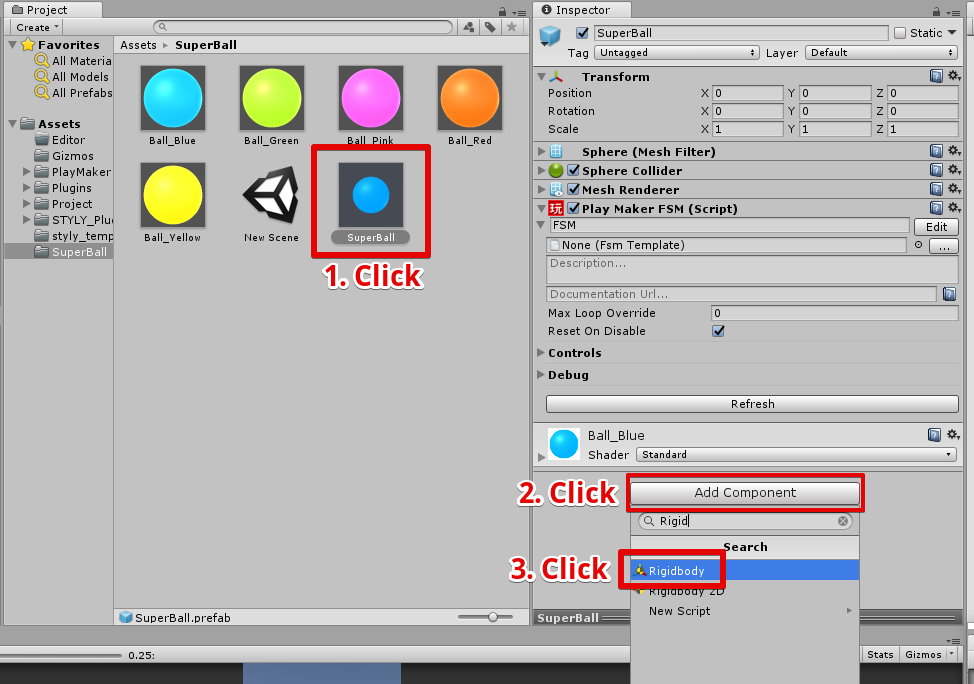
Add Rigidbody component
Click the play button and check that the balls fall down.
Executed result
CAUTION: If the ball positions cross over when the balls are created, the balls will burst apart.
The balls bursting apart
Set the balls to bounce
Set PhysicsMaterial so that the balls bounce.
Create Physics Material
Right click upon the Project window, and create a Physics Material.
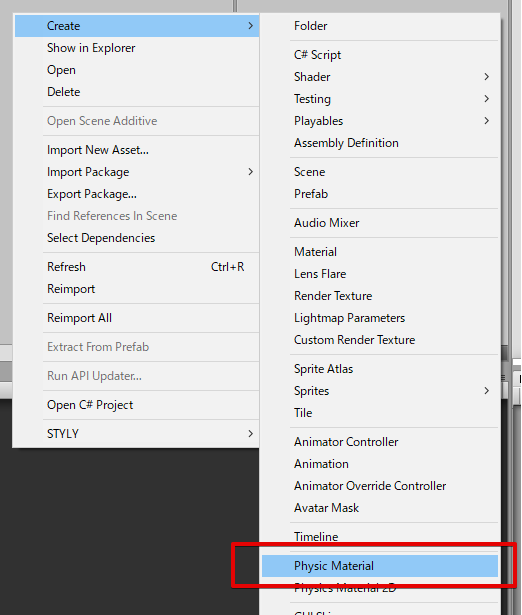
Create Physics Material
Set up Physics Material
Set up the PhysicsMaterial as below.
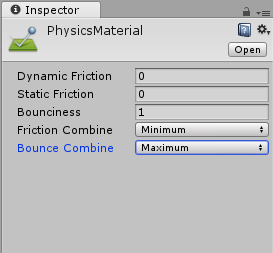
Physics Material settings
I set Friction to 0.0, and Bounciness to 1.0. If you want to make the balls less bouncy, please set the Bounciness smaller.
Registering Physics Material
Register Physics Material to the SuperBall prefab.
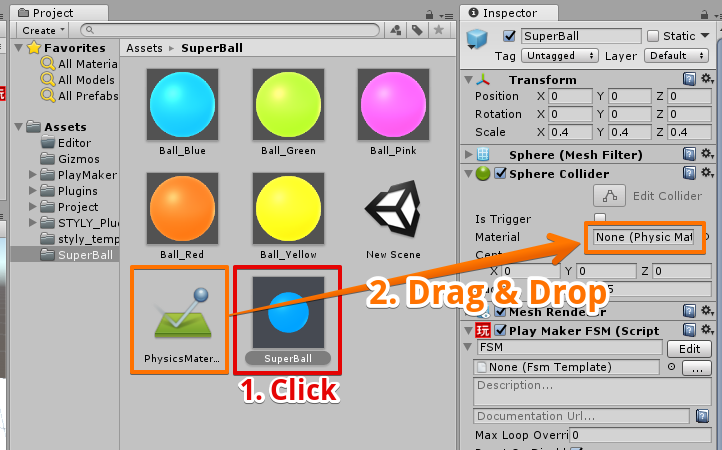
Register Physics Material
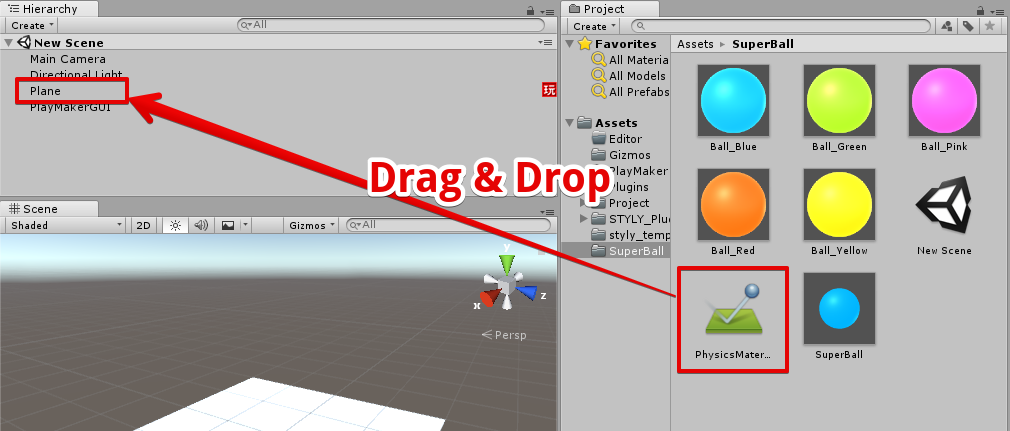
Do the same for the floor(Plane).
You can check the settings by playing the scene.
Execution result
That will be all for setting up the balls!
Uploading to STYLY
Create Prefab
To make things simple, change the Plane object name to “SuperBallPlane”.
Change name to “SuperBallPlane”
Drag and drop the SuperBallPlane to the Project window, and create a Prefab.
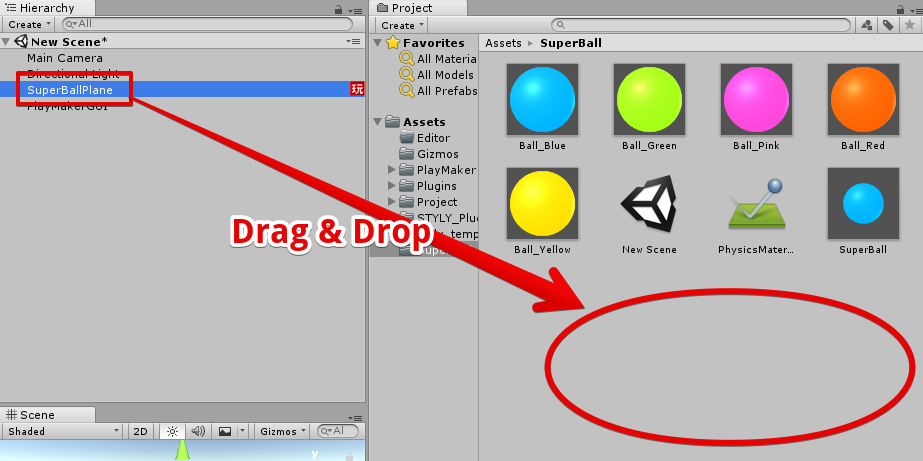
Create Prefab
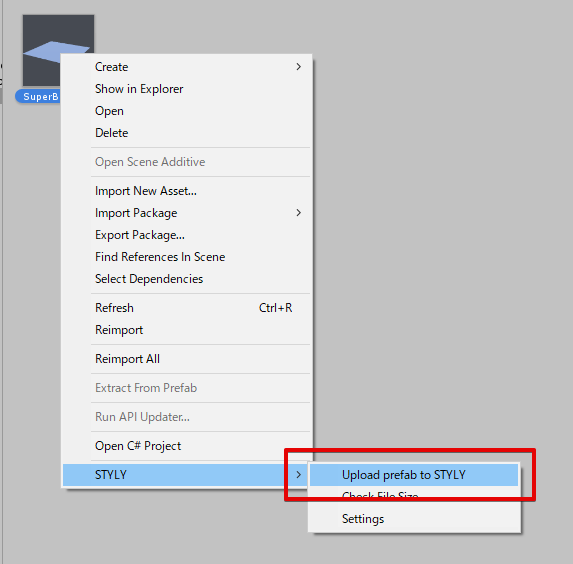
Upload the prefab to STYLY
Right click the prefab, and select Upload prefab to STYLY.
Uploading to STYLY
A window will popup, so wait for the upload to complete.
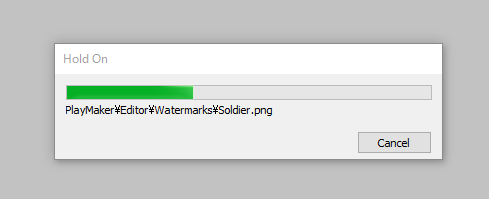
Uploading window
Once the upload is complete, a Upload succeeded message will popup.
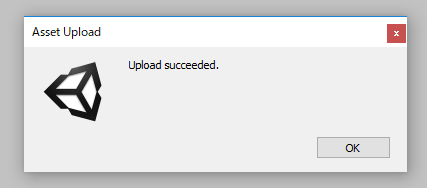
Upload complete window
Check in STYLY
Click the SuperBallPlane in 3D Models in STYLY, and place the prefab into your scene.
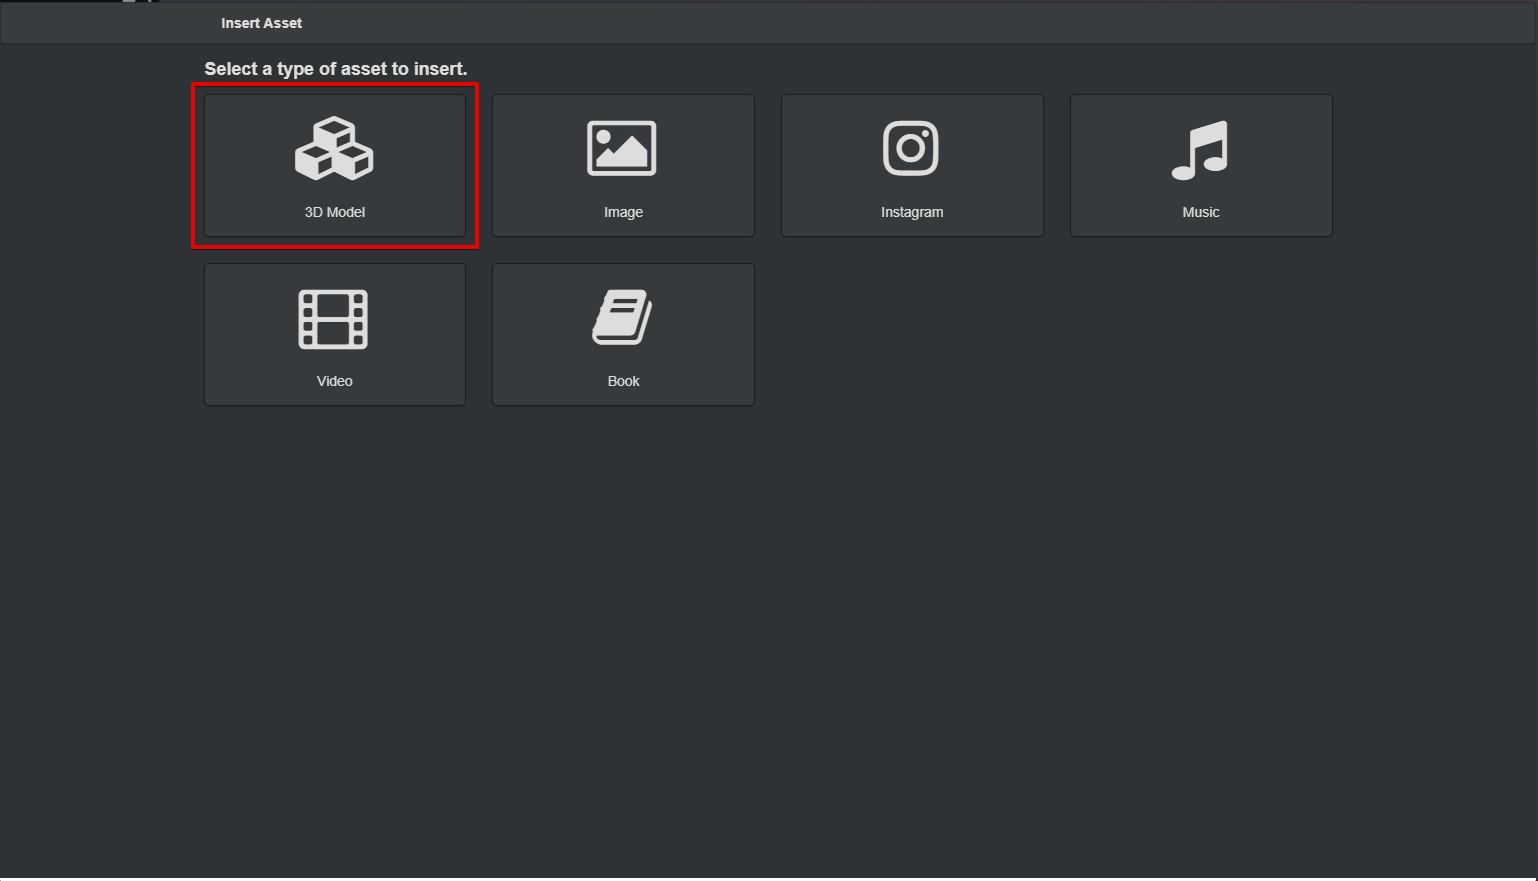
Select 3D Models
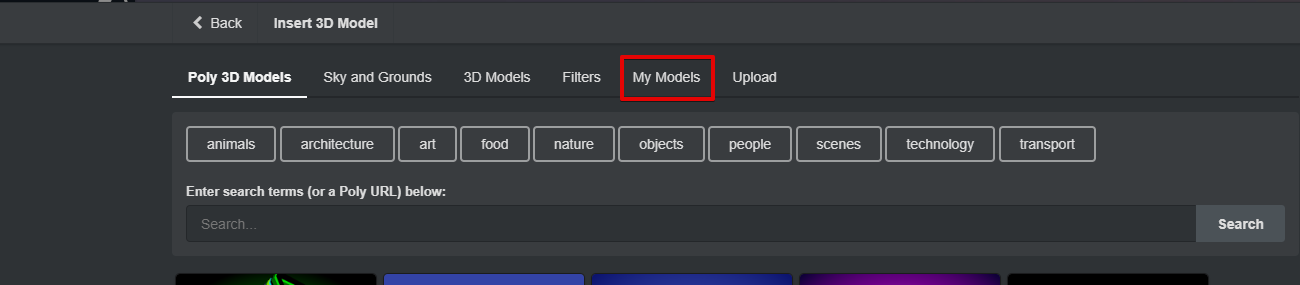
Select My Models
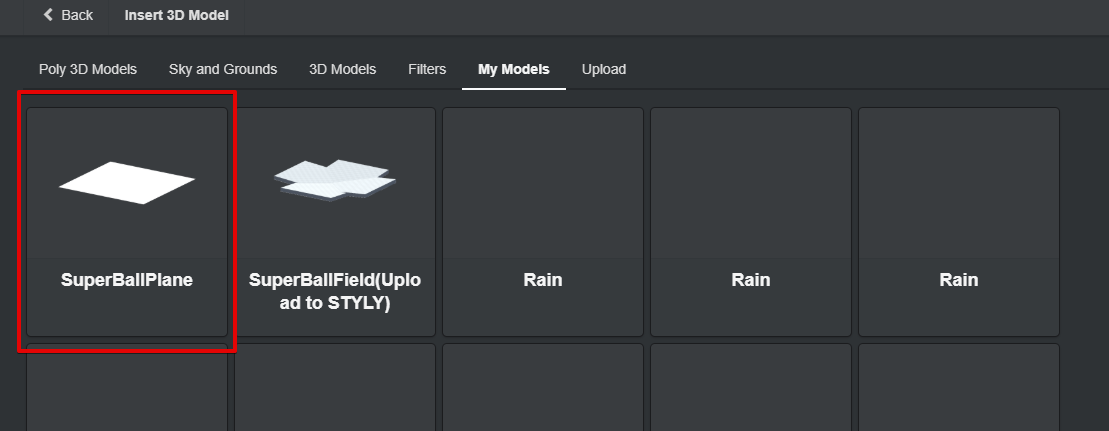
Select SuperBallPlane
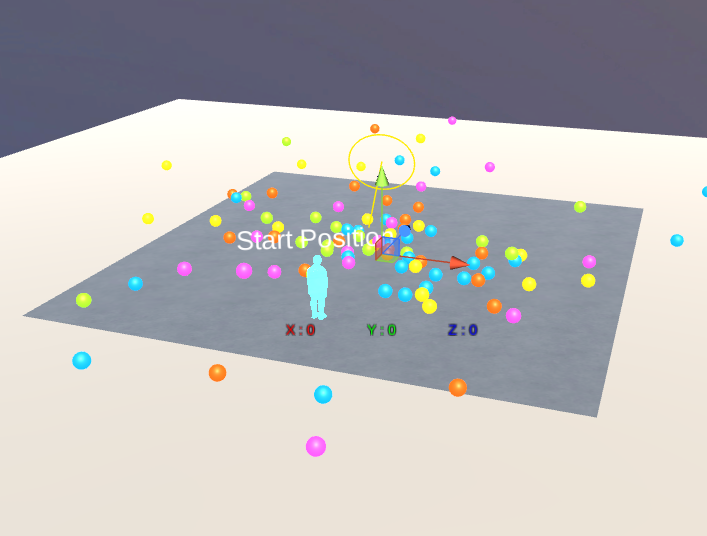
The balls appear in STYLY