In this article we will show you how to use Unity’s Render Texture to reflect the camera’s image on an object in the scene, and how to make the object move in a circular motion.

Sample Scene
Sample
You can experience a sample space from the STYLY GALLERY.
A camera is installed on a small car.
Make sure that the texture on the object in front of you changes as the small car moves.
How to Use the Render Texture
We will now briefly explain how to use the Render Texture.
Creating a Render Texture
Click on Assets from the tab at the top of the screen and select Create→Render Texture.
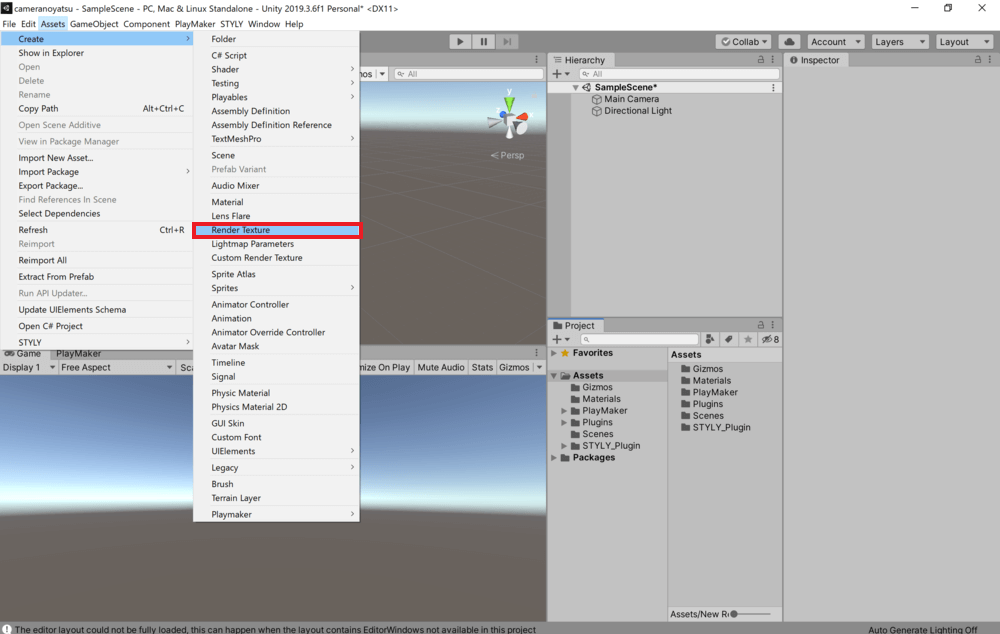
Click on Assets from the tab at the top of the screen and select Create→Render Texture.
This will create a Render Texture in the Assets section of the Project window.
You can change the name of the texture as you like, but we will use New Render Texture.
Creating and Setting Up the Camera
Next, we will create a camera that will be reflected in the Render Texture.
Click on GameObject in the tab at the top of the screen and select Camera.
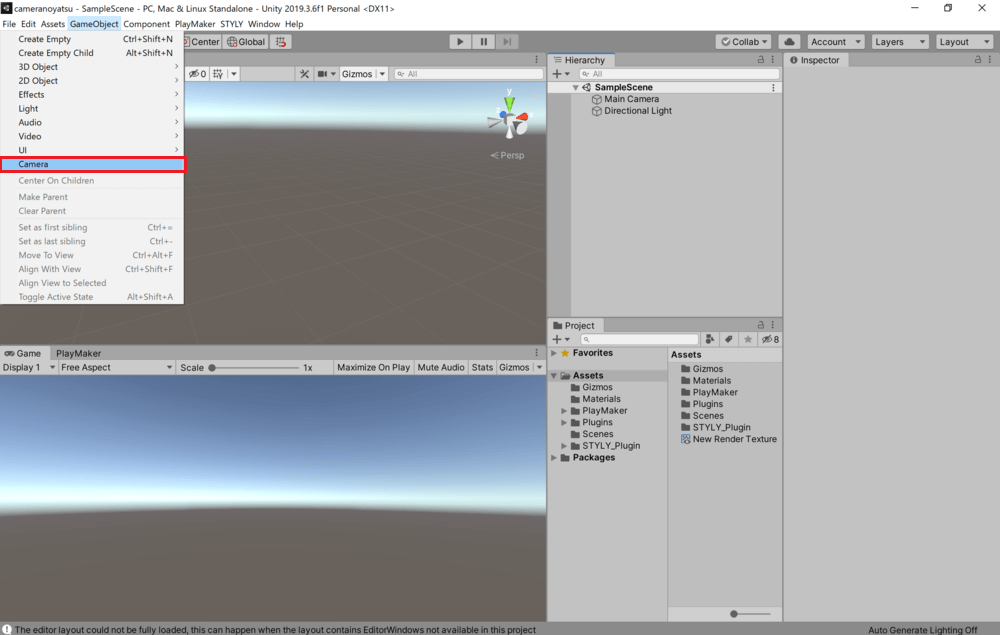
Click on GameObject in the tab at the top of the screen and select Camera.
You can then create a camera in the scene.
You can rename it as you like, but we will use Camera for now.
Next, we will reflect the camera’s image in the Render Texture.
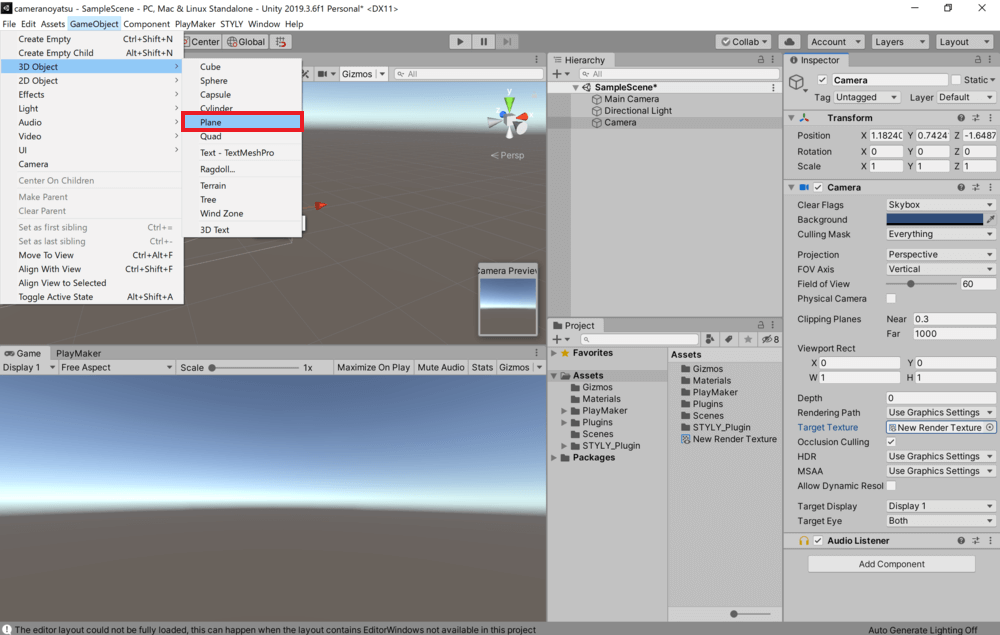
Click on the round icon to the right of the Target Texture in the Inspector of the camera you just created, and select New Render Texture.
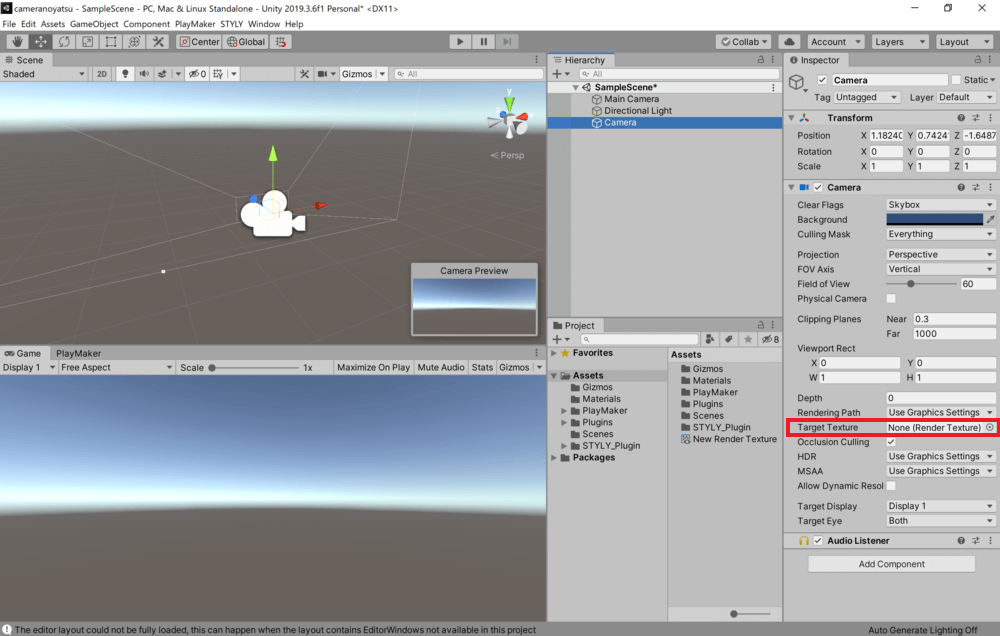
Click on the round icon to the right of the Target Texture in the Inspector.
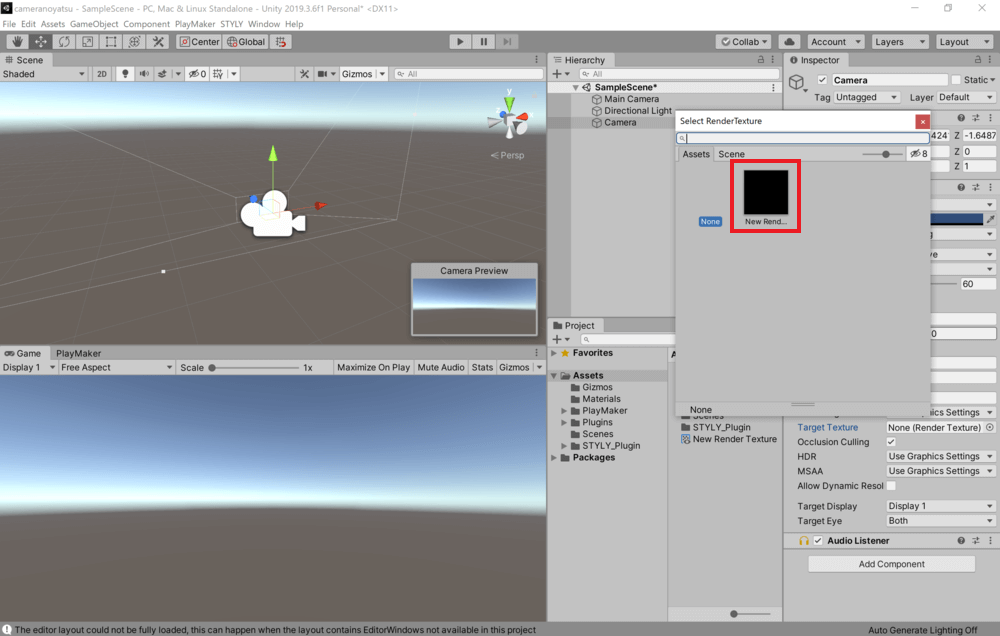
Select the New Render Texture.
The camera’s image is now reflected in the Render Texture.
Applying the Render Texture to an Object
The next step is to create an object to which we will apply the Render Texture.
Click on GameObject from the tab at the top of the screen and select 3D Object→Plane.
Click on GameObject from the tab at the top of the screen and select 3D Object→Plane.
You can then create a Plane in your scene.
You can rename it as you like, but we will use Plane for now.
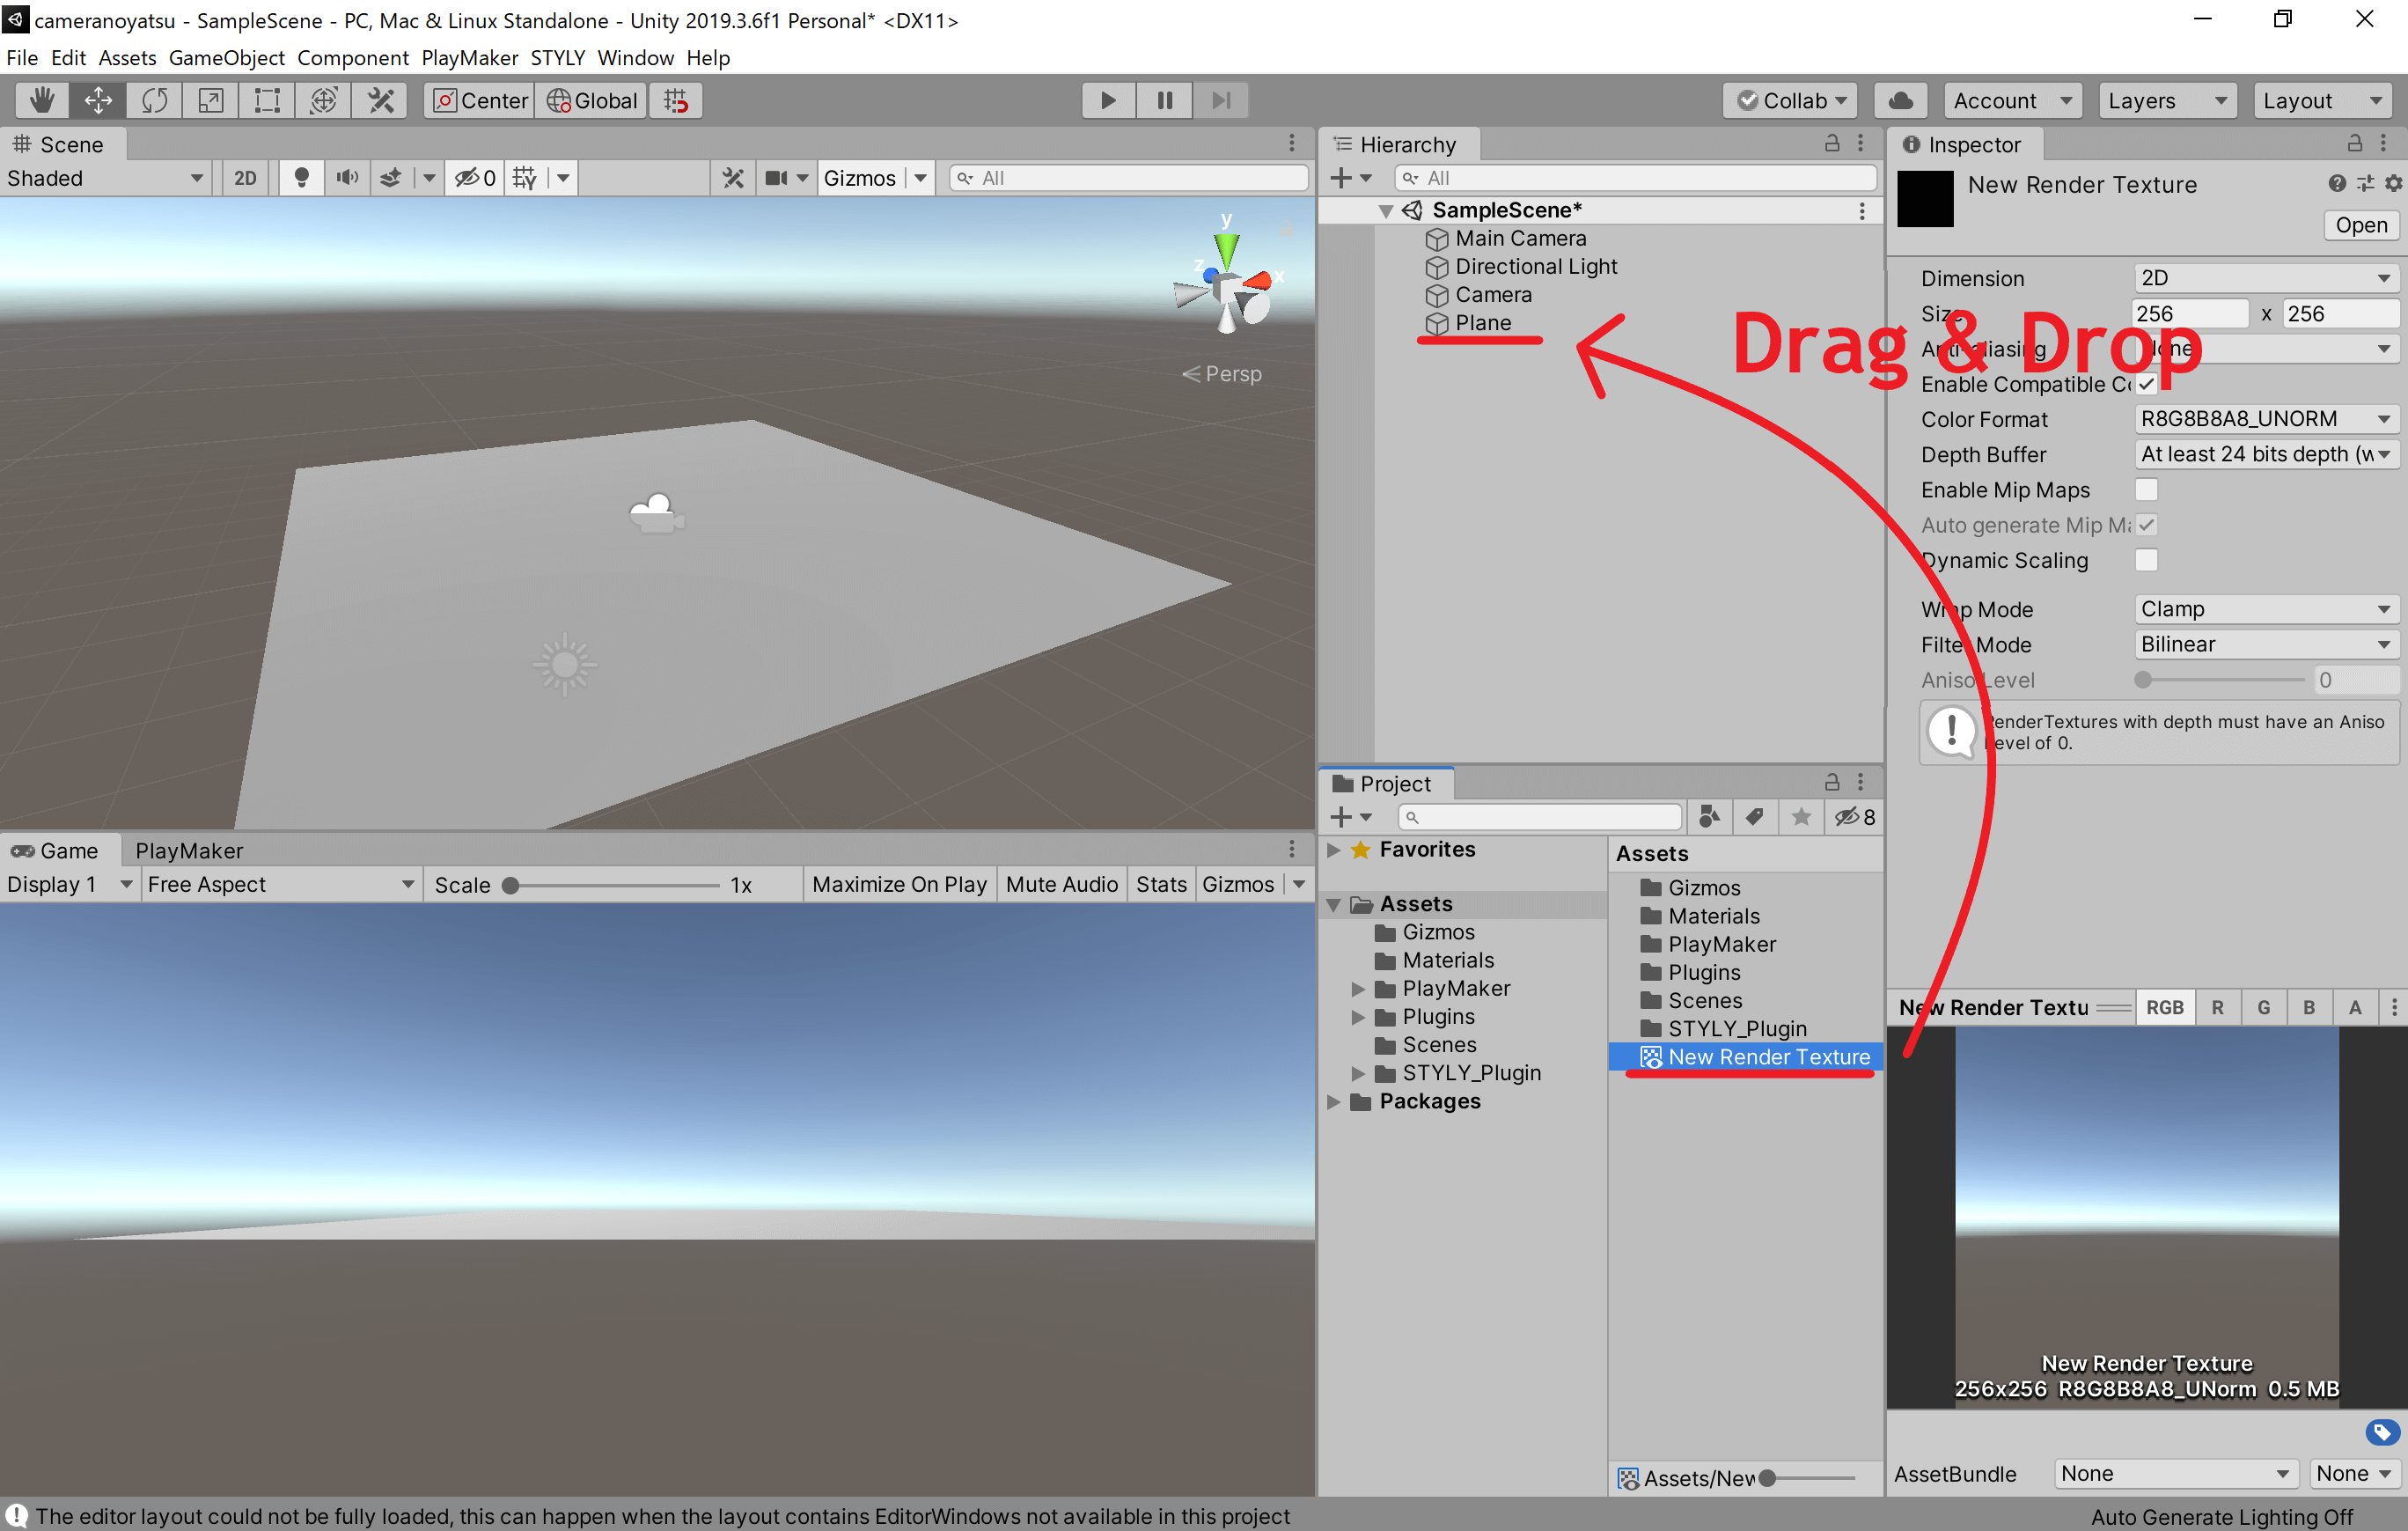
Next, paste the New Render Texture onto the plane.
Drag and drop the New Render Texture from the Assets section of the Project window onto the Plane in the scene.
The appearance of the Plane in the scene view changes.
The New Render Texture is now reflected in the Plane in the scene.
You can also see that the appearance of the Plane in the scene view has actually changed.
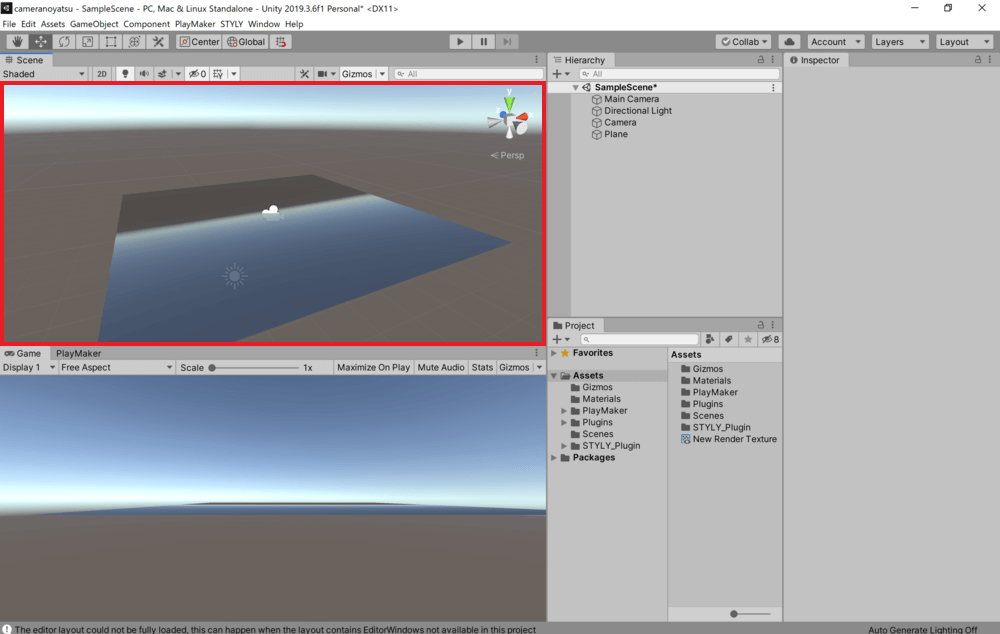
The appearance of the Plane in the scene view has changed.
*If you apply the New Render Texture to a rectangular plane with different length and width, the camera image may be stretched.
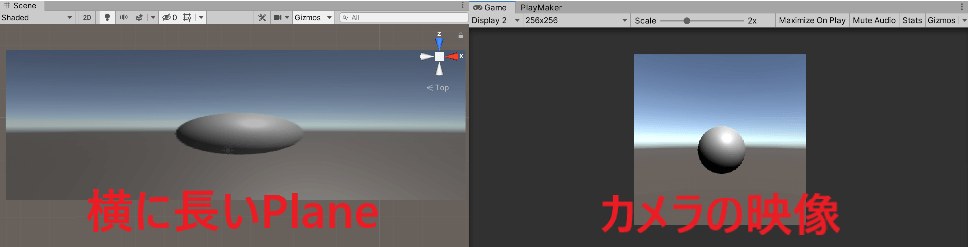
Camera image being stretched.
In order to avoid stretching, you need to change the Size from the default value of 256×256 to a value that matches the aspect ratio of the plane.
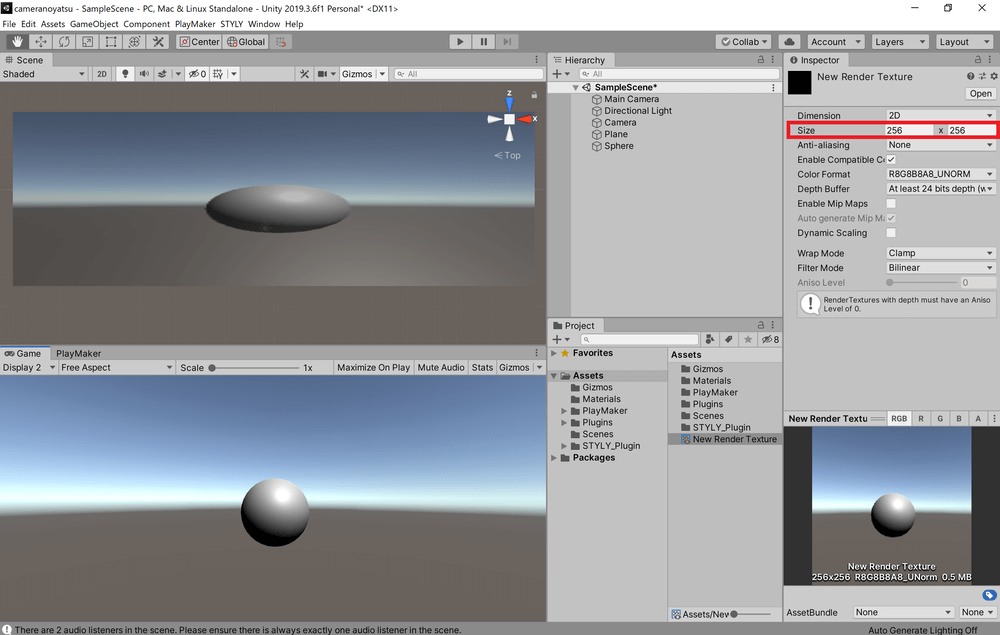
Changing the Size value.
The Size value can be determined freely, but it should preferably be entered as a power of two.
If you enter a value that is not a power of two (NPOT), it may be a little slower and may not be displayed correctly in some environments.
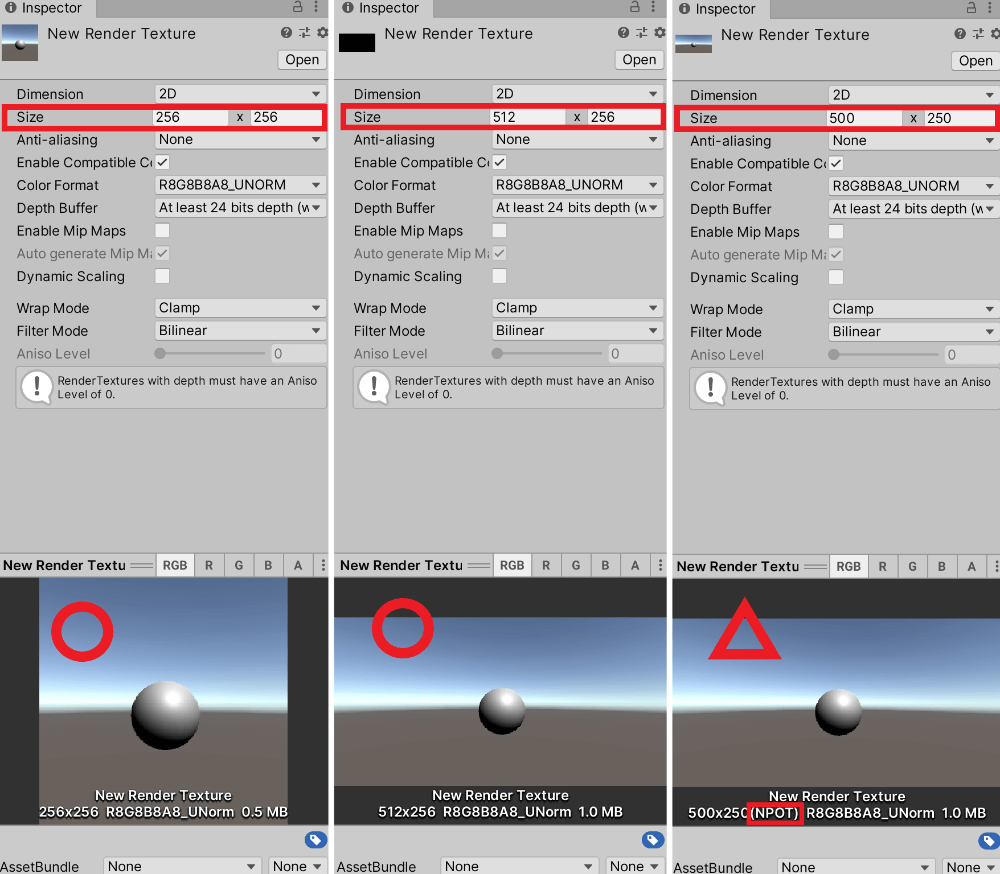
Size example, from left to right: 256×256, 512×256, 500×250 (NPOT).
Now, you can reflect the camera image to the object.
For the sake of clarity, we have chosen Plane as the object to reflect the camera image, but it can also be reflected in Cube and Sphere.
In the sample, we have actually reflected the camera image on a Cube and a Sphere, so you can see how the image is reflected.

Various objects reflecting the camera image.
How to Implement the Sample
In the sample, a red car moves in a circular path.

Circular motion.
This movement was created using PlayMaker. As it is a movement that is often used when creating a scene, we will explain how to create it now.
The following explanation assumes that you have installed PlayMaker in Unity.
For an overview of PlayMaker and how to install it, please refer to the following article:
![[Unity Tutorial] Creating a Game Using Playmaker ① From Basic Introduction to Installing](https://styly.cc/wp-content/uploads/2019/06/1200px-160x160.jpg)
This time, we will rotate on one axis. And as the object rotates around that axis, we will move the object in a circular orbit.
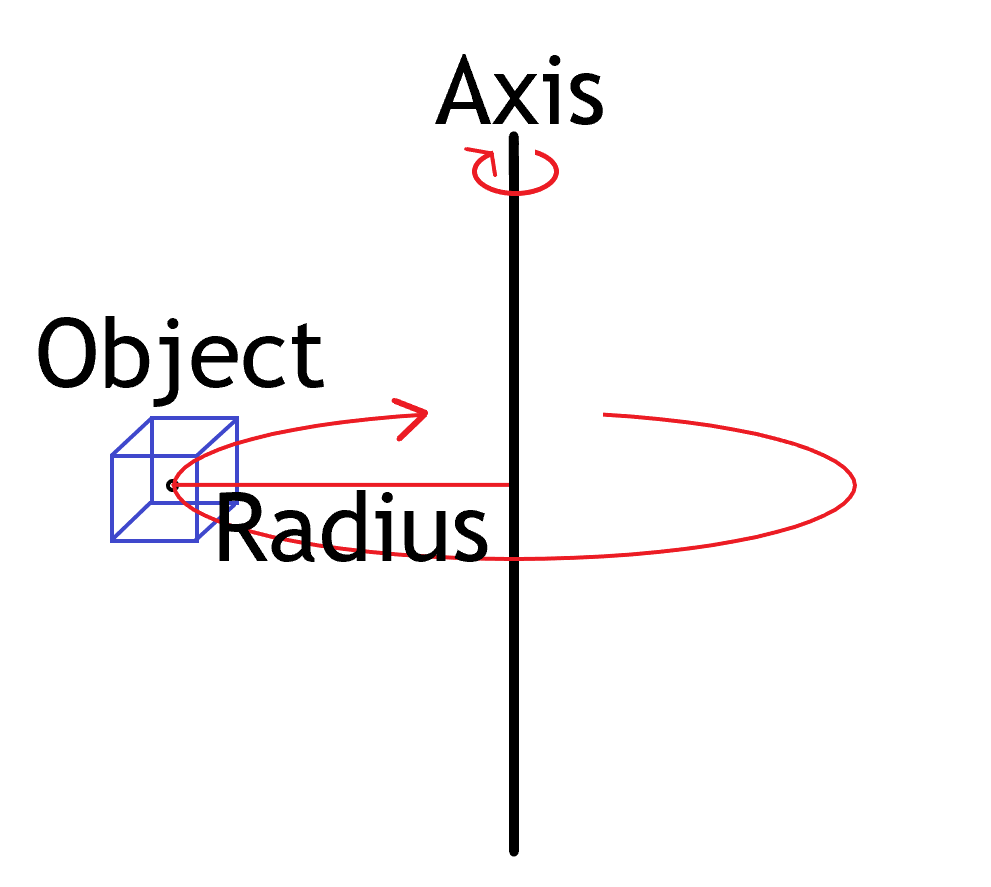
Image of the implementation method.
The first step is to create the axis to be rotated.
For the sake of simplicity, let’s assume that the axis to be rotated is the Y axis with X=0 and Z=0.
Click on GameObject in the tab at the top of the screen and select Create Empty.
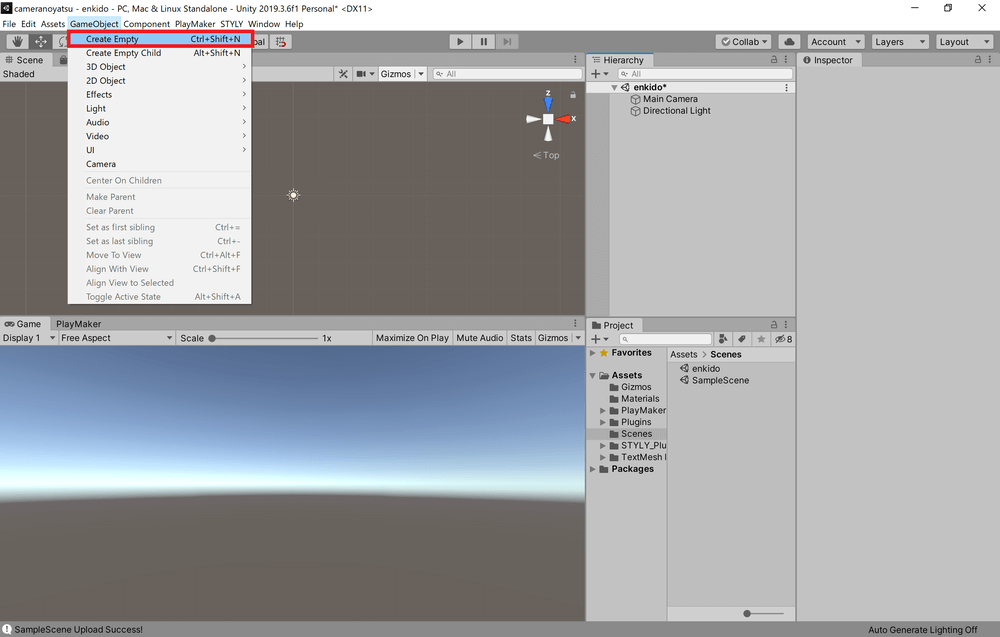
Click on GameObject from the tab at the top of the screen and select Create Empty.
You can now create a GameObject in the scene.
The name can be changed freely, so we will change it to Y axis.
Open the Inspector for the Y axis and change the Position to 0 for X, Y, and Z.
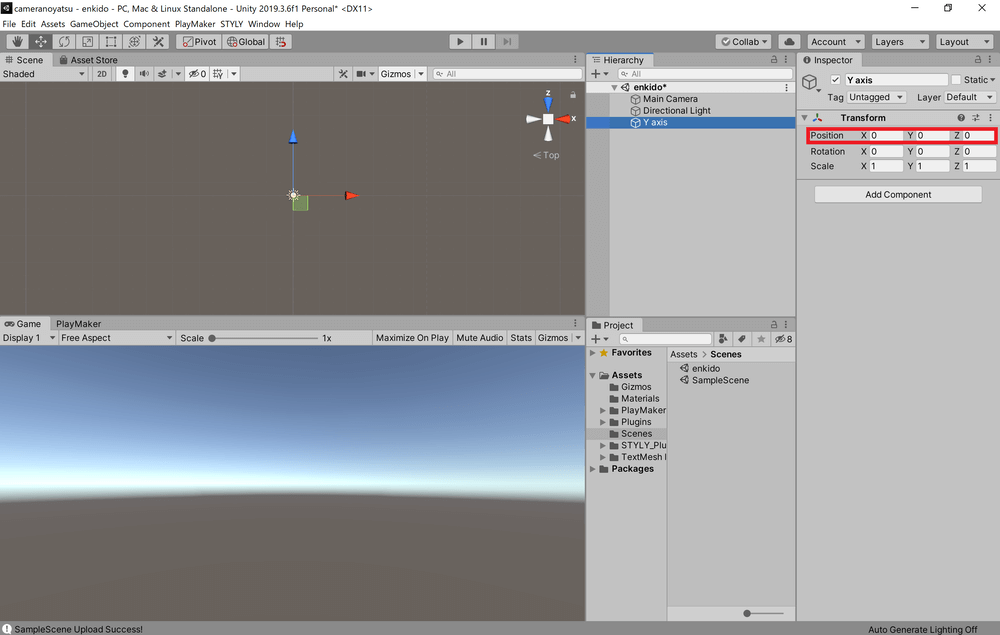
Change Position to 0 for X, Y, and Z.
Next, we will create an object that will move in a circular motion.
Right-click on the Y axis in the scene and select 3D Object→Cube.
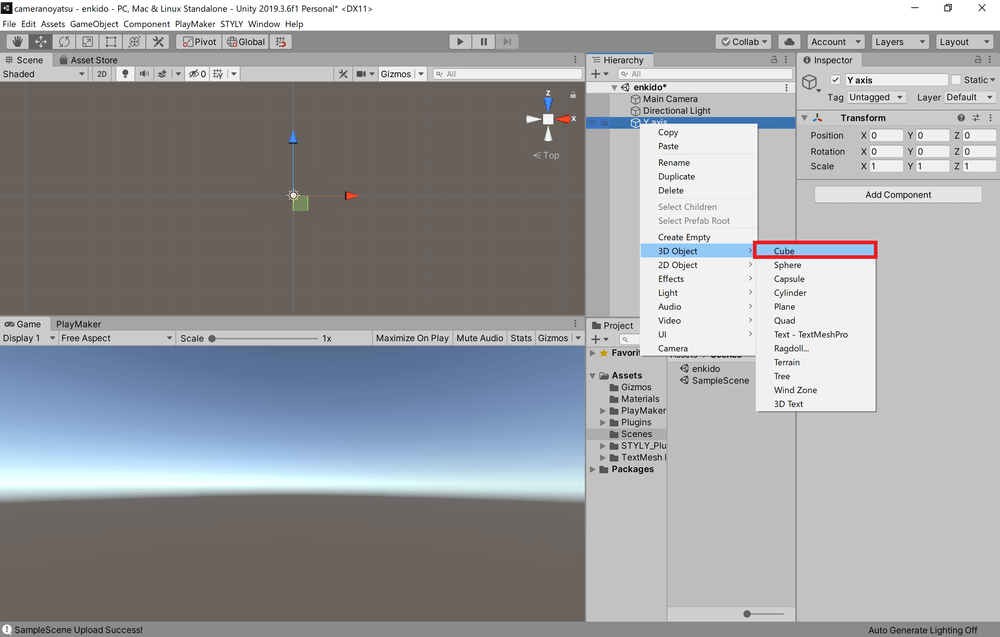
Right-click on the Y axis in the scene and select 3D Object→Cube.
Then you can create a cube in the scene.
You can rename it as you like, but for now we will use Cube.
Open the Inspector of the Cube and change the Position to 5 for X only.
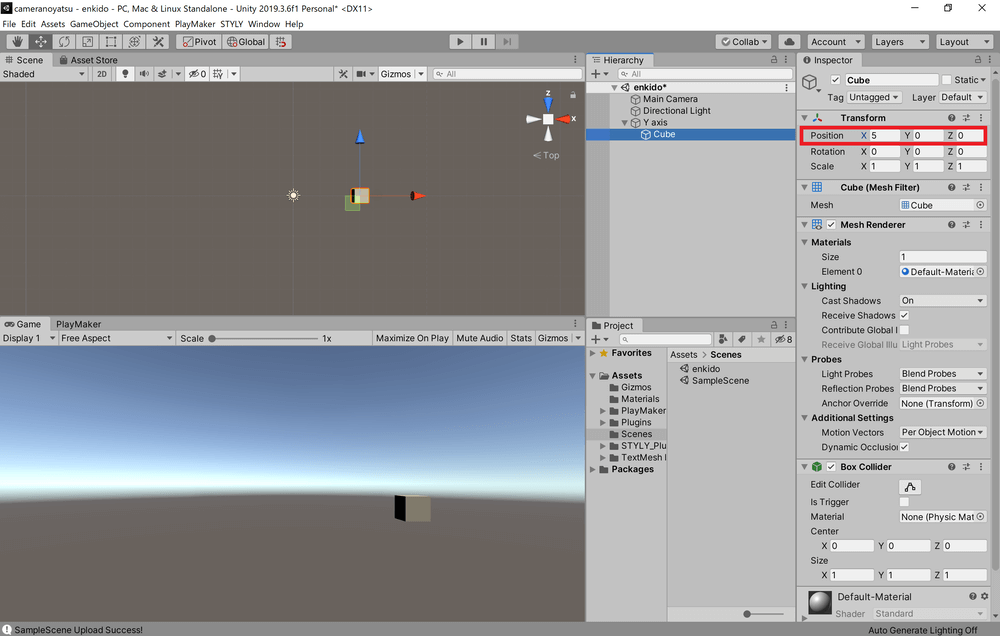
Change the Position to 5 for X only.
*In this case, the parent object of the Cube is Y axis, so the coordinates in the Cube’s Inspector are local coordinates centered on Y axis.
The X value is the distance between the Cube and the rotation axis. In other words, the radius of the circular orbit the Cube moves.
Next, we will use PlayMaker to create a mechanism for the Cube to rotate around the Y axis.
From the Y axis Inspector, click Add Component and add the PlayMakerFSM.
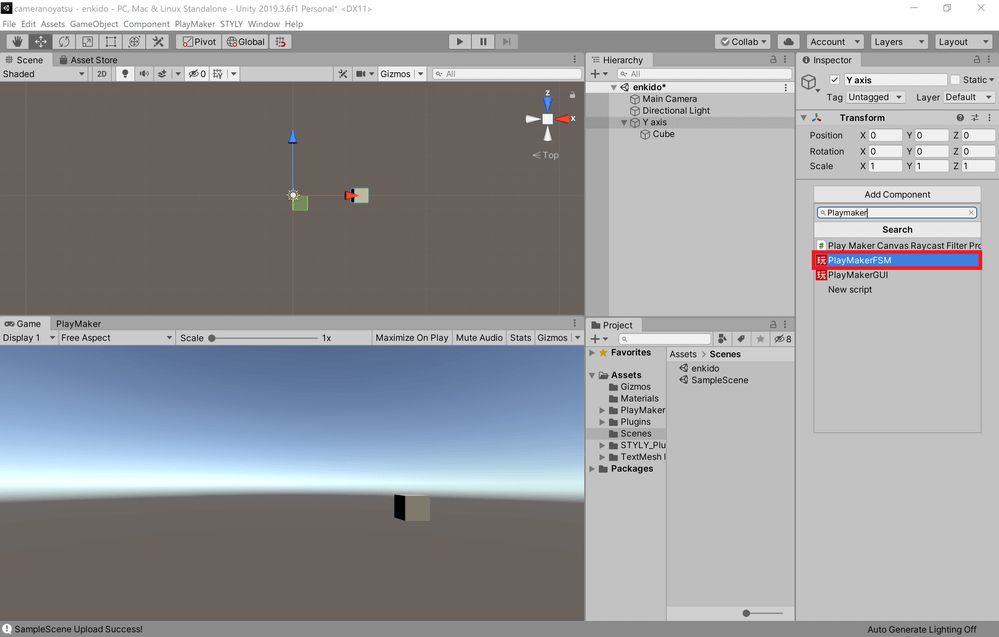
Click Add Component to add a PlayMakerFSM.
Next, click Edit on the PlayMakerFSM to open the PlayMakerFSM editing window.
Select State 1, open the Action Browser, and add Float Add and Set Rotation.
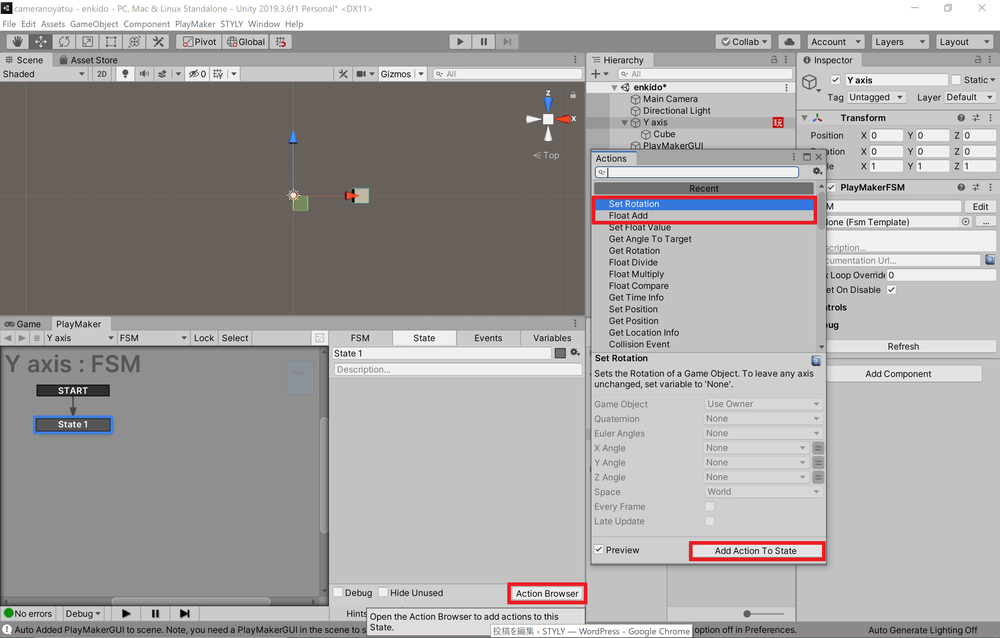
Add Float Add and Set Rotation.
In Float Add, change the Float Variable from None to New Variable and name the new variable Y Angle.
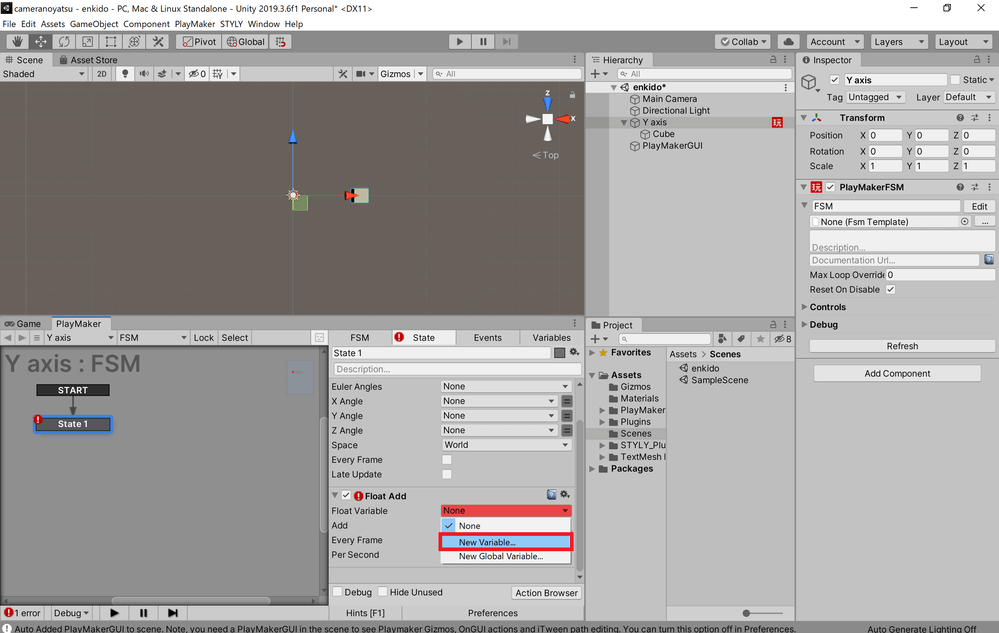
Change Float Variable from None to New Variable.
Change the Float Add’s Add from 0 to 1, and also check the Every Frame checkbox for both Float Add and Set Rotation.
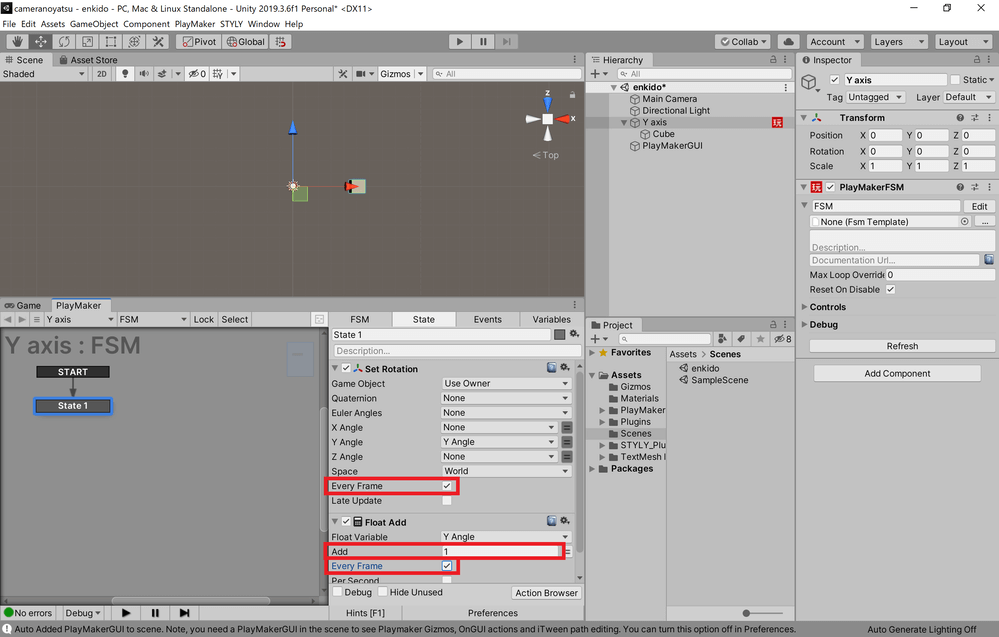
Change the Add of Float Add from 0 to 1, and also check Every Frame of both Float Add and Set Rotation.
Finally, change the Y Angle of Set Rotation from None to Y Angle.
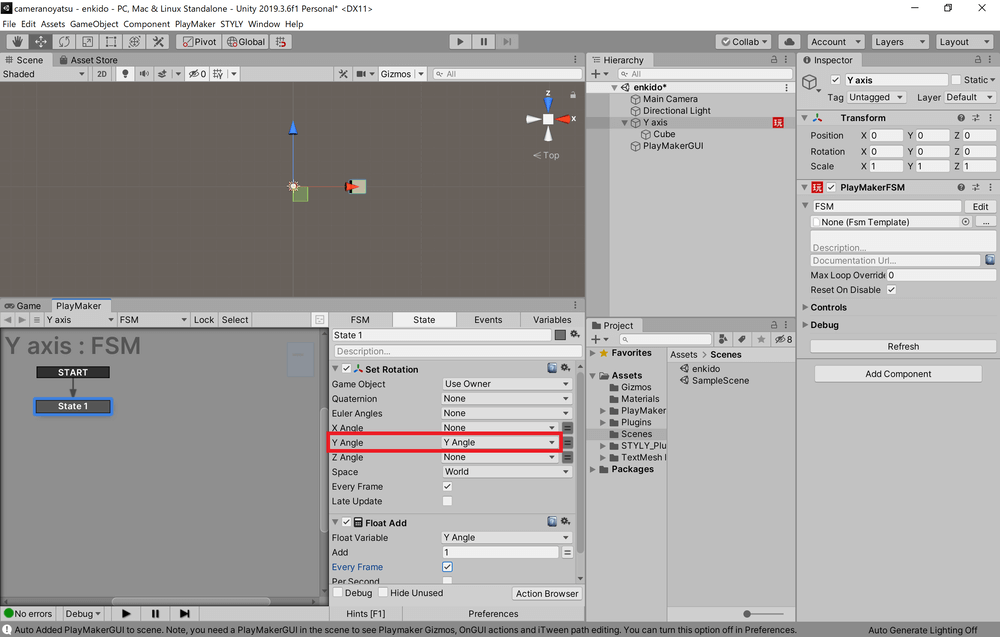
Change the Y Angle of Set Rotation from None to Y Angle.
Press the Play button at the top to confirm that the Cube actually moves in a circular path.

Circular motion of the Cube.
How to upload to STYLY
Let’s upload your 3D model to STYLY.
Create a STYLY account
How to create an account

How to upload to STYLY

How to upload from Unity to STYLY

Let’s learn VR/AR content creation with no experience!
NEWVIEW SCHOOL ONLINE is an online learning site where you can learn the basics of Unity and PlayMaker required for VR/AR content production, as well as the production process (and production techniques) of the attractive content distributed on STYLY!
- You can create VR/AR contents without writing programming code.
- Officially supervised Unity courses are available.
- Additional elements such as photogrammetric production methods and content weight reduction are available.
- You can learn how to think about creating VR/AR content.
