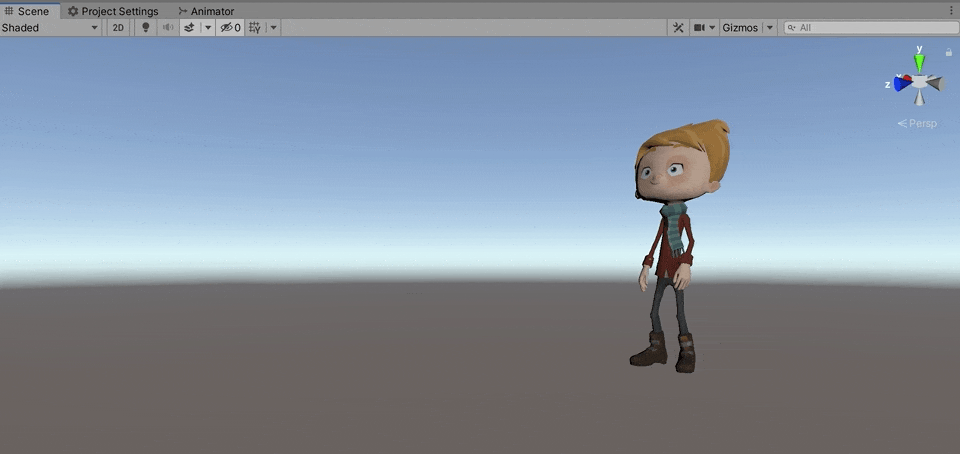
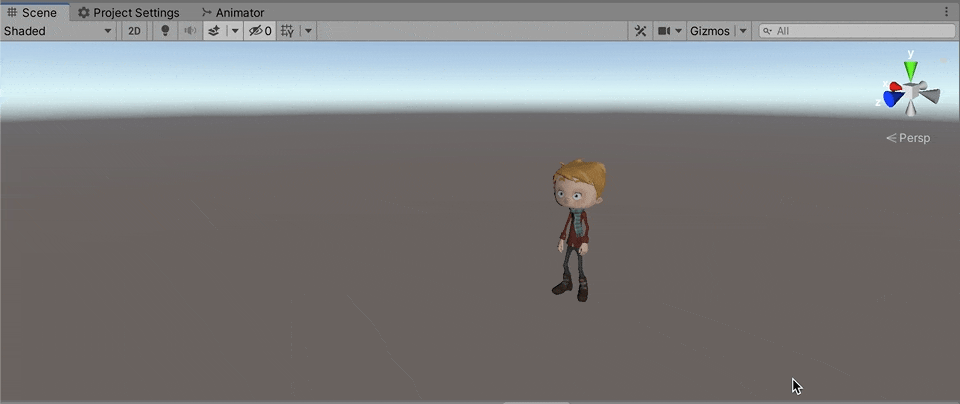
This article will illustrate how to apply Unity animations by animating an avatar.
In this article, we will learn how to attach multiple animations to a humanoid avatar and control the animation transitions.
Let’s challenge ourselves to use various animations to create more complex expressions.
In this course, students will prepare a human avatar and learn how to apply multiple animations to the avatar and control the animation transitions using Unity.
Specifically, we will use
- Waiting
- Walking
- Run
- Stop
and be able to set your own playback timing for each animation.
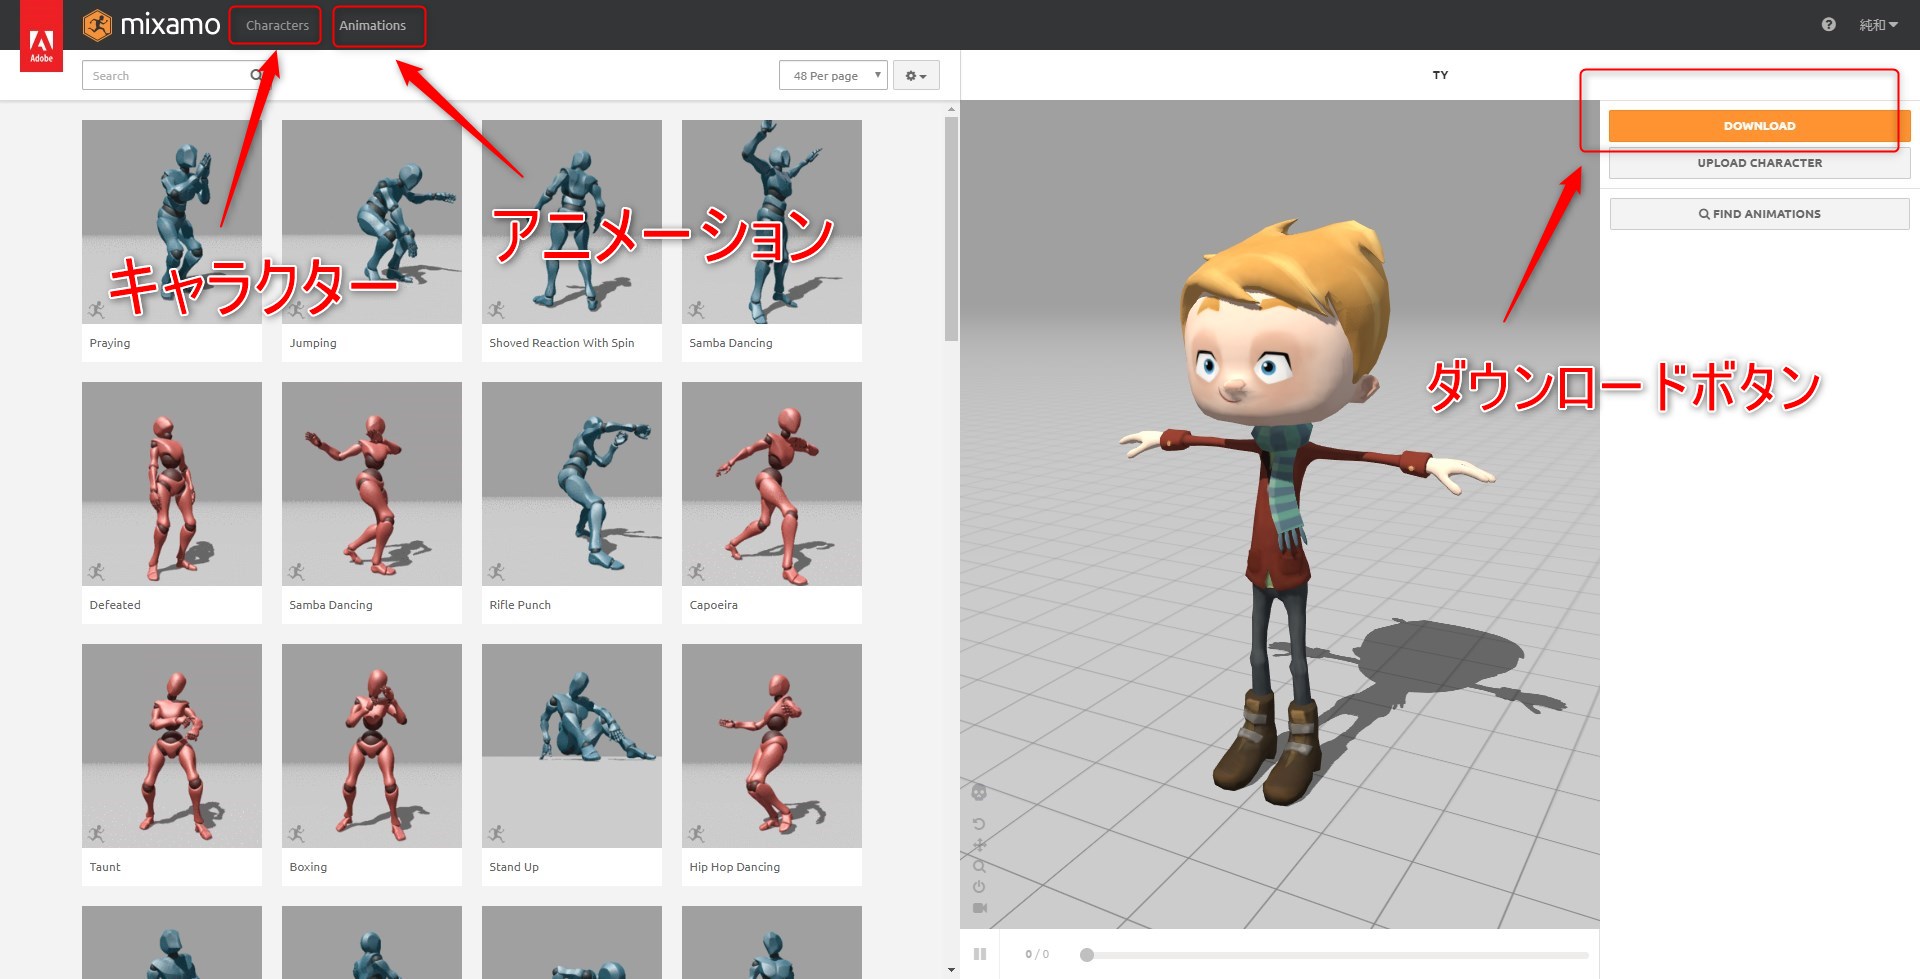
Let’s try Mixamo!
In this section, we will use the “Mixamo” service provided by Adobe to prepare avatars for use in this course.
Mixamo allows you to download any combination of “character” x “animation”.
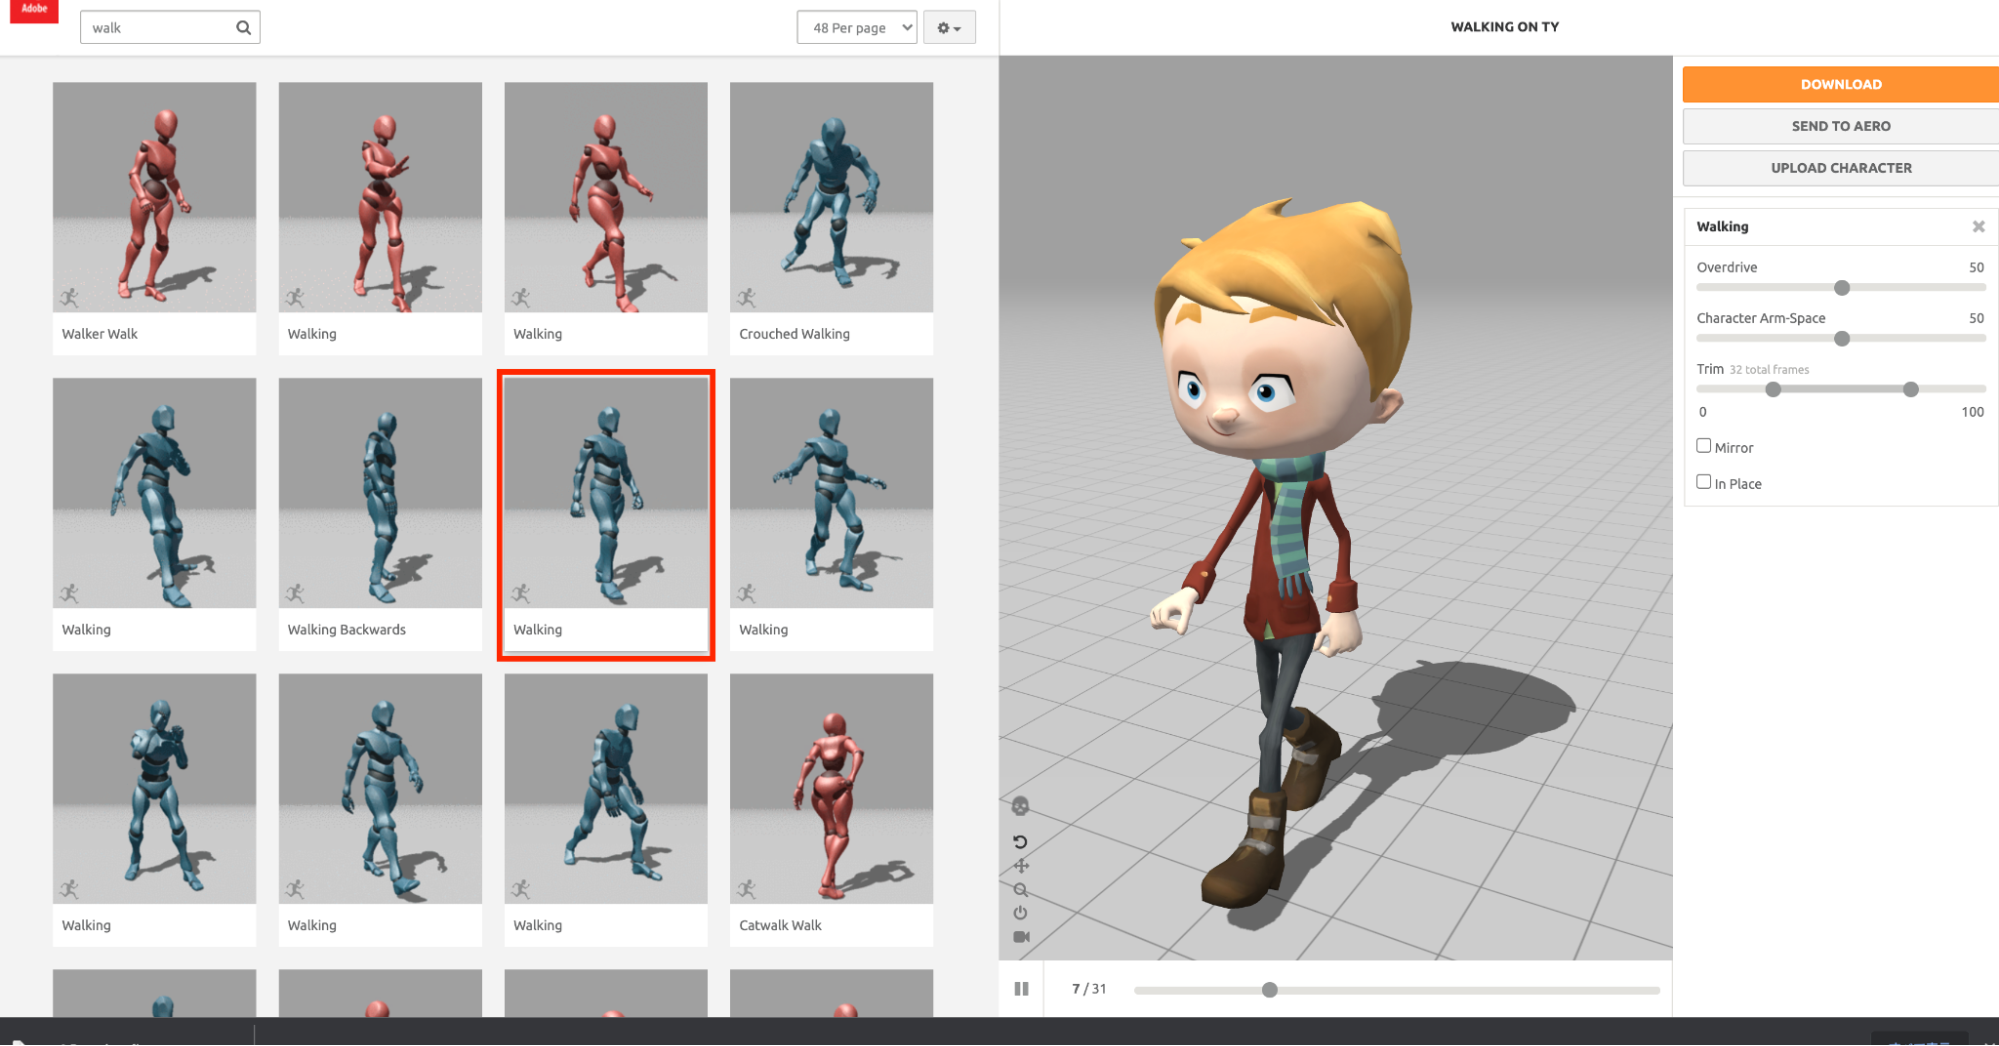
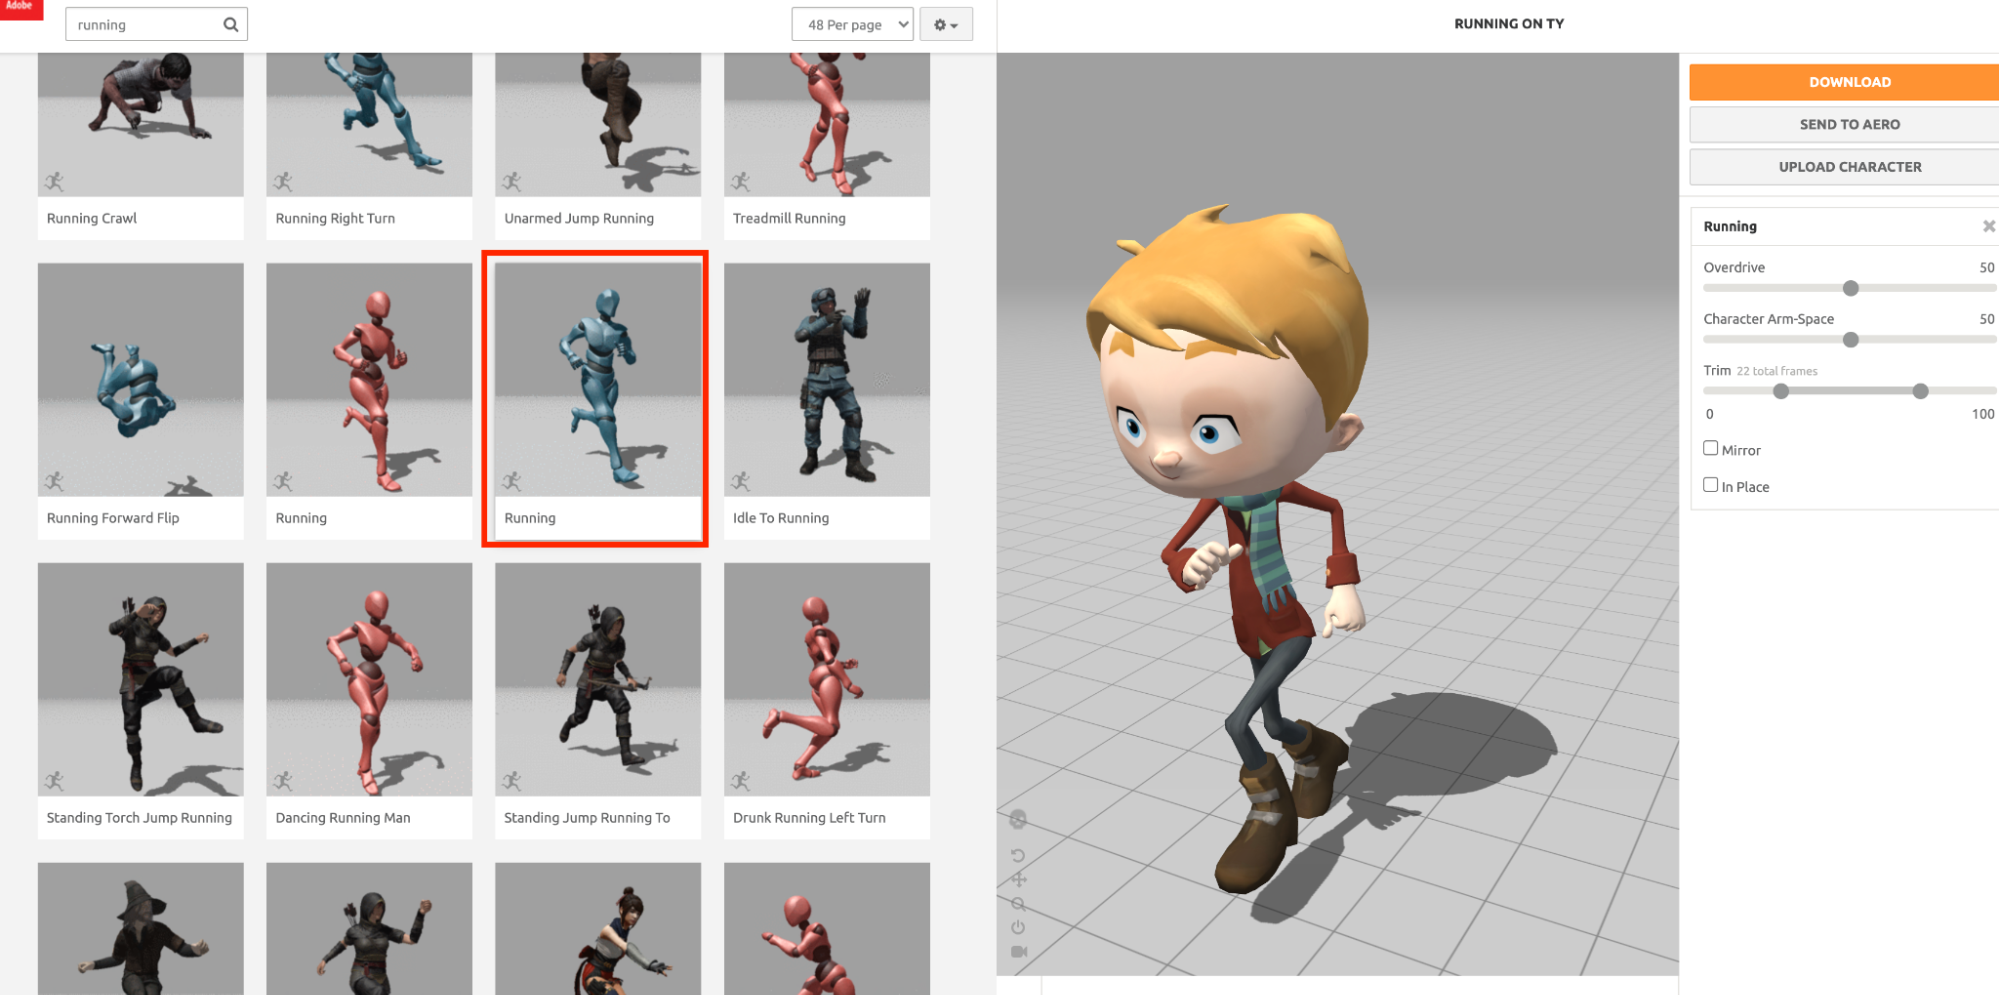
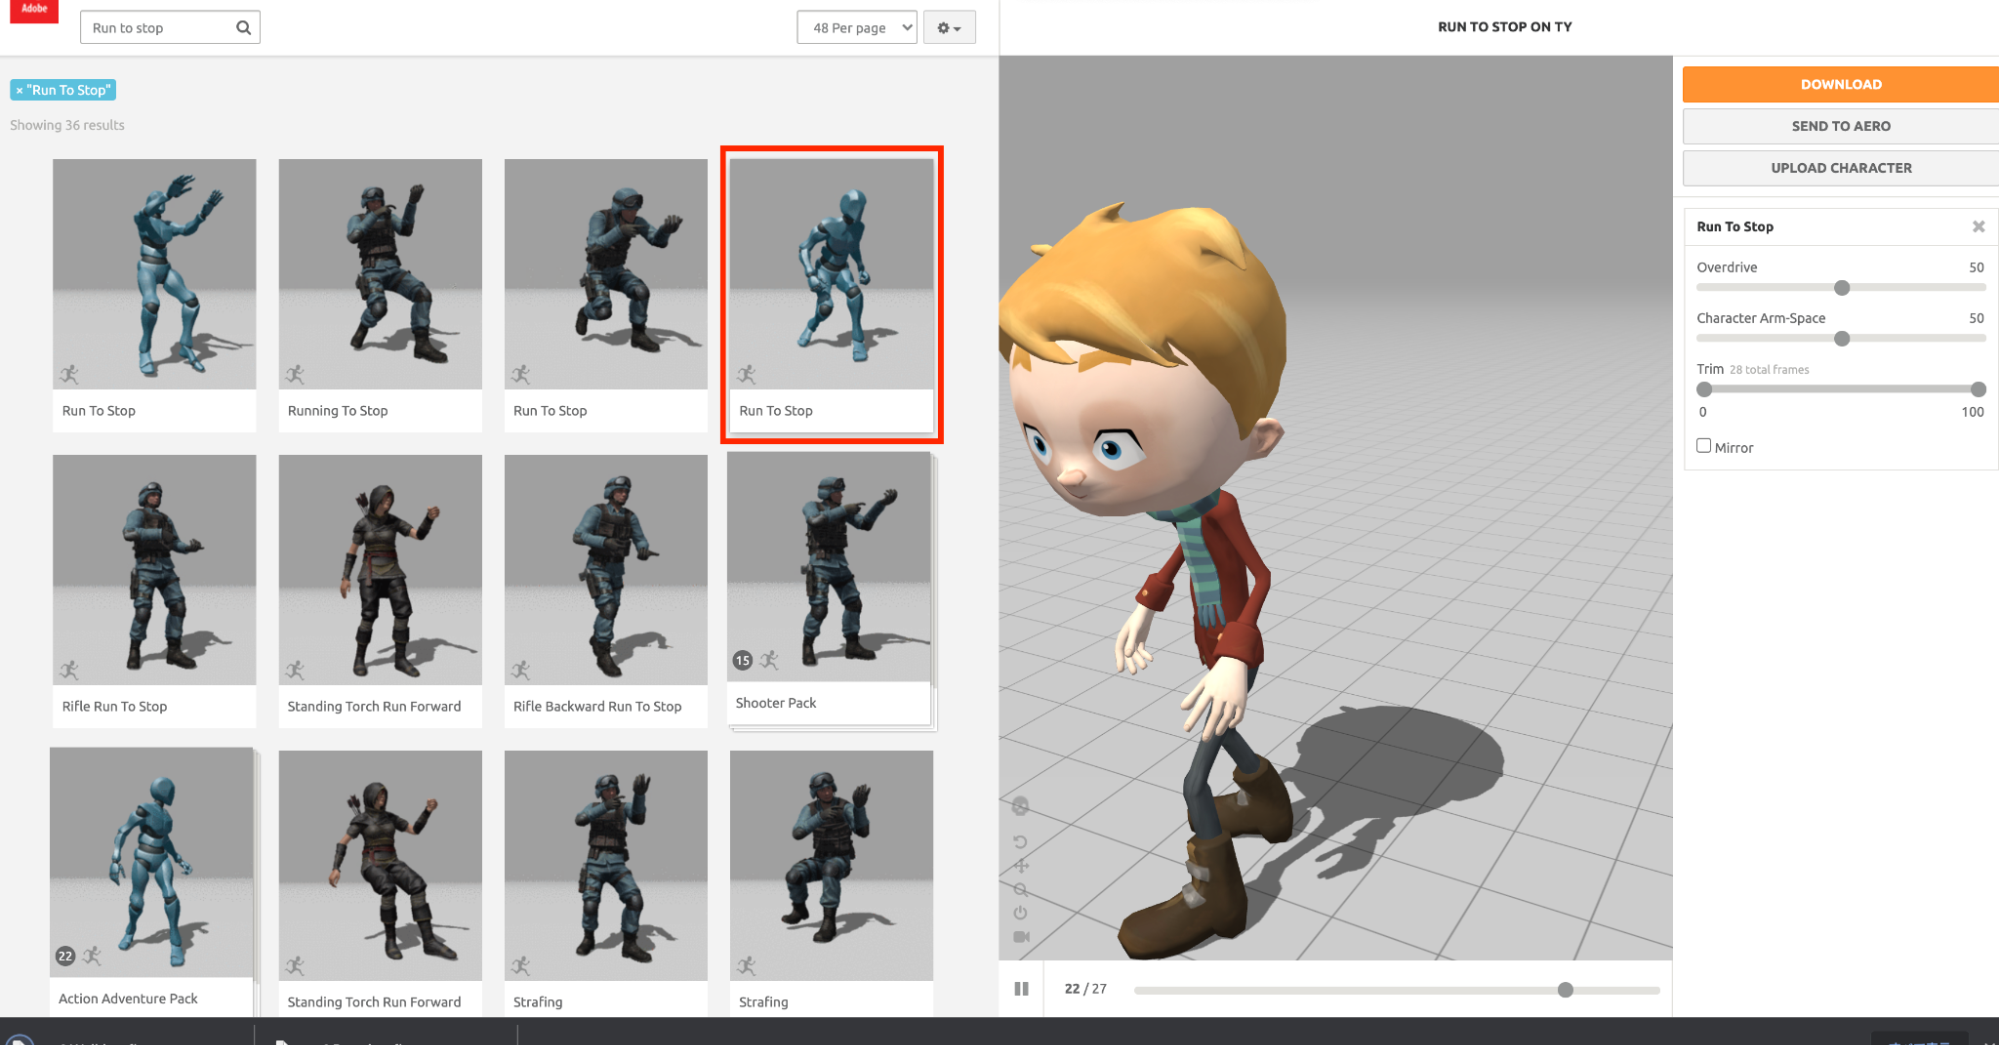
Select each from the list and preview them on the right side of the screen.
003
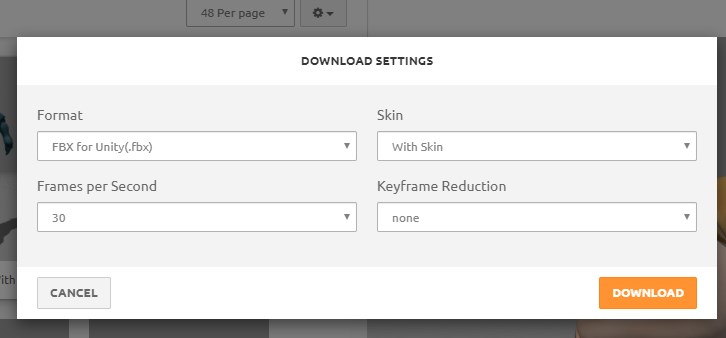
With the character displayed on the preview screen, select the animation and press the “DOWNLOAD” button to display the settings dialog, as shown below,
- Format is ” FBX for Unity (.fbx)
- Select ” With Skin ” for Skin
Please select “FBX for Unity (.fbx)” for Format and “With Skin” for Skin as shown below.
Click the “DOWNLOAD” button in the dialog to actually start downloading the file (.fbx format).
The downloaded file name is usually “[character name]@[animation name].fbx” (e.g. ty@Walking.fbx)
It is possible to upload your own character file, apply Mixamo animations to it, and download it, but we will not do so in this lecture.
The animations we will be using are
Breathing Idle
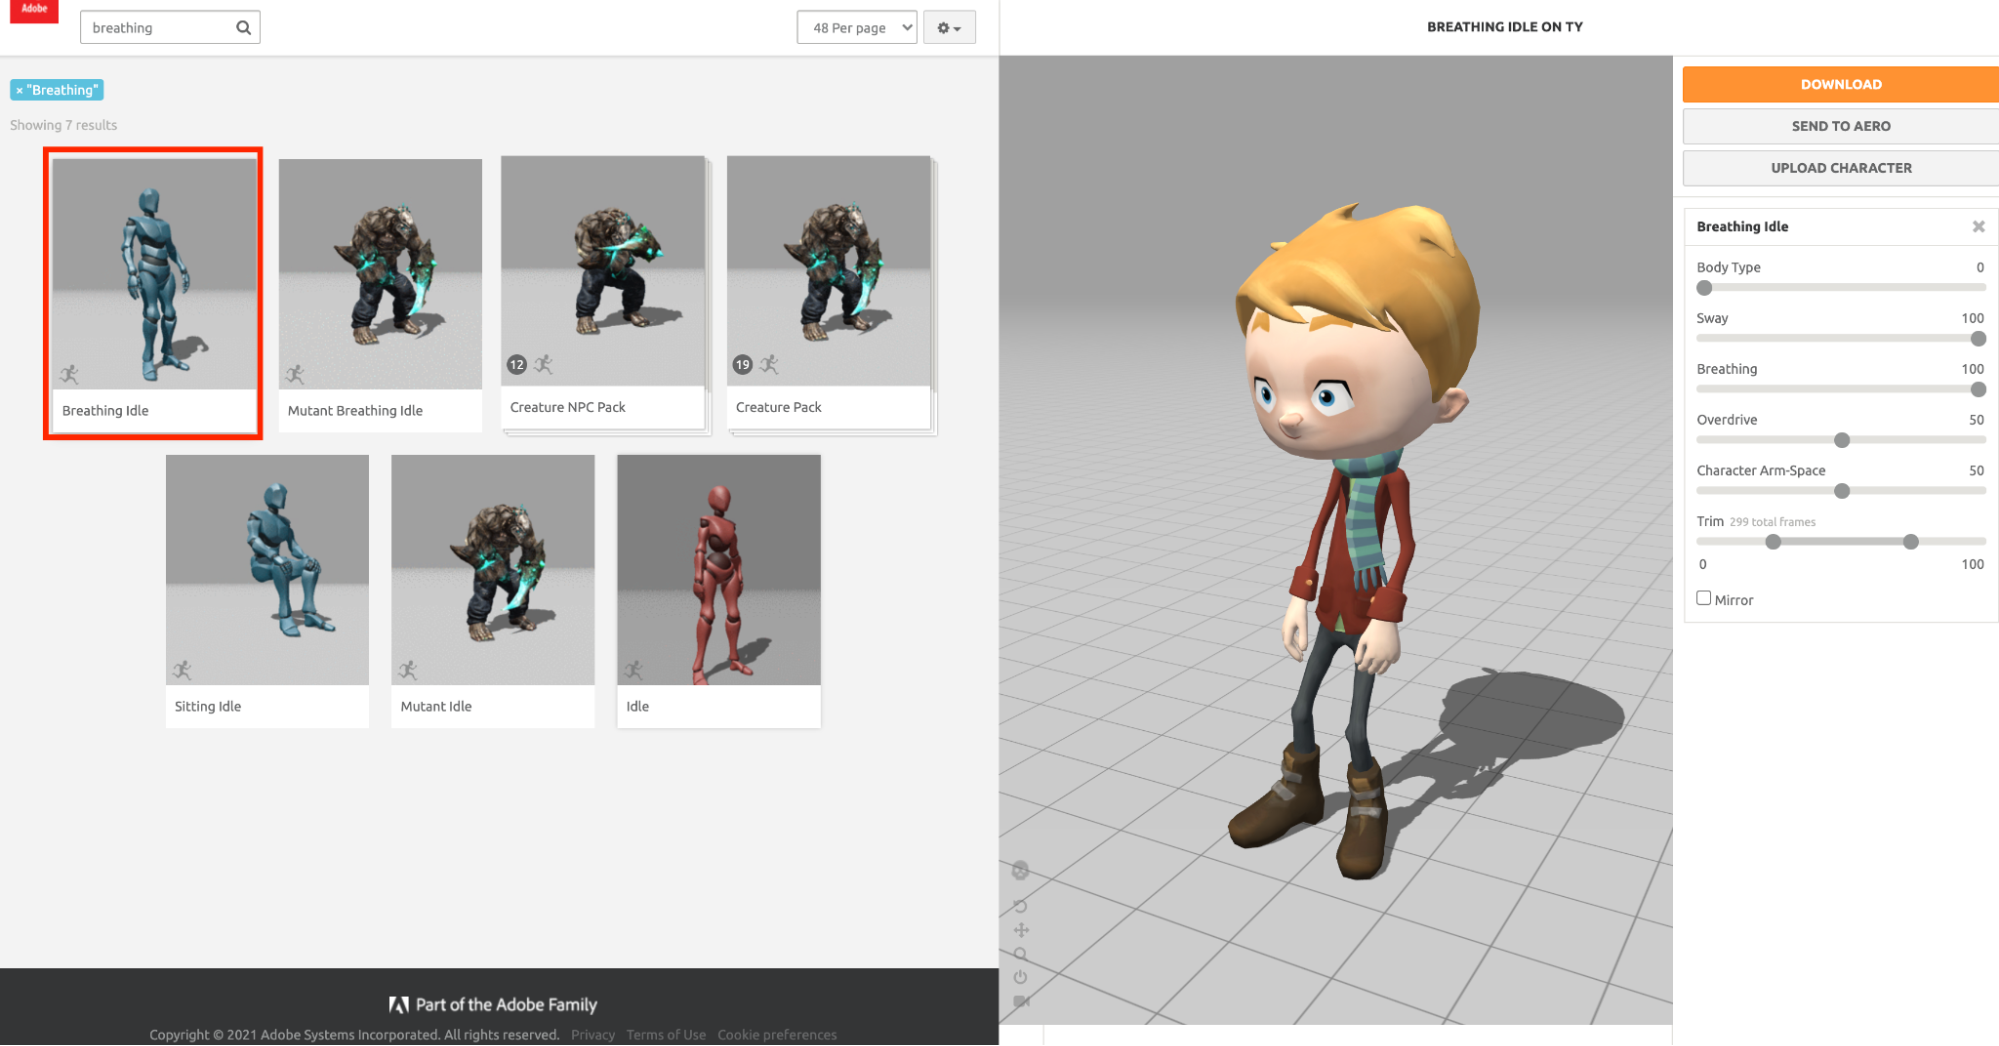
Walking
Running
Running ・Run to Stop
These are the four animations used in this project.
(Generic animations such as Walking and Running may have more than one animation.
In that case, download the animation you like, as the differences in movement do not affect the operations that follow.
You can search for an animation name using the input form in the upper right corner of the screen.
Choose the character you like and download the four animations.
Let’s place the downloaded files in your Unity scene!
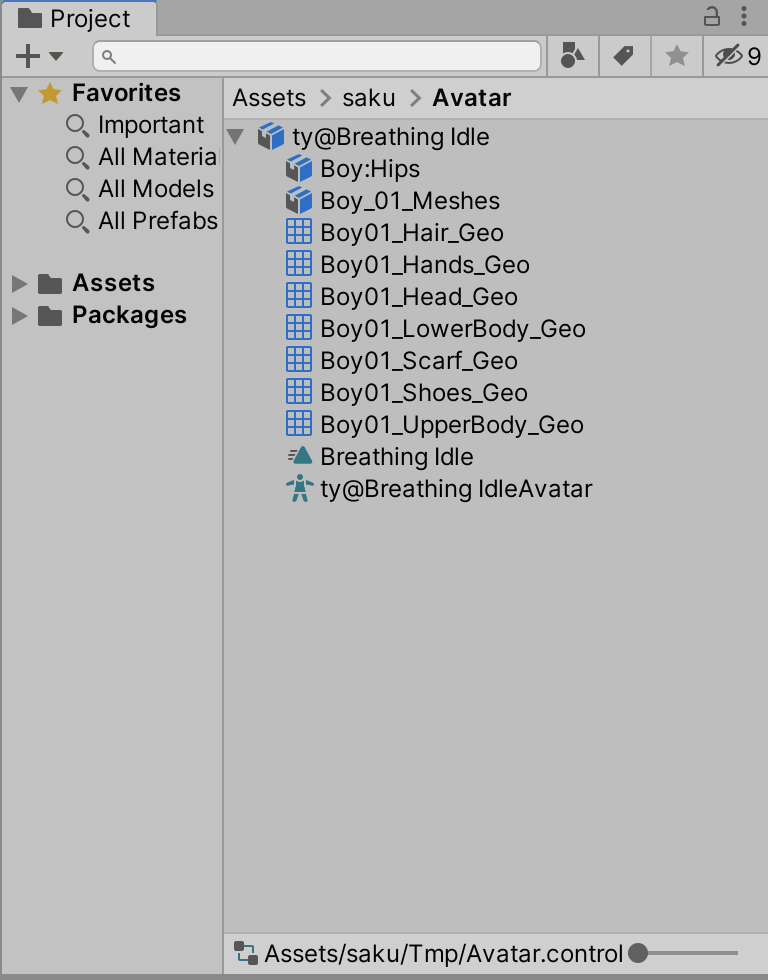
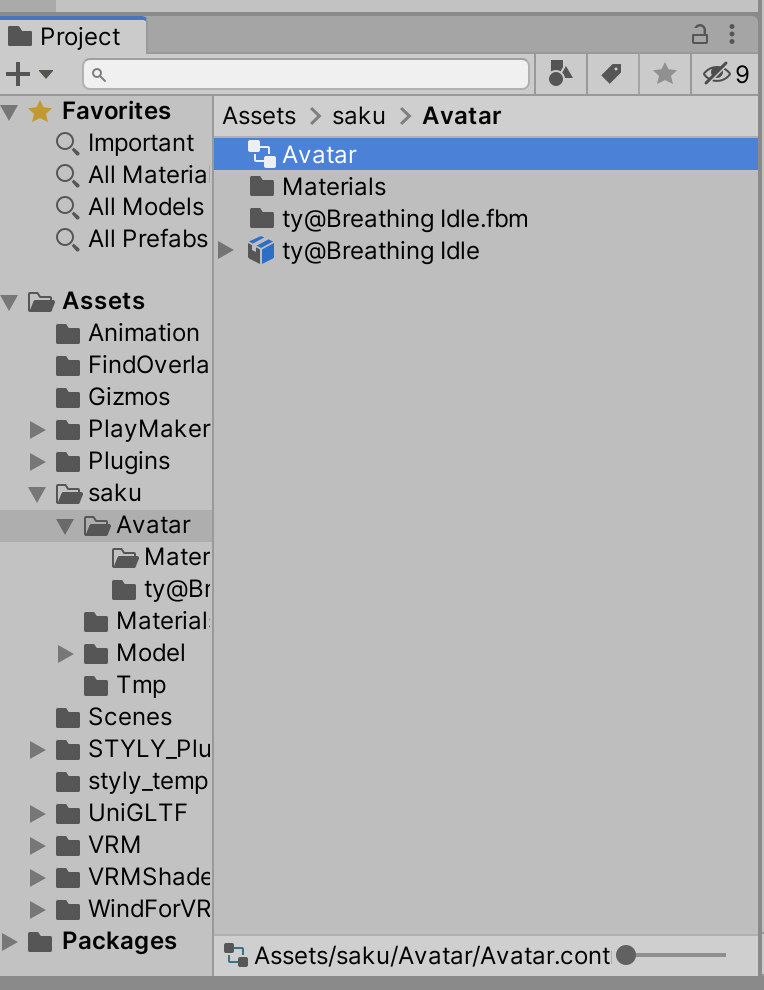
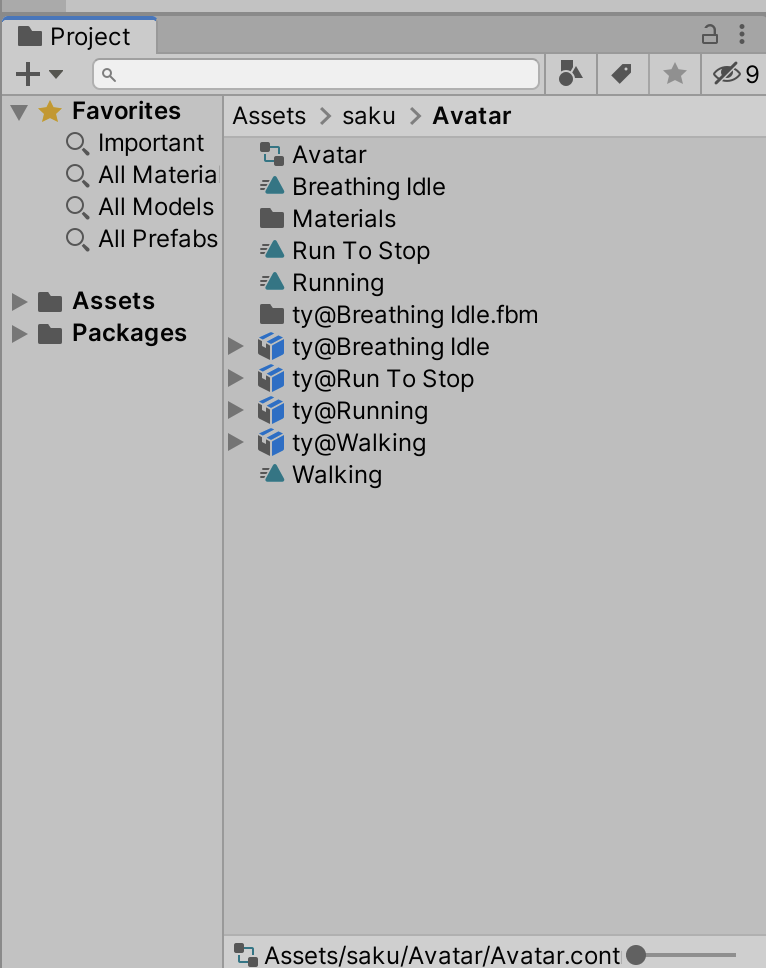
Import the downloaded fbx files into Unity.
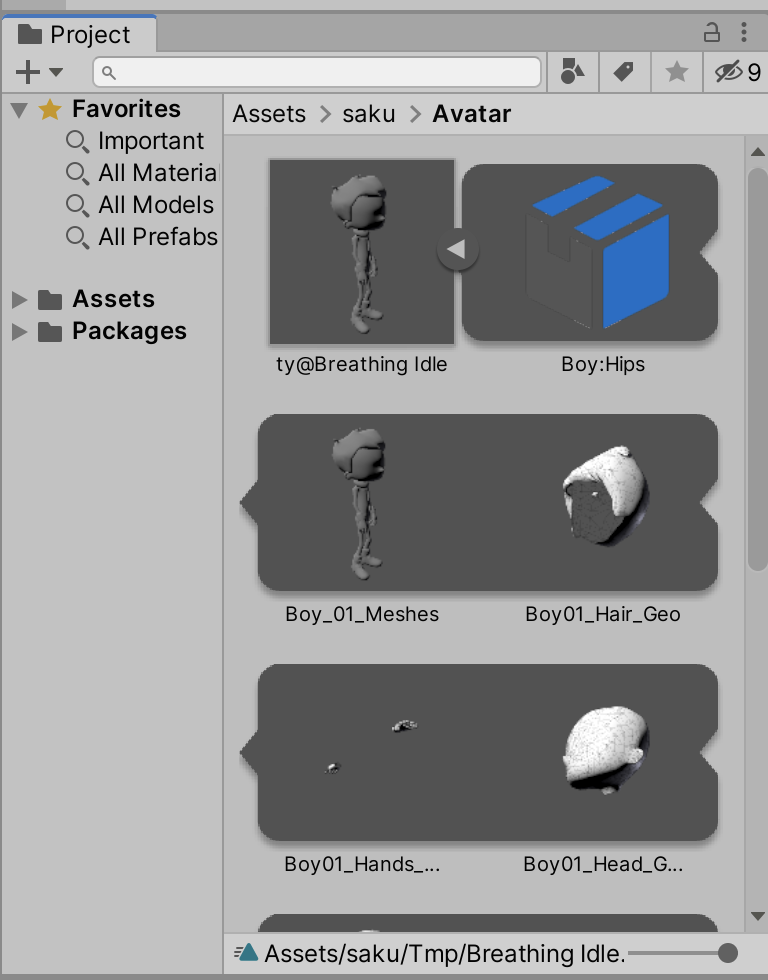
Create a folder called “Models” under Assets in the project window and import the fbx files there.
Drag and drop the files from Explorer for Windows or Finder for Mac to import them.
Click on the left button of the fbx file to expand it, and you will be able to view the various data contained in the fbx file,
You can check the data contained in fbx.
Project window: List view
Project Window: Maximum Icon Display
Adjusting the Material of Imported Model Data
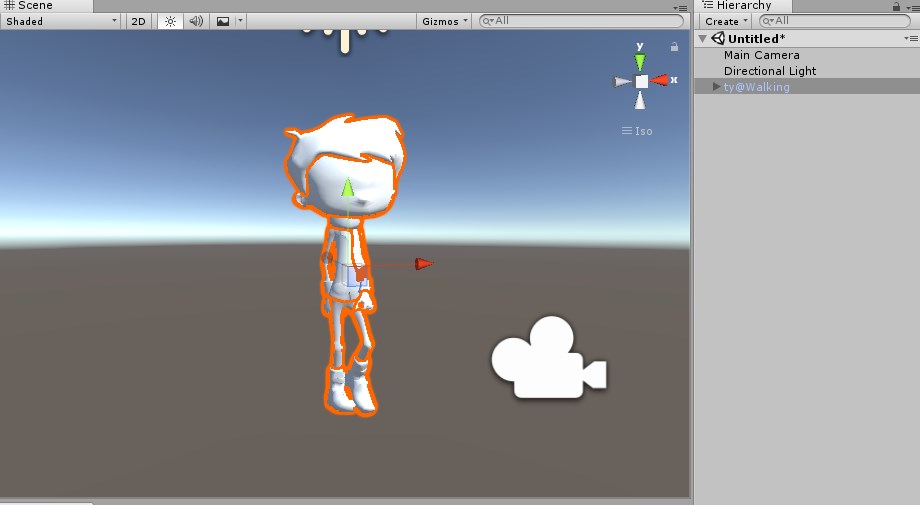
If you have not done anything, you may notice that no texture is applied to the imported fbx when you place it in the scene.
This is because the imported model and material/texture references do not mesh well.
To fix this, select the fbx in the imported project window and make settings in the Import Settings (Inspector).
*It is not the scene view (hierarchy) where you placed the fbx that you want to select.
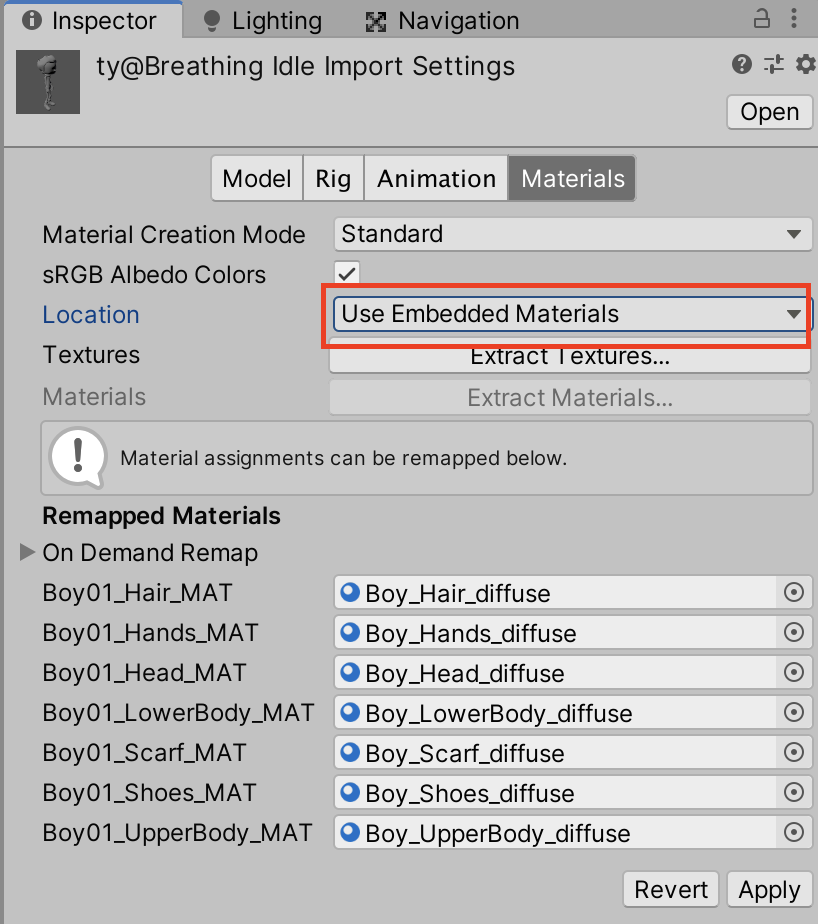
Select the ” Materials ” tab within Import Settings.
There are several ways to do this, but in this case we will adjust the Location item.
By default, it is ” Use Embedded Materials “.
Change this to ” Use External Materials (Legacy) “.
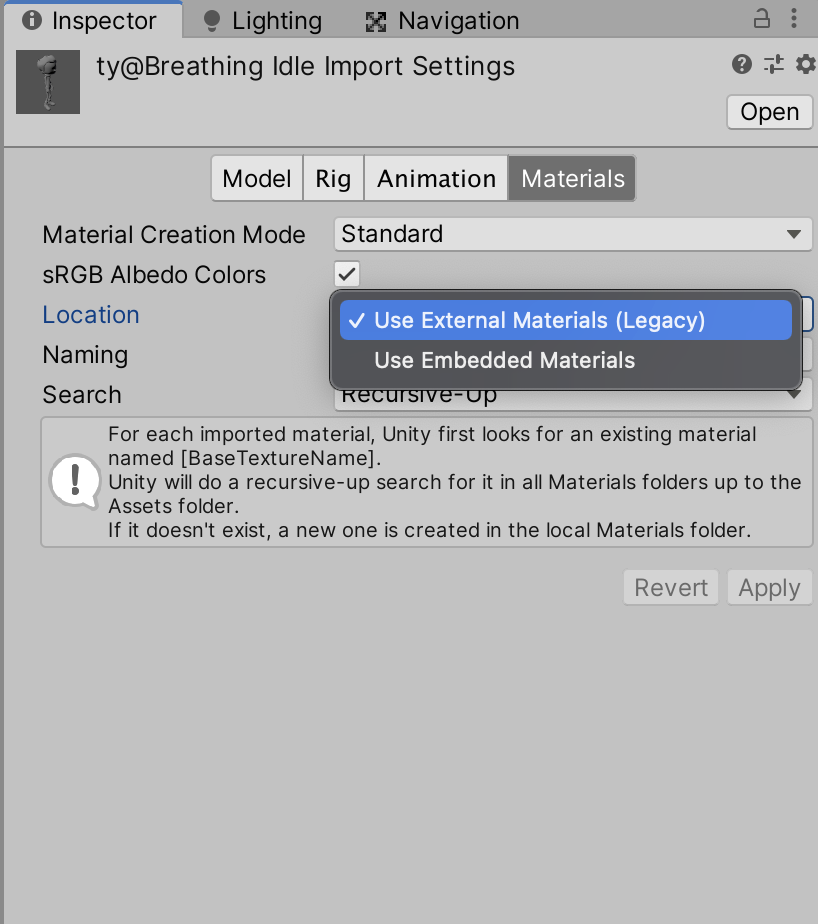
In Import Settings, you will need to press the “Apply” button to apply the changes.
The following two folders will be created.
- Materials” folder
- The “Character Name”@”Animation Name” folder
The “Materials” folder contains the materials used for the character’s face and body, and the “Character Name”@”Animation Name” folder contains the textures used for the character.

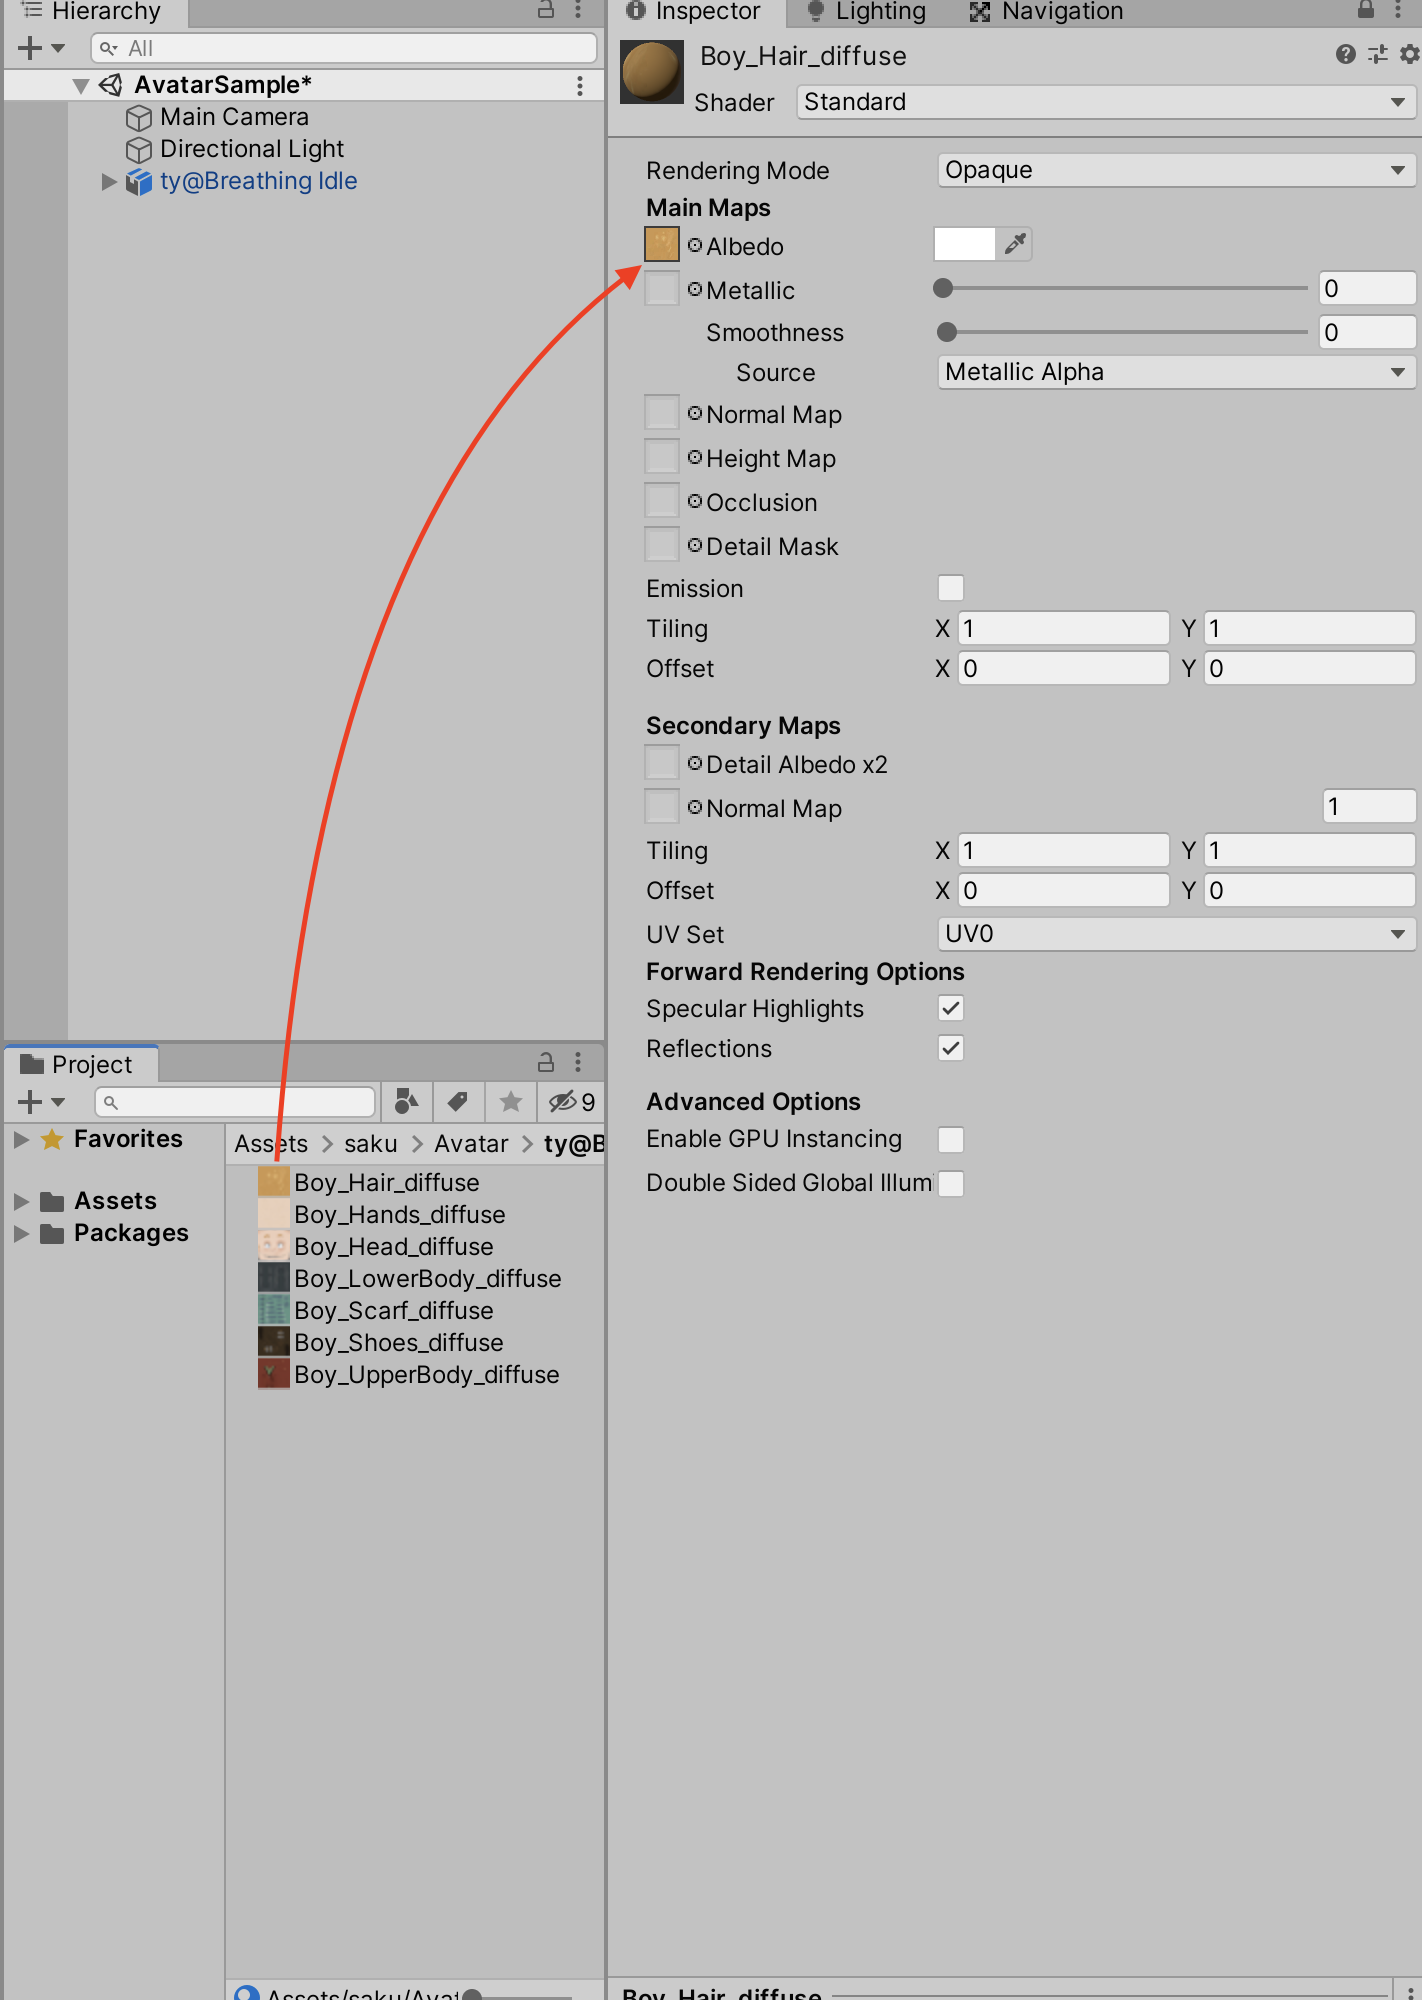
For each material, apply a texture of the same name to make it look the same as Mixamo’s.
To apply a texture, select a material and drag and drop the texture into the square next to Albedo.
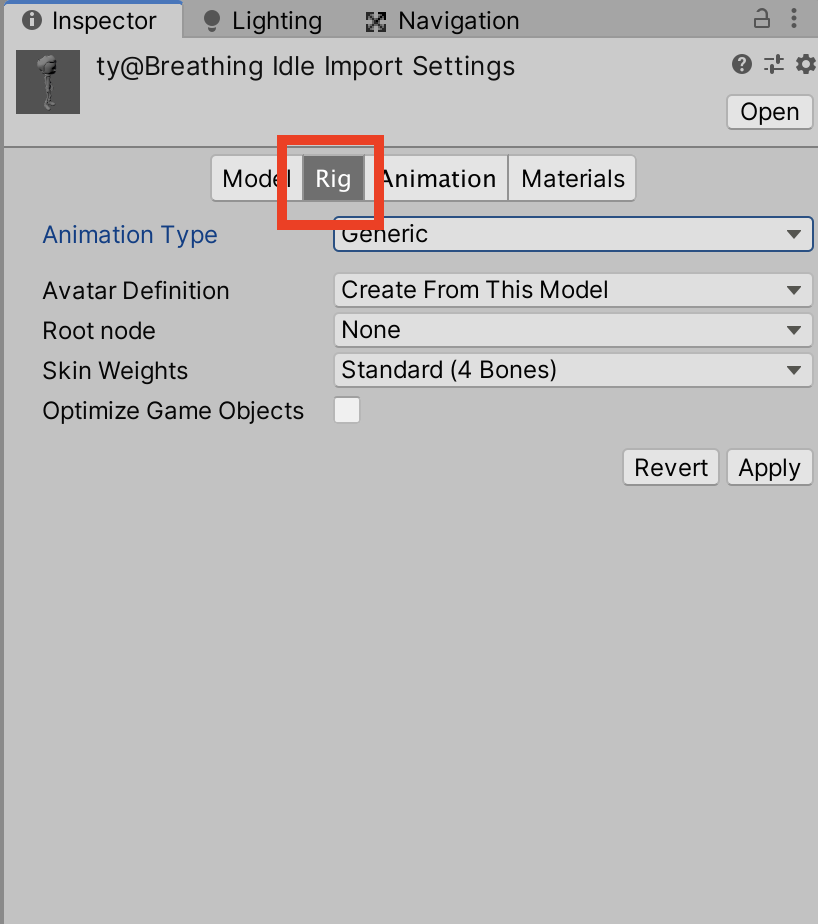
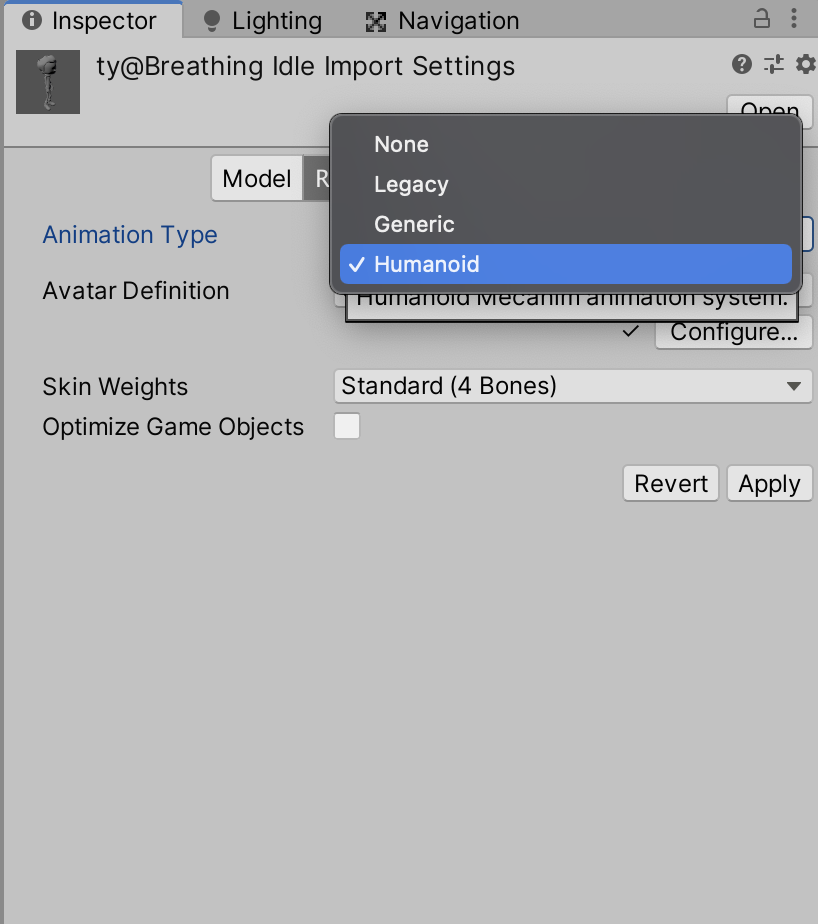
Also, to apply the animation to the model, go to the “Rig” tab and change the Animation Type to “Humanoid”.
This completes the import/initial setup of the model.
Let’s apply animation to the object.
Creating the Animator Controller
First, create an Animator Controller.
In the previous section, we used the Animator Controller that is automatically created when you press “Create” in the Animation window.
This time, however, we will use the method for creating the Animator Controller by itself, since we will be using a pre-prepared Animation Clip.
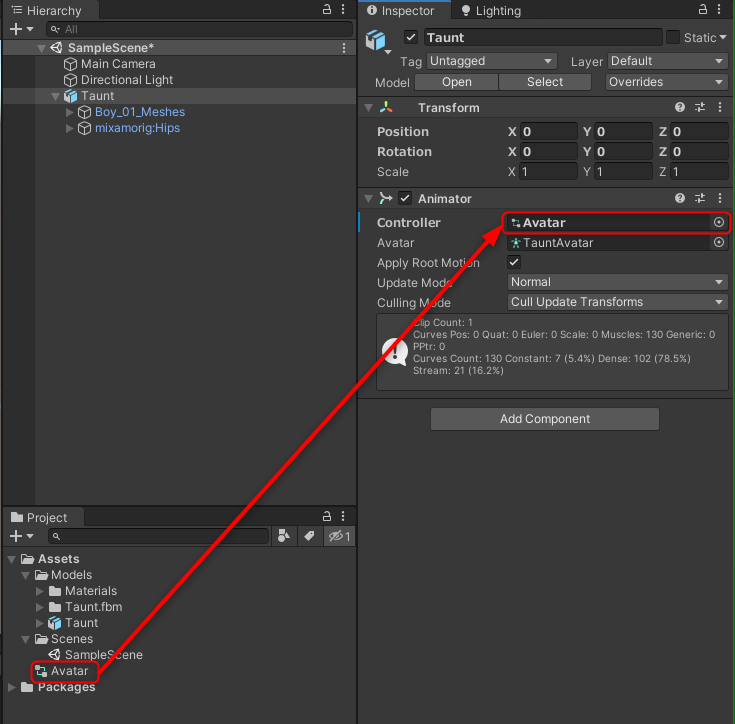
Select an object in the scene and look in the inspector and you will see that an ” Animator ” component has already been added in addition to the Transform component.
The Animator is an essential component for moving the avatar.
The Animator has a property called Controller, which is set to None.
We will create an asset called Animator Controller to be set here.
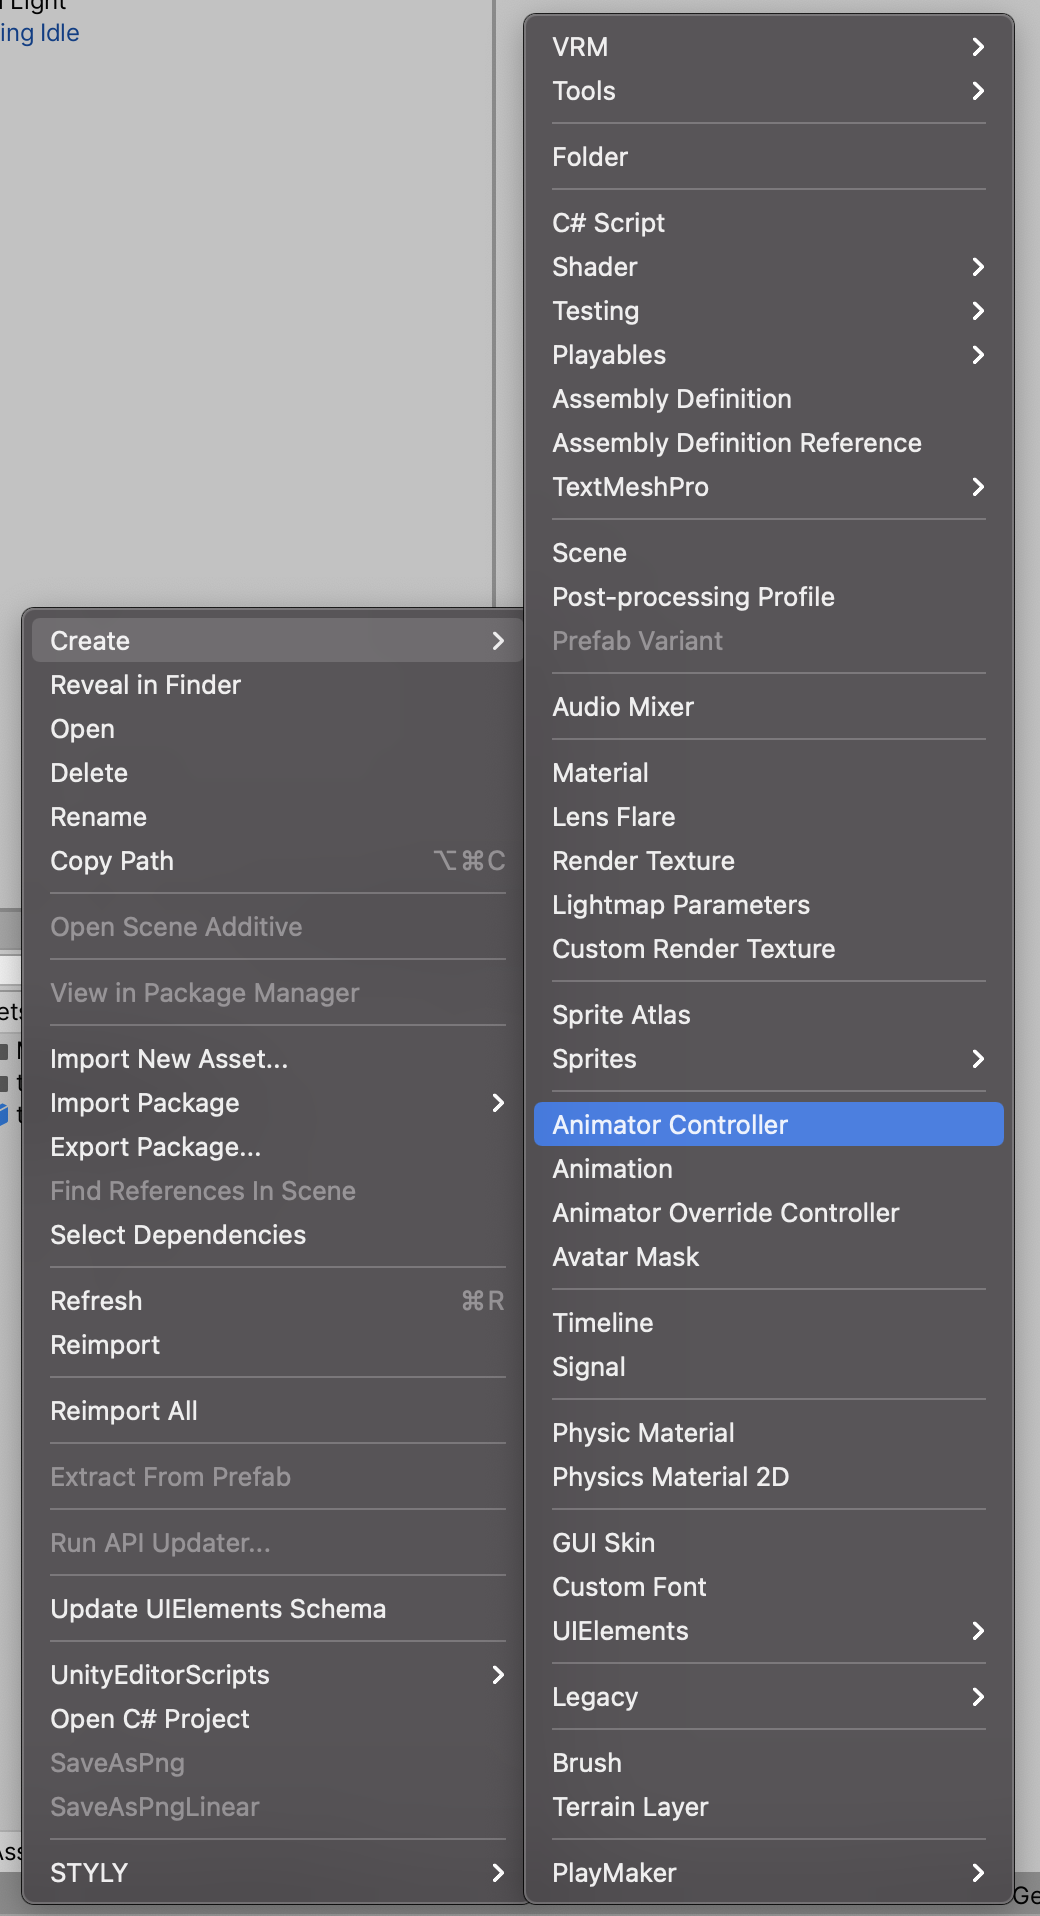
Select [Create] > [Animator Controller] in the project window to create it.
Since the Animator is to be applied to an avatar, we name the Animator Controller “Avatar.
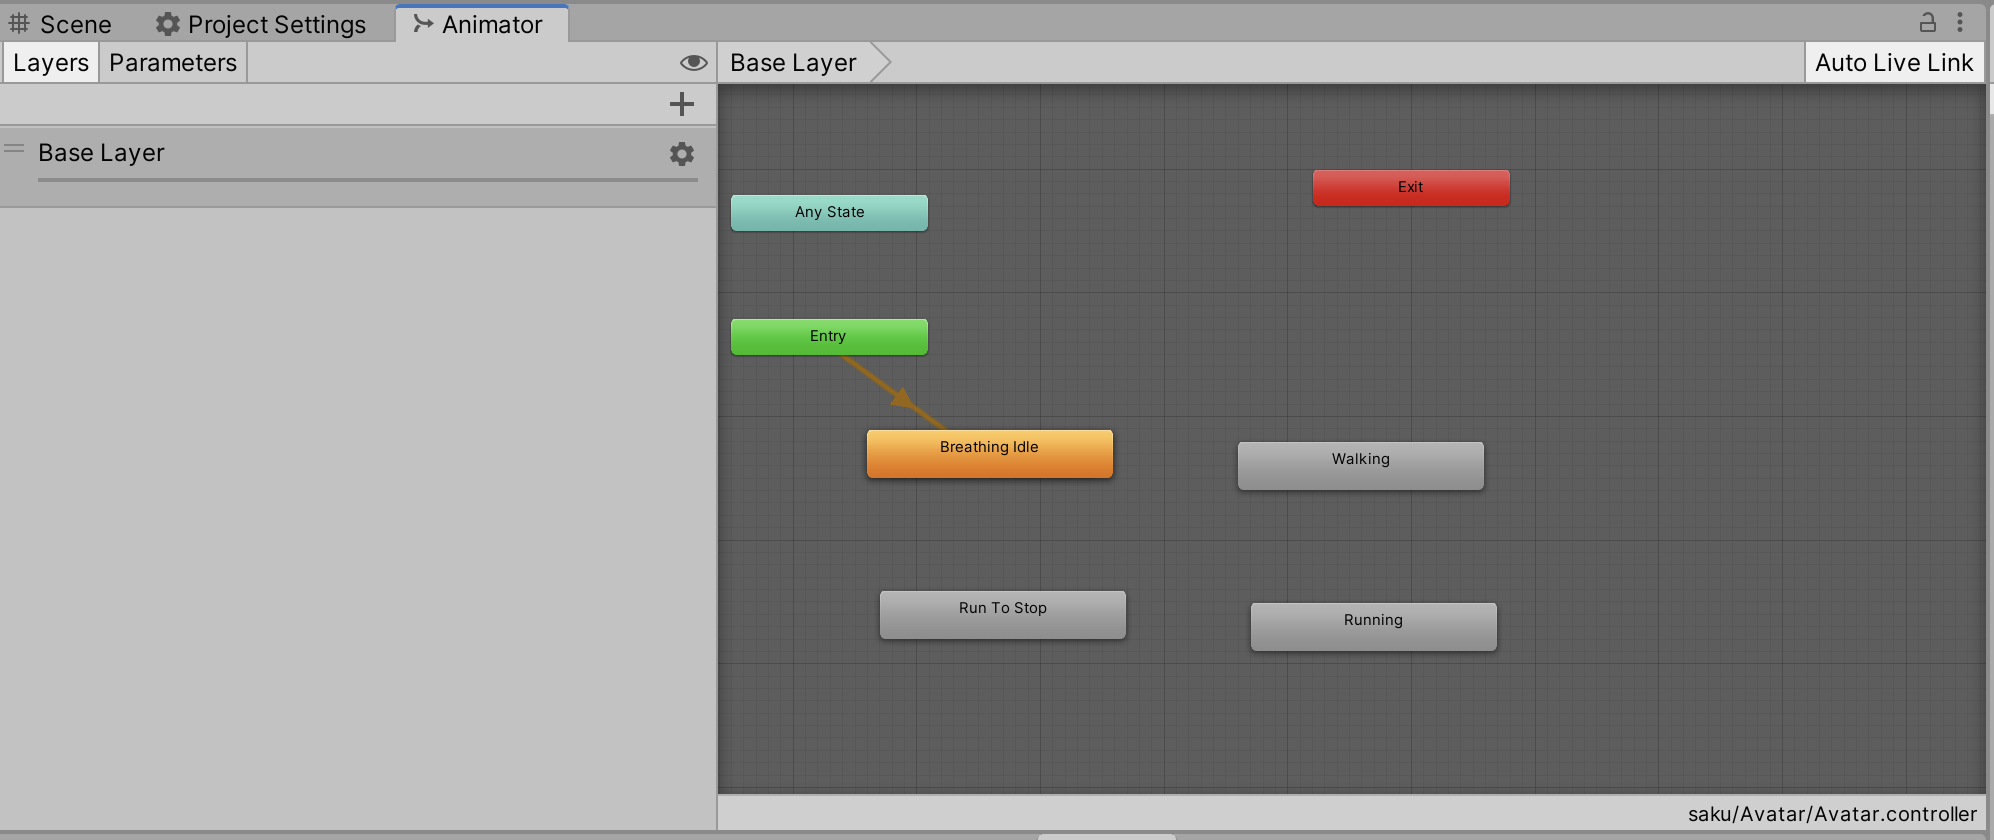
Double-click the Animator Controller you just created, and the Animator window will open.
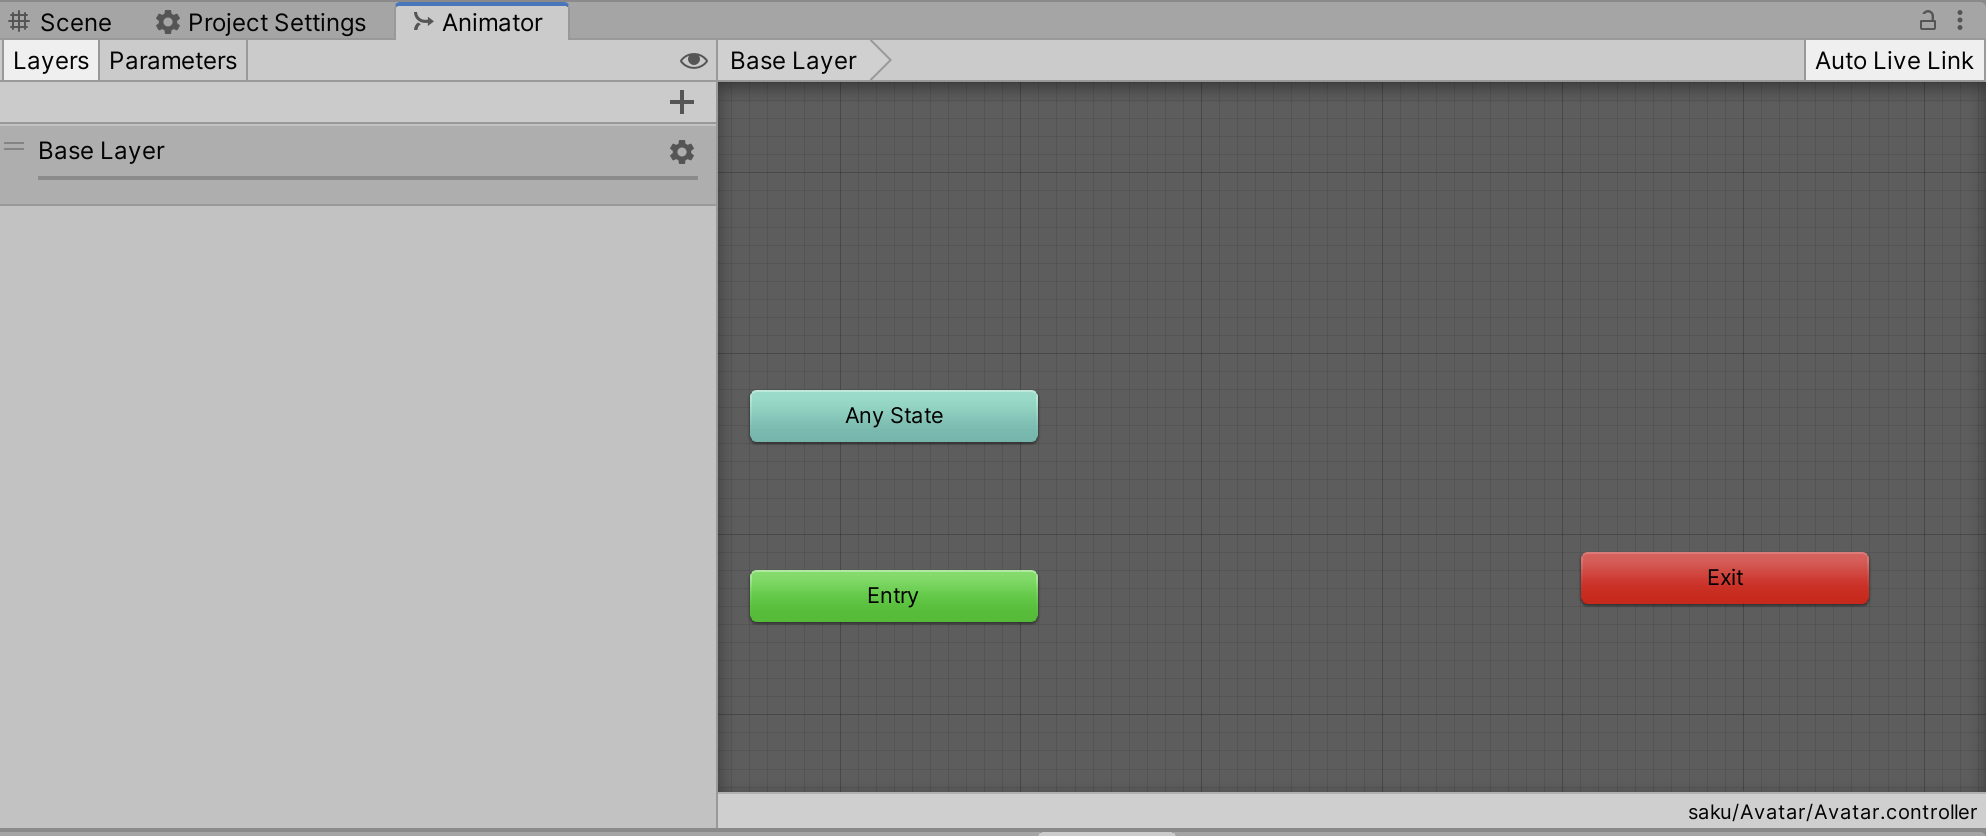
An Animator consists of an object’s State and its Transition, and the data is saved as an “Animator Controller asset (file).
By default, there are “AnyState” and “Entry” and “Exit” boxes, each of which is a “State”.
The animation data created in Mixamo must be set in this Animator Controller.
Set the Animation Clip to the state of the Animator Controller
In the project window, expand the ▼ of the fbx and select the Animation Clip in the fbx.
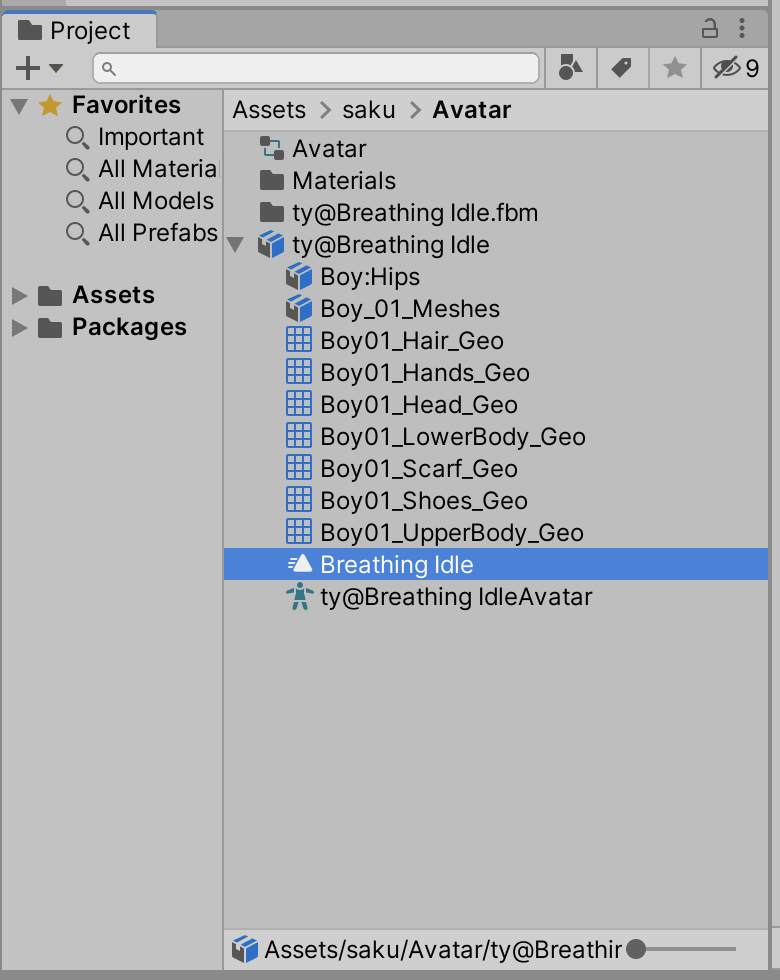
Press Ctrl + D in this state to duplicate it outside the fbx.

Drag and drop the duplicated animation into the Animator window.
This will create a state with the same name as the animation name, and you should see an arrow extending from the Entry state.

This completes the creation of the Animator Controller/placement of the Animation Clip.
Let’s check if the animation plays by pressing the play button in Unity.
Let’s make the animation transition.
Since only one animation is playing now, let’s add an animation.
In the same way as we added the “Breathing Idle” animation, add the “Walking”, “Running”, and “Run to Stop” animations to the Animator Controller.
This time, since the model is already prepared, there is no need to set up materials, etc.
Import fbx, change Rig to Humanoid / Duplicate Animation*, and add the duplicated animation to Animator Controller.
*(If you do not do this, the animation will not transition smoothly and the position will return to the origin when the animation transitions.
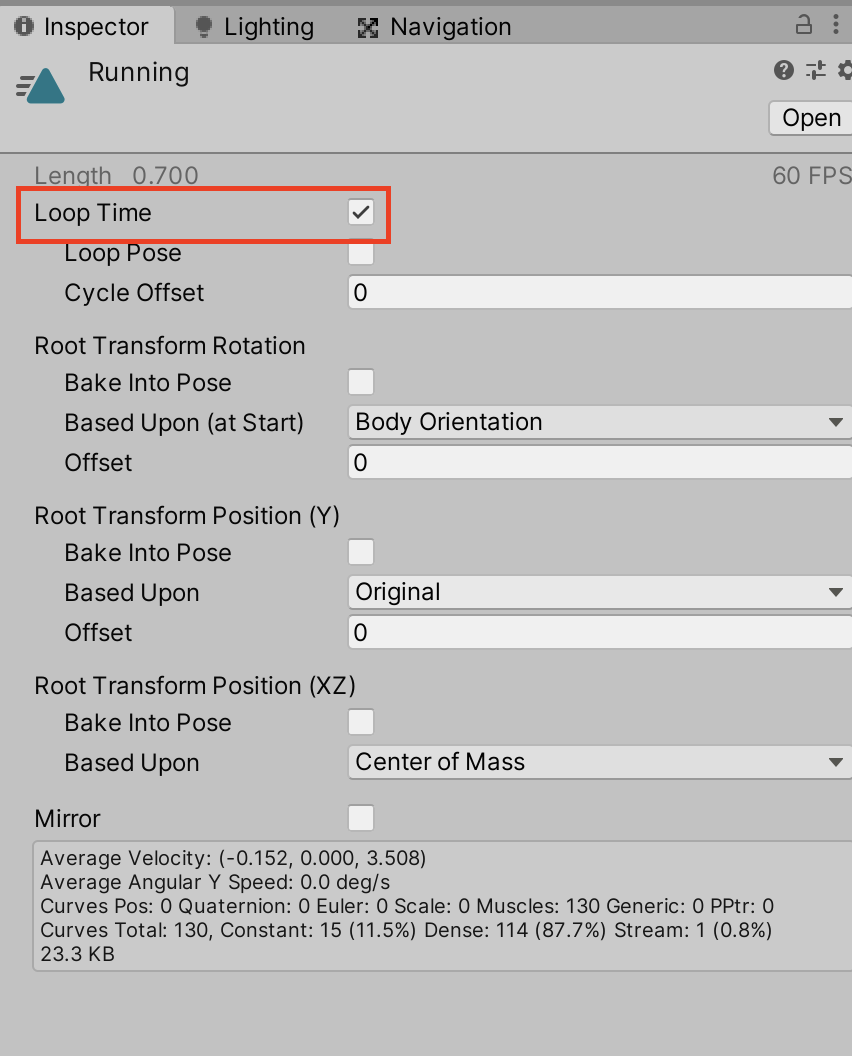
Once the animation has been duplicated, set up a loop.
Animations such as Walking and Running need to be looped because they move the model by repeating the animation of one step forward.
Click on Breathing Idle, Walking, or Running and check the “Loop Time” checkbox in the inspector.
Next, set the Transition for the animation: right-click on
State, and from “Make Transition” connect Breathing Idle > Walking > Running > Run to Stop > Breathing Idle.
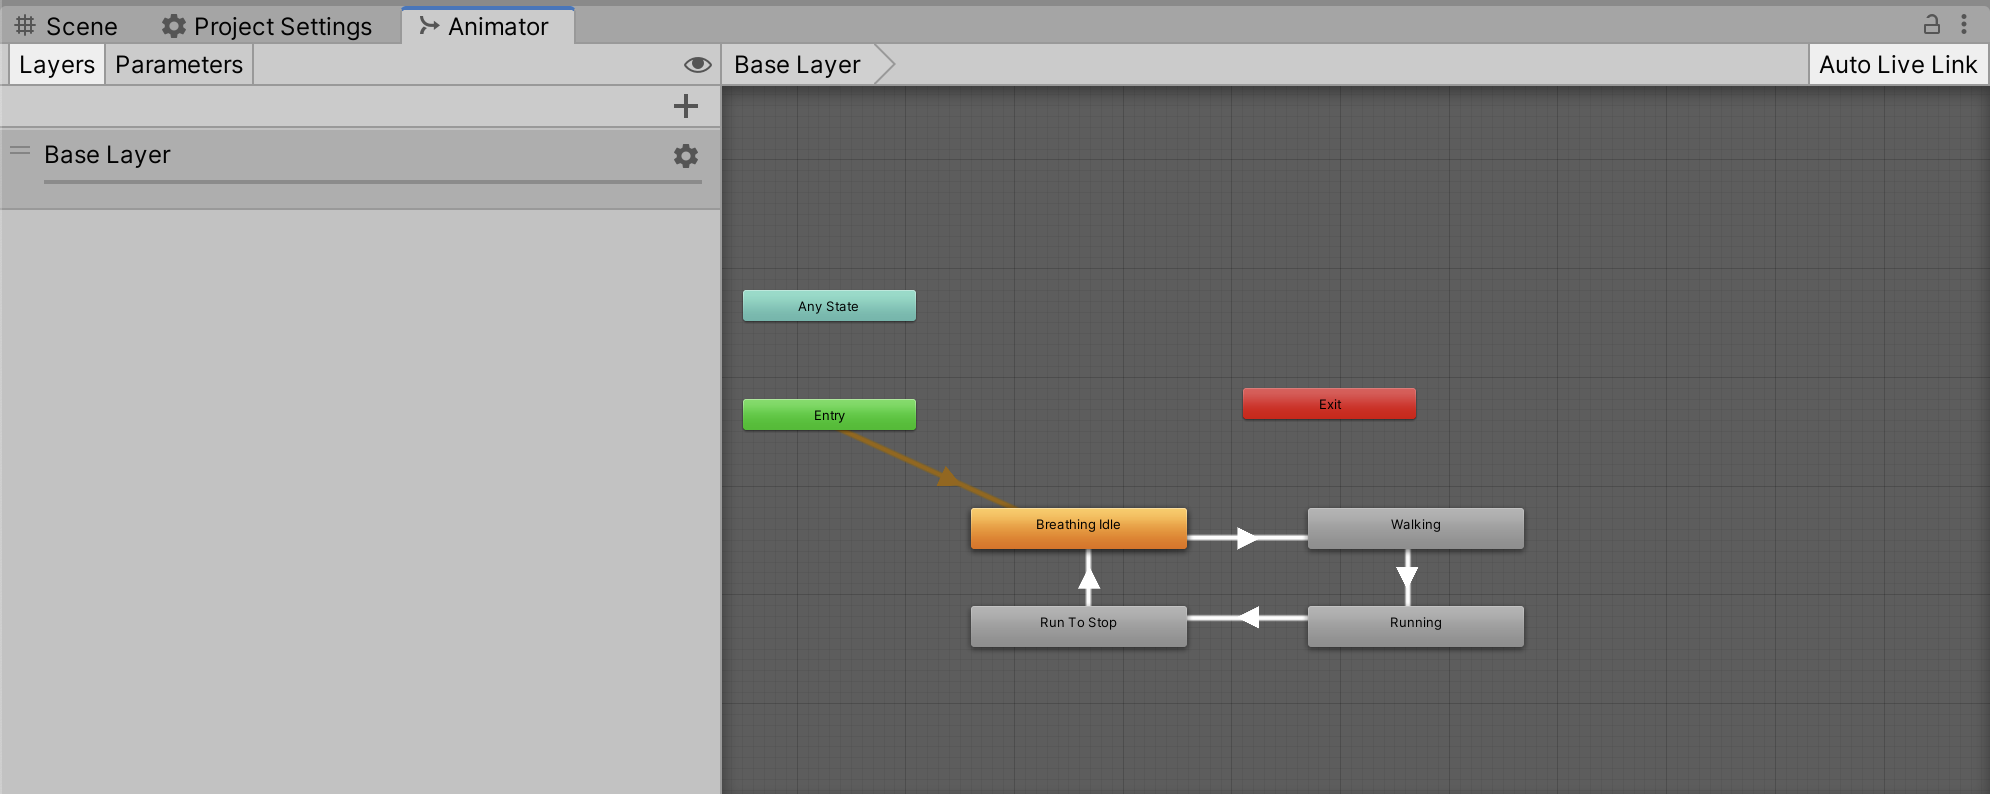
After setting up the Transition, let’s play it again.
The sequence of “Wait > Walking > Running > Run to Stop > Wait” is now animated.
However, the time spent walking and running is too short and feels strange.
In the next section, we will explain how to determine the animation time.
Let’s adjust the timing of the transitions.
Over the previous section, you can now play multiple animations on your avatar.
This section explains how to control the playback time of each animation.
The settings for each animation transition can be found by clicking on the Transition arrow and selecting “Settings” in the Inspector.
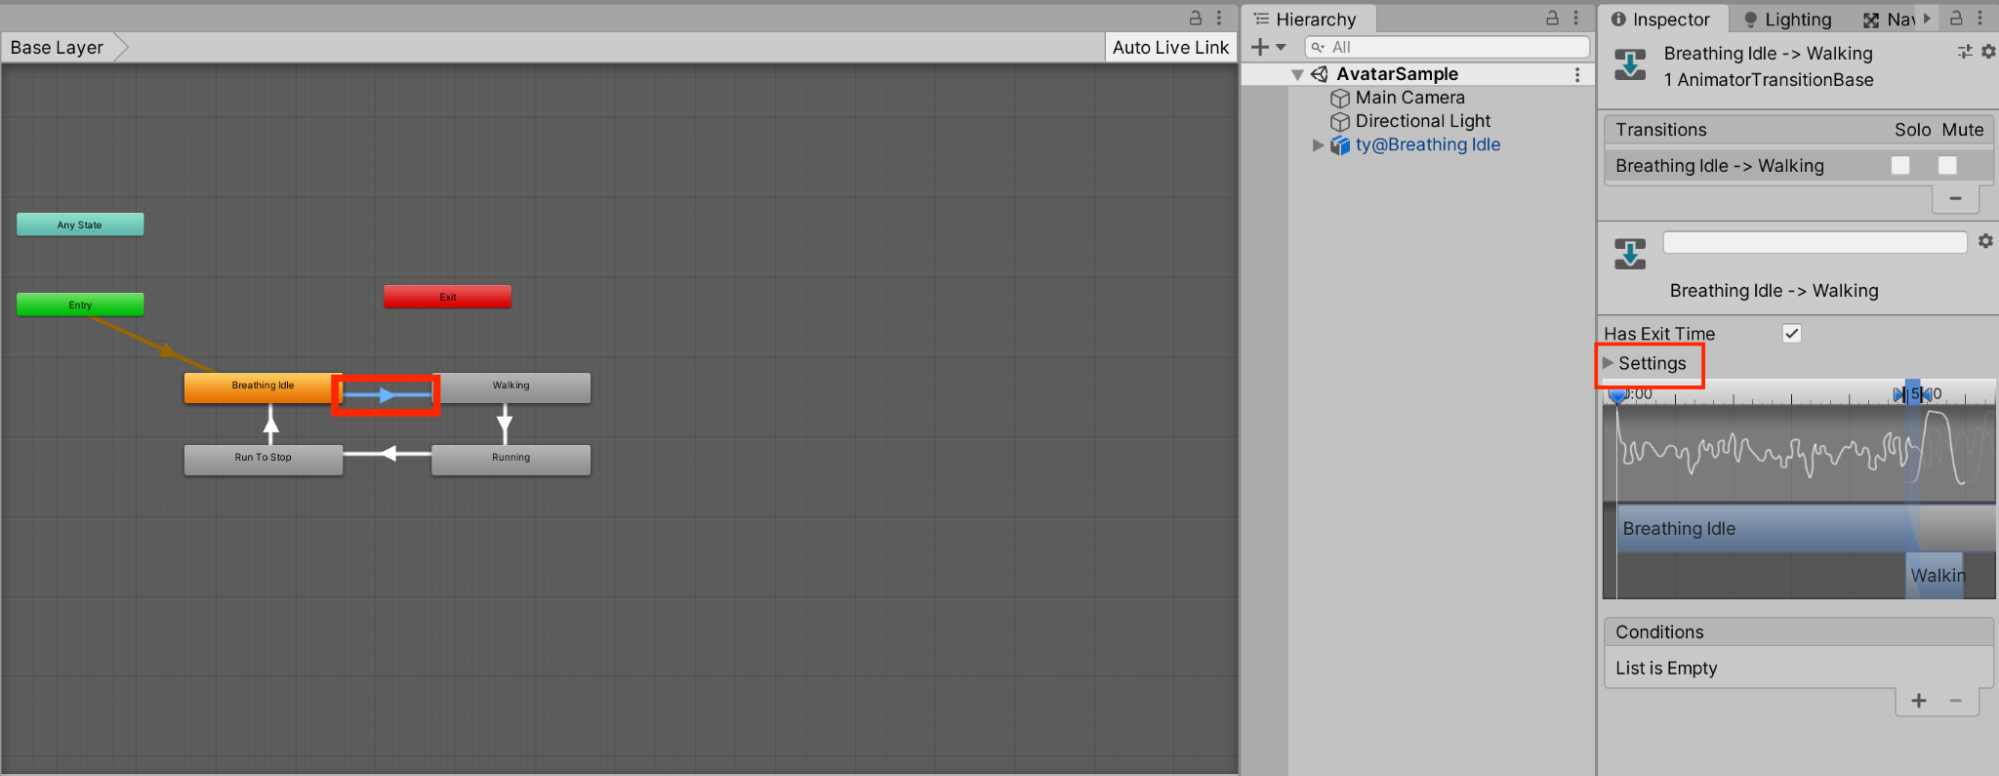
Expand the Settings drop-down menu to reveal the following items
- Has Exit Time: If enabled, the animation will transition when the time set in Exit time elapses.
- Exit Time: If “Has Exit Time” is enabled, this is the transition start time, expressed as a percentage (2 means the transition will occur after two animation plays).
- Fixed Duration: If enabled, the Transition Duration is set in hours; if disabled, it is set as a percentage.
- Transition Duration: Transition Duration in hours if Fixed Duration is enabled, or in percentage if disabled.
- Transition Offset: The animation is shifted by a set amount of time.
- Interruption Source: Interruption source for the transition, used to interrupt and call the transition of the destination.
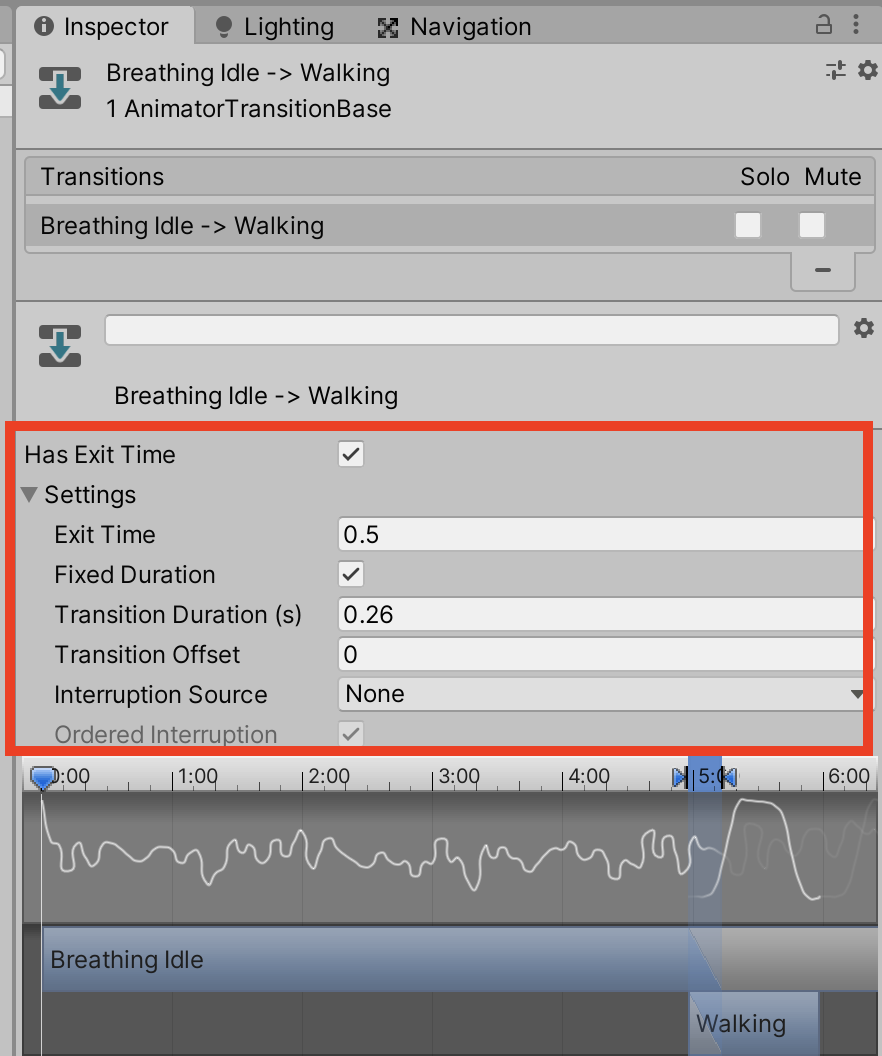
In this case, we will change the length of the Walking and Running animations, so we will change the Exit Time.
Click on the Walking > Running arrow / Running > Run to Stop arrow and set the Exit Time to 5.
After setting the transition, let’s play the scene.
The Walking and Running animations, which switched instantly before, will now play for a longer period of time.
This concludes the explanation of animating avatars and controlling transitions.
As an application of the animation knowledge, we have explained how to prepare avatars and animations using Mixamo and control them in Unity.
Using the application methods we have learned, we can apply various animations to avatars and control them freely.
You can get animations not only from Mixamo but also from Unity’s Asset store.
Let’s experiment with various animations and expand your range of expression.