In this article, I will introduce a free 3D sculpting tool called ‘SculptGL’. I will explain about the UI, the basic operations, and how to sculpt a model using SculptGL.
After sculpting a model, we will import it into Sketchfab to check the final state.
What is SculptGL?
SculptGL is a free 3D sculpting tool that can be used with any web browser.
No registration or download is required to use it. Anyone can easily sculpt a model by simply accessing the URL for SculptGL.
This online software allows you to sculpt an object using tools like brushes, creases, etc. This software also supports pressure-sensitive tablets.
You can access the official website here.
SculptGL – A WebGL sculpting app – stephaneginier
https://stephaneginier.com/sculptgl/
SculptGL
UI and Basic Operations of SculptGL
You will need to operate SculptGL with a mouse, so prepare this in advance.
SculptGL UI
How to Switch Languages
You can change languages by selecting ‘Language’ in the top menu.
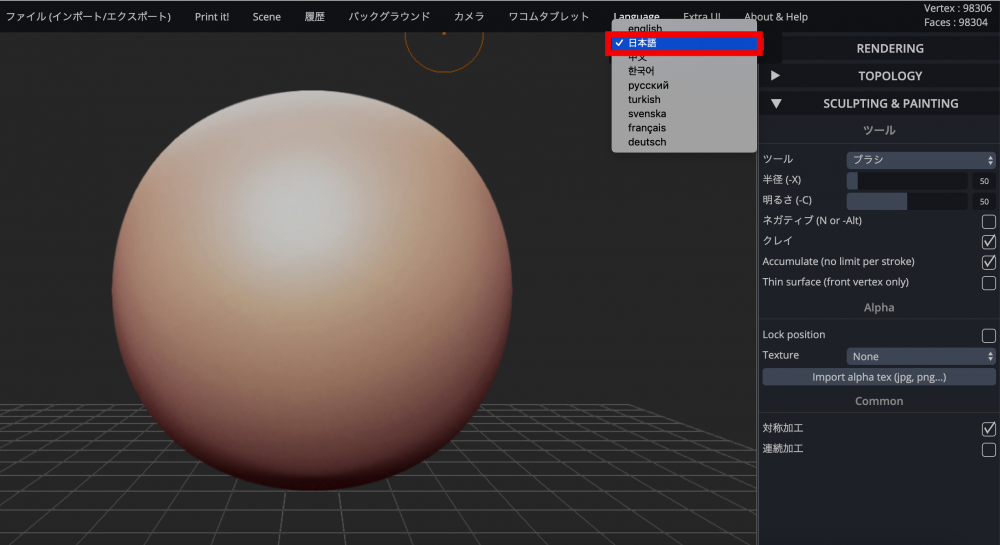
Switch languages
Scene Tab
In the Scene tab, a scene is generated when creating an object.
You can delete the generated scene by selecting ‘Clear scene’.
Please be aware that you cannot restore it with ‘undo (Ctrl+Z)’ after you execute the ‘Clear scene’ command.
Below ‘Add (object)’ options, there are options required for sculpting, such as ‘Show contour’, ‘Show grid’, and ‘Show mirror line’.
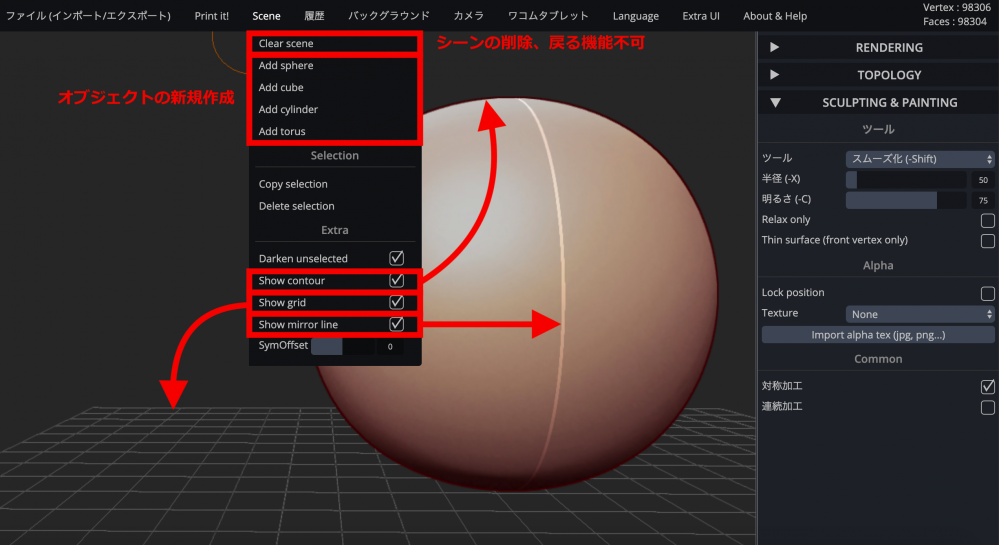
Scene tab
History Tab
In the History tab, you can ‘undo’ or ‘redo’.
There are shortcut keys available for Windows users, but macOS users don’t seem to have shortcut key options (I tried ‘Command+Z’ and ‘Command+Y’, and found they didn’t work). So, you need to click the commands in this History tab when using SculptGL on macOS.
By the way, you can control how many times you can undo operations by changing the ‘Max Stack’ value at the bottom of the History tab. In the example below, you can undo up to 15 operations.
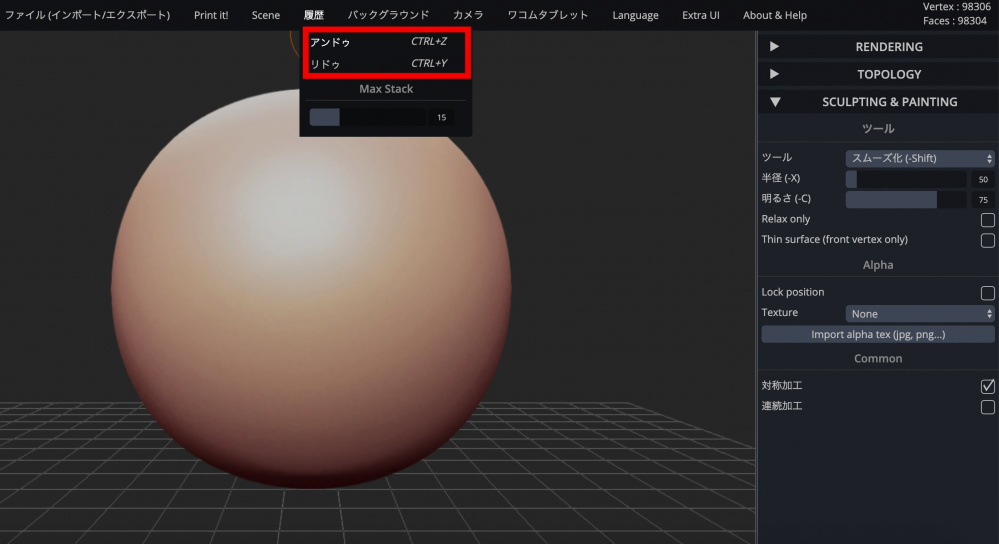
Undo & Redo
Camera Tab
In the Camera tab, you can change the appearance of the scene.
You can switch views with the ‘View’ buttons. You can easily access them with shortcuts.
Although it’s not shown in the screenshot below, you can display a wireframe on the entire object by pressing the ‘W’ key and the translate tool by pressing the ‘E’ key.
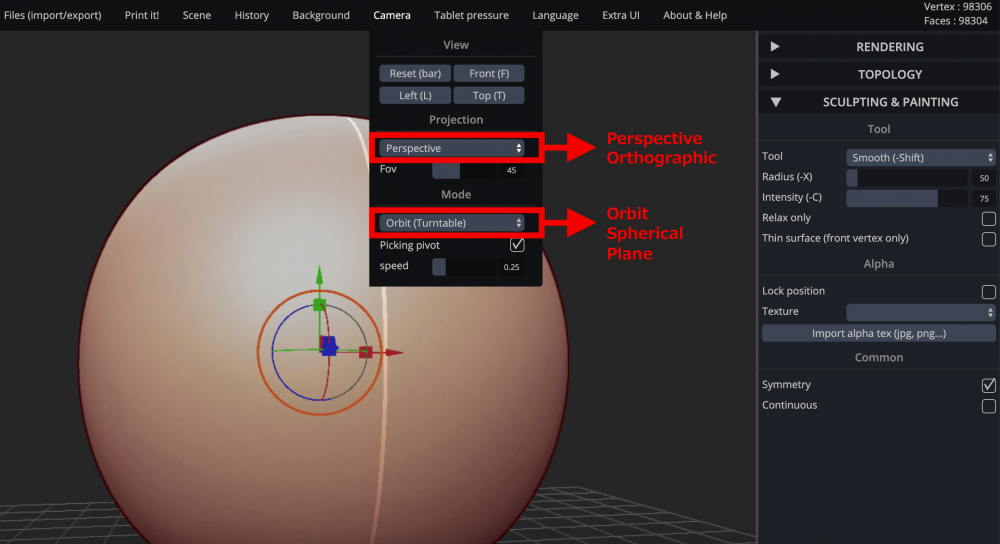
Camera tab
Extra UI Tab
In the ‘Extra UI’ tab, you can change the color of the entire window. Be aware that you can change it just temporarily, you cannot save this color setting.
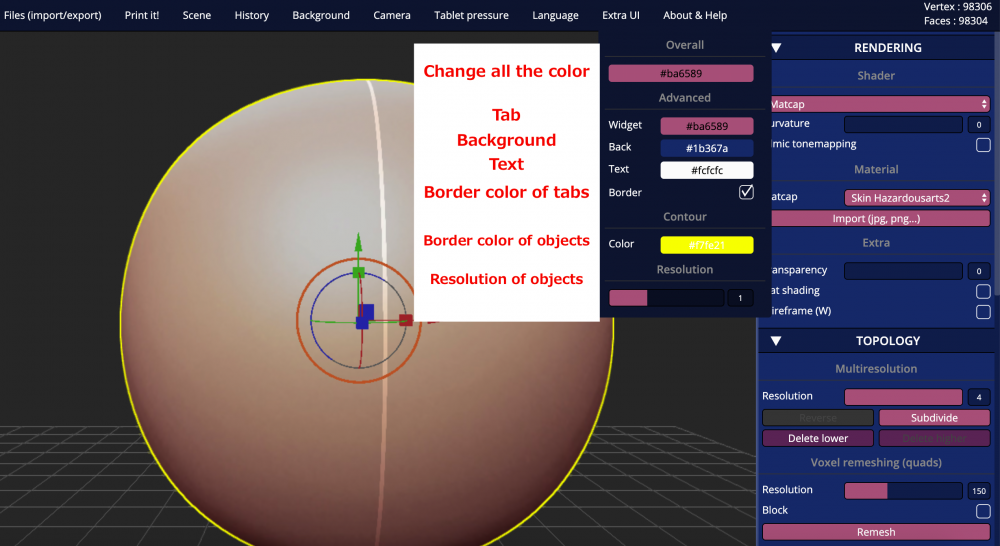
Extra UI tab
Tablet Pressure Tab
In the ‘Tablet pressure’ tab, you can adjust the pressure sensitivity of your pen tablet.
When you don’t have a tablet connected, the parameters on this tab do nothing. If you are not using a tablet device, you can set up the brush by adjusting the radius etc. on the ‘SCULPTING & PAINTING’ tab on the right.
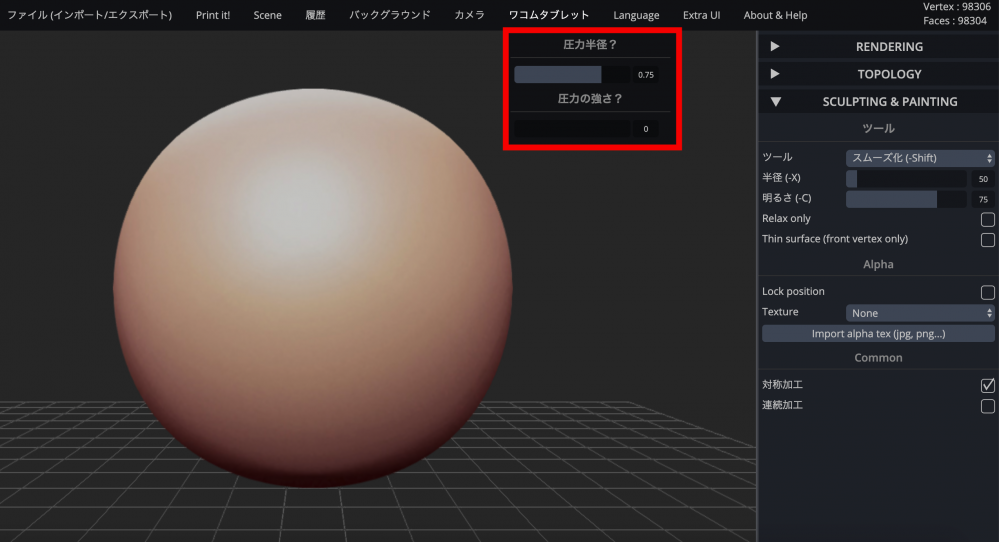
Tablet pressure tab
Background Tab
In the Background tab, you can change the background of the scene. You can import an image file by selecting ‘Image’.
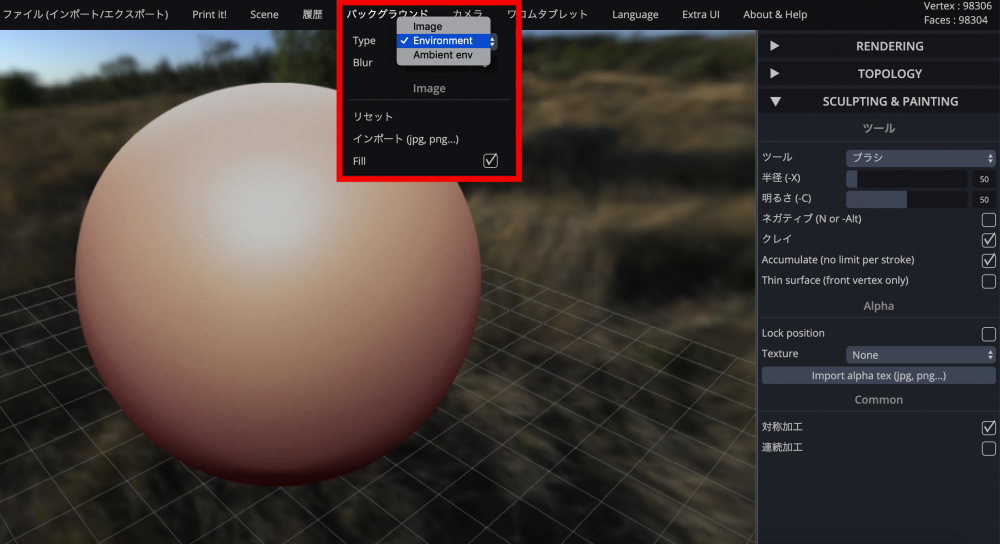
Background tab
- Scale > scroll the middle button
- Pan > drag with the middle button
- Tumble > drag with the right button
These are all you need to navigate in SculptGL.
Let’s start sculpting.
Let’s Sculpture with SculptGL
Please be aware that what I will explain is meant for a beginner. If you already have some experience with other sculpting software, then feel free to start creating your own original work.
Sculpt Modeling
Before starting to sculpt, check ‘Show mirror line’ on the Scene tab and check ‘Symmetry’ highlighted in the red box in the following screenshot.
Tool: Drag
Radius: 80
We model the ears of a rabbit. If the shape gets distorted, correct it by using ‘Smooth’ and ‘Flatten’.
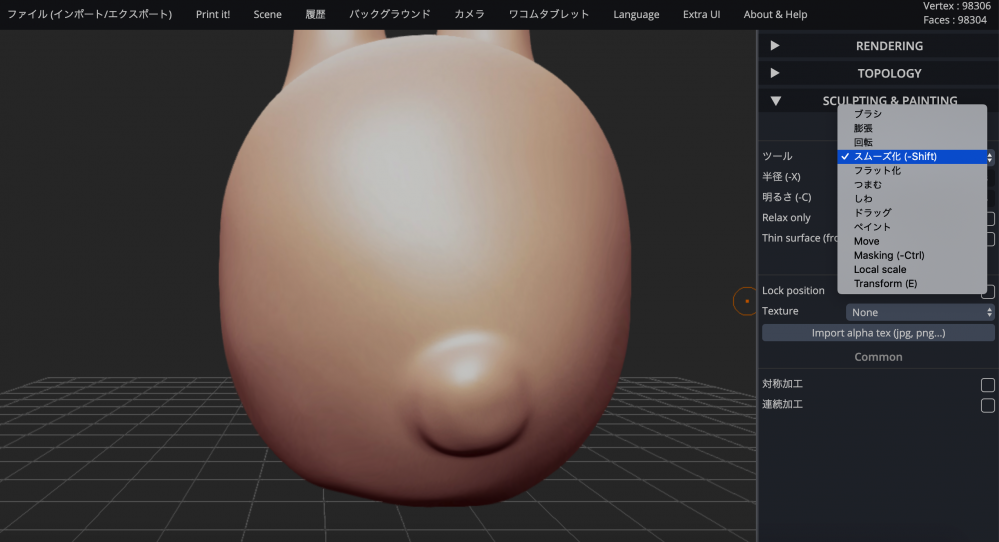
※Please be aware that all the captured screenshots have the ‘Smooth’ tool selected. This has been selected automatically every time I captured a screenshot. Please follow the text and not the screenshots.
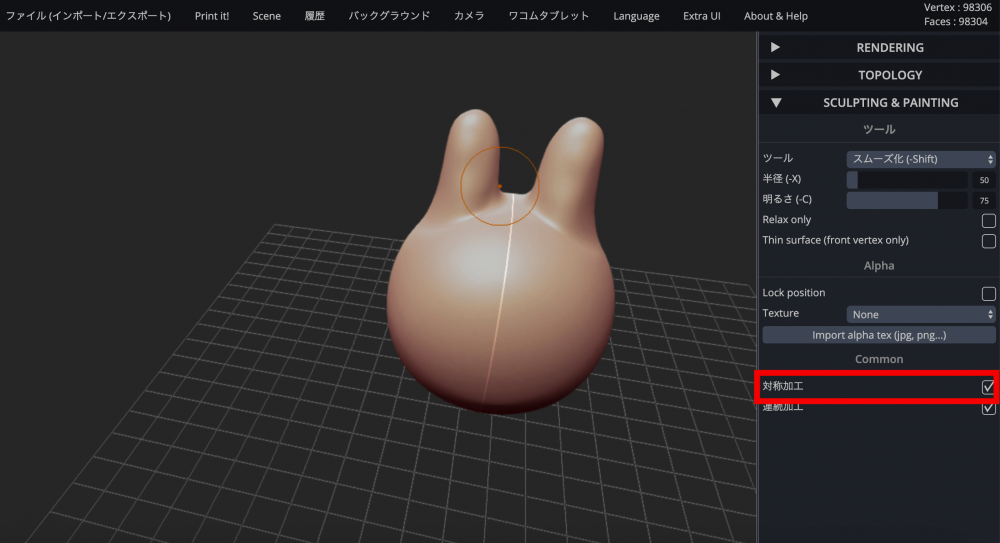
‘Symmetry’
Create the face for the rabbit.
Tool: Brush
Radius: 12
Draw the eyes with this brush. Then, uncheck ‘Symmetry’ and draw the nose.
Next, draw the mouth.
Tool: Crease
Radius: 20
Intensity: 30
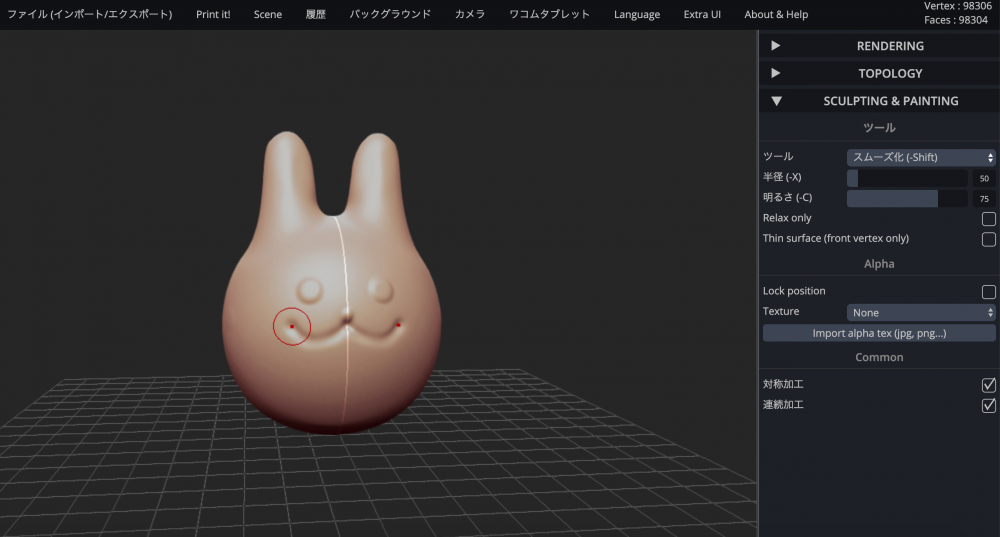
The face of the rabbit
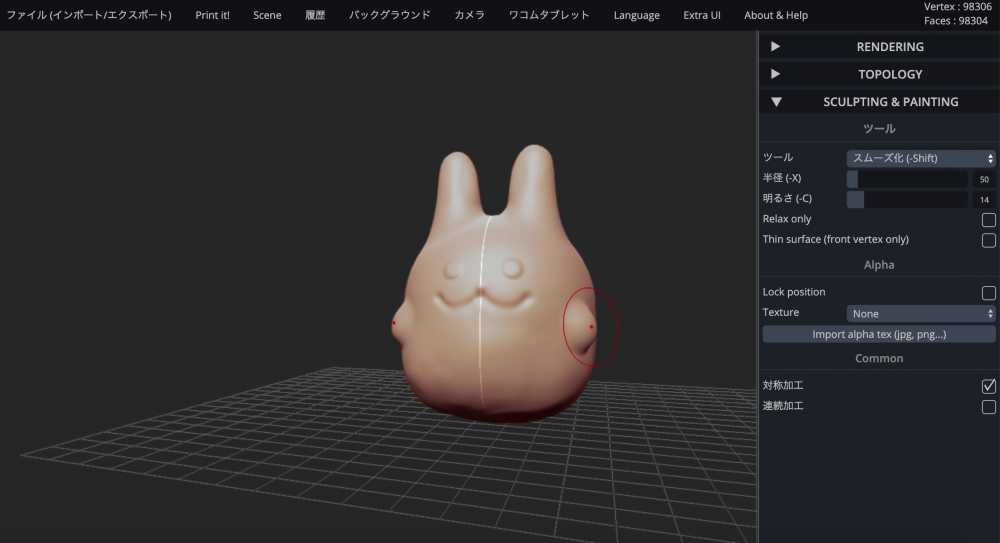
Next, create the tail for the rabbit.
Tool: Brush
Radius: 30
Intensity: 15
Adjust the shape using ‘Smooth’ and ‘Flatten’.
The tail of the rabbit
Create the arms for the rabbit.
Tool: Drag
Radius: 40
Let’s create the legs with the same setting as the arms.
The arms and legs of the rabbit
Let’s color the rabbit.
Tool: Paint
Radius: 224
Intensity: 75
Albedo: #e8c6c6 (Or your own favorite color)
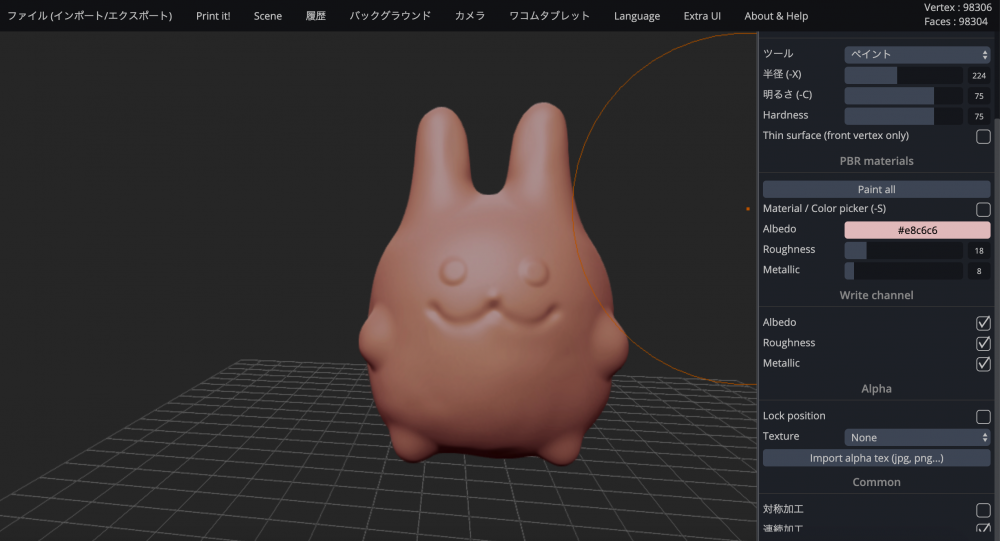
Paint the rabbit #1
Color the face, mouth, etc. in the same way.
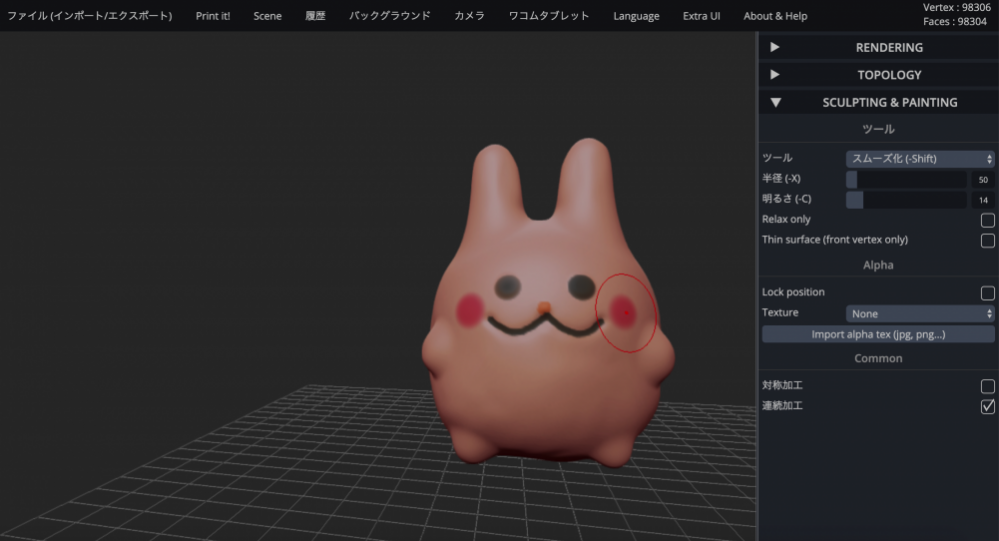
Paint the rabbit #2
This completes the sculpting model of the rabbit.
Export the Model
Select ‘Files (import/export) > Save .obj’ to export the model.
You can save the data file by selecting ‘Files (import/export) > Save .sgi (SculptGL)’.
Alternatively, you can import the SculptGL data by accessing SculptGL and selecting ‘Files (import/export) > Add (obj, sgi, ply, stl)’. I found the color information was also imported correctly this way.
※Select ‘Clear scene’ before importing the SculptGL data.
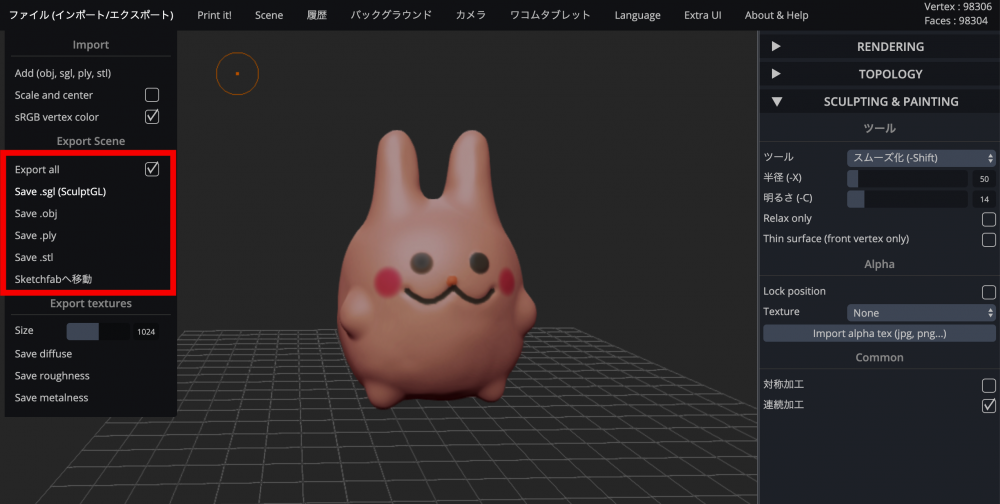
Export the model
Now, you have exported the model.
Check the Created Sculpt Model in Sketchfab
Go to Sketchfab
Select ‘Files (import/export) > Go to Sketchfab’.
It exports the model to Sketchfab.
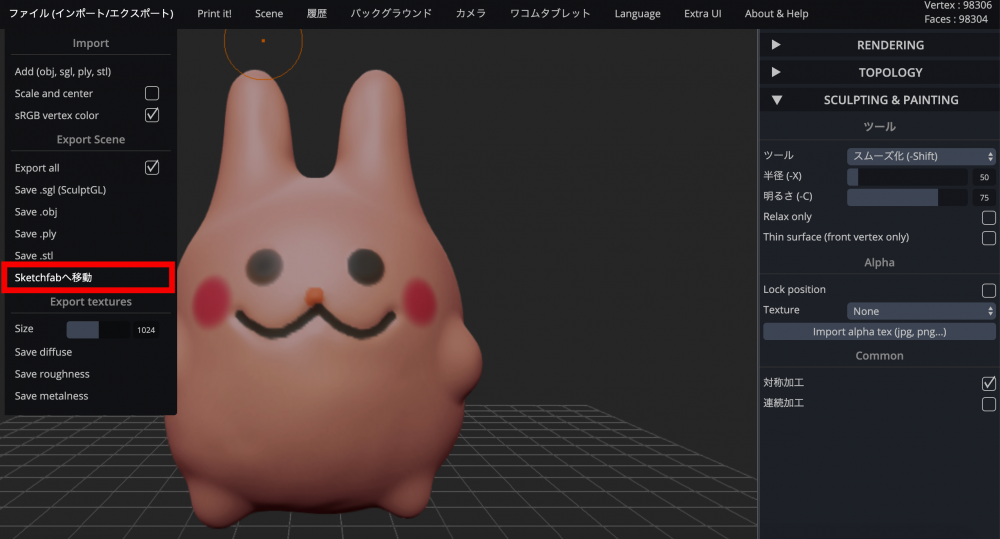
‘Go to Sketchfab’
Access Sketchfab and go to ‘My Page’.
You can access Sketchfab here.
https://sketchfab.com/feed

Sketch fab – My Page
The color information is applied properly. Adjust the lighting in Sketchfab and then finish the task by selecting ‘Exit’. The model has been exported to Sketchfab successfully.
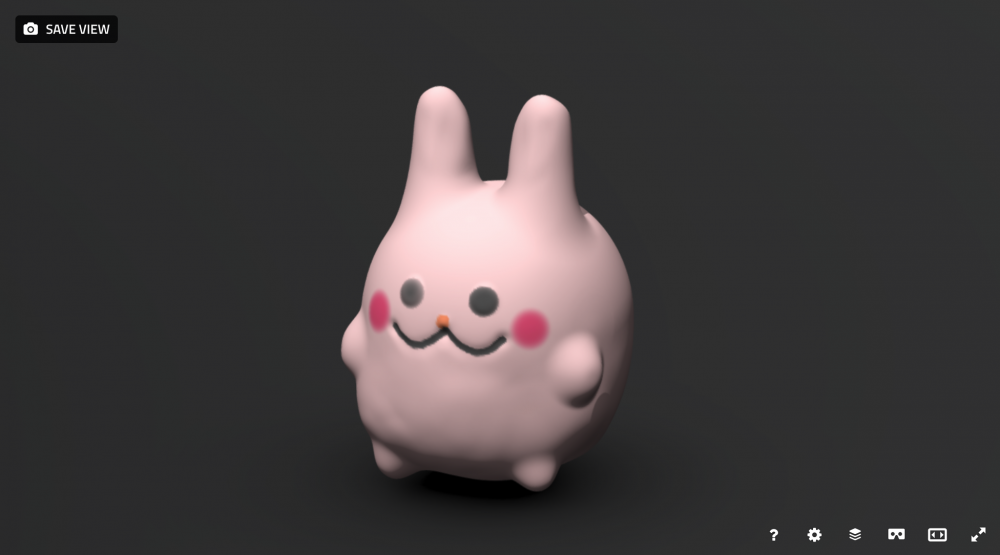
Check the model on Sketchfab
Please read the following article to upload a 3D model in Sketchfab to STYLY.
How did you find this tutorial?
I am impressed that this free software has good usability and supports many functions such as the import of a textured image. However, please be aware that there are some bugs when using it on macOS.
In my view, SculptGL is just as useful as a paid software such as Zbrush.