In this article, I introduce how to pick up a book (PDF) from the book collection placed in the distance and move it in STYLY. I am planning to make a Scene where I can call a book I want closer to me with a magic wand.
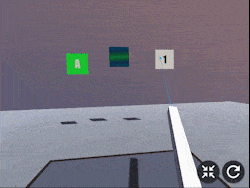
The completion image
Sample
You can taste the sample space from STYLY GALLERY.
How to use Hold down the right grip button with the pointer kept at a book (PDF) to call it closer to you.
Pull the right trigger with the pointer kept at a book (PDF) to turn a page.
Pull the left trigger with the pointer kept at a book (PDF) to go back to the previous page.
You can download the Unity project introduced in this article. Choose a Book – Sample project
I use a paid asset, PlayMaker, in this article. Playmaker – Asst Store
How to create a wand
Create a wand
Firstly, we create a magic wand. This time, make a simple one from Unity’s Cube object. Change each parameter in the ‘Scale’ field so that the object forms an elongated shape.
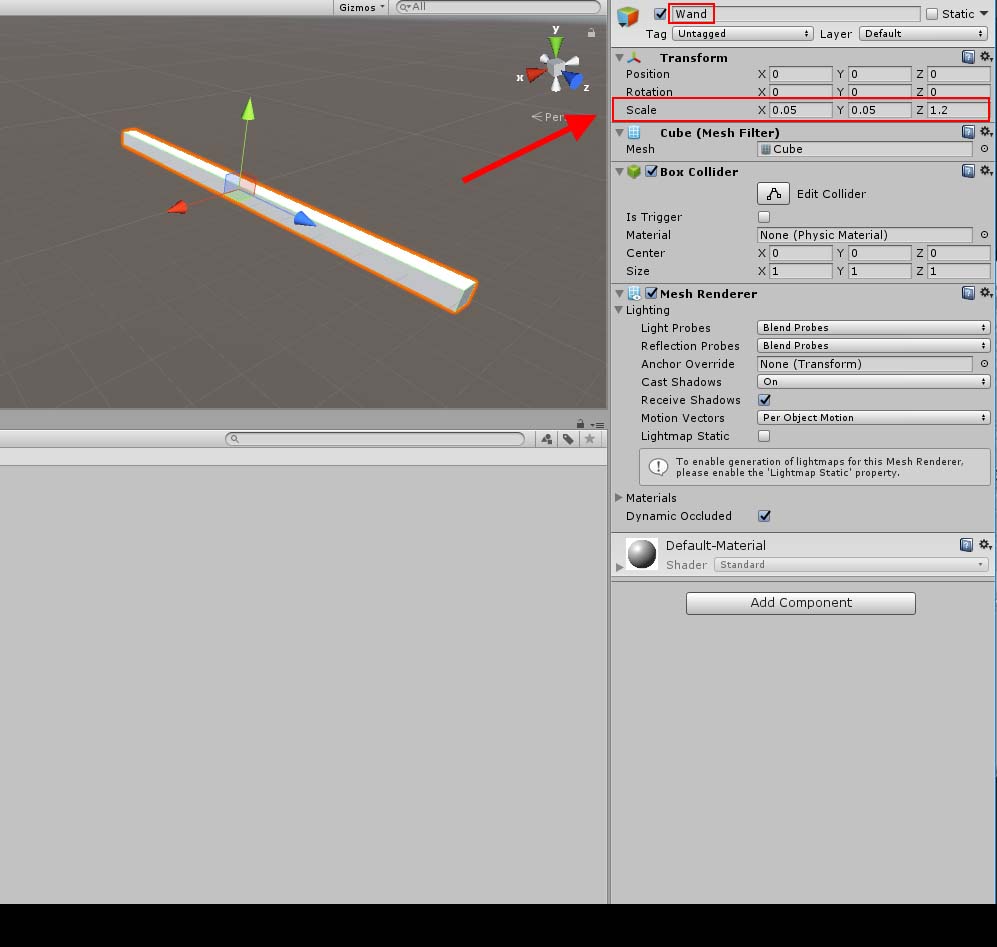
Create a wand.
I renamed it ‘Wand’.
Convert it into a Prefab
Convert the created wand into a Prefab. You just need to create the Prefabs folder and drag ‘Wand’ into it.
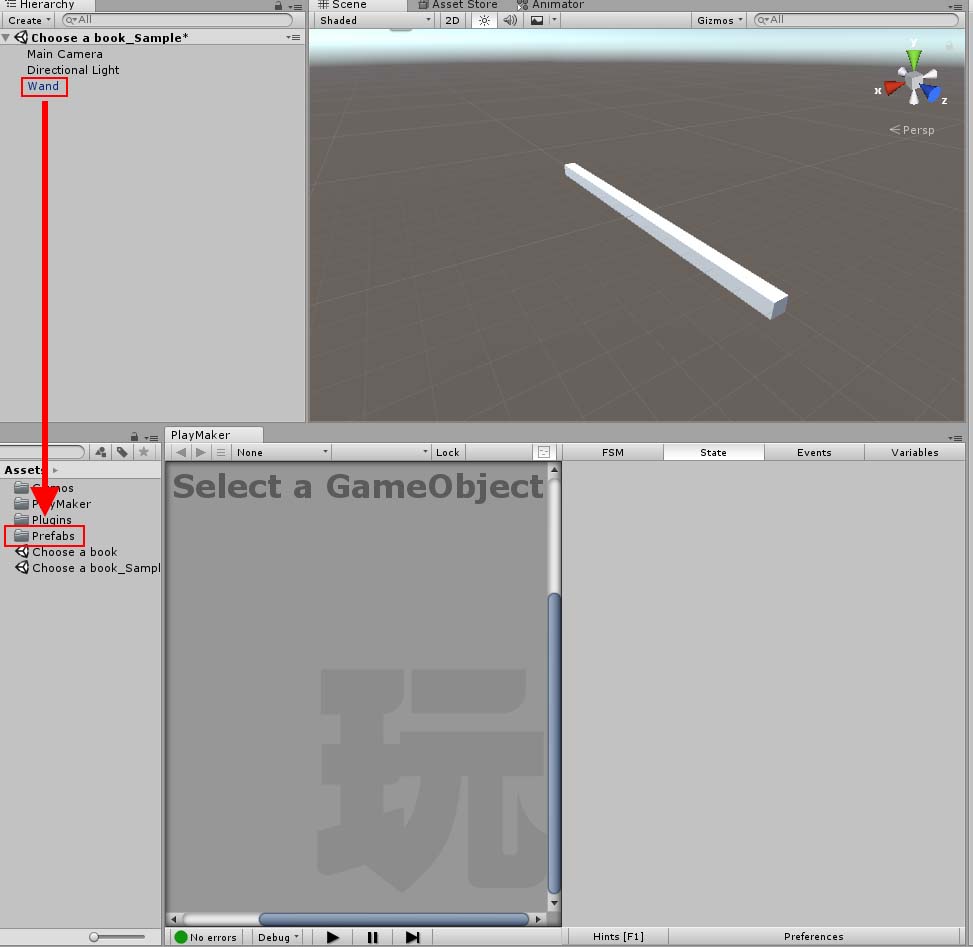
Convert it into a Prefab.
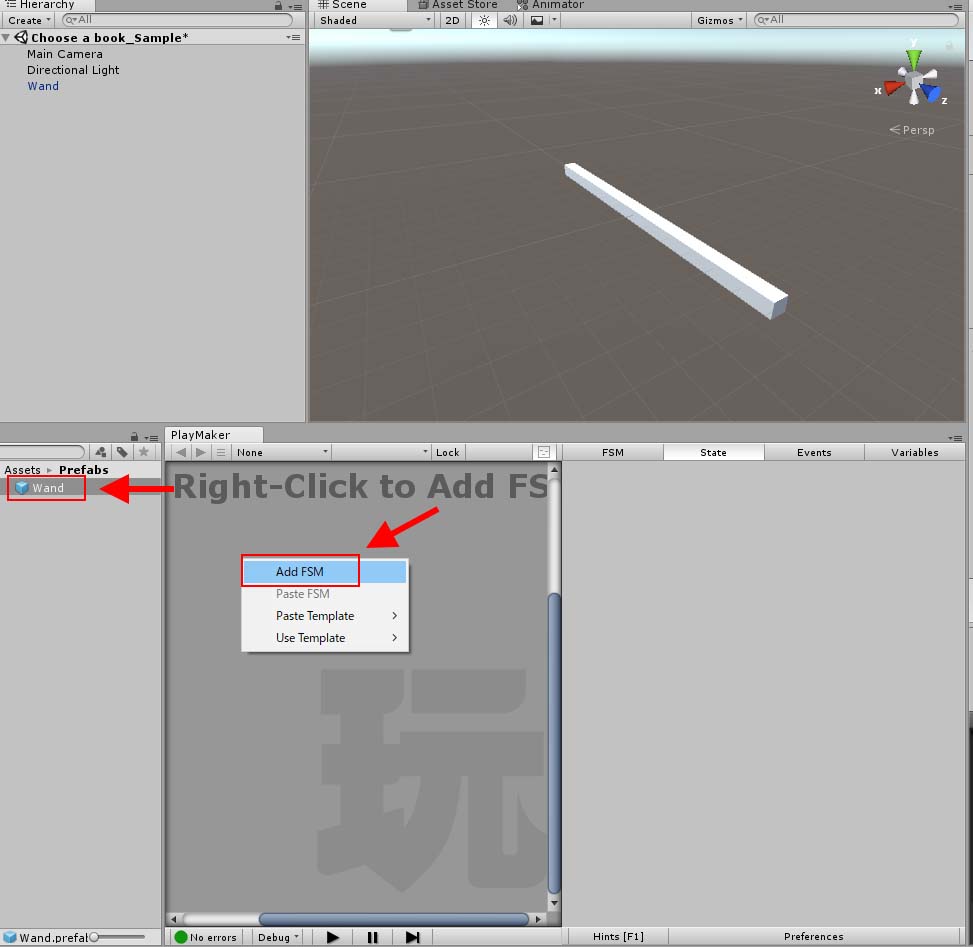
Next, we add PlayMakerFSM to this Prefab.
Set up the sequences until the grip is held down
Right-click and select ‘Add FSM’ to add an FSM.
Working with PlayMaker
We add an action to State1.
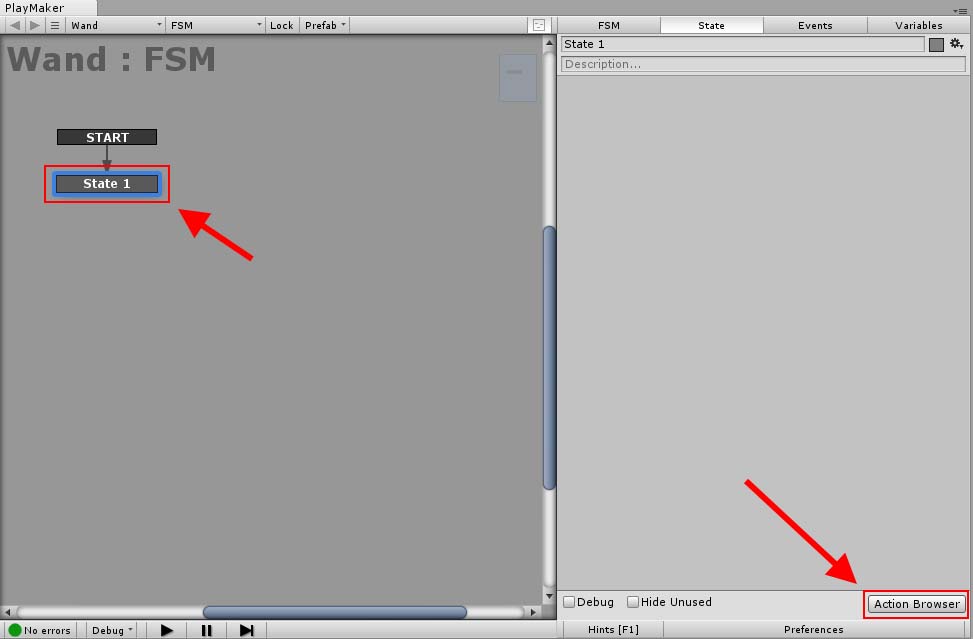
Add an action.
Add ‘Find Object’ by Action Browser. Firstly, acquire the controller and store it in a variable. Enter ‘Controller (right)’ in the ‘Object Name’ field. Note that there is a space between ‘Controller’ and ‘(right)’. Create a new variable by selecting ‘New Variable…’.
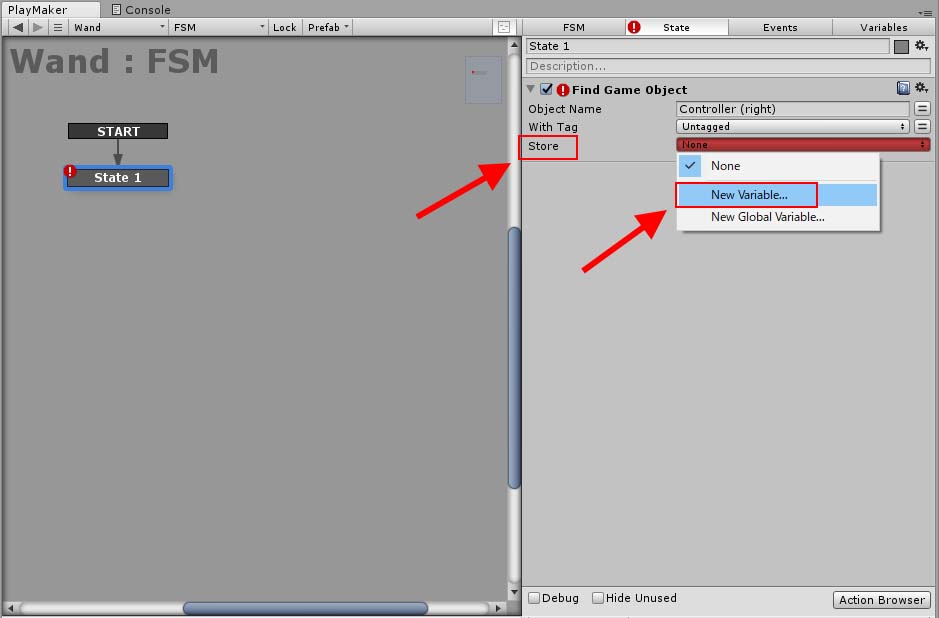
Create a variable
Name it ‘Controller’ and set it in the ‘Store’ field
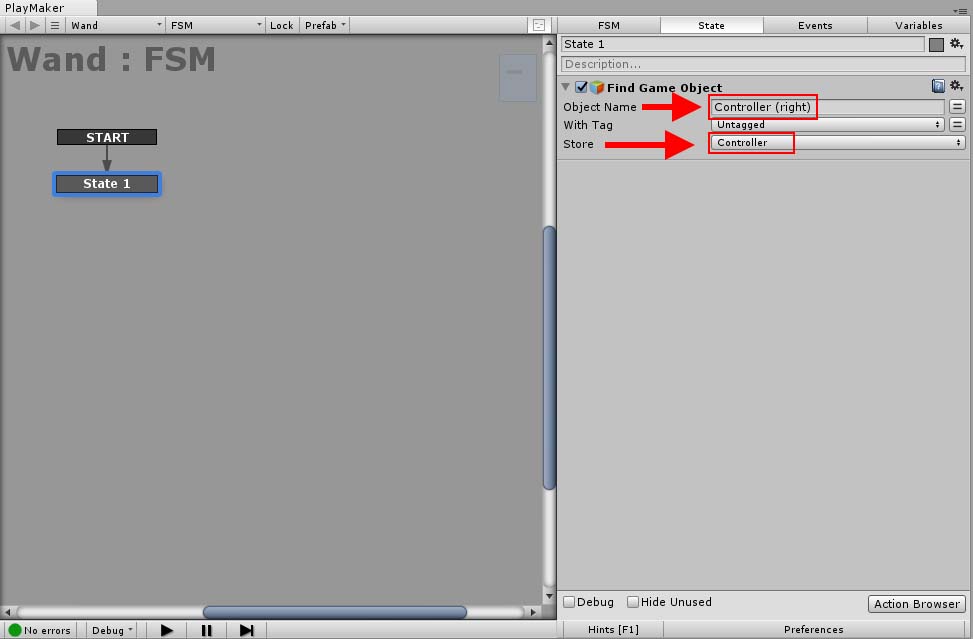
The setting for Find Game Object.
Next, make the wand created earlier a child of the controller by ‘Set Parent’.
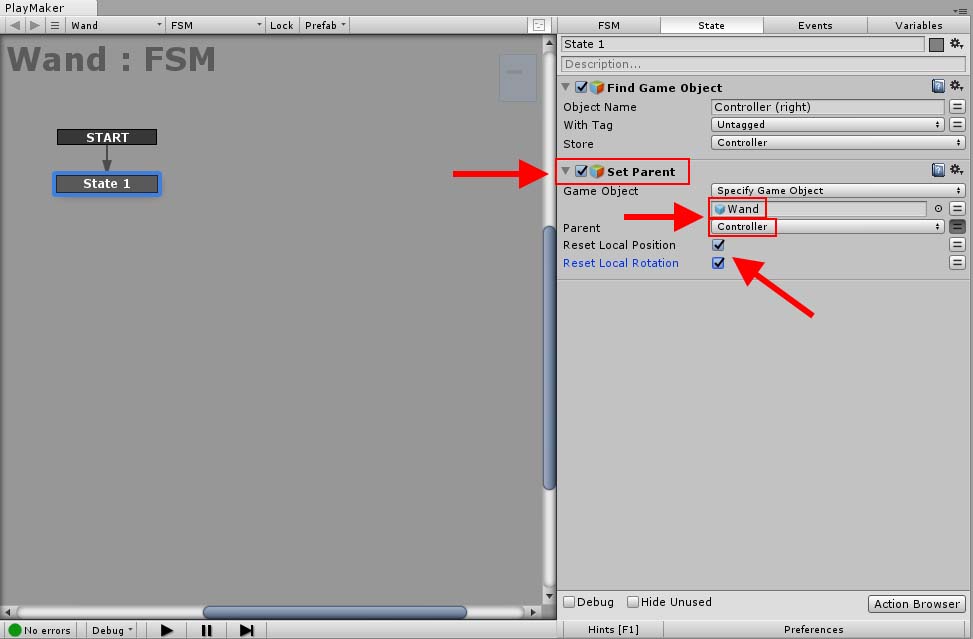
The setting for ‘Set Parent’
It creates the wand at the same place as the controller.
Add Raycast
Make the wand cast a Ray so that it acquires the object hit by it.
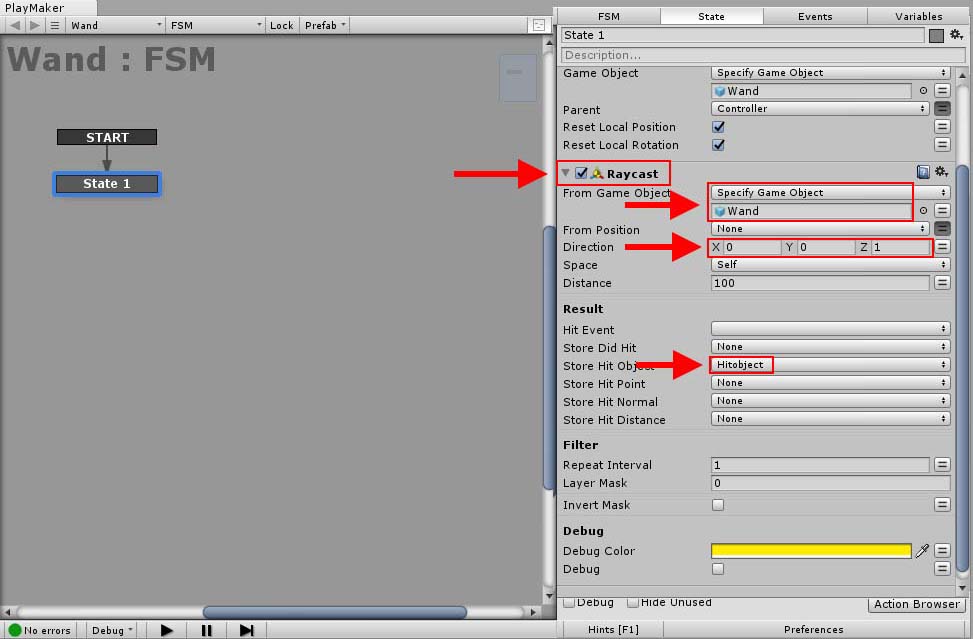
The setting for Raycast
Select ‘Specify game Object’ and specify the ‘Wand’ Prefab in the ‘From Game Object’ field. Set the Z-direction to 1. The object hit by Ray will be stored in ‘Store Hit Object’. Create ‘Hitobject’ by ‘New Variable…’ and specify it in the ‘Store Hit Object’ field.
Add the ‘Global_GripPressDown’ event
Create the ‘Global_GripPressDown_R’ event to trigger a transition when holding down the grip of VIVE controller.
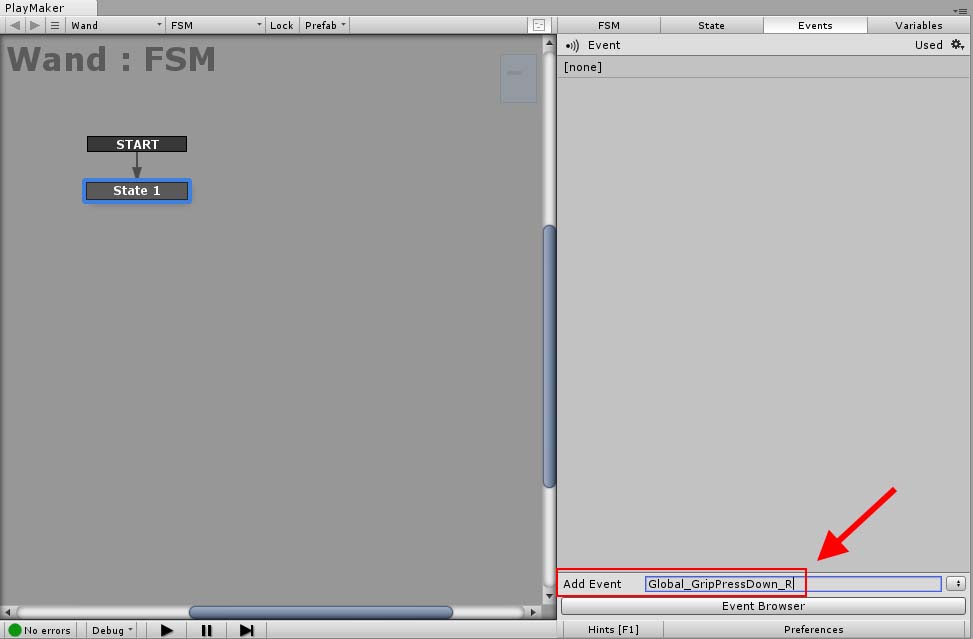
Add an Event.
by ‘Add Transition’, select ‘Global_GripPressDown_R’ created above.

The setting for Transition
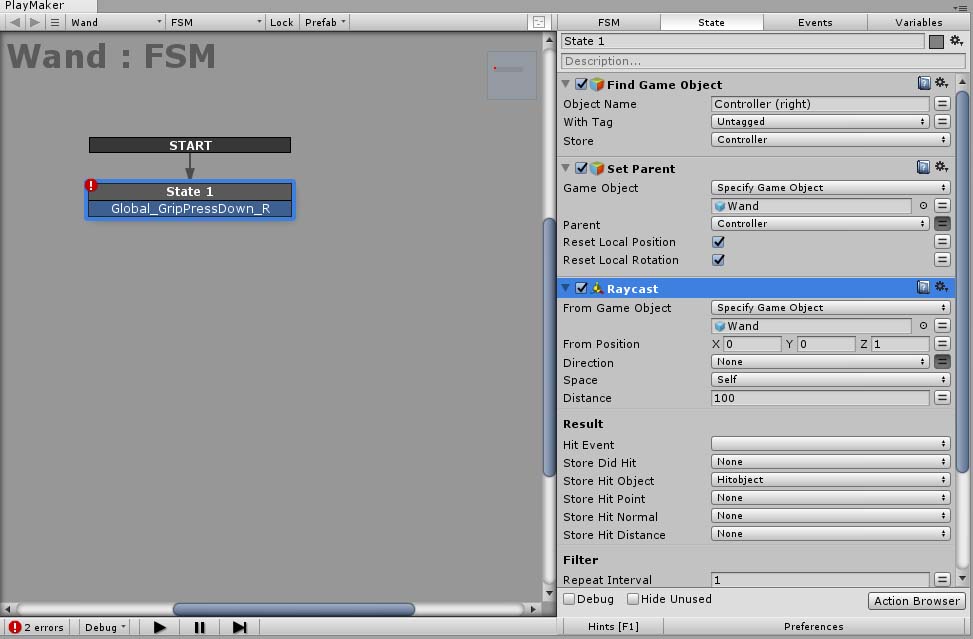
State1 is completed.
It completes the setting for State1.
Identify the object hit by Ray
Create a State to evaluate whether the object hit by Ray is a book or not. Create State2 and add ‘Get Name’ to it. Store the name of the hit object in a variable. Create a variable by ‘New Variable…’ and name it ‘Book’.
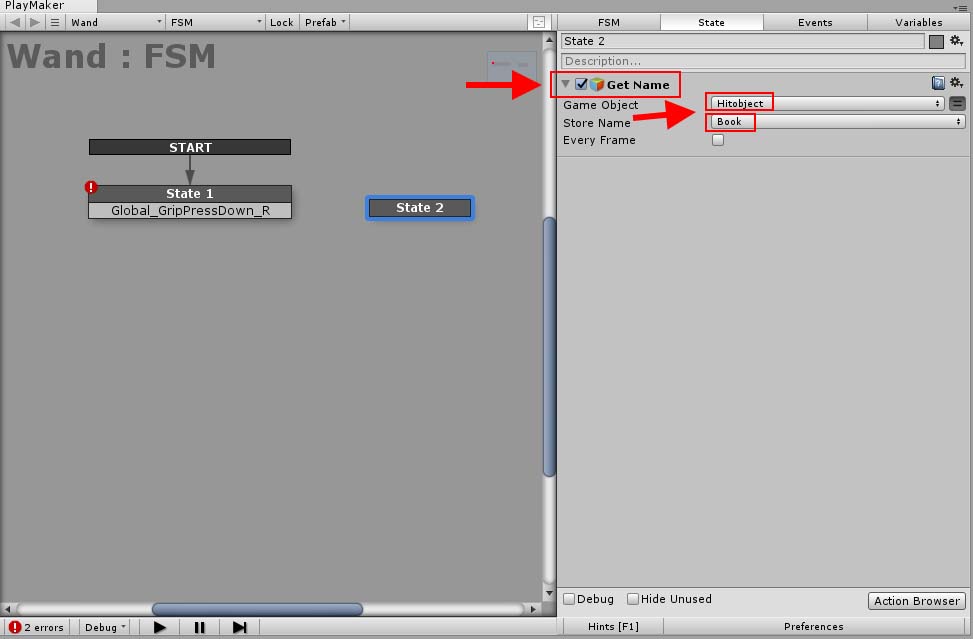
The setting for ‘Get Name’
Add ‘String Compare’ to compare character strings. Set ‘Equal Event’ to ‘True’. Create the ‘False’ event and specify it in the ‘Not Equal Event’ field.
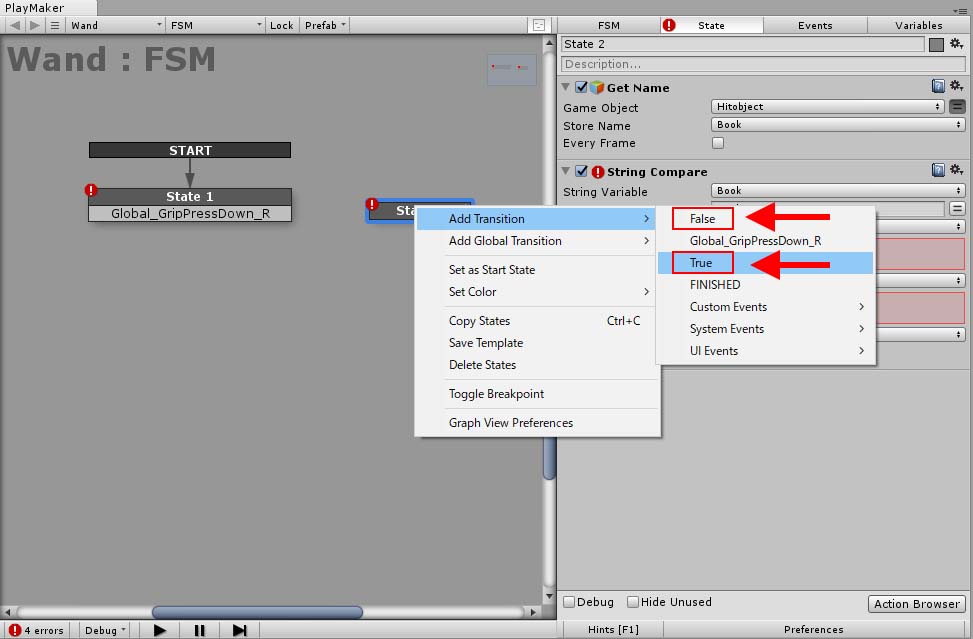
The setting for the Event
Specify a character string, ‘Book’, in the ‘Compare To’ field. If the hit object is ‘Book’, it triggers the True event, and If not, triggers the False event. When the False event is triggered, it goes back to State1.
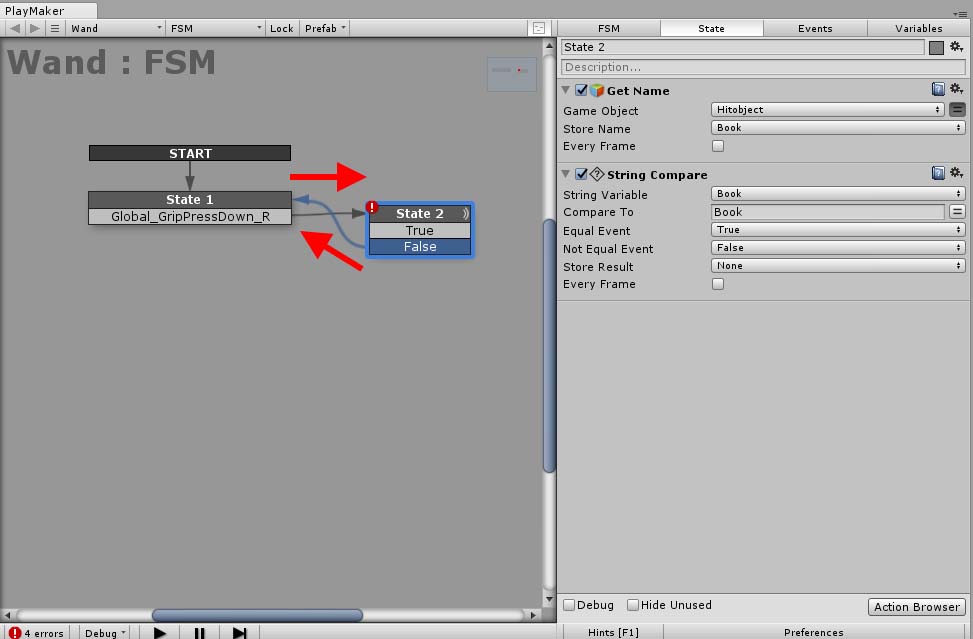
Connect it to State1.
The sequence to move ‘Book’
In State3, we set the sequence when State2 triggered the True event. Firstly, create State3 and connect State2’s True to it.
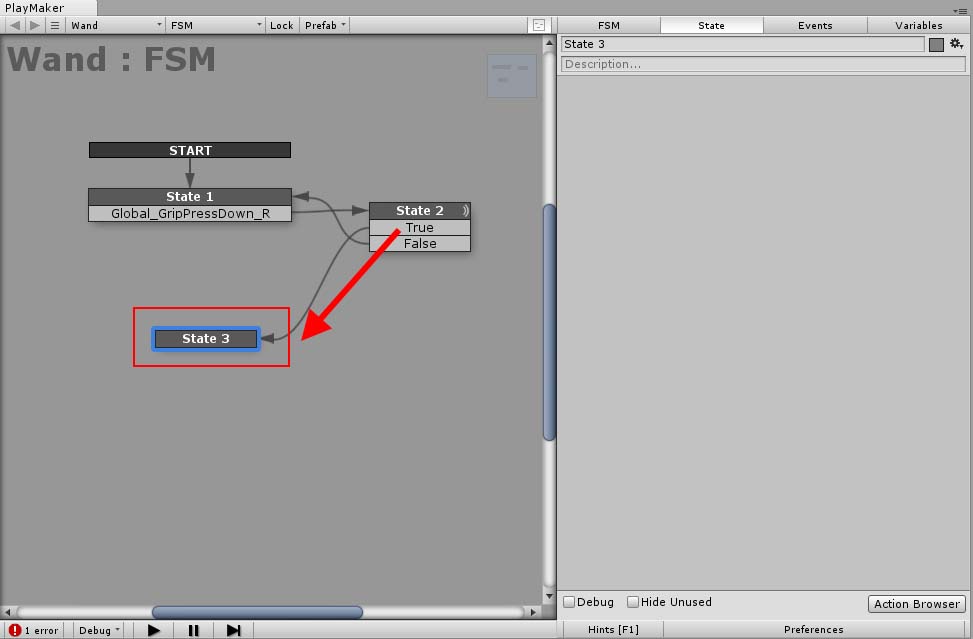
Create and connect Stage3.
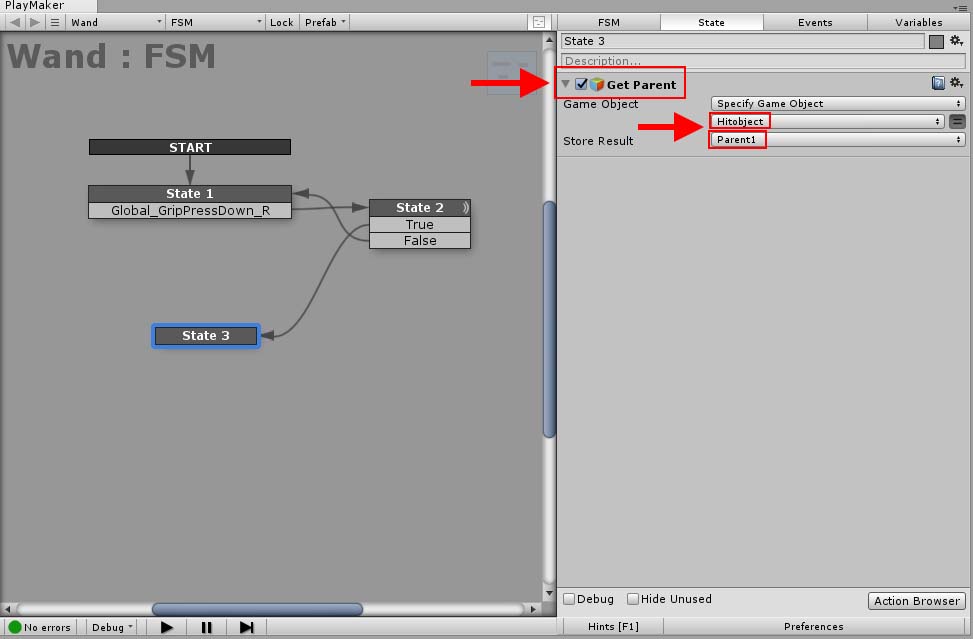
When moving ‘Book’, we also want to move the parent object of ‘Book’. Acquire the parent object by using ‘Get Parent’. Create ‘Parent1’ by ‘New Variable…’ and specify it in the ‘Store Result’ field.
The setting for ‘Get Parent’.
We also want to acquire the one-higher-level parent object, so add ‘Get Parent’ once more. Create ‘Parent2’ by ‘New Variable…’ and specify it in the ‘Store Result’ field.
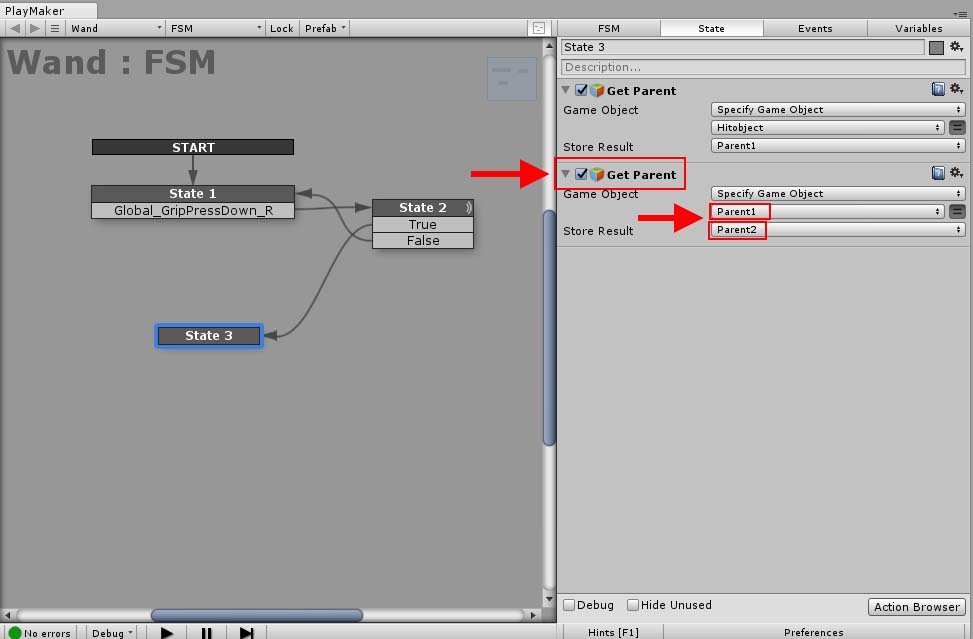
Add another ‘Get Parent’.
Move the parent object acquired to a location by ‘Move Towards’. In the sample Scene, I set it so that the object moves to the location, (0,1,0). Set ‘Finish Distance’ to 0.
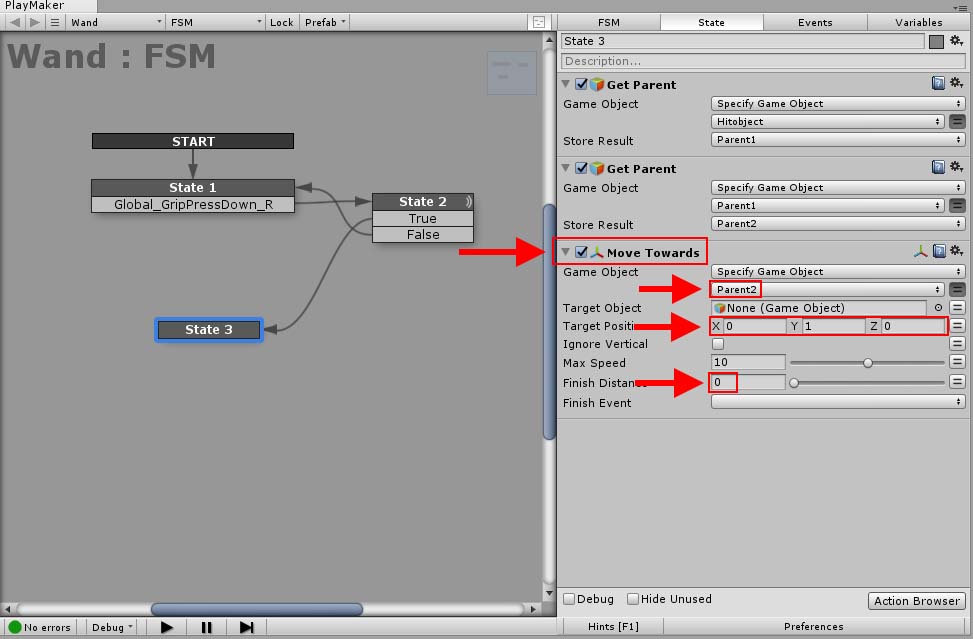
The setting for ‘Move Towards’.
Add ‘FINISHED’ to State3’s Transition and connect it to State1. It’s completed now.
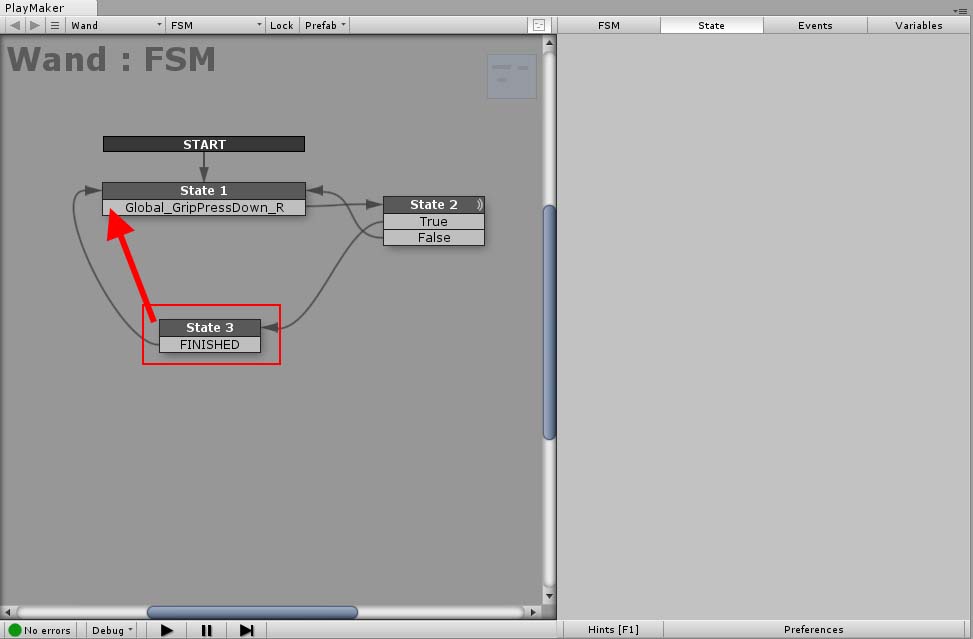
Connect it to State1.
I placed the asset so that the book is put on the desk exactly. Now you can select and call a book in the distance while setting back on the sofa.
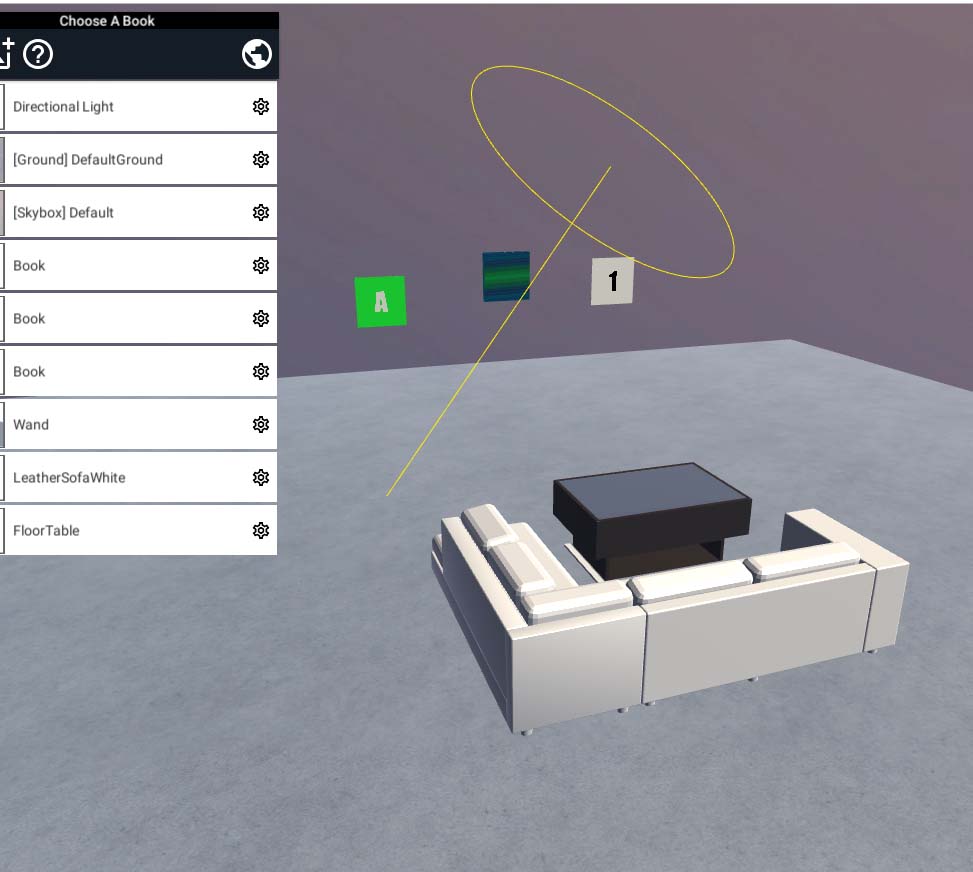
The completed Scene.
Please refer to the article below to learn how to import a PDF to a Scene. Read the article How to upload an asset from Unity to STYLY. Read the article In this article, I introduced how to access a remote object by casting a Ray. It would be useful to create the Scenes with the UI for navigation or a game.