In this article, I’ll show you how to record motion data using EVMC4U and EasyMotionRecorder, use that data to animate a character, and upload the character to be animated to the STYLY space.
EVMC4U is an app that works in conjunction with virtual motion capture that enables you to move 3D models in Unity. Furthermore, if you use these apps in conjunction with a script called EasyMotionRecorder, you can record motion data. You can then create character animations from this data and prefabricate the characters, and you can even place the animated characters in the STYLY space.
This is a great way to create a character-driven space in STYLY, so give it a try.
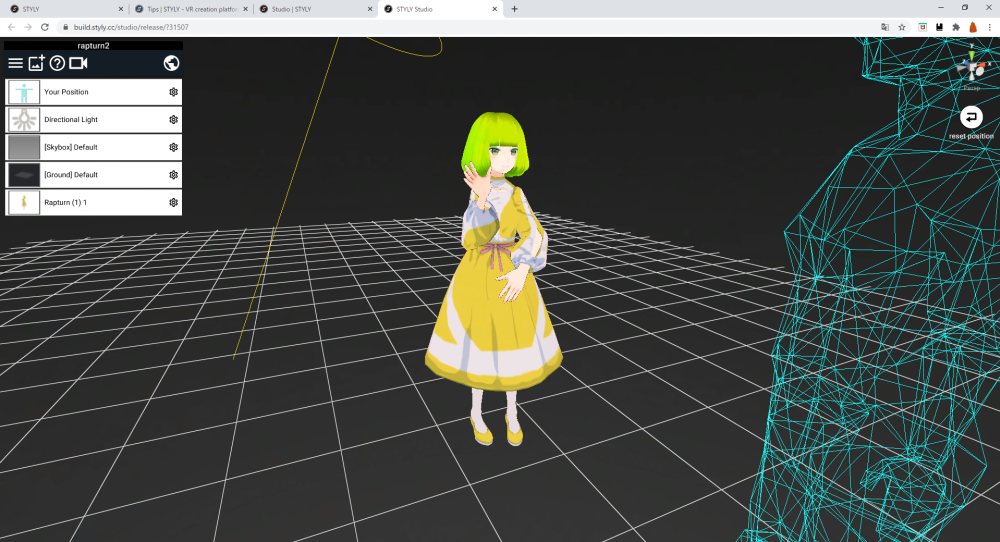
Sample
You can experience the sample space from the STYLY GALLERY
Introducing Virtual Motion Capture and EVMC4U
The first step is to use virtual motion capture and EVMC4U to make your character move in Unity. The following article will help you get your EVMC4U ready for use in Unity.
Virtual Motion Capture
Please check out this article that explains how to introduce and use virtual motion capture.

Virtual Motion Capture (free version)
https://sh-akira.booth.pm/items/999760
EVMC4U
You can also check out this past article on how to install and use EVMC4U here.
EVMC4U (stable version)
https://booth.pm/ja/items/1801535
Introducing EasyMotionRecorder
How to get it
This time, we will record the motion of the character using a script called EasyMotionRecorder.
EasyMotionRecorder
https://github.com/neon-izm/EasyMotionRecorder
First, download the latest EasyMotionRecorder.unitypackage from the Reases page.
Import
Import the EasyMotionRecorder.unitypackage that you just downloaded into your Unity project that is importing the EVMC4U.
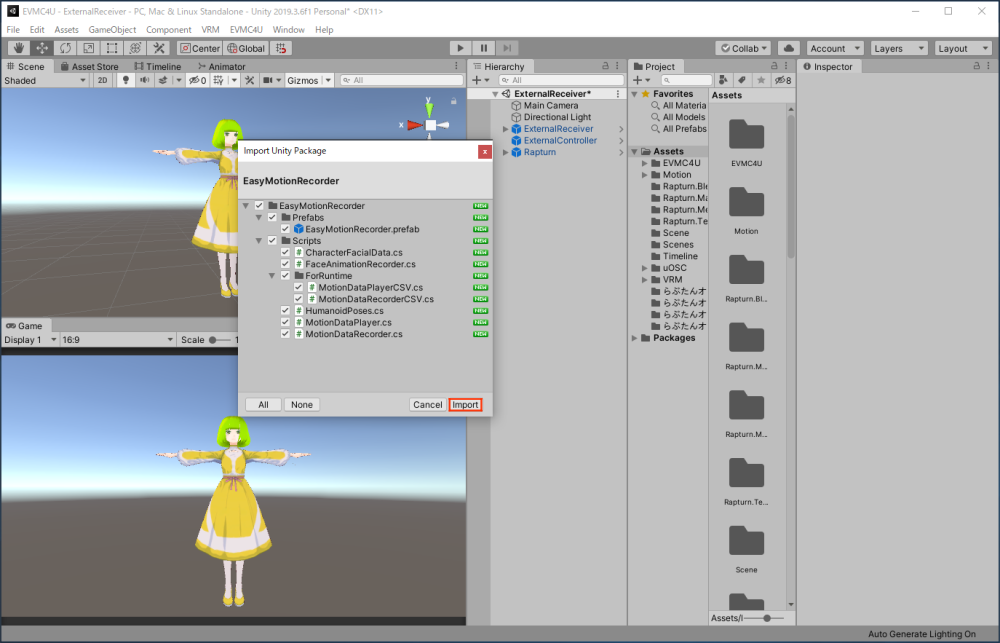
Import the EasyMotionRecorder.unitypackage
Preparation
After importing the EasyMotionRecorder.unitypackage, place the EasyMotionRecorder.pre-fab in your scene.
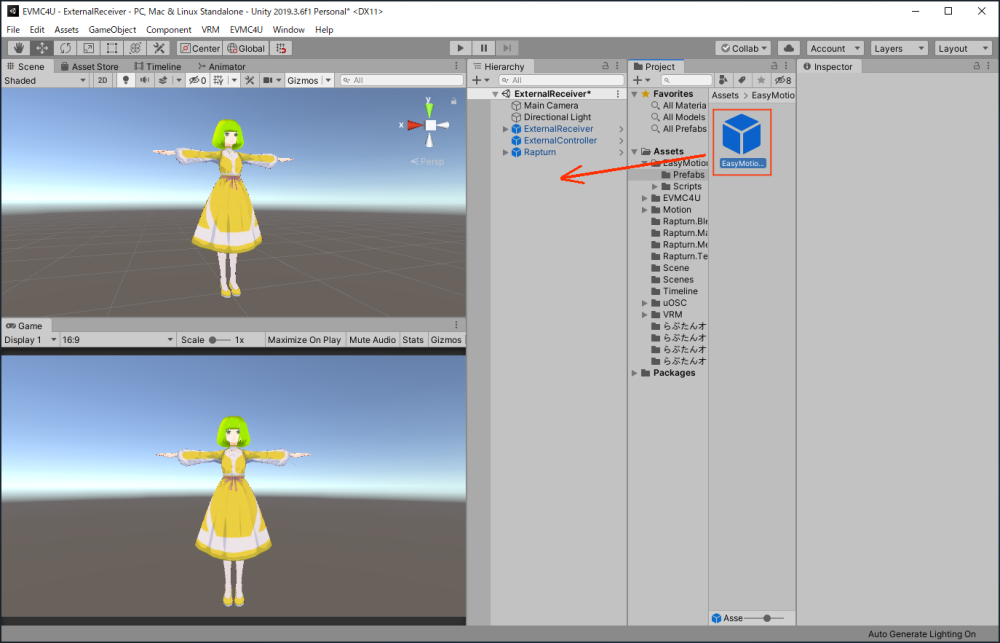
Place the EasyMotionRecorder.preflab in the scene.
Next, let’s attach a motion-capture target character to the Animator of MotionDataRecoder component attached to EasyMotionRecorder placed in your scene.
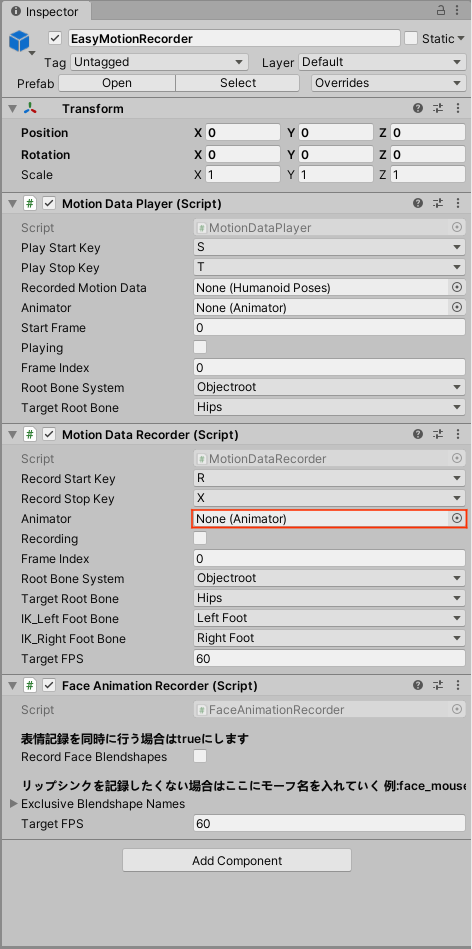
Attaching a motion capture character
We are now ready to record motion using EasyMotionRecorder.
Recording a motion
Now, let’s record the actual motion by pressing the Run button in the Unity editor.
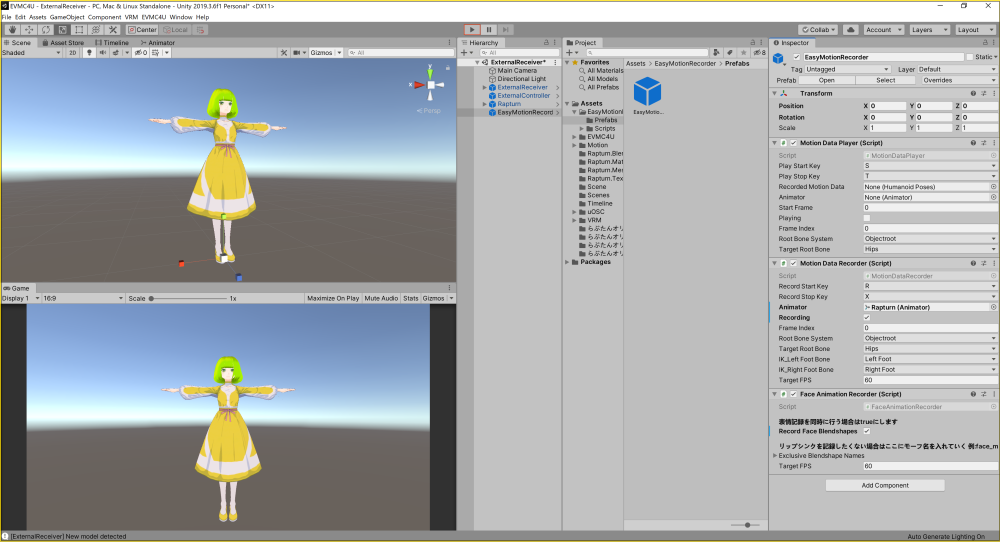
Press the Play button
Once you have confirmed that virtual motion capture is working with the EVMC4U, press [R] (the default setting) when you want to start recording. A motion recording will start. To end the motion recording, press the “X” button. The file is written out and the recording is finished.
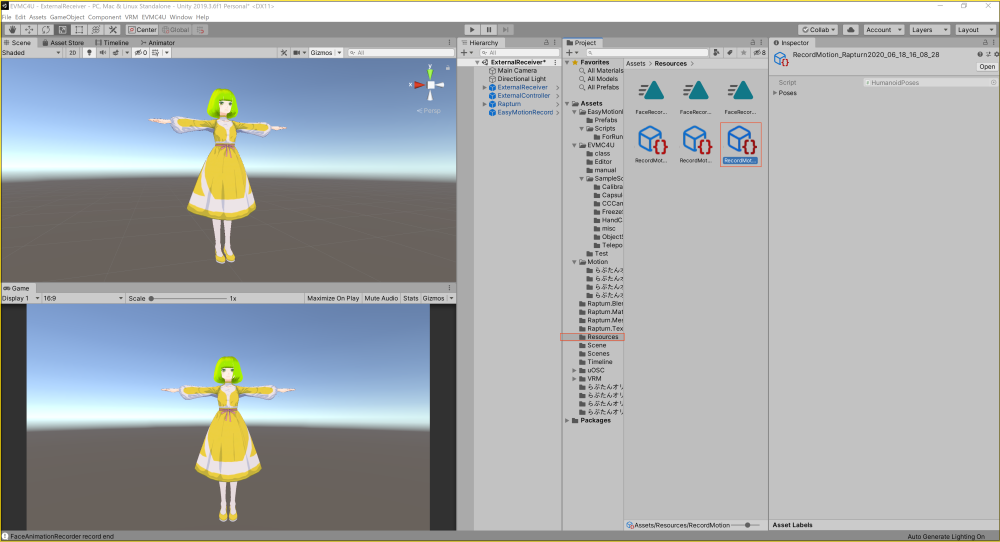
The recording is written out here.
Next, select the recorded file and right-click on it in the inspector. Now select “Export as Humanoid animation clips” to convert the file to AnimationClip.

Right-click and select “Export as Humanoid animation clips”.
Now you can apply this motion to your character to animate it.
Upload your model to STYLY
Now that we’ve created the motion, we want to apply it to our character and upload it to STYLY.
You can find more information on how to add motions and upload them to STYLY in this article.
Applying motion to your character
First, right-click on the Project area to create a new Animator Controller.
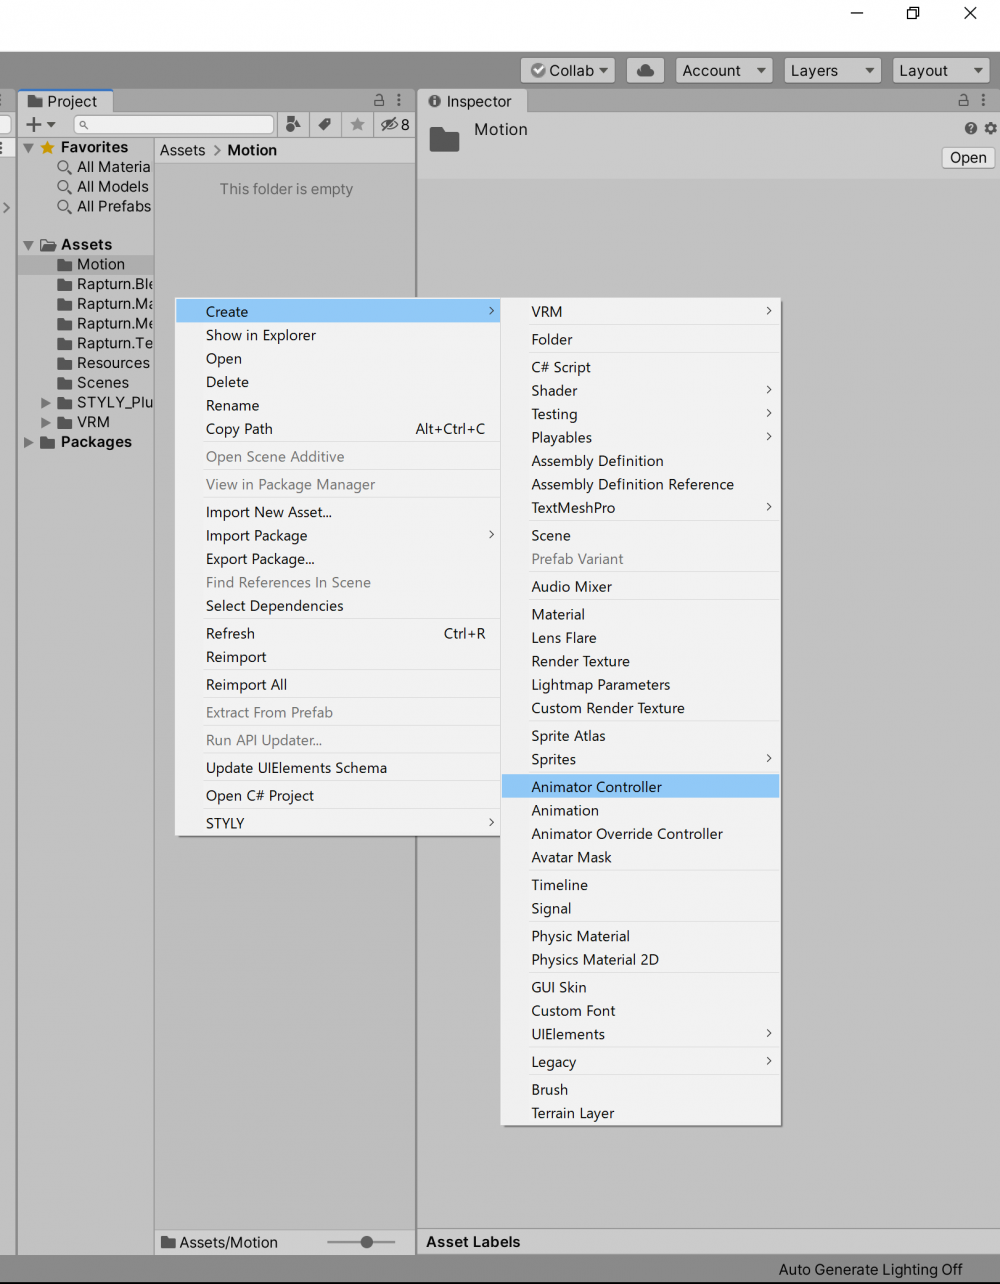
Create Animator Controller
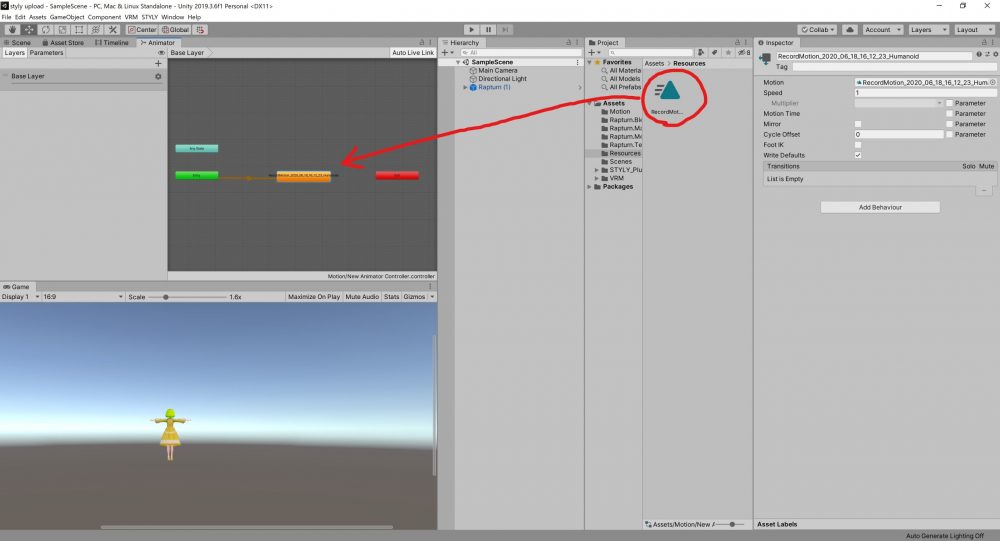
Drag and drop the previous animation clip
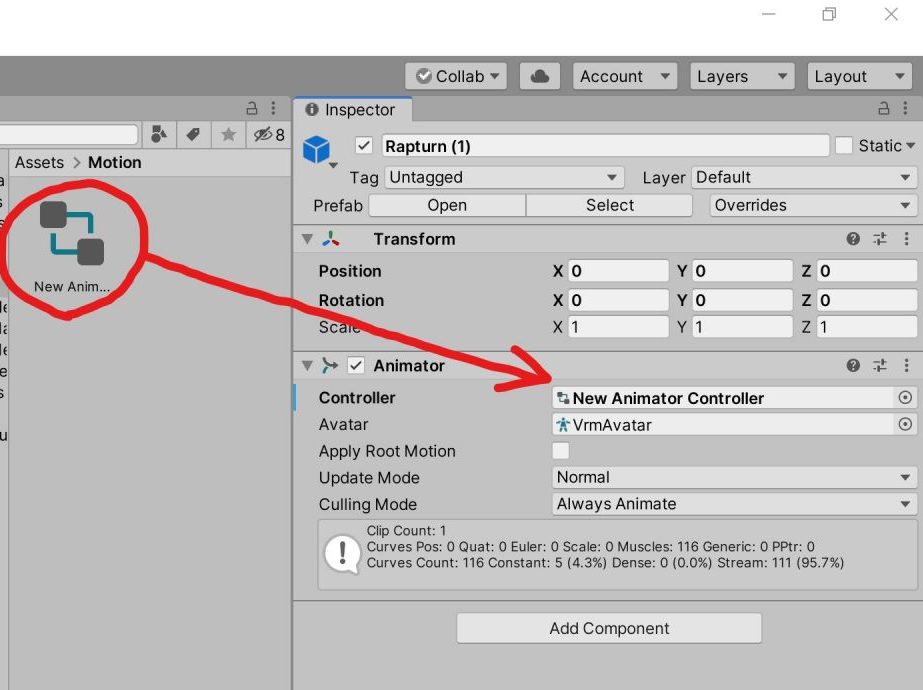
Drag and drop on the Animator Controller of the model
Uploading to STYLY
Once you’ve applied motion to your character, the next step is to upload your character to STYLY. Since we’re using a VRM style model, we need to remove any unnecessary scripts that are not available in STYLY beforehand. Remove “secondary” at the bottom of the prefab in the hierarchy and all scripts labeled (Script) in the inspector.
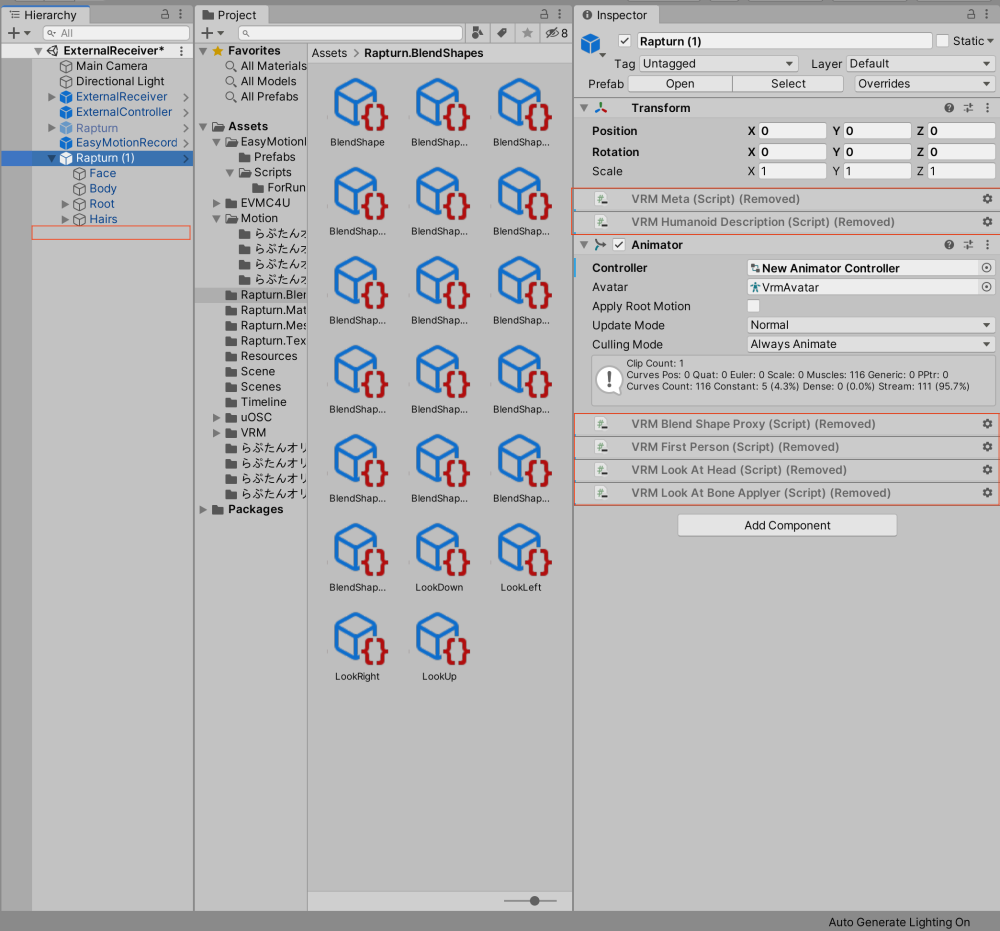
Remove unnecessary scripts
You are now ready to upload your character to STYLY. The next step is to import the STYLY plugin for Unity and upload this character’s prefab to STYLY. You can use the following article to help you import and configure the various settings.
How to upload assets from Unity to STYLY
When you have finished importing and configuring the STYLY plugin for Unity, right-click on the prefab of your character in your project. Select “STYLY” and click on “Upload prefab or scene to STYLY” to start the upload to STYLY.
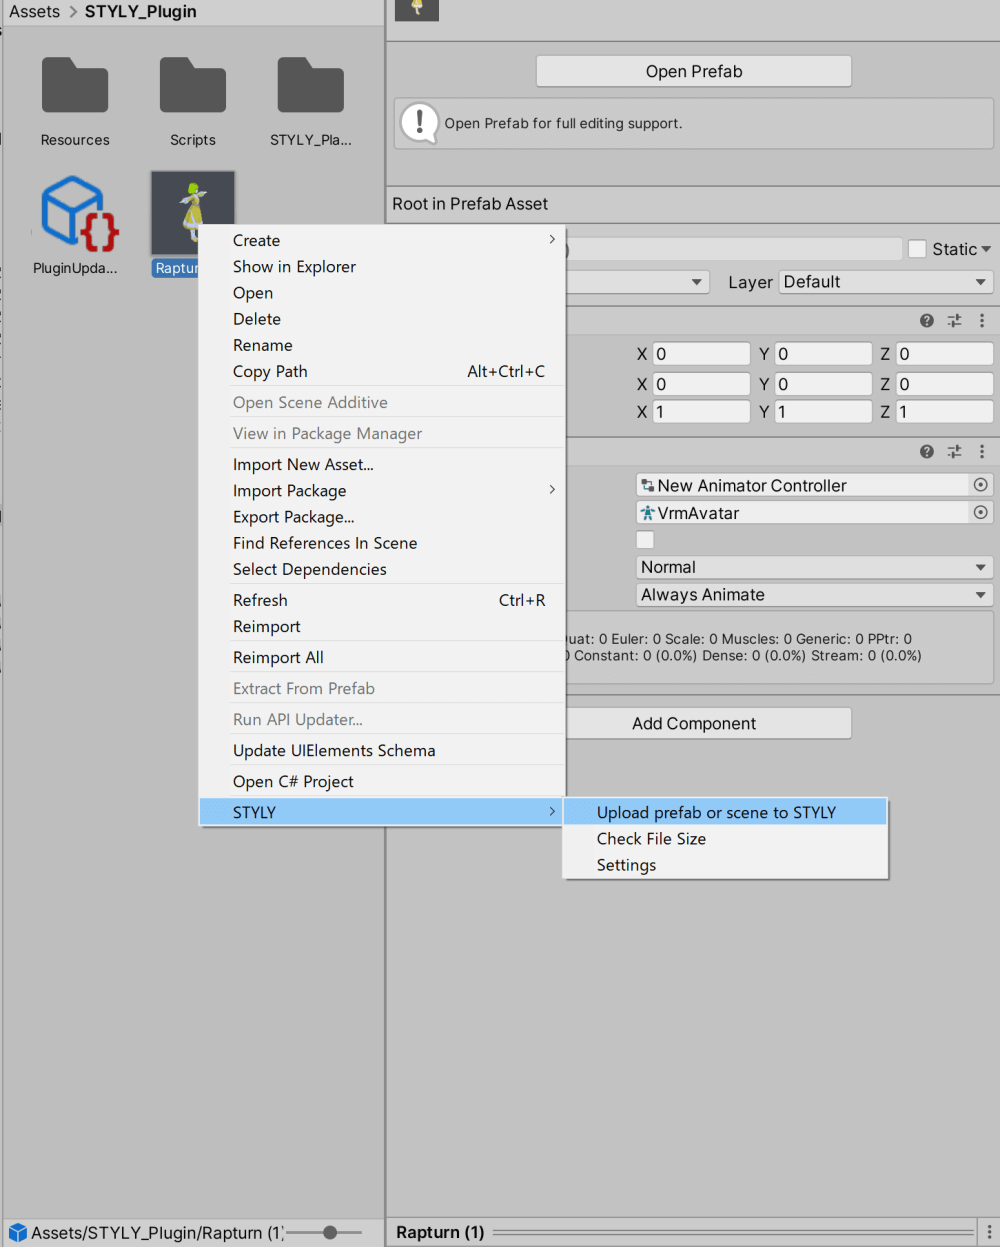
Uploading to STYLY
If the upload is successful, you will see a message like this.
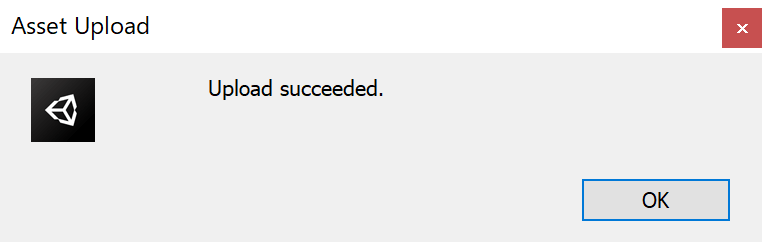
If the upload fails, try removing the EVMC4U from the Unity project.
Check STYLY out
Once you’re ready to upload, open STYLY Studio, go to Assets -> 3D Model -> My Models and you should see the prefab of the character you uploaded added, so you can actually place it in the space to see how it moves and so on. If there are no problems, you’re done!
Done!
With EVMC4U and EasyMotionRecorder, you can easily record motion in Unity. If you have a VR device and Unity, you can create your own motion for free and easily, and it will be useful for your STYLY creations, too. Try it out.
Introducing NEWVIEW SCHOOl ONLINE
We are now offering NEWVIEW SCHOOl ONLINE where you can learn the basics of Unity and PlayMaker, from the basics to the application of VR/AR content creation as well as the process of creating compelling content to be distributed STYLY (and the techniques used to create it will be made public).
