This article introduces “Shaders Laboratory”, where you can find a variety of shaders that can be used for free in Unity.
It’s free to use and the shaders can be easily implemented through copy and paste, so even if you’re thinking, “I want to try shaders, but it seems too difficult,” feel free to try it out!
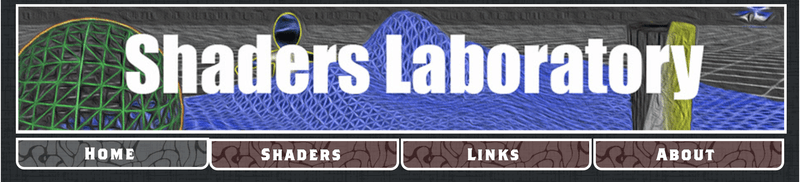
Top page of Shaders Laboratory
What is Shaders Laboratory?
Shaders Laboratory is a site with many free shaders.
You can use the shaders listed here for any project without having to credit them.
Explanation of the tabs in Shaders Laboratory
It’s easy to use.
First, let’s take a look at the tabs.
Shaders Laboratory tabs
There are four tabs: “HOME”, “SHADERS”, “LINKS”, and “ABOUT”.
You can find a description of Shaders Laboratory in the HOME tab.
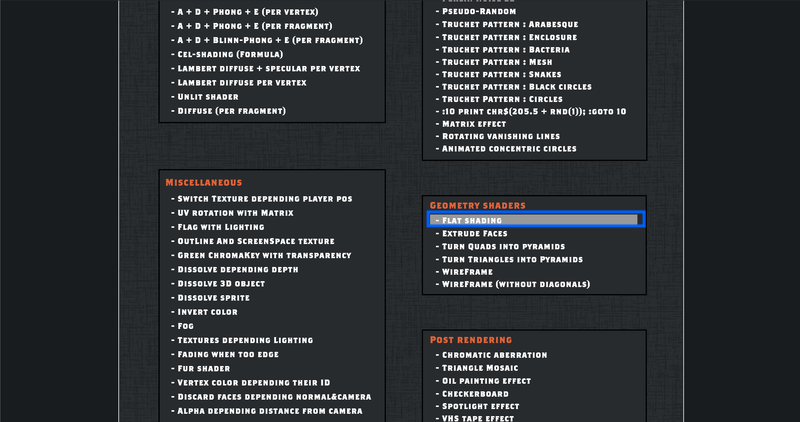
In the SHADERS tab, you can find a variety of shaders. This is the tab that is most used.
LINKS has a lot of useful links to help you learn about shaders. If you want to learn about shaders, this is also a good place to start.
ABOUT has a YouTube channel and Twitter account for the Shaders Laboratory admins. A link to support the admins as a patron is also available.
How to use Shaders Laboratory
I’ll get right to the point and explain how to use this site.
Click on the “SHADERS” tab. You’ll be taken to a page with various shaders listed by different categories.
Since this is an introduction, I’d like to start off by looking at STEP BY STEP.
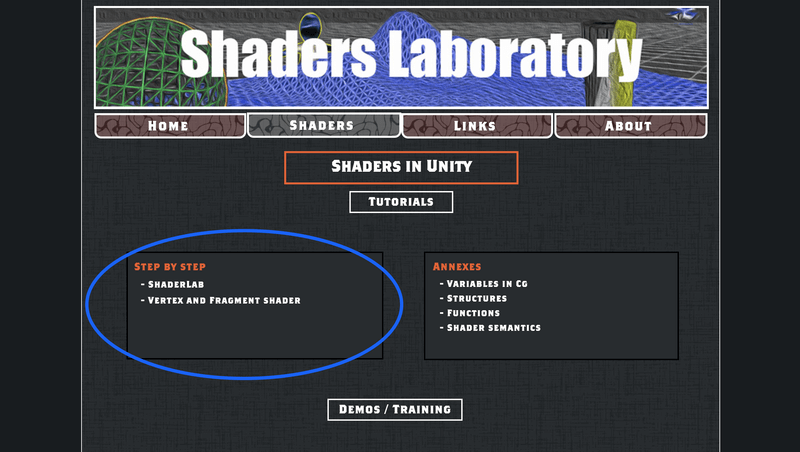
STEP BY STEP
We will do both Step 1: Shaderlab and Step 2: Vertex and Fragment Shader. We can follow along by watching the video in the image below. The source code is also available in the video.
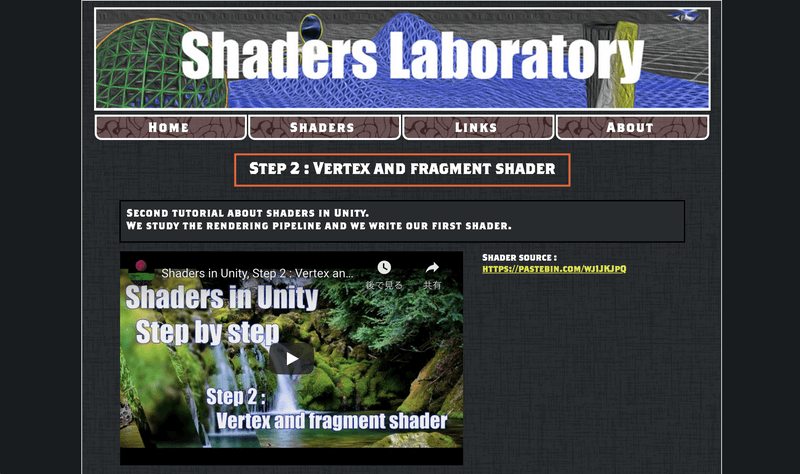
VERTEX AND FRAGMENT SHADER
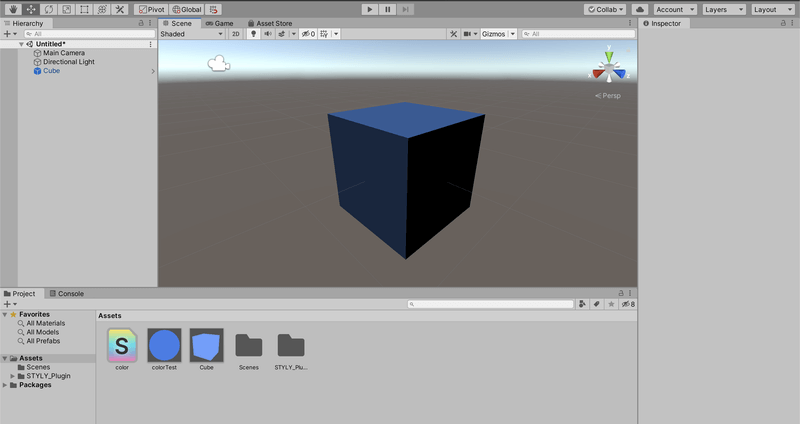
After completing “Step 2: Vertex and Fragment Shader”, you will be able to create a cube that you can change the color for, as shown in the following image.
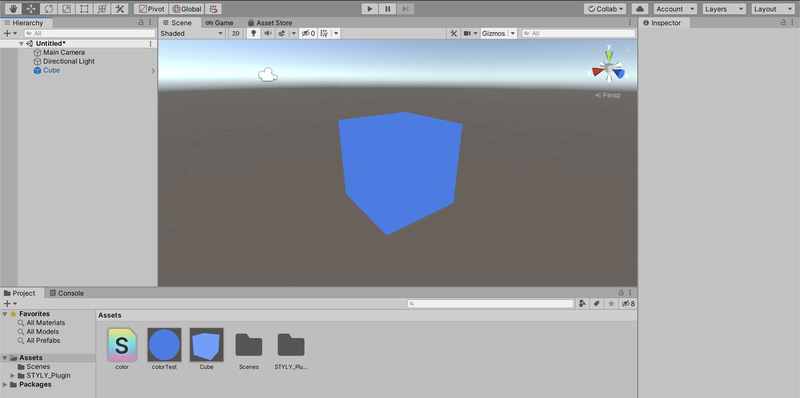
The finished image
Try out the other sample shaders
Now that we can use the basic foundation, a shader that changes the color of the cube, we’ll look at how to use the other shaders as well.
We can use them the same way as the shader we just created.
All you have to do is rewrite the part of the code for the shader that we just copied and pasted.
In this article, we’ll be using the Flat Shading shader here.
Location of Flat Shading
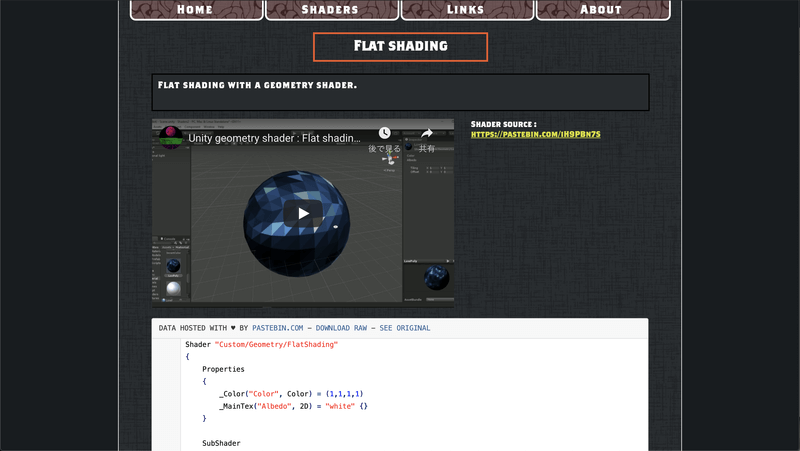
Video and source code for Flat Shading
You can use it by adapting it on Unity, by referring to the video and source code on the page you are visiting.
Completed image of Flat Shading
It is completed.
Recommended Shaders in Shaders Laboratory
Now that you know how to use Shaders Laboratory, I’d like to introduce you to some of the cool shaders I’d like to recommend in Shaders Laboratory.
All of this can be implemented in the same way as explained above, by watching the video for instructions and copying and pasting the source code as needed.
Rim Effect
This shader can create icy effects.
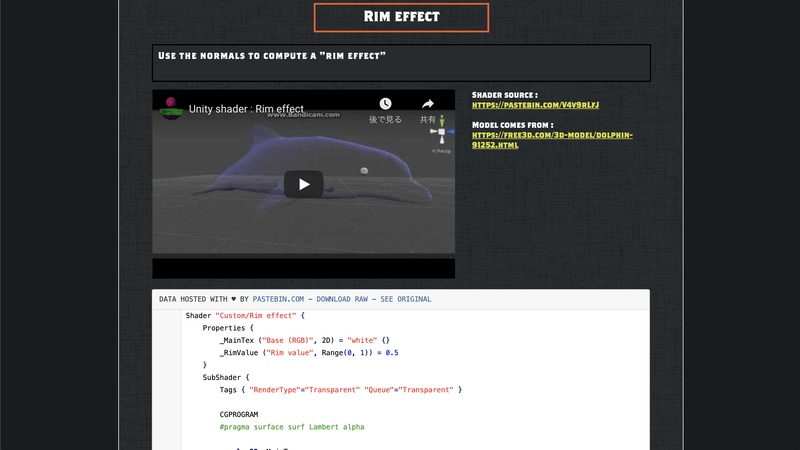
Rim Effect
Snow Effect
The snow effect is a shader that can create an effect as if a surface were covered with snow.
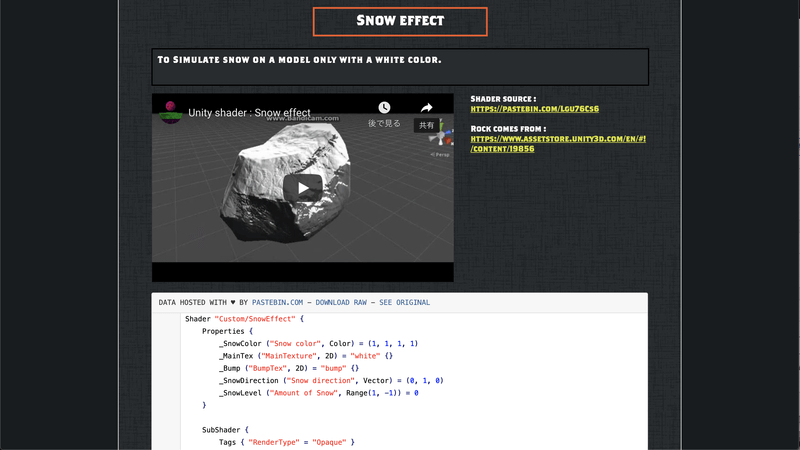
Snow Effect
Oil Painting
There are shaders that can be used not only for 3D objects, but for images as well. Here’s a shader that gives an oil painting look.
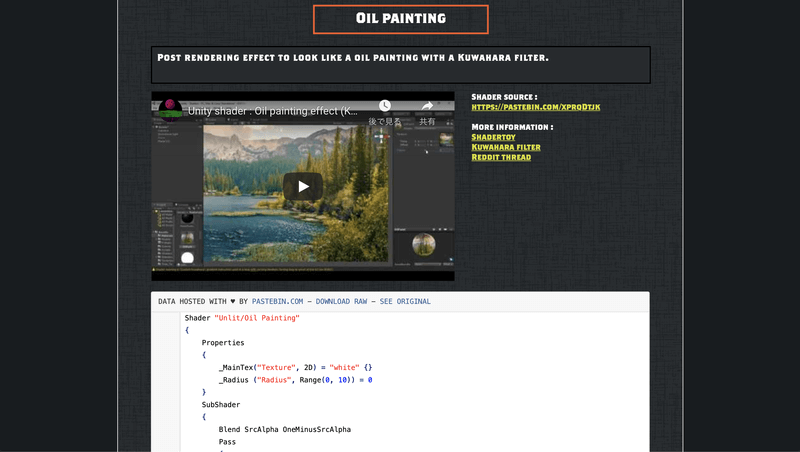
Oil Painting
SEPIA WITH FINAL COLOR
This is a shader that gives your image a sepia tone.

SEPIA WITH FINAL COLOR
Uploading to STYLY
You can upload objects with the Shaders Laboratory shaders applied to them to STYLY.
How to upload assets from Unity to STYLY

I introduced Shaders Laboratory in this issue. It’s easy to create cool shaders, so try combining and modifying them to expand the range of your expression!