In this article, I explain how to spice up your VR space using real-time lighting by Unity’s light component. By using the light component, you can not only improve the appearance but also boost the presence of your VR space by casting the shadows. I also introduce some ideas of the gimmick by using shadows, so please try creating a VR space by making good use of the light component after reading this article.
The sample project
Samples
You can taste the sample space from STYLY GALLERY. Light&Shadow 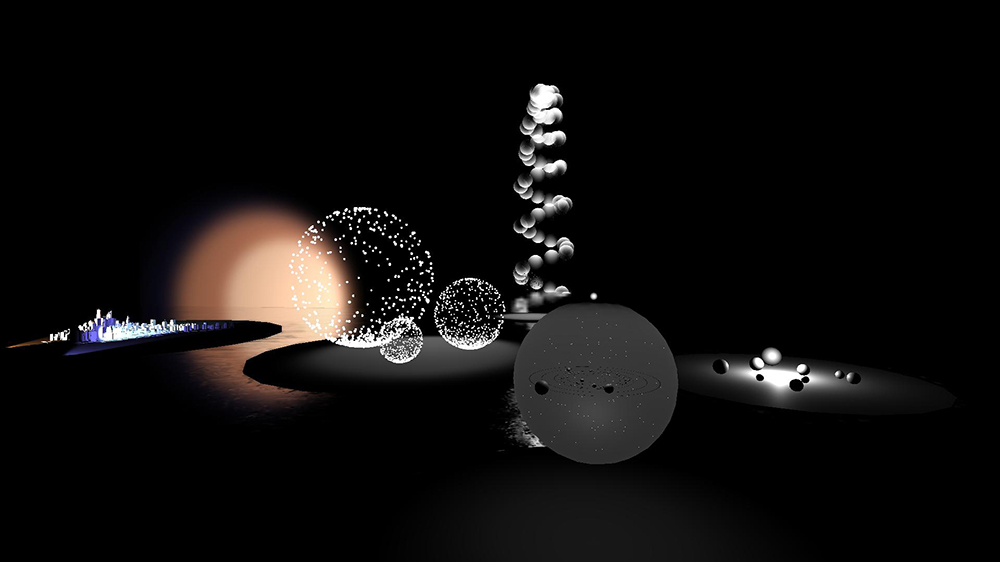 You can download the Unity project introduced in this article. STYLY-Unity-Examples
What is the light component in Unity?
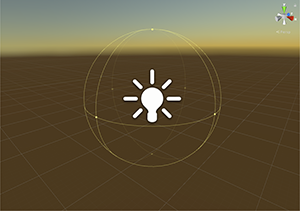
‘Light’ in Unity is the object of the light source in a scene as its name implies. If you place this light source, the surrounding objects under the influence of the light are shaded in and cast their shadows. There are three types of lights, ‘Directional lights’, ‘Spot lights’, ‘Point lights’, available in Unity. STYLY also supports those three types of light.
The types of light
| Directional lights | Point lights | Spot lights | |
| Image |  |
 |
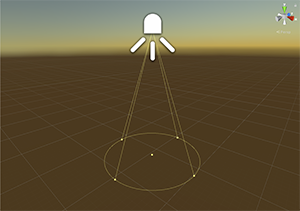 |
| Description | The light behaves like the sun, which illuminates all objects in the scene as if the light is from the same direction. | The source sends out light in all directions from a point. | As its name suggests, it’s a spotlight-type light source. You can adjust the range and angle of the illumination. |
| Note | There is ‘directional light’ available in STYLY by default even if you don’t bring it in from Unity. |
How to use light in STYLY
You can directly import the lights created with Unity into STYLY, but there is one thing to note. That is, you have to select ‘Important’ for ‘Render Mode’ in the light setting. Now, I explain how to actually create a light
Place a light
Firstly, place an object in the scene to work on lighting while checking the shadows and etc. This time, we prepare a simple cube and sphere. Right-click on the Hierarchy window and select ‘3D Object > Cube’.
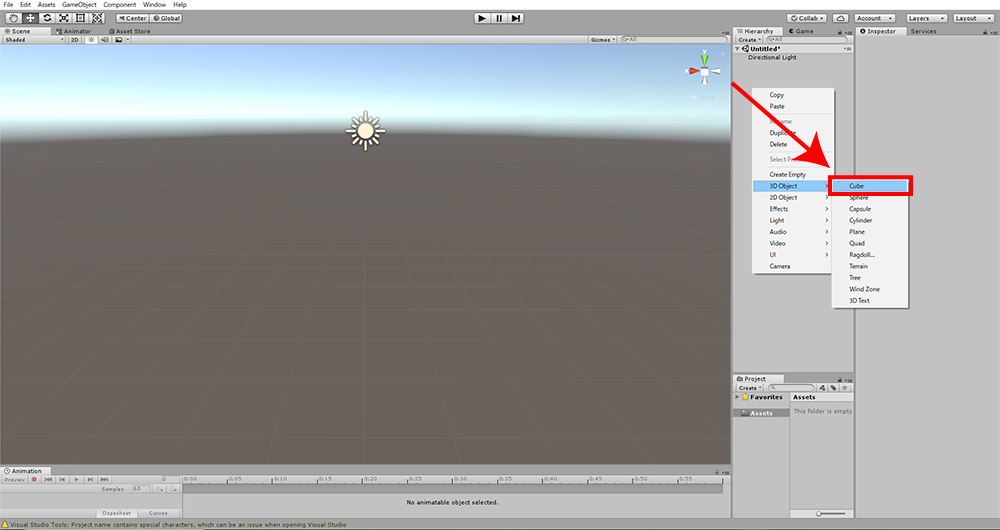
Place a Cube
Next, right-click on the Hierarchy window and select ‘3D Object > Sphere’.
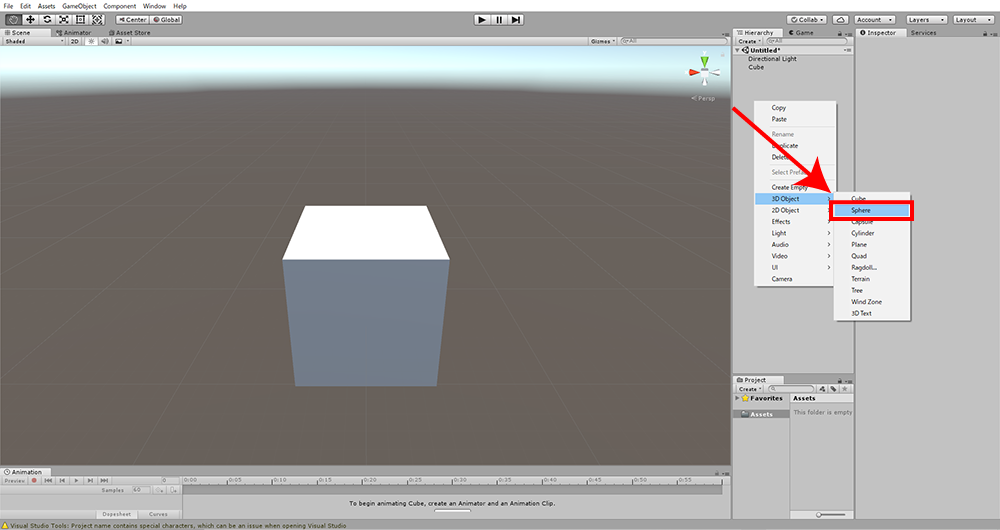
Place a Sphere
Scale down the created Sphere a bit and move it above the Cube. Now all objects have been prepared.
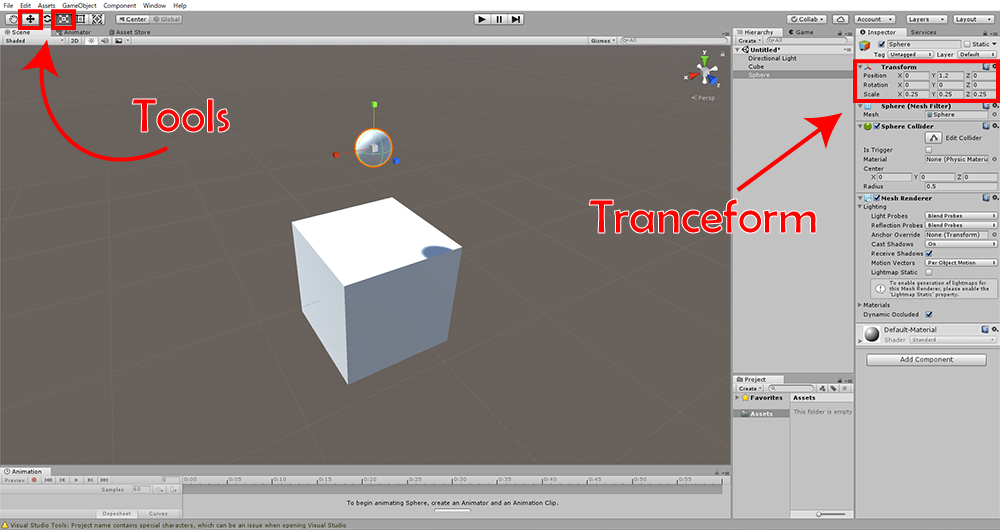
Reduce the size of the Sphere and put it above the Cube.
Next, place a light. This time, create a spotlight so that it illuminates the Sphere from above to cast the shadow on the Cube. At first, right-click on the Hierarchy window and select ‘Light > Spotlight’.
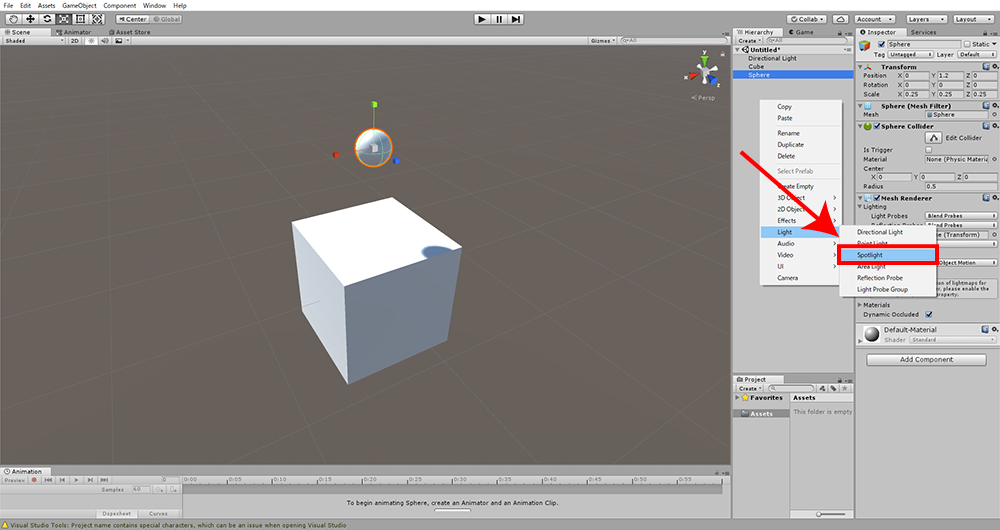
Place a spotlight
Move the created spotlight with ‘Move Tool’ and put it above the Cube. In this state, it doesn’t cast the shadow yet. You need to change the light setting so that it cast the shadow.
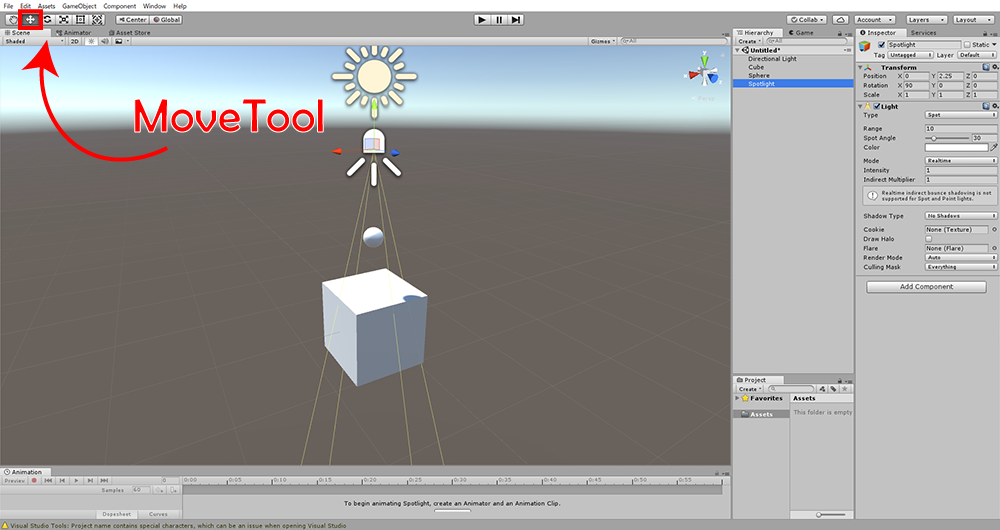
Move the Spotlight with MoveTool
Change the property of the light to cast the shadow
Next, change the property to cast the shadow with the light component. Open the Inspector of the Spotlight and change ‘No Shadows’ into ‘Hard Shadows’ (or ‘Soft Shadow’ alternatively) for ‘Shadow Type’. (Hard Shadow is a shadow with clear boundaries and doesn’t look as realistic as Soft Shadow, but it costs less computationally.) When you import the light component and use it in STYLY, change ‘Auto’ into ‘Important’ for ‘Render Mode’. The shadow should be cast now. This time, I deleted the directional light because the shadow is less visible with it.
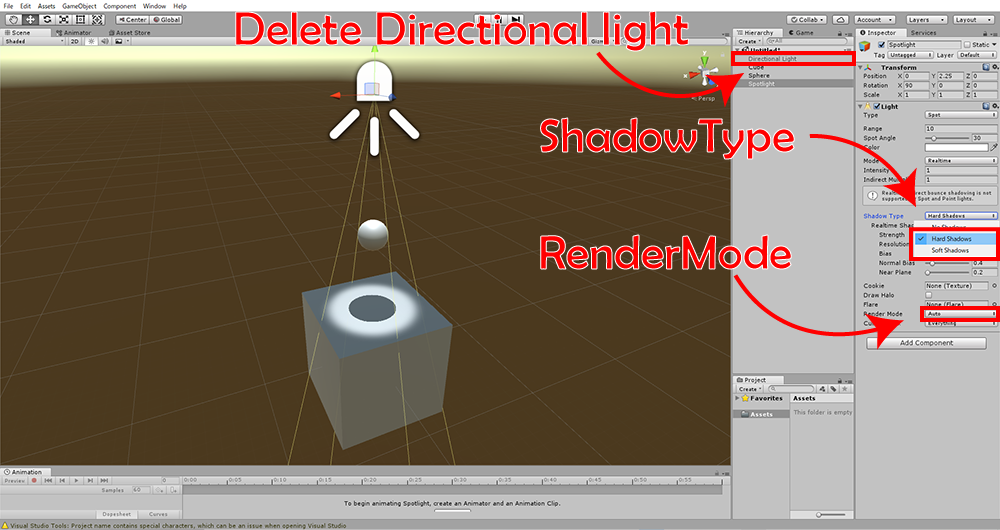
The setting for ‘Shadow Type’ and ‘Render Mode’
【Advanced】The property of the light component
There are some settings for the light component. I picked up some basic ones and briefly summarized into the table shown below. If you need more details, I recommend reading Unity Official Document.
| Property | Description |
| Type | You can change the type of light (Spot light, Directional light, Point light and etc.). |
| Range | The influence range of light |
| Spot Angle | The angle of the spotlight cone. |
| Color | The colour of light |
| Intensity | The intensity of light (The light is intensified more by increasing this value). |
| Shadow Type | You can set the type of shadow (‘Hard Shadow’ has clear boundaries. It looks less realistic but costs less computationally). |
【Advanced】Emphasize the shade by adjusting the ambient light
When you actually place a light to cast the shadow, you might feel that the light is not so effective because the scene itself is too bright. In that case, you can make the light more effective by adjusting the setting for the ambient light. Firstly, open the setting window for lighting. On the menu bar, select ‘Windows > Lighting > Settings’.
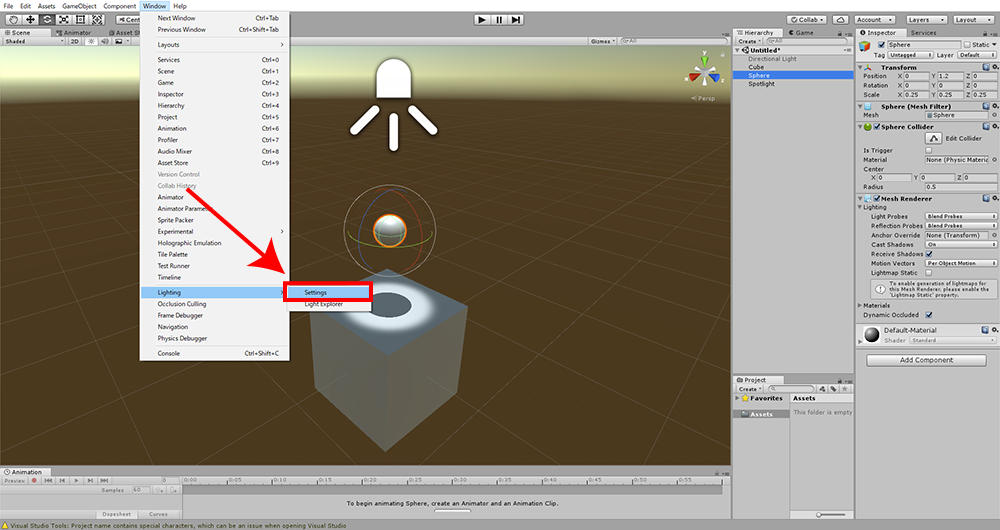
Open the setting window for lighting
When the setting window is opened, you will find ‘Intensity Multiplier’ of both ‘Environment Lighting’ and ‘Environment Reflections’ set to 1. You can make the scene darker by decreasing the value of those two ‘Intensity Multiplier’. If you set those values to 0, the scene becomes completely dark. Once you adjusted them to your favourite brightness, close the setting window. I set both of them to 0.5 in this example.
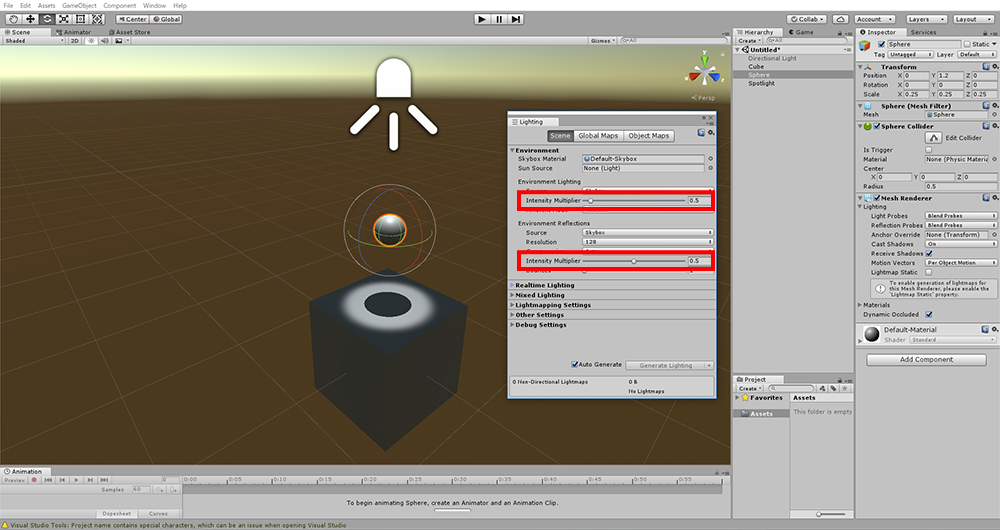
Adjust the ambient light.
You need to upload the whole scene at once to import the adjusted ambient light to STYLY. I explain it later in the ‘Import to STYLY’ section.
About ‘Directional Light’
Since directional light behaves like the sunlight, placing one in a scene is sufficient unless you use it in a specific manner. Directional light is available in STYLY by default. Therefore, delete the directional light originally set by STYLY when you place the directional light customized with Unity (Changing the colour, adding animations and etc.).
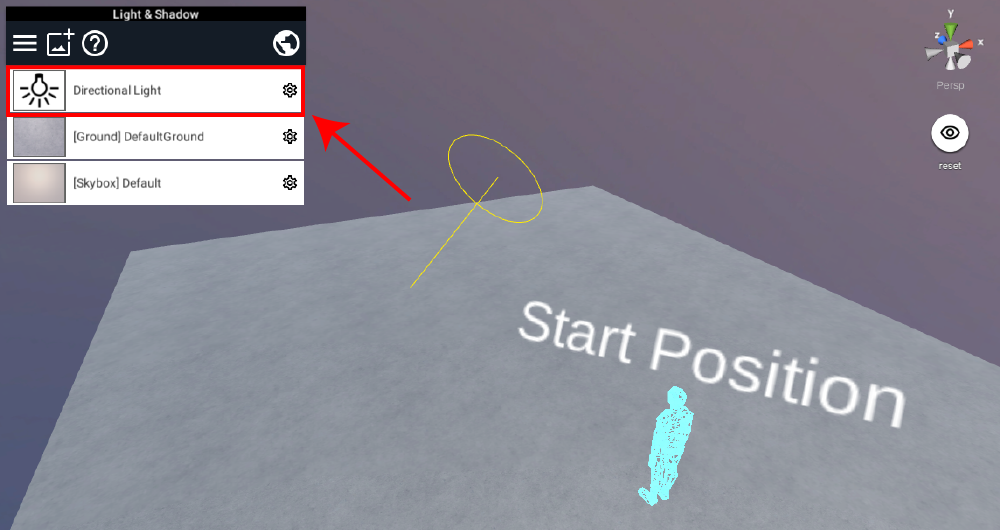
The Directional Light set by STYLY
Ideas to spice up the scene by lighting
This point onward, I introduce some ideas of how to spice up the scene by lighting.
Animate and colour light with Animator
You can animate a light and change its property (Intensity, colour, the influence range and etc.) by Animator. By controlling the light component by Animator, you add a dynamic effect to the scene.
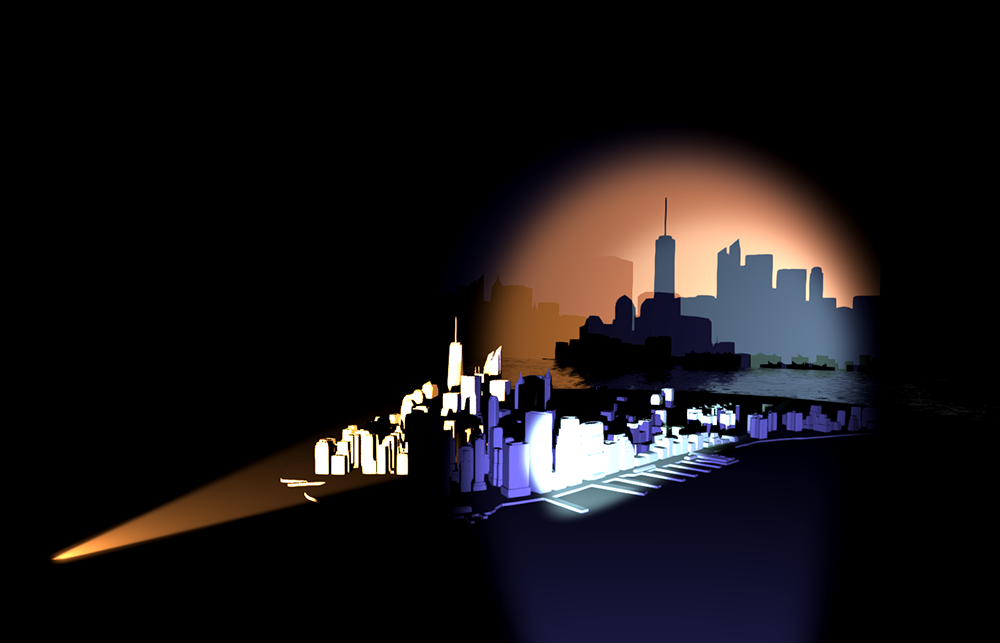
An example of the effect by using Animator
① On the menu bar, select ‘Window > Animation’ to open the Animation window.
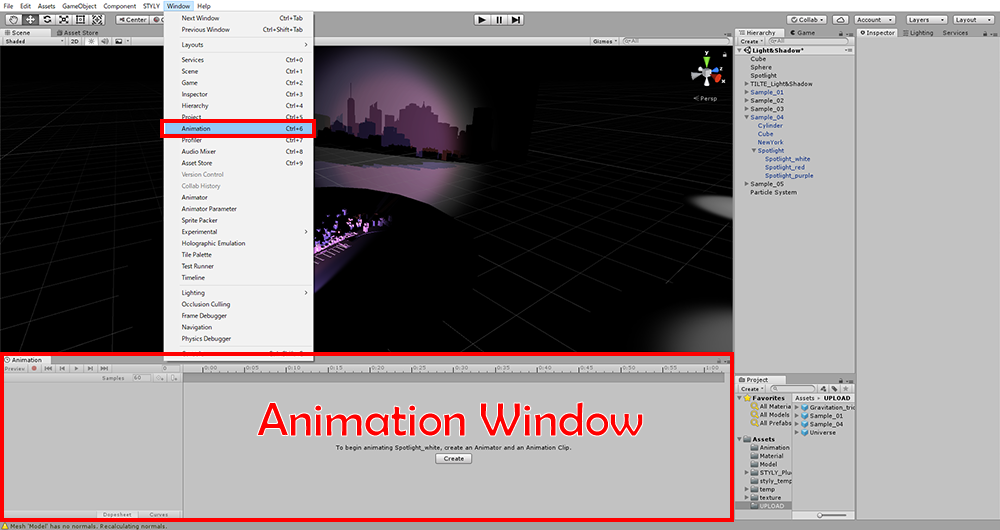
Open ‘Animation Window’
③Select ‘Spotlight’ and press the ‘Create’ button in the Animator window. It opens the window to specify where to save it.
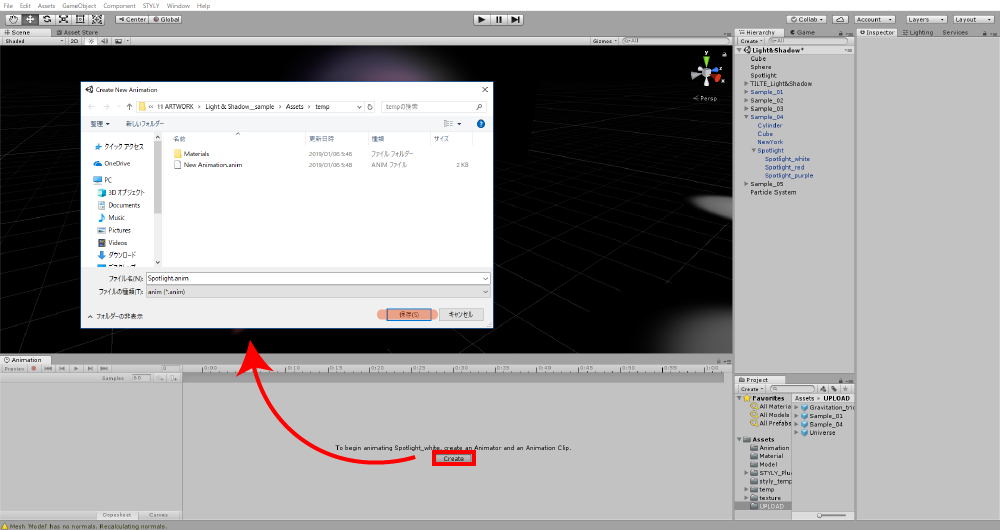
Create an animation
③ This time it would be sufficient if we controlled animation in seconds, so I set ‘Sample’ to 1. To move the light, click ‘Add Property’, select ‘Transform > Position’ and press the ‘+’ button on the right.
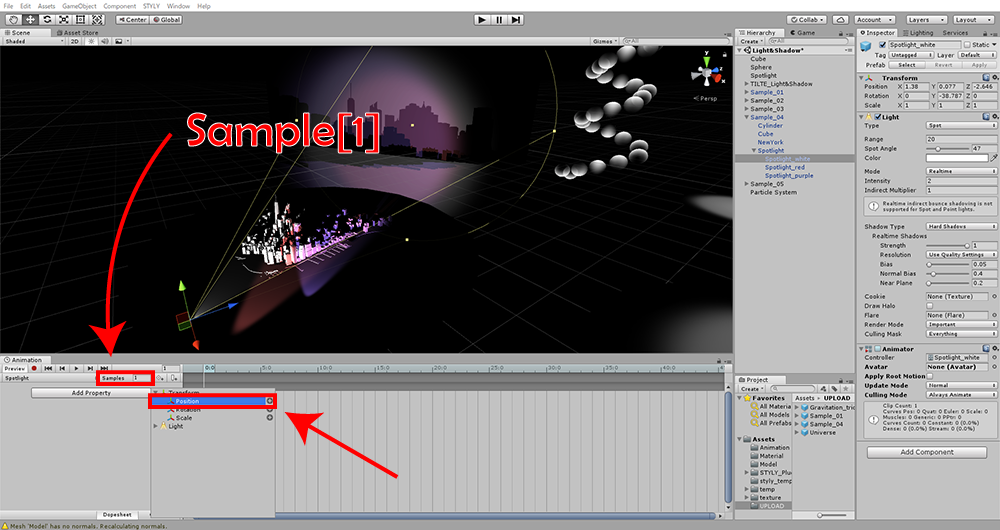
Add ‘Position’ property
④ To change the colour of the light, click ‘Add Property’, select ‘Transform > Light > Color’ and press the ‘+’ button on the right.
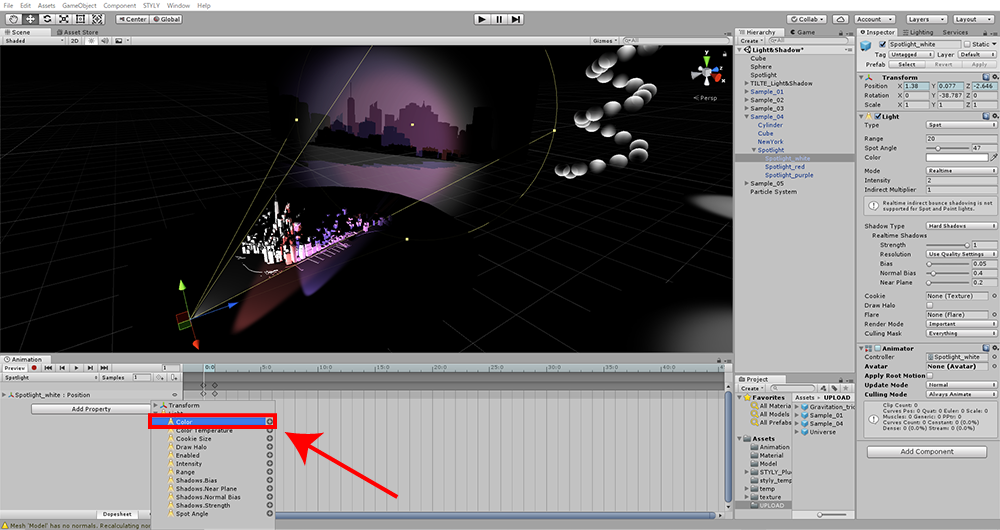
Add ‘Color’ property
⑤ After that, all you need is to edit the animation on the timeline. The lateral axis of the timeline represents the time. Since I set ‘Sample’ to 1 this time, the unit of the lateral axis is ‘second’ (For example, ‘5:0’ means 5 seconds). We set the motions of the light on the timeline. Since I want to make the animation loop in 60 seconds this time, drag the end point (key) at the default position to the position of 60 seconds.
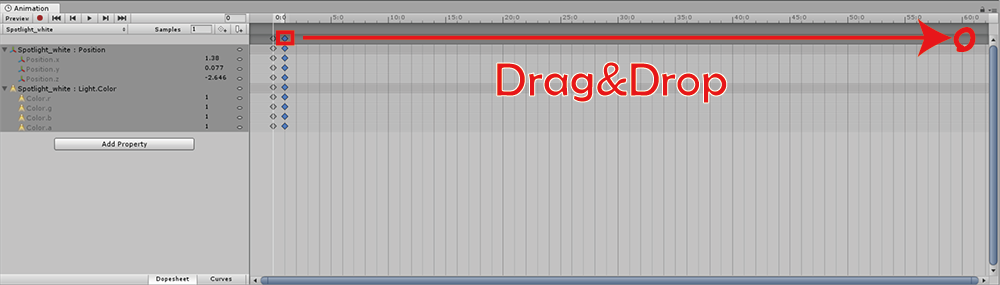
Make the animation loop in 60 seconds
Since we want to move the light to the other place at 30:0, move the play head (the while vertical line) to the position at 30:0 and press the record button (Thre red round button). Then, in the Scene window, move the light to the point where you want the light to move to at 30:0. It completes the animation, ‘the light moves to the other point at 30:0 and then go back to the start point at 60:0’.
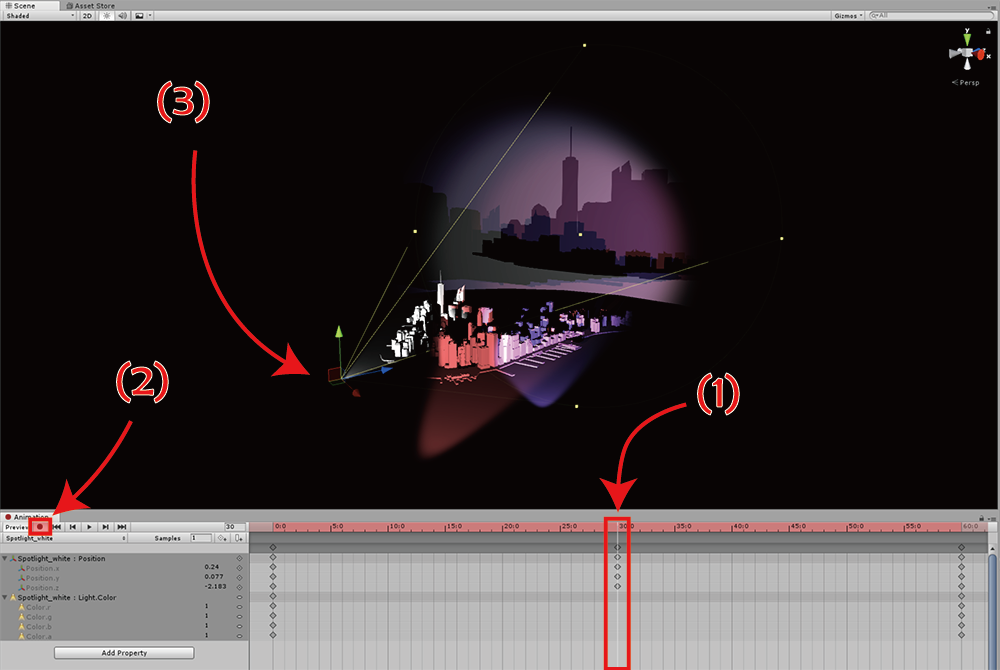
Edit the timeline
Next, make the light to change its colour at 30:0. Move the play head (the white vertical line) to 30:0 on the timeline, press the record button (the red round button) and select the colour by opening the colour window of the light. It completes the animation, ‘The light changes its colour at 30:0 and go back to the original colour at 60:0’.
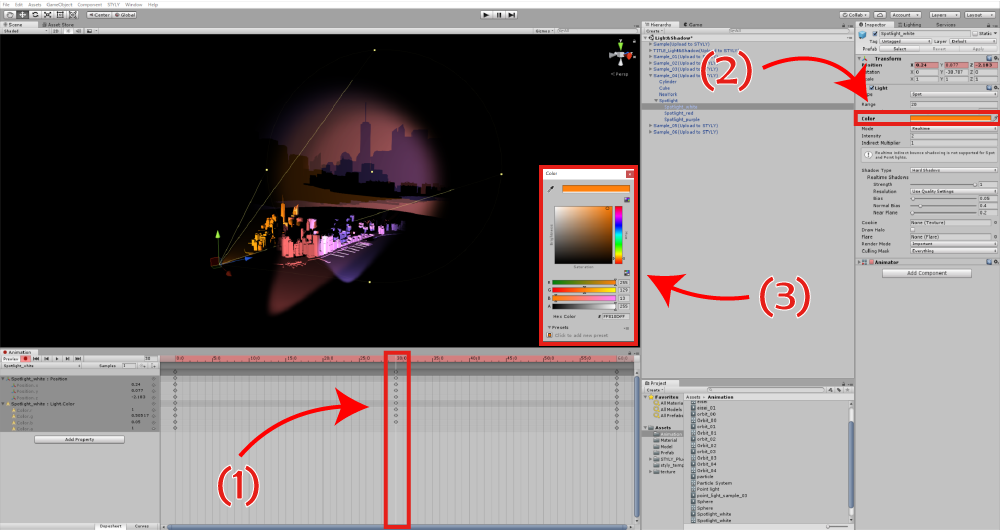
Edit the timeline
Now, you have added motion to the light and set it up so that its colour changes over time. Since Unity Official Document explains how to use Timeline in detail, I recommend reading it if you need further information.
Switch between ‘hiding’ and ‘unhiding’ for the shadow / Display the shadow without the object
You can switch between ‘hiding’ and ‘unhiding’ for each object and show the shadow only. By using this function, you can create a mysterious effect, ‘Cast the shadow with a shape different from the shape of the object’.
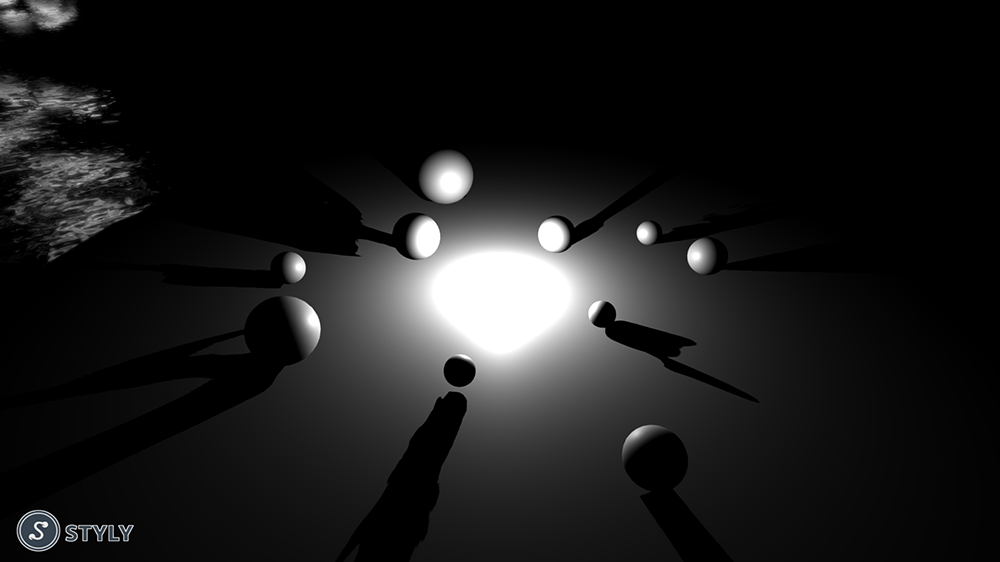
An example of the effect created by switching the visibilities of the shadows.
① Firstly, prepare the object to show and the object to cast a shadow. Then place them so that they are overlapped. This time, I prepared ‘Sphere’ as an object to show and ‘the Statue of Liberty’ as an object to cast the shadow.
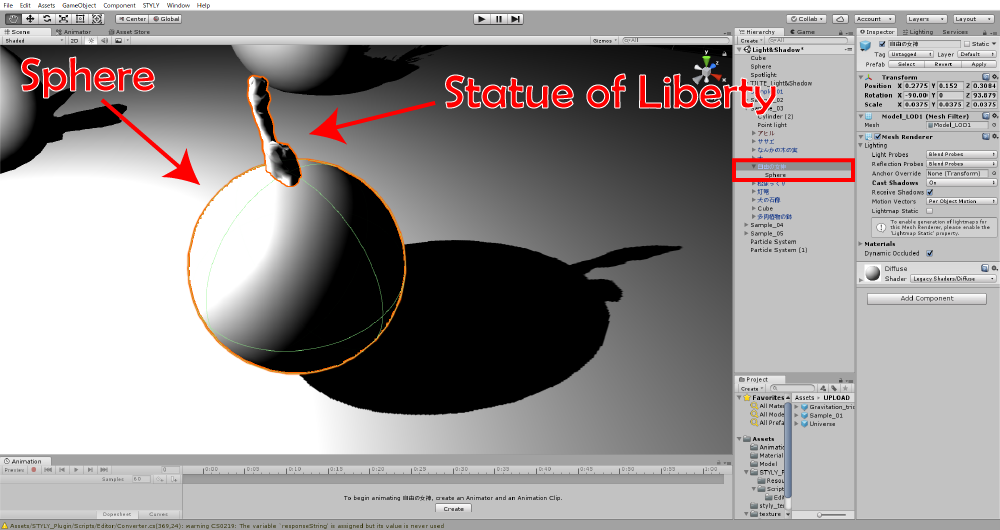
Prepare objects
② Open the Inspector of the object to show (Sphere), set ‘Cast Shadow’ in ‘Mesh Renderer’ to ‘Off’. It stops the object casting the shadow even if the light illuminates it.
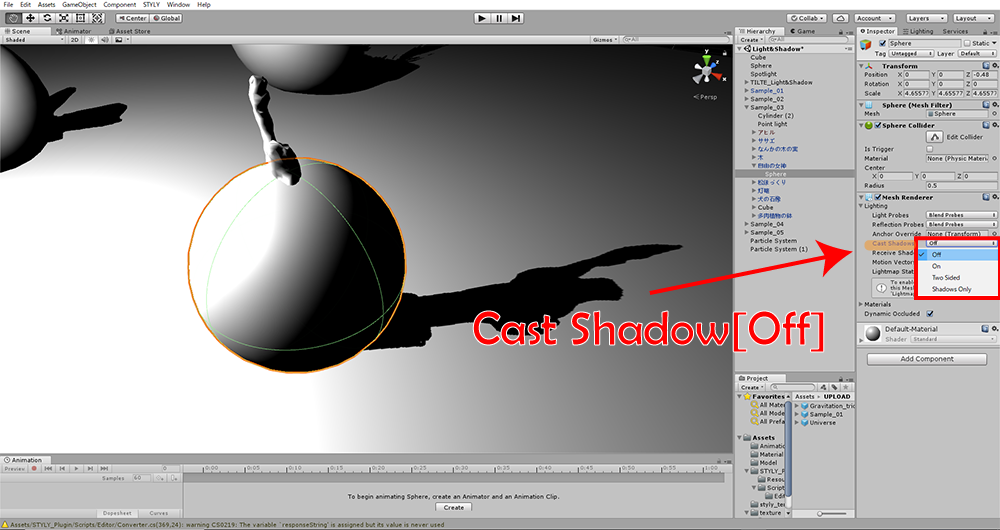
Set ‘Cast Shadow’ to ‘Off’ for the object to show.
③ Open the Inspector of the object to cast the shadow (the Statue of Liberty) and set ‘Cast Shadow’ in ‘Mesh Renderer’ to ‘Shadow Only’. It makes only the shadow appear.
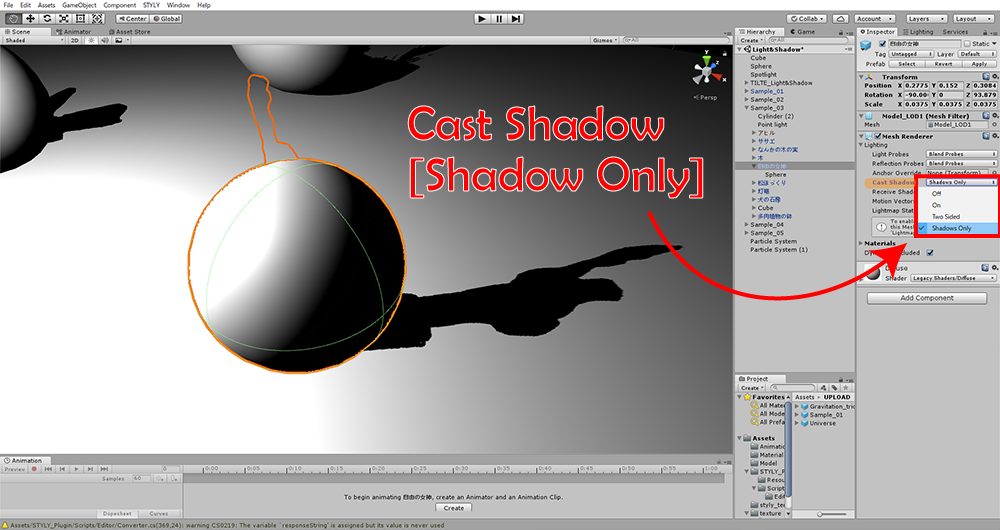
For the object to cast the shadow, set ‘Cast Shadow’ to ‘Shadow Only’.
It completes the gimmick, ‘Casting the shadow with a shape different from the shape of the object’.
Emphasize the light source by Halo
You can emphasize the light source by adding the Halo component. Since you could lose the position of the light source especially when moving the light, you can avoid the confusion by using Halo to emphasize the light source.

Add the Halo component
① Select the light you want to add ‘Halo’ to and click ‘Add Component’ in the Inspector.
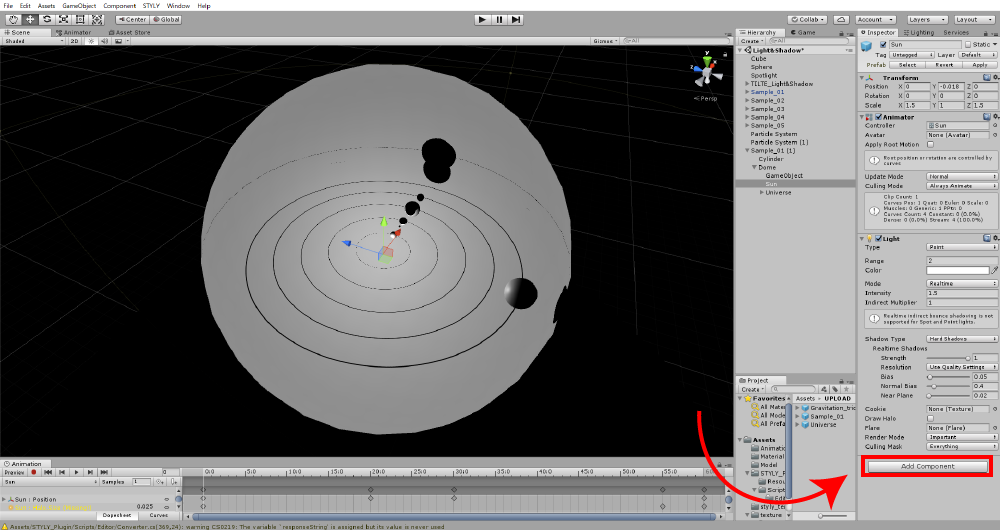
Click ‘Add Component’
② Find and click ‘Halo’ in the ‘Effect’ category (Alternatively, enter ‘Halo’ in the search box to find it).
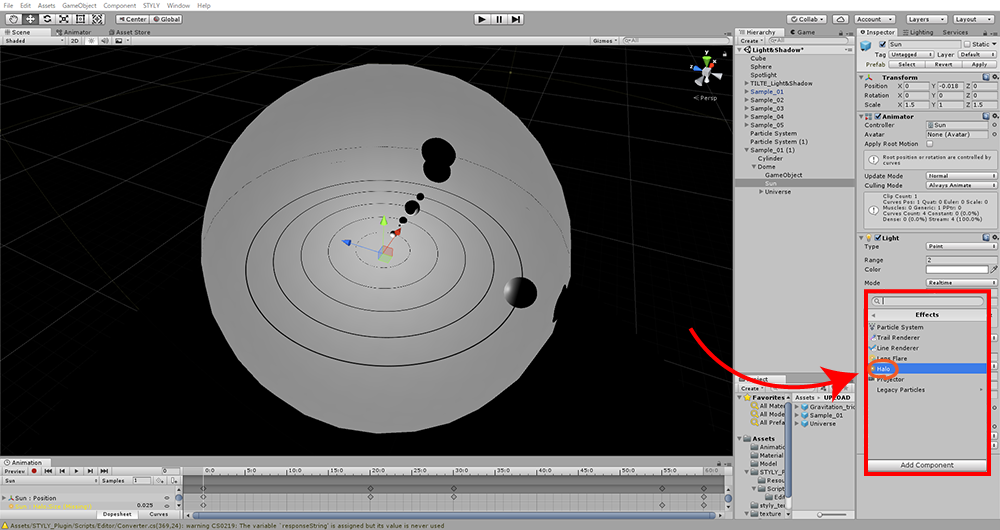
Attach the Halo component
③ In the Inspector, set the colour and size as you like. I set ‘Color’ to white and ‘Size’ to 0.025 here (Since the default size of ‘Halo’ is too large, so I recommend reducing the size).
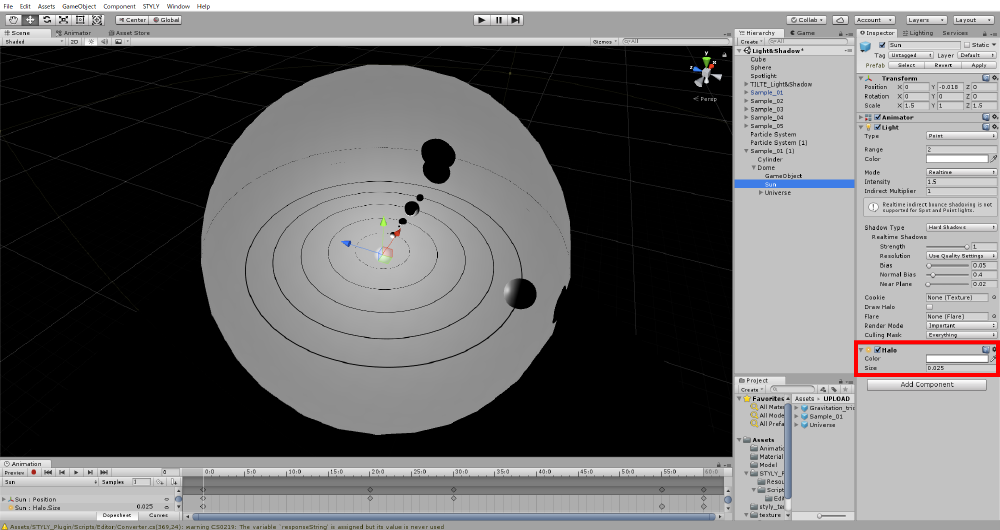
Set the colour and size of the Halo component
Now you have added the Halo component.
Import to STYLY
It’s very easy to import the light to STYLY. All you need is to convert the created light into a prefab and upload it to STYLY. Please check that ‘Render Mode’ is set to ‘Important’ if you want to make the light cast shadows). The article below explains how to upload an asset from Unity to STYLY in detail. Read the article How did you find those techniques? You can improve the quality of your scene by making good use of the light component. Please try creating a scene with the light component used.