This is the fourth article in the series about creating simple games in Unity using PlayMaker. We are going to have an overview of PlayMaker; look at how to install it, and how to use it.
PlayMaker can be used to create Unity/VR content easily without knowledge about programming language (C#) in Unity.
You can even use it together with STYLY to create VR content, so let’s get started!
In the last article, we showed you how to move the ball by keystrokes.
In this article, you will place items on the stage so that you can collect them with a ball.
We’ll also create a UI to display the number of items collected to complete the game.
Preparation
Install PlayMaker if you don’t have it.
And now, we are going to explain the detail about the installation of PlayMaker.
![[Unity Tutorial] Creating a Game Using Playmaker ① From Basic Introduction to Installing](https://styly.cc/wp-content/uploads/2019/06/1200px-160x160.jpg)
If you are new to PlayMaker, you can read the followings for a better understanding.
![[Unity] Starting Playmaker from Scratch](https://styly.cc/wp-content/uploads/2019/09/PlaymaerCoreConcept-160x160.png)
Games to create
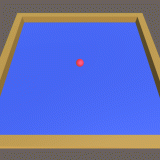
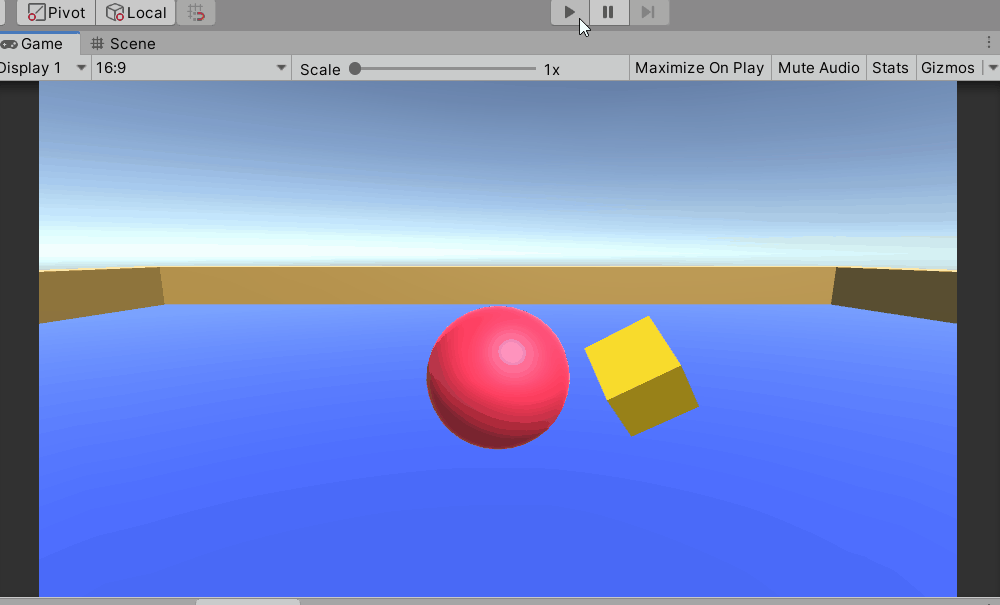
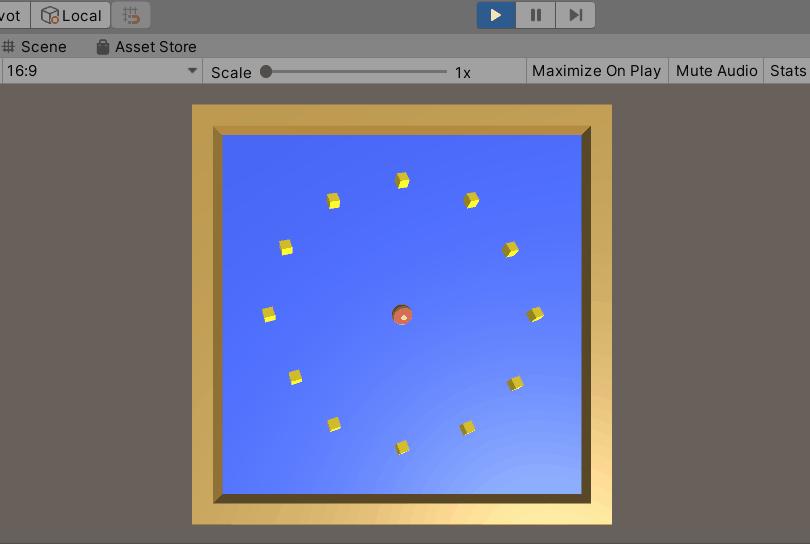
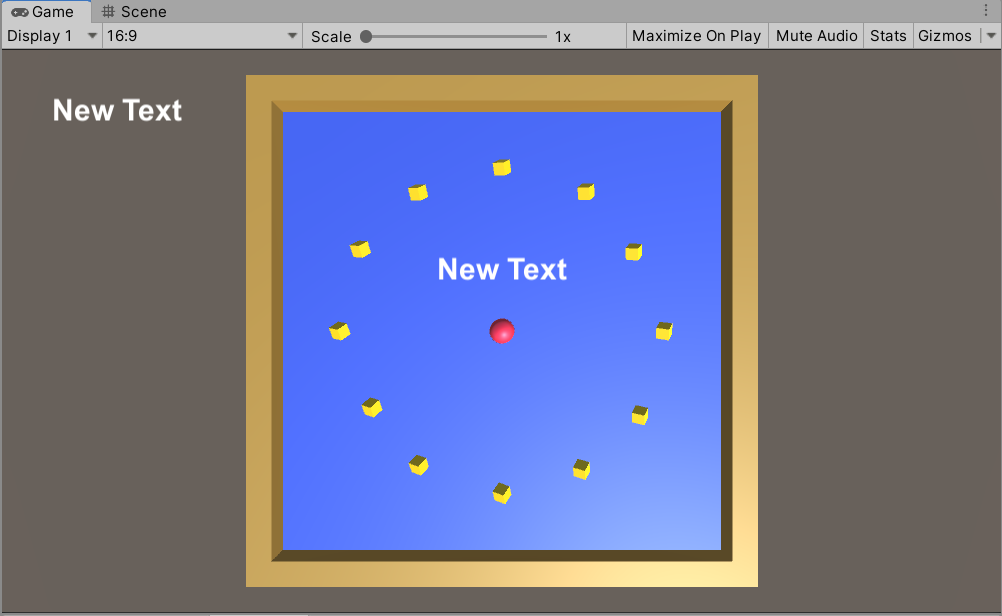
This is an image of the game we are going to create.
I will make a game in which we can control a ball by keystrokes to get 12 items.

Image of the completed game
Try out here.
Please note that this is a free Unity official “Roll-a-ball” tutorial created in PlayMaker.
By creating this game, you’ll be able to understand the basics of game creation in Unity and PlayMaker.
Creating Items
Create a GameObject
Create a GameObject and change its name to “PickUps”.
Position is set to (0,0.5,0).
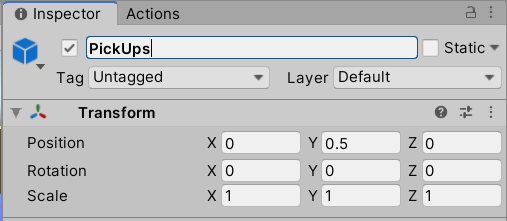
Change the name to PickUps
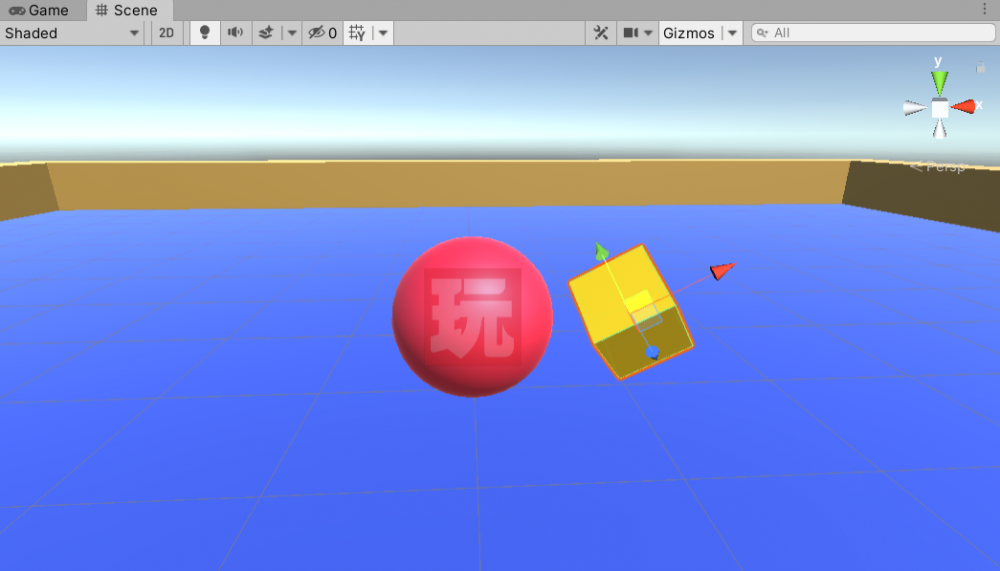
Create a Cube
Create a Cube in Pick Up and rename it as “Pick Up”.
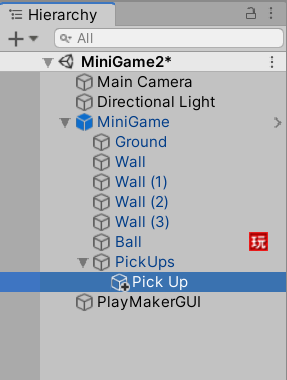
Create a Cube
Set up a Transform as shown in the image.
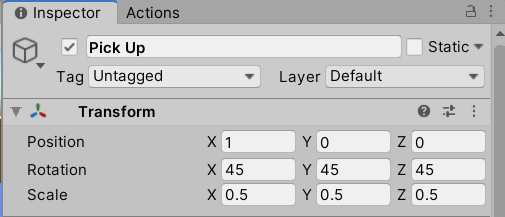
Set the Transform
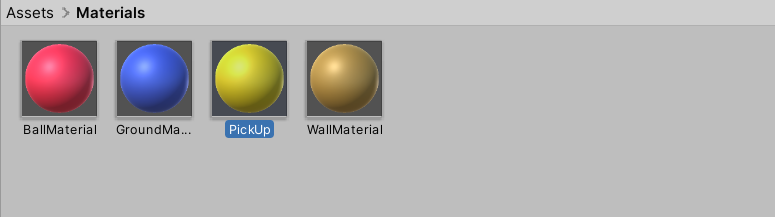
Next, let’s set up the cube material.
Right click Project, go to Create > Materials and create a material, rename it “Pick Up”.
I’ve set the material to yellow, but you can change them according to your own preference.
Transform settings
When you set the PickUp material to a cube, the image should look like this
Set the material to the cube
FSM settings for the item
To make the cube looks like an item, let’s make it rotate.
Rotate it using PlayMaker.
Select PickUp to open the PlayMaker editor and add the FSM.
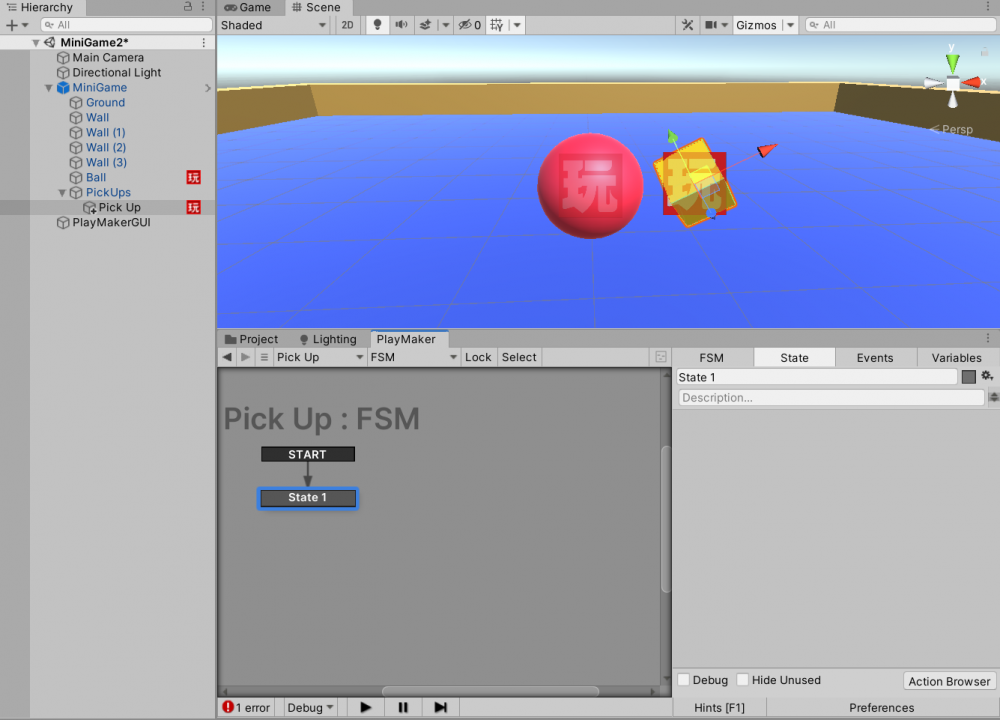
Add the FSM to PickUp
Change the name of State 1 to “Rotating”.
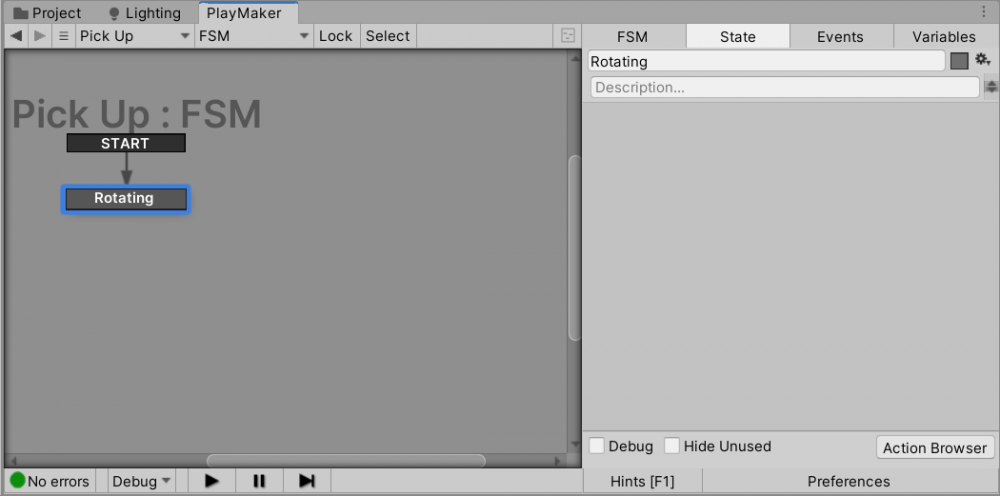
Rename State 1 to “Rotating”.
Add a “Rotate” action and make the values and settings as the image.
This allow you to rotate 15 degrees on the X axis per second, 30 degrees on the Y axis, and 45 degrees on the Z axis.
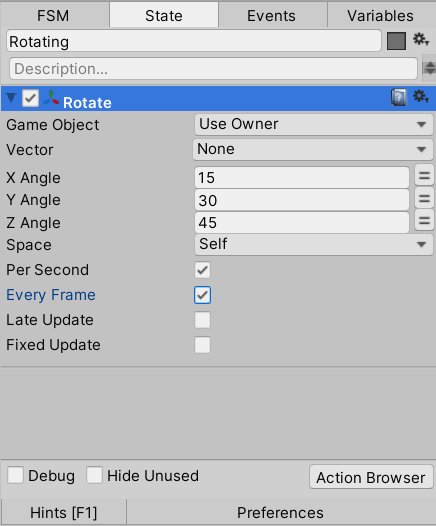
Rotate Action Settings
Once you play the scene, the item cubes spin.
The items are now moving
Check the “Box Collider” checkbox in the cube inspector.
It is necessary to decide the collision between the item and the ball, so let’s set it beforehand.
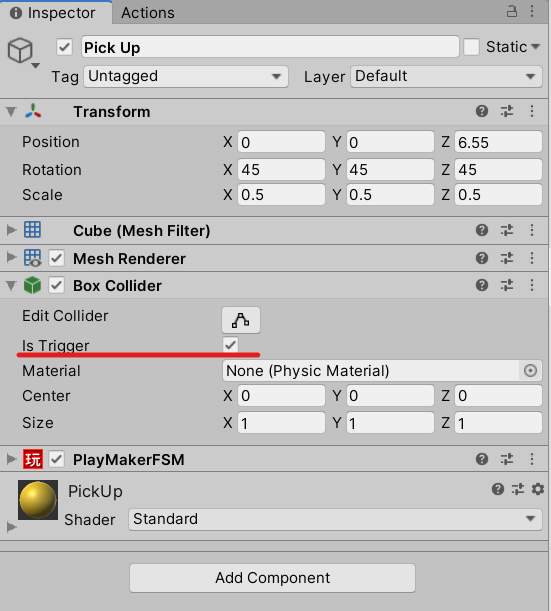
Check the Box Collider
Let’s duplicate [Ctrl+D] the item we created and place it on the stage.
Duplicate the item 12 times and place them in a circle.
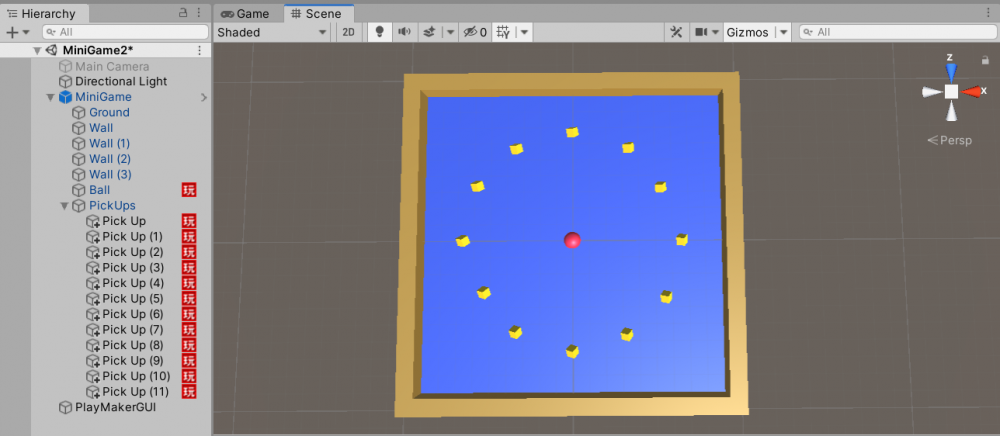
Duplicate items and place them on the stage.
Item-Ball Collision Detection
You can use “TriggerENTER” to determine the collision in PlayMaker.
If you want to learn more about TriggerENTER, read this article.
![[Unity/Playmaker] How to Trigger an Event when the Controller Touches an Object (TRIGGER EVENT)](https://styly.cc/wp-content/uploads/2020/02/Controller-69-160x160.jpg)
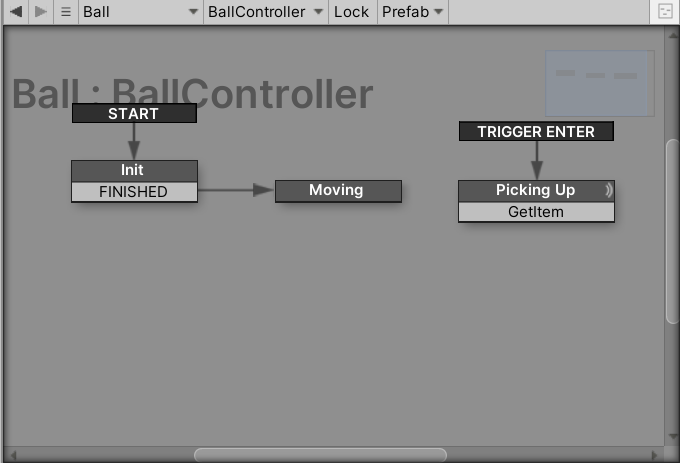
Configure the Picking Up State
Open the Ball’s FSM, add a new state and change the name from State 1 to Picking Up.
Next, select the Picking Up state and right-click to add a Trigger ENTER for the global transition.
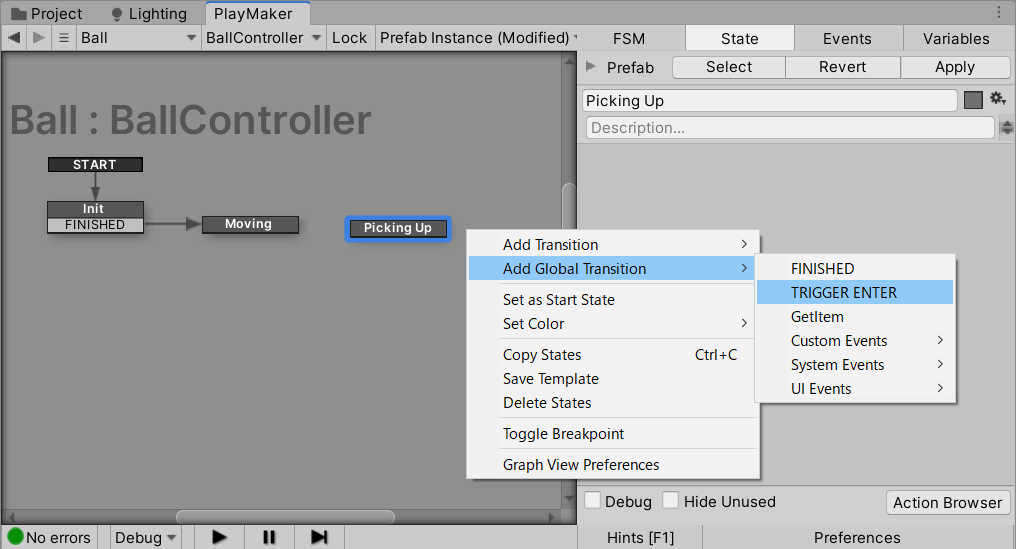
Add Trigger ENTER
It looks like this after the addition.
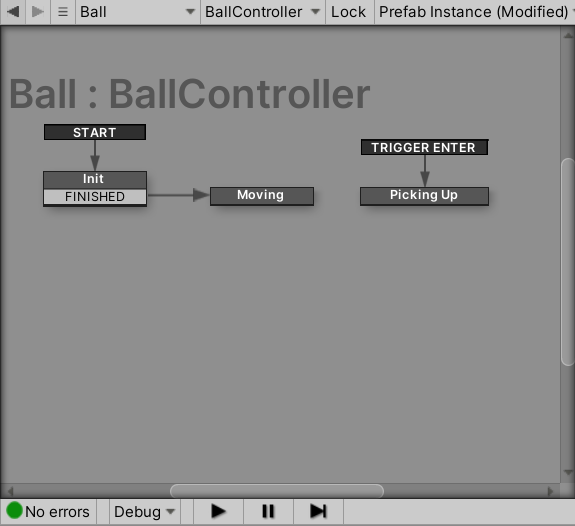
Proceed to the Picking Up State
Add Get Trigger Info action to the Picking Up state.
Set the newly created “other” variable in Game Object Hit.
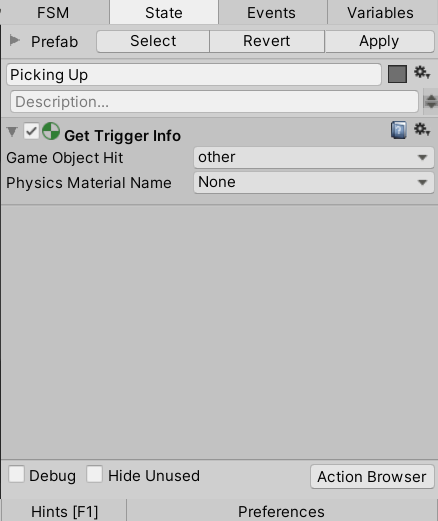
Set the Get Trigger Info action
Add the ‘Game Object Compare’ action.
Set the other to GameObject.
Set the newly created ‘GetItem’ event to Not Equal Event.
Set the newly created “GetItem” event to Not Equal Event. (Yes! No worries!)
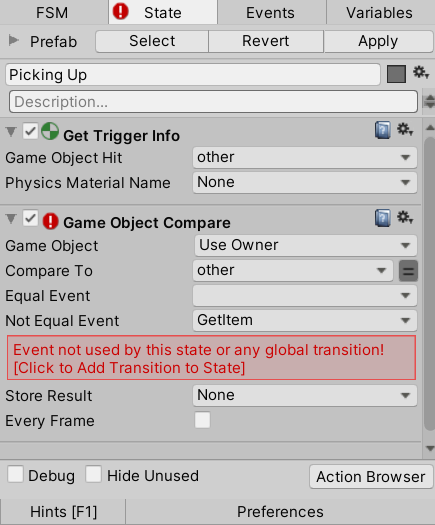
Set up the Game Object Compare action
Set the GetItem event to the PickingUp state.
Set the GetItem event to the PickingUp state
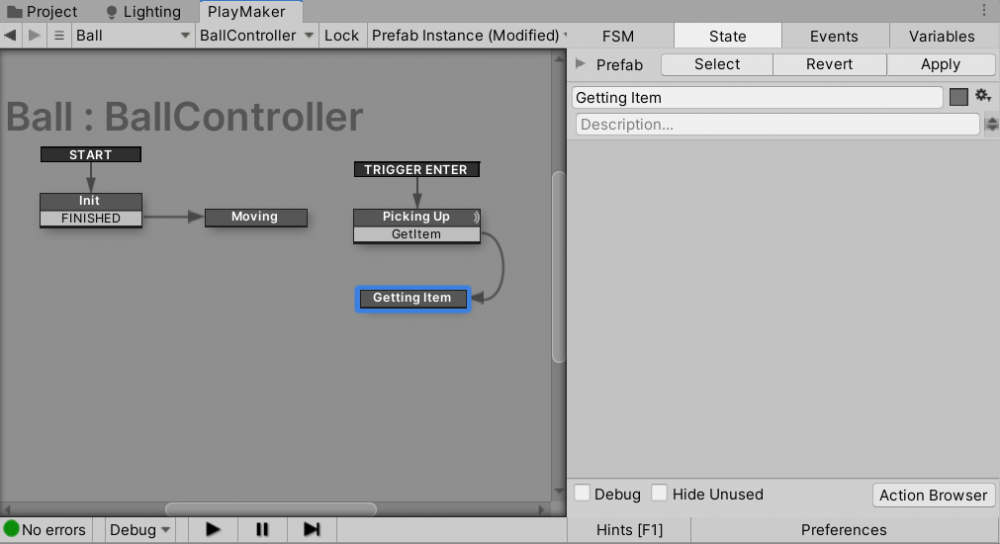
Set the Getting Item State
Create a new state, rename it as “Getting Item” and connect from the Picking Up state.
Add the Activate Game Object action, change the Game Object to Specify Game Object and specify another.
Uncheck Activate.
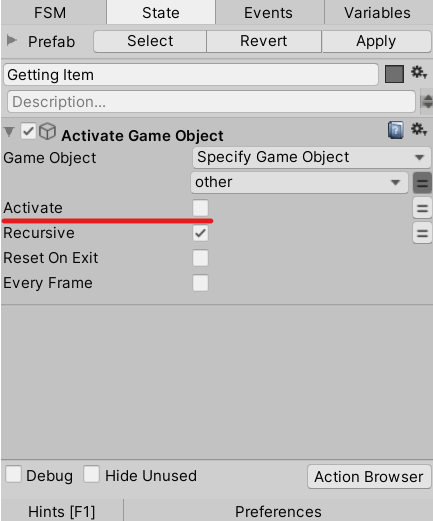
Uncheck the Activate box
The FINISHED event is set in the Getting Item state and connect to the Moving state.
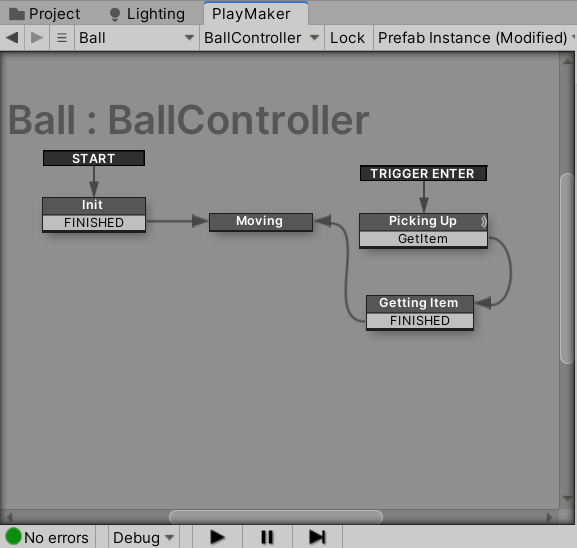
Connect Transitions to the Moving State
Collided items disappear when we play a scene and key a ball.
Collided items disappear
Create UI for score display
UI and PlayMaker combined so that the number of items collected is displayed on the screen. Yes, let’s move on.
Create Text
In Hierarchy, right-click UI > Text and select Create Text.
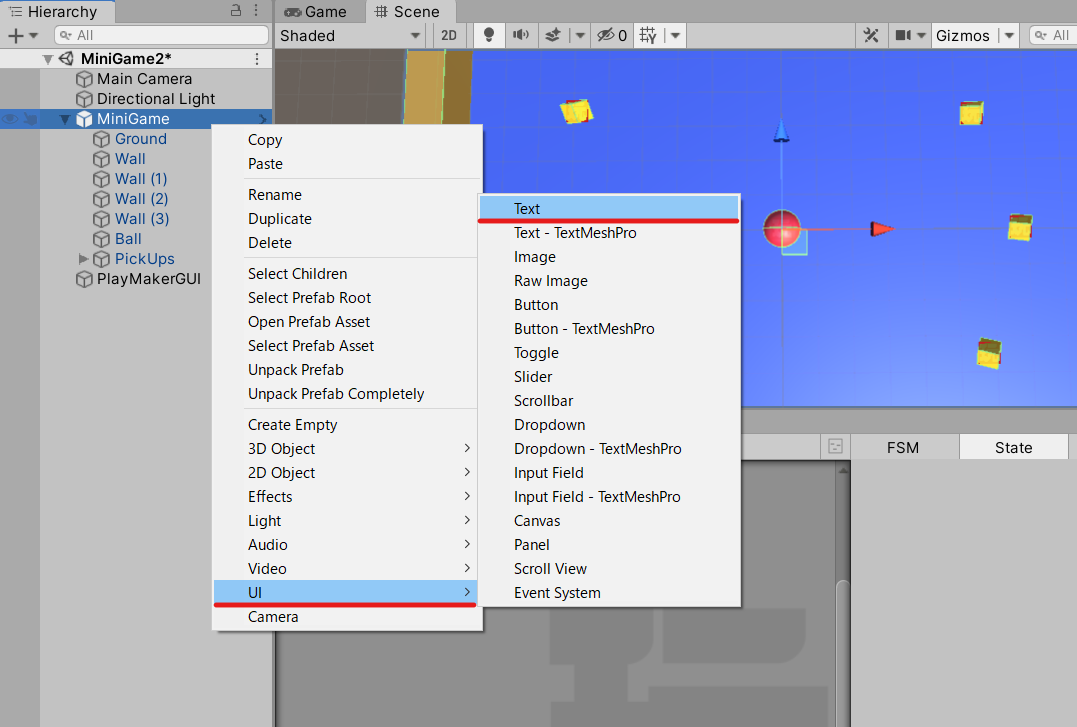
Create Text
The “Canvas” and “EventSystem” are automatically generated and should not be deleted by the Hierarchy.
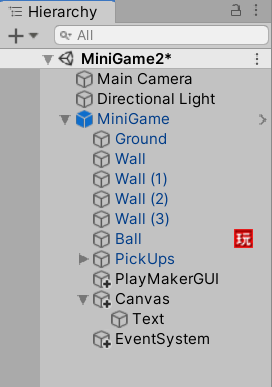
Hierarchy state
Change the Text name to “Score”.
Change the Layer setting from the default UI to Default.
(Don’t forget to change this setting as it is necessary for the final upload to STYLY!)
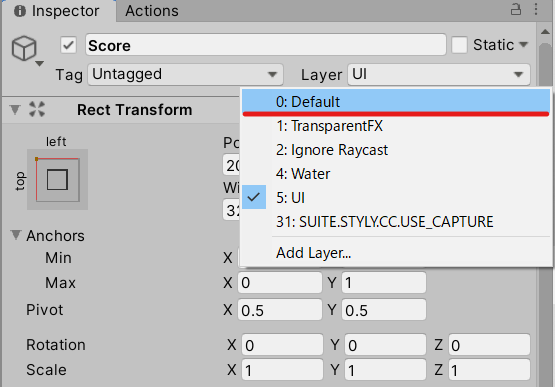
Change the Layer setting to “Default”
Change the Score’s Rect Transform component as shown.
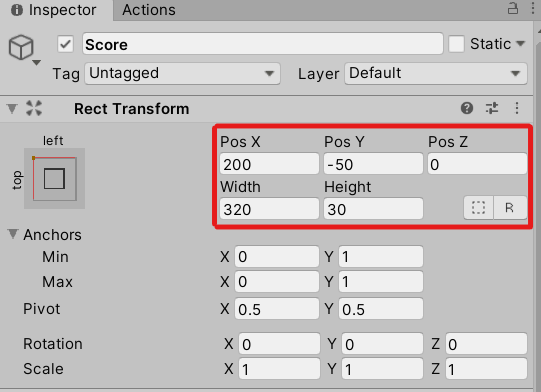
Setting of Score’s Rect Transform
Change the text component of Score as shown in the image.
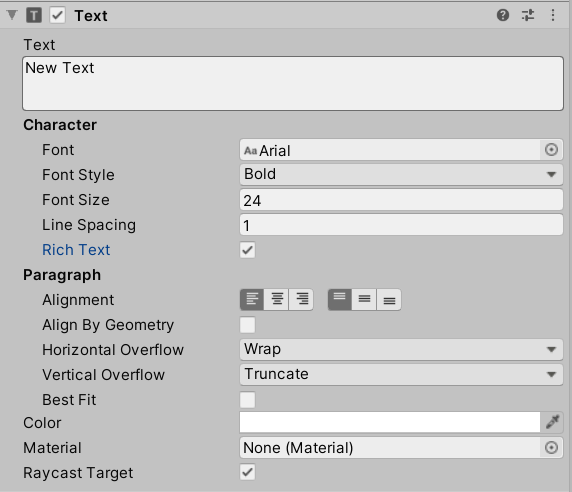
Sett the text component of Score
When you play a scene, New Text and score UI will be shown in the upper left corner of Game View. (Change the Transform in Main Camera)

New Text” is displayed in the upper left corner of Game View
Create a UI for the clear messages
Create a Text by right-click in Hierarchy and selecting UI > Text.
Rename the Text to “Win” and change the Layer to Defalt.

Create a WinUIText and change the Layer to Defalt
Change the Rect Transform component of Score as shown in the image.
Set the Rect Transform component of Score.
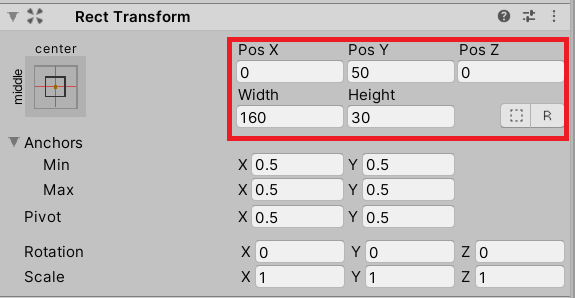
Modify Win’s Rect Transform component as shown in the image.
Configure Win’s Rect Transform
When you play the scene, New Text will be displayed in the center of the Game View.
New Text appears in the center
FSM Settings
You can set the FSM of the ball to display the number of items collected.
How to set the Init state
Open the Ball’s PlayMaker editor and open the State tab of the Init state .
Two “UI Text Set Text” actions are added before the Get Component action, add the following.
In the first UI Text Set Text action, set a new “score” variable in the Game Object and enter “Count: 0” and a space after the : in the Text.
In the second UI Text Set Text action, set a new “score” variable in the Game Object and enter “Count: 0” and a space after the “:” in the Text.
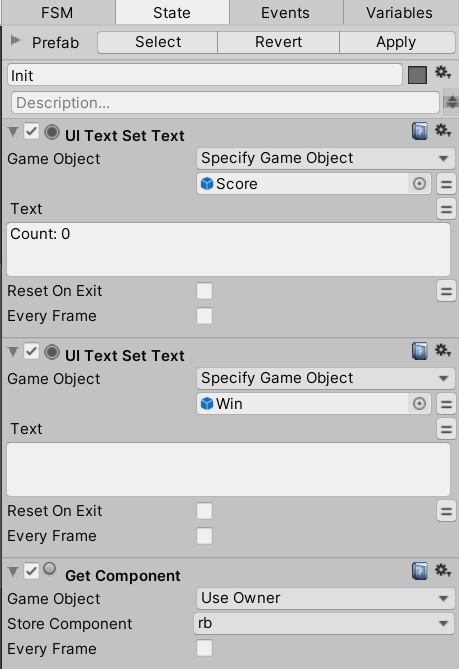
UI Text Set Text action settings
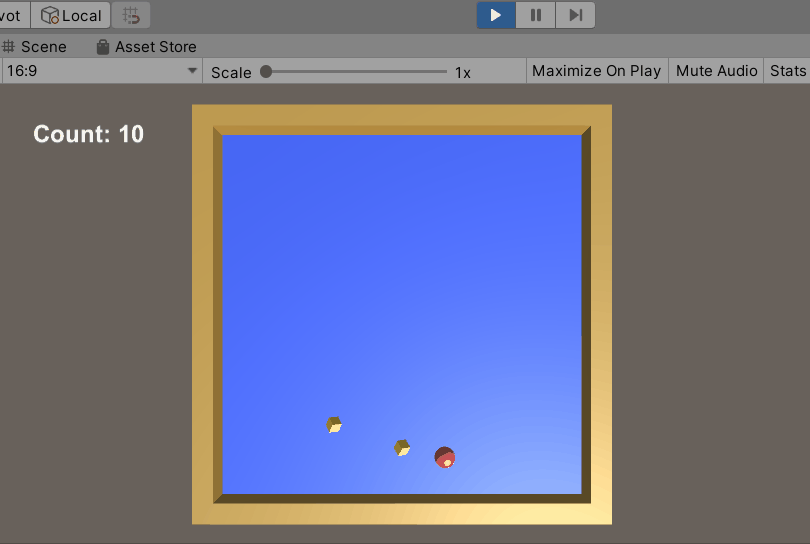
When you start the game, the Score in the upper left corner of the screen will say Count: 0, and the Win is temporarily hidden from view.

Count: 0 appears in the upper left corner
Add “Set Int Value” action.
Set Int variable to a newly created variable “count” and set Int Value to 0. You can also use a variable called “count” with a default value of 0.
This allows us to use a variable called “count” with a default value of 0.
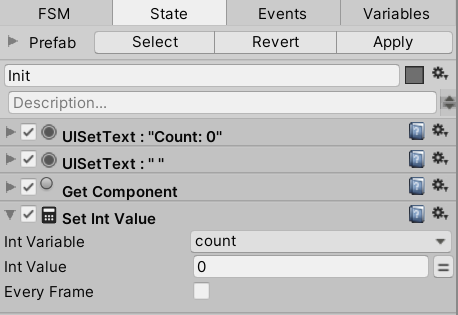
Set the Set Int Value action
Set up the Getting item
Select the Getting item state and open the State tab.
Add the “Int Add” action.
Specify a count for the Int Variable and set Add to 1.
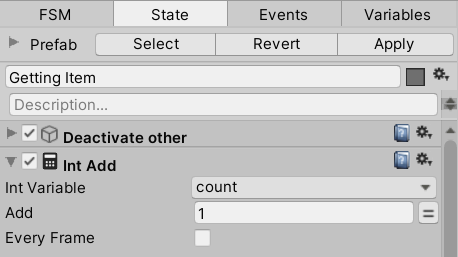
Configure the Int Add action
Add the “Convert Int To String” action.
Specify a count for the Int Variable, create a new String Variable, and convert it to a string. Set the “countString” variable.
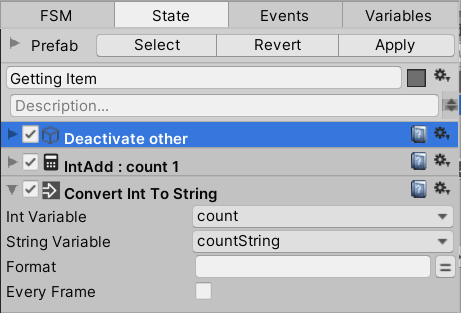
Configuring the Convert Int To String action
Add a “Build String” action.
Set String Parts to 2, Element 0 to “Count:” and Element 1 to Specify the “countString”.
Specify a new variable “message” for the Store Result.
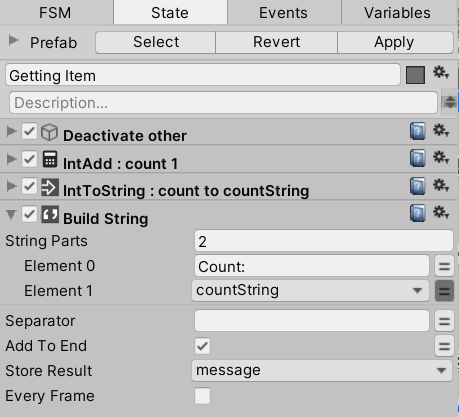
Configure the Build String action
We are going to add the “UI Text Set Text” action.
We’ll add the score viriable to the Game Object and add the message variable we just set to the Text Specify the action.

UI Text Set Text action settings
Add the “Int Compare” action.
Integer 1 with count and Integer 2 with 12.
Specify a new Win event for Equal.
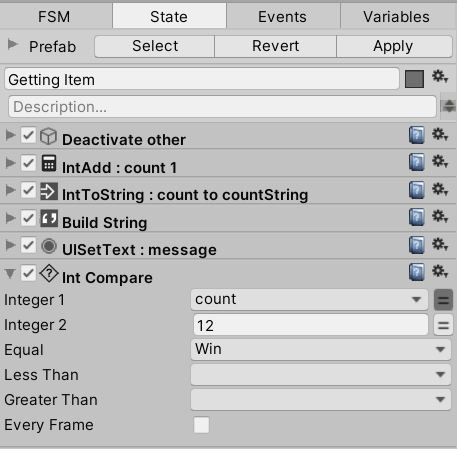
Configure the Int Compare action
Add the Win event you created to the Getting Item state.
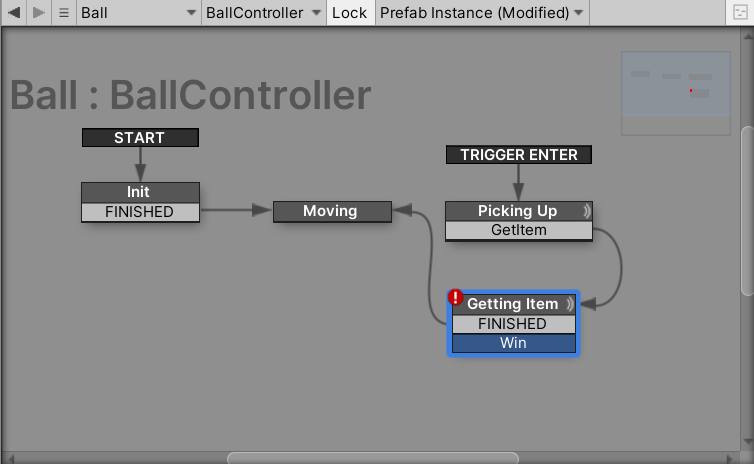
Add a Win Event to the Getting Item state
Clear State Settings
Create a new state and rename it “Clear”.
Connect the transition from the Getting Item state to the Clear state.
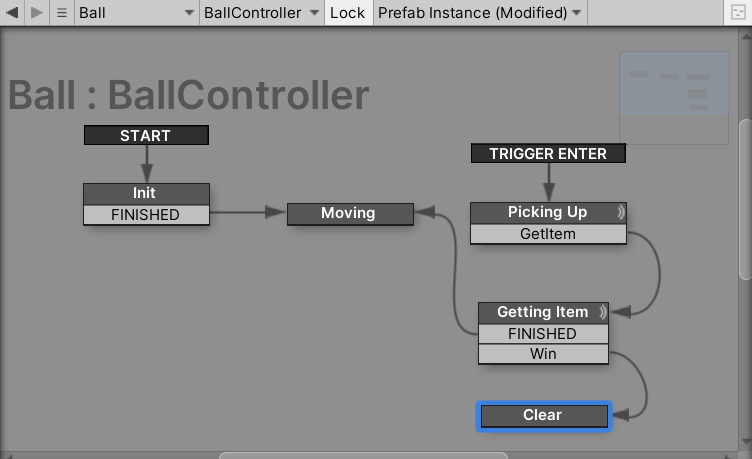
Create the Clear state
Select the Clear state and open the editor.
The UI Text Set Text action is added, and the UI Text Set Text action is added to the Game Object. Set up Win variable.
Enter “You Win!” as the text.
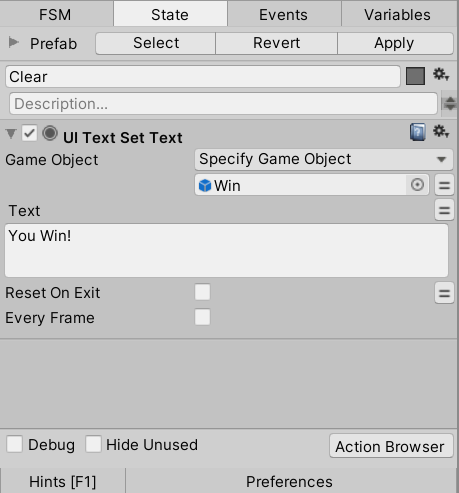
UI Text Set Text action settings
Finally, open the Variables tab in the PlayMaker editor and set the score and win variables.
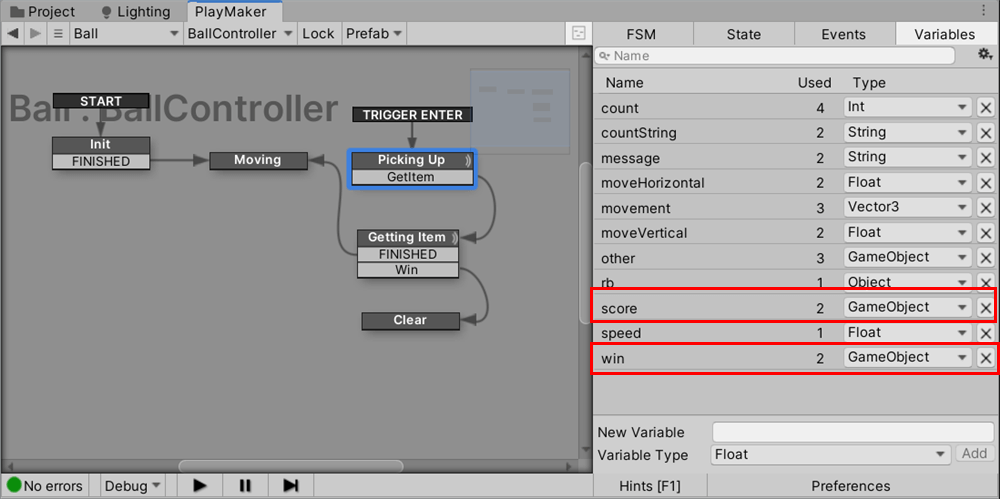
Open the Variables tab.
Drag and drop the score of the UI to the Value in the score variable setting screen.
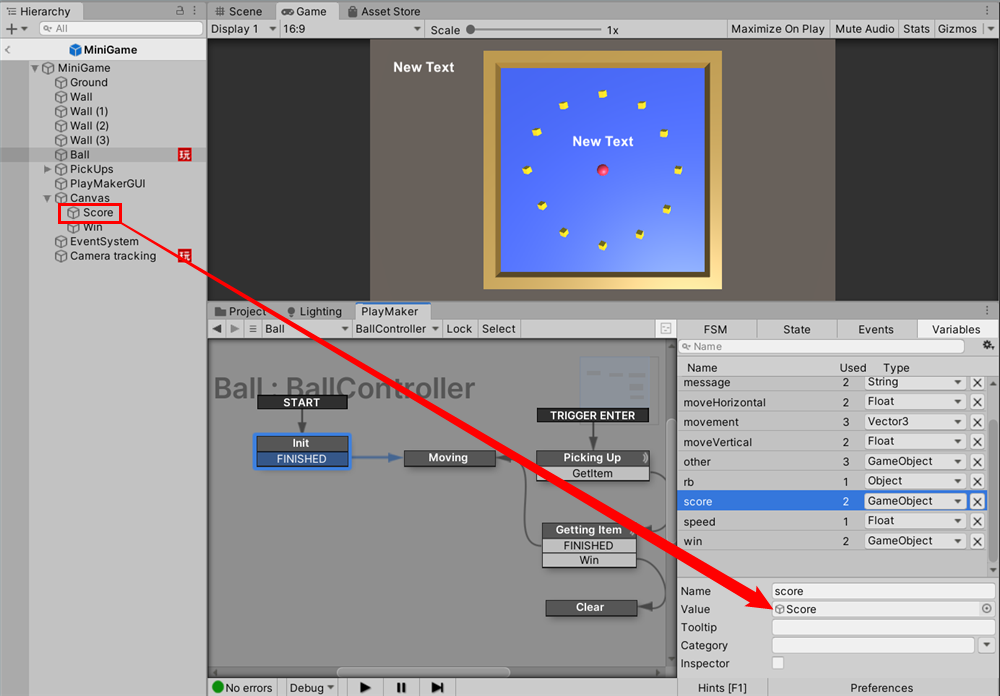
Score is set to Value.
You can set the win variable in the same way by dragging and dropping Win of the UI to Value.
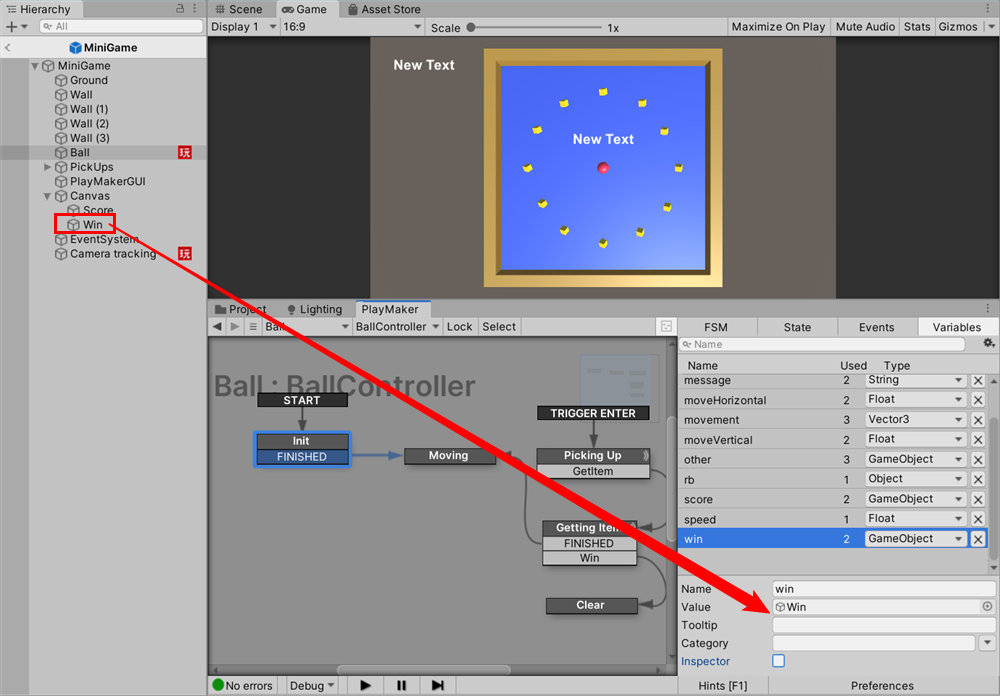
Set Value to Win.
Now you’ll see a clear message “You Win!” when you collect all 12 items.
Try to collect the 12 items!
When you collect all 12 items, the clear message appears
That’s it! You’ve completed the ball rolling game!
In our next article, we’ll be talking about how to set up your camera to upload your Unity game to STYLY and how to use the “Here’s how to upload it”.
This article is written by Unity Technologies Japan, LLC [Unity Dojo 2017] using a modified version of the content of the first Unity programming slides in PlayMaker We have a lots to do!