In this article, we’ll explain how to trigger an event when the controller touches an object.
When the controller touches an object, it can cause a variety of interactions, such as changing color, rotating, or changing size of the object.
There are two main types of events that the controller touches an object: the “TRIGGER EVENT” and the “COLLISION EVENET”.
This time, I will explain how to generate events using TRIGGER EVENTS.

TRIGGER EVENT
Click here for COLLISION EVENT
![[Unity / Playmaker]How to Cause an Event to Occur when the Controller Collides with an Object(COLLISION EVENT)](https://styly.cc/wp-content/uploads/2020/03/1-160x160.gif)
Advanced preparation
First of all install Playmaker, a plugin for Unity.
![[Unity Tutorial] Creating a Game Using Playmaker ① From Basic Introduction to Installing](https://styly.cc/wp-content/uploads/2019/06/1200px-160x160.jpg)
For the new users of Playmaker, please read the following articles for the better understanding.
![[Unity] Starting Playmaker from Scratch](https://styly.cc/wp-content/uploads/2019/09/PlaymaerCoreConcept-160x160.png)
Overview
In Unity, the interaction is triggered by firing an event when the controller and object hit each other.
This is implemented by Playmaker.
There are two types of events that are triggered by an object and a hit.
- TRIGGER EVENT: Events triggered by “Touch”.
The interaction is triggered by the overlapping information between the controller and the 3D model. - COLLISION EVENT: Events caused by “Collisions”.
The interaction is triggered by information about the physical action of the collision detection with the controller.
About the TRIGGER EVENT
The conditions for firing a TRIGGER EVENT are as follows;
- Both GameObjects must contain the Collider component
- Collider.isTrigger, whichmust be enabled,and Rigidbody must be included.
- If Collider.isTrigger is enabled on both GameObjects, no collisions will occur.
- The same is applied if both GameObjects do not have a Rigidbody component.
Conditional reference source for firing a TRIGGER event
Unity MonoBehaviour.OnTriggerEnter(Collider)
Conditions for using TRIGGER EVENTS in STYLY
In order to use TRIGGER EVENT in STYLY, the following settings must be made for the object;
Granting Collider
This is all it takes to trigger “TRIGGER ENTER” in the Playmaker when the controller touches an object.
See how to make it. Before going on furtherer, here are some explanations for the process flow;
- Prepare a 3D model
- Add a “Collider” to a colliding 3D model
- Set up interaction with 3D models in Playmaker
Prepare a 3D model
Prepare a 3D model to implement the interaction. This time we will use Cube
Right-click in Hierarchy and select Cube in 3D Object.
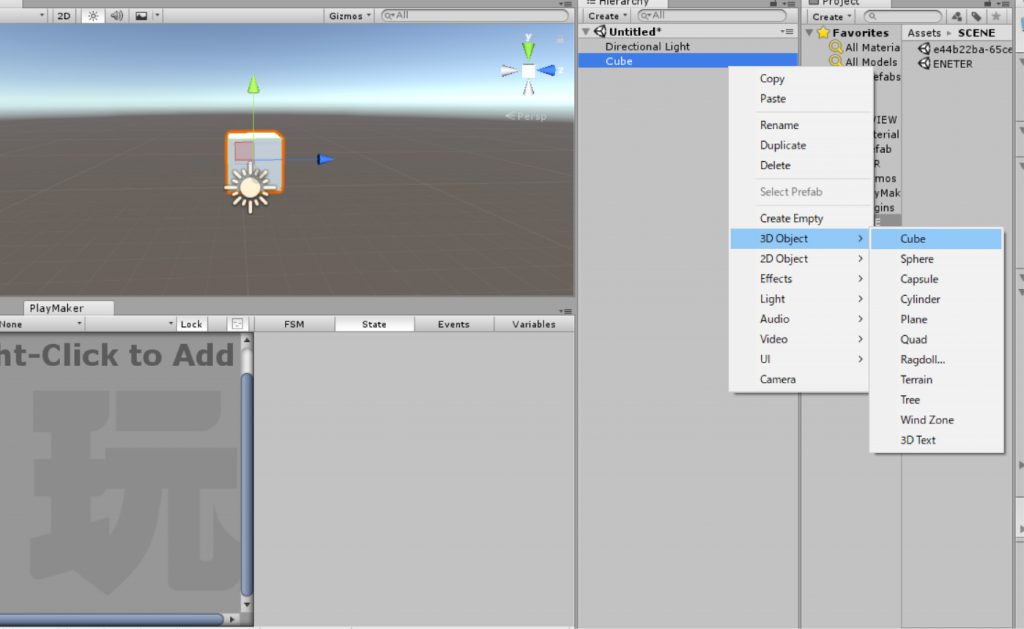
Create a Cube
This time, it will be a 3D model that implements the interaction. Even if you put the controller on, it will slip over.
Therefore, add a collider to Cube to give it a collision detection.
Add a “Collider” to a colliding 3D model
[Colider]
Collider is a component that calculates the collision detection. By assigning this information to the target 3D model, the “collision” information will be obtained when the target 3D model is touched by another 3D model.
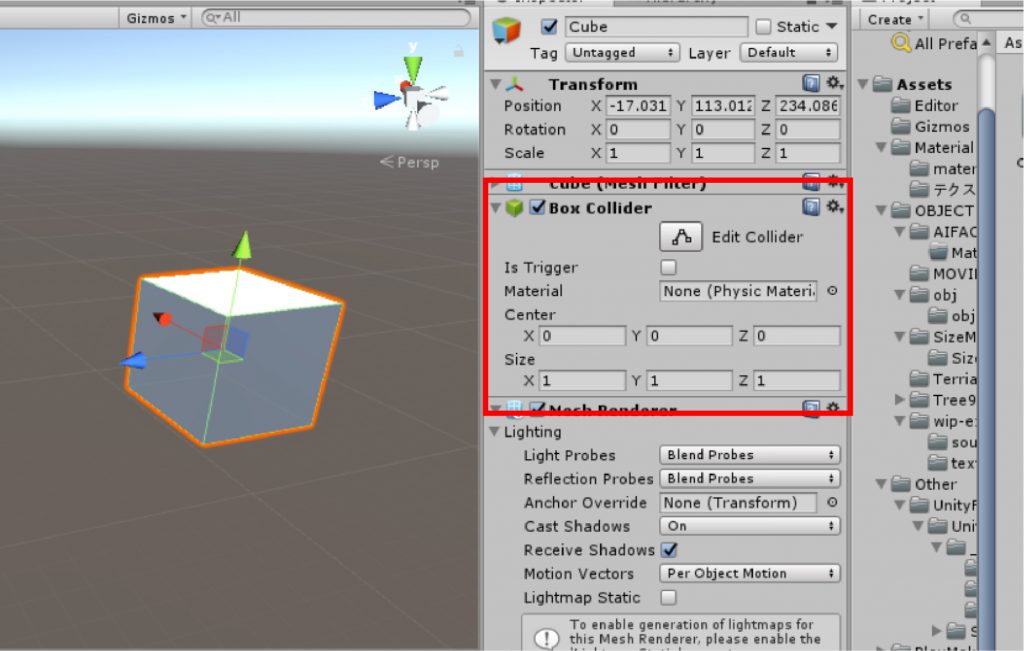
Collider
Normally, Cube and Sphere created on a scene in Unity are granted by default, but imported 3D models need to be granted.
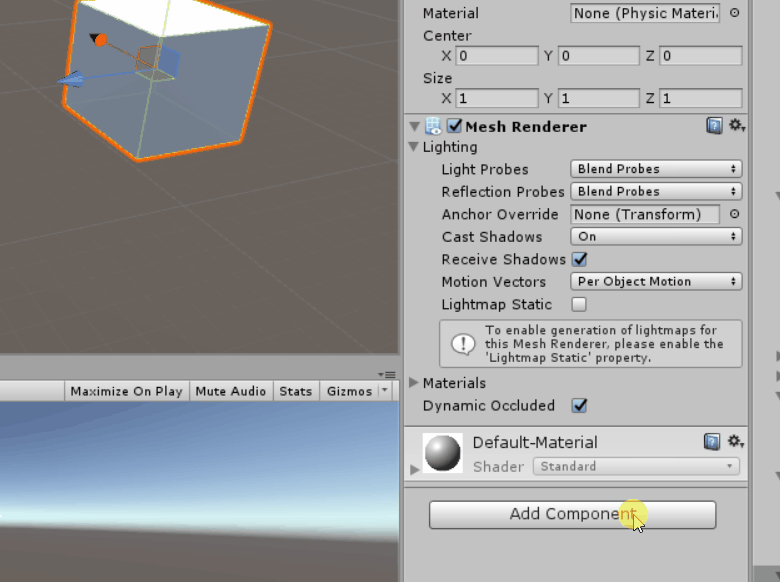
When you wish to add a component, add it from “Add Component” in the Inspector.
Choose a Collider according to the shape of the model you want to give
By adding Collider, the 3D model can now be judged as a collider.
Now it’s ready for the 3D model that implements the interaction.
Next, use Playmaker to set up the interaction.
Setting up interaction with 3D models in Playmaker
This time, when the controller hits a 3D model (Cube), a TRIGGER EVENT is triggered and the interaction changes color.
In advance, create a material to change the color.
Right click on Project and select ‘Create > Material’ to create a material.
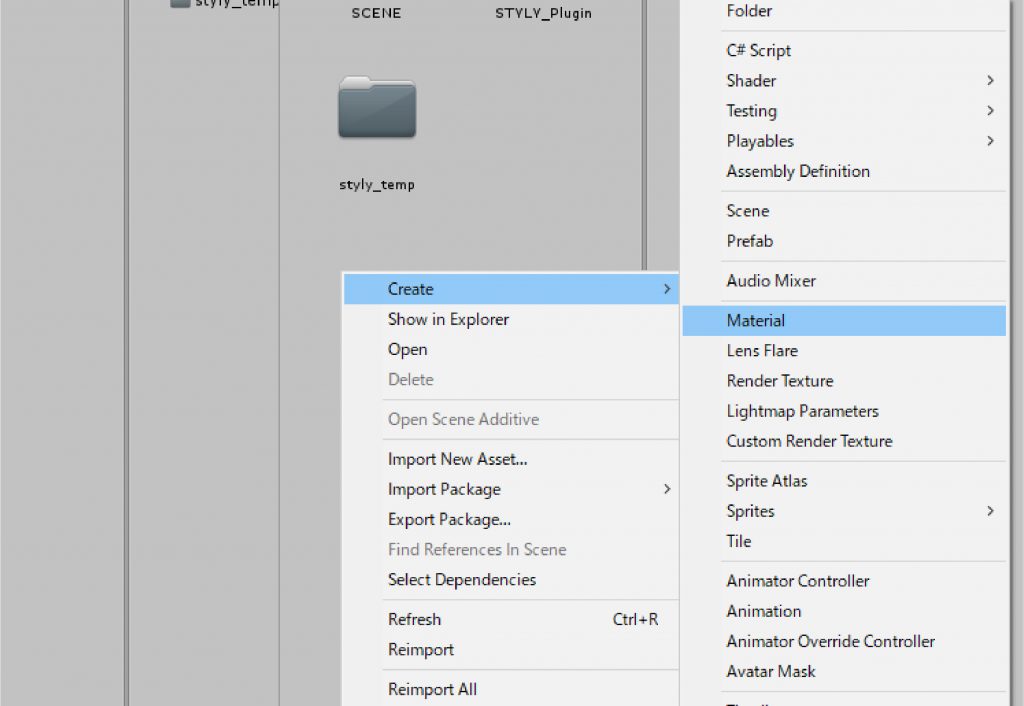
Create Material
Once you created the Material, name it RED.
Change the name and change the color within Inspector.
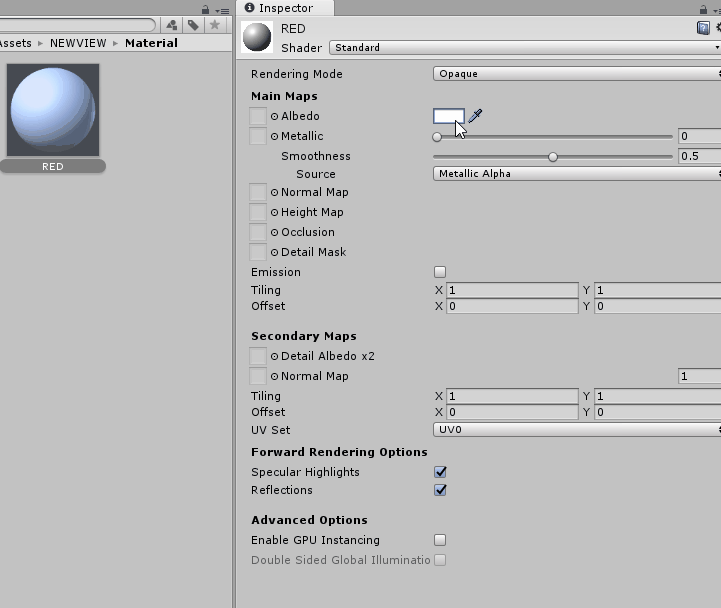
Change the color
Now it’s ready for using the material.
The next step is to prepare the interaction in Playmaker.
Once Cube is selected, right-click on the Playmaker Editor and select “Add FSM”.

Add FSM
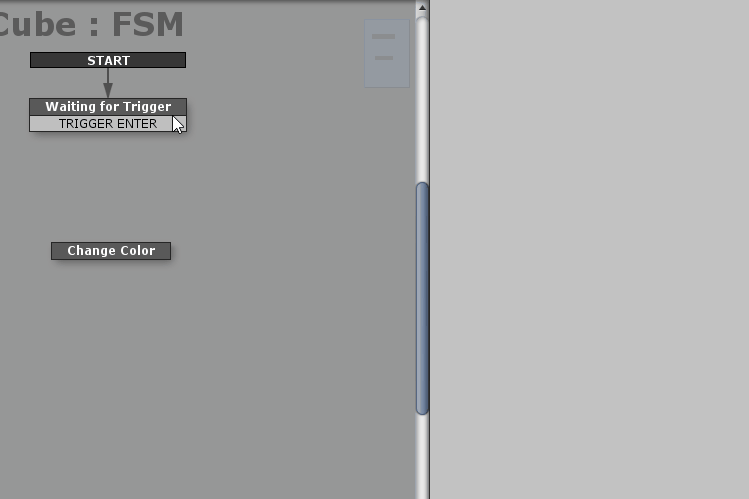
State1 will be added; rename State1 to “Waiting for Trigger”.
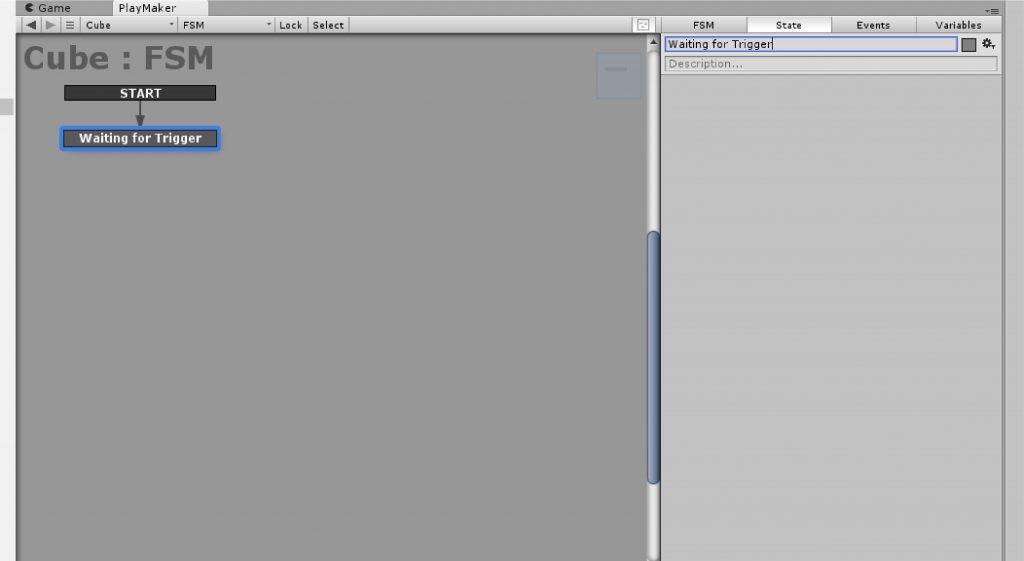
Change your name
With the State of Waiting for Trigger to be selected, right-click and select Add Transition, System Events in that order, then click TRIGGER ENTER.
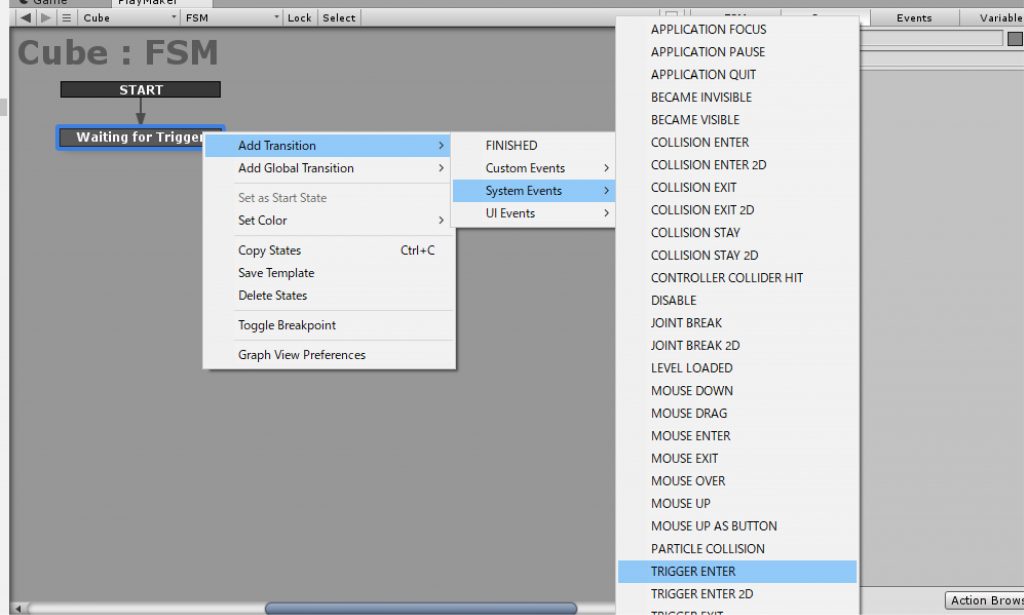
Set the TRIGGER ENTER
Next, right-click on the Playmaker Editor and select Add State. Set the action for this state to change the color.
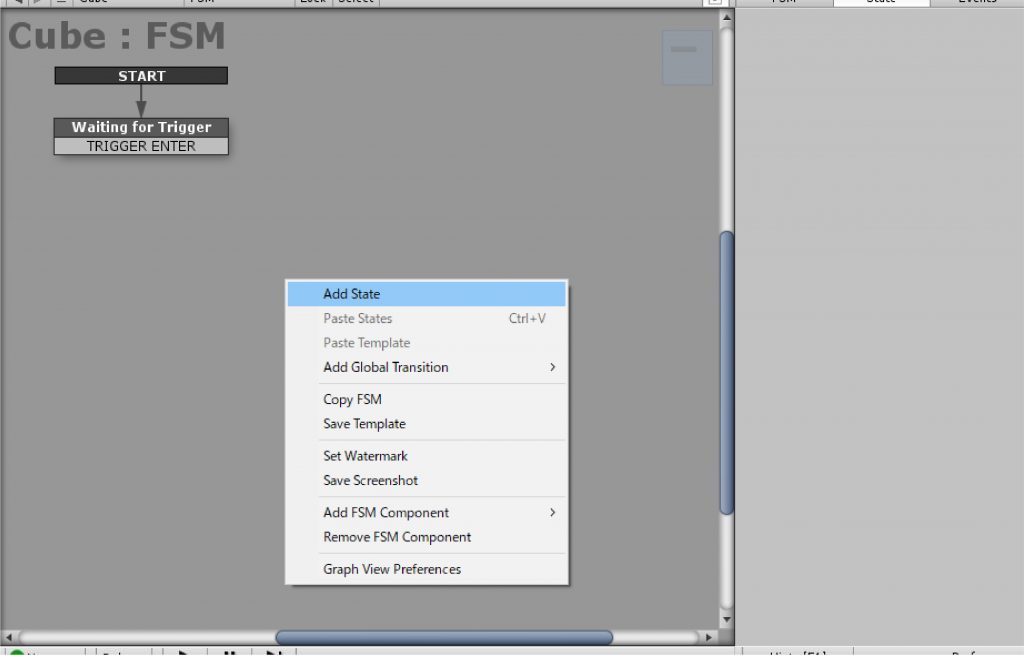
Add State
State1 is added. Change the name to “Change Color”.
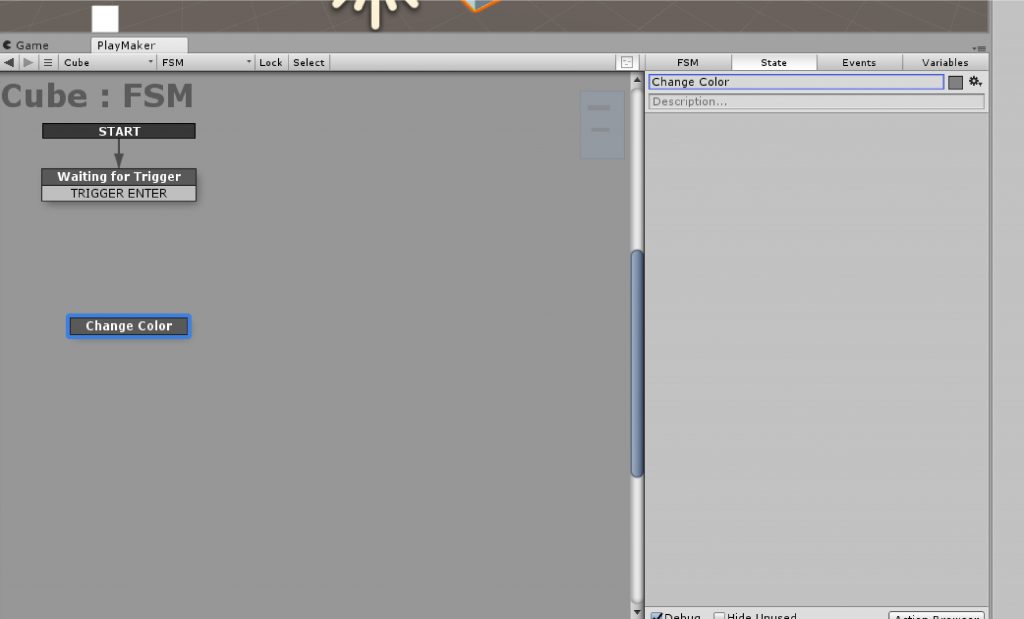
Change your name
Open the browser by selecting “Action Browser” in the lower right hand corner of the State tab while selecting the State for Change Color.
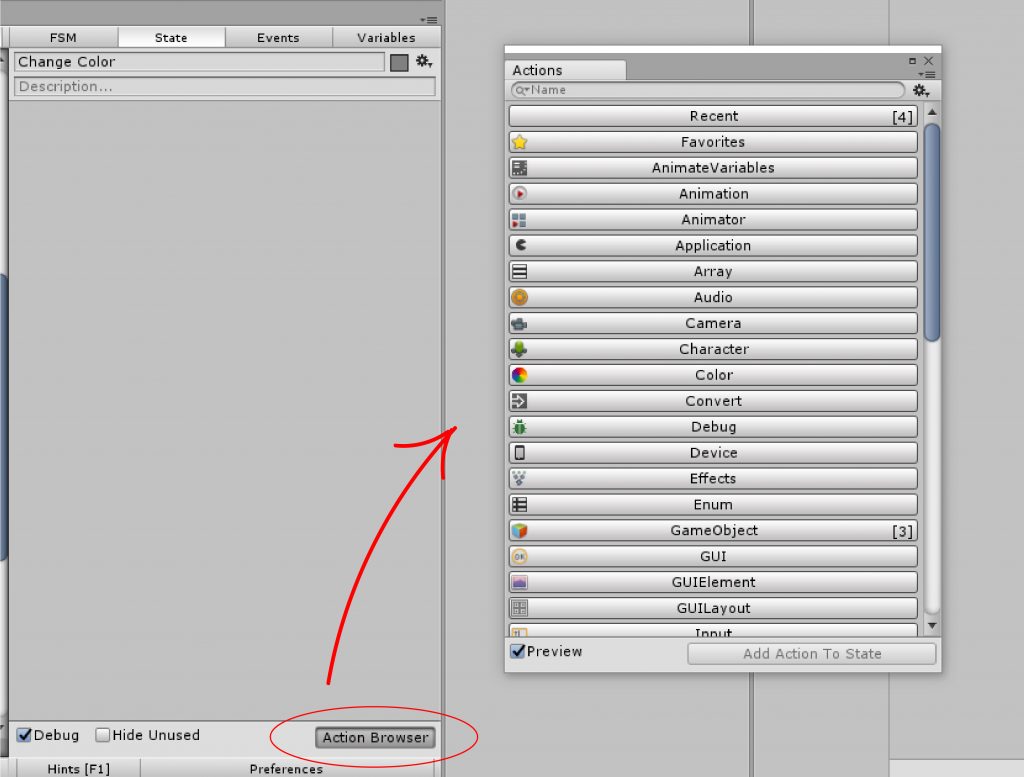
Open the Action Browser
Select “Set Material” from the Action Browser and select “Add Action To State” at the bottom right to add the action.
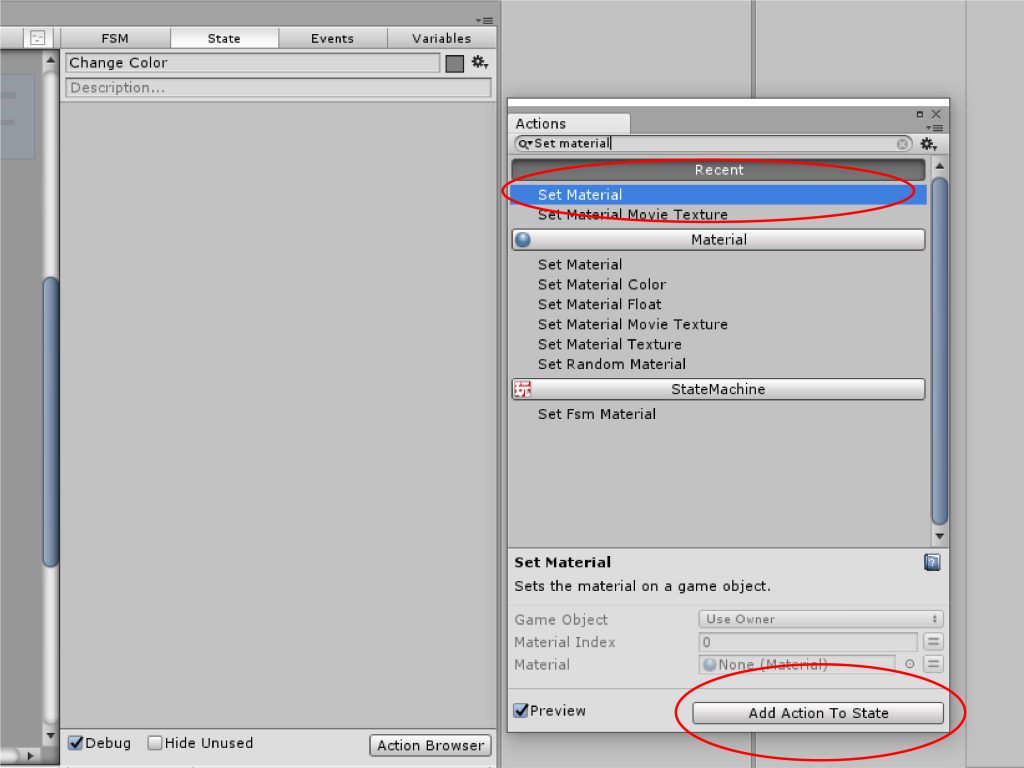
Add Set Material
Set the action of Set Material.
In the Set Material section, set the previously prepared “RED” material to “Material”.
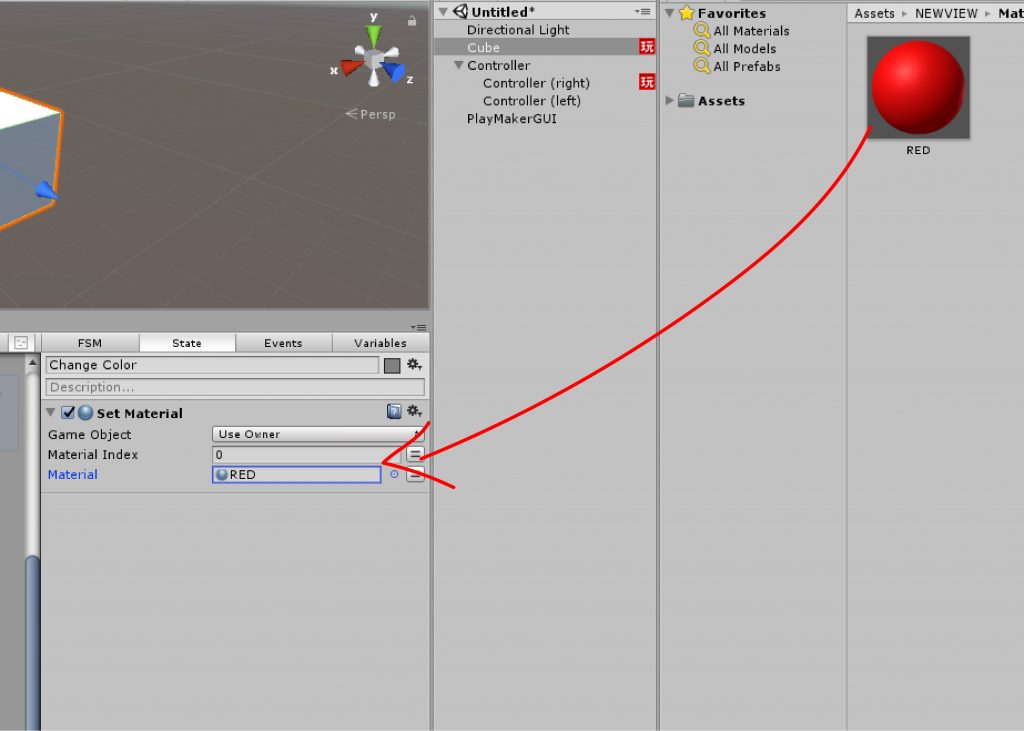
Set Material
Finally, connect the state of “Waiting For Trigger” with the state of “Change Color”.
Connect the State
Now we can set up the interaction with the trigger event in Cube.
How to upload to STYLY
Let me show you how it actually works on uploading it to STYLY.
For more information on how to upload, please click here.

Here is the action of the upload to STYLY.
When the controller touched the CUBE, a TRIGGER ENTER was fired and an action was performed to change the color of the CUBE to red.
TRIGGER EVENT
Let’s create a work that is full of originality!