In this article, I’ll show you how to make Unity’s animation transitions smooth.
This will be a useful tip to improve the quality of your scenes with animations.
You can change the smoothness of the transitions by adjusting the time it takes for one animation to transition to the next.
This is automatically set by default, but by adjusting it yourself, you can expand the range of your expression.
This is knowledge that you can put into practice relatively quickly, so please give it a try.

Part of the animation we will create
Sample animation
Here is a sample of a scene which you can compare animations with adjusted transition settings.
The model on the left has the Transition Duration in Animation set to 2, the model in the middle has it set to 0.8, and the model on the right has it set to 0.1.
This makes the animation change faster as the model goes from left to right.
Preliminary preparation
As a preliminary preparation, please download the following assets.
We will be adding animations to this model.
If you do not know how to download the assets, please refer to the following article.
Creating the animation
First, let’s prepare the animation to be attached to this model.
In this case, we use a service called Mixamo to prepare the animation.
Access Mixamo and go to the following screen.
In this screen, you need to upload the FBX file of the model you want to animate.
(In the image, the Robot model has already been uploaded.)
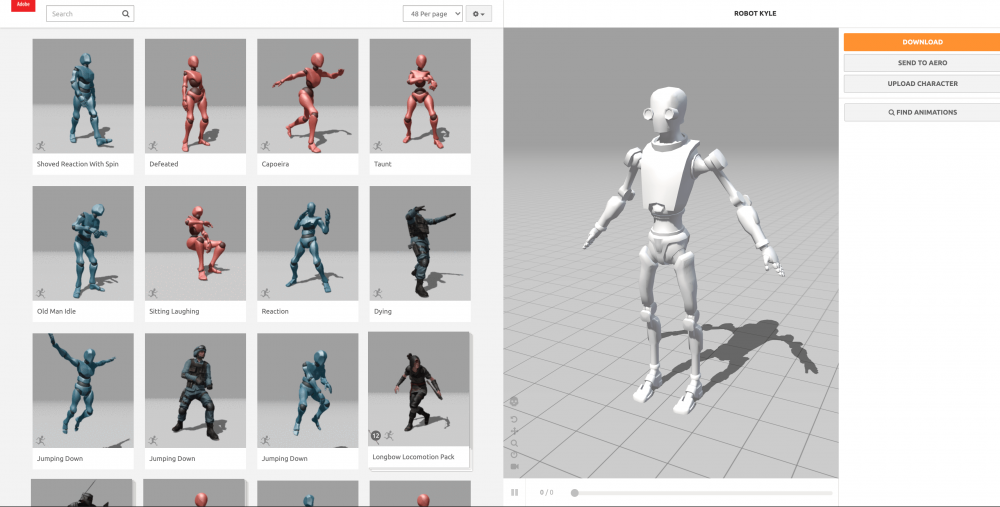
Mixamo’s main screen
First, right-click on Unity’s Asset > Model > RobotKyle, and open the robot’s FBX file directory from “Reveal in Finder” (or “Show in Explorer” on Windows).
Then, upload the FBX file and meta file from Mixamo’s “UPLOAD CHARACTER”.
If you upload only the FBX file, the upload may fail.
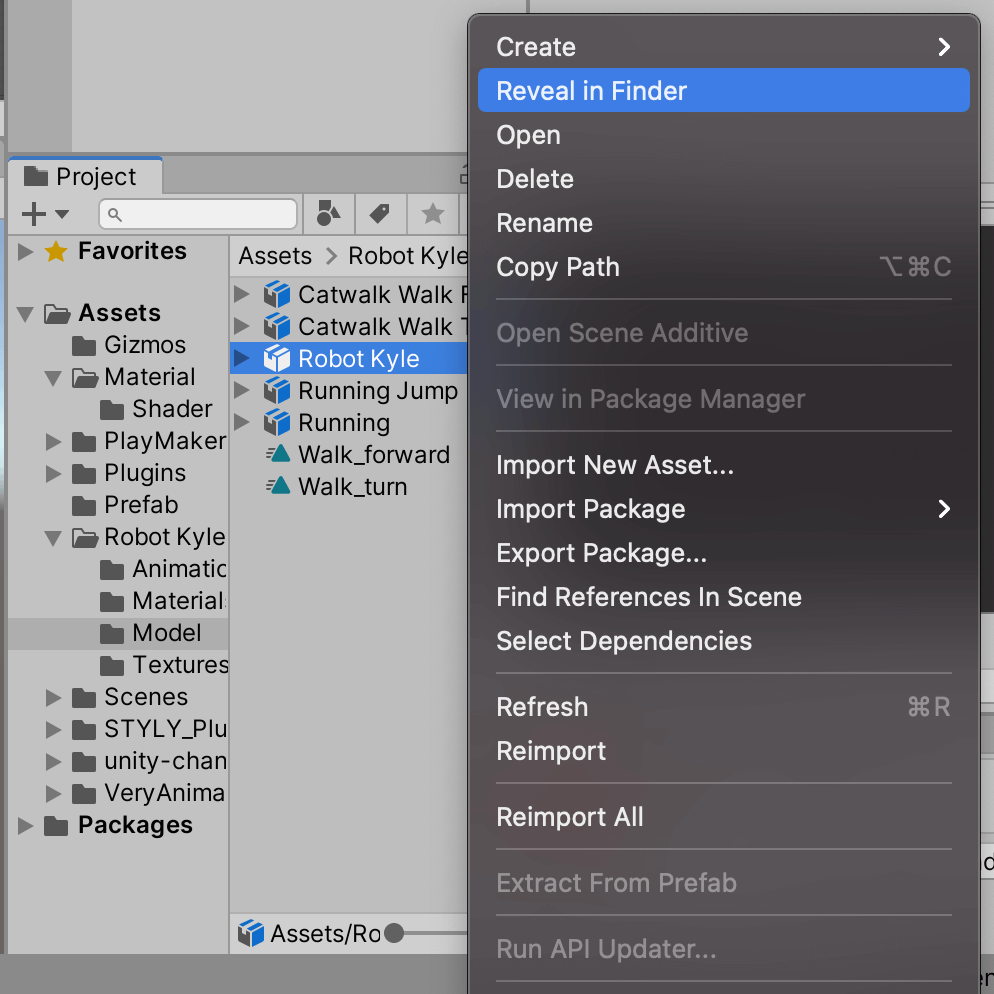
Open the FBX file directory

fbx and meta files
Next, download any animation you want to use for the transition.
Select the animation and click “Download” in the upper right corner to download it in FBX for Unity format.
In this case, I downloaded the Walk, Run, and RunningJump animations.
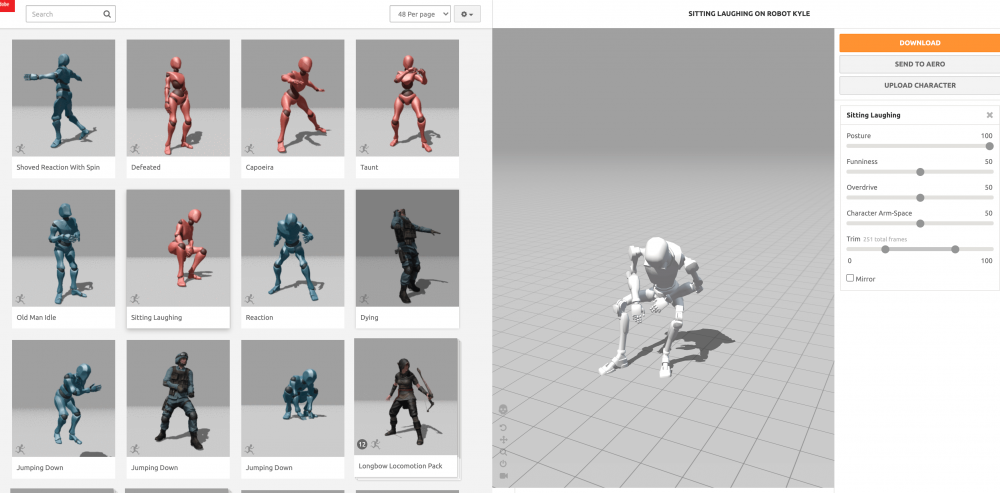
Select an animation
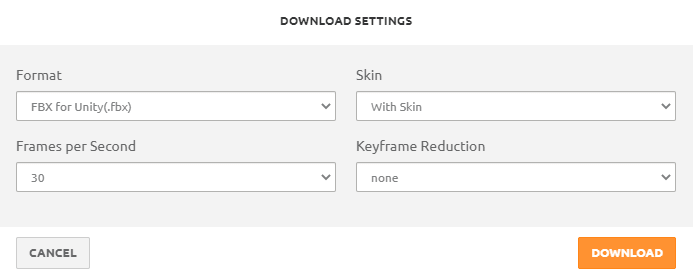
Download the animation
Import the animation
Let’s import the downloaded animations into Unity and make sure they are ready to play.
Import the downloaded FBX into Unity and change the “Animation Type” of the model’s Rig to Humanoid.
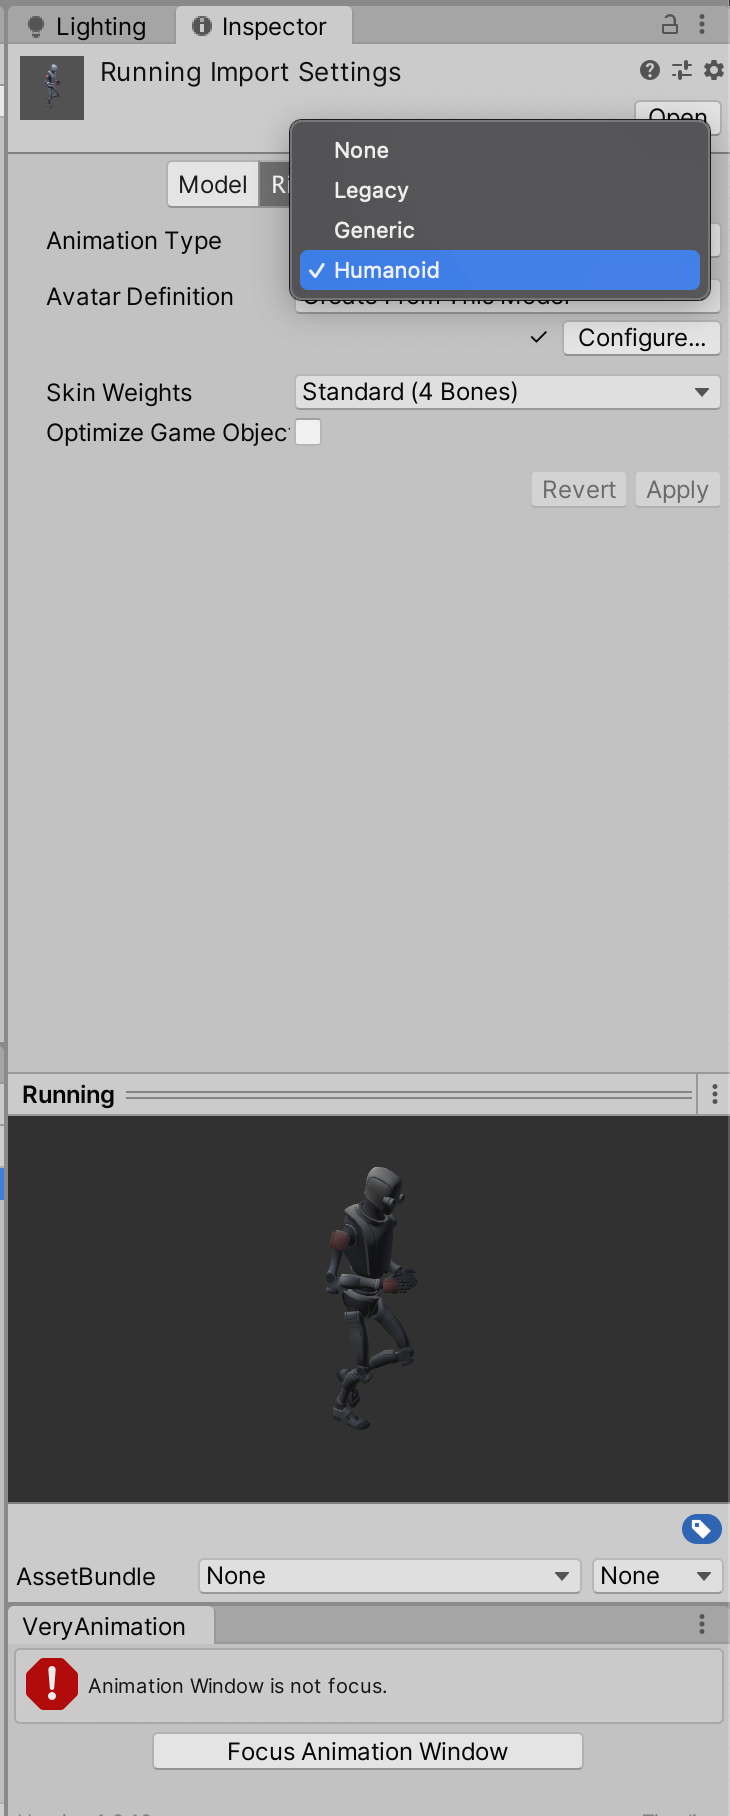
Change the Rig
After that, duplicate the animation file in the prefab by pressing Cmd+D (or Ctrl+D on Windows).
Duplicating will make the animation editable, allowing you to make adjustments and add the function to occur events.
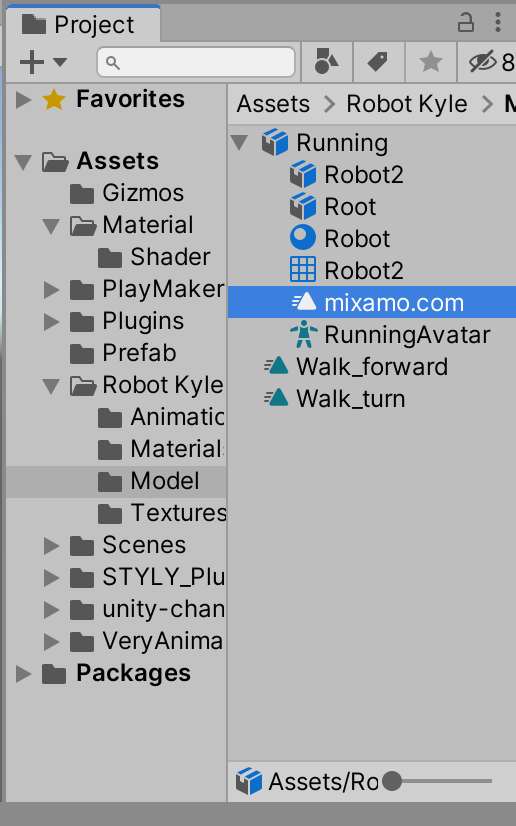
Duplicating an animation
Rename the duplicated animation to something easily recognizable and turn on Loop Time.
The animation is now ready.

Turn on Loop Time
Let’s create a new animator and place the duplicated animation in it.
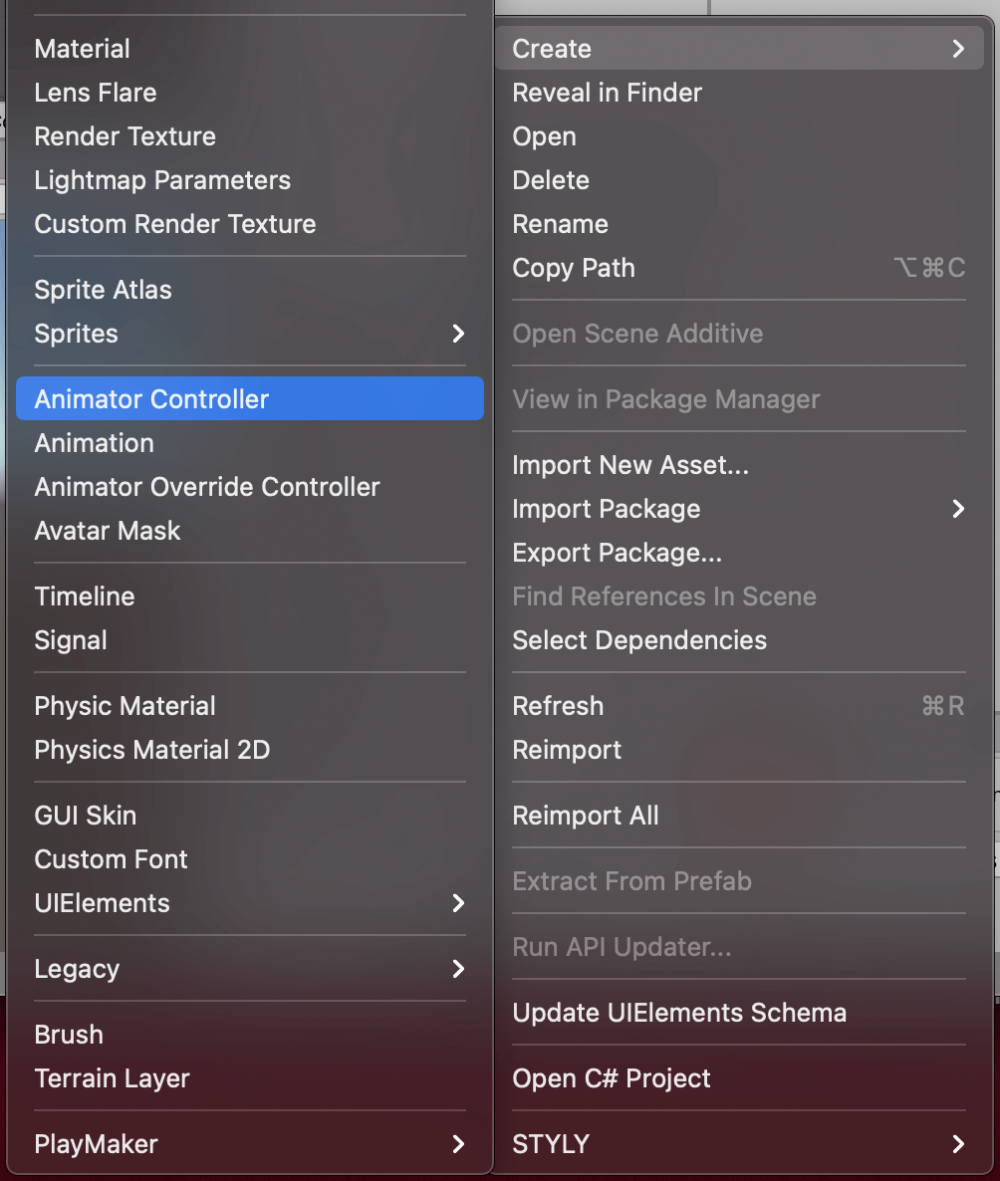
Create an Animator Controller
Then, set up transitions for each animation so that the animation transitions.
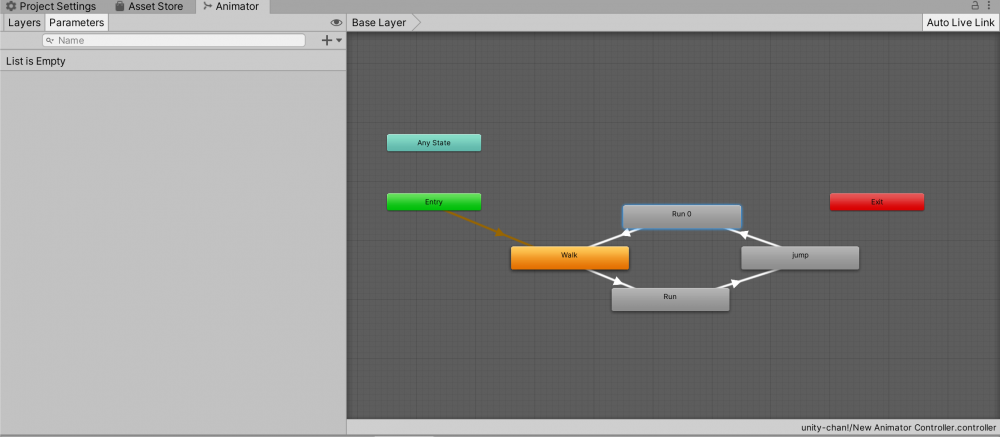
Adding animation transitions
Finally, place the robot in the scene, set the animator, and you’re done.

Attaching the Animator
Change the transition settings
You can change various parameters from the inspector by clicking on the arrow of the animation transition.
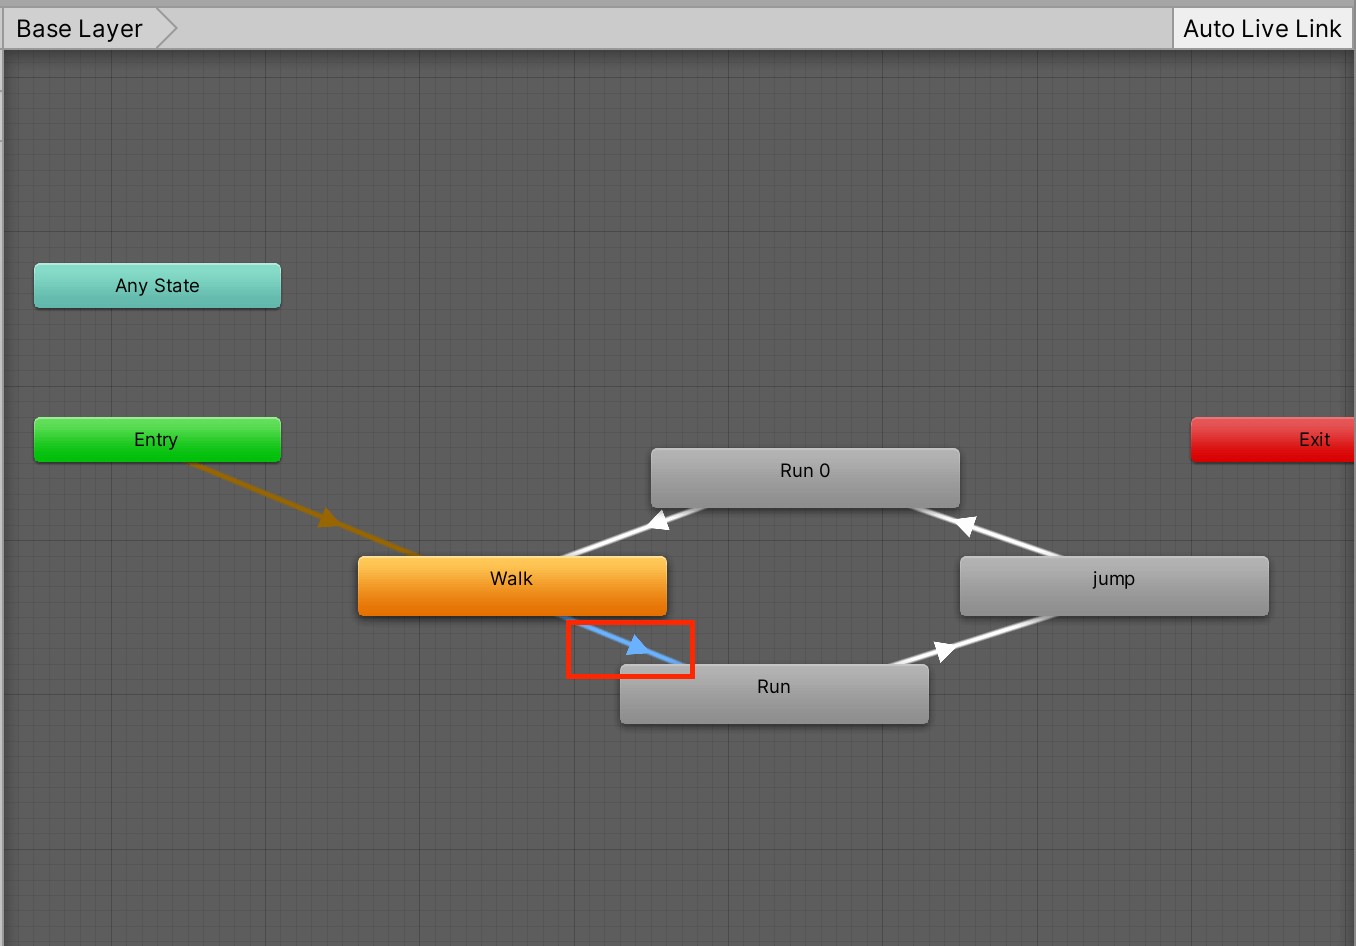
Select a Transition
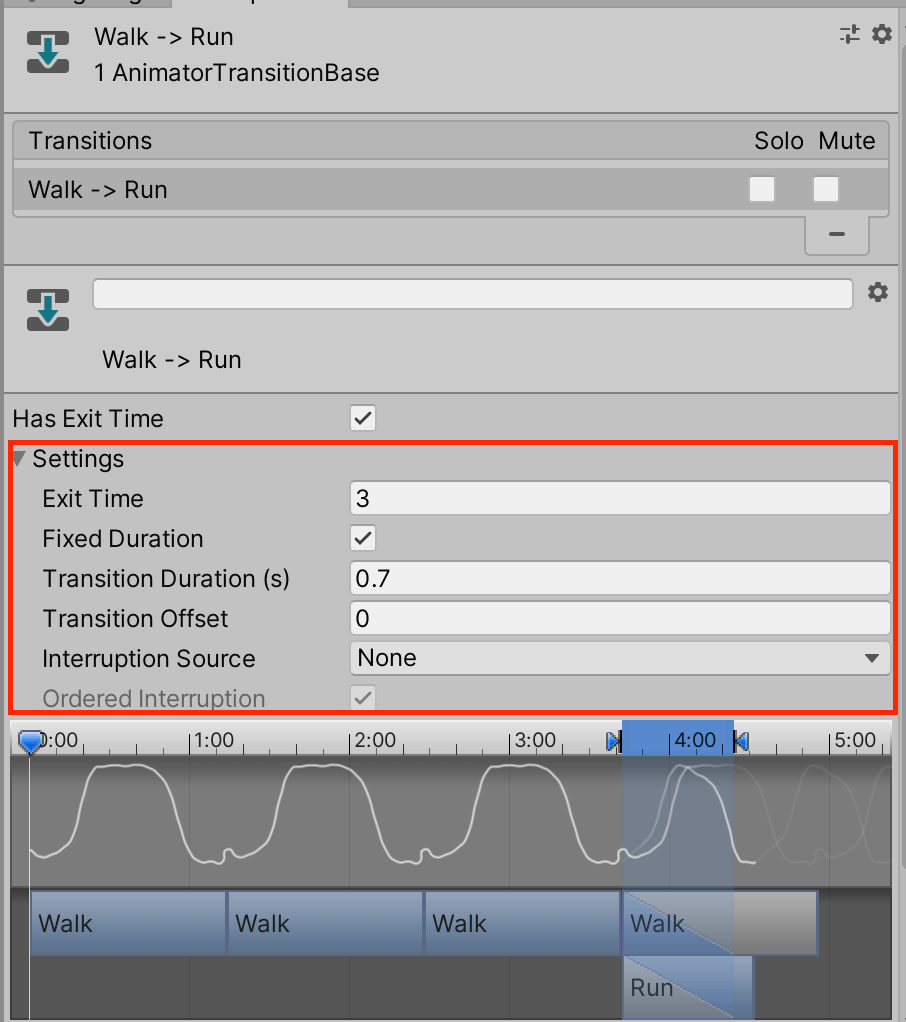
The meaning of the setting items are roughly as follows.
- Has Exit Time:If enabled, the animation will transition when the time set in Exit time elapses.
- Exit Time:The transition start time when Has Exit Time is enabled.
- Fixed Duration:When enabled, Transition Duration is set in time. If disabled, it is set as a percentage.
- Transition Duration:Transition duration in hours when Fixed Duration is enabled, or in percentage when it is disabled.
- Transition Offset:The animation is shifted by a set amount of time.
- Interruption Source:Interruption settings for transitions. This is used to interrupt and call the transition at the transition destination.
Transition Options
In this example, we will not use triggers, etc., but will allow the animation to transition based on time.
Turn on the Has Exit Time option for each transition.
Set the Exit Time for Walk to Run, Run to Jump, and Run to Walk to 3.
Set the Exit Time from Jump to Run to 1.
Now, every 3 seconds, the Walk and Run will play for 3 seconds, and the Jump will play for 1 second before transitioning to the next animation.
This time, we will change the Transition Duration.
If we set it to 0, the animation will suddenly switch to the next one.
Transition Duration = 0
Next, set it to 0.8, and the animation will switch a little more smoothly.
Transition Duration = 0.8
Using these settings, we can adjust the appearance of the transition.
However, since the values only set the amount of time it takes to complete the transition, if you increase the value too much, it will look strange.

Transition Duration = 2.0
For example, a person cannot stop abruptly after running.
Therefore, try to find a value that looks natural, such as increasing the Transition Duration from Run to Walk.
How to upload to STYLY
Let’s upload your 3D model with the animation you made to STYLY.
Create a STYLY account
How to create an account

How to upload 3D model to STYLY

How to upload from Unity to STYLY

In this article, I showed you how to use Transition Duration to make smooth animation transitions.
With a little effort, you can change the look of your animation.
I hope this article will be useful for your creation.
You can use STYLY FORUM to solve the problem. STYLY FORUM is a place where people can discuss a service or technical issue on STYLY, or provide bug reports on STYLY.
https://en.forum.styly.cc/support/discussions