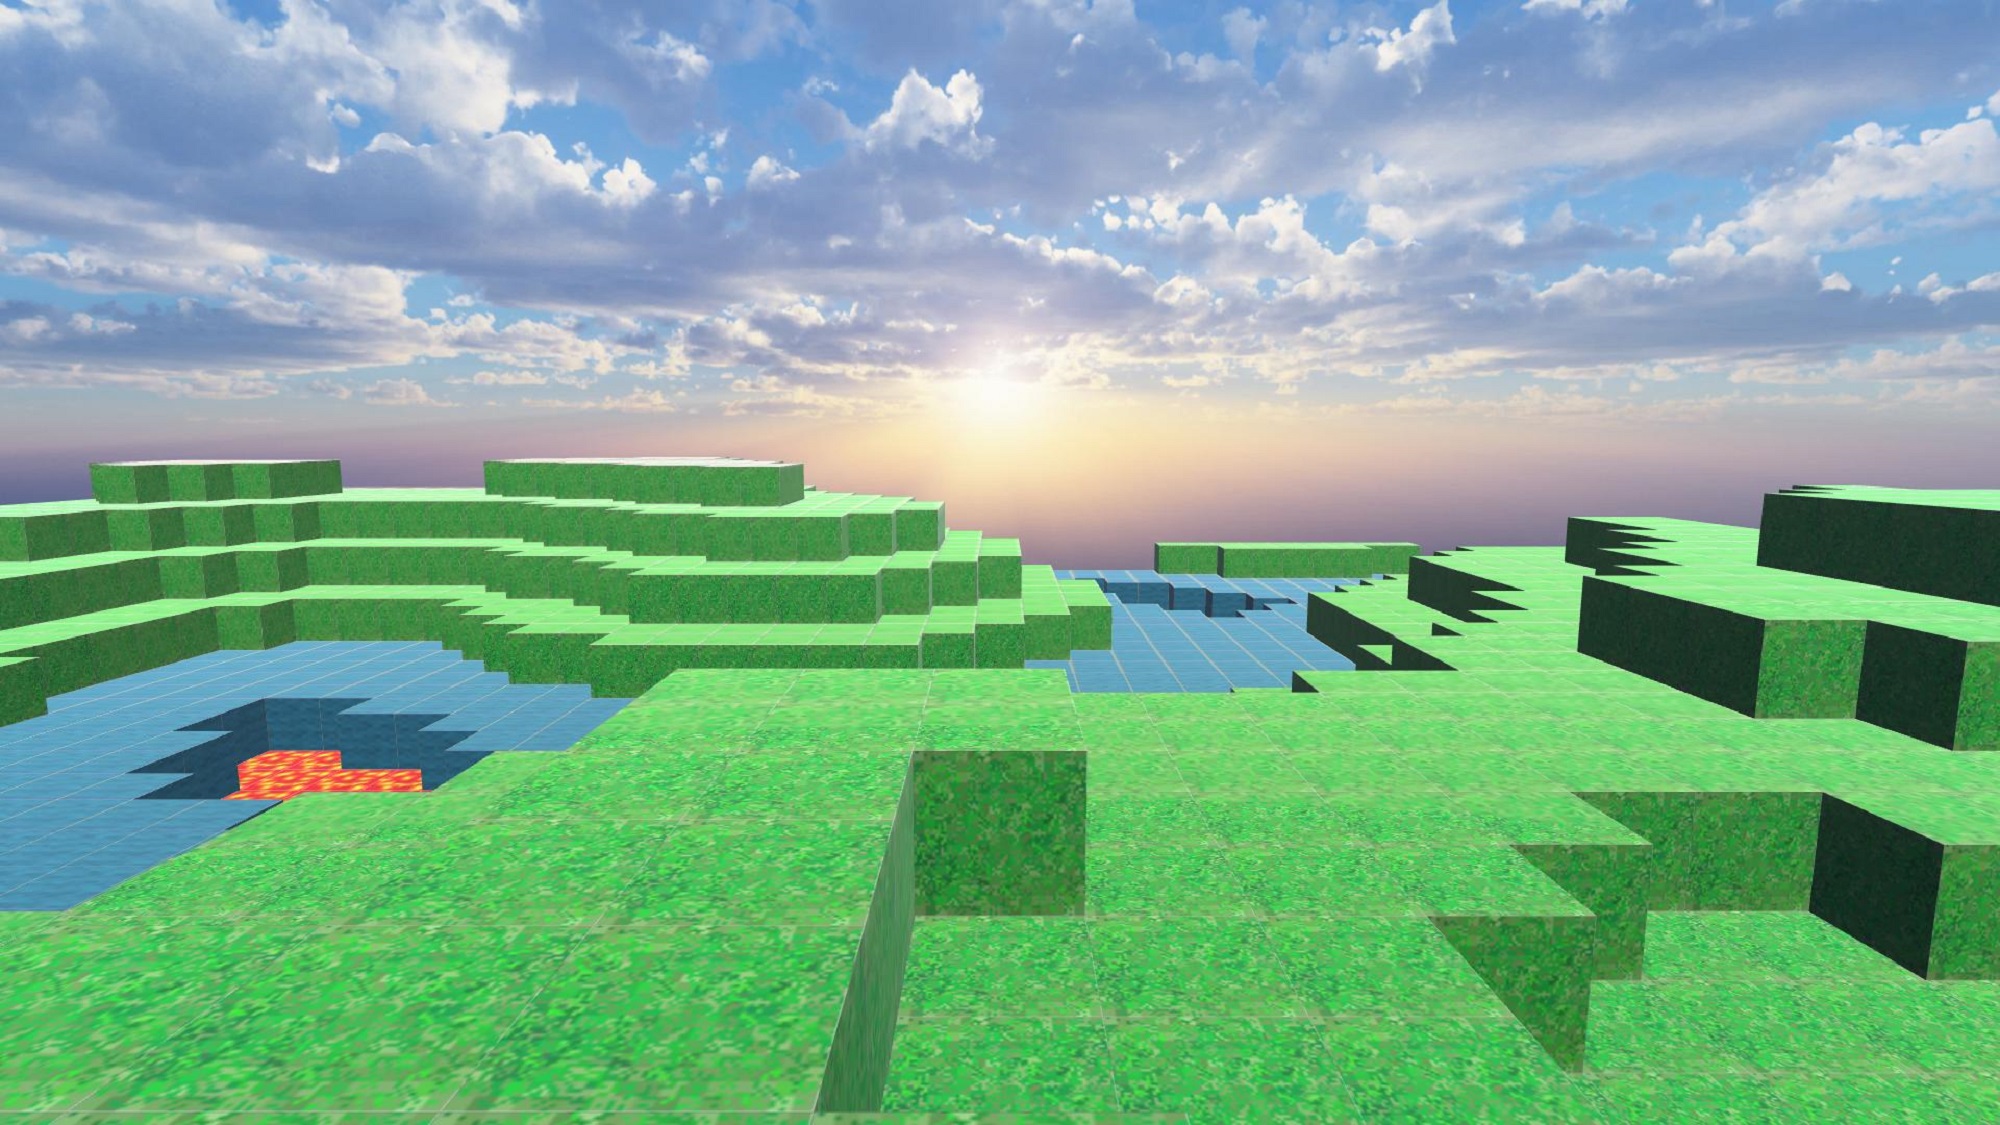
Creating a Minecraft-like landscape and uploading to STYLY -Part 1 of 2- In this article, I will introduce how to create a Minecraft-like landscape and upload it to STYLY.

Minecraft-like landscape
Sample
Open the sample scene from STYLY GALLERY.
How to create a Minecraft-like landscape
We will create a Minecraft-like landscape using the following 5 steps.
-
- Auto-creating a landscape in Unity
- Pasting textures
- Combining meshes and improving performance
- Save auto-created meshes
- Create a prefab from the saved meshes and uploading
I will explain the 5 steps briefly.
Auto-creating a landscape in Unity
Use the random number generator and place cubes so they form a landscape.
Pasting textures
Paste textures to the cubes and change the texture according to the height of the cube.
Combining meshes and improving performance

If we upload 2500 cubes to STYLY, the viewer will freeze.
By combining the meshes of 2500 cubes, the project will not freeze even when uploaded to STYLY.
Save auto-created meshes
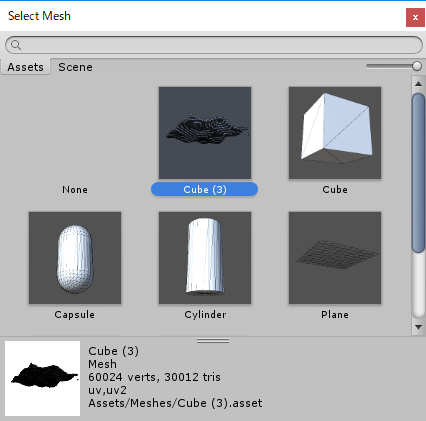
Save the created mesh
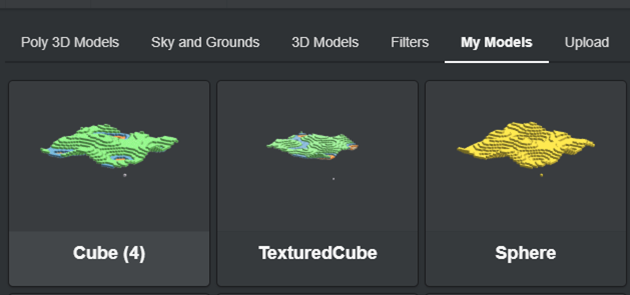
Create a prefab from the saved meshes and uploading

Paste the created mesh to a game object, and create a prefab from it.
Uploading to STYLY
Ok, let’s go through the steps in detail.
Auto-creating a landscape in Unity
Preparation
Creating a base object
Create a cube to the scene, and name it “Ground”.

Creating the Ground object
Create a ground forming object
Add the following script and name it “VoxelGround.cs”.
using UnityEngine;

public class VoxelGround : MonoBehaviour
{
    private float sizeX = 50f;
    private float sizeY = 10f;
    private float sizeZ = 50f;
    private float sizeW = 17f;
    private void Awake()
    {
        var material = this.GetComponent<MeshRenderer>().material;
        for (float x = 0; x < sizeX; x++)
        {
            for (float z = 0; z < sizeZ; z++)
            {
                GameObject cube = GameObject.CreatePrimitive(PrimitiveType.Cube);
                cube.transform.SetParent(transform);
                float noise = Mathf.PerlinNoise(x/ sizeW, z/ sizeW);
                float y = Mathf.Round(sizeY * noise);
                cube.transform.localPosition = new Vector3(x, y, z);
            }
        }
        transform.localPosition = new Vector3(-sizeX / 2, 0, -sizeZ / 2);
    }
}
Confirm the results
Add “VoxelGround” as a component to Ground object.
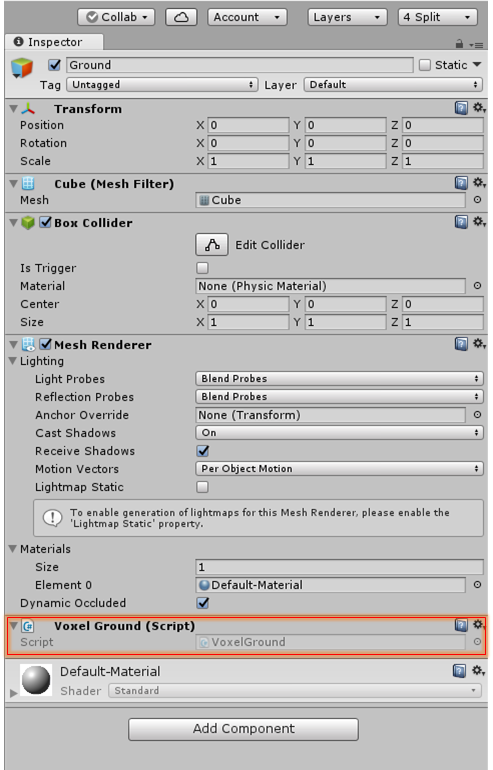
Adding VoxelGround
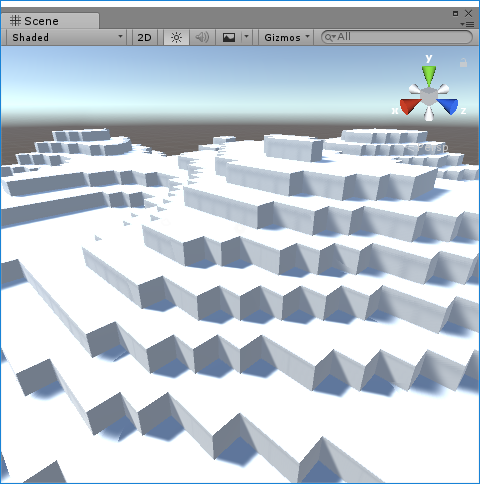
Press the Ctrl + P keys and if a landscape like the one in the image below gets created, it is a success.

Success
Explanation
About VoxelGround.cs
    private float sizeX = 50f; //The number of blocks to the X-axis
    private float sizeY = 10f; //The max height of the landscape
    private float sizeZ = 50f; //The number of blocks to the Z-axis
    private float sizeW = 17f; //The size of
We specify the size of the landscape here.
The sizeW might be hard to understand, but it is the distance from the top of the mountain to the ground.
So, in the sample, a mountain is created from 17 blocks, which means there will be about 3 mountains created from 50 blocks.
If we make the number smaller than 17, there will be more mountains created in the scene.
    private void Awake()
    {
        var material = this.GetComponent<MeshRenderer>().material;
        for (float x = 0; x < sizeX; x++)
        {
            for (float z = 0; z < sizeZ; z++)
            {
                //Creating blocks
                GameObject cube = GameObject.CreatePrimitive(PrimitiveType.Cube);
                cube.transform.SetParent(transform);

                //Create a variable that smoothly changes according to the X-axis and Y-axis
                float noise = Mathf.PerlinNoise(x/ sizeW, z/ sizeW);

                //Set the number as the Y-axis position (height)
                float y = Mathf.Round(sizeY * noise);
                cube.transform.localPosition = new Vector3(x, y, z);
            }
        }
        transform.localPosition = new Vector3(-sizeX / 2, 0, -sizeZ / 2);
    }
In the sample, we will create 50 blocks on the X-axis, and 50 blocks on the Z-axis, resulting in 2500 blocks.
By using Mathf.PerlinNoise as the height of the blocks, we can create a smooth landscape.
Pasting textures
Preparation
Importing textures
Download a texture pack from a Minecraft fansite.
The texture used in this sample was downloading from the following URL.
detailed minecraft

Texture pack
Import the texture to the Unity editor.

Importing the texture
Creating a material
Drag and drop the imported texture to the “Ground” game object.
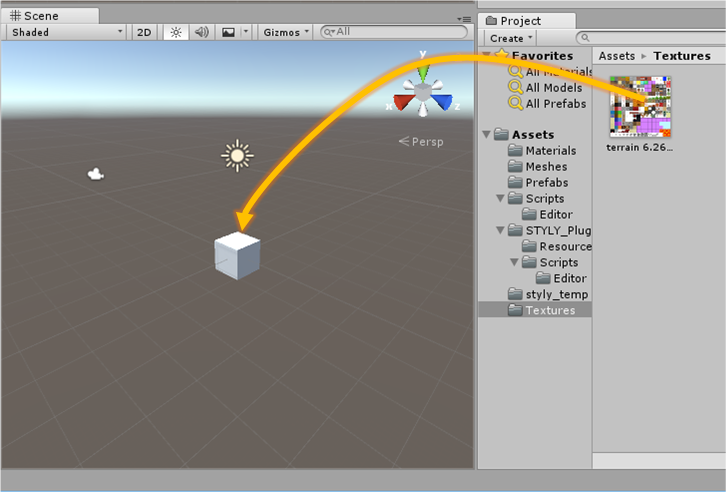
Drag and drop the texture to the game object
The texture will be applied to the “Ground” object, and check that a material with the same name as the texture is created. ( In the sample, the material name is “terrain 6.26.56 PM” )
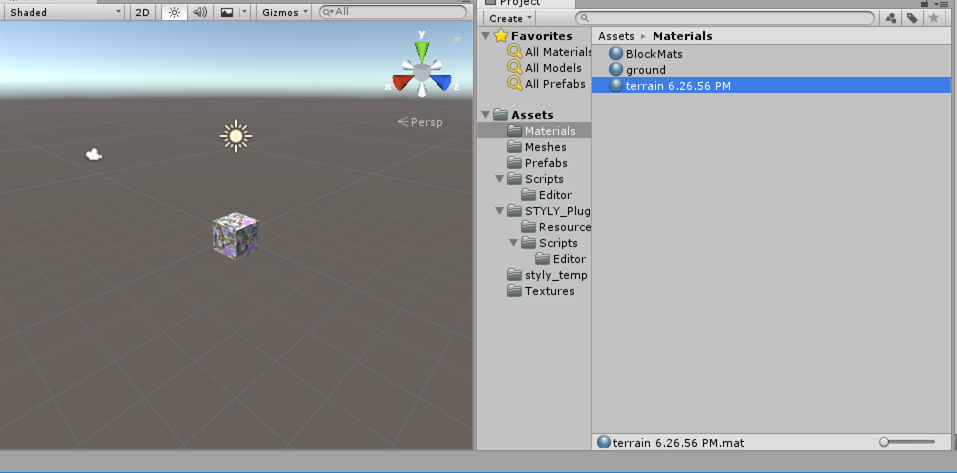
A material is created
Adjusting a ground forming object
Adjust “VoxelGround.cs” as below.
using UnityEngine;

public class VoxelGround : MonoBehaviour
{

    private float sizeX = 50f;
    private float sizeY = 10f;
    private float sizeZ = 50f;
    private float sizeW = 17f;

    private void Awake()
    {
        var material = this.GetComponent<MeshRenderer>().material;
        for (float x = 0; x < sizeX; x++)
        {
            for (float z = 0; z < sizeZ; z++)
            {
                GameObject cube = GameObject.CreatePrimitive(PrimitiveType.Cube);
                cube.transform.SetParent(transform);
                cube.GetComponent<MeshRenderer>().material = material;

                float noise = Mathf.PerlinNoise(x/ sizeW, z/ sizeW);
                float y = Mathf.Round(sizeY * noise);
                cube.transform.localPosition = new Vector3(x, y, z);

                SetUV(cube);
            }
        }
        transform.localPosition = new Vector3(-sizeX / 2, 0, -sizeZ / 2);
    }

    private void SetUV(GameObject cube)
    {
        cube.GetComponent<MeshFilter>().mesh.uv = GetBlockUVs(2, 15);
        if (cube.transform.position.y > sizeY * 0.3f)
        {
            cube.GetComponent<MeshFilter>().mesh.uv = GetBlockUVs(0, 15);
        }
        else if (cube.transform.position.y > sizeY * 0.2f)
        {
            cube.GetComponent<MeshFilter>().mesh.uv = GetBlockUVs(1, 2);
        }
        else if (cube.transform.position.y > sizeY * 0.1f)
        {
            cube.GetComponent<MeshFilter>().mesh.uv = GetBlockUVs(15, 0);
        }
    }

    private Vector2[] GetBlockUVs(float tileX, float tileY)
    {
        float pixelSize = 16;
        float tilePerc = 1 / pixelSize;

        float umin = tilePerc * tileX;
        float umax = tilePerc * (tileX + 1);
        float vmin = tilePerc * tileY;
        float vmax = tilePerc * (tileY + 1);

        Vector2[] blockUVs = new Vector2[24];

        //-X
        blockUVs[2] = new Vector2(umax, vmax);
        blockUVs[3] = new Vector2(umin, vmax);
        blockUVs[0] = new Vector2(umax, vmin);
        blockUVs[1] = new Vector2(umin, vmin);

        //+Y
        blockUVs[4] = new Vector2(umin, vmin);
        blockUVs[5] = new Vector2(umax, vmin);
        blockUVs[8] = new Vector2(umin, vmax);
        blockUVs[9] = new Vector2(umax, vmax);

        //-Z
        blockUVs[23] = new Vector2(umax, vmin);
        blockUVs[21] = new Vector2(umin, vmax);
        blockUVs[20] = new Vector2(umin, vmin);
        blockUVs[22] = new Vector2(umax, vmax);

        //+Z
        blockUVs[19] = new Vector2(umax, vmin);
        blockUVs[17] = new Vector2(umin, vmax);
        blockUVs[16] = new Vector2(umin, vmin);
        blockUVs[18] = new Vector2(umax, vmax);

        //-Y
        blockUVs[15] = new Vector2(umax, vmin);
        blockUVs[13] = new Vector2(umin, vmax);
        blockUVs[12] = new Vector2(umin, vmin);
        blockUVs[14] = new Vector2(umax, vmax);

        //+X
        blockUVs[6] = new Vector2(umin, vmin);
        blockUVs[7] = new Vector2(umax, vmin);
        blockUVs[10] = new Vector2(umin, vmax);
        blockUVs[11] = new Vector2(umax, vmax);

        return blockUVs;
    }
}
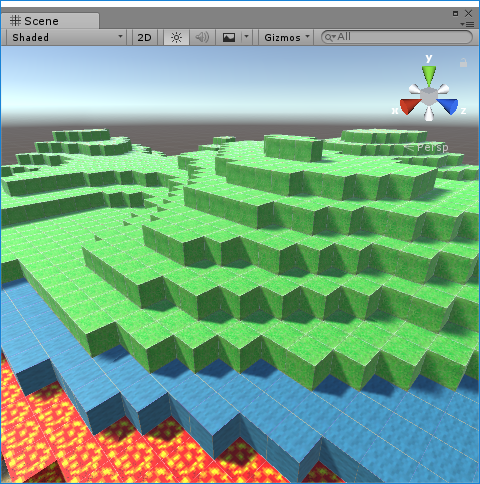
Confirm the result

Apply textures to the landscape
Press the Ctrl + P keys, and see if a landscape like the one in the next image is created.
Explanation
About the texture
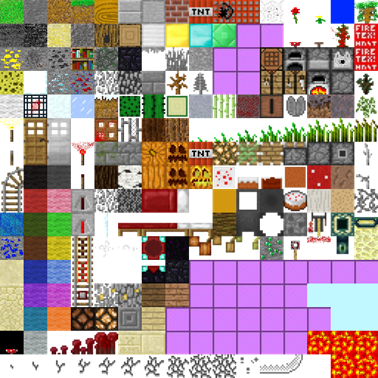
Texture pack
The image above is called a texture pack, and the textures needed to create a minecraft-like landscape is included.
By using a texture pack, we only need one material for the scene, so we are able to combine the meshes.
Adjusting the script①
    private void SetUV(GameObject cube)
    {
        cube.GetComponent<MeshFilter>().mesh.uv = GetBlockUVs(2, 15);
        if (cube.transform.position.y > sizeY * 0.3f)
        {
            cube.GetComponent<MeshFilter>().mesh.uv = GetBlockUVs(0, 15); //山
        }
        else if (cube.transform.position.y > sizeY * 0.2f)
        {
            cube.GetComponent<MeshFilter>().mesh.uv = GetBlockUVs(1, 2); //water surface
        }
        else if (cube.transform.position.y > sizeY * 0.1f)
        {
            cube.GetComponent<MeshFilter>().mesh.uv = GetBlockUVs(15, 0); //lava
        }
    }
In the sample, the texture is changed according to the height of the landscape.
GetBlockUVs(0, 15) specifies green for the grass located in the upper left corner of the texture pack.
GetBlockUVs(15, 0) specifies the red color of the lava located at the bottom right of the texture pack.
Adjusting the script②
    private Vector2[] GetBlockUVs(float tileX, float tileY)
    {

        float pixelSize = 16;
        float tilePerc = 1 / pixelSize;

        float umin = tilePerc * tileX;
        float umax = tilePerc * (tileX + 1);
        float vmin = tilePerc * tileY;
        float vmax = tilePerc * (tileY + 1);

        Vector2[] blockUVs = new Vector2[24];

        //-X
        blockUVs[2] = new Vector2(umax, vmax);
        blockUVs[3] = new Vector2(umin, vmax);
        blockUVs[0] = new Vector2(umax, vmin);
        blockUVs[1] = new Vector2(umin, vmin);

        //+Y
        blockUVs[4] = new Vector2(umin, vmin);
        blockUVs[5] = new Vector2(umax, vmin);
        blockUVs[8] = new Vector2(umin, vmax);
        blockUVs[9] = new Vector2(umax, vmax);

        //-Z
        blockUVs[23] = new Vector2(umax, vmin);
        blockUVs[21] = new Vector2(umin, vmax);
        blockUVs[20] = new Vector2(umin, vmin);
        blockUVs[22] = new Vector2(umax, vmax);

        //+Z
        blockUVs[19] = new Vector2(umax, vmin);
        blockUVs[17] = new Vector2(umin, vmax);
        blockUVs[16] = new Vector2(umin, vmin);
        blockUVs[18] = new Vector2(umax, vmax);

        //-Y
        blockUVs[15] = new Vector2(umax, vmin);
        blockUVs[13] = new Vector2(umin, vmax);
        blockUVs[12] = new Vector2(umin, vmin);
        blockUVs[14] = new Vector2(umax, vmax);

        //+X
        blockUVs[6] = new Vector2(umin, vmin);
        blockUVs[7] = new Vector2(umax, vmin);
        blockUVs[10] = new Vector2(umin, vmax);
        blockUVs[11] = new Vector2(umax, vmax);

        return blockUVs;
    }
In the sample, we set the texture to the cube-shaped meshes.
For pixelSize, we set the row number of the texture pack.
In the sample, we are using a 16 x 16 texture pack, so I set the variable as 16.
I referred to the below blog for UV.
”Unity の Cube を使う時、側面の天地が揃う UV 作った”
Conclusion
That will be all for part1.
We have completed the first 2 steps of the whole 5 steps, and we have finished creating the appearance of the landscape.
Auto-creating a landscape in UnityPasting textures- Combining meshes and improving performance
- Save auto-created meshes
- Create a prefab from the saved meshes and uploading
To upload this project to STYLY, we need to combine and save thousands of cubes, and finish up the settings.
In the latter article, I am going to explain how to do this.
This is not an official product of Minecraft.
This product is not approved from Mojang, and is not related to Mojang.
Please refer to the following for the second part of the article.