In this article, I am going to show you how to use and assemble basic nodes when working with textures in the Amplify Shader Editor.
Sample
You can download the Unity project described in the article here.
https://github.com/styly-dev/STYLY-Unity-Examples
Enabling node previews
First of all, let me introduce the node preview feature of Amplify Shader Editor.
With this feature enabled, you can visually see what is going on within each node.
You can activate the node preview feature by clicking on the arrow in the upper right corner of each node, or by pressing the P key on your keyboard.
Node preview function
This feature allows you to intuitively see the results of operations within each node.
How to Use Texture Nodes
Using textures
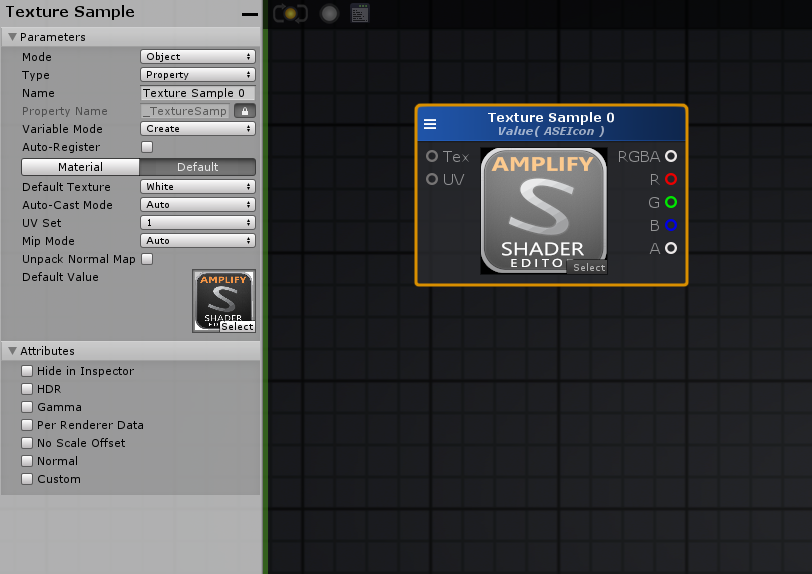
When using textures, use the Texture Sample node. You can also call it from a search, but since the texture sample node is assigned a shortcut key, you can also call it by holding down the T key plus a left click.
Select the texture you want to use. You can also drag and drop textures directly from the Unity project folder.
Mix textures and colors
When mixing textures and colors, connect the Texture Sample and Color nodes to the Add (add) and Multiply (multiply) nodes.
Even when the same colors are combined, you can see that the result is lighter for Add node and darker for Multiply node.

In addition to using Add and Multiply nodes, there are other ways to mix textures and colors using Lerp nodes (linear interpolation).
The Lerp node mixes the textures and colors connected to the A and B ports, depending on the values connected to Alpha.
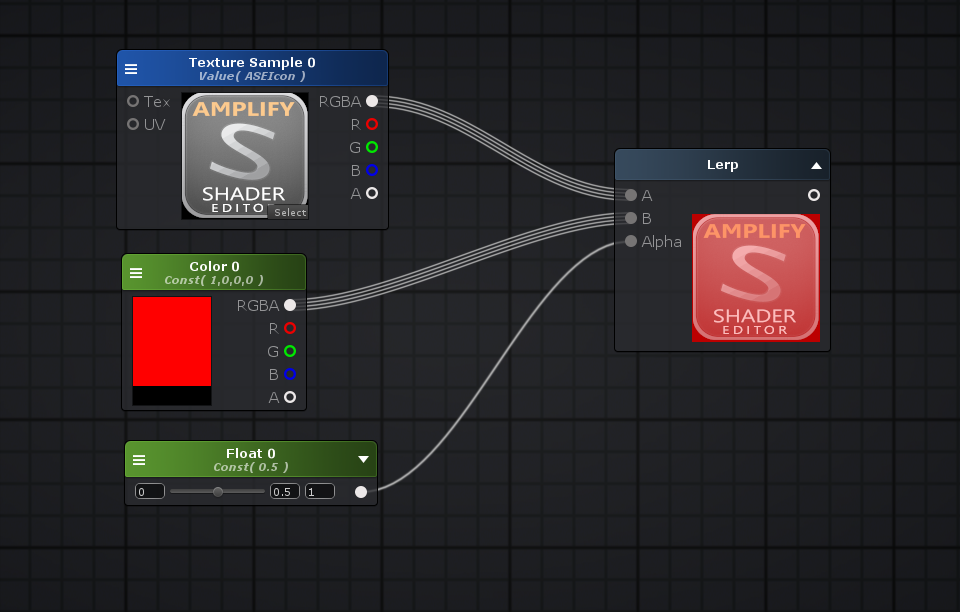
Lerp nodes are also useful for merging textures together.

In addition to Float (a number), you can also connect textures to Alpha.
This is used for mask expression, etc.

Utilizing HSV color space
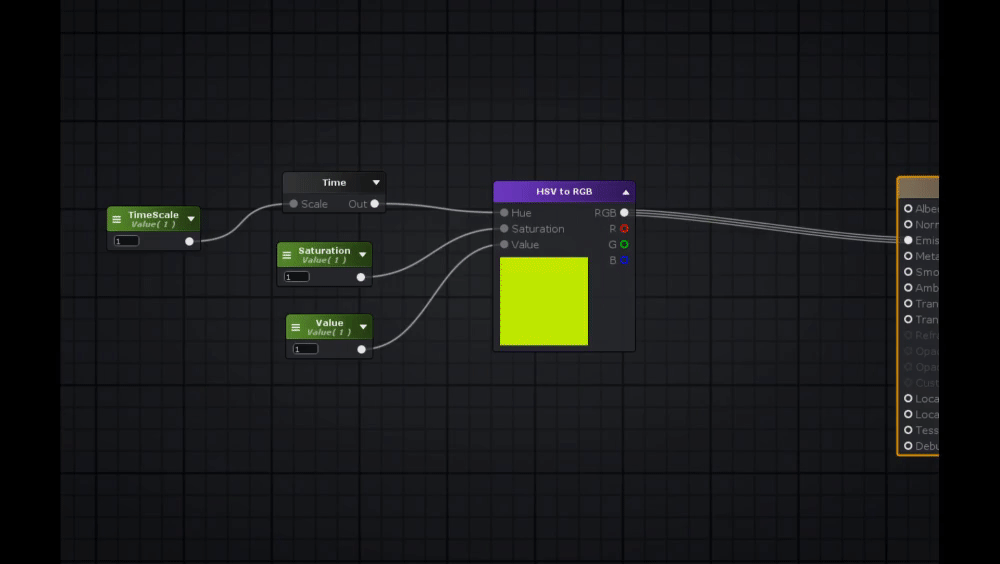
When adjusting the saturation and brightness of the texture, it is useful to convert the color space from RGB to HSV.
The RGB to HSV node is used for the conversion from RGB to HSV, and the HSV to RGB node is used for the conversion from HSV to RGB.
While RGB expresses color by combining primary colors (red, green, and blue), HSV color space expresses color by three elements: hue, saturation, and lightness.
One of the merits of using HSV color space is that you can easily make sensory adjustments such as “I want to darken this color” or “I want it to be darker”.
As an example, each element of the HSV can be individually adjusted by connecting it to the Add node and increasing or decreasing its value at the Float node.

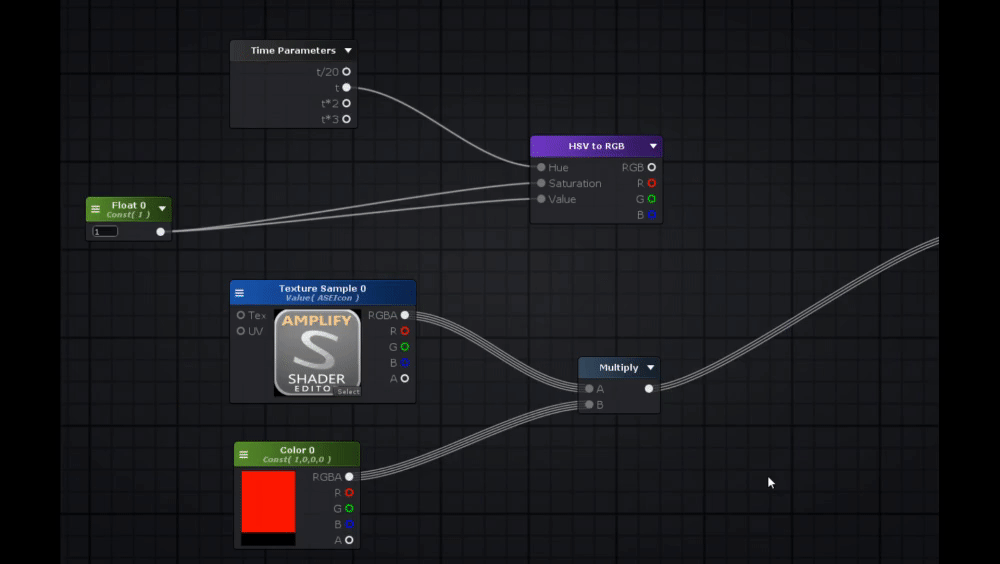
And, by using HSV space, it is possible to create expressions that change colors over a period of time.
By connecting the Time node to the Hue (hue) of the HSVtoRGB node, the value of the Hue is constantly changed over time.
Use the normal map
Change the Texture Sample settings to handle the normal map
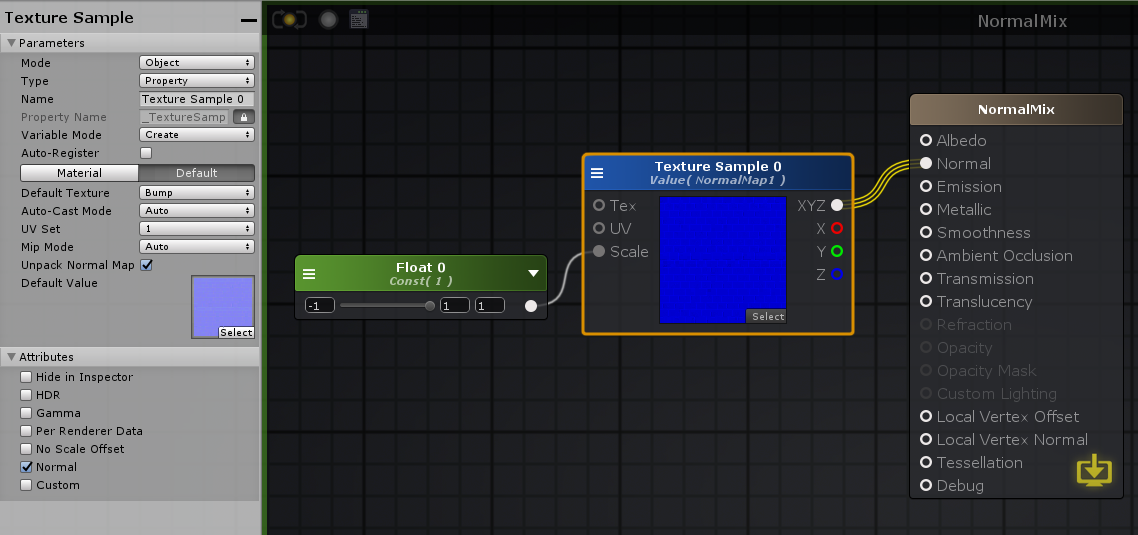
The texture sample node is used for normal maps as well as normal textures, but it cannot be used as a normal map with the default settings.
Select the Texture Sample node and change the parameters displayed on the left side of the screen. Change the Default Texture from White to Bump and check Normal in the UnpackNormalMap and Attributes fields.
When switching to the normal map setting, the normal map scale is set to 1 as default, but by connecting a Float node to the scale you can adjust the value from the material inspector.
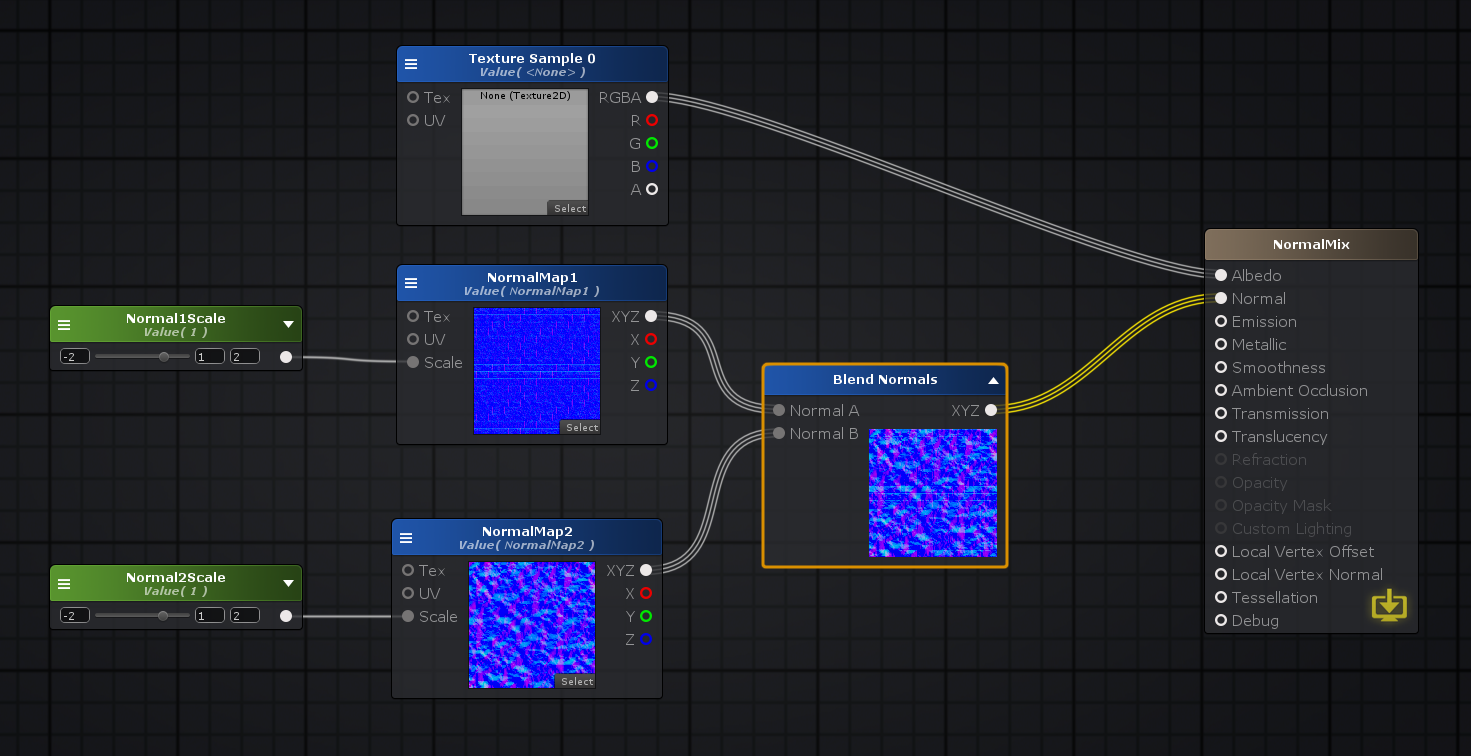
Combine multiple normal maps
As with normal textures, it is also possible to combine different normal maps.
For normal textures, we used Add and Lerp nodes, but for normal map compositing, we use special nodes called Blend Normals.
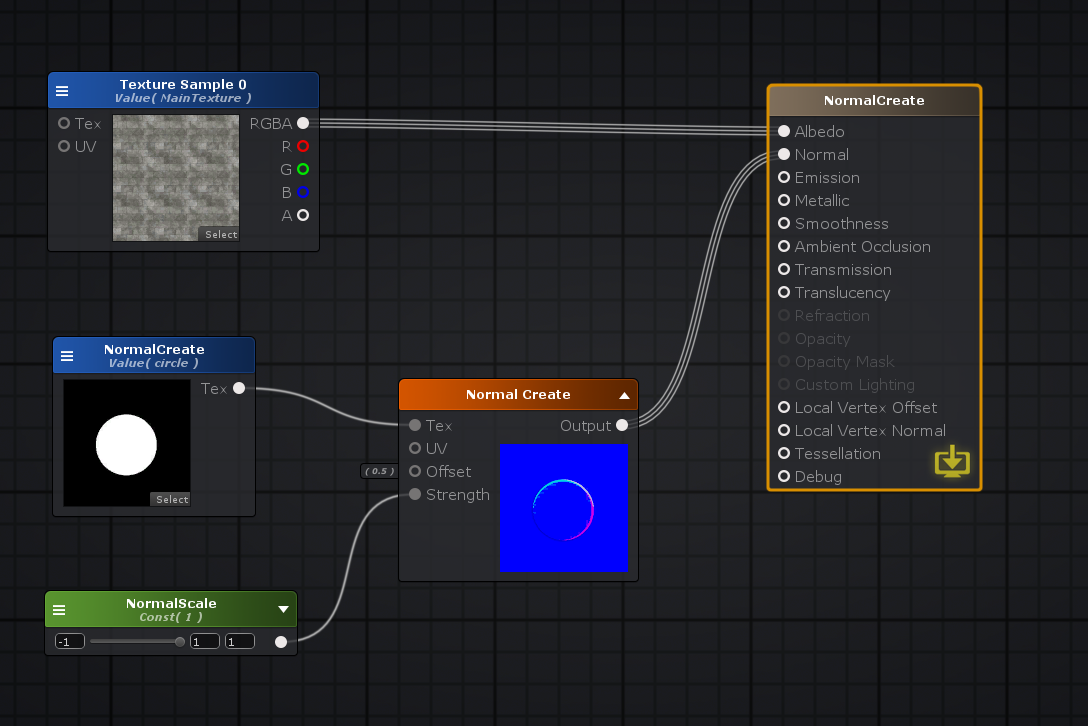
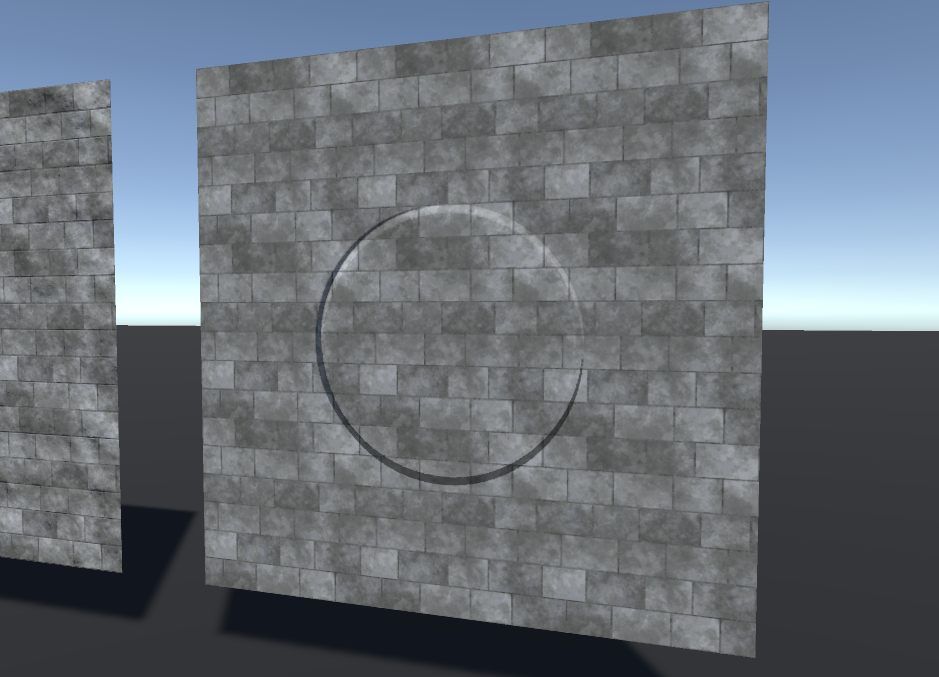
Converting normal textures to normal maps for use
Generally, normal mapping requires a separate texture for the normal map. Yet, by using the NormalCreate node, normal texture can be converted to a normal map and applied to the model.
Apply the texture you want to convert to a normal map to the Texture Object node, and then connect it to the NormalCreate node.
Moving and rotating textures
Move over time (UV scrolling)
To scroll the texture UV, connect the Panner node to the UV of the texture sample. The Texture Coordinates node is also connected to the Panner node.
By connecting a Vector2 node to the Speed of a Panner node, the speed of movement in each direction of XY can be controlled.
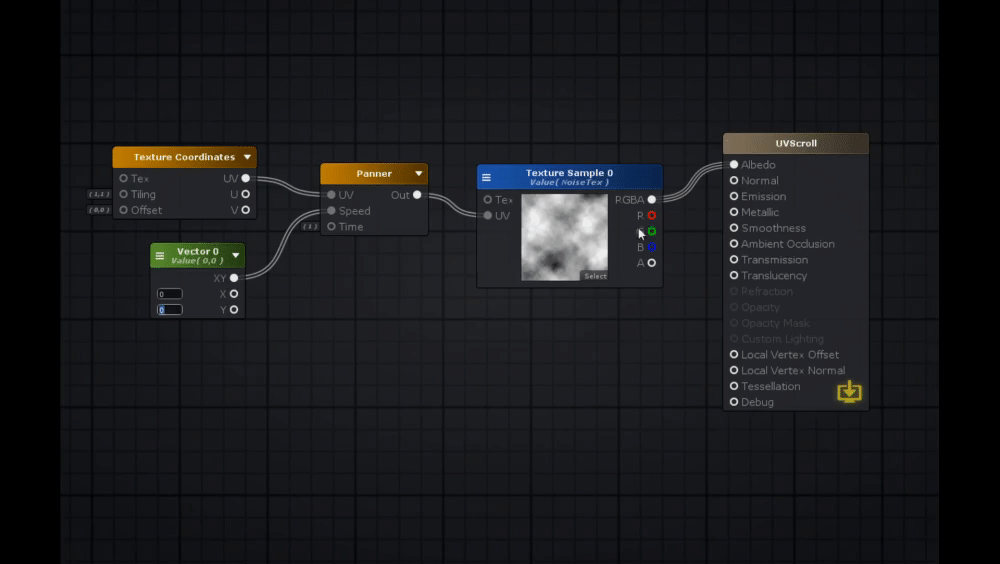
It is also possible to UV-scroll the normal map- this is a technique used to express the texture of waves and water with a water shader.

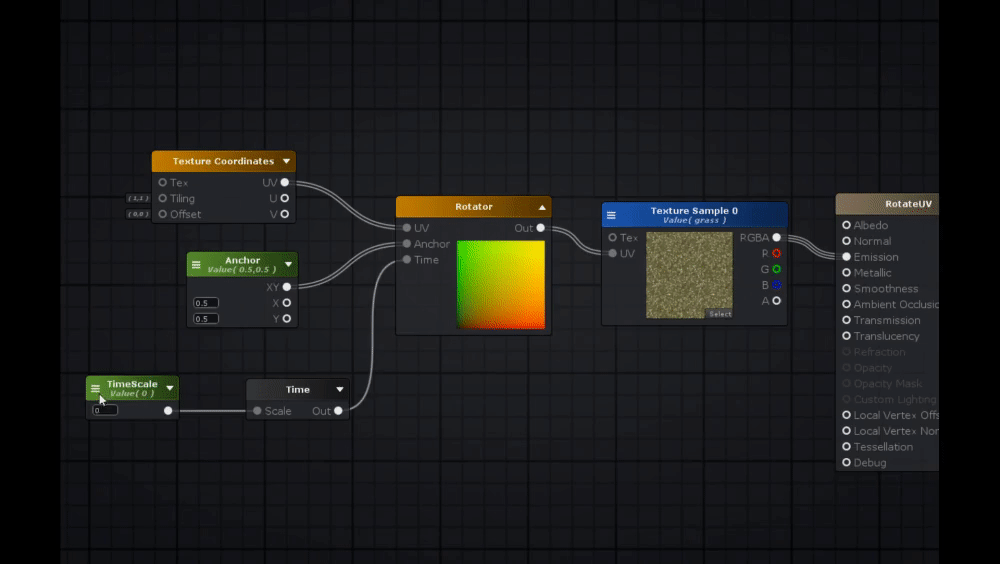
Rotate with the passage of time
The Rotator node can be used to rotate the texture by connecting it to the UV of the texture sample. Besides, Texture Coordinates node is connected to the Rotator node.
The Rotator node rotates the UV according to the value connected to Time, with the value of Vector2 connected to Anchor as the center of the rotation.
At the end
In this article, I have introduced basic node usage and assembly for working with textures in AmplifyShaderEditor.
Textures are used for a variety of purposes in shader production, including application to the model, combination with colors and textures, as well as combination with noise and mask textures for the creation of masks and UV scrolling.
I hope this article can help you expand your shader creation.
How to upload assets from Unity to STYLY
