This article explains how to use the Unity Timeline.
The Unity Timeline is a feature that allows you to visually edit music, play animations, show/hide objects, control particles, etc. along the time axis.
It is similar to the ability to add and edit music, video, subtitles, and direction to a track in video editing software.
It may be used to create a spatial piece of work where the movement of multiple objects and the timing of music are combined to create an unfolding storyline.
Sample
STYLY’s work with Timelines includes the following:
CocoTsuki VRMV – Android Girl –
Glossary
Assets and Instances in the Timeline
- Timeline Asset
A data file (with the extension .playable) for the Timeline created in the Project view. Each track in the Timeline is not tied to a game object or anything else. - Timeline Instance
Timeline Assets are used to apply actual animations, etc. to the track.
The connection to the game objects is stored (this connection is called a binding). The data is stored in a scene (.unity).
You may think of the relationship between Timeline Assets and Timeline Instances as being similar to the relationship between prefabs and instances.
However, changes such as adding a track to a Timeline Instance are immediately reflected in the Timeline Asset without having to use ‘Apply’.
Instance
A term that explicitly refers to the actual game objects that exist in the scene when the prefab is placed in the scene.
Or, it may be a game object that you based your prefab on when you created it.
Track Types
As in video editing, each vertical line on the Timeline is called a track.
In the case of a Unity Timeline, each track represents something like an animation or audio sequence of a game object.

The main types of tracks are as follows:
- Activation Track: A track that controls the activation or inactivity of the target object.
- Animation Track: Controls the movement, rotation, and other animation of the target object.
- Audio Track: Controls the audio.
- Control Track: Controls objects, etc.
- Playable Track: Used for scripting.
Use the Activation Track to Make the Cube Appear
Creating a Timeline Asset
Select “Timeline” from the Create menu in the Project view to create a Timeline Asset.

An icon will appear in your project.
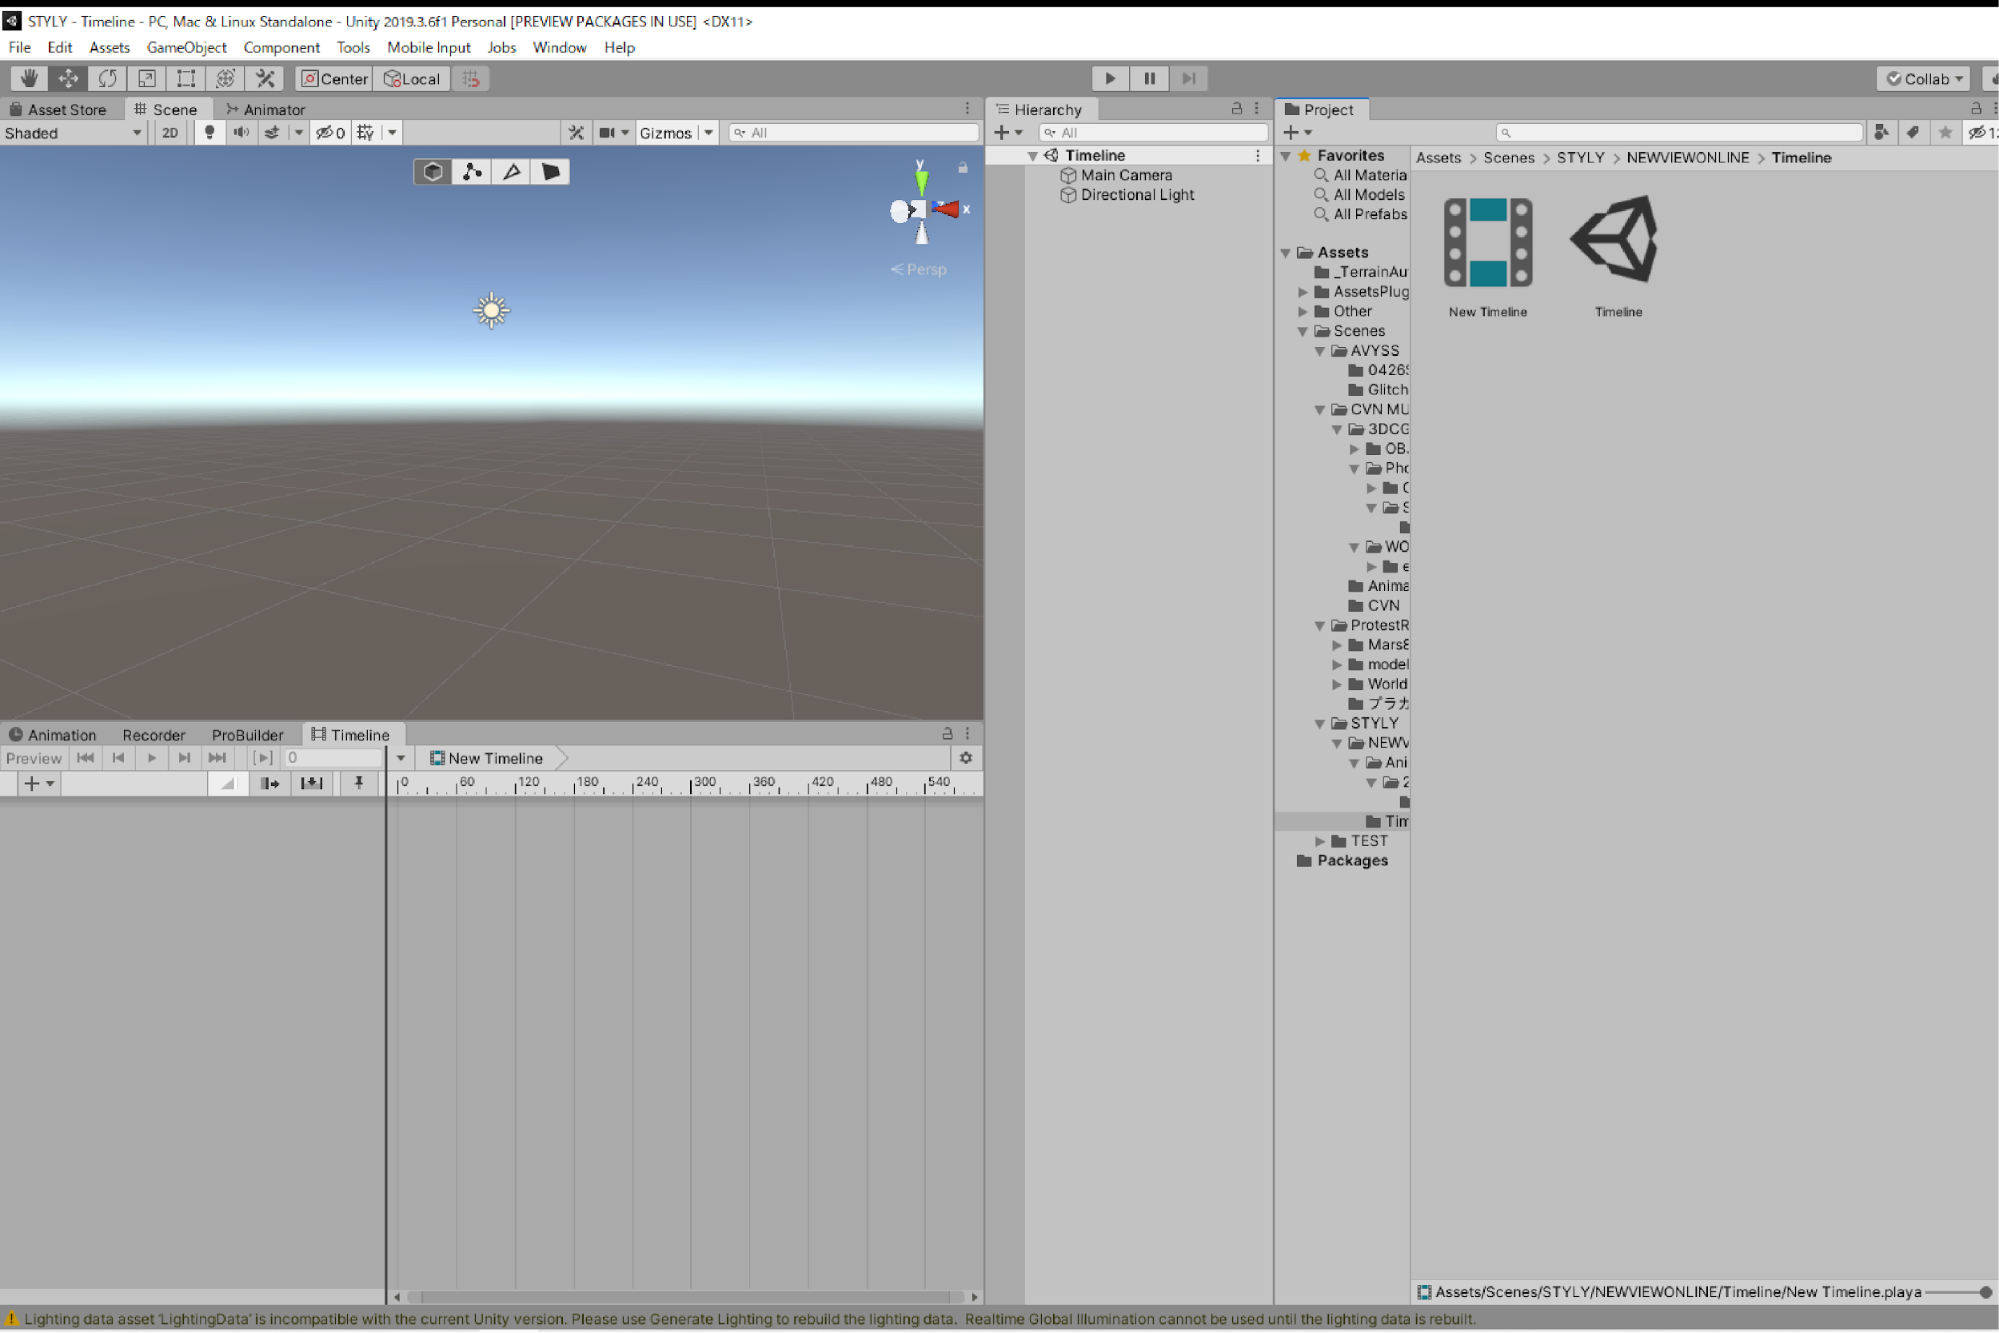
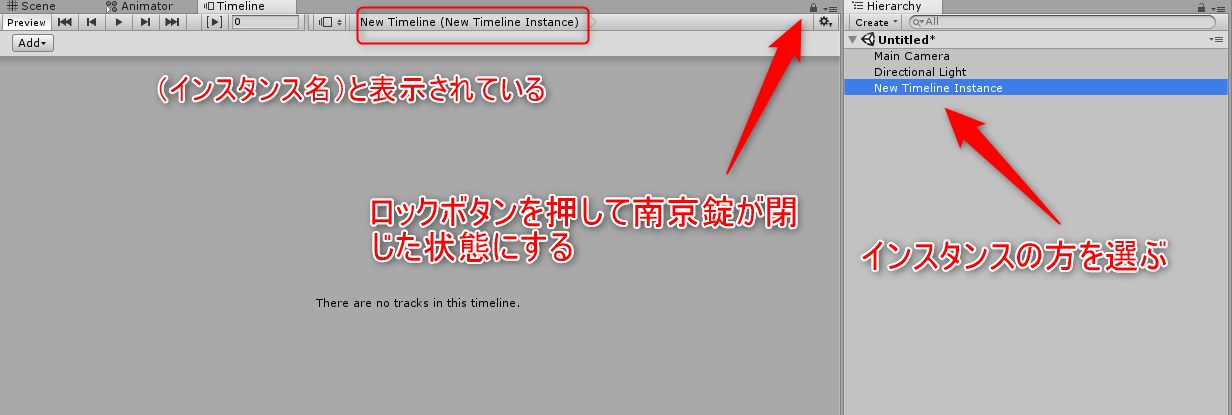
Creating a Timeline Instance
Drag and drop the Timeline Asset you created above into the hierarchy to create a Timeline Instance.
Here we will manually rename it “New Timeline Instance” for the sake of awareness and clarity.
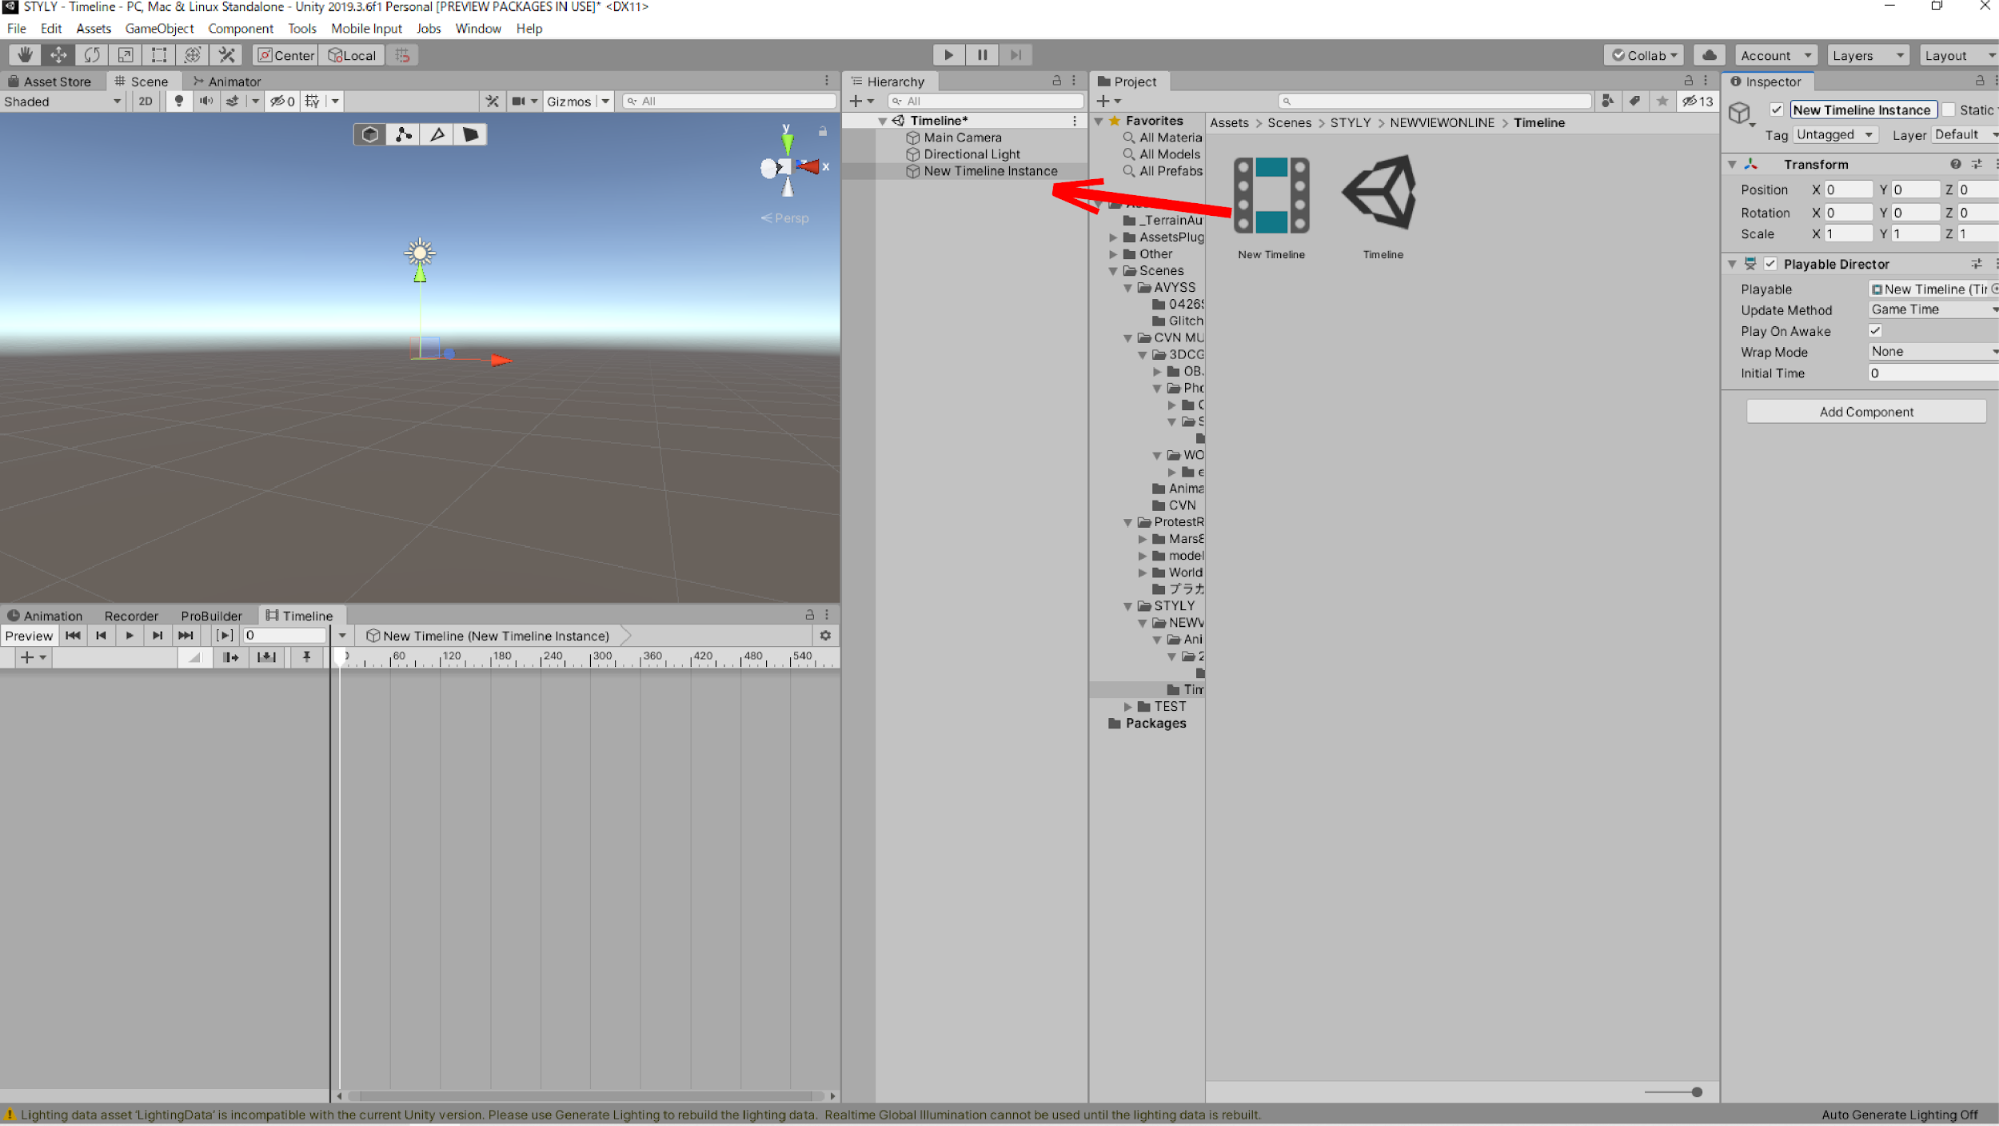
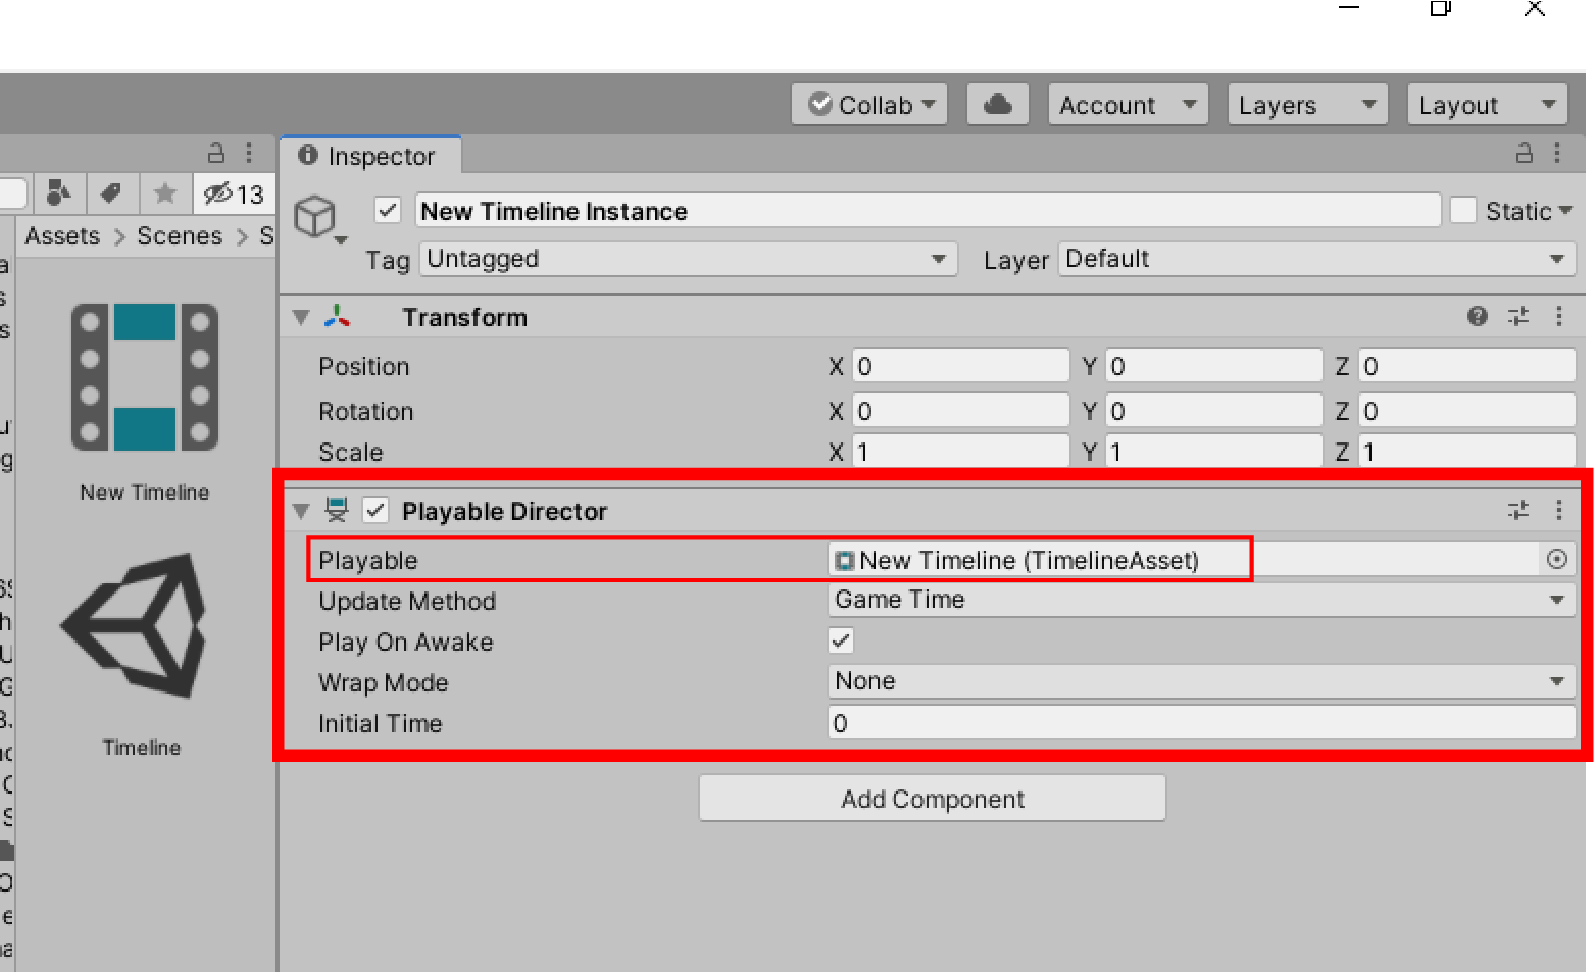
If you look in the Inspector window (hereinafter referred to as the Inspector), you will see that it has a component called “Playable Director” attached to it with the “Playable” property set to the Timeline Asset we just created, named New Timeline.
Open the Timeline Window
Double-clicking on a Timeline Asset in Project will open a Timeline window.
(It can also be opened by selecting Timeline from the window menu above).

Lock the Timeline Window for Editing
For ease of use, the Timeline window can be locked in the same way as the Inspector, and the Timeline window can display information about both assets and instances of the Timeline in the same way.
Editing is targeted at the Timeline Instance, so the Timeline window can be locked with the Timeline Instance selected.
Adding Tracks to the Timeline: Activation Track
From here, we will add the track to the Timeline.
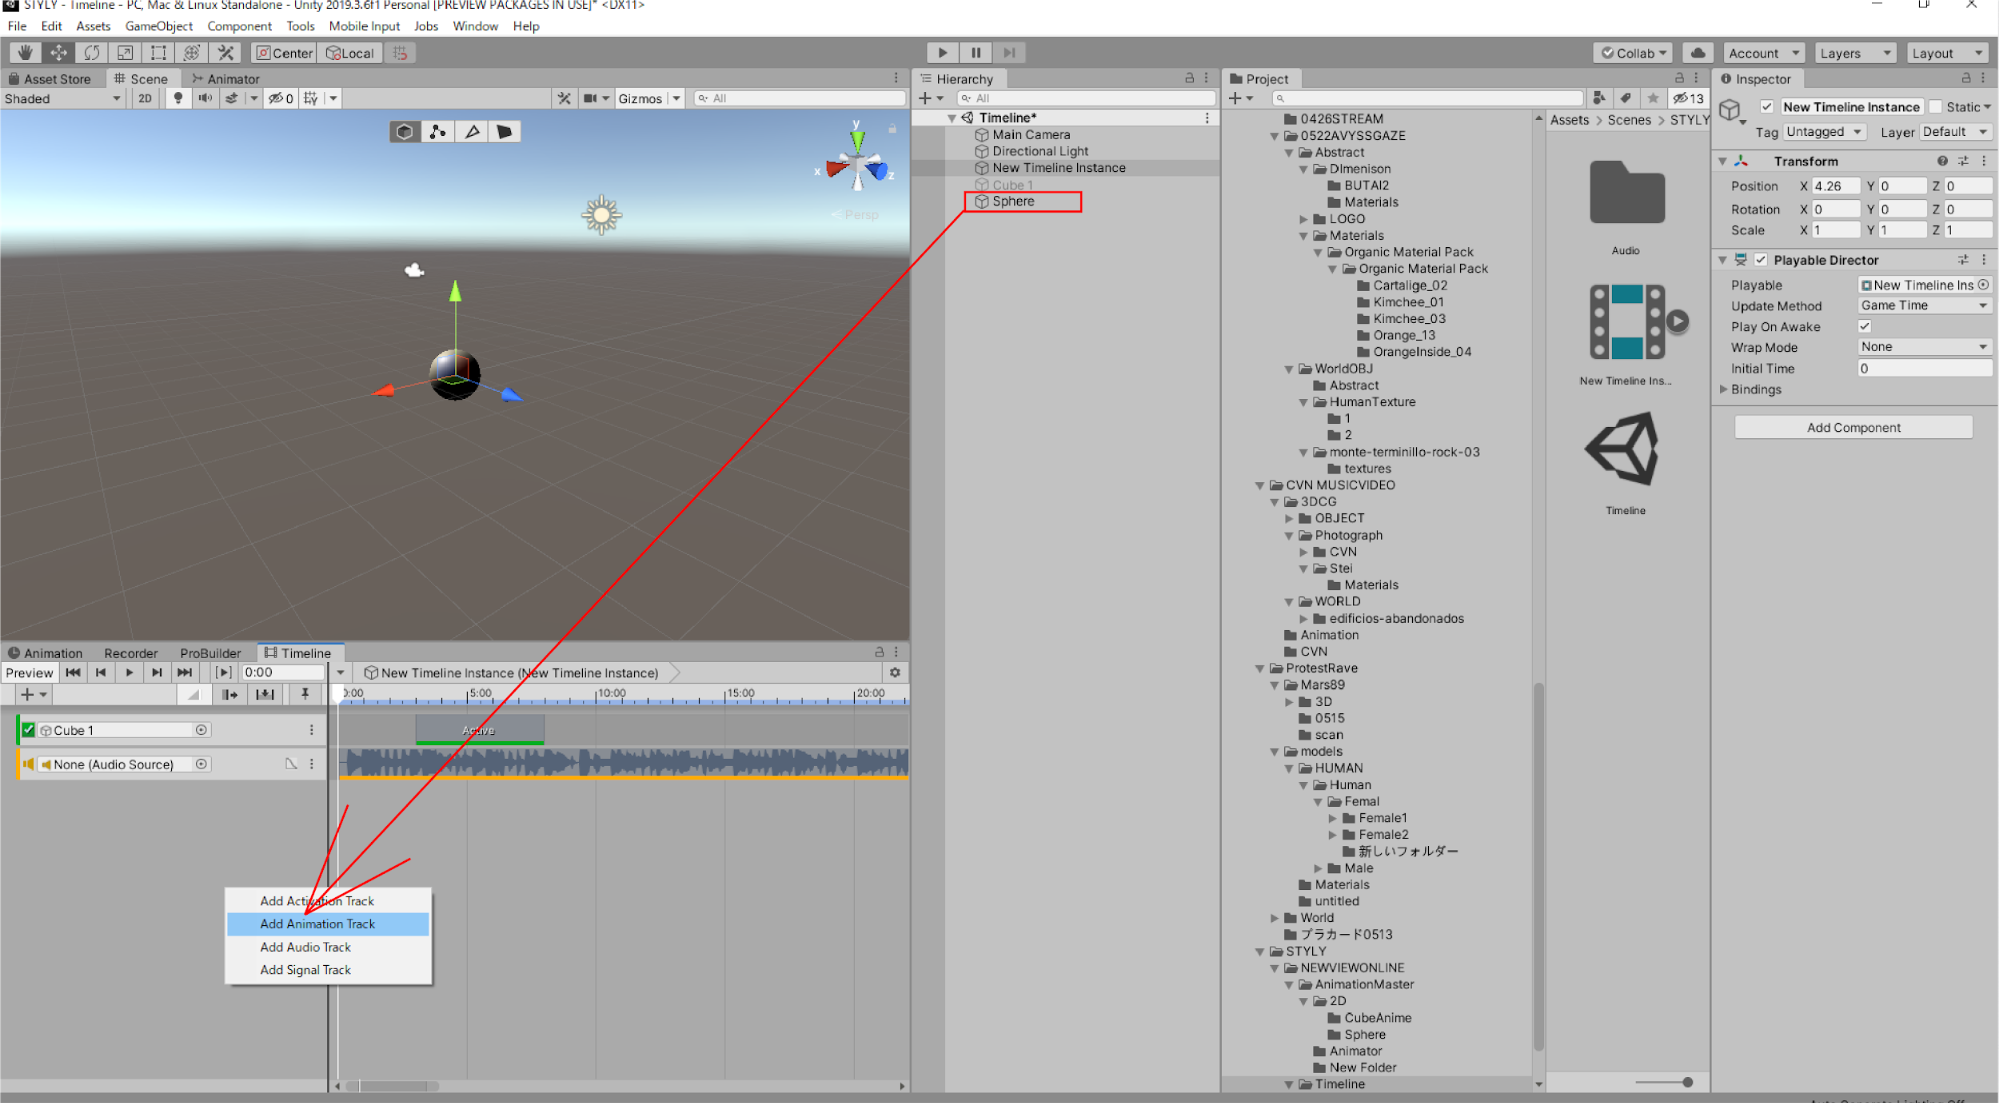
Right-click in the hierarchy and create a new Cube from a 3D Object.
Drag and drop the Cube from the hierarchy to the Timeline window.
Select “Add Activation Track” in the menu.

A track has now been created on the Timeline window.
To the left of the track you can see an icon indicating the type of track, and to its left you can see the game object (binding) that is tied to this track.

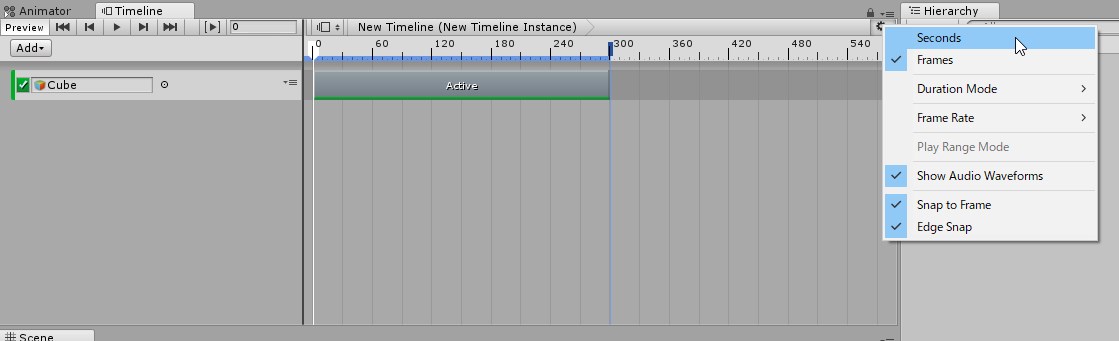
When you add a track, you’ll see a time-like scale at the top.
By default, this number is not the time, but the number of frames in the game.
To switch to time (seconds), select the “Seconds” gear icon in the upper right corner of the Timeline window.
If you play Unity in this state, the Cube will simply remain visible.
Editing Tracks: Activation Track
The “Activation Track” we just created is a track that allows you to enable or disable game objects. When it’s enabled, the Cube will appear in the scene, and when it’s disabled, it will disappear.
In the clip view (the graduated area of the Timeline window) there is a box labeled Active.
This is called the Activation Clip, and for the duration of this area, the associated game object (in this case, the Cube) will be active.
Currently, the activation clip is set to be active from the beginning of the Timeline, so we can drag the activation clip to appear in the middle of the scene, or at any point we choose.
In the example, I’ve made it appear after 3 seconds.

If you play Unity in this state, the cube does not exist at first, but after 3 seconds it will appear.
Let’s see this in action.

After 3 seconds, the Cube is now appearing!
Combining these together makes it easy to create a simple animation.
Next, let’s add some music.
Add Music with Audio Track
Importing Audio Files
In this section, you will learn how to add music to the Timeline.
First, we need to prepare an audio file.
I’ll use the following free audio file to illustrate the process. You can use music that you own.
You can download the music from the following URL:
https://drive.google.com/uc?id=1BnrEtx810lzKcUGAbEklVlzogfGCY6HG
( Source: MusMus – Free Background Music and Music Downloads http://musmus.main.jp/)
Once you’ve downloaded your audio file, it’s time to import it into Unity.
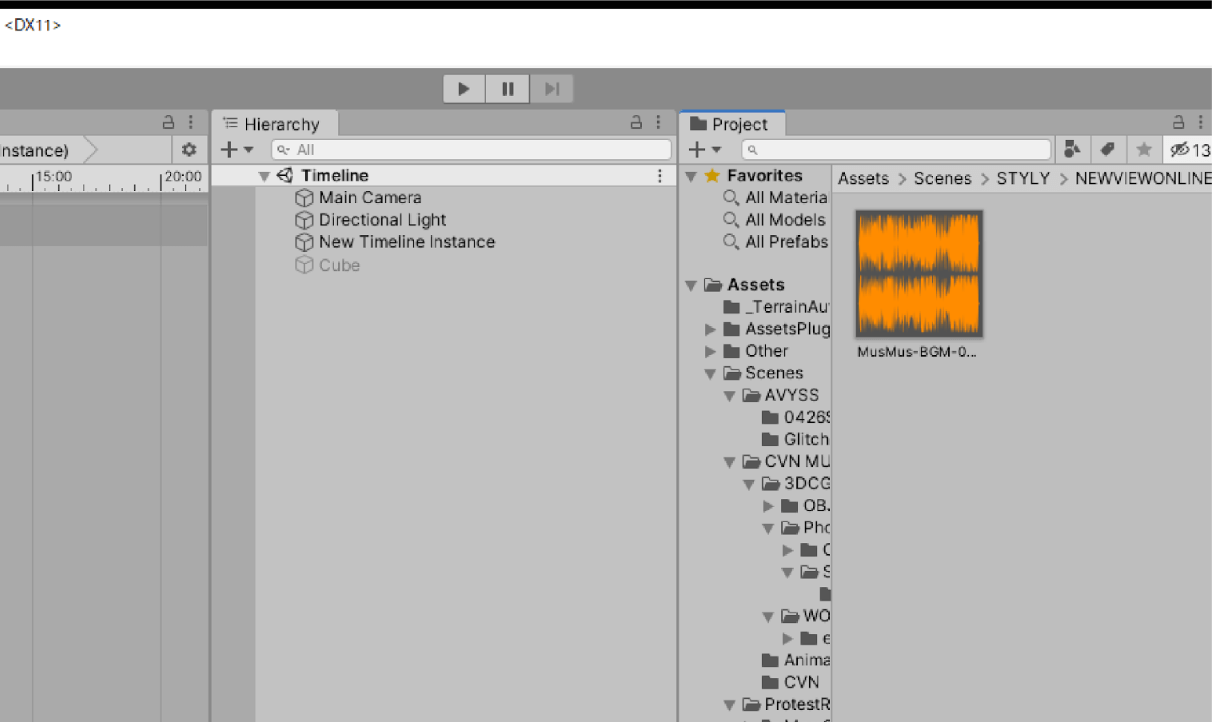
Adding a Track to the Timeline:Audio Track
Add an Audio Track to the Timeline you just created.
To add an Audio Track, drag and drop an audio clip onto the Timeline window.
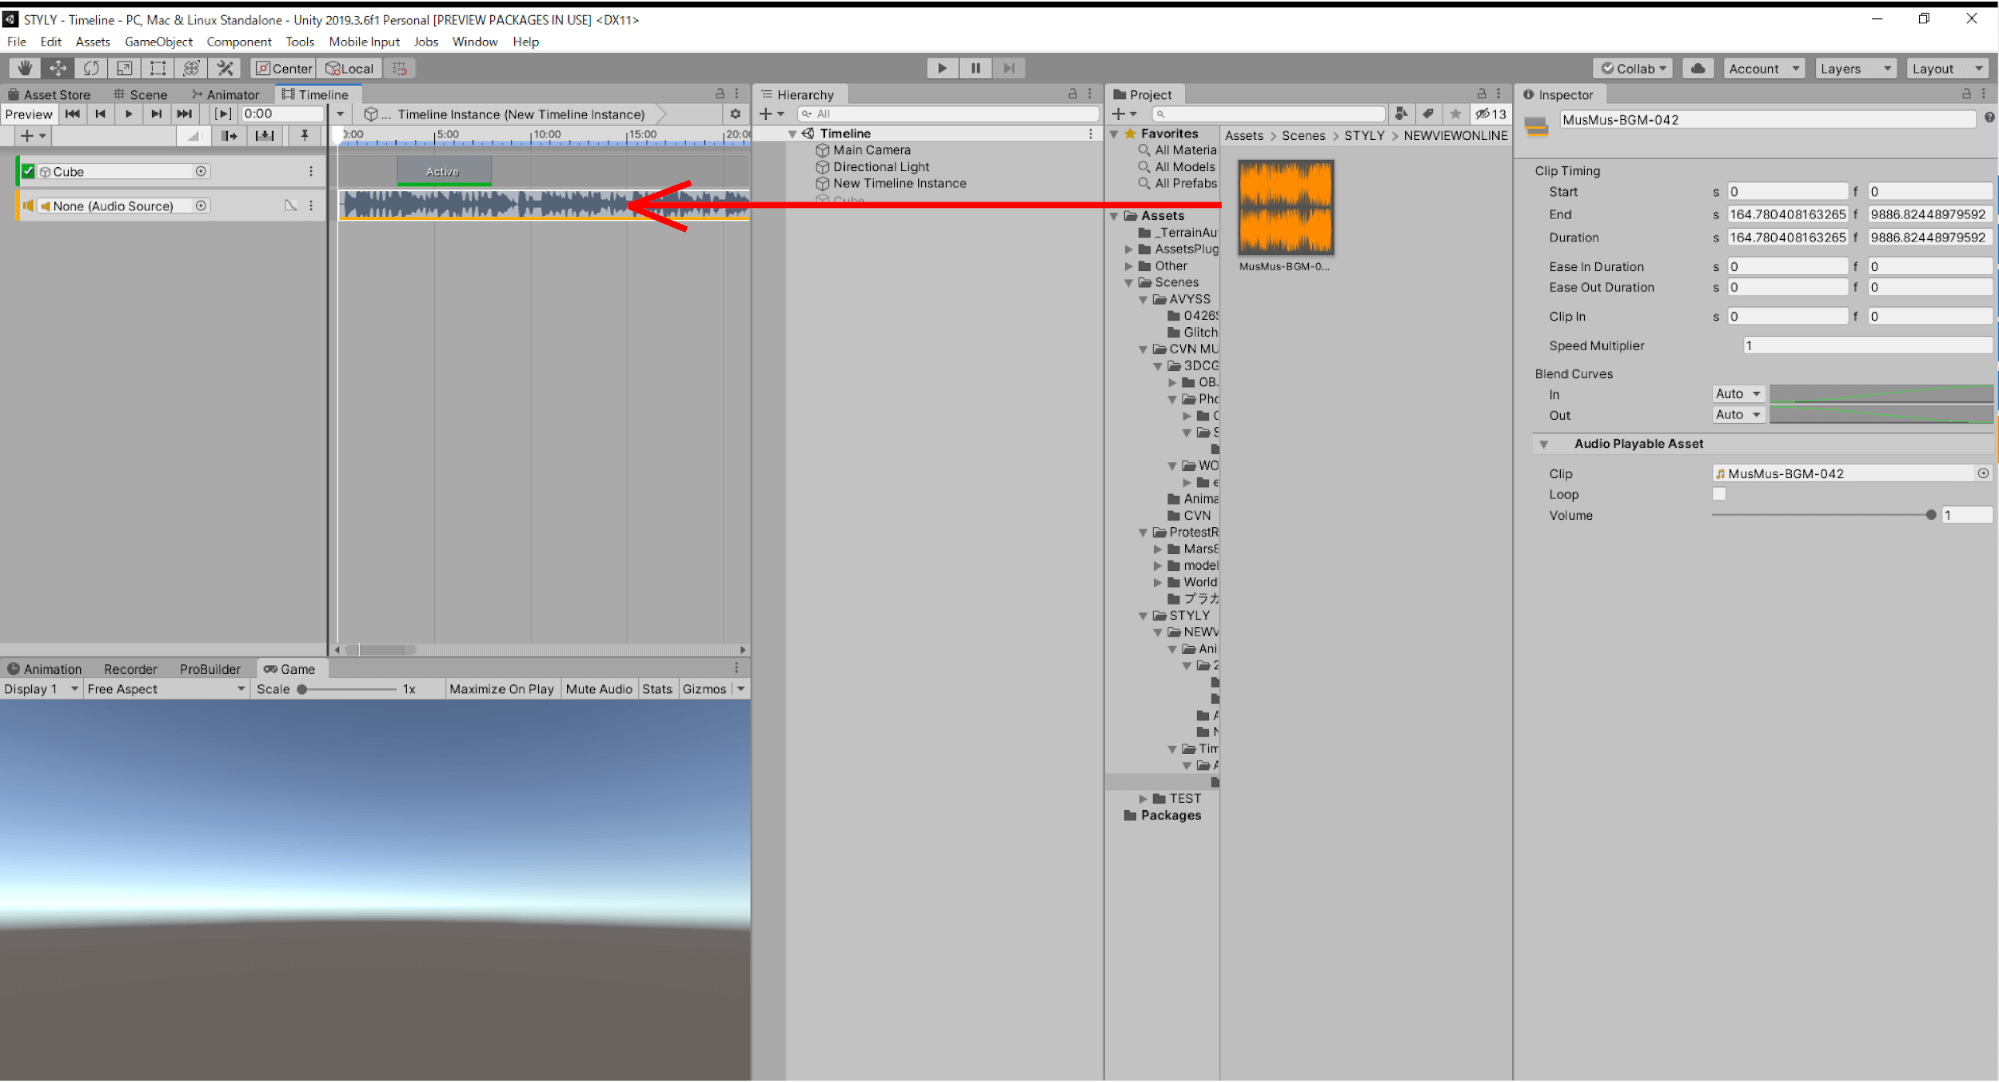
When you play Unity, the music will play at the start of your scene.
Check the audio waveforms, etc., and try to create an animation where the audio and the object’s movements are in sync.
TIPS
- How to use the Mouse, Keys, and Trackpad
Scrolling(x with the mouse wheel or trackpad): stretches (scales) the clip view horizontally.
Ctrl+Scroll:stretches the track height.
Alt (Option) Dragging the clip view: You can drag horizontally.
- The combination of the play button or fast forward button in the upper left corner of the Timeline window (Timeline playback control) and the white playback head on the scale makes it possible to play the Timeline anywhere on the scale without having to play the Unity editor to see what happens on the Timeline.
- If you want to start at any position, including audio, you can change the starting position of the Timeline by changing the [Initial Time] property of the Timeline Instance. However, this is not temporary and will be saved, so set it back to zero at the end if you are using it for confirmation purposes.
Creating an Animation with the Animation Track
Adding a track to the Timeline:Animation Track
Next, we will use the Animation Track to control a complex animation in the Timeline.
First, create a Sphere by right-clicking on the hierarchy to add an Animation Track and selecting Sphere under 3D Object.

Once the Sphere has been created, drag and drop it onto the Timeline.
Select “Add Animation Track” from the menu that appears.
If an Animator component is not attached to the game object, it will be added automatically. This is because the Animation Track is bound to the Animator.
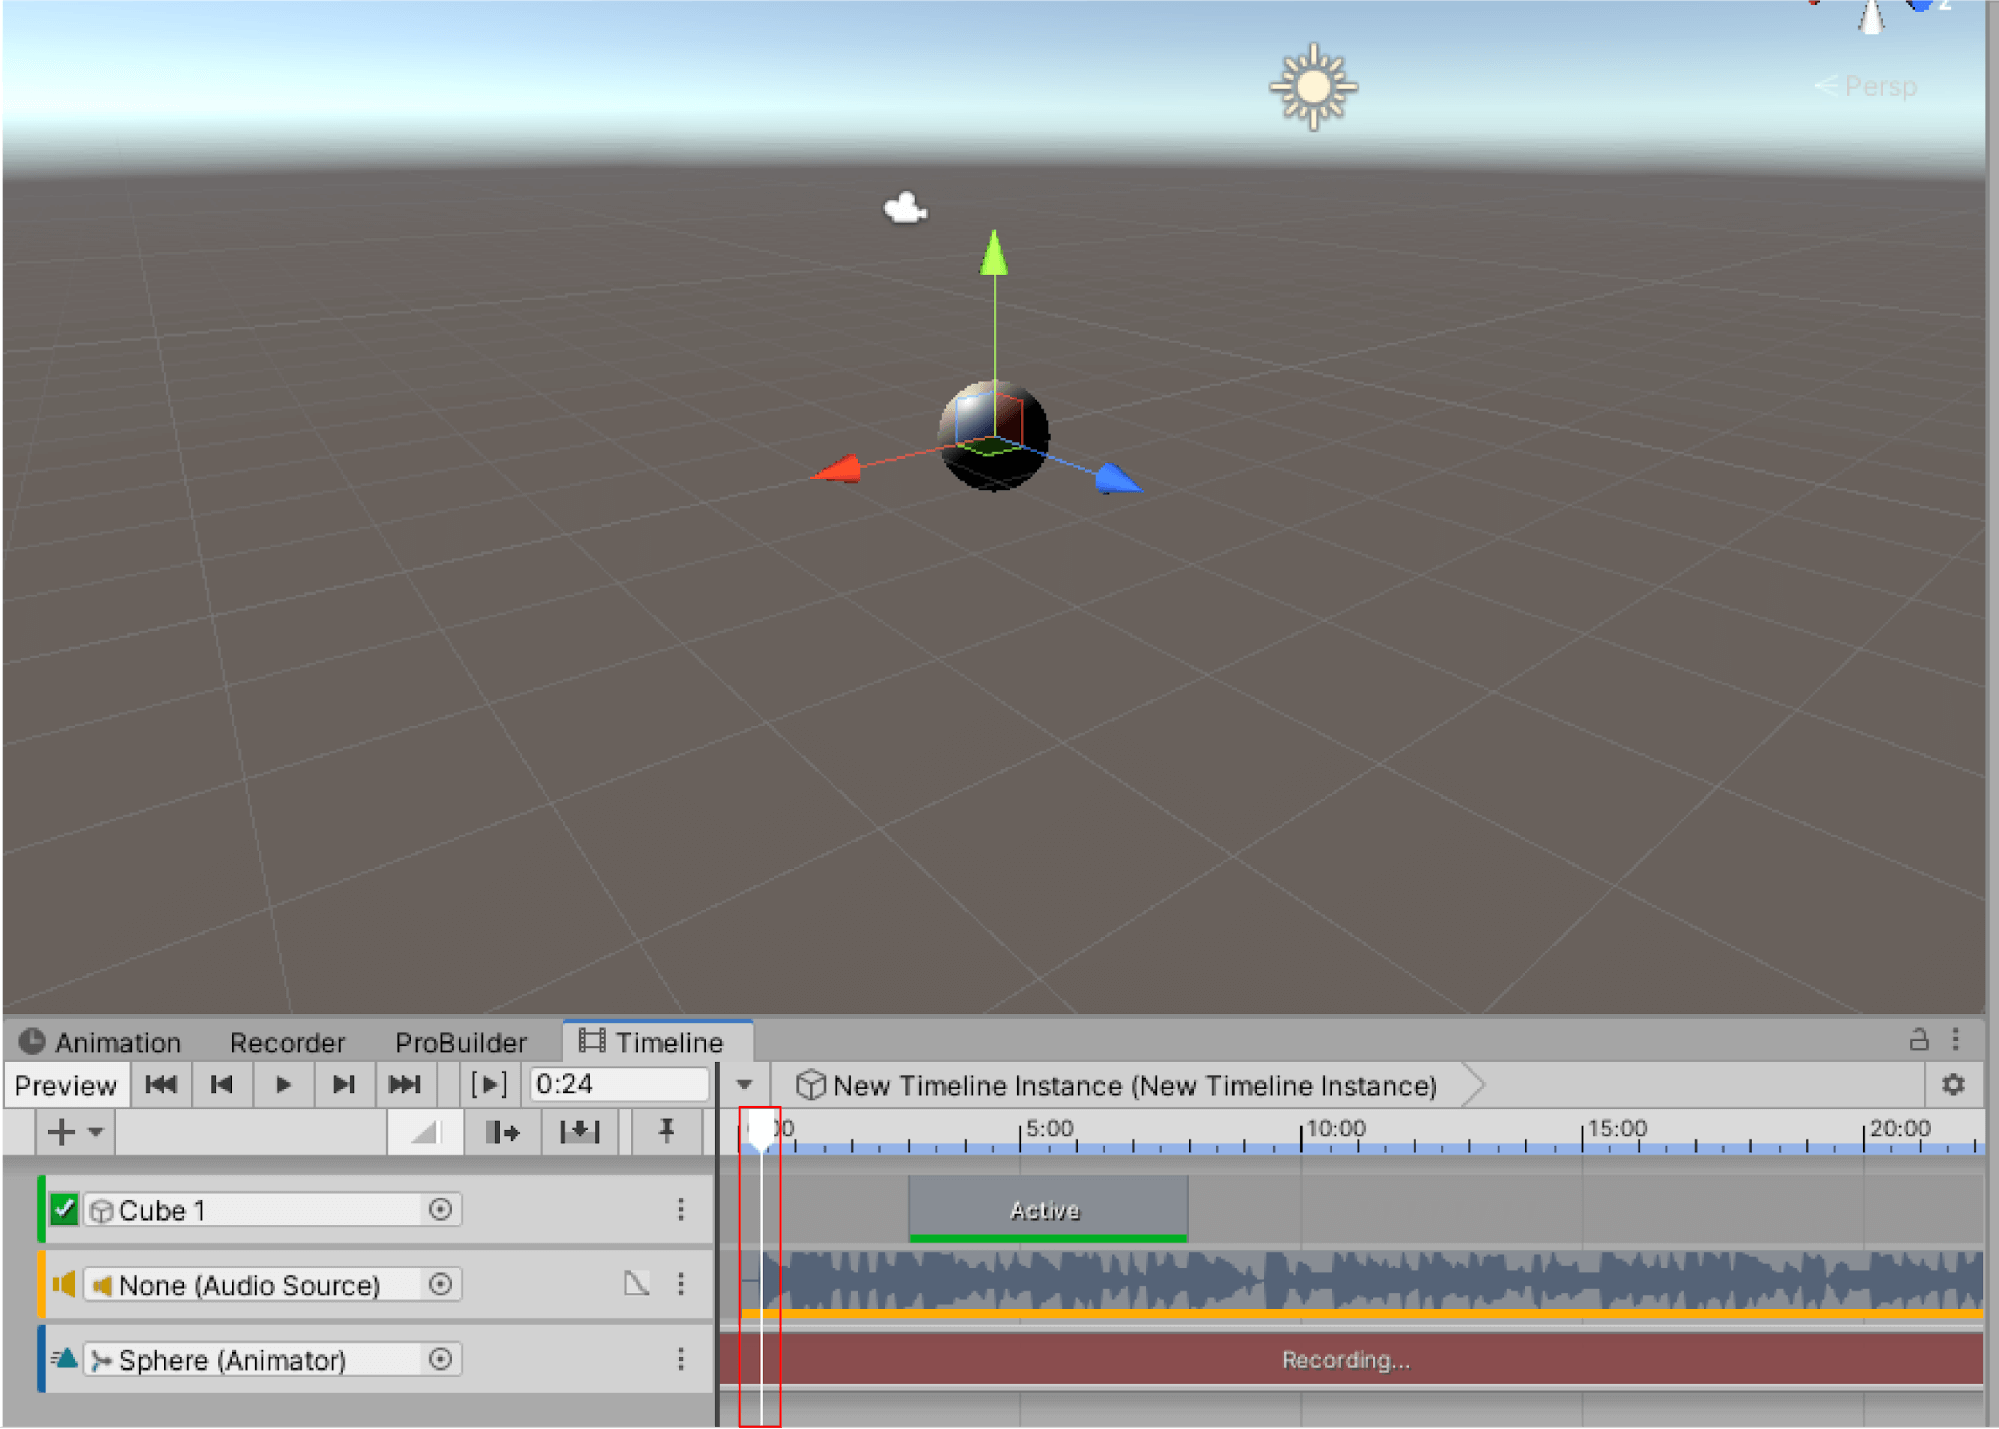
Enter Record Mode to Record the Animation
To create a clip to add to the Animation Track, we’ll animate and record manually.
To start a record, use the light red button to the left of the clip view in the Animation Track.
When you press the Record button to enter record mode, the Record button will flash and the Animation Track clip will display “Recording…” in the Animation Track.

Record the Animation
Now that we are in record mode, we will animate the target game object and record it.
The recording is done by manually changing the target property value to the timing (i.e. frames or seconds) that you want it to be, and then creating a keyframe within the clip.
For example, 3 seconds after the start of the Timeline (timing), the Y coordinate should be 10 (property value).
The property values between the keyframes will be interpolated automatically.
In the following example, we will create a keyframe by changing the Position of Sphere as the target property.
To change the Position, you can either use the Inspector to change the value or move the game object to the desired position in the Scene View.
(If the value of the property you want to change is the color of a material, you can do so from the Inspector.)
Move the Playback Head to the Desired Frame
Drag the white playback head to the desired frame.
In this case, I brought it to the music head.
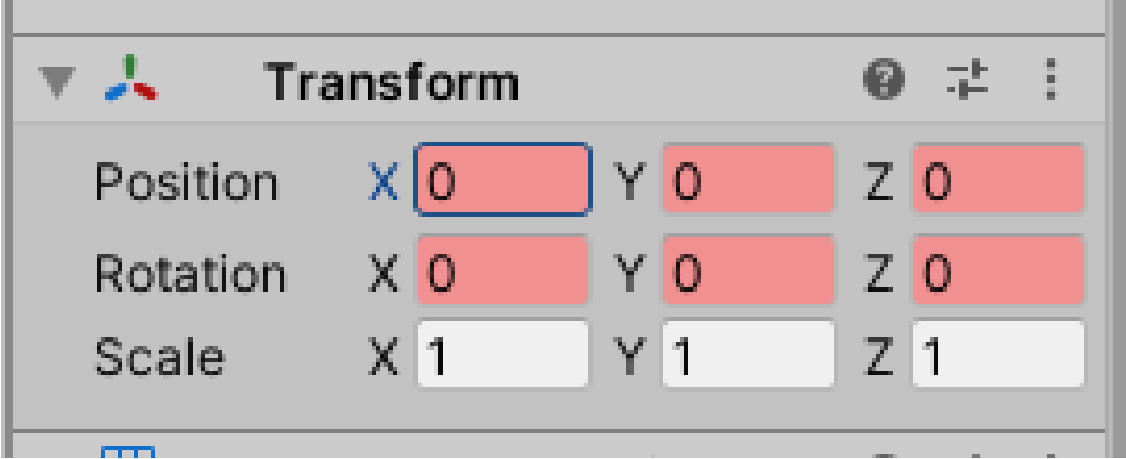
Change the Numbers
Change the game object you want to animate by selecting it in either Scene View or Hierarchy View and typing a value directly into the Inspector.
In this case, the Inspector value is as follows:
You will see a white diamond in the clip. This is a keyframe.
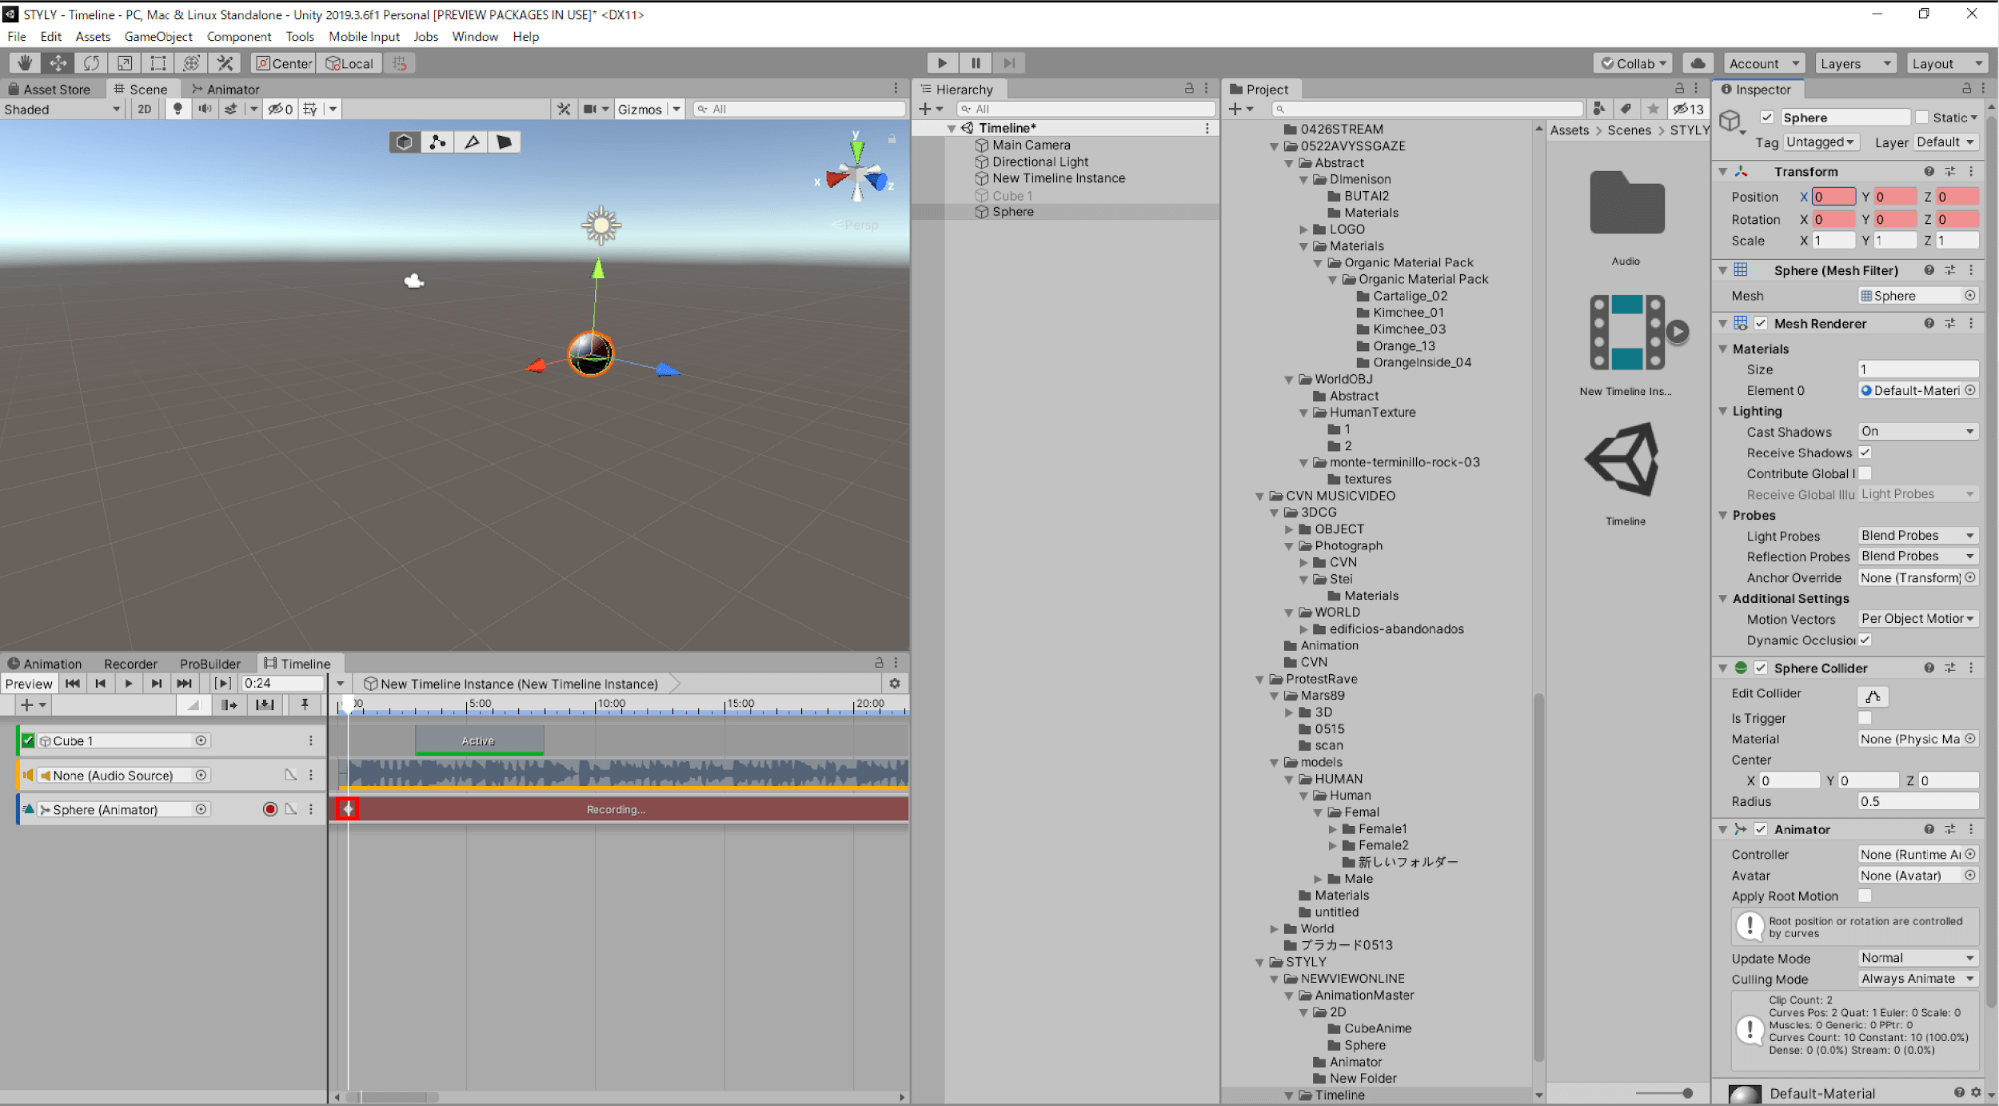
If you want to set the current property value as a key, right-click on the property name. Select [Add Key] on the menu.
(If the key already exists, “Update Key” will be displayed and you can update the value.)
Next, let’s set the X value to 7 at 3:00.
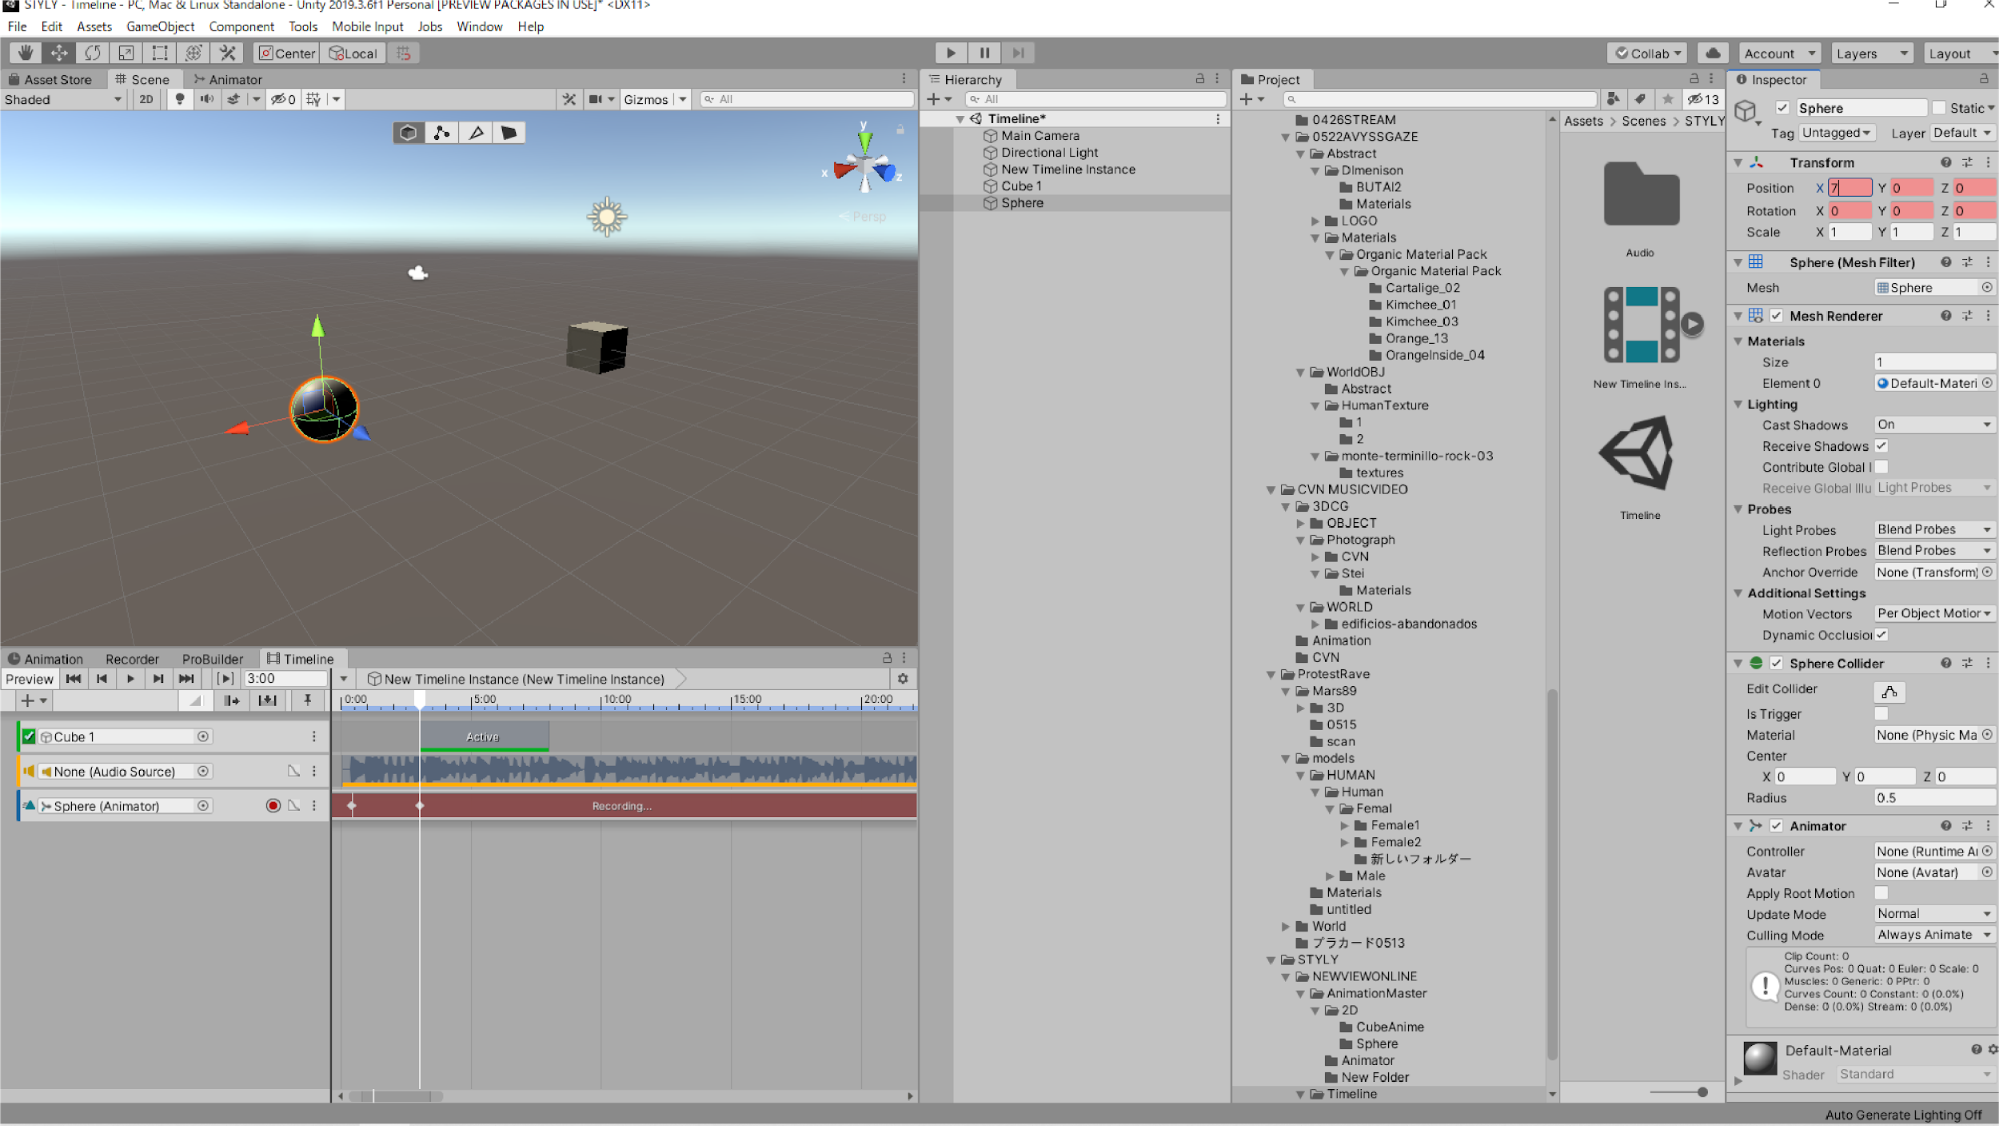
Now you have the animation set up.
Exit Record Mode
When you have finished creating the desired keyframe, press the Record button to exit record mode.
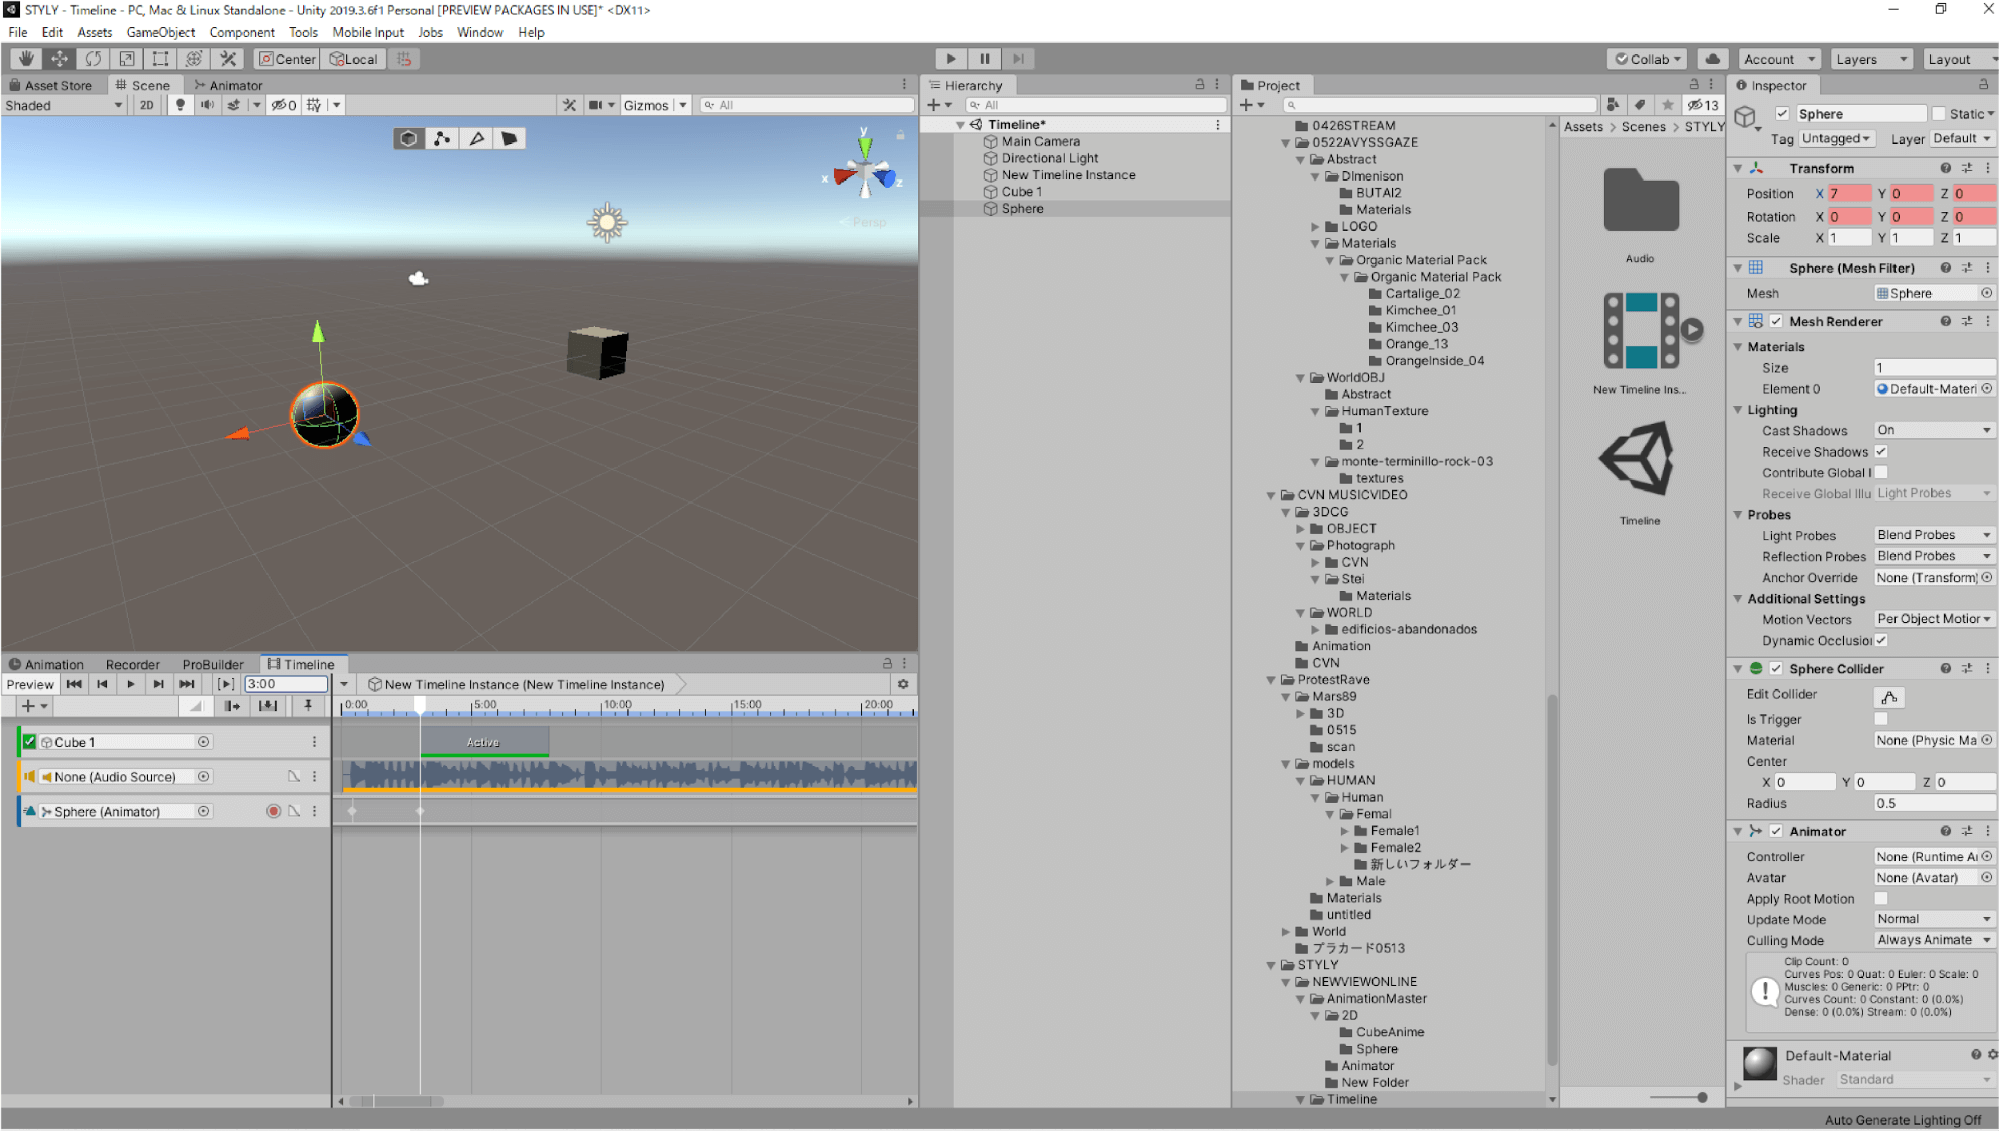
When you play Unity in this state, the target game object will animate between the keyframe you created and the target game object.
Below is a GIF so there is no music is playing, but if your have followed the above instructions correctly it will be playing in your scene.

With Animation Track, you can set up animations like this to create free movement in the Timeline.
Make use of the Timeline to create all sorts of effects.
Supplement
Pressing a button like “Holder” on the right side of the record button will open the curve view.
The curve view shows the changes in the animation as curves.
Each curve shows a change in the value of a property (in the example, the x, y, and z curves of the Position).
You can select a key here to delete it.
(In addition to deleting a key, you can also edit the curve view in a more flexible way. For more information, see the Unity manual. → Curved View )


Upload to STYLY
Upload the scene you’ve created in your Timeline to STYLY.
How to create an account

How to upload to STYLY from Unity
