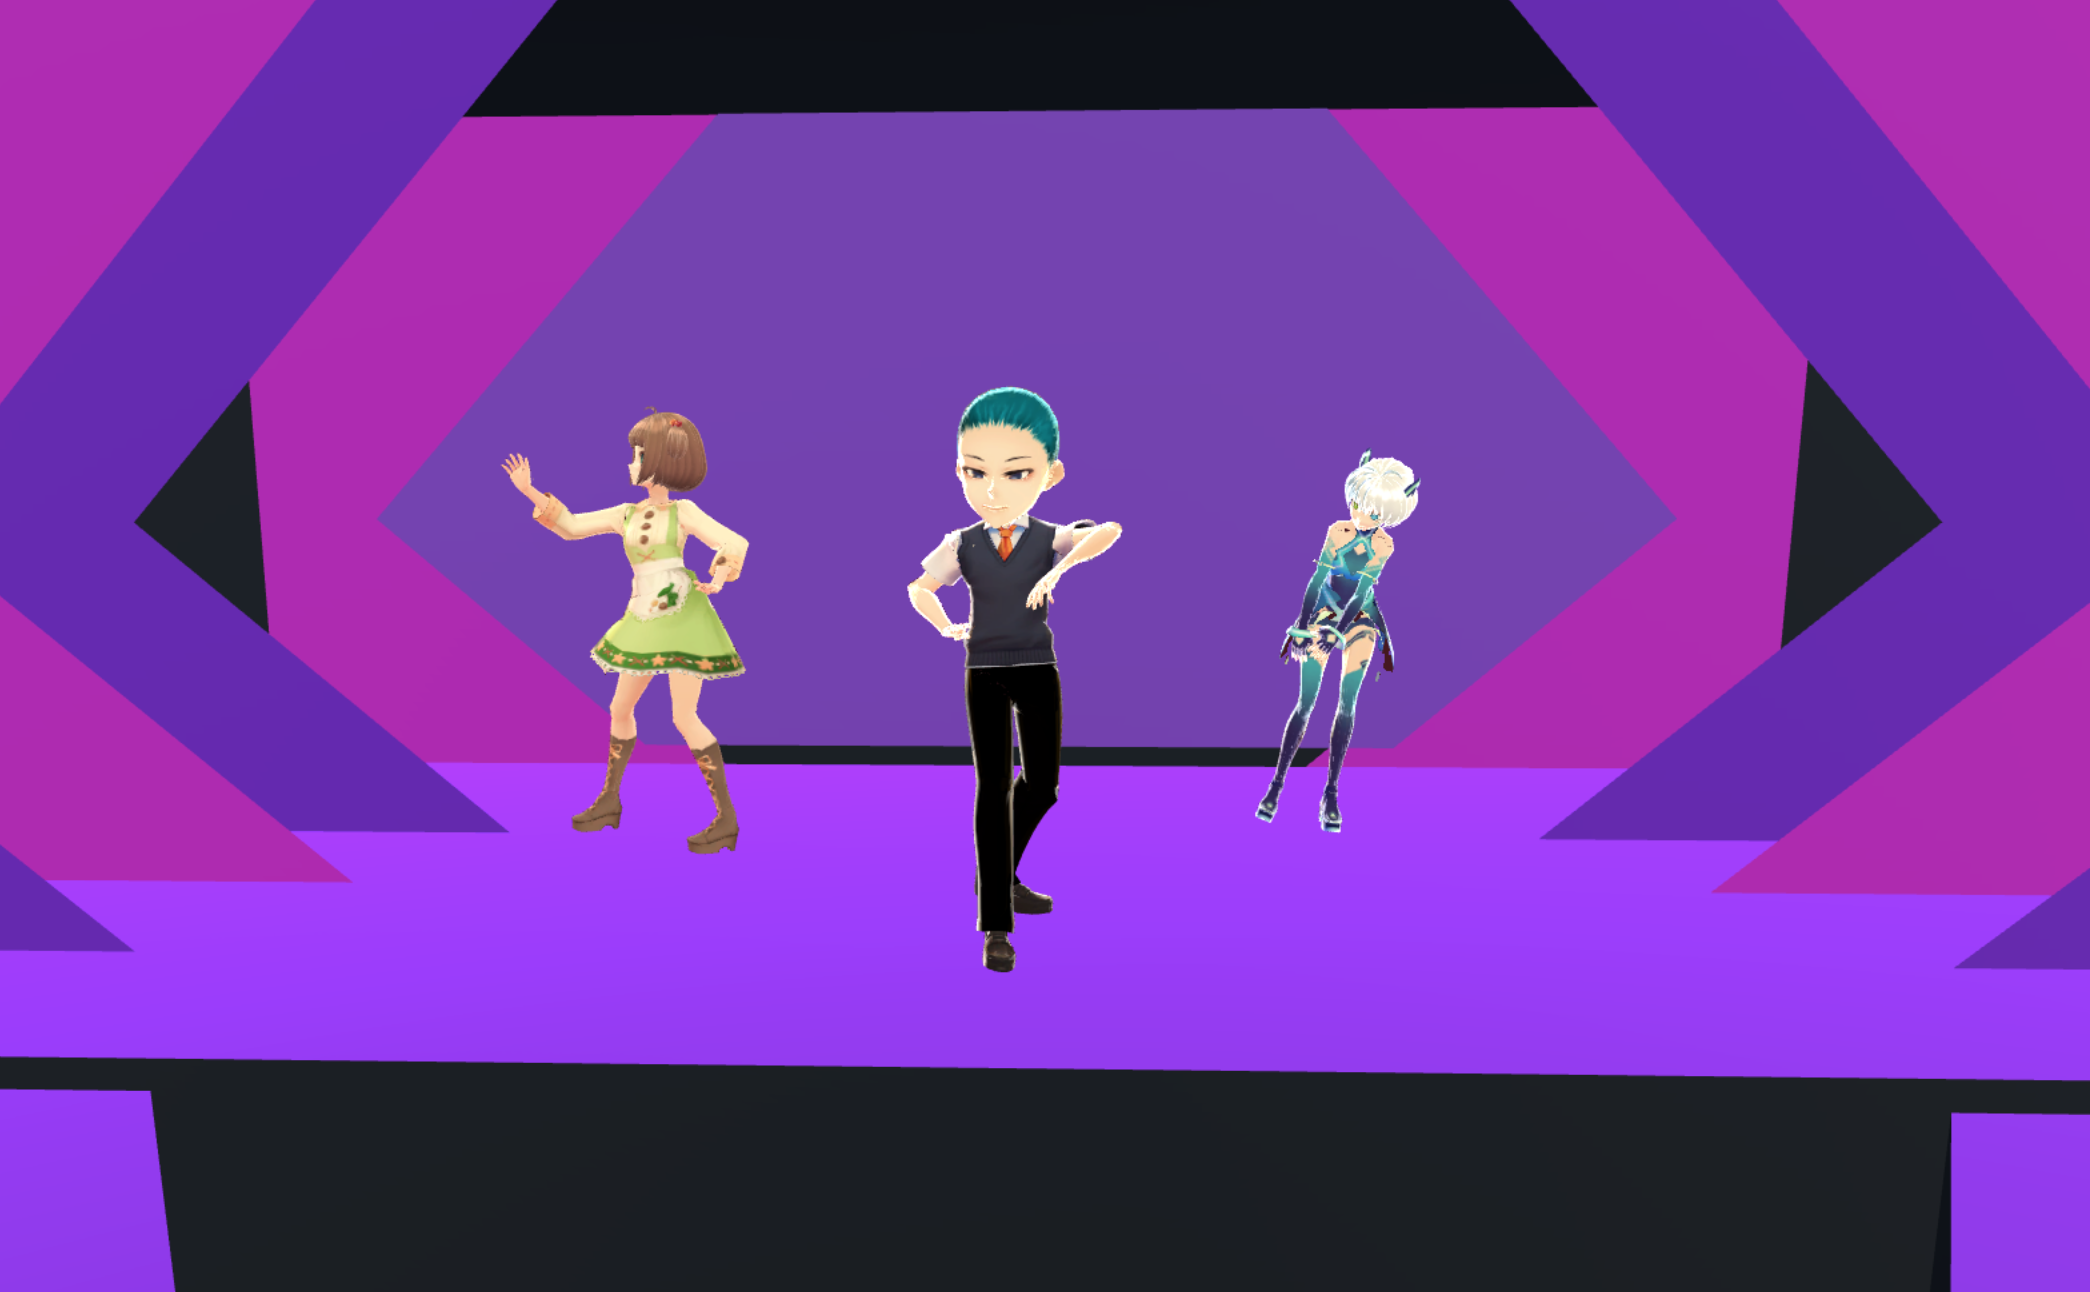
In this article we will introduce an application called VirtualMotionCapture.
VirtualMotionCapture is an application to control a 3D model in VRM format with VR devices, and I recommend it for those who want to become a ‘Vtuber’.
In addition, since it can be launched simultaneously with a VR game application, you can record an MR video as if the character entered the world of the game application by combining the game application screen with the VirtualMotionCapture screen.
Below we explain how to become a Vtuber with VirtualMotionCapture and the space generated by STYLY.
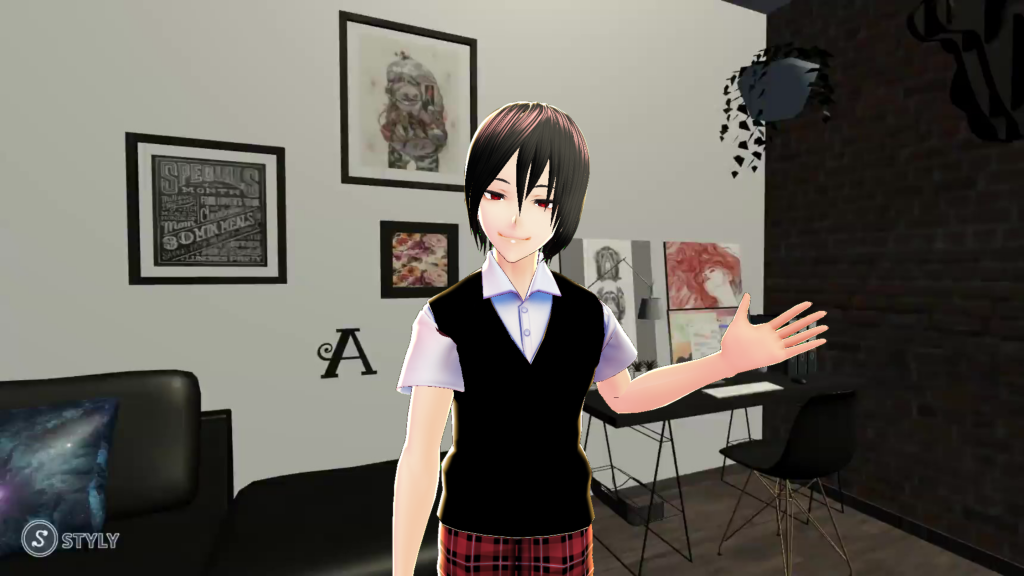
The completed image.
Introduction and preparation
Introduction
In order to record the MR video that combines the screens of the VR-game application and VirtualMotionCapture, you need to use the application for MR-overlay such as LIV, and the MR-overlay function by using externalcamera.cfg.
We will explain how to use those applications and how to set up them in the next article, so here we will introduce the basics of how to use VirtualMotionCapture.
Preparation
VirtualMotionCapture is the application that handles the 3D model defined by the file format called ‘VRM’, so you need to prepare a 3D model in VRM format. In addition to the models sold or distributed, you can also use your original VRM model created with the tools such as Vroid, ‘Cecil Henshin Application’.
▼This article explains how to use VRoid▼
Also, we use a live-streaming application called OBS Studio at the final stage, so download this software as well.
If you are familiar with other live-streaming software, you may use it instead.
▼Download OBS Studio from here▼
https://obsproject.com/ja/download
What is VirtualMotionCapture?
It is an application that allows you to control VRM-format 3D model by VR device (HTC Vive/Oculus Rift/WinMR), so you can become so-called Vtuber.
Unlike other common applications that control the model by VR devices, it can control the model while playing a VR game.Reference: https://sh-akira.booth.pm/items/999760
The most notable feature of VirtualMotionCapture is that you can launch it simultaneously with the VR-game application, which is considered impossible with other common applications.
By using this feature, you can move a character in sync with the motion of the player who plays the VR game, so you can livestream the VR game like a Vtuber. In addition, instead of launching it with the VR game, you can simply use it to control a 3D model, which is also an advantage for various applications.
*Note: VirtualMotionCapture supports English UI. You can select the language by the drop-down box at the bottom of the ‘Settings’ window.
Download VirtualMotionCapture
You can download VirtualMotionCapture for free from BOOTH. If you are a paid subscription member, the pre-release version can be downloaded from pixv FUNBOX.
For the purposes of this article we will download the free version (Ver 0.23) from BOOTH.
▼BOOTH▼
https://sh-akira.booth.pm/items/999760
Import VRM model
After launching VirtualMotionCapture, import the VRM model you want to control.
When launching the application, the control panel will appear.
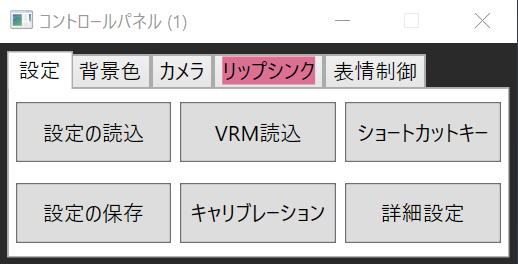
Control Panel.
Press the ‘Open VRM’ button on the ‘Settings’ tab to open the ‘file-selection’ window.
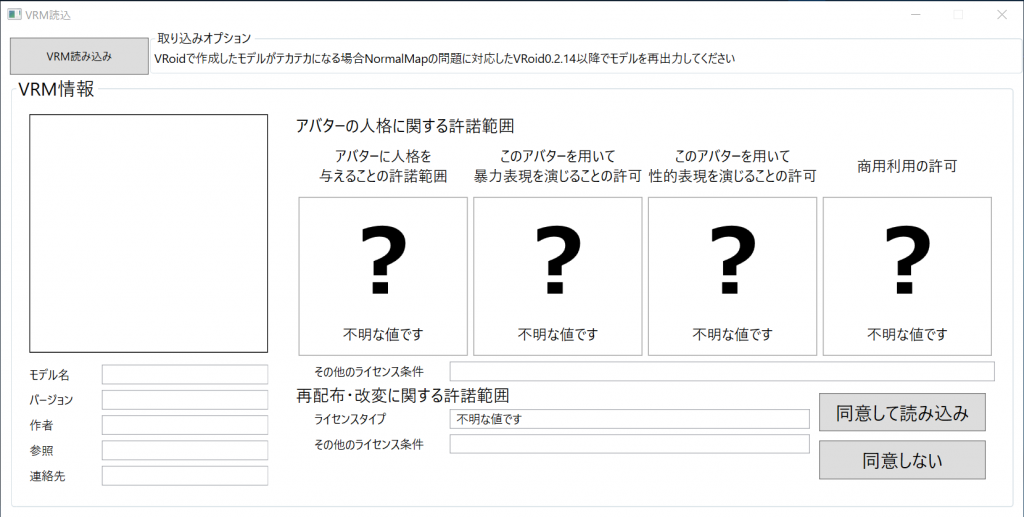
Select the VRM file by pressing the ‘Open VRM’ button.
Select and open the VRM file prepared earlier. It brings up the license information for the avatar, so check it closely before pressing the ‘Agree / Import’ button if you use the purchased model etc.
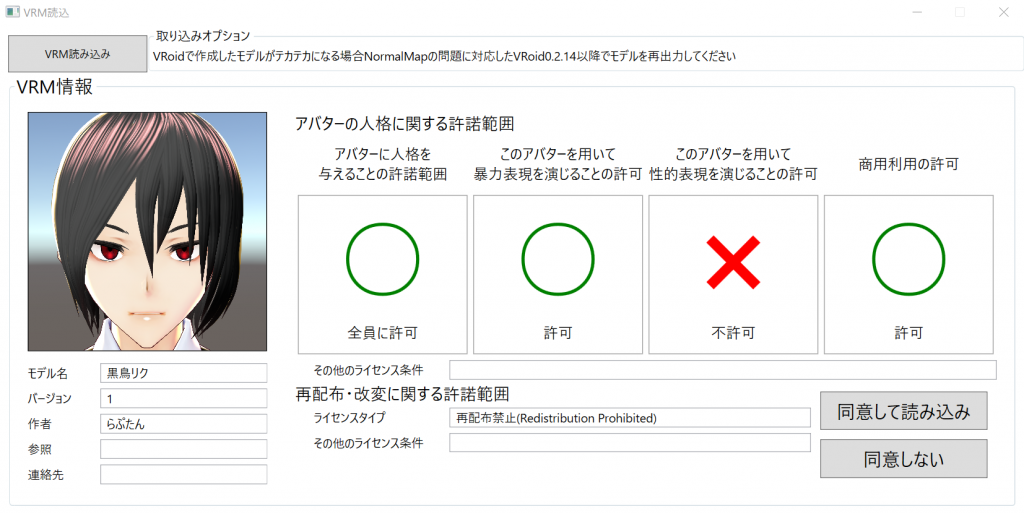
The license information is displayed.
In the case you use your original model was created with VRoid etc., the avatar information you set is displayed, so just press the ‘Agree / Import’ button. If everything goes well, the model will be displayed on the screen.
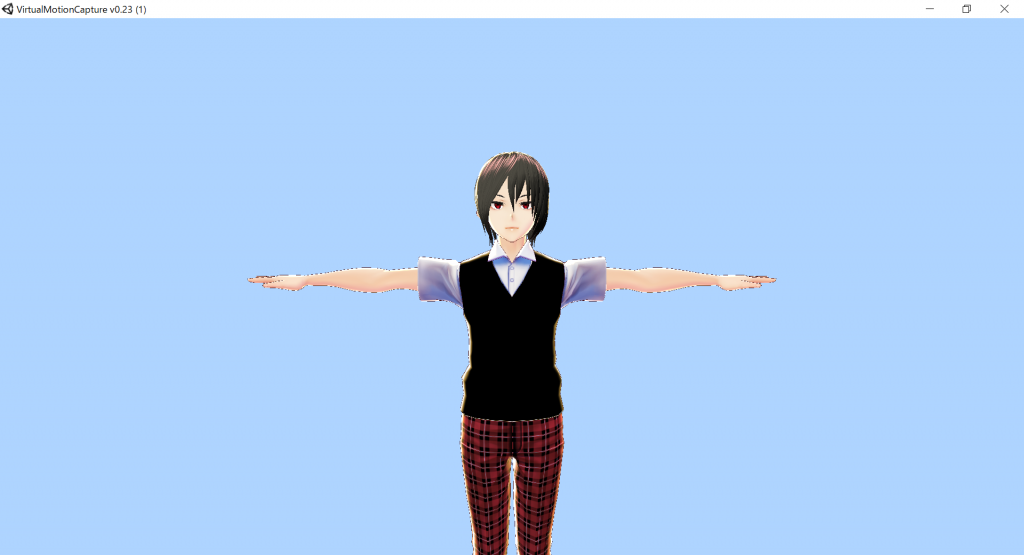
The model has been imported.
The Setting for Camera, Lip Sync and Trackers
The Setting for Camera
You can set up the Camera by selecting the ‘Camera’ tab. Press ‘Front’ as we want to use the Front Camera.
Click the main screen and then use the mouse to adjust the position of the Camera.
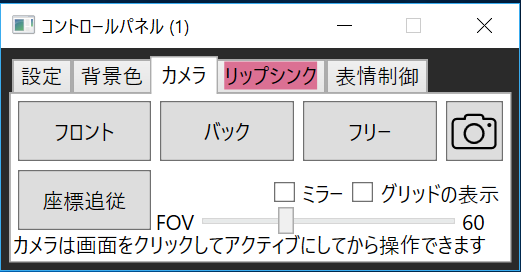
The setting for the Camera.
The Setting for Lip Sync
By setting up ‘Lip Sync’, you can animate the lip of the avatar in sync with the voice input by the microphone. If you have not specified the microphone for Lip Sync, the ‘Lip Sync’ tab is shown in red, so you can easily see whether it’s set up or not.
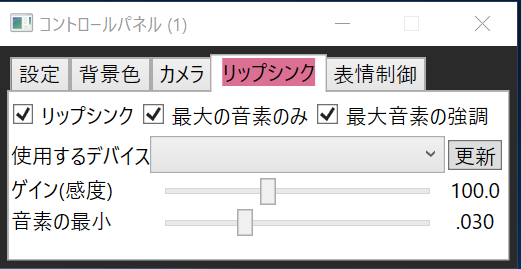
The ‘Lip Sync’ tab – The microphone has not been specified.
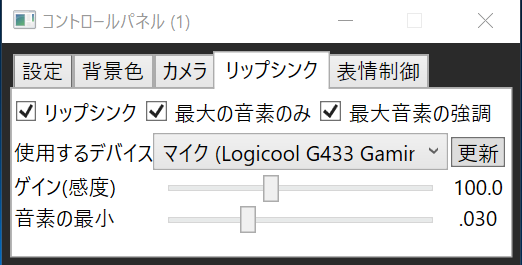
The ‘Lip Sync’ tab – The microphone has been specified.
If you don’t use Lip Sync, you don’t need to set it up.
The Setting for Trackers
VirtualMotionCapture also supports ‘full tracking’ by Trackers. In order to assign the Trackers, press the ‘Setting’ button on the ‘Settings’ tab.
Next, press the ‘Tracker Config’ button to open the ‘Tracker assignment setting’ window where you can assign the Trackers. As we won’t use Trackers this time, leave it with the default settings.
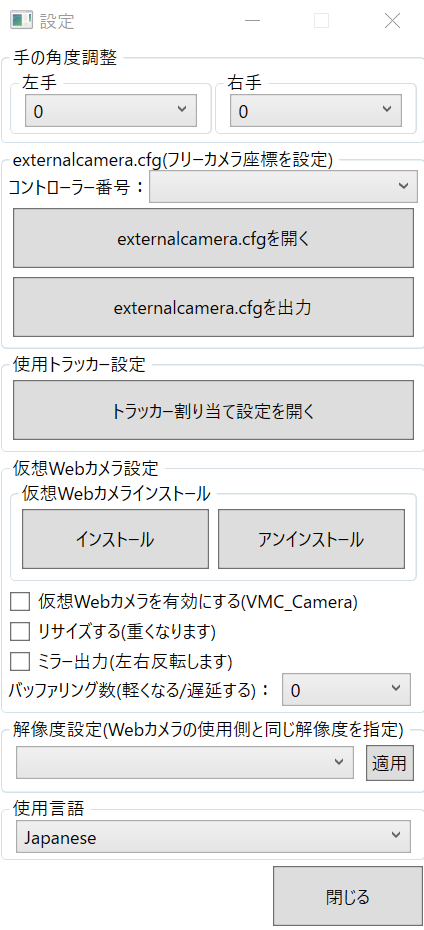
The ‘Setting’ window.
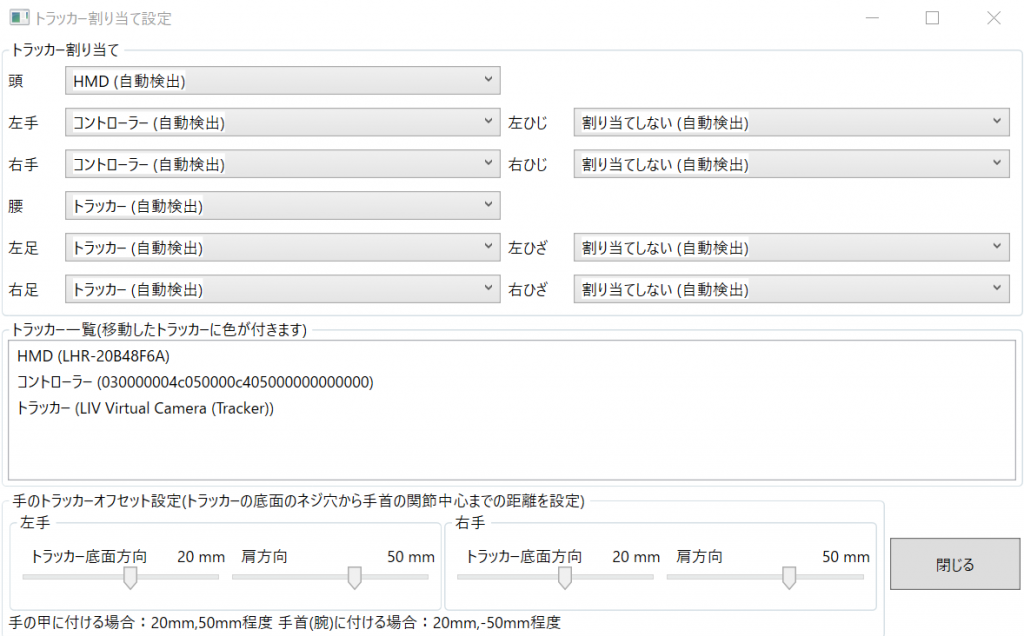
The ‘Tracker assignment setting’ window.
Calibration
After finishing the settings, let’s move the model straight away.
Press the ‘Calibration’ button on the ‘Settings’ tab.
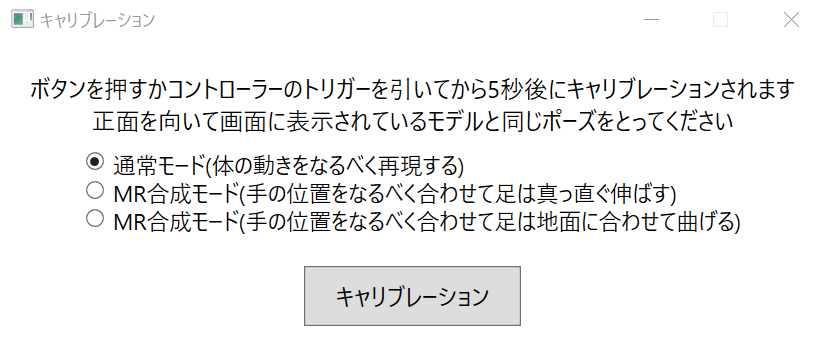
The settings for Calibration.
There are three modes for the calibration. This time, select the ‘Normal’ mode at the top. The calibration starts after 5 seconds when pressing the ‘Calibration’ button or pulling the trigger of the controller.
Spread your arms, keep the controllers upright and turn your palms forwards. Although the screen instructs ‘take the same pose as the model displayed…’, the angle of the wrists would go wrong if you turn the controller and your palms downward.
The white spheres displayed in the main screen represent the positions of the HMD and the controllers. Adjust the position of the HMD and the controllers so that those spheres are at the head and hands of the model.
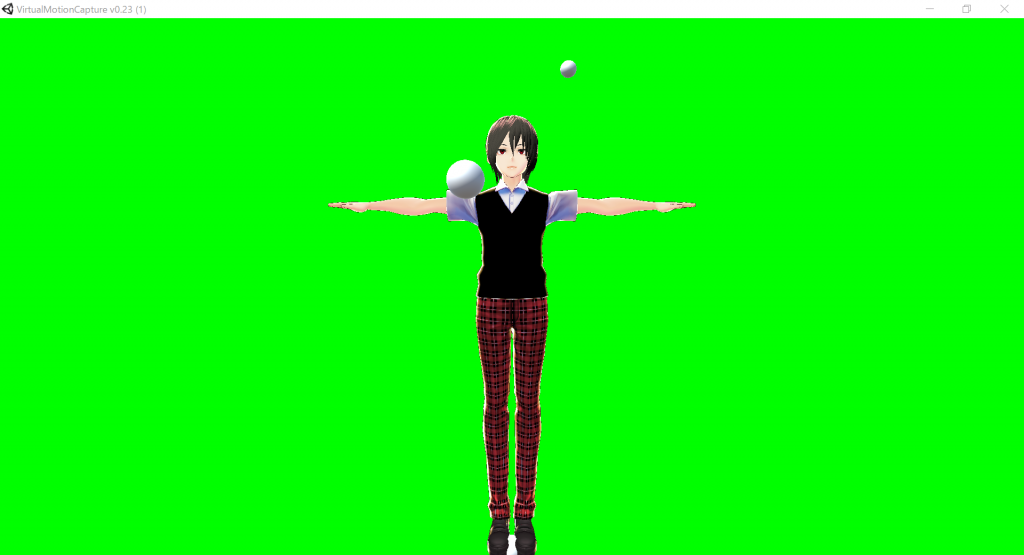
The spheres represent the positions of the HMD and the controllers.
You can control the model if the calibration is successful.
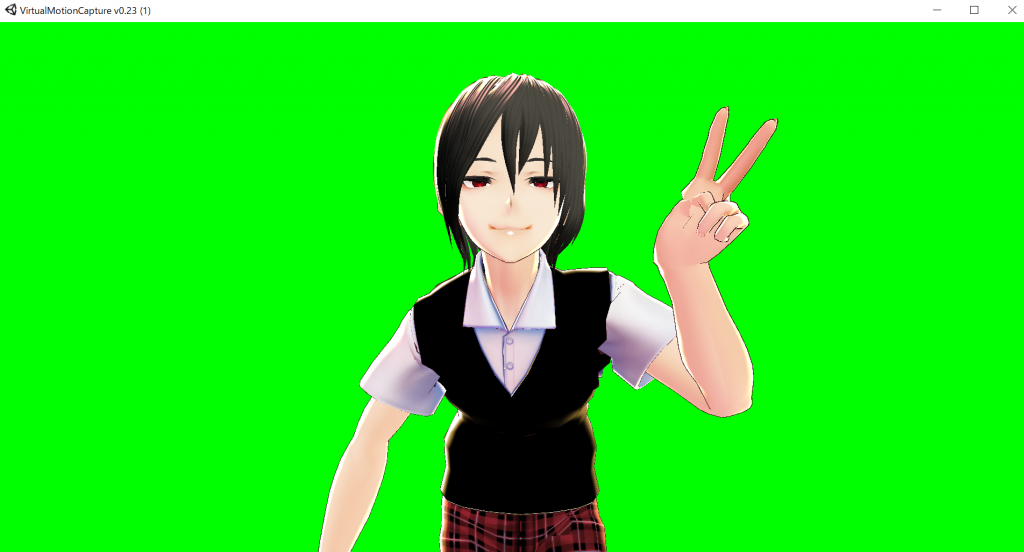
The calibration is successful.
How to Cecome Vtuber with STYLY
Now you are able to move the model. Next, create the live-streaming screen for Vtuber by using the space created with STYLY as the background.
The Setting for Background Colour
By selecting the ‘Background’ tab, you can change the background colour to ‘blueback’, ‘greenback’ or other colours. If you select one of those background colours, you can combine the character controlled by VirtualMotionCapture with the image or the video you want to use as the background, by using the ‘Chroma key’ processing.
In addition, you can select ‘transparent’ as the background of VirtualMotionCapture, so it’s possible to overlay the character on the desktop screen. This time, by using ‘greenback’, we apply ‘Chroma key’ to the screen of VirtualMotionCapture to combine the character with the space created with STYLY.
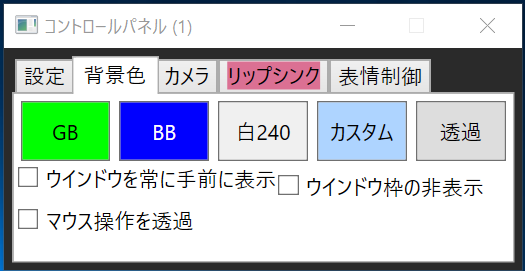
Select the background colour.
Prepare a Space with STYLY
Create your favourite space with STYLY Editor. Since we use the space as the background, you may create a dummy space by modelling only what the camera can see. As you can record the video of the space with the Camera function in STYLY Editor, you can also make the background with motions.
This time, we will use what is shown in the screenshot below.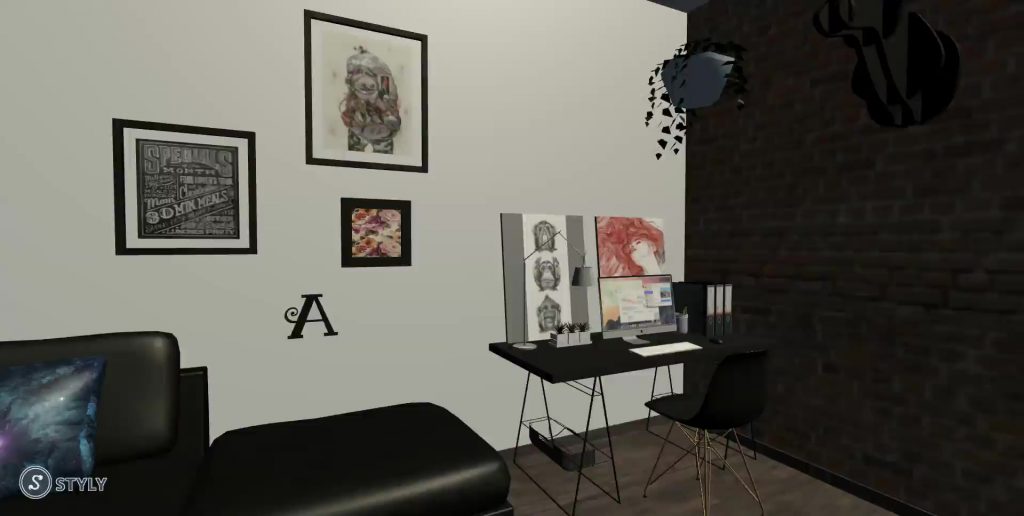
Combine Character and Space
Finally, we overlay the character on the screenshot of the scene created with STYLY Editor.
We use the live-streaming software called OBS Studio in this article. Launch VirtualMotionCapture before launching OBS Studio.
Firstly, we add the image to ‘Sources’.
Press the ‘+’ button below the ‘Sources’ box. Click ‘Image’ from the menu and select ‘Create new’.
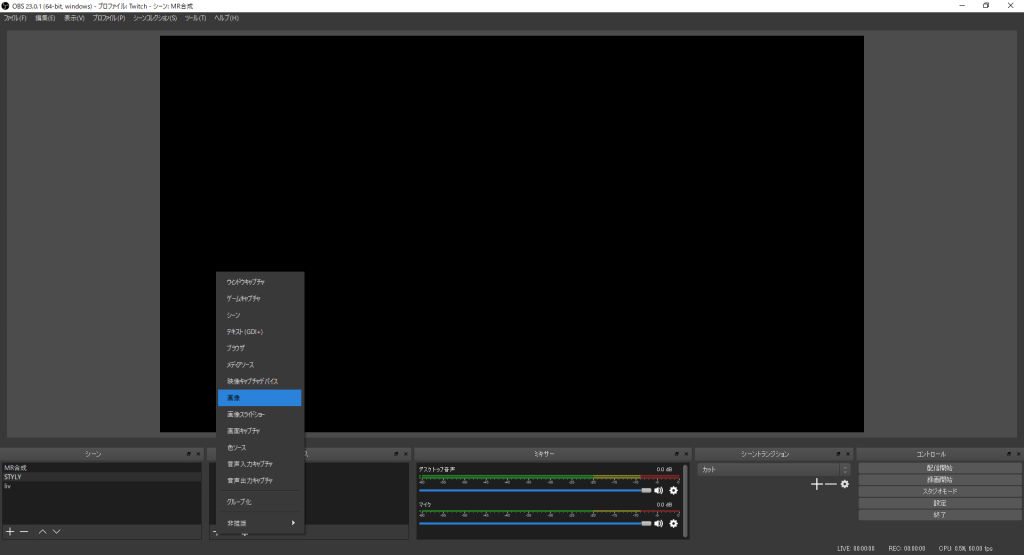
Add the image.
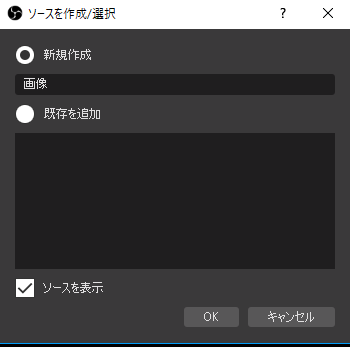
Create a new ‘Image’.
Then, you can add the background image to ‘Sources’ by selecting the image you want to use in the ‘Properties’ window.
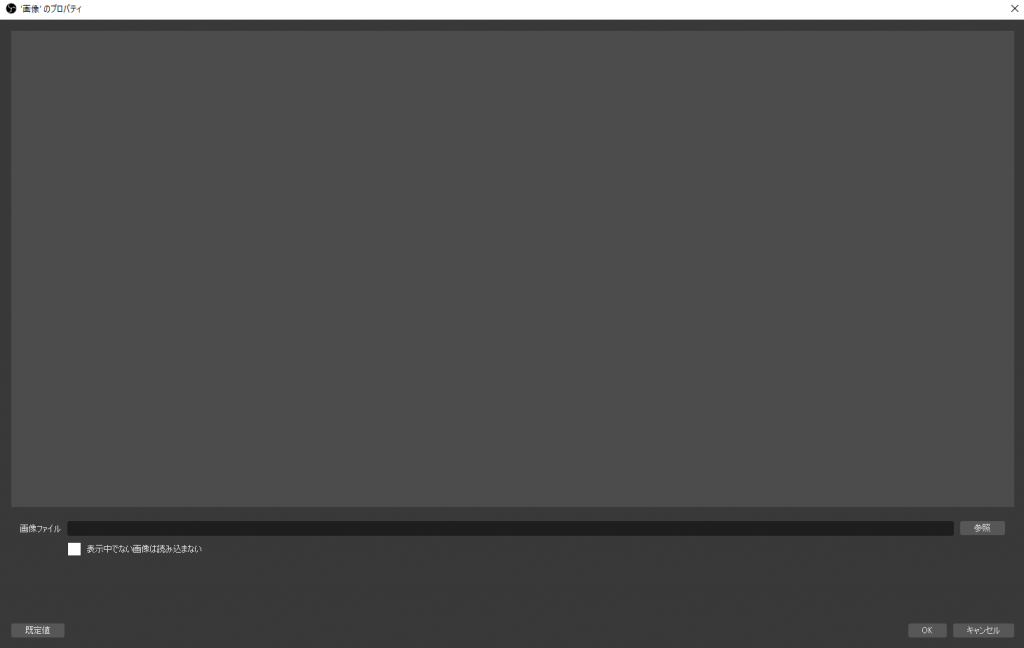
Select the image.
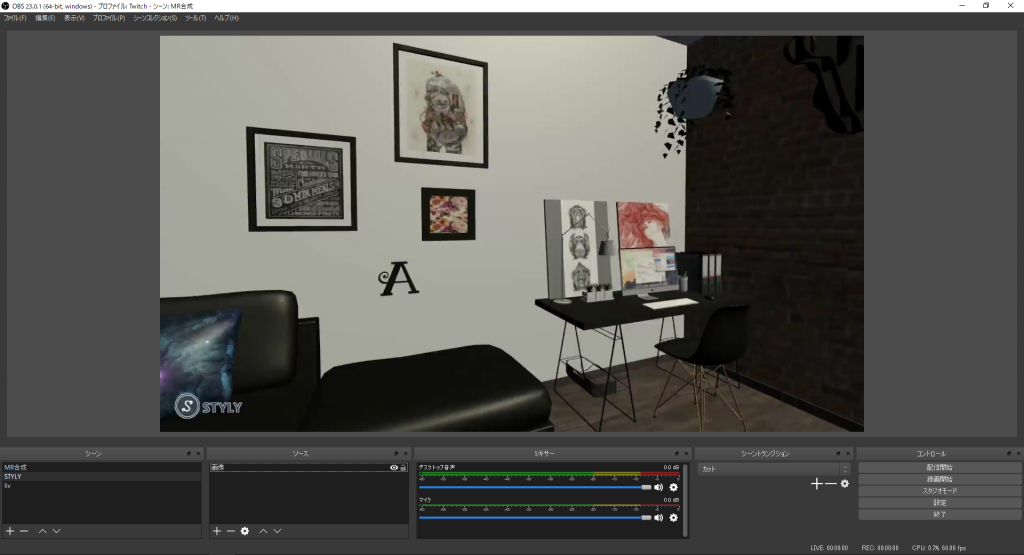
Now the image has been added.
Next, add the window of VirtualMotionCapture to ‘Sources’. As we did earlier, press the ‘+’ button below the ‘Sources’ box to display the menu.
Click ‘Window Capture’ from the menu and select ‘Create new’.
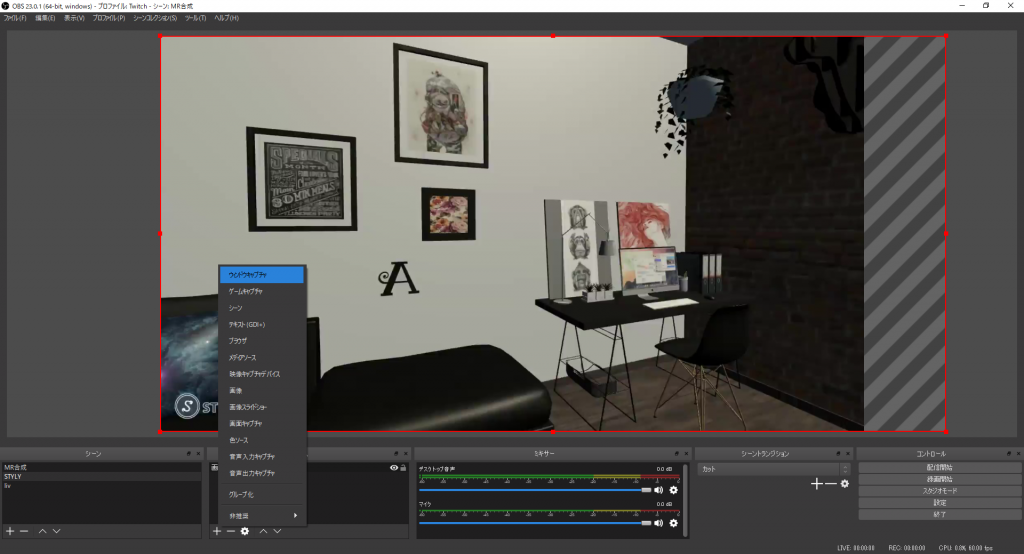
Select ‘Window Capture’.
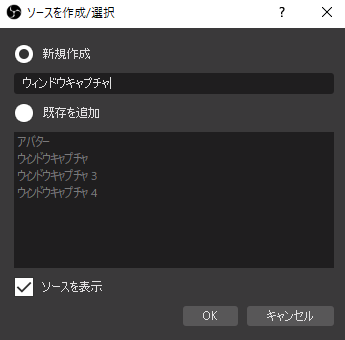
Create a new ‘Window Capture’.
Then, select ‘[VirtualMotionCapture.exe]: VirtualMotionCapture v0.23’ in the Property window. It adds the window of VirtualMotionCapture to ‘Sources’.
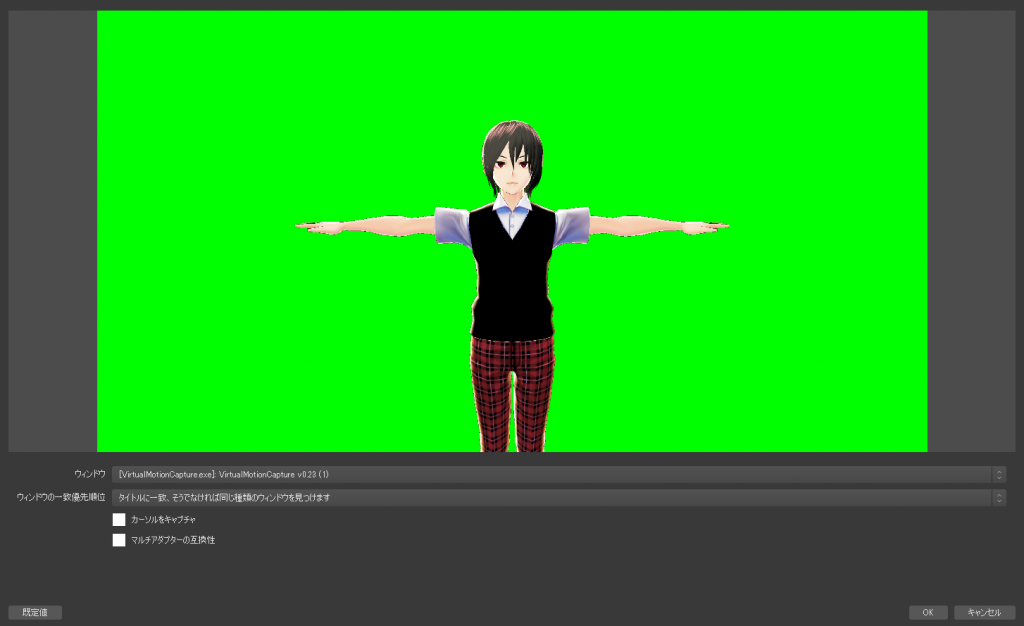
Select the window of VirtualMotionCapture.
As a Source listed above another Source will be on the top of another Source in the display, reorder the Sources so that the Window Capture is above the Image.
In this state, only the screen of VirtualMotionCapture is visible and you cannot see the background image at all, so we apply ‘Chroma key’ to the VirtualMotionCapture window to show the background.
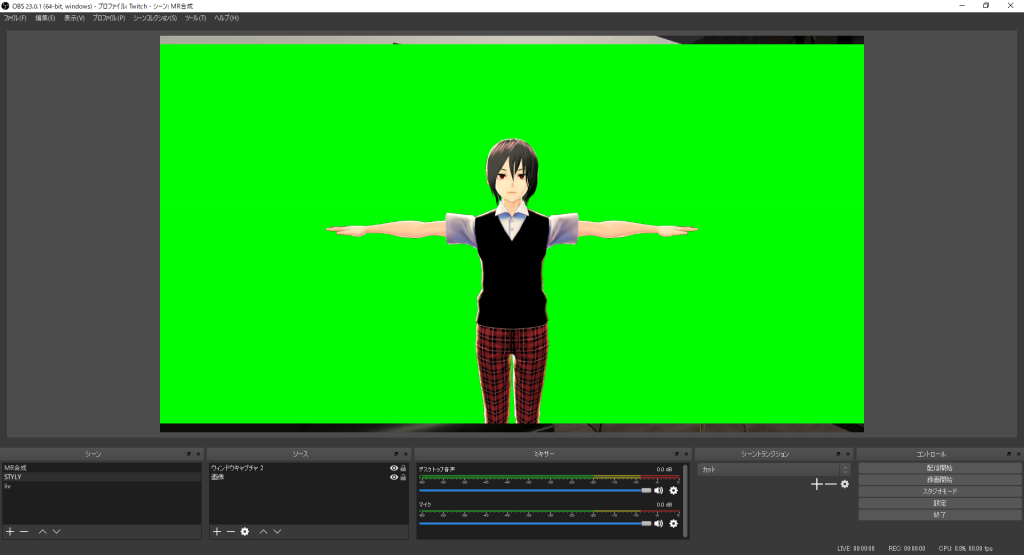
How it looks before applying ‘Chroma Key’.
Right-click the Window Capture in ‘Sources’ and select ‘Filters’ from the menu.
Next, press the ‘+’ button below the ‘Effect Filters’ box and select ‘Chroma Key’ from the menu.
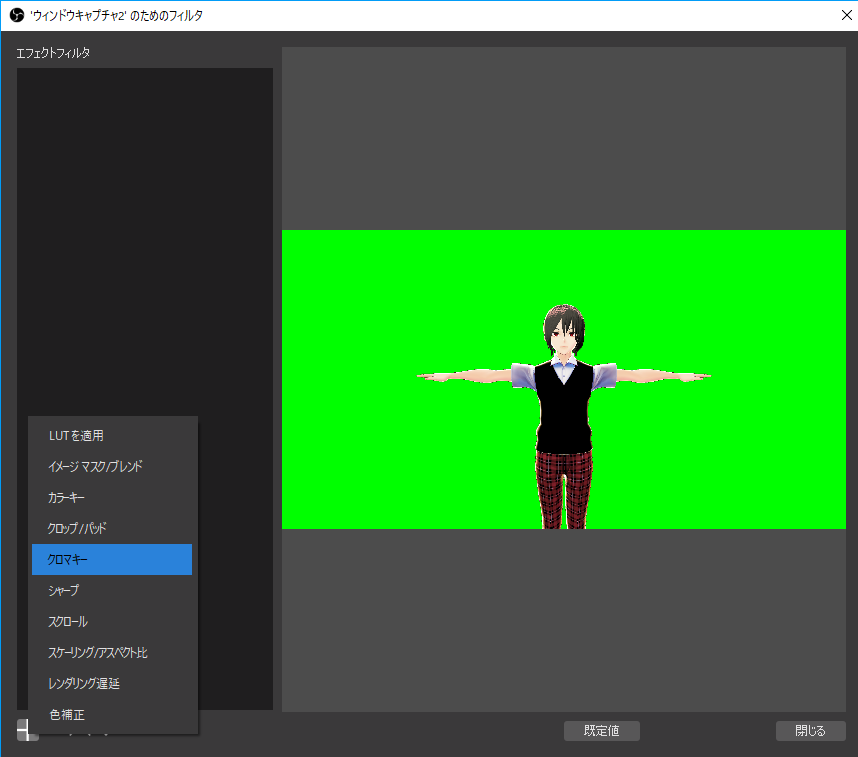
Select ‘Chroma Key’.
Select the ‘Chroma Key’ in the ‘Effect Filter’ box, and set ‘Key Color Type’ to the same colour as the background selected in VirtualMotionCapture.
Then, the ‘Chroma Key’ filter makes the background colour of VirtualMotionCapture transparent so that the character is combined with the background image in the display.
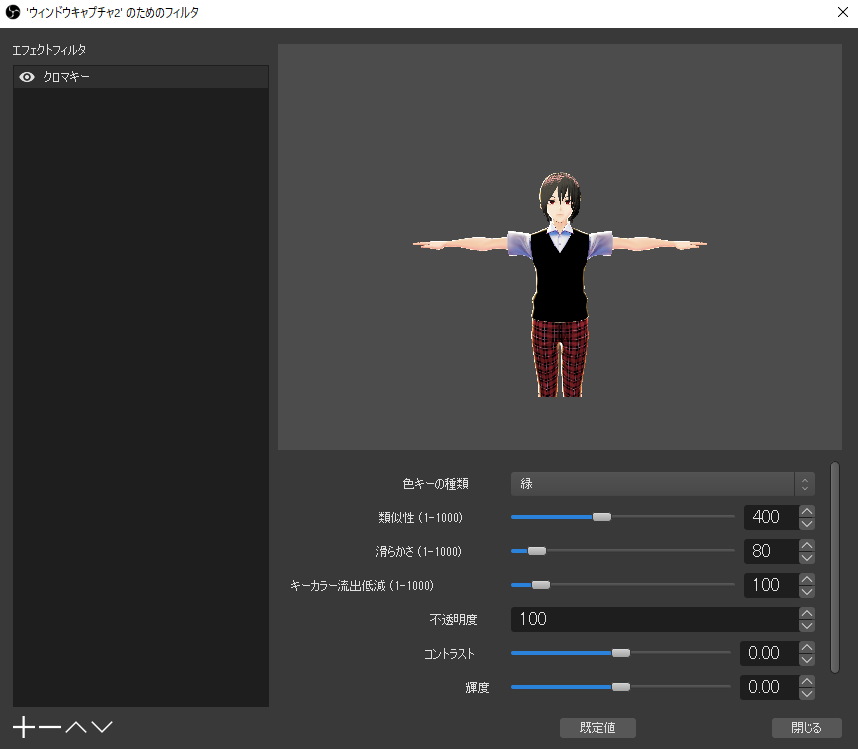
‘Chroma Key’ filter.
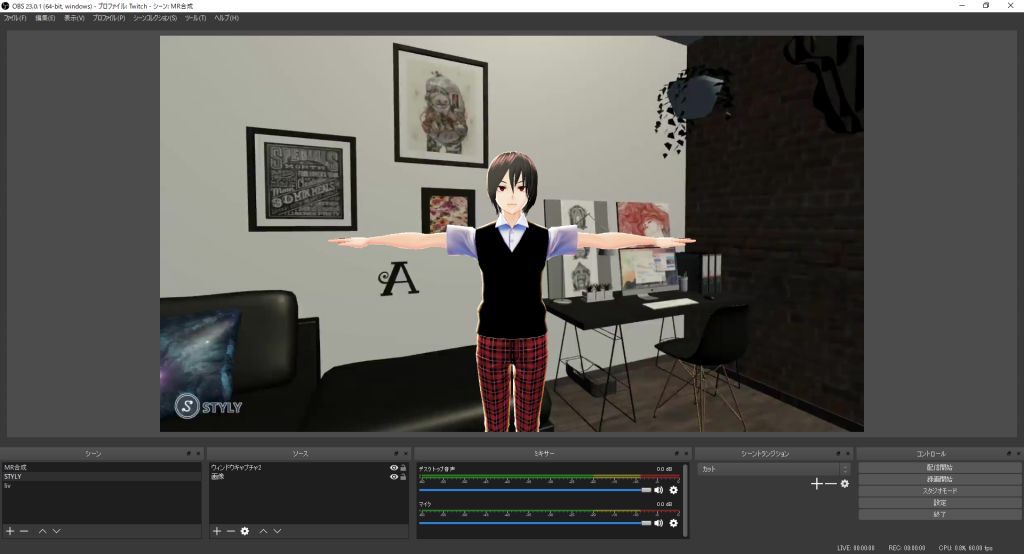
How it looks after applying ‘Chroma Key’.
And it’s completed! Once you set up the recording and the broadcasting, you will be able to create a video and livestream.
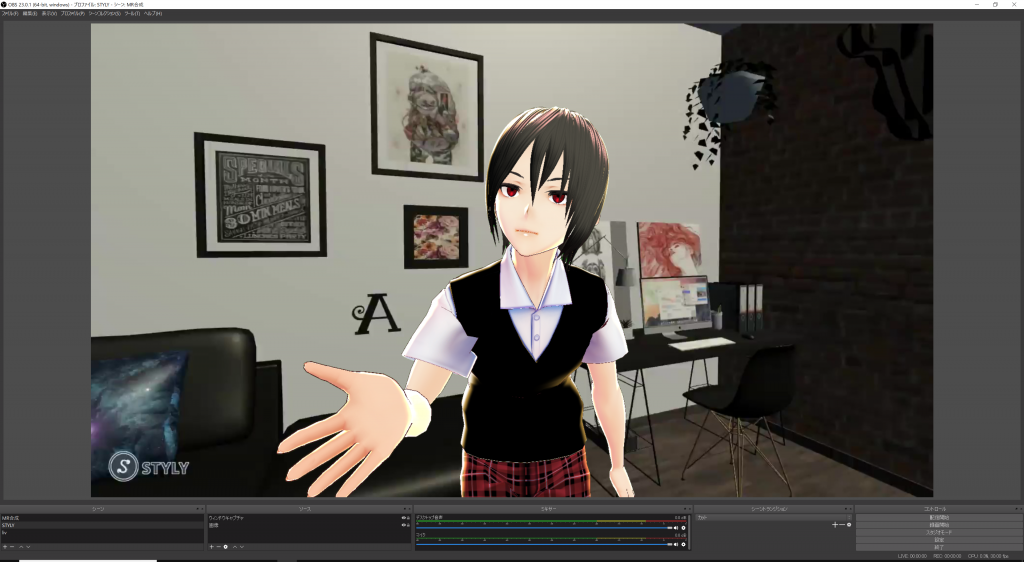
Completed!
Congratulations!
In this article, we introduced the basics to use VirtualMotionCapture. Even this basic way allows you to livestream gameplay like Vtuber straight away. However, you still need to learn more if you want to create an MR video as if the character entered the world of the game application.
Next, we will introduce the application required to record an MR video and advanced way to use VirtualMotionCapture.
