In this article, I explain how to use ‘Post Processing’ on STYLY. In the previous article, we made it possible to teleport VR camera. This time, we make a mechanism to apply ‘Post Processing’ when the teleportation is triggered. We use Playmaker and Post Processing Stack here.

PostProcessing – the completion image
Sample
You can experience the sample space in STYLY GALLERY.
You can download the Unity project used in this article. TeleportSystem_Sample
Get ‘Maincamera’
https://styly.cc/ja/tips/use-post-processing-stack-with-styly_afjk_postprocessingstack/ ↑The article shown above explains how to use Post Processing Stack on STYLY. I follow the workflow as instructed by the above article. Get the main camera to apply ‘PostProcessing’ to. Get it by ‘Get main Camera’ and store it in ‘Maincamera’.
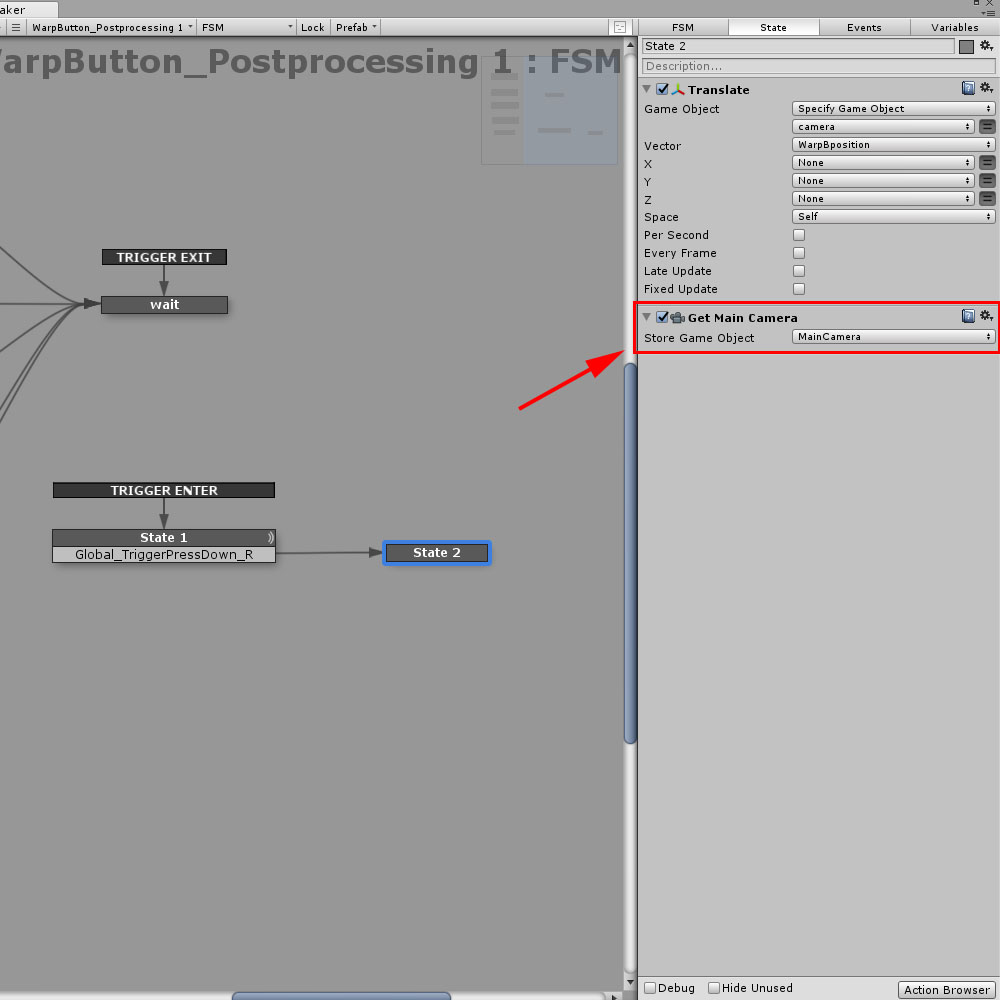
Get ‘MainCamera’.
Add ‘Post Processing behavior’
Add ‘Post Processing behavior’ by ‘Add Component’.
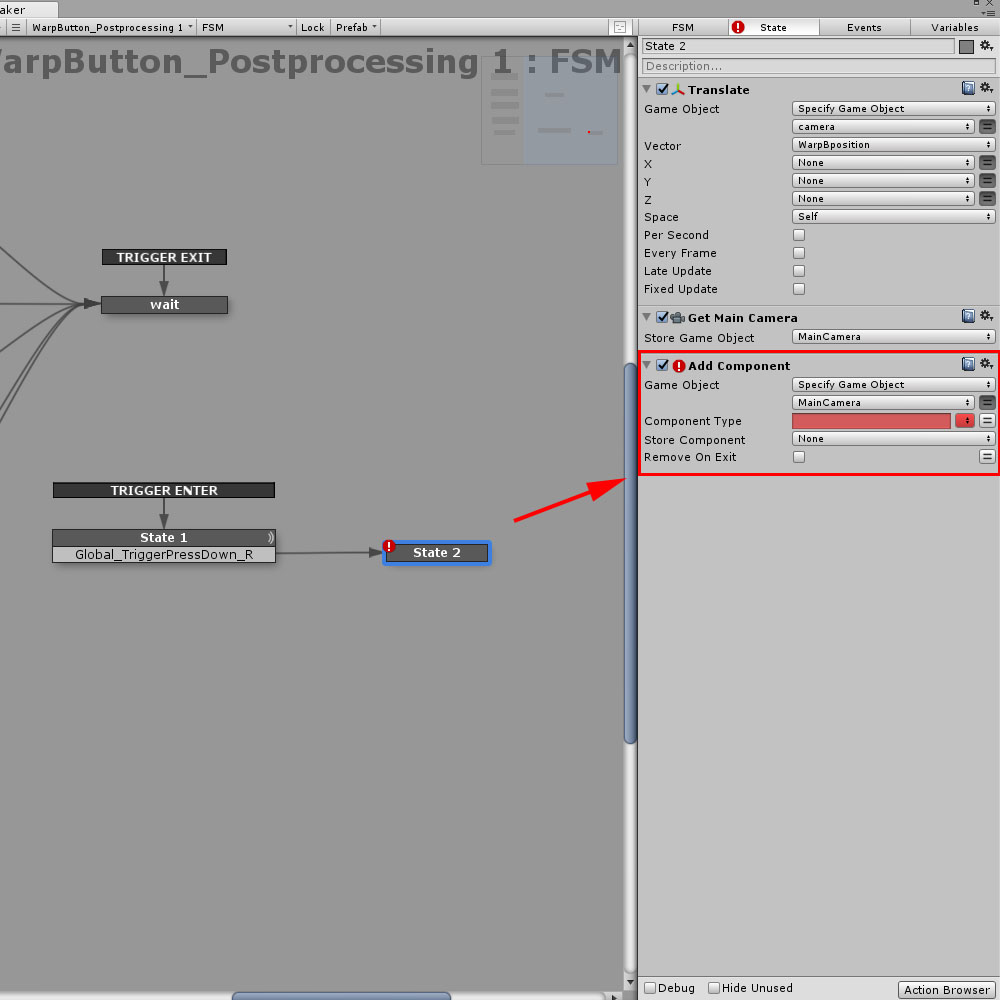
Add a Component.
Make a new Object-type variable, ‘PostProcessingCamera’.
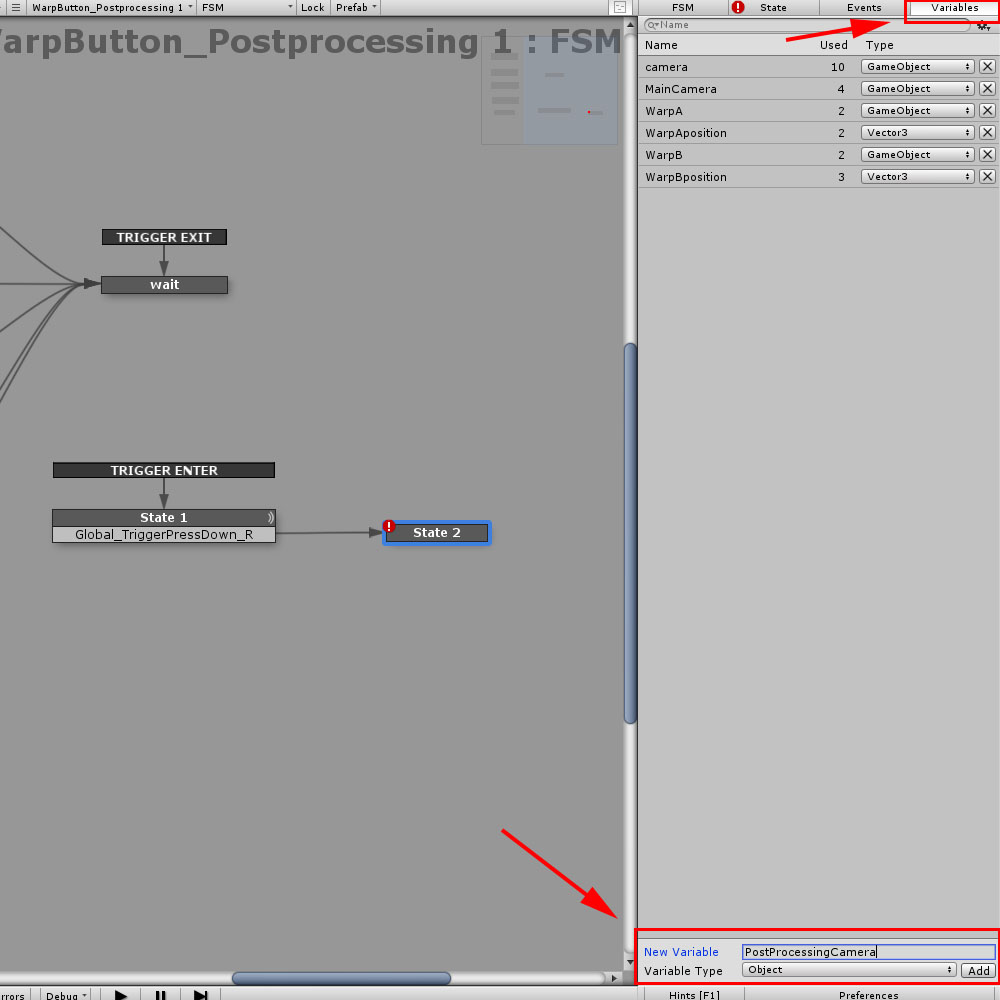
Create a variable.
Furthermore, we change the variable type. Select PostProcessing > PostProcessingBehaviour.
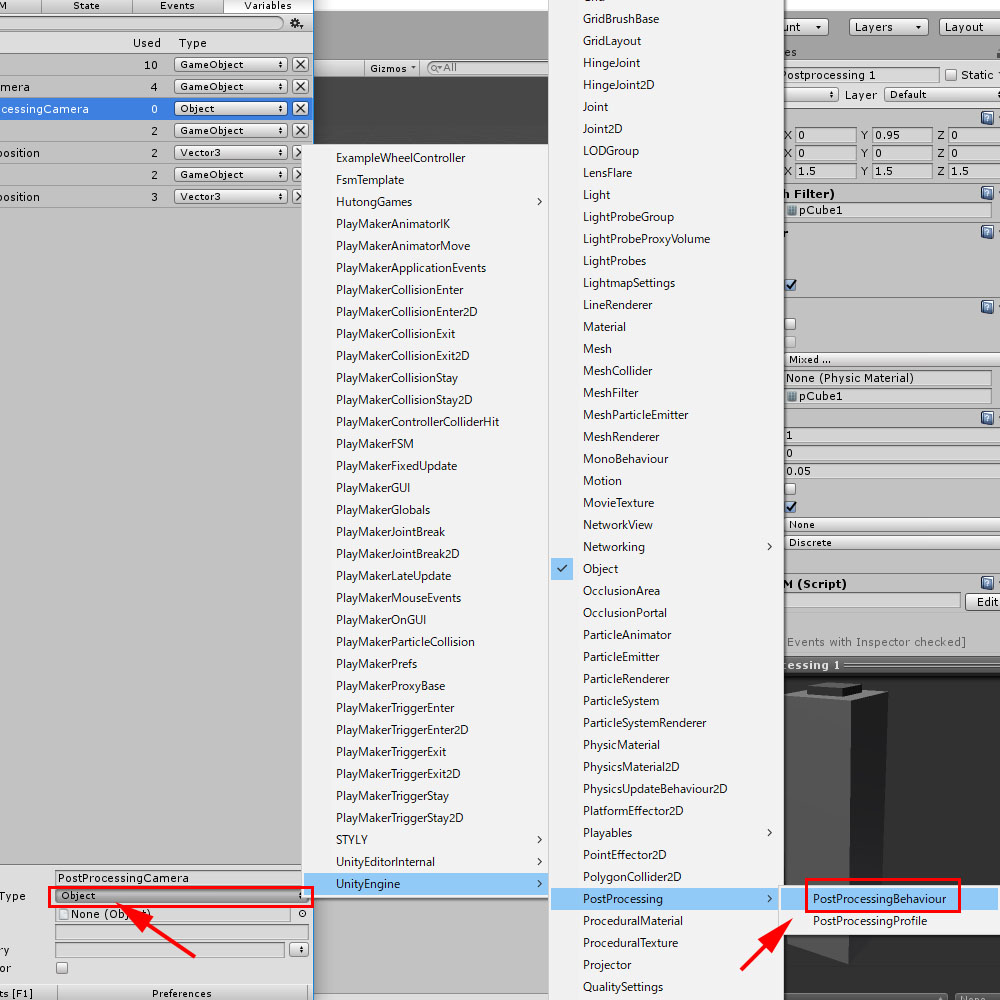
Change the type of variable.
‘Add Component’ has been set now.
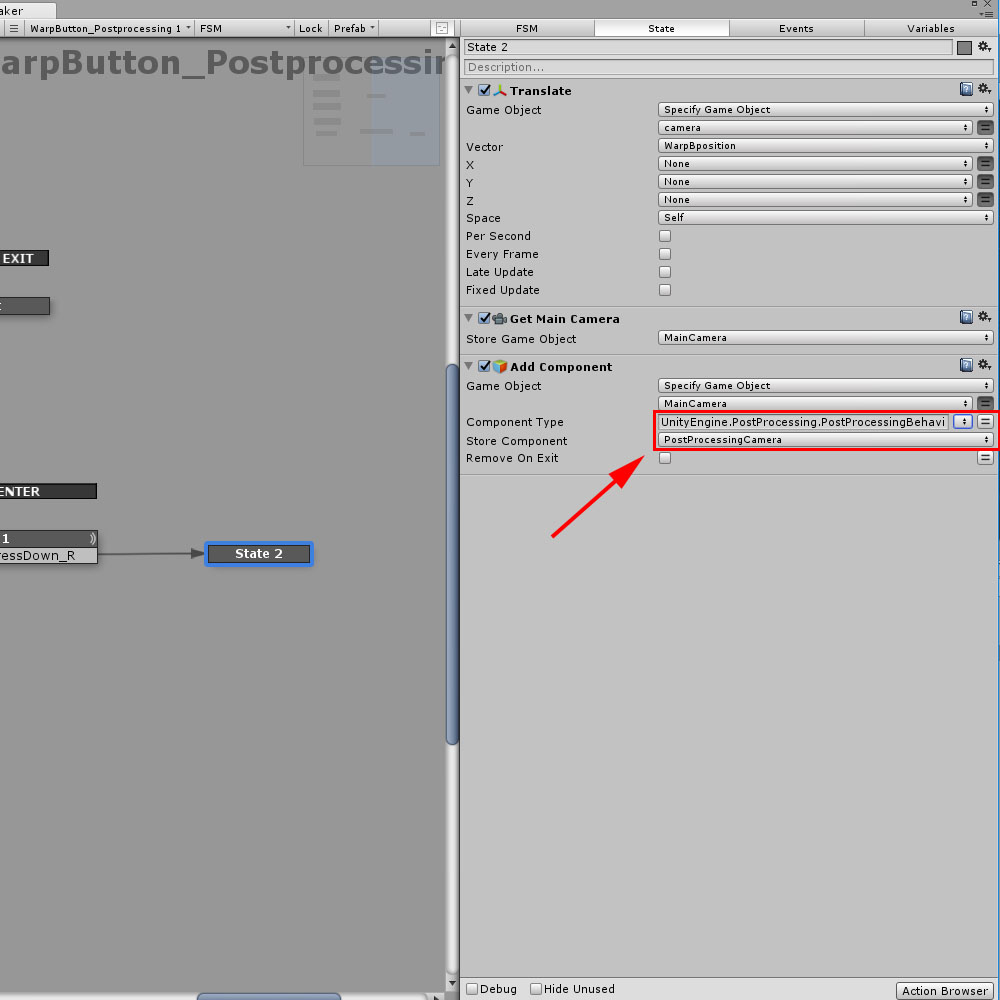
The setting for ‘Add Component’
Add ‘Set Property’
Add ‘Set Property’.
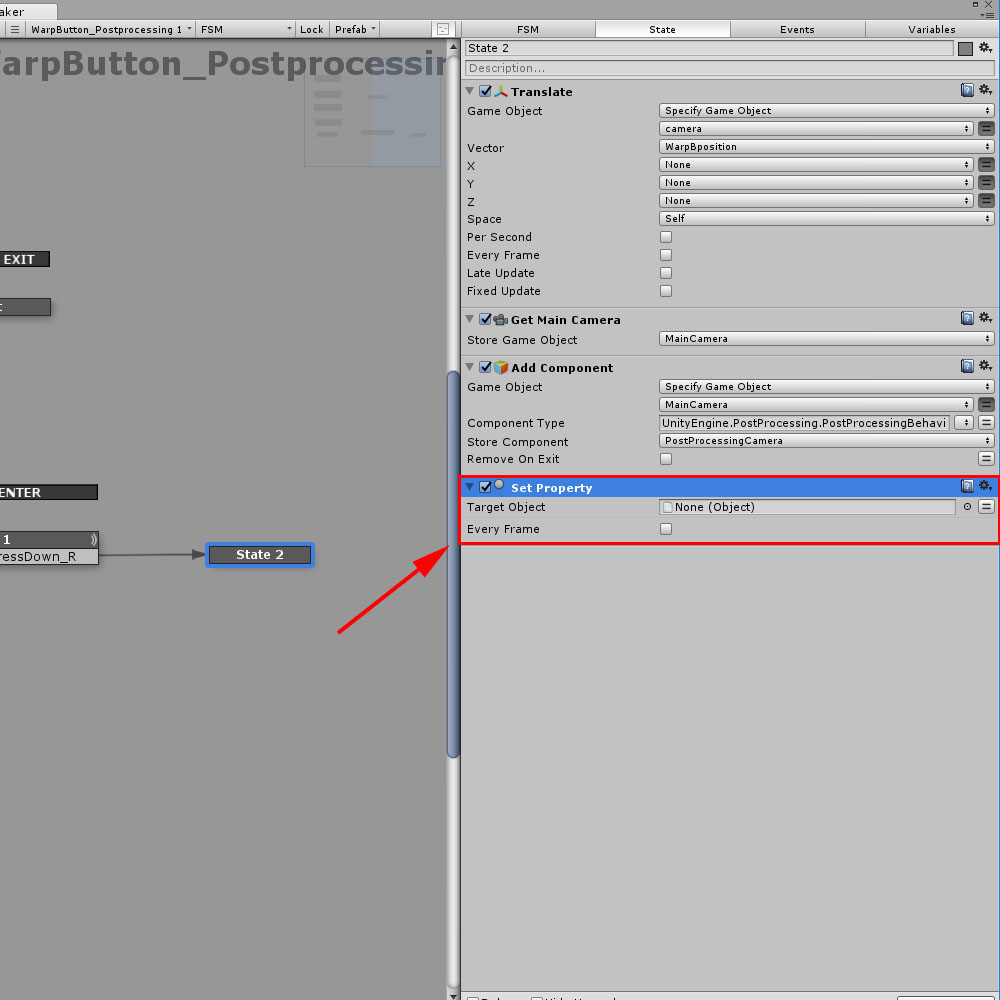
Add ‘Set Property’.
Create a new Object-type variable, PostprocessingProfile.
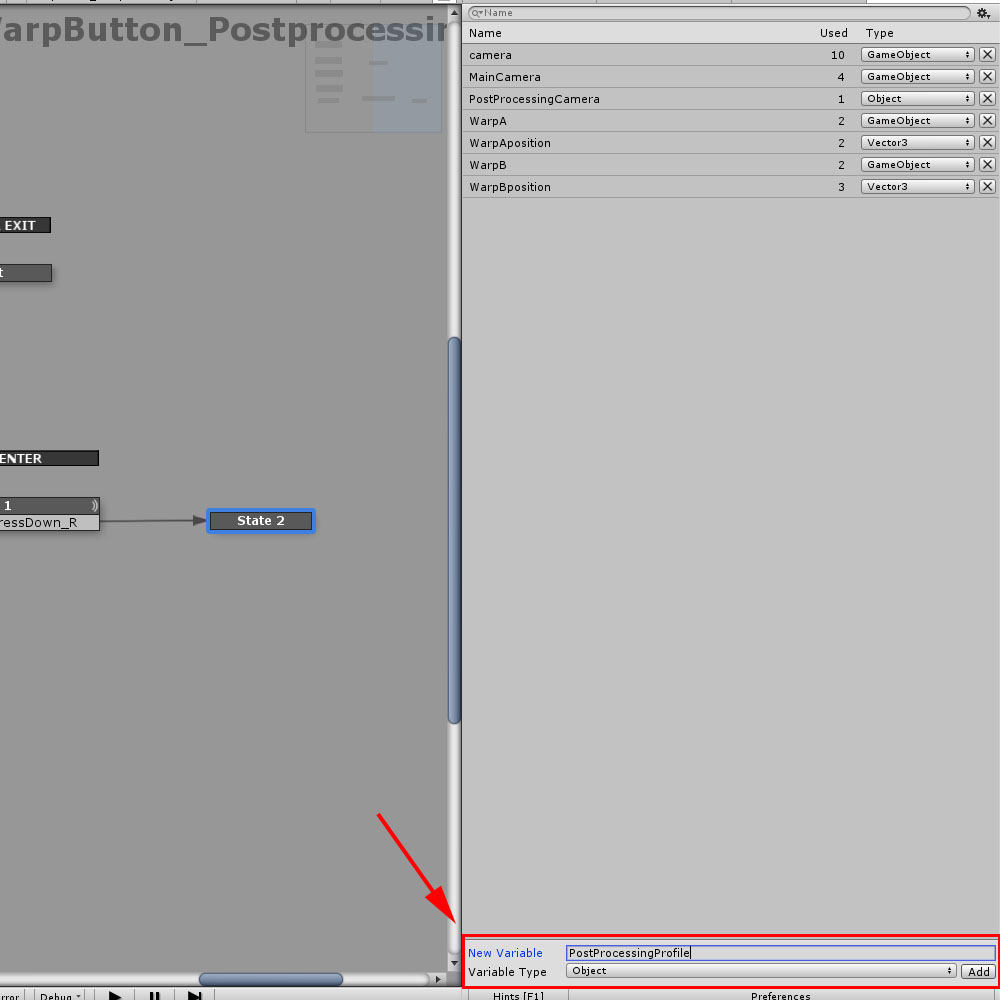
Add a variable
Change the variable type of ‘PostprocessingProfile’ to PostProcessingProfile.
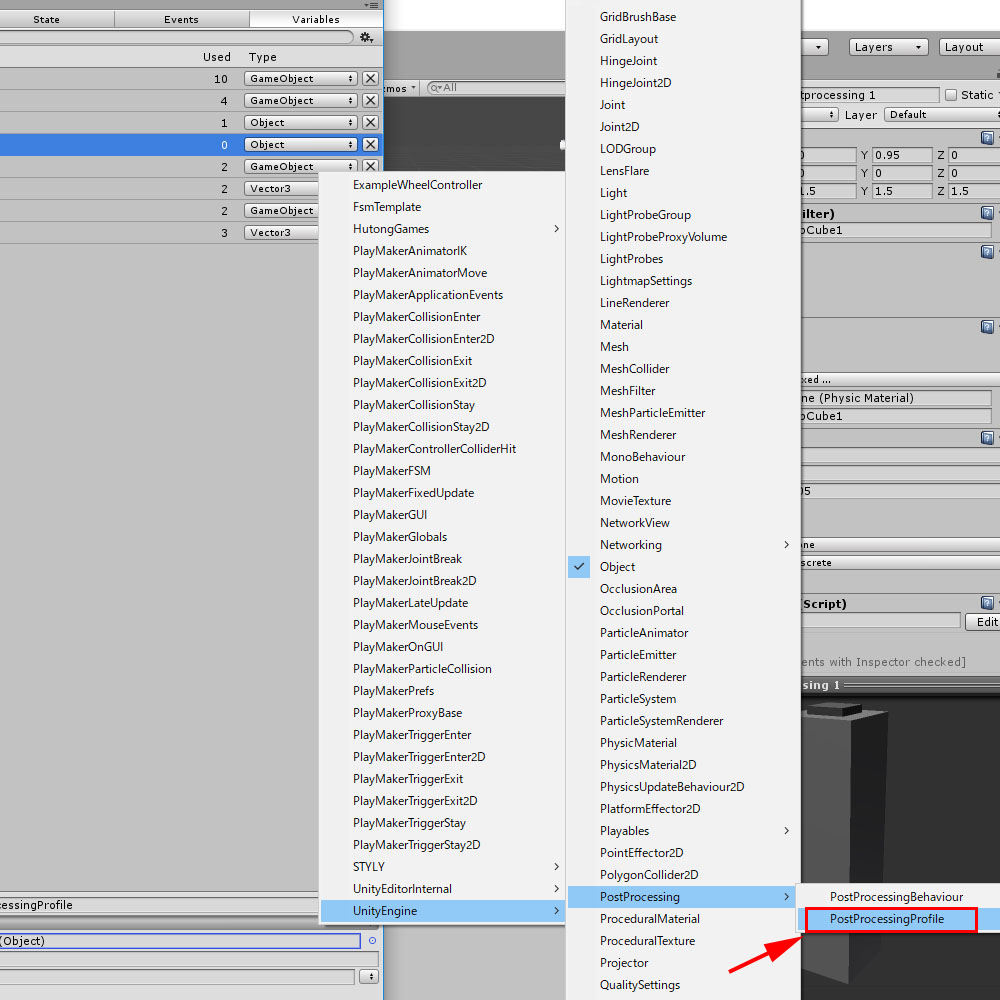
Change the type of variable.
Check the ‘Inspector’ box so that you can set it in the Inspector.
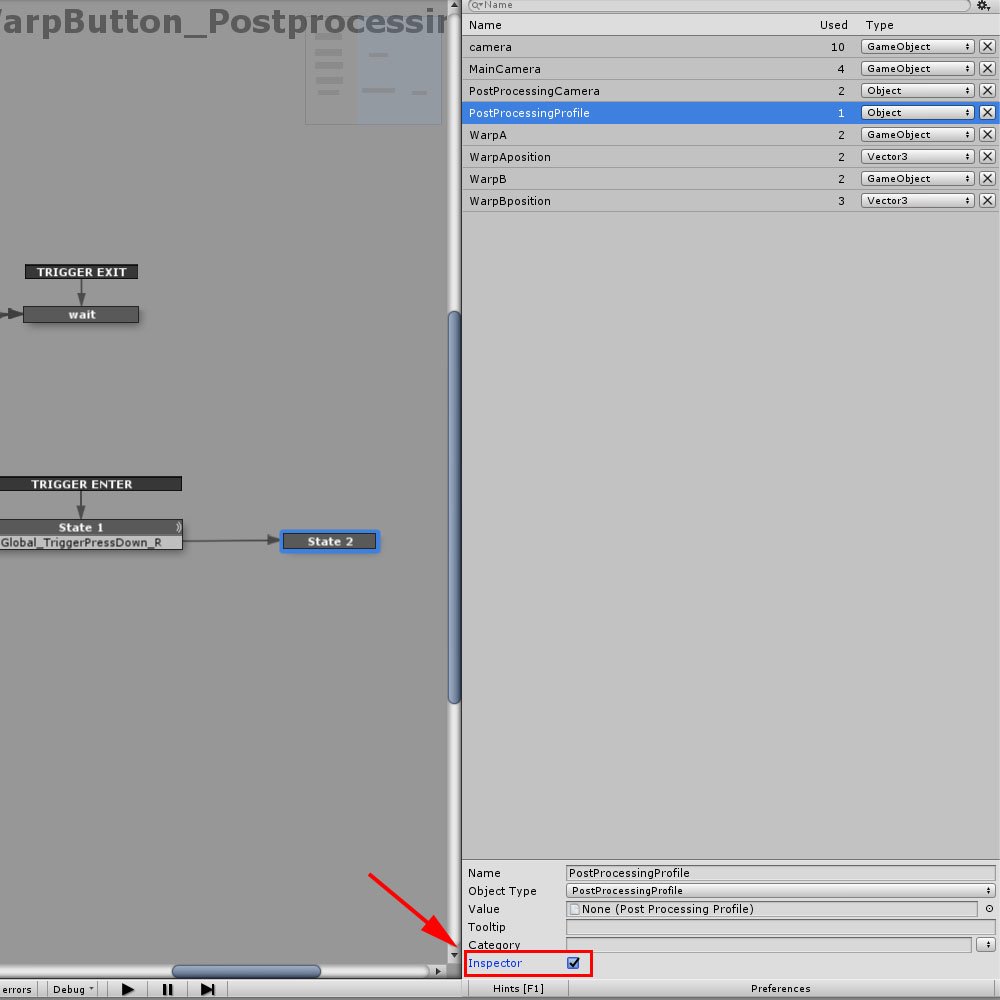
Check the ‘Inspector’ box.
Set ‘Target Object’ to PostProcessingCamera. Set Property to profile. Set ‘Set Value’ to PostProcessingProfile.
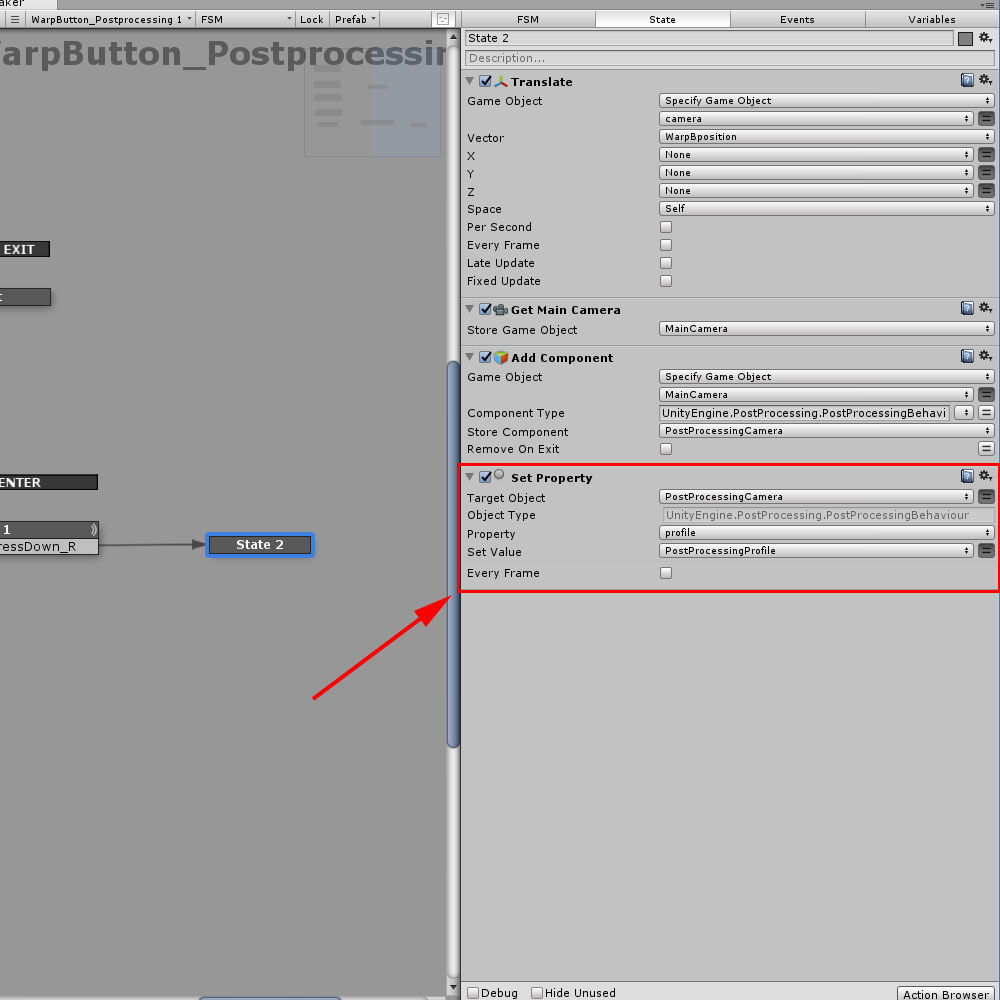
The setting for ‘Set Property’.
Create Post-Processing Profile
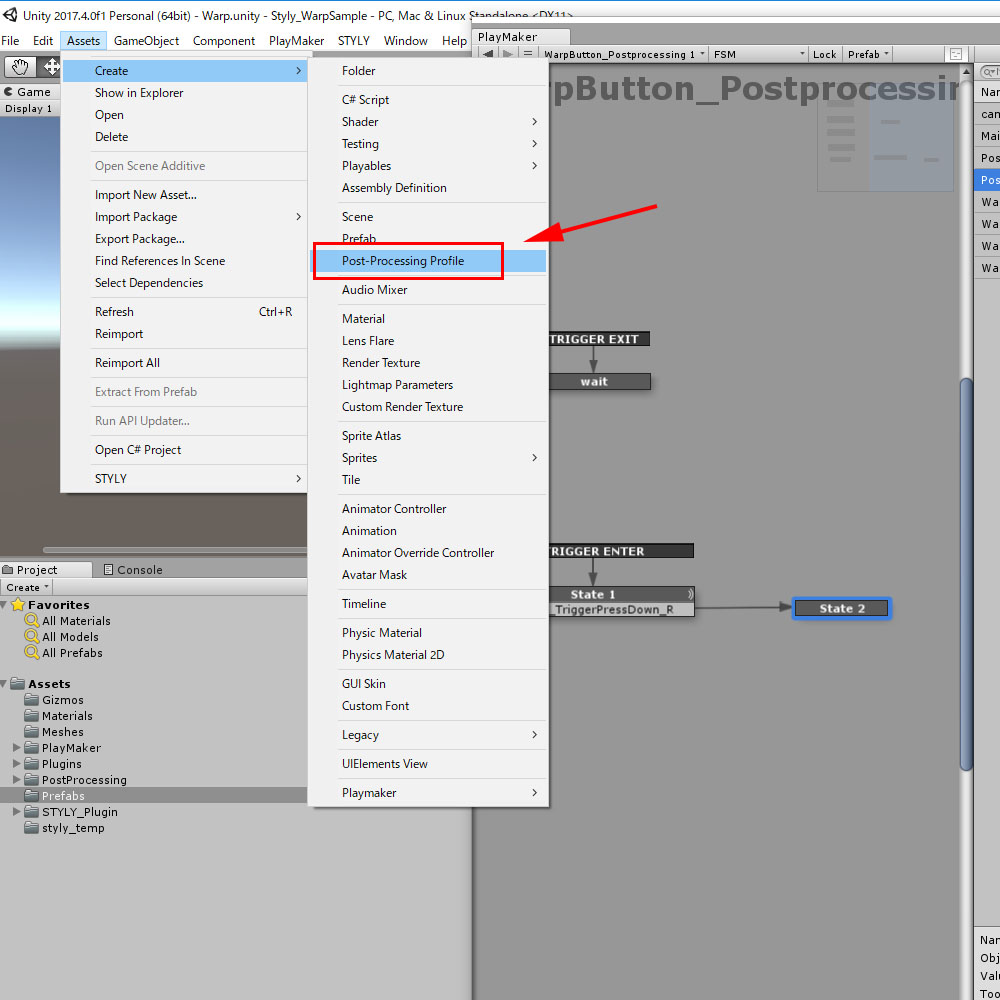
Create a Post-Processing profile
I set only the Bloom effect here. In the Inspector view, specify the PostProcessing Profile that you set the effect in.
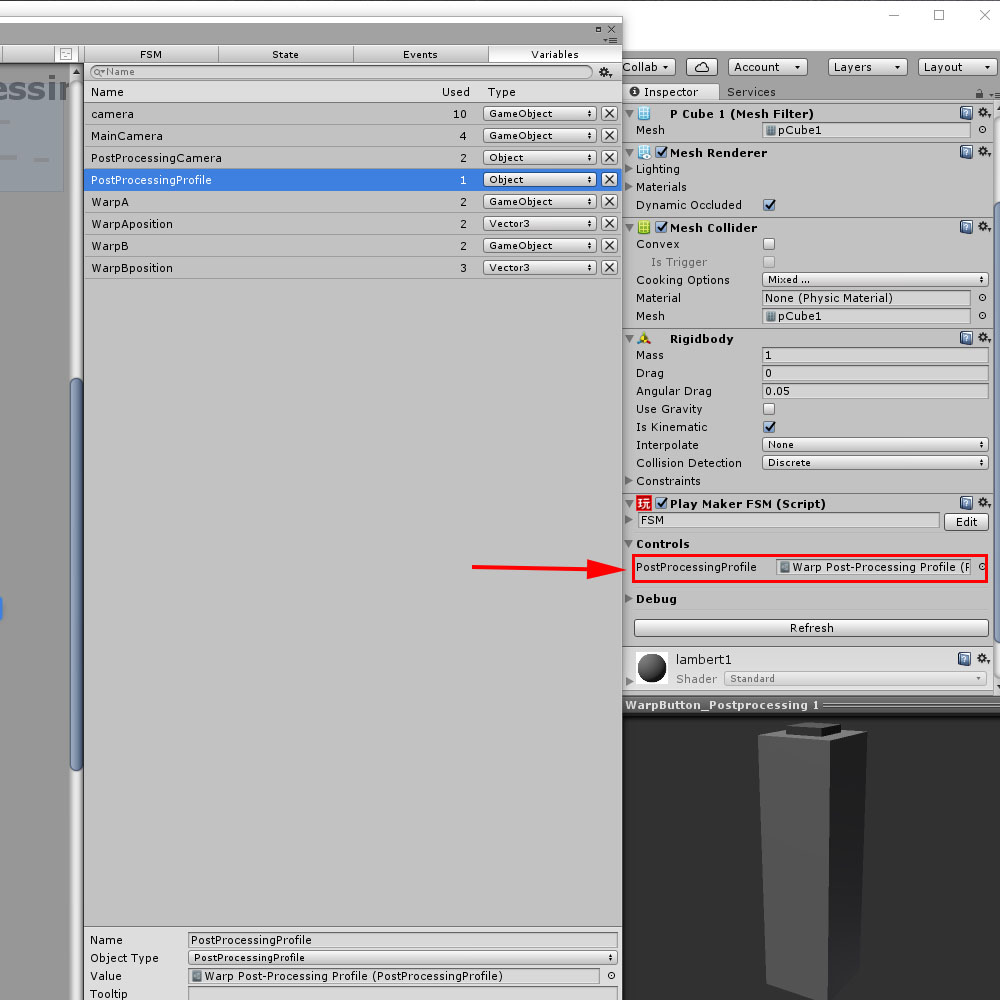
Assign the profile in the Inspector view.
This makes ‘Post Processing’ apply when teleporting by pulling the trigger. However, in this state, ‘Post Processing’ will be kept active even after the teleportation is finished. So you need to add the Destroy Component to the check-camera State to destroy the Post-Processing component so that the effect is deactivated at the beginning.
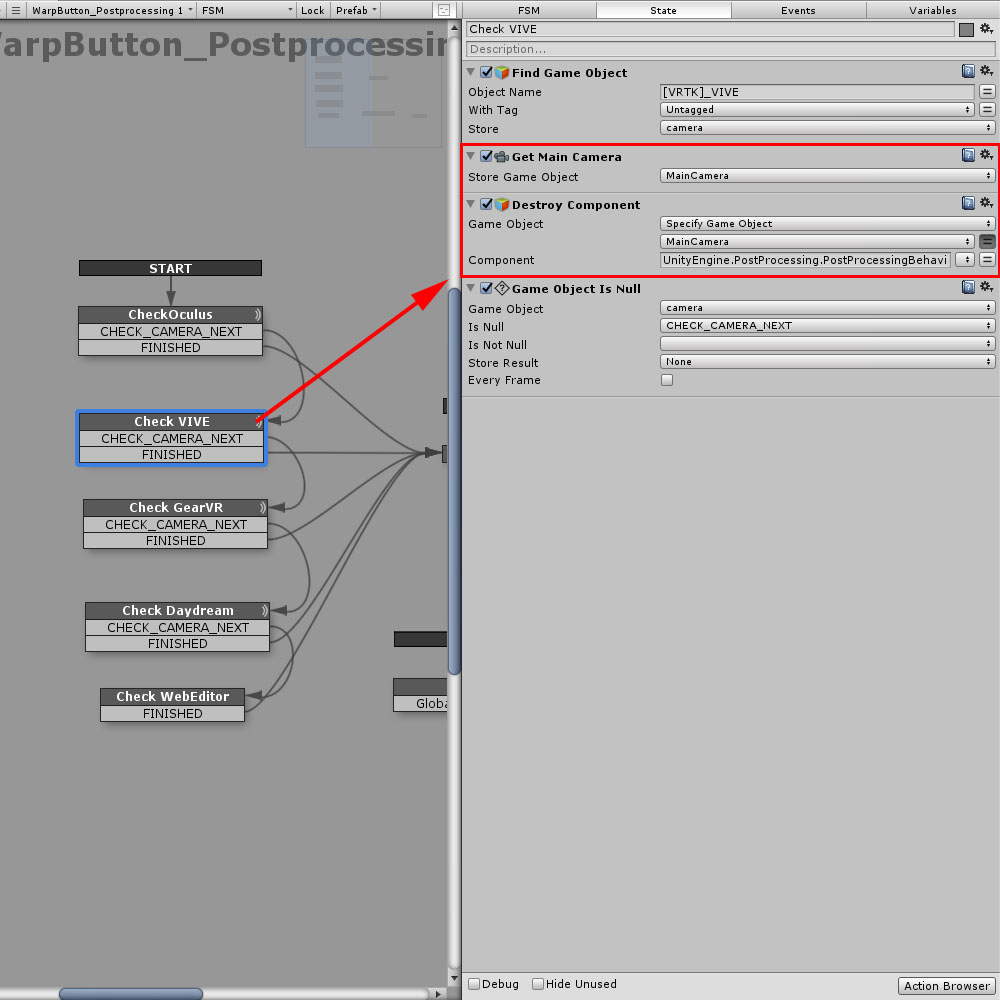
Destroy when checking VR Camera.
By the way, this still leaves the camera with ‘Post Processing’ applied when playing other Scene. In the sample Scene, you can turn off ‘Post Processing’ with the trigger button on the left controller
Place the asset by STYLY Editor
To taste the teleportation, I placed the destination at a remote location.
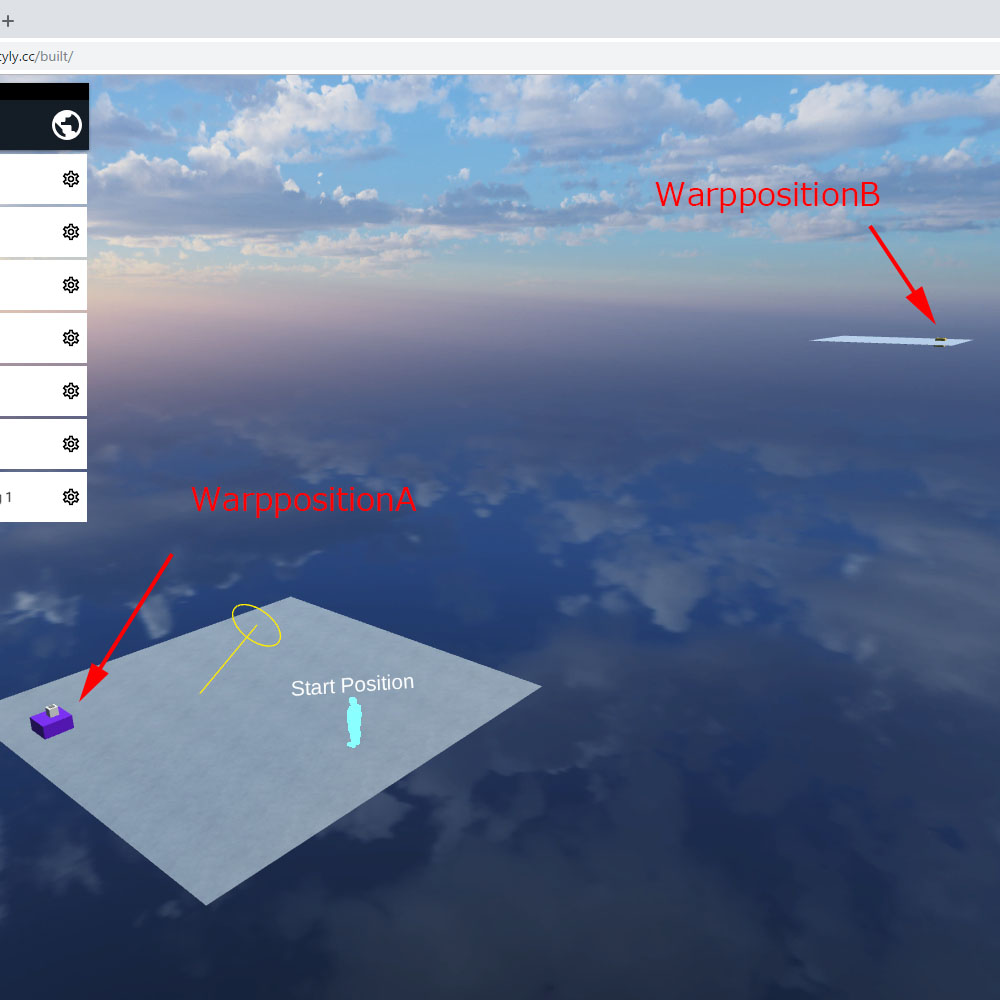
Place the asset by STYLY Editor
Even for this long distance, you can jump there in a flash. How to upload assets from Unity to STYLY: Read the article. In this article, I explained how to use ‘Post Processing’ on STYLY. When you improve the details of various Scenes, you would have a situation that you want to trigger an Effect at the specific location or timing. You could make your VR Scene more attractive if you make good use of the workflow explained here. Since the main camera is shared with other Scenes, it would be troublesome if it’s left with PostProcessing applied. I think it’s safe to destroy it at once if you got trouble with it. 
※If you have your STYLY account, you can view the Scene created in this article. If you don’t have it, please create a new account and then press the button above.