この記事ではUnityのPlaymakerを使用してStylyのVR空間でスローモーションを作る方法を紹介します。 マウスのボタンとHTC Viveのコントローラでの操作になります。
完成データのプレー動画
完成のイメージはこのようになります。 トリガーを押しているときだけ時間がスローモーションになります。
サンプル
STYLY GALLERYからサンプル空間を体験できます。
記事で紹介しているUnityプロジェクトのダウンロードはこちらからできます。 Slowmotion_Sample プロジェクトデータには各種プラグインは入っていませんので使用する際はご自身でインストールしてからご利用ください。 Playmaker SteamVR Plugin
PlaymakerとSteam VR Plugin
アセットストアからそれぞれダウンロードしてUnityで使用できる状態にします。
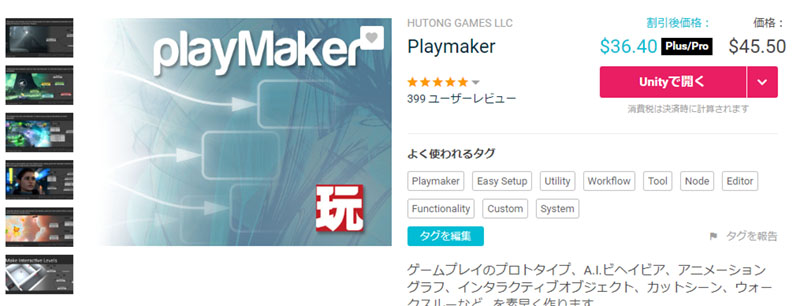
アセットストアにあるPlaymaker
Playmakerは有料アセットです。 Playmaker
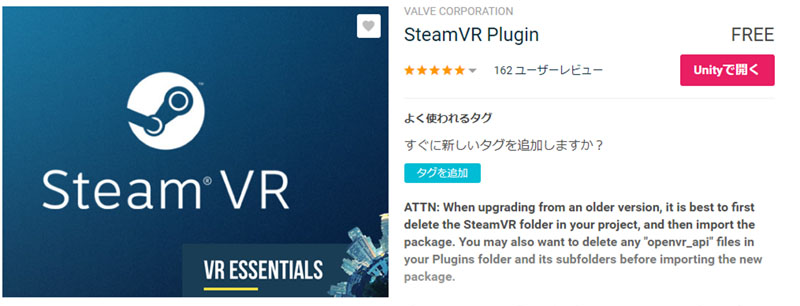
Steam VR プラグイン
Steam VRは無料で使用できます。 SteamVR Plugin
Bulletの作成
スローモーションを感じるための動くアセットとして弾丸を作ります。
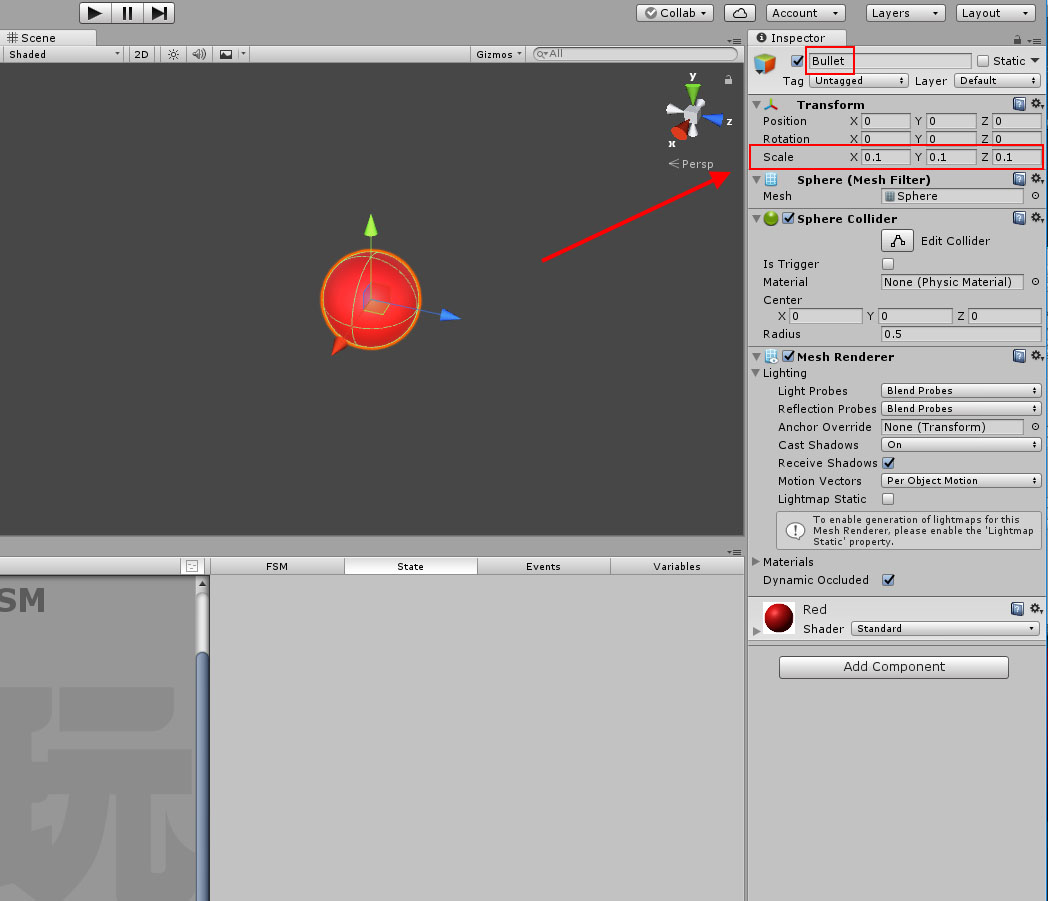
弾となるSphere
Sphereの名前を”Bullet”としてスケールをそれぞれ0.1にしました。 Bulletを選んだ状態でPlaymaker Editorを開きます。
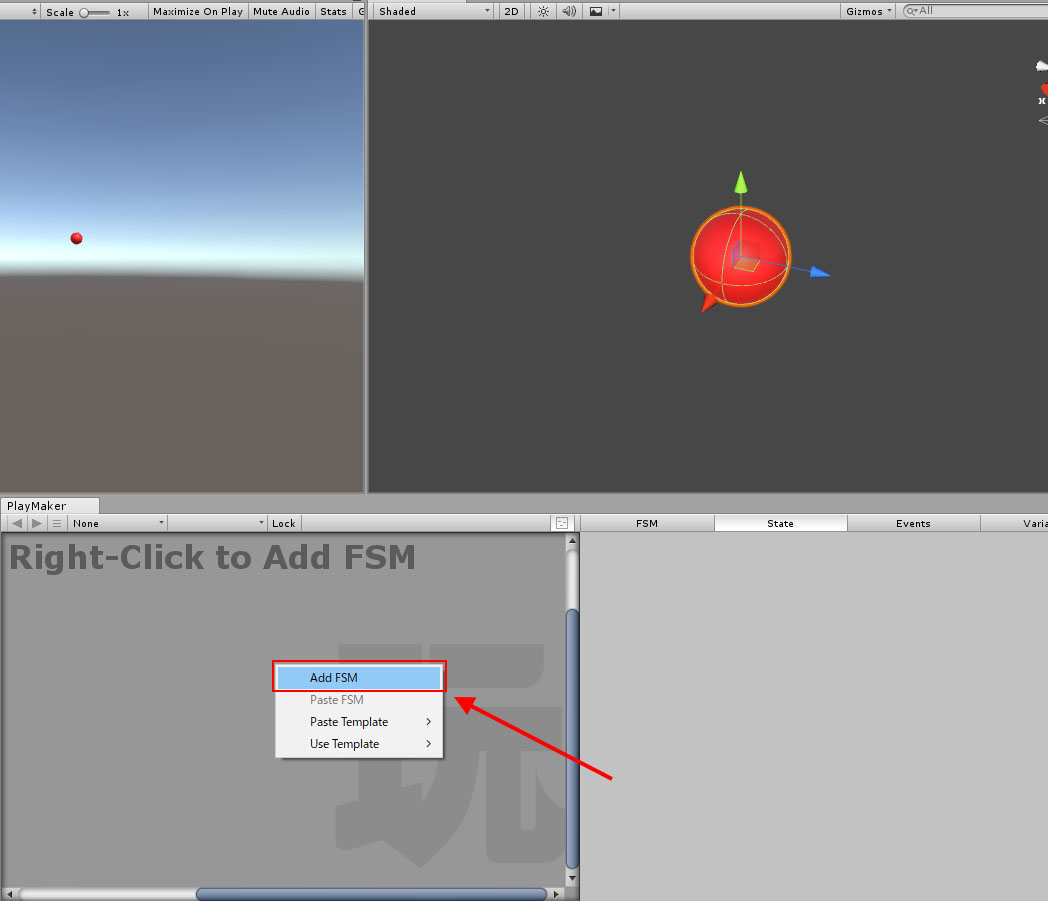
FSMの追加
右クリックから”Add FSM”を選びます。
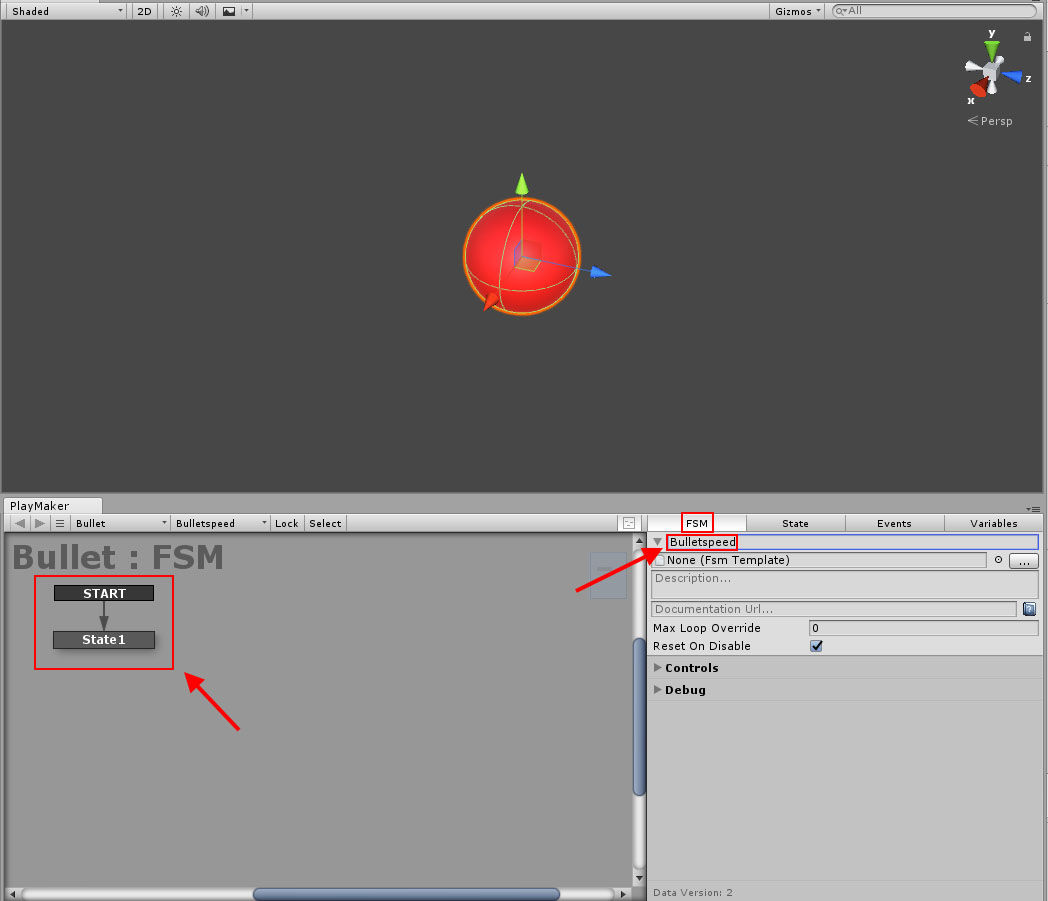
FSMの名前を変更
新しくStateが作られました。 FSMの名前をBulletspeedに変更しました。 続いてBulletへのActionを追加していきます
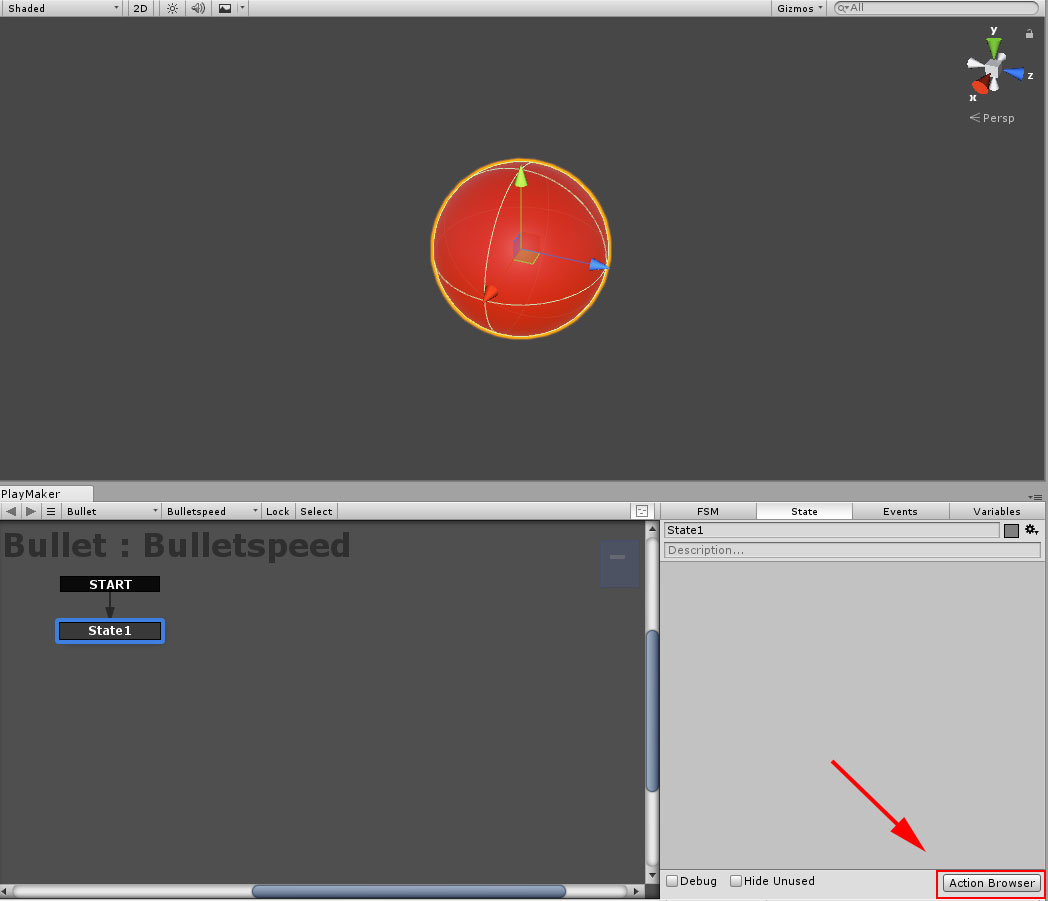
Actionを追加
Action Browserをクリックします。
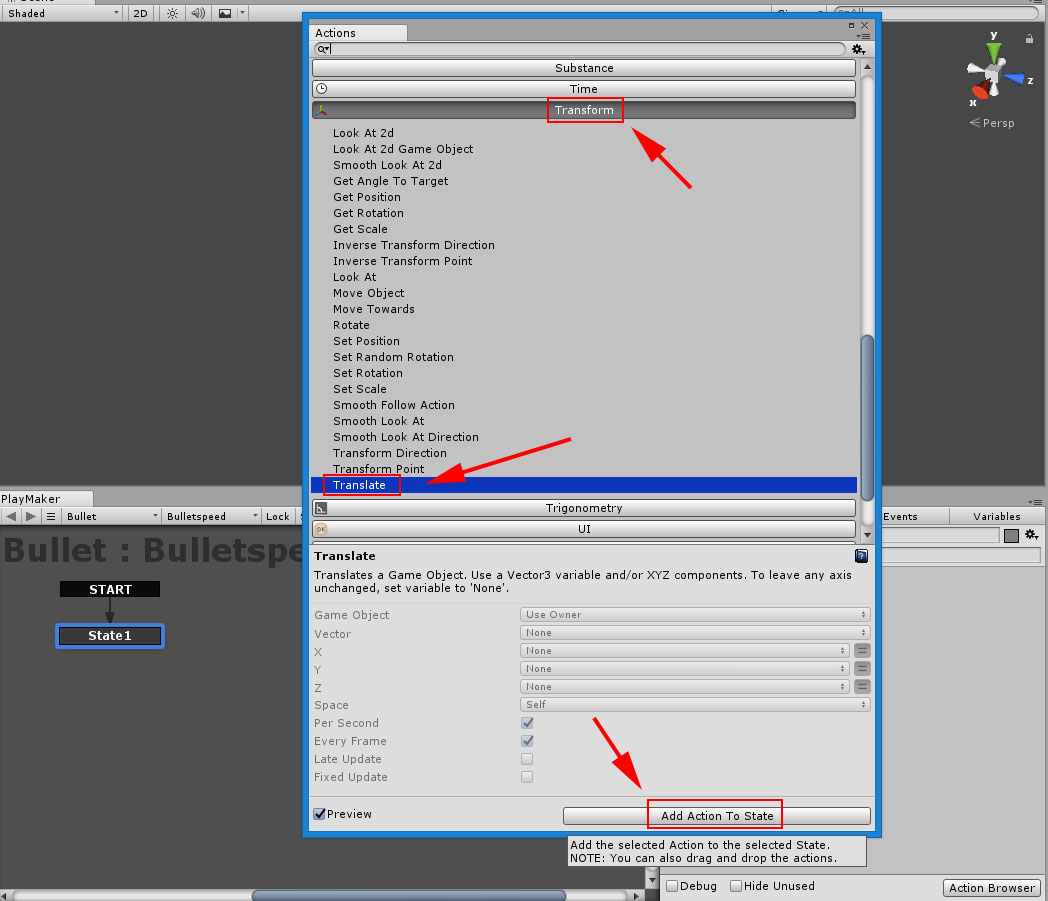
Action Browserから選択
BrowserからTransformのTranslateを選択してAdd Action To Stateをクリックします。 これでActionが追加されました。 弾丸のスピードを設定します。
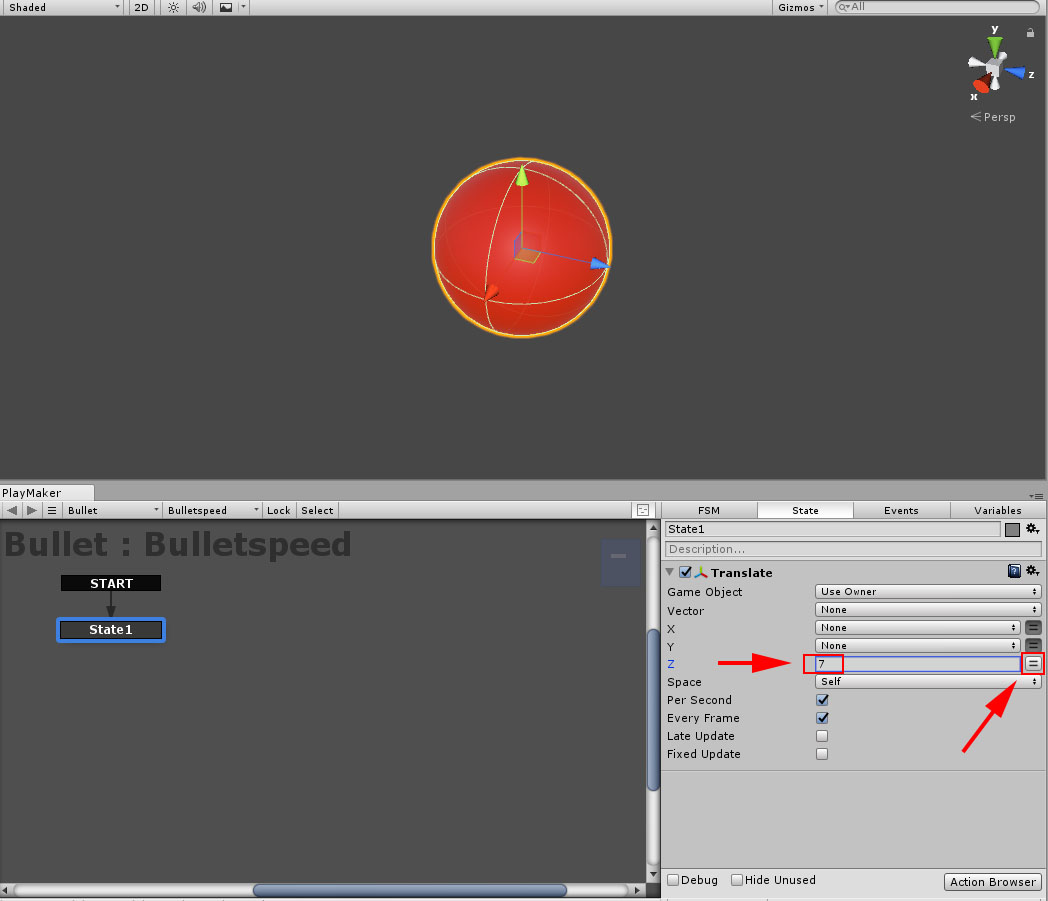
Translateの設定
ここではZに7を設定しました。
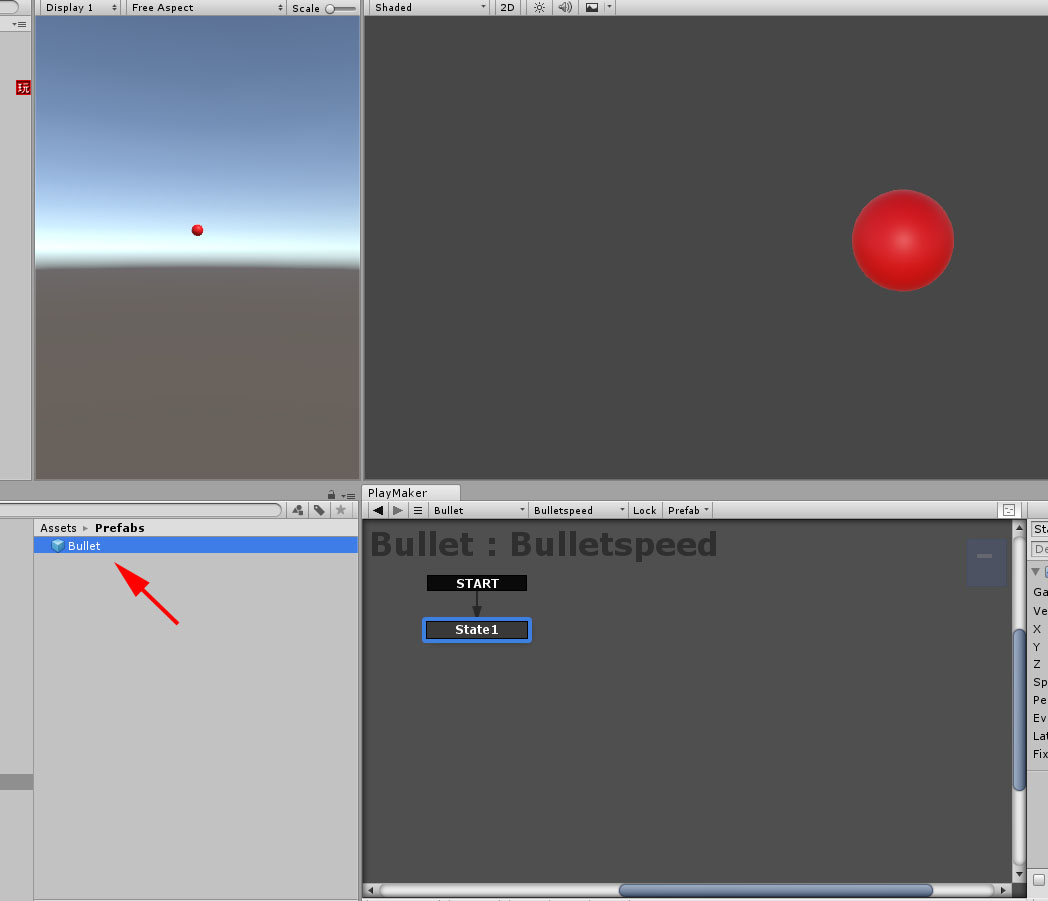
Prefabにする
これをPrefabにします。
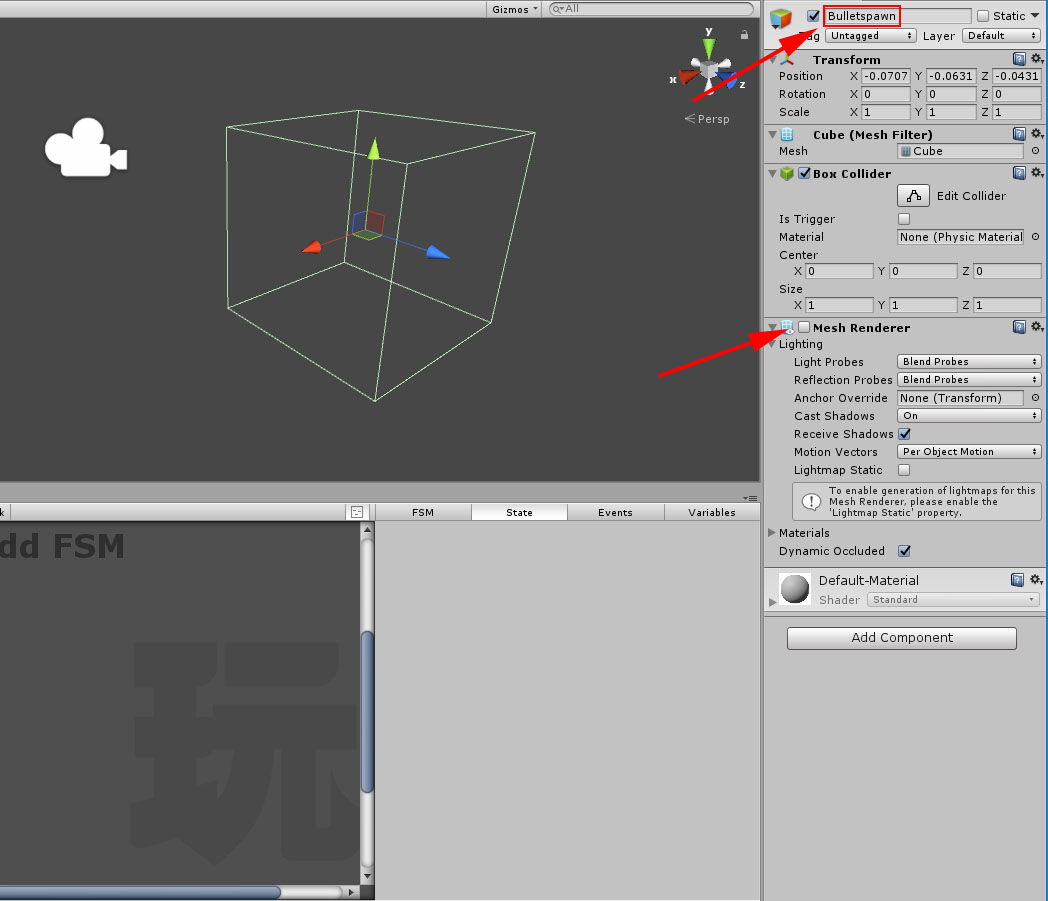
弾丸が出る場所を作る
Bulletspawnという名前のCubeを作りMesh Rendererのチェックを外します。
Bulletspawnの設定
BulletspwanにもPlaymakerでFSMを作成します。
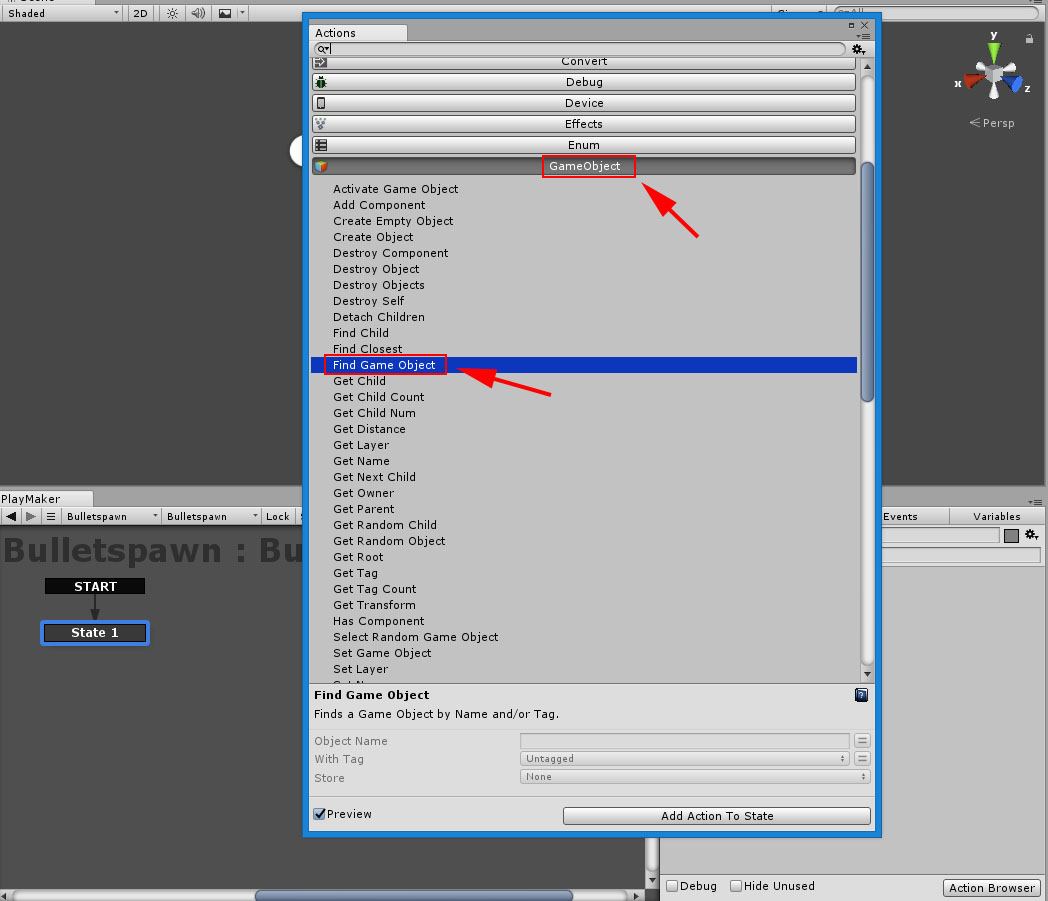
BulletspawnのAction Browser
Add ActionからFind Game Objectを追加します。
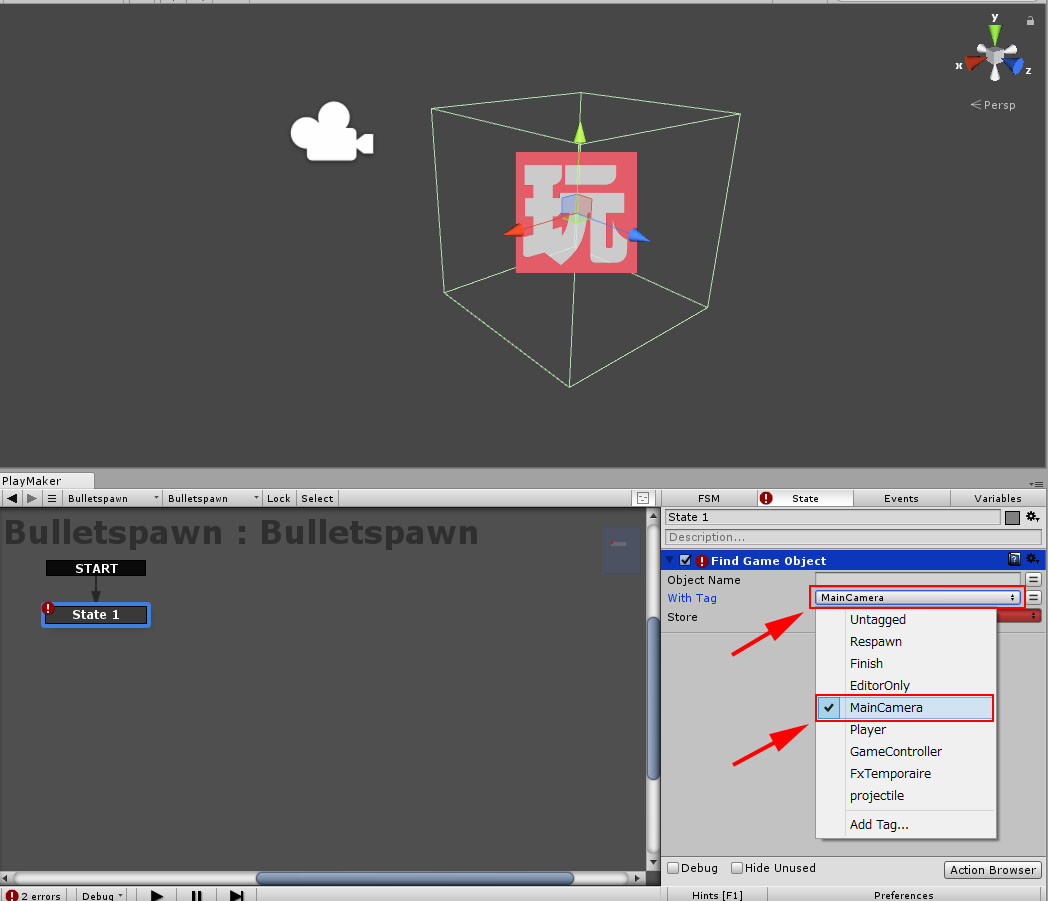
MainCameraをFind
With TagからMainCameraを選択してMainCameraのタグを持ったオブジェクトをFindします。
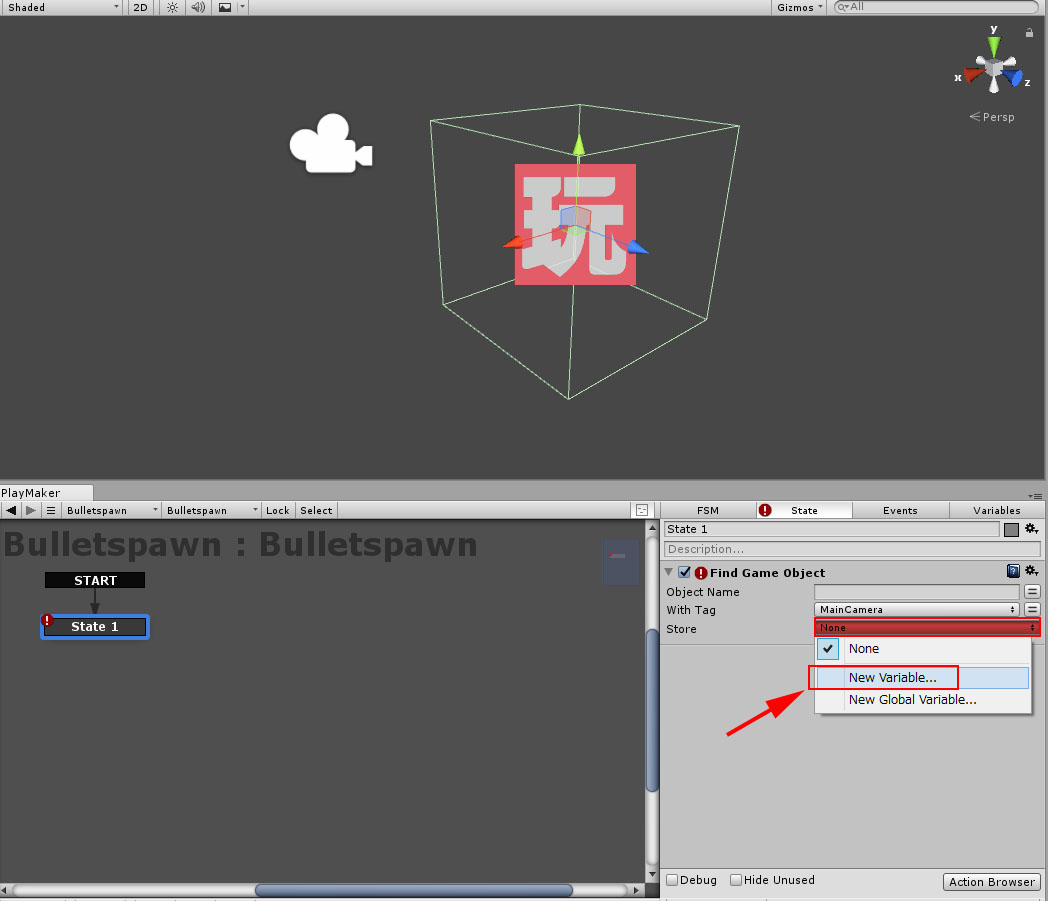
新規に変数を作る
New Variableから新規の変数を作りそこに格納します。
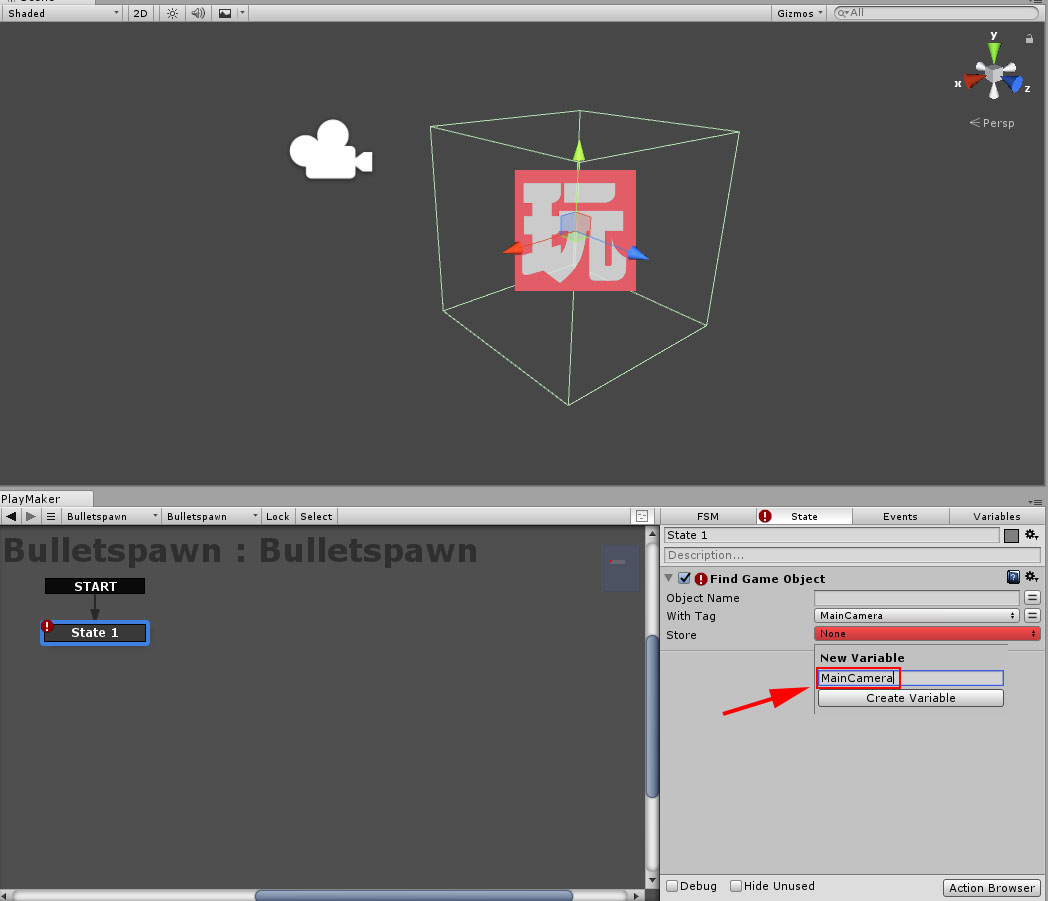
変数を作って格納
ここではmainCameraという変数名にしました。 Add Stateをして新たにStateを作ります。
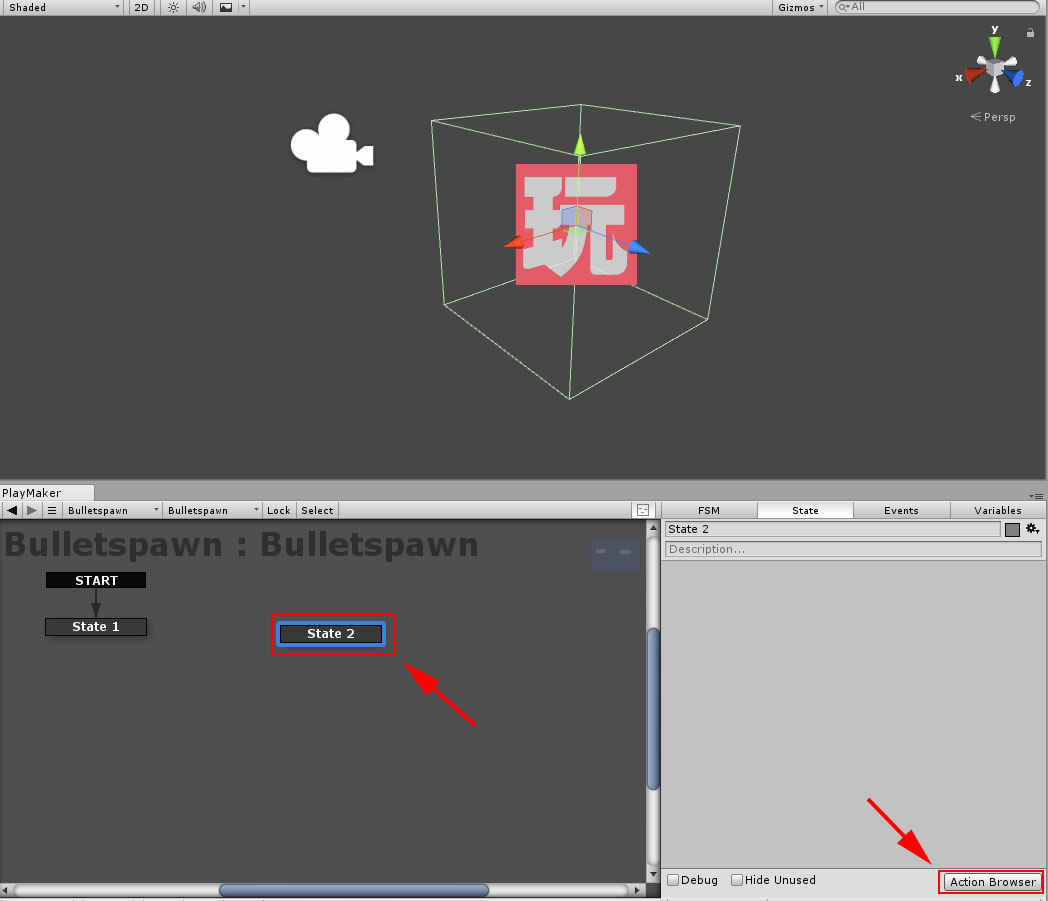
State2ができた
TransformからLook Atを追加します。

Look Atを追加
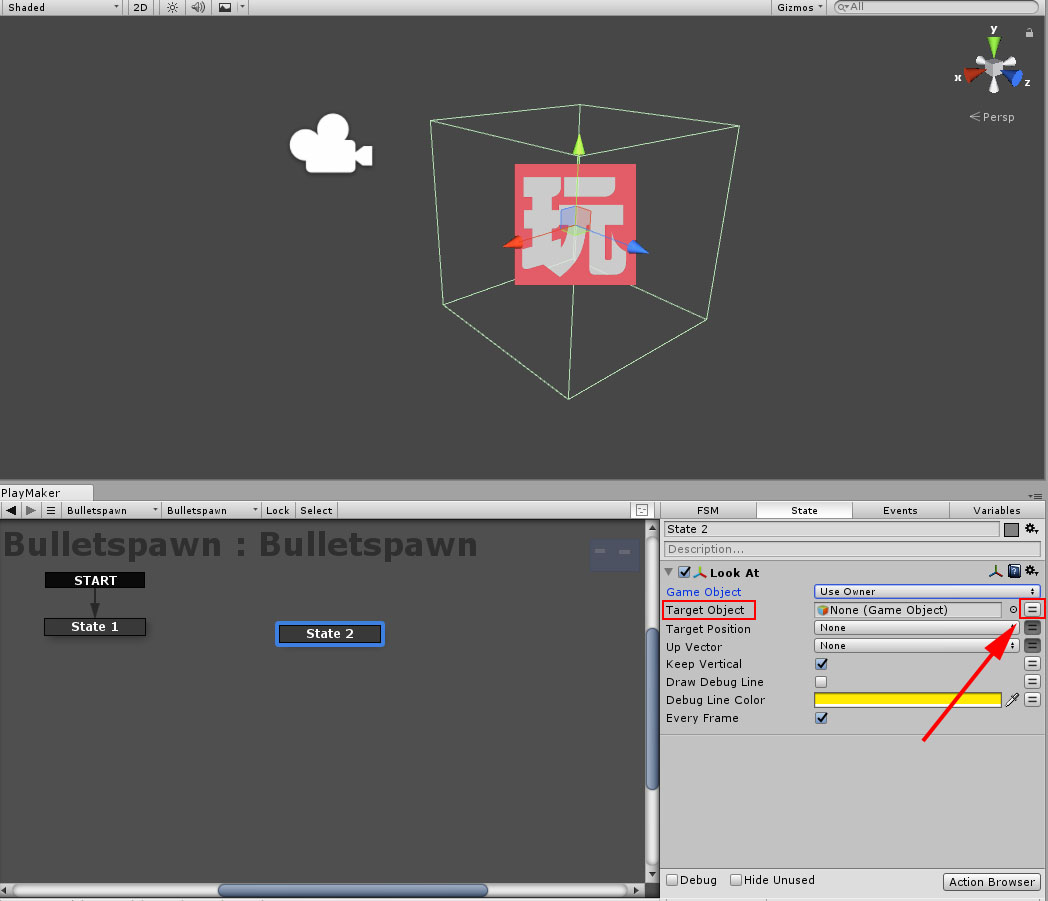
Target Objectを選ぶ
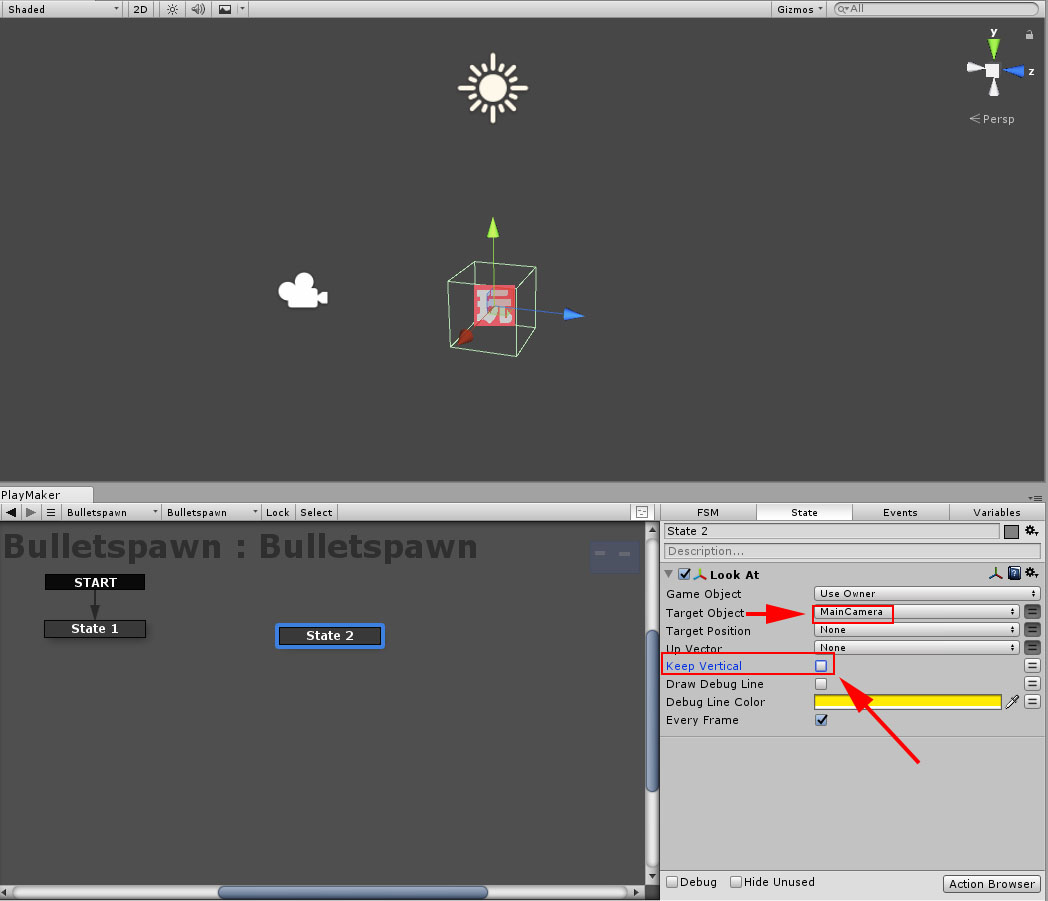
TargetをmainCameraに
Look Atのターゲットを先ほど作ったMainCameraにしてKeep Verticalのチェックを外します。 State1のTransitionをFINISHEDにします。
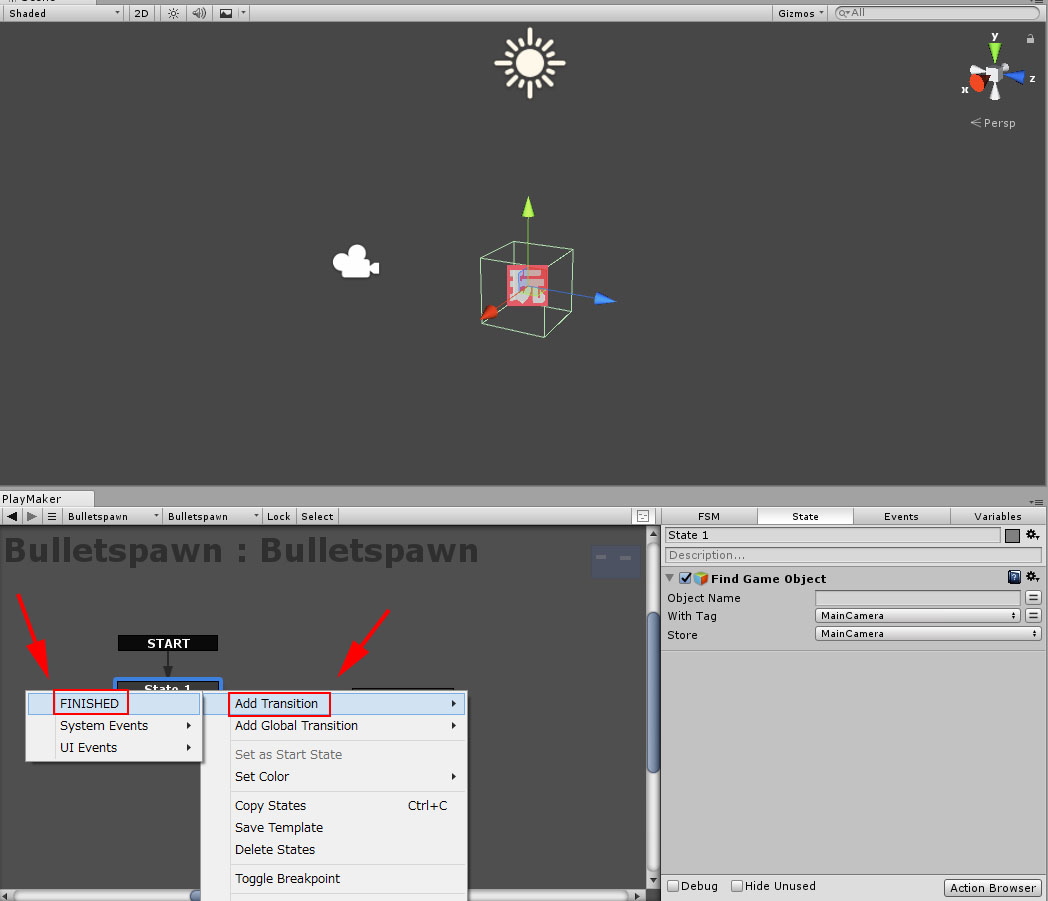
TransitionをFINISHEDに
そこからState2につないでいきます。
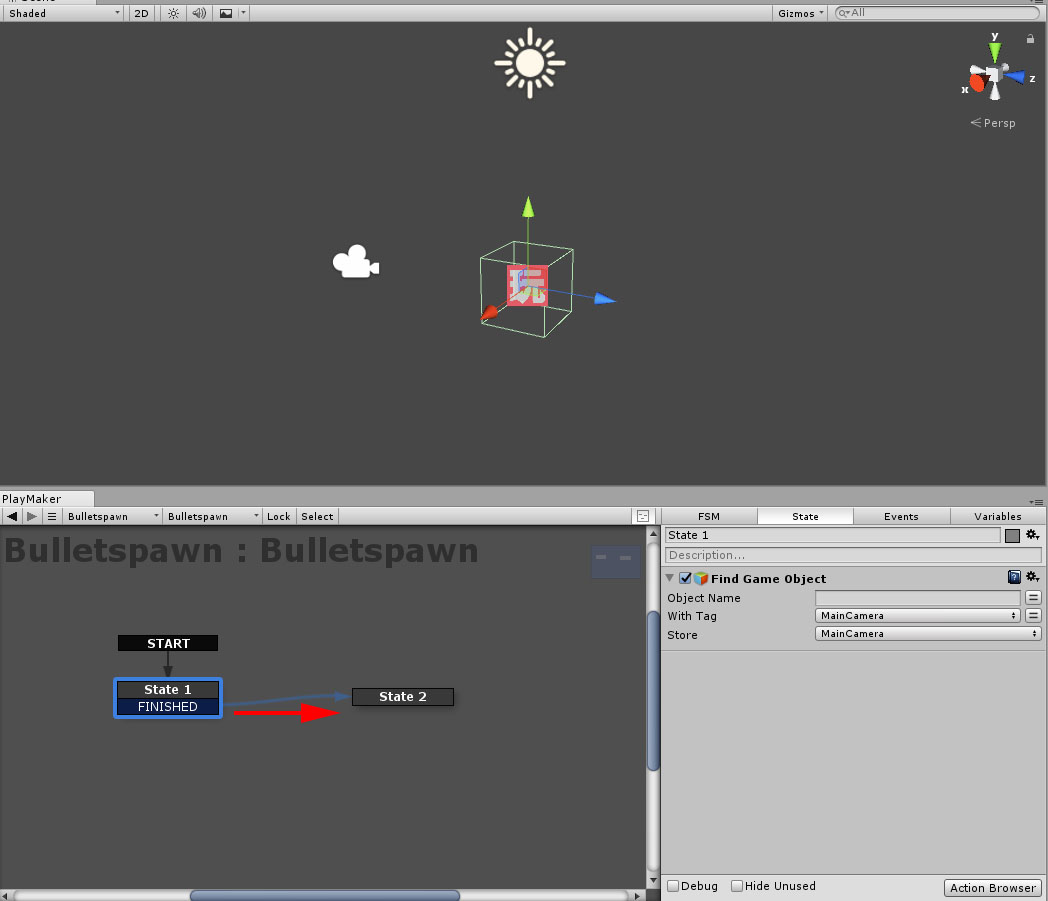
State2につなぐ
次にState3を作り、Create ObjectのActionを追加します。
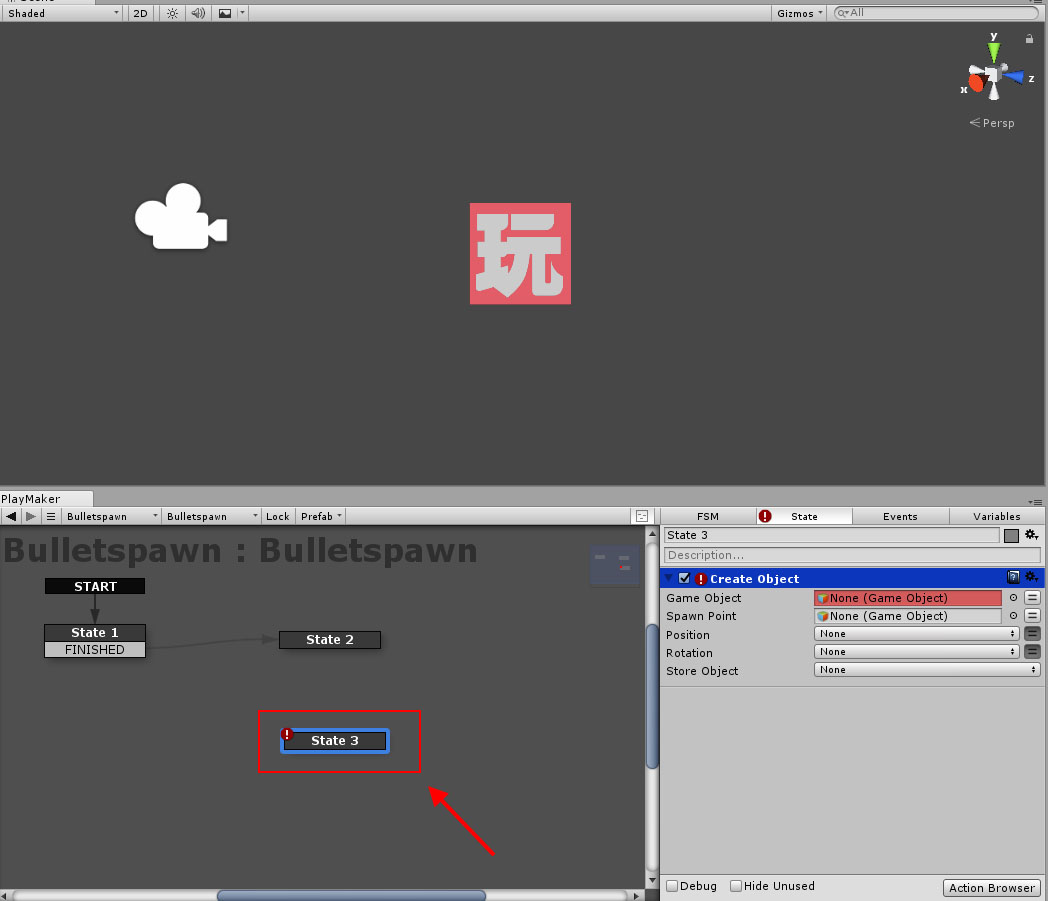
Create ObjectのActionを追加
Createするオブジェクトを指定します。
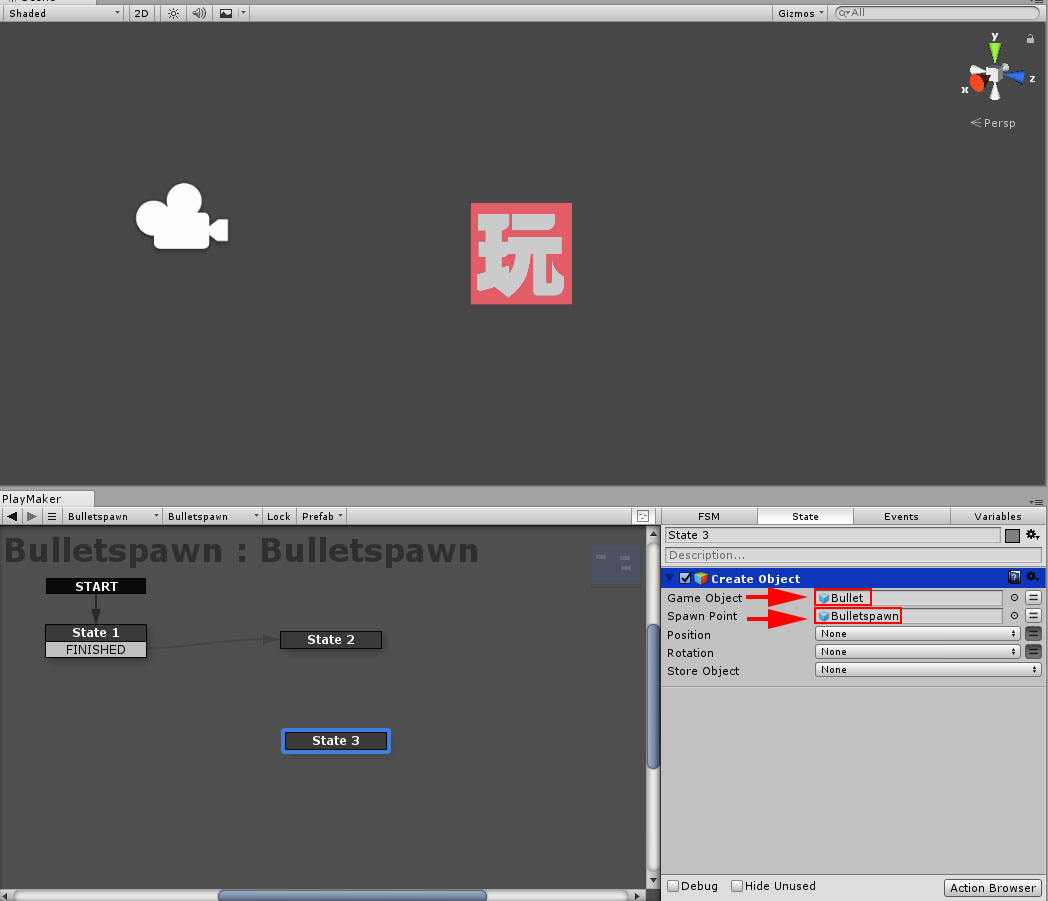
BulletとBulletspawnの追加
Game Objectには”Bullet”をSpawn Pointには”Bulletspawn”を指定します。
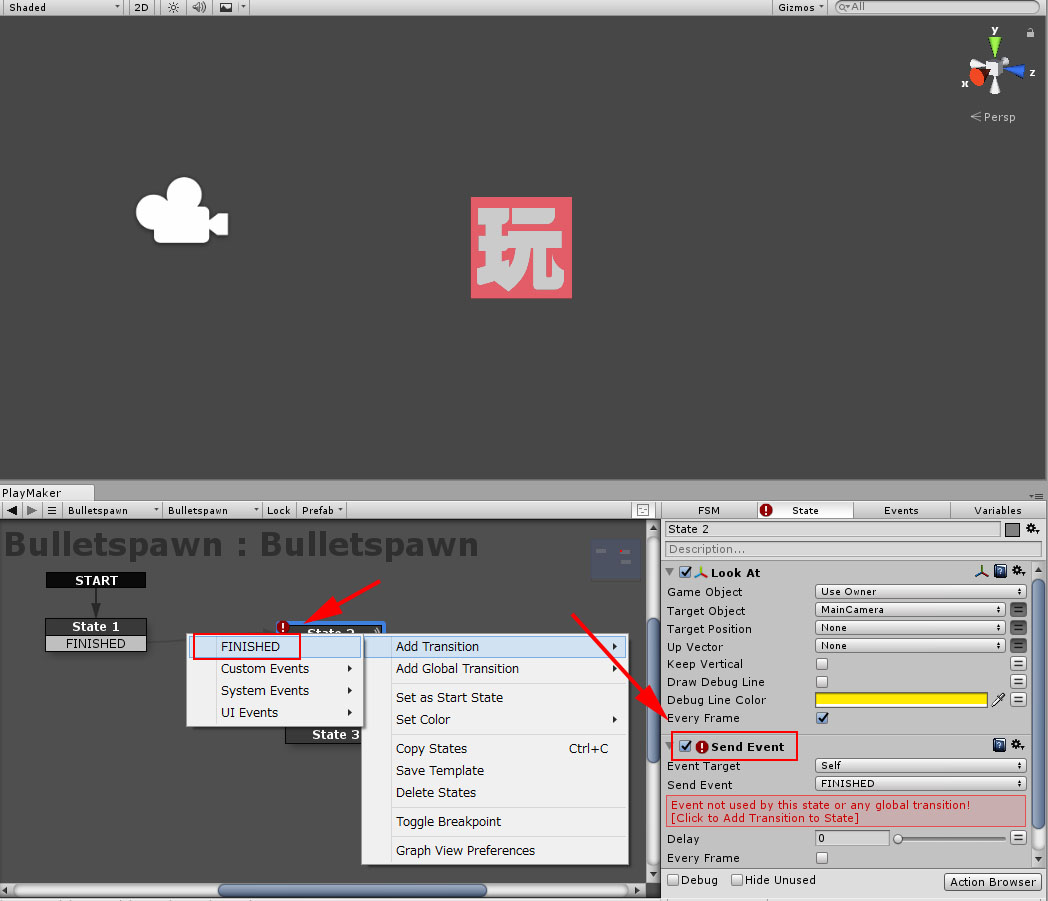
Send EventからFINISHED
Send EventのActionを追加してTransitionをFINISHEDにします。 State2からState3につなぎます。
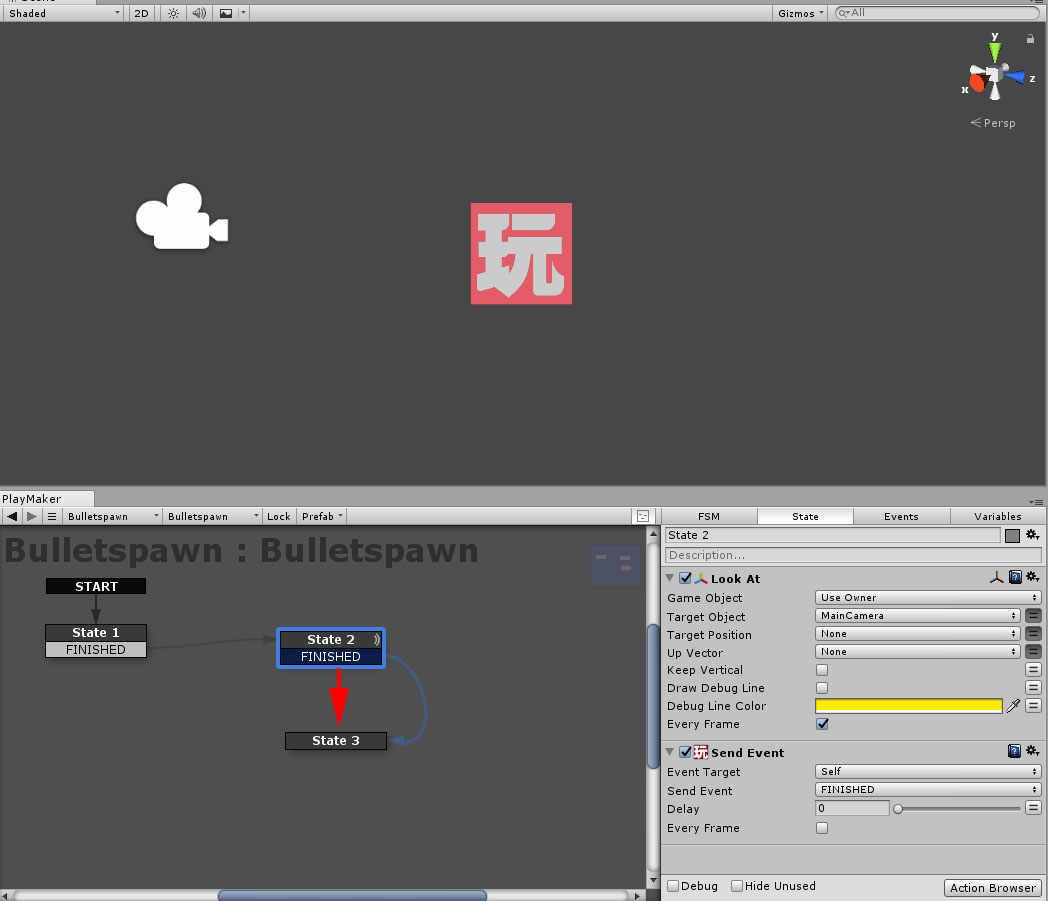
State3につなぐ
繰り返しになるようにState3からState2にもつなぎます。
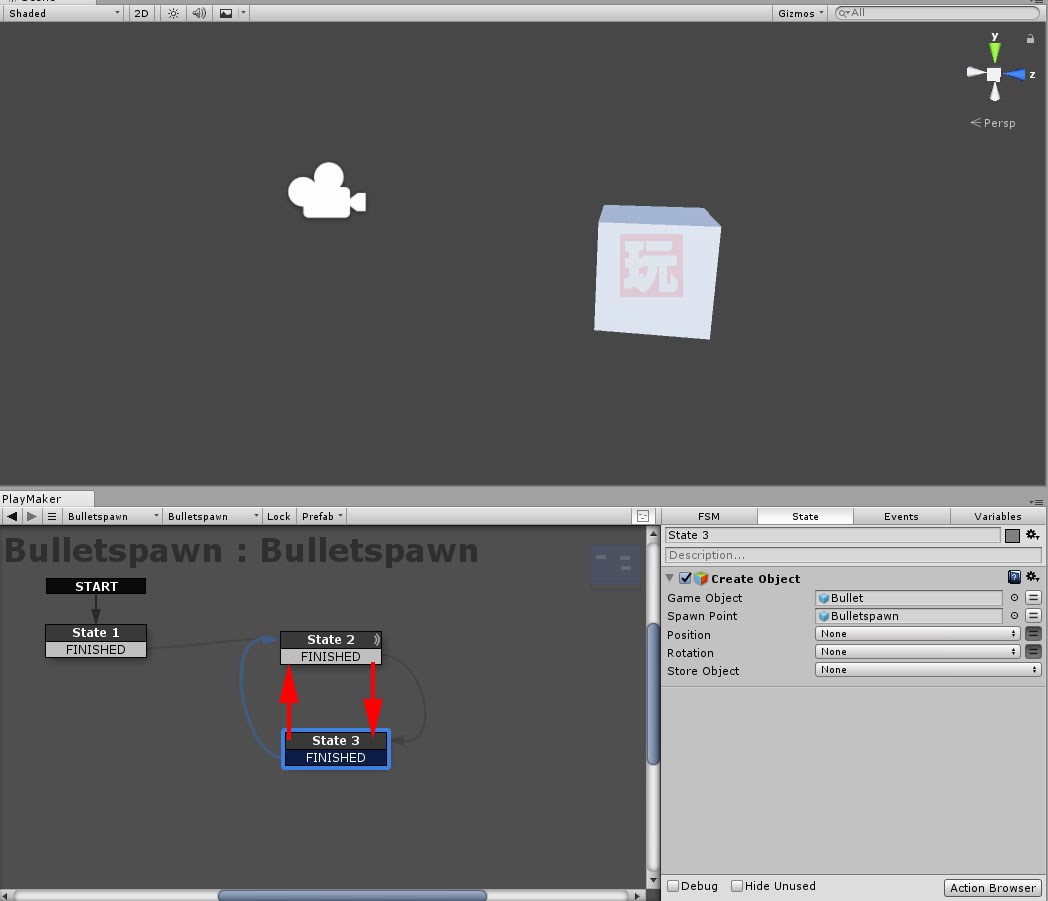
State3からState2につなぐ
1秒ごとに発射されるようにWaitを追加します。
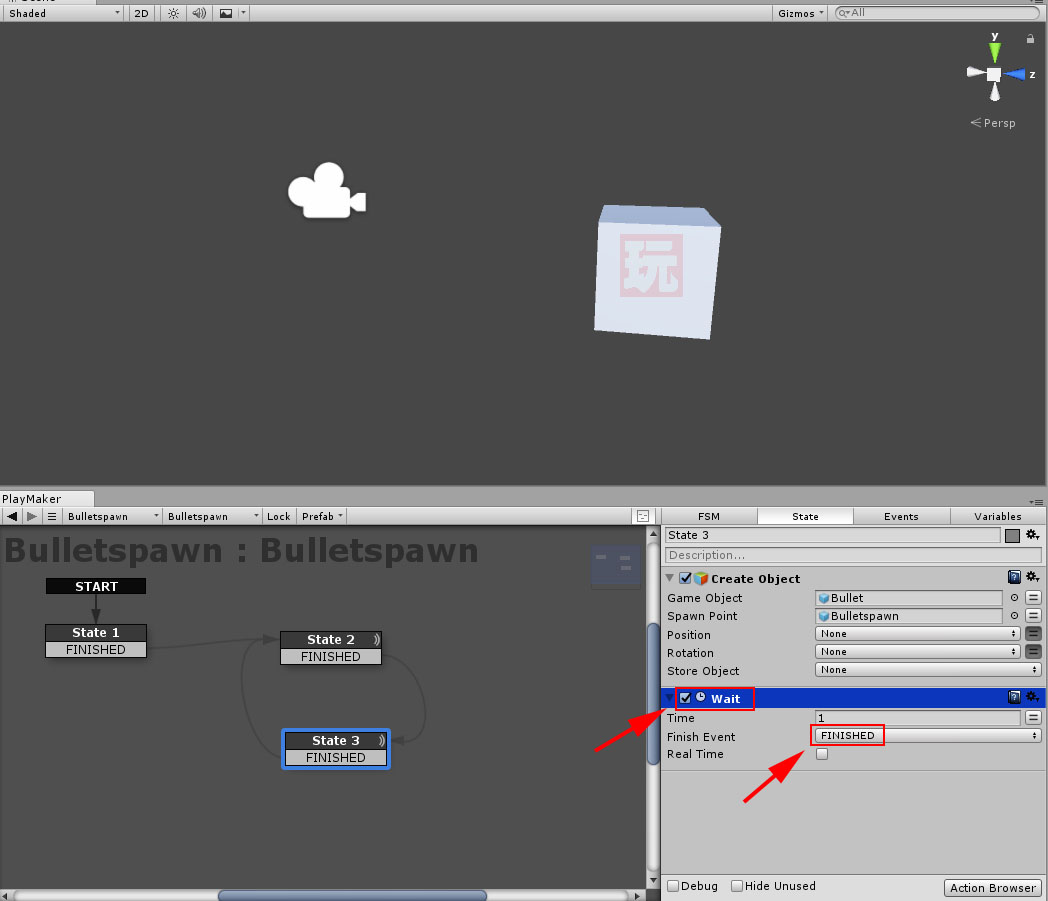
Waitの追加
時間は1秒にしました。 Finish EventはFINISHEDにします。 このままだと弾丸がずっと飛び続けてしまうので適当なところでDestroyします。
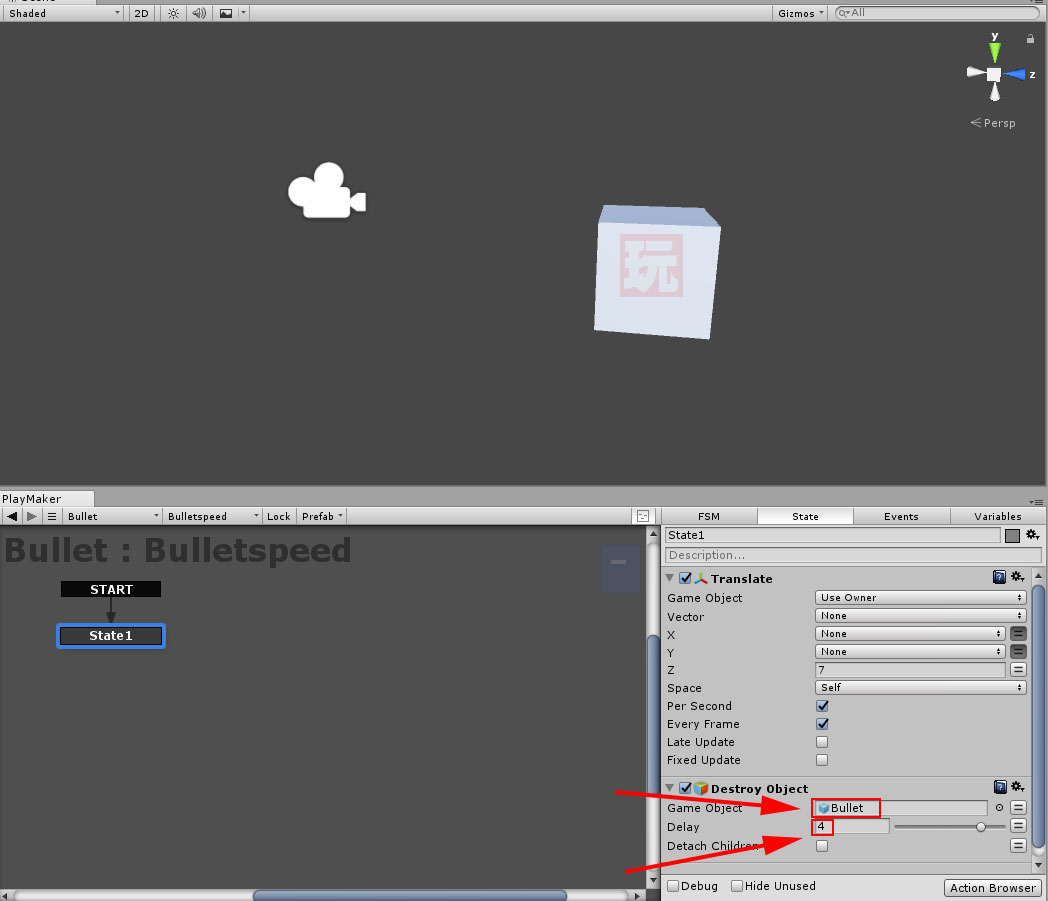
DestroyとDelayの時間
Destroy ObjectでBulletを指定してDelayする時間を4秒にしました。 この記事ではUnityのPlaymakerを使って弾丸を自動生成する方法を紹介しました。 次の記事ではこの弾丸の動きをスローモーションにする方法を紹介します。 続き
UnityからSTYLYにアセットをアップロードする方法
