Unityのシェーダーを利用して、以下のような光のラインが走る表現(スキャンライン)を作る方法を解説します。
空間スキャンライン表現
サンプル
GitHubサンプル
サンプル空間
空間スキャンラインの作り方
ここでは、空間スキャンラインを作る方法を解説いたします。
x座標を色として使う
Unityのシェーダーでは、画面に映っているオブジェクトの画素が空間中のどの位置にあるかという、座標をとることができます。 例えば、空間のx座標をオブジェクトの色として使うと以下のような見た目になります。
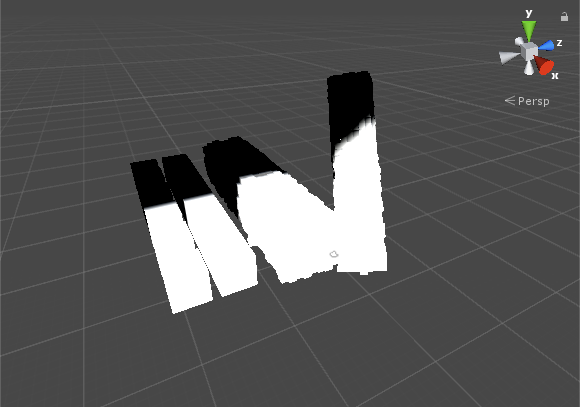
オブジェクトの色にx座標を適用
x座標が0.0より小さい部分は黒色に、 1.0より大きい部分は白色に、0.0 ~ 1.0の部分は灰色になります。 UnityのShaderLabで書いた場合は以下になります。
float x = IN.worldPos.x; // x座標
o.Emission = x; // 色として出力
光の線を作る
0.0 ≦ x座標 ≦ 0.1を満たすときはオブジェクトの色を白く、それ以外は黒くします。

0≦x≦0.1の部分を白くする
UnityのShaderLabで書いた場合は以下になります
float x = IN.worldPos.x; // x座標
o.Emission = step(0.0, x) * step(x, 0.1);  // 色として出力
光の残像を加える
これに光の残像を加えます。
光の残像を加える
UnityのShaderLabで書いた場合
float x = IN.worldPos.x; // x座標
float scanline = step(0.0, x) * step(x, 0.1); // 光の線
float trajectory = step(x, 0.0) * smoothstep(-4.0, 0.0, x); // 光の残像
o.Emission = scanline + trajectory * 0.3; // 色として出力
アニメーションを作る
光の線を動かす
光の線の繰り返しを作り、これを時間で動かします。
線を時間で動かす
UnityのShaderLabで書いた場合
float x = IN.worldPos.x; // x座標
x -= _Time.z * 6.0; // x座標から時間をマイナス
x = fmod(x, 12.0); // x座標を0.0 ~ 12.0の間で繰り返す
float scanline = step(-0.1, x) * step(x, 0.0); // 光の線
float trajectory = step(x, 0.0) * smoothstep(-4.0, 0.0, x); // 光の残像
o.Emission = scanline + trajectory * 0.3; // 色として出力
色をつけて完成
最後に色を乗算することで今回の空間スキャンライン表現の完成です。
色を付ける
float x = IN.worldPos.x; // x座標
x -= _Time.z * 6.0; // 時間をマイナス
x = fmod(x, 12.0); // x座標を0.0 ~ 12.0の間で繰り返す
float scanline = step(-0.1, x) * step(x, 0.0); // 光の線
float trajectory = step(x, 0.0) * smoothstep(-4.0, 0.0, x); // 光の残像
o.Emission = scanline * _LineColor + trajectory * _TrajectoryColor; // 色として出力
実際にUnityで作る
シェーダーファイルの作成
Create/Shader/Unlit Shaderを選択し、シェーダーファイルを作成します。
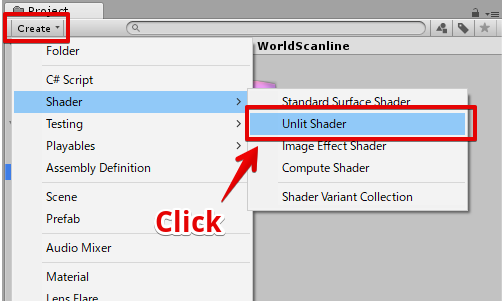
シェーダーファイルの作成
シェーダーファイル名はWorldScanlineとします。
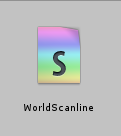
作成したシェーダーファイル
シェーダーの編集
WorldScanlineシェーダーを開き、中身を以下のように書き換えます。
Shader "STYLY/Examples/WorldScanline" {
	Properties{
		_MainTex("Albedo (RGB)", 2D) = "black" {}
		_LineColor("Scan Line Color", Color) = (1,1,1,1)
		_TrajectoryColor("Scan Trajectory Color", Color) = (0.3, 0.3, 0.3, 1)
		_LineSpeed("Scan Line Speed", Float) = 1.0
		_LineSize("Scan Line Size", Float) = 0.02
		_TrajectorySize("Scan Trajectory Size", Float) = 1.0
		_IntervalSec("Scan Interval", Float) = 2.0

		[Space]
		[Space]
		_Glossiness("Smoothness", Range(0,1)) = 0.5
		_Metallic("Metallic", Range(0,1)) = 0.0
	}
		SubShader{
			Tags { "RenderType" = "Opaque" }
			LOD 200

			CGPROGRAM
			// Physically based Standard lighting model, and enable shadows on all light types
			#pragma surface surf Standard fullforwardshadows

			// Use shader model 3.0 target, to get nicer looking lighting
			#pragma target 3.0

			sampler2D _MainTex;

			struct Input {
				float2 uv_MainTex;
				float3 worldPos;
			};

			// line parameters
			fixed4 _LineColor; // color of line
			half _LineSpeed; // speed of line movement
			half _LineSize; // thickness of line

			fixed4 _TrajectoryColor; // color of trajectory
			half _TrajectorySize; // size of trajectory

			half _IntervalSec; // interval(sec)

			// other
			half _Glossiness;
			half _Metallic;

			void surf(Input IN, inout SurfaceOutputStandard o) {

				#define LINE_POS (_Time.w * _LineSpeed)
				#define INTERVAL (_IntervalSec * _LineSpeed)
				#define STEP_EDGE (_LineSize)
				#define STEP_EDGE_1 (STEP_EDGE + _TrajectorySize)
				#define STEP_EDGE_2 (STEP_EDGE)

				float scanline = step(
						fmod(abs(IN.worldPos.x - LINE_POS), INTERVAL),
						STEP_EDGE
					);
				float trajectory = smoothstep(
						STEP_EDGE_1, STEP_EDGE_2,
						fmod(abs(IN.worldPos.x - LINE_POS), INTERVAL)
					);

				fixed4 baseColor = tex2D(_MainTex, IN.uv_MainTex);
				o.Albedo = baseColor.rgb;
				o.Emission = _LineColor * scanline + _TrajectoryColor * trajectory;
				o.Metallic = _Metallic;
				o.Smoothness = _Glossiness;
			}
			ENDCG
		}
			FallBack "Diffuse"
}
マテリアル作成
シェーダーファイルを右クリック選択し、Create/Material を選択してマテリアルを作成します。
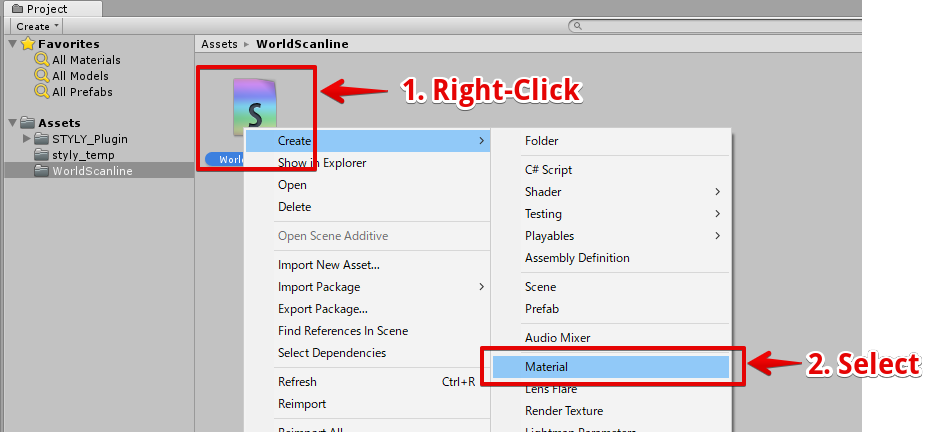
マテリアル作成
作成したマテリアル
マテリアルを箱に張り付ける
HierarhchyのCreate/Cubeを選択し、Cube(箱)を作成します。
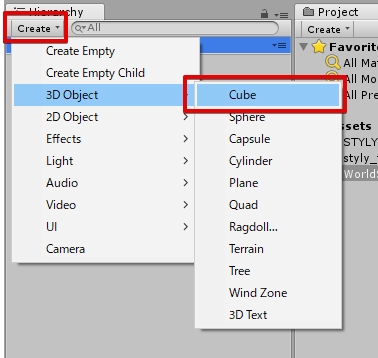
Cubeオブジェクトの作成
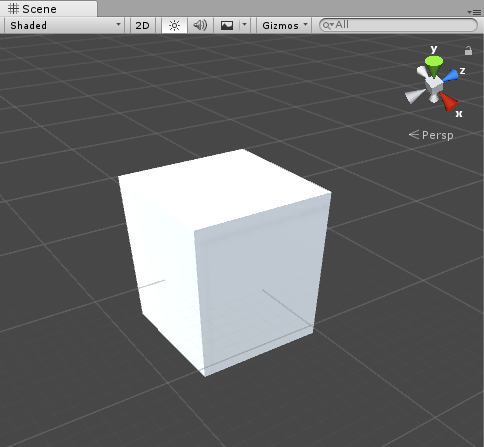
作成したCubeオブジェクト
作成したCubeオブジェクトに先ほど作成したマテリアルをドラッグ&ドロップし、Cubeにマテリアルをくっつけます。
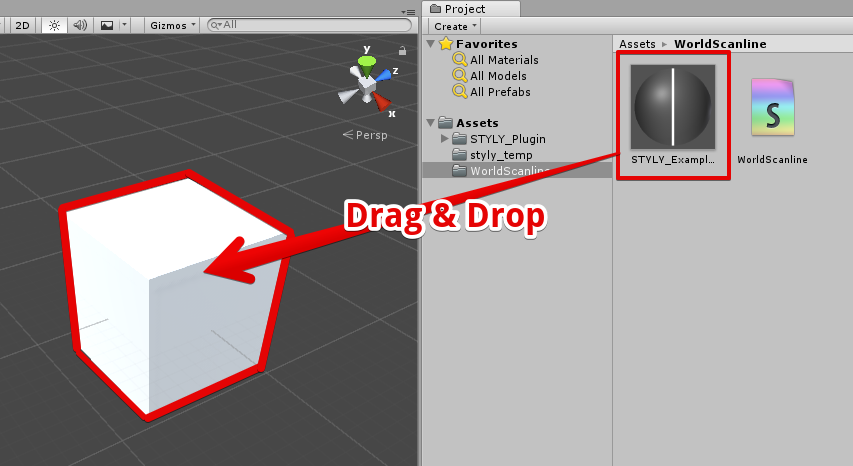
マテリアルを箱オブジェクトに適用
スキャンラインマテリアルを適用した状態でゲームを再生すると、以下のようにラインが流れる箱になります。
マテリアル適用結果
板を作る
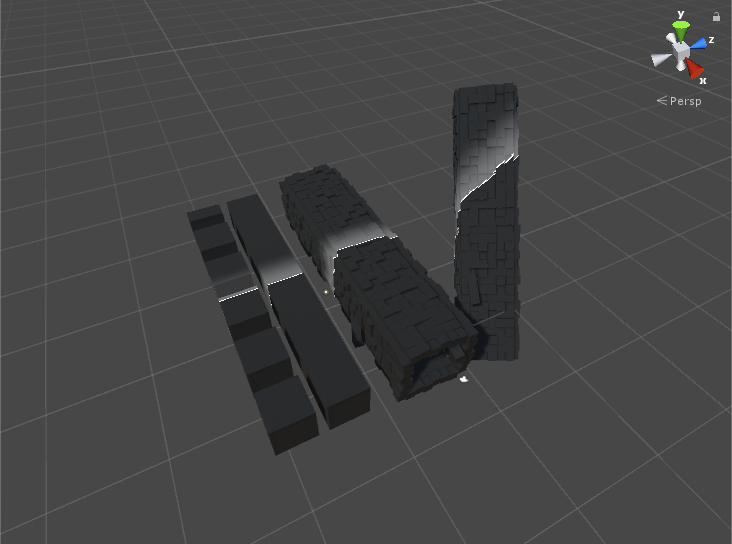
SciFiな感じの板を作る
以下のようなSciFiな雰囲気ただよう板の作り方を解説します。
板状に並べた立方体に対するスキャンライン表現
まずは、Cubeをたくさん並べて以下のような板を作ります。
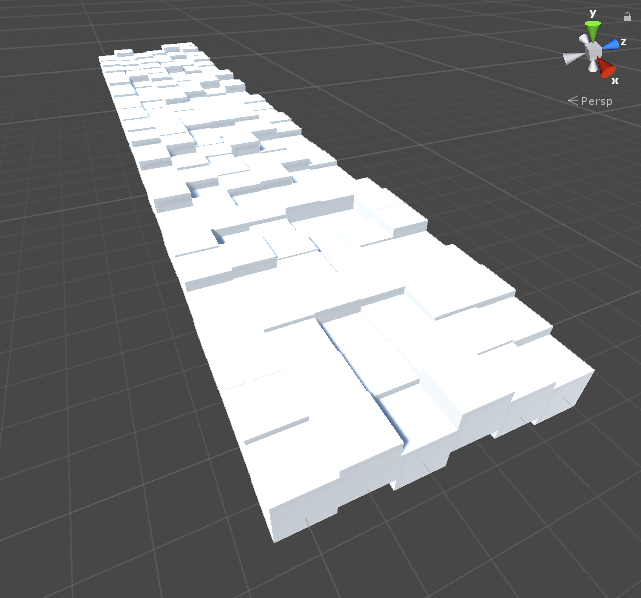
立方体を並べる
マテリアルのパラメータを以下のように設定し、それぞれのCubeに適用します。
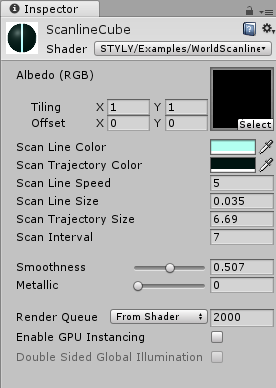
マテリアルのパラメータ設定
マテリアルを適用すると以下のような見た目になります。
スキャンラインシェーダーを適用した結果
UnityからSTYLYにアセットをアップロードする方法
UnityからSTYLYへデータをアップロードする方法については下記リンクの記事をご覧ください。 https://styly.cc/ja/manual/unity-asset-uploader/