A new PlayMaker custom action, GetARCameraTexture, has been added.
GetARCameraTexture allows you to capture images or video information from your smartphone’s camera onto a texture in real time.
To use the GetARCameraTexture feature, the STYLY plugin and PlayMaker must be installed as prerequisites.
Sample scene (Every Frame)
https://gallery.styly.cc/scene/92c29701-0d1b-4ccb-b3ca-64b4efc634ad
Sample Scene
What are Custom Actions
PlayMaker comes with a variety of features for creating game logic and interactions.
Each of these features is called an action.
![[Playmaker Reference] Action Reverse Lookup List](https://styly.cc/wp-content/uploads/2019/09/df5ecbda-ba63-493c-9d22-5f07389e37a6-160x160.jpg)
In STYLY, multiple actions are implemented independently to expand the expressiveness of VR / AR scenes.
These “independently implemented actions” are called custom actions.
Custom actions are available when you download the STYLY Plugin for Unity (PlayMaker is required to use custom actions).
![[Unity / PlayMaker] How to use the custom action “GetARCameraTexture”](https://styly.cc/wp-content/uploads/2024/01/w-160x160.jpg)
Also, see the article below for a list of custom actions available for STYLY.
![[Unity / PlayMaker] STYLY Custom Actions List](https://styly.cc/wp-content/uploads/2021/01/catch-1-160x160.png)
Operating Platforms
GetARCameraTexture” works only in Mobile environment
.
| Platforms |
Operation |
| VR | ×Mobile |
| Web | ×Mobile |
| Mobile | 0 |
Sample Scene Creation
In this article we will use GetARCameraTexture to create an asset that will continue to transfer the smartphone video to the Cube texture.
Create Material
Create a RenderTexture: project window > right click on Assets and select Create→RenderTexture.
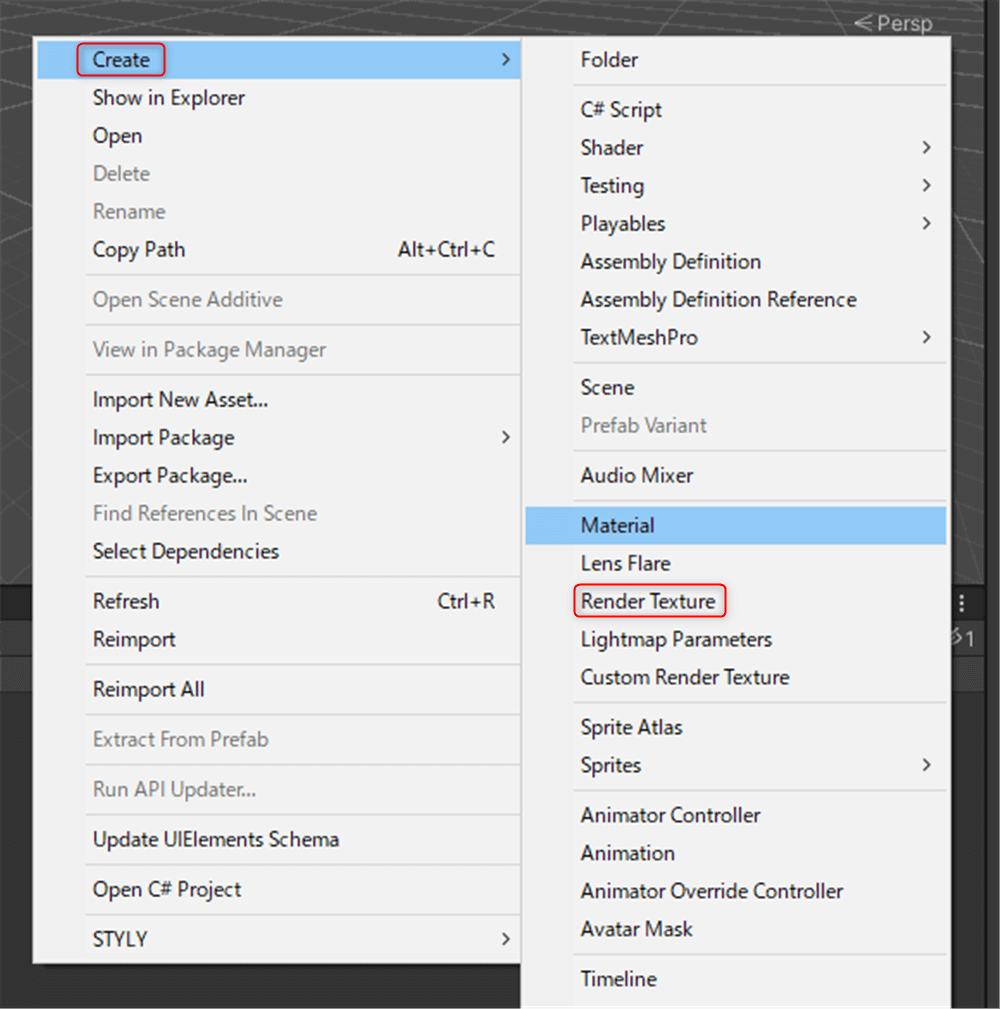
Create→RenderTexture
Change the Resolution of RenderTexture (where Size is located) to 1024. This time we set it to 1024, but this resolution can be arbitrary.
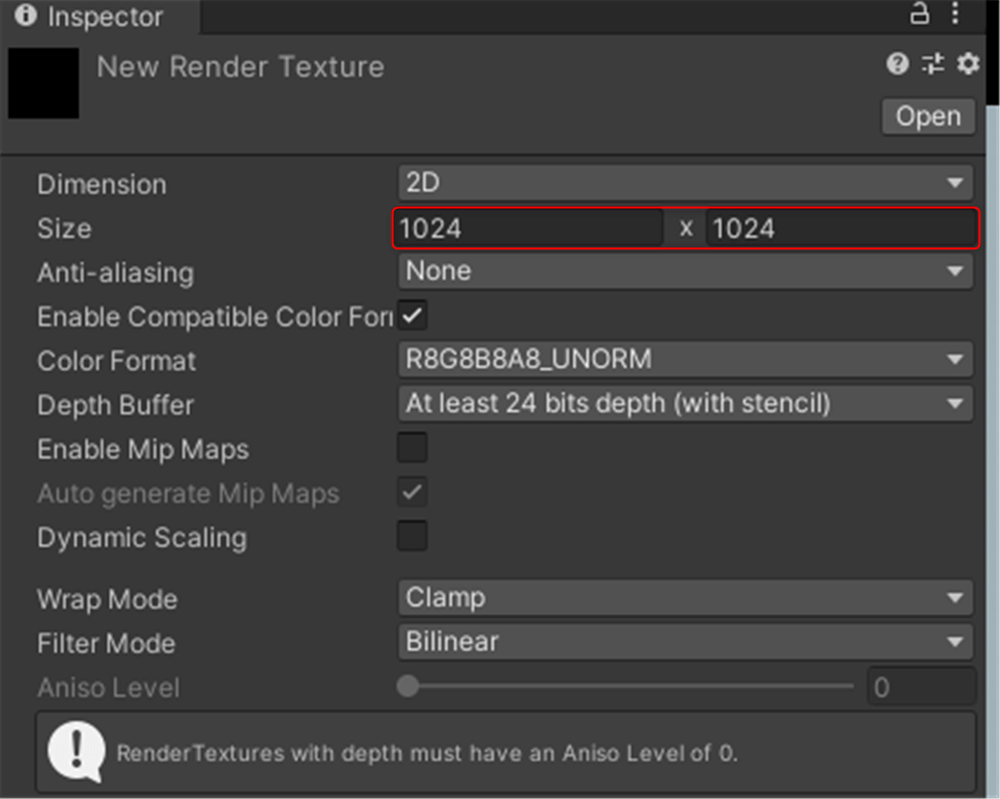
Resolution of RenderTexture
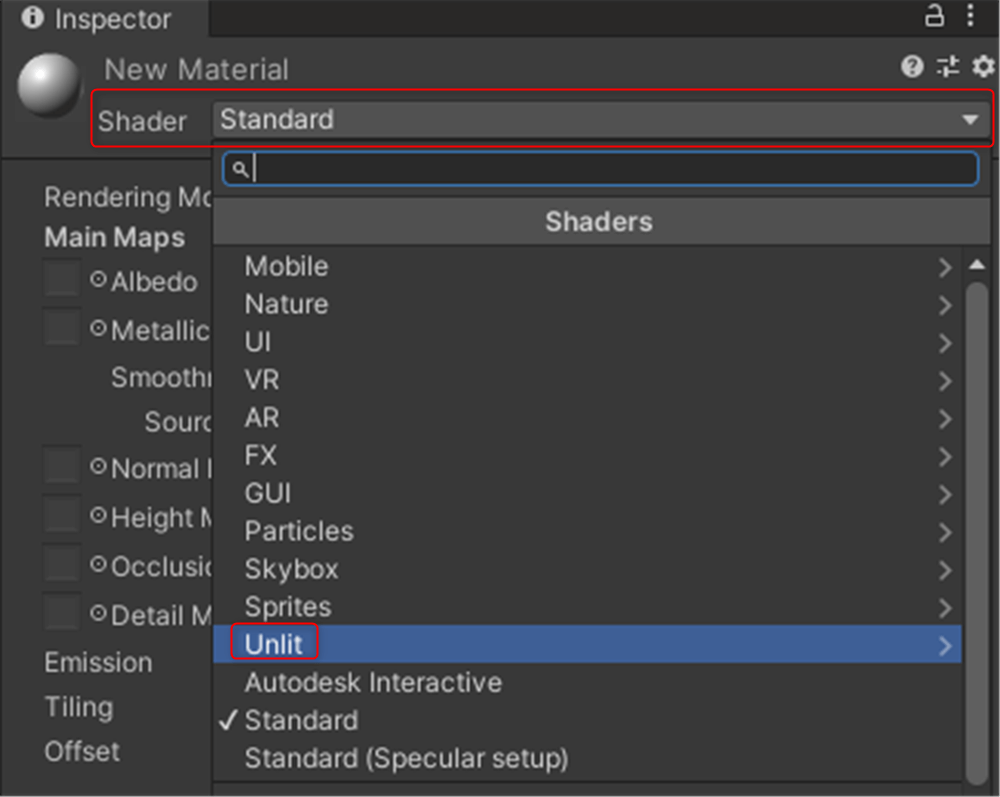
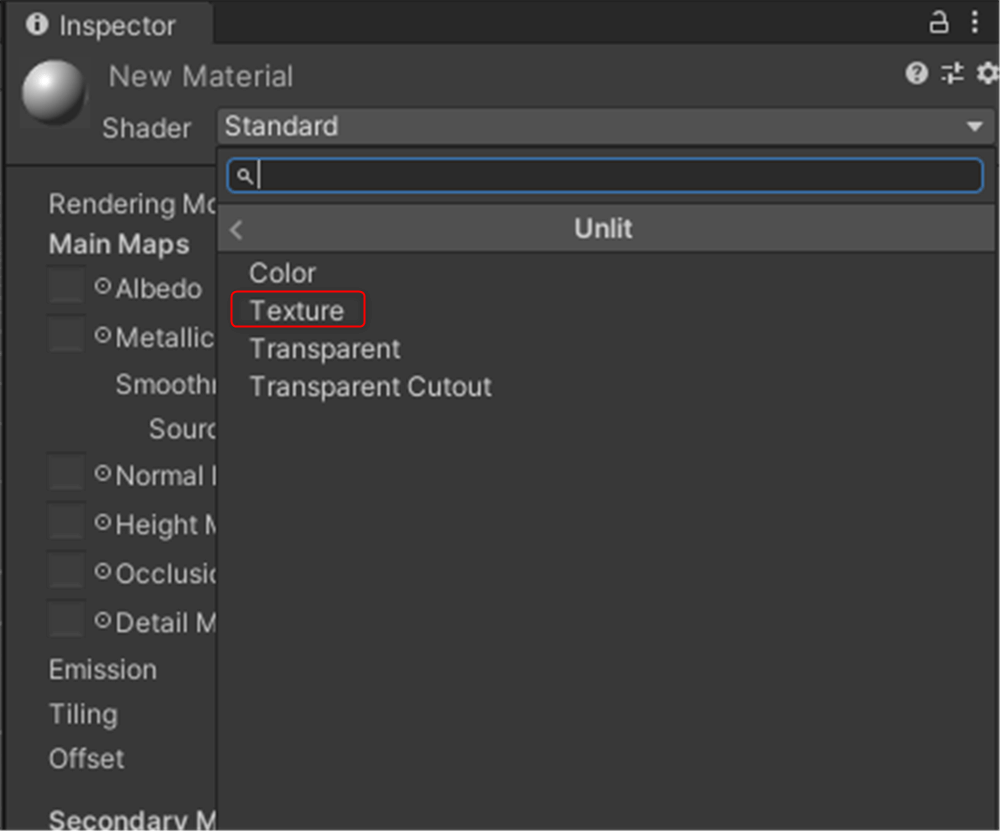
Create a material and select Unlit→Texture from the shader in the inspector.
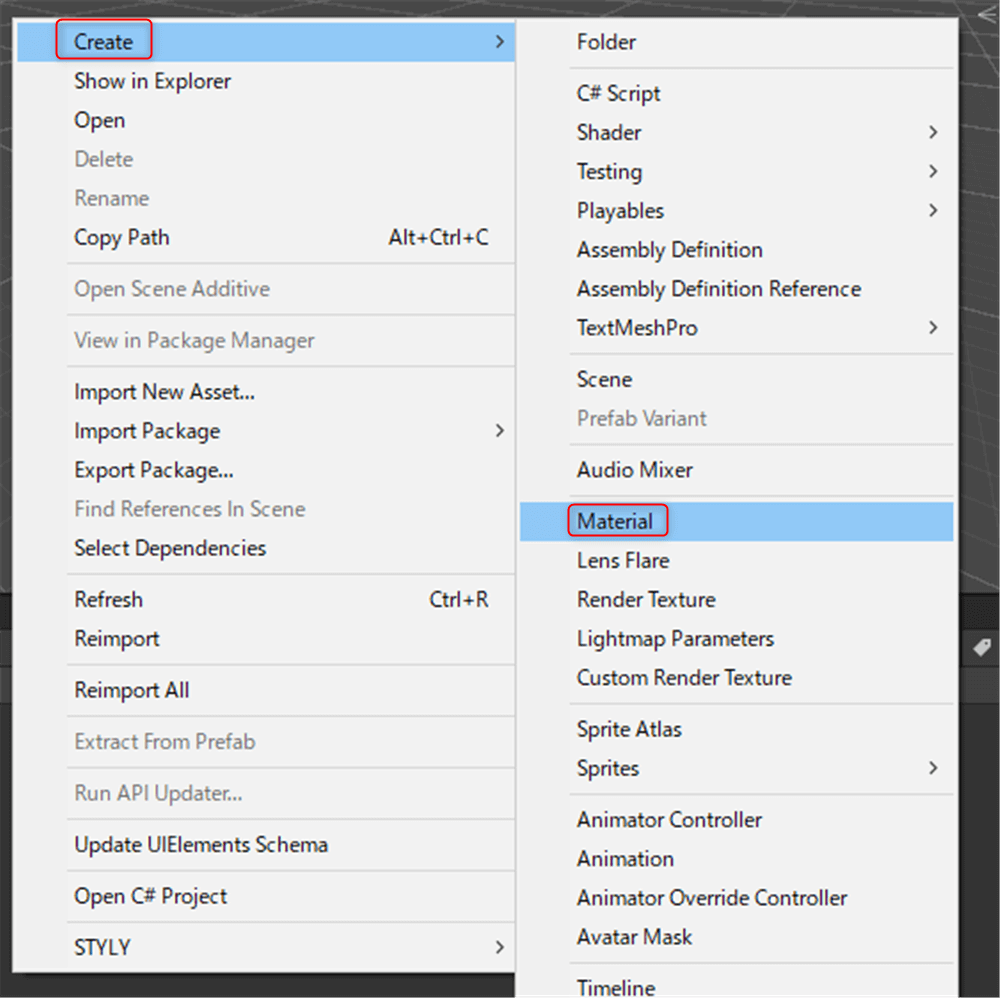
shader→Unlit→Texture
shader→Unlit→Texture
shader→Unlit→Texture
Drag and drop the RenderTexture you just created at None(Texture).
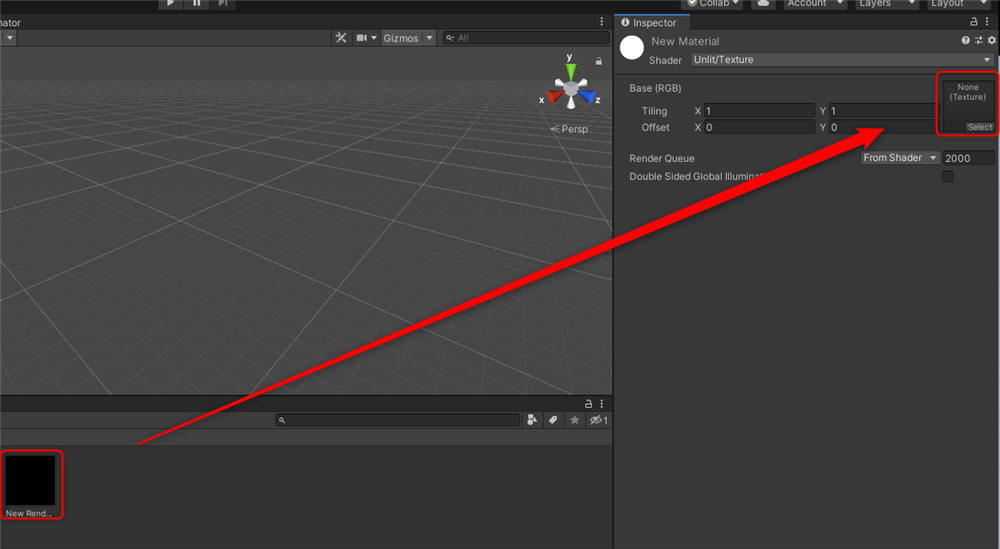
RenderTexture→None(Texture)
Add a Cube to the scene and apply the material created here. this Cube will be used to project the camera information.
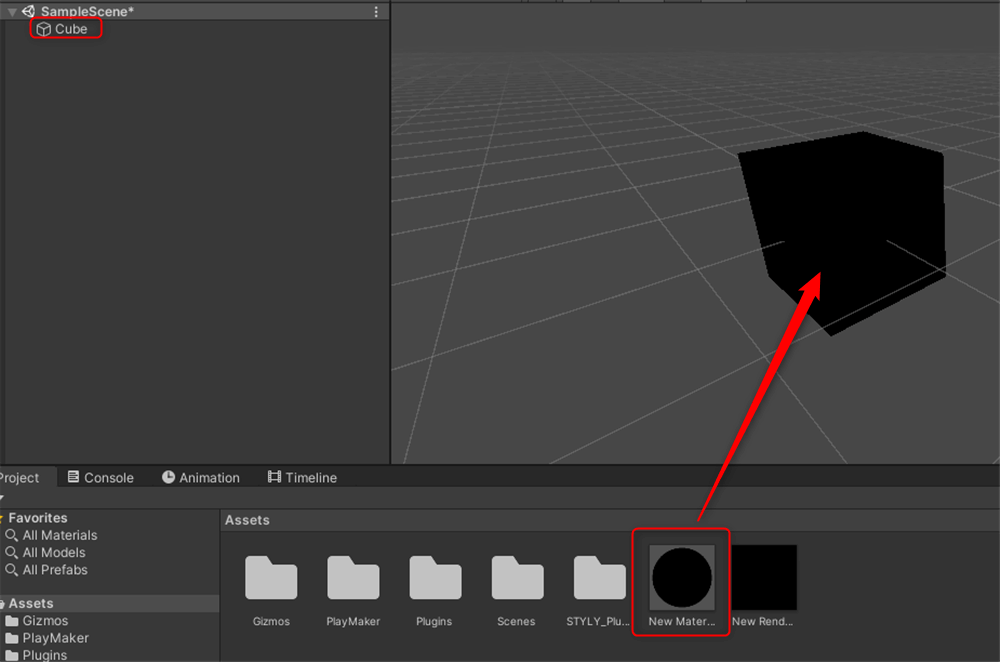
Add new cube
To make it easier to see the texture of the Cube in the AR scene, add a rotation animation. add PlayMaker FSM to the Cube and add rotate from the Action Browser.
Change the X,Y,Z values to 0.1.
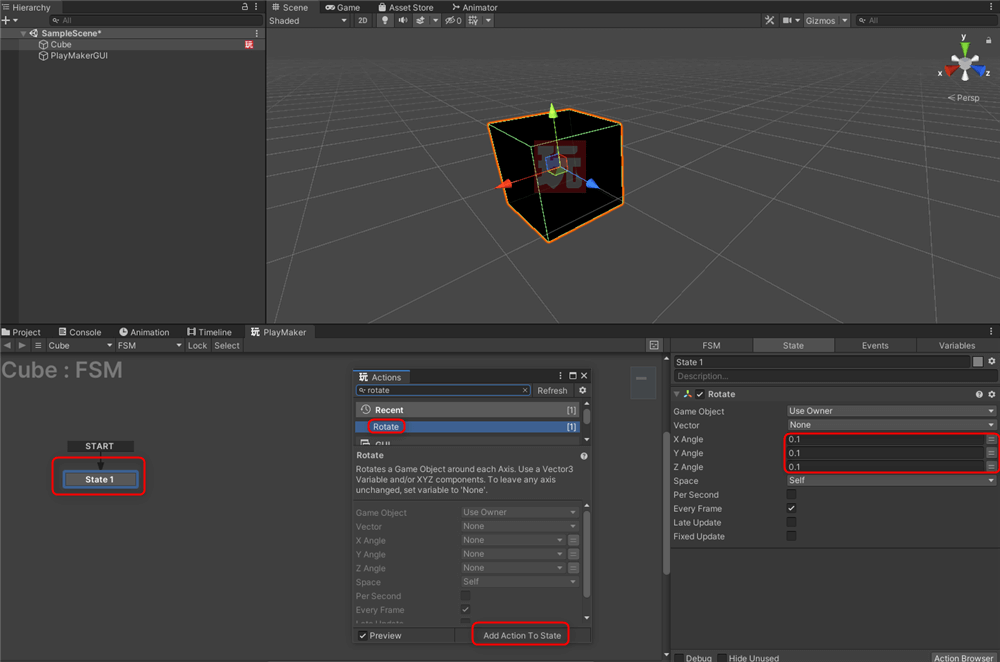
Action Browser→rotate→X,Y,Z=0.1
Creating the Main System
Next, create the main FSM.
Right click in the hierarchy and add a GameObject, then add the FSM in the PlayMaker editor.
You may rename the GameObject for clarity.
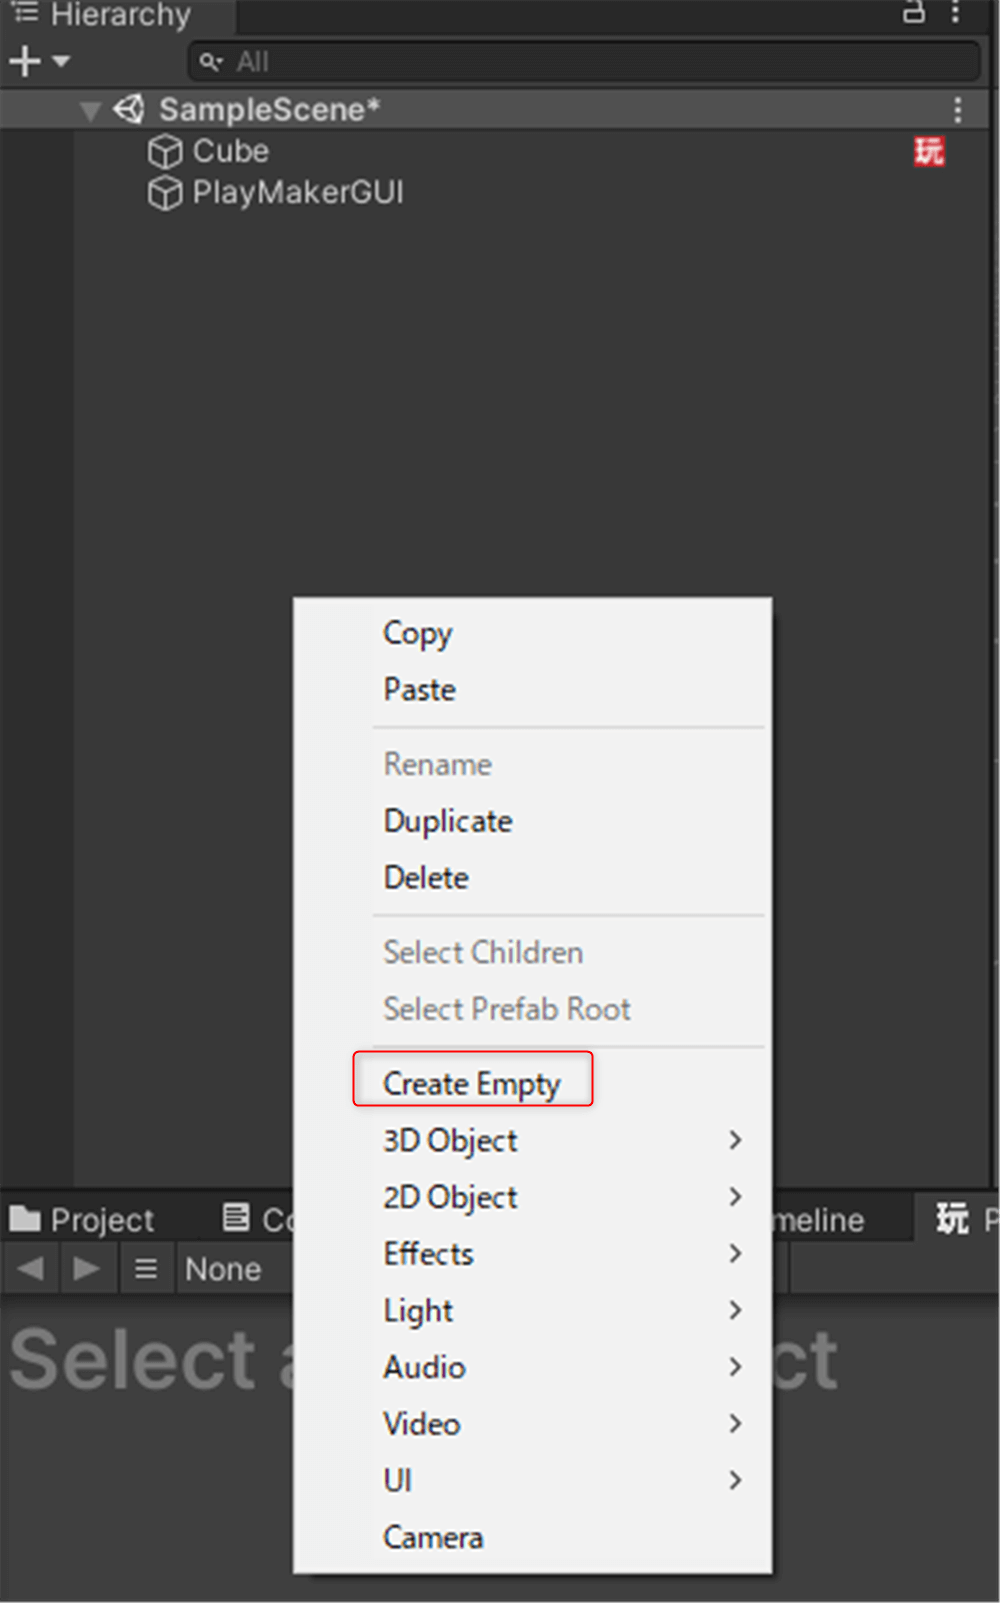
Add new GameObject and FSM
Add an action to the added FSM.
Select state 1, search for Get AR in the Action Browser and add Get AR Camera Texture.
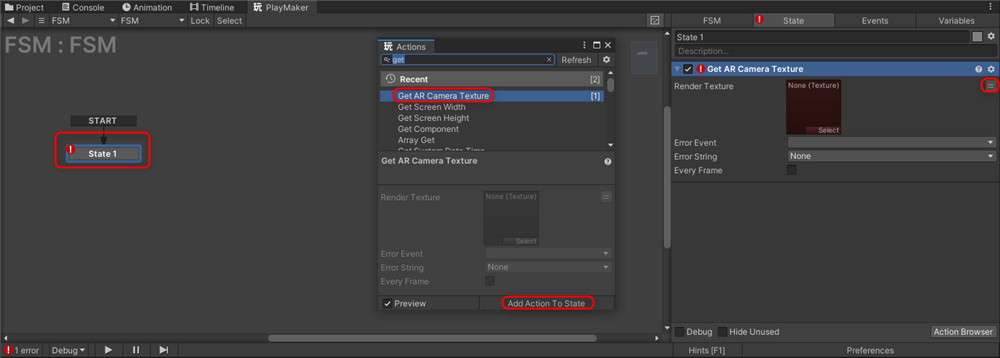
Get AR Camera Texture
Create a new variable “RenderTexture” by clicking on the two-line icon in RenderTexture.
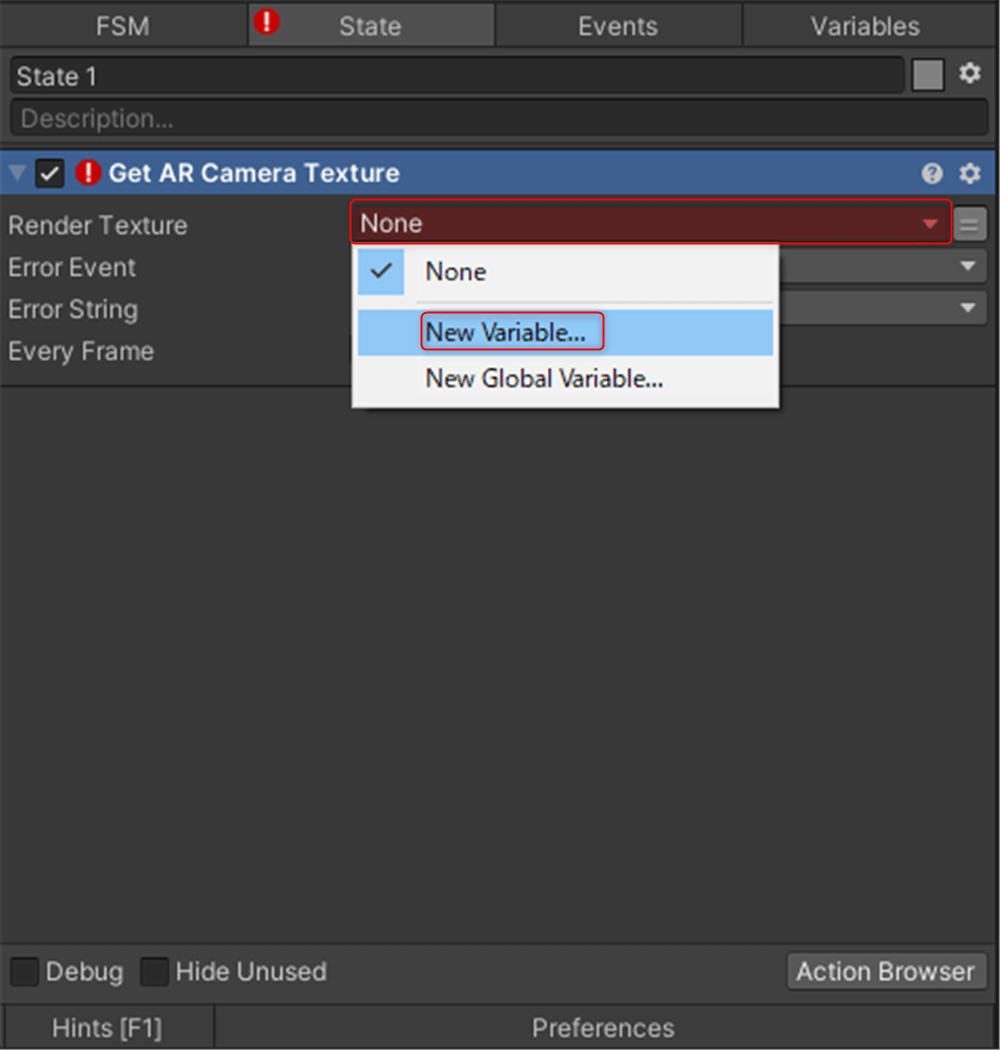
New variable→RenderTexture
Create a new variable called “error” in the Error Event section as well.
Check the Every Frame check box.
If you check the Every Frame checkbox, the camera information will be repeated every frame, so you will naturally get the camera image in real time.
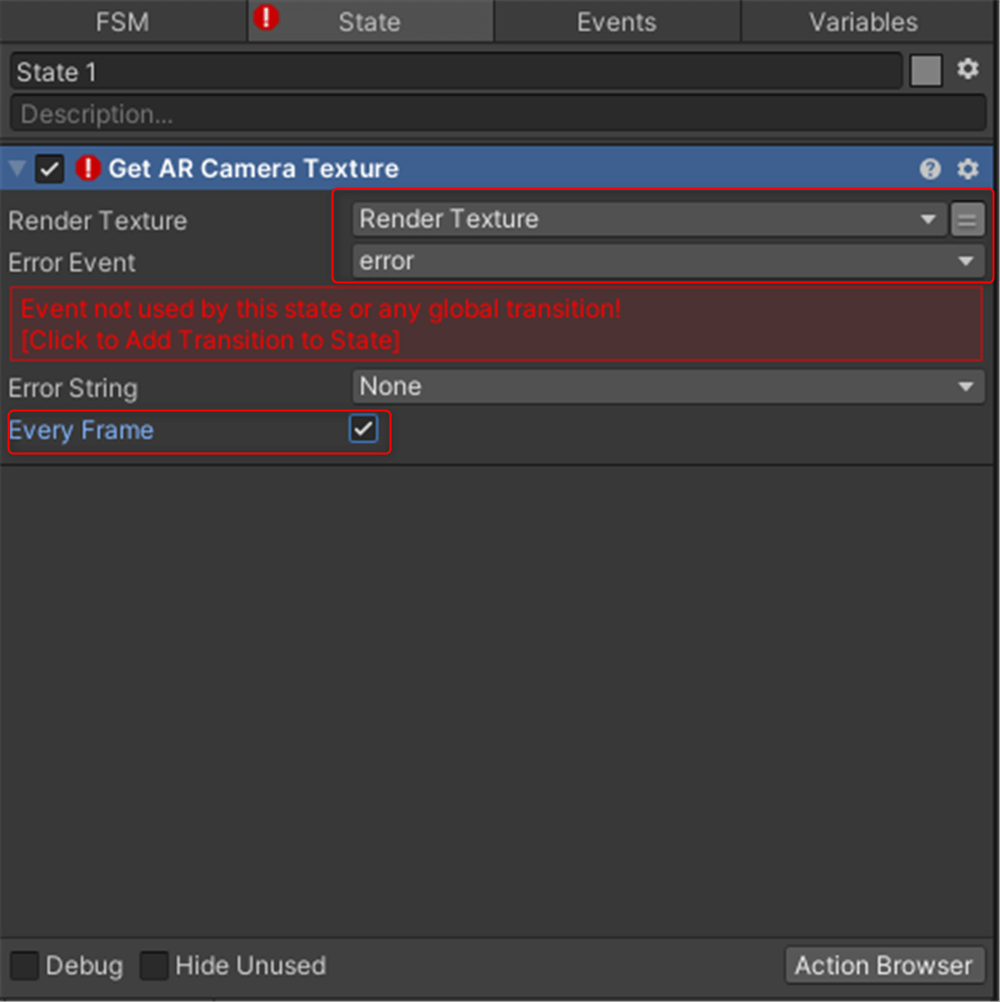
Every Frame
Right click on state 1 and add the error you just created from Add Transiton.
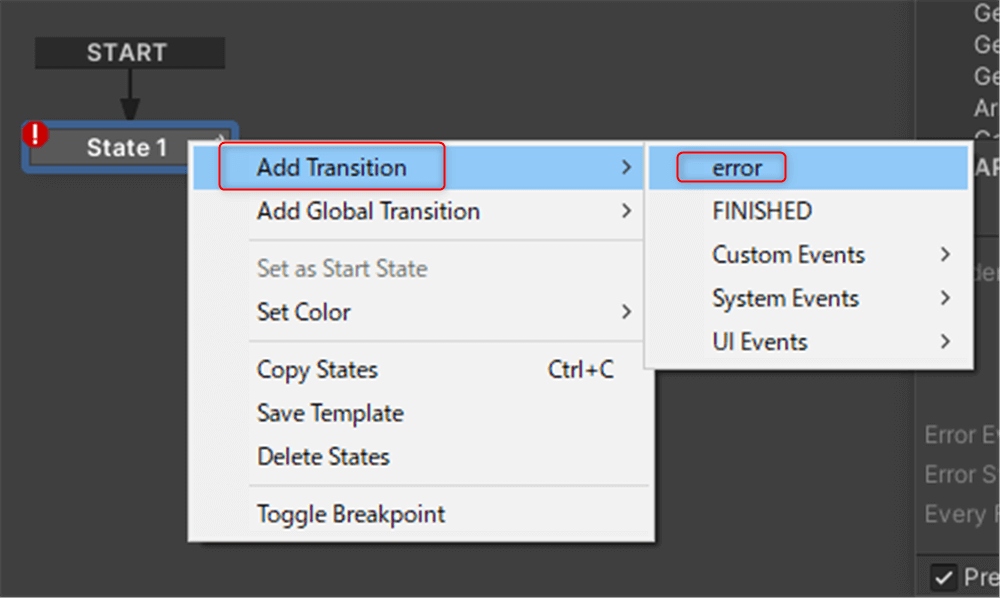
Add Transiton→error
Once this is done, create a new State and connect it to State 1.
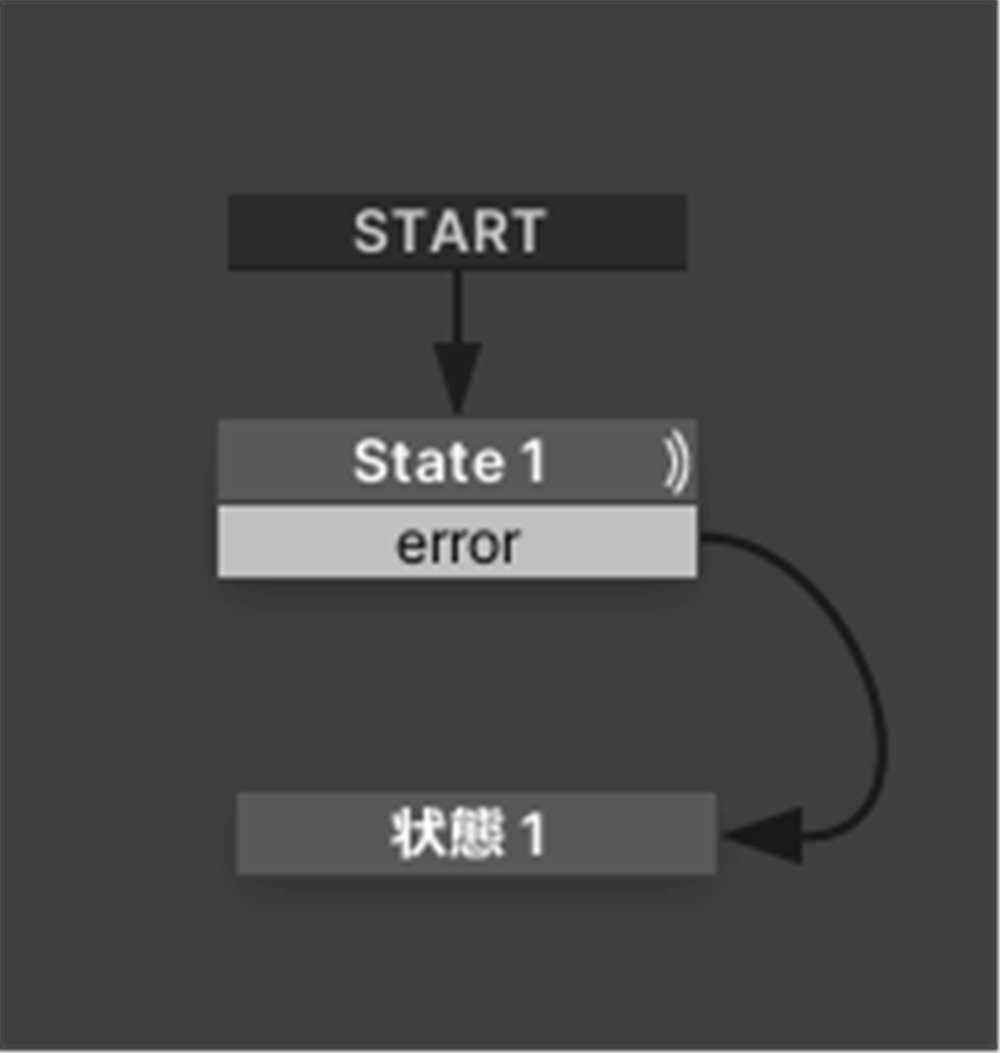
Add new state
Enter Cube in the New Variable of Variables in the FSM, change Variable Type to GameObject and add it with Add.
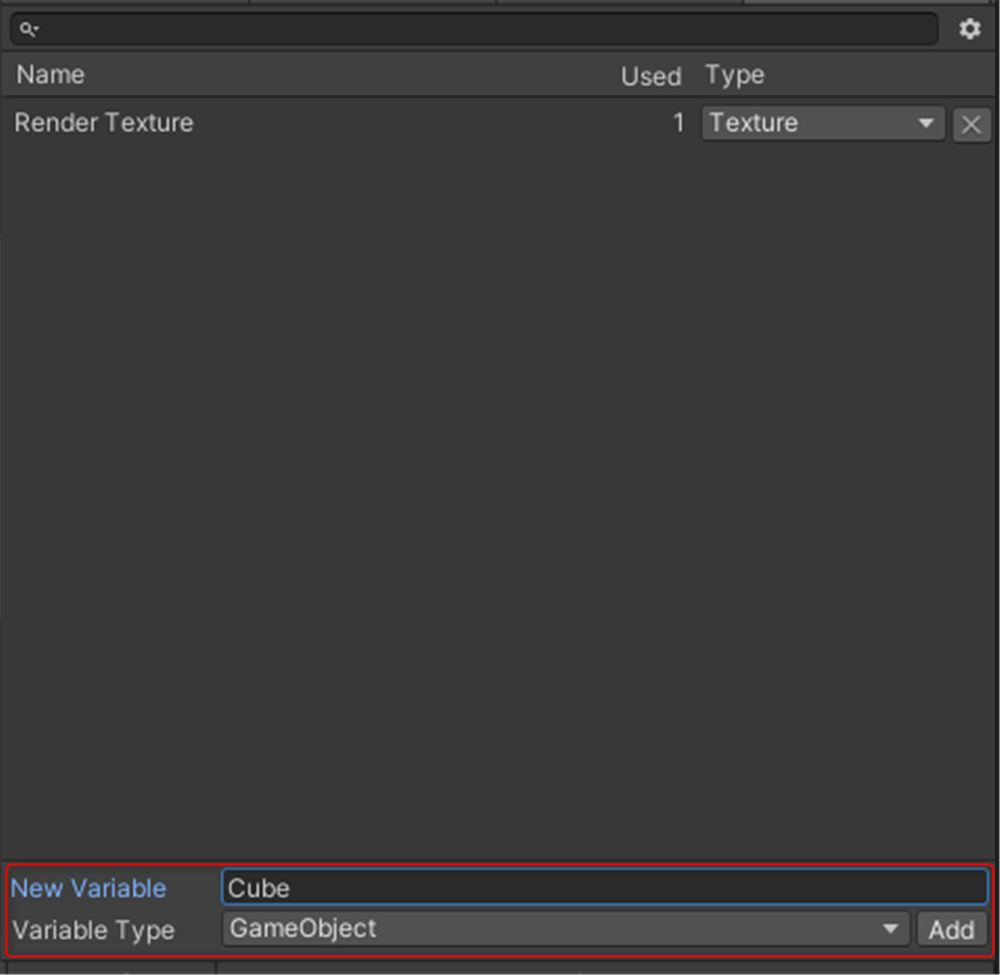
Variable Type→GameObject
Once added, checkmark Input for both Cube and Render Texture.
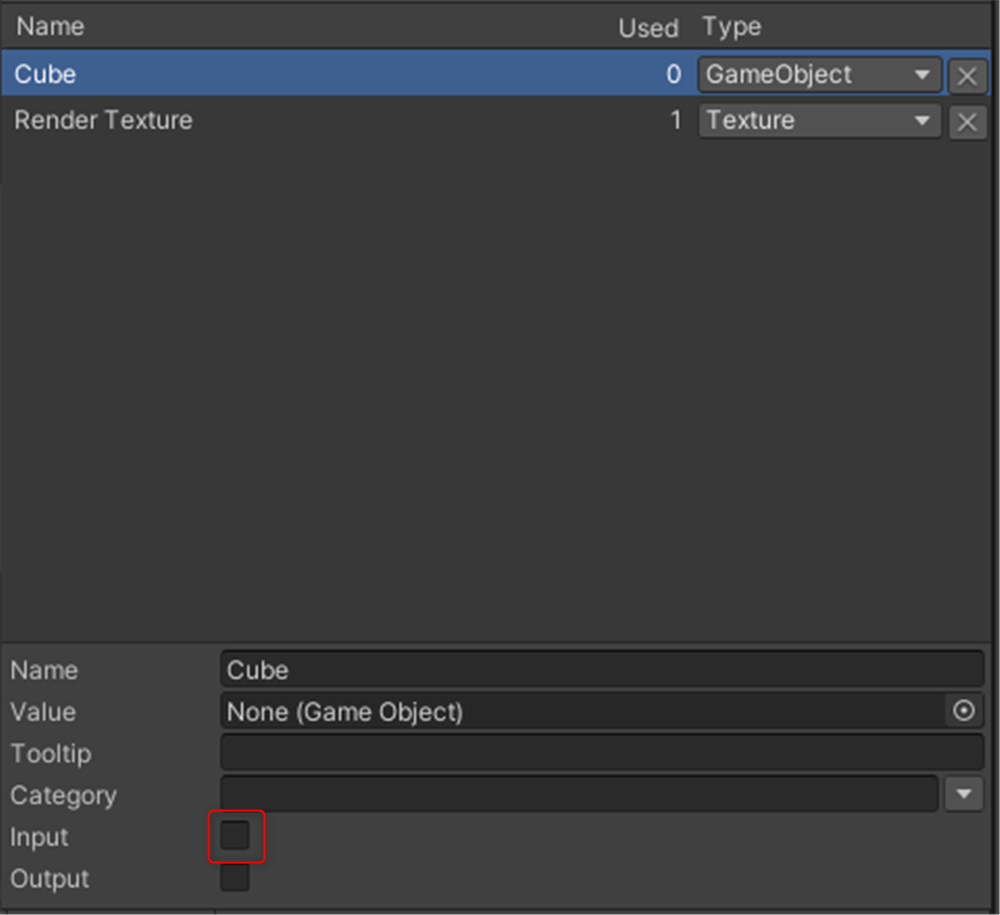
Input
Then the FSM inspector will show a list of Inputs and you can specify the Cube and RenderTexture you created earlier.
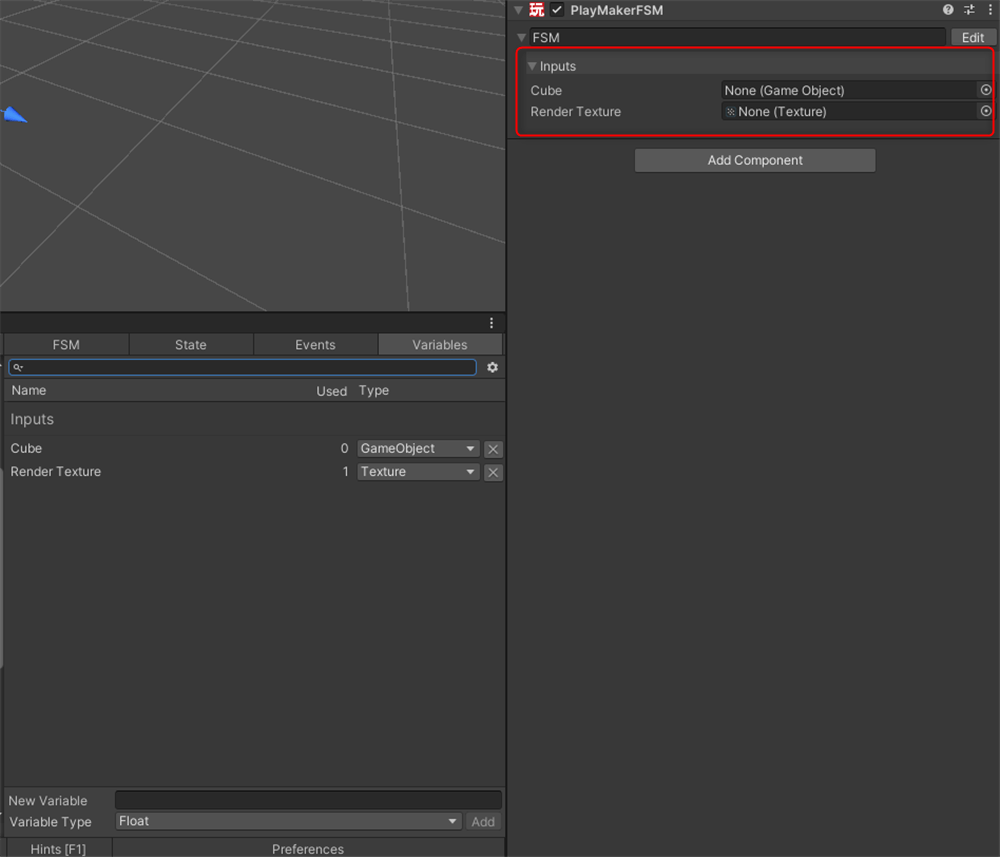
Select Cube and RenderTexture
Once this is done, delete the hierarchy PlayMakerGUI, create a new GameObject to contain the Cube and FSM and put them together.
Then drag and drop the GameObjec into Assets to Prefab it and upload it STYLY
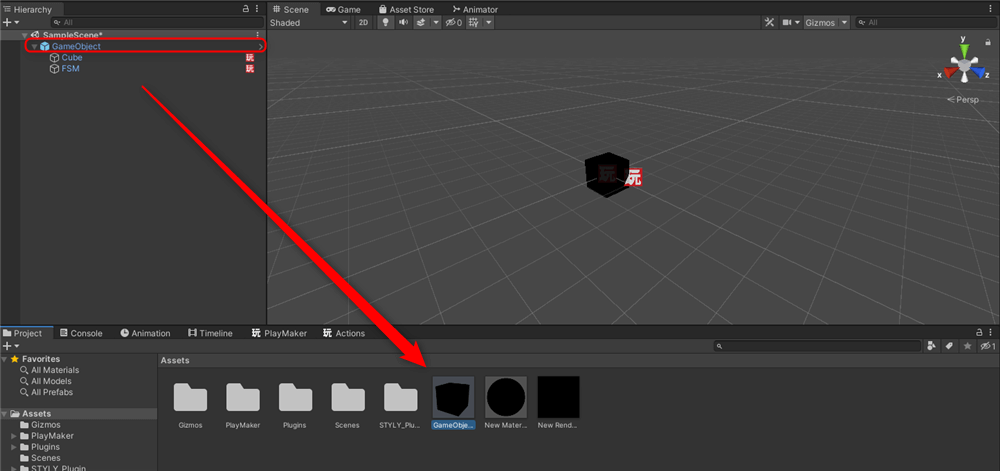
Prefab
Uploading to STYLY
Let’s actually upload the scene to STYLY and use it.
This time we will upload the Unity scene directly to STYLY.

account

This article is an overview of GetARCameraTexture, and detailed explanations of specific examples of its use can be found in the following articles.
![[Unity/PlayMaker] Example of GetARCameraTexture custom action](https://styly.cc/wp-content/uploads/2024/01/アートボード-1-160x160.jpg)