In this article, we create a ‘singing-and-dancing’ live space with the ‘particle’ performance by using the model created with VRoid Studio.
By applying this method, you can make your favourite live space by using your original model, playing other songs or creating your original particle performance.
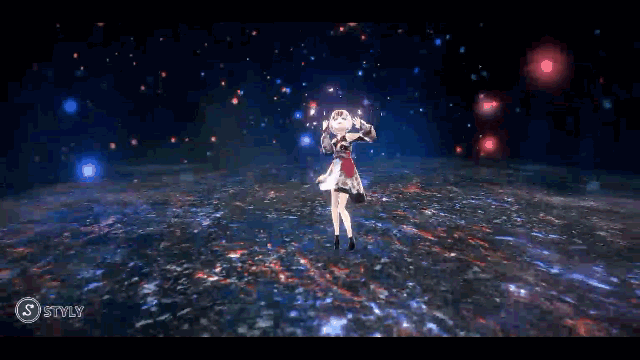
The completion image – ‘Particle Live’
I will show the instruction in the series of four separate articles, which contains Chapter 1 to 11.
This first article covers Chapter 1 to 5, completing the import of the model created with Vroid.
Sample
You can taste the sample space form STYLY GALLERY.
https://gallery.styly.cc/jojomon/9c5ece23-1fe9-11e9-b34d-4783bb2170d0
You can download the Unity project introduced in this article from here:
Preparation
In this article, ‘Vroid Studio’ is used to create the character and the ‘Unity-Chan “Candy Rock Start” Live Demo’ project is used as the base of the live space.
VRoid Studio
Unity-Chan ‘Candy Rock Star’ Live Demo
https://github.com/unity3d-jp/unitychan-crs
The project to upload to STYLY is created with Unity 2019.3.x.
The whole layout
The ‘particle live’ in this article consists of the following components and many of them are controlled by the timeline.
- 3D model
- Animation (The whole model, expressions and dynamic motion of hair and clothes)
- Song (CandyRockStar)
- Stage (Particle and Shader)
- PostProcessing
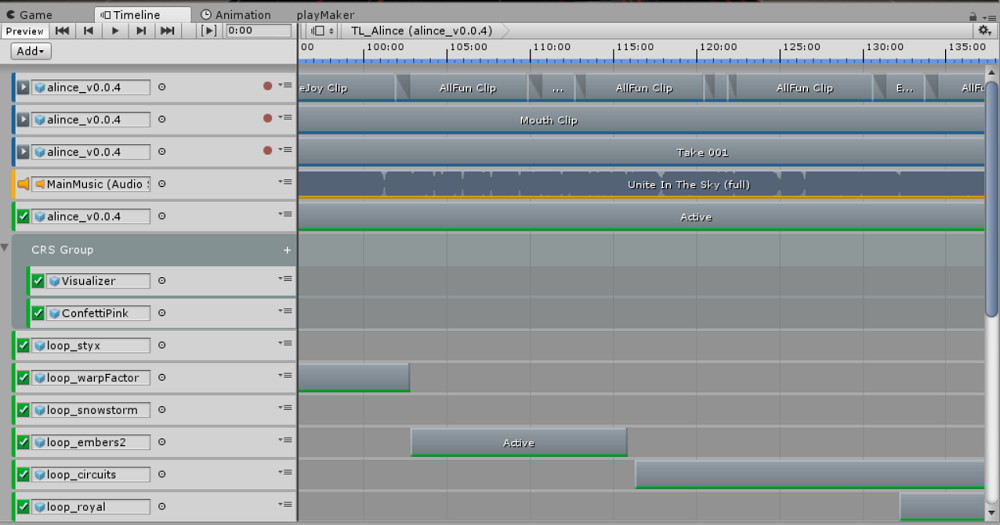
The completion image – Timeline
Import the character created with VRoid Studio
VRoid Studio is a free application for Windows and Mac to create 3D model
I am going to explain how to edit the clothes of the default character available in VRoid Studio and export it as a VRM file.
By the way, please read the article below to learn more about how to create a character and export it.
Note that I use VRoid Studio ver.0.5.4 from this point onward.
Download VRoid Studio
Download by clicking the ‘Download’ button on the site shown below.
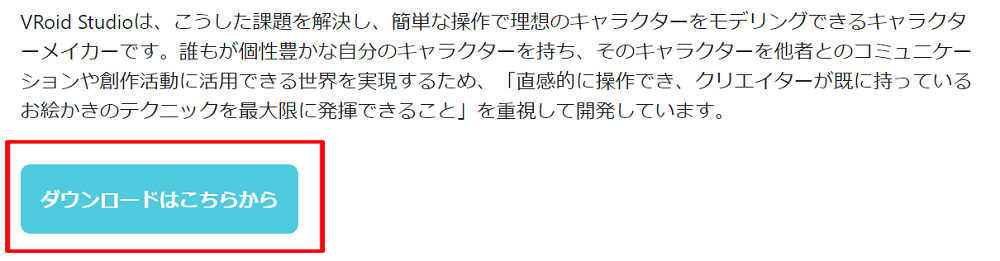
Download VRoid Studio
In this article, I use ‘For Windows (64bit) v0.5.4-p1’.
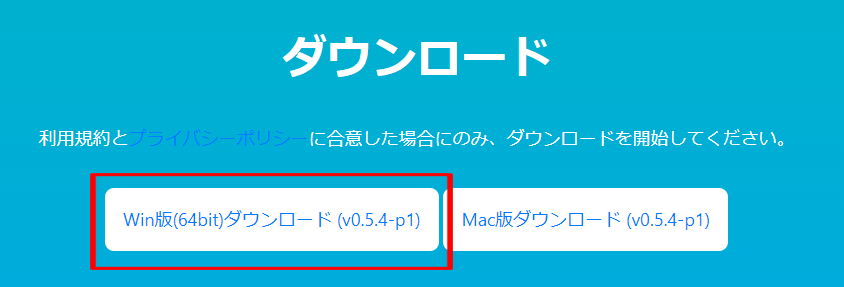
Download VRoid Studio
Download the texture for clothes
In BOOTH, there are a lot of clothes and accessories for VRoid.
This time, I use the clothes created by slip.
https://mrslip777.booth.pm/items/1112303
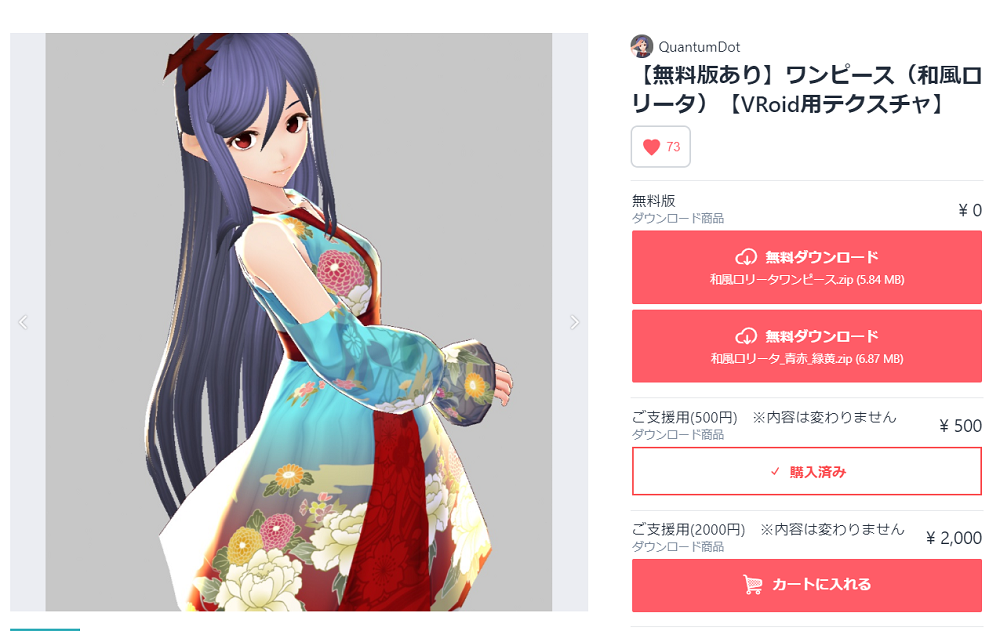
Download the texture from Booth
※ Every creator has his/her own user policy, so please read it carefully before use.
How to use VRoid Studio
- After launching VRoid Studio, select a sample character from the initial screen.
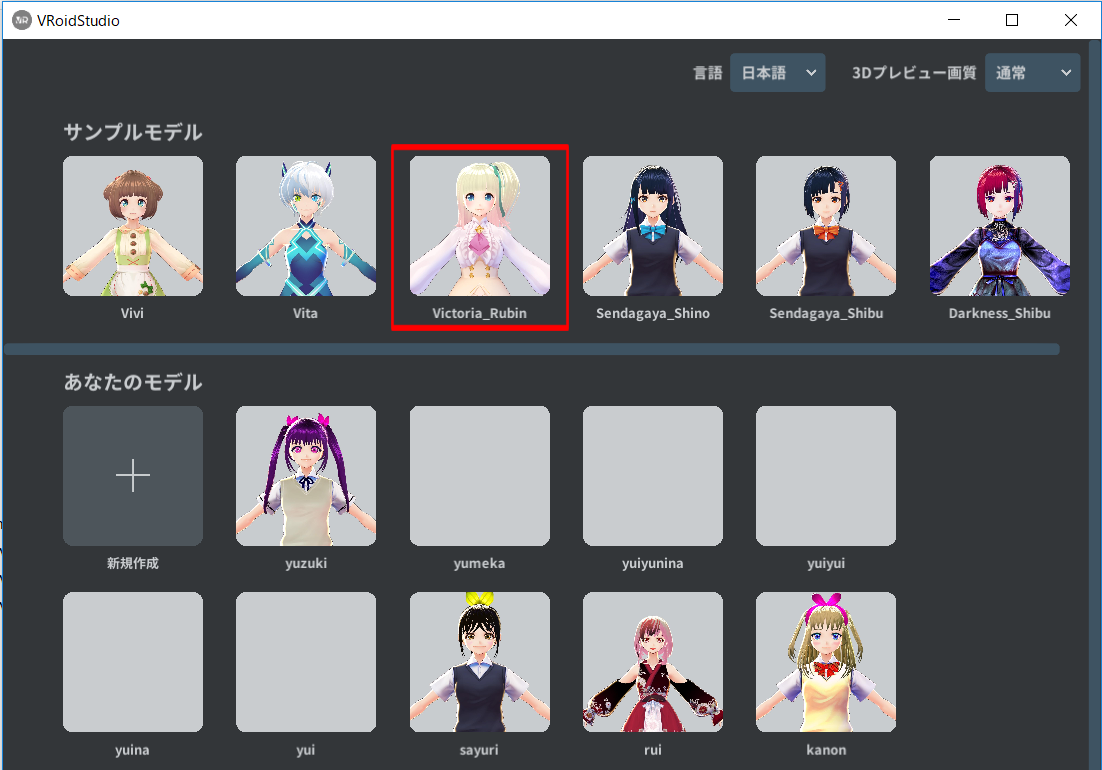
Select a default character
- Select the ‘Clothing Editor’ tab and then the ‘Texture’ tab.
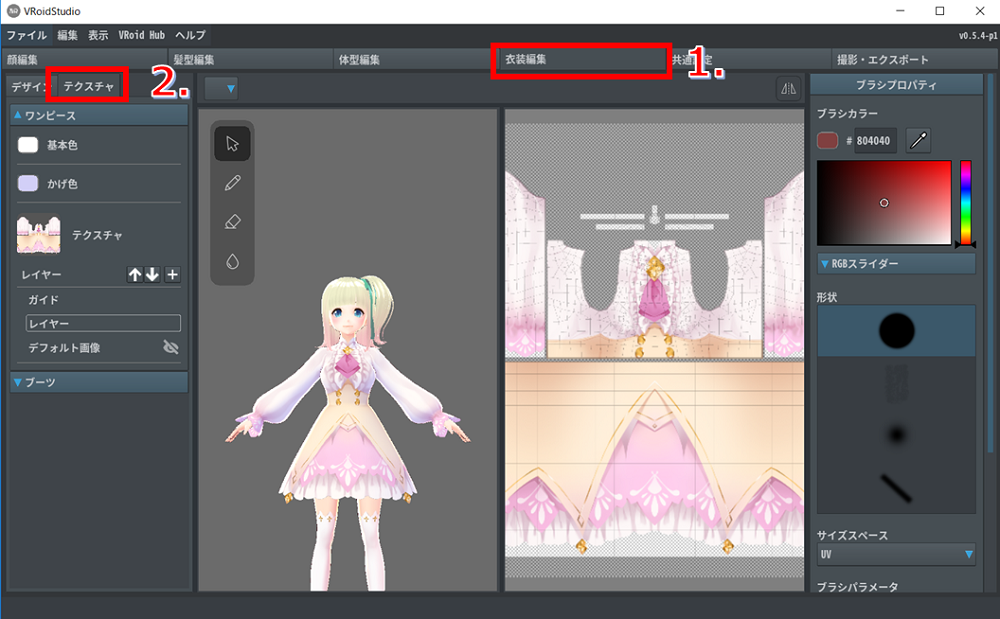
Edit the texture ~1
- Replace the clothes with the ones prepared earlier. Click the ‘+’ button next to ‘Layers’ to add a layer.
Right-click the added layer and select ‘Import’. Then, select the texture of the clothes downloaded earlier.

Edit the texture ~2
- Save the model.
From the top menu, select ‘Menu > Save As…’ to save the model. - Select the ‘Camera/Exporter’ tab and export the VRM file.
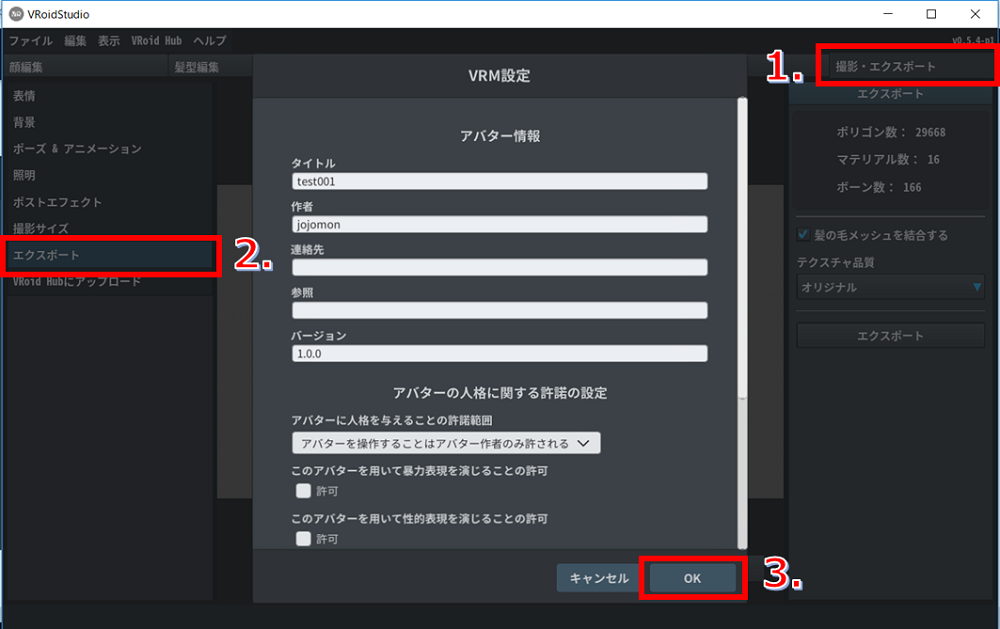
Export the VRM file
Import the model created with VRoid into Unity
I am going to explain how to import the created model into Unity and display it.
Create a new project with Unity.
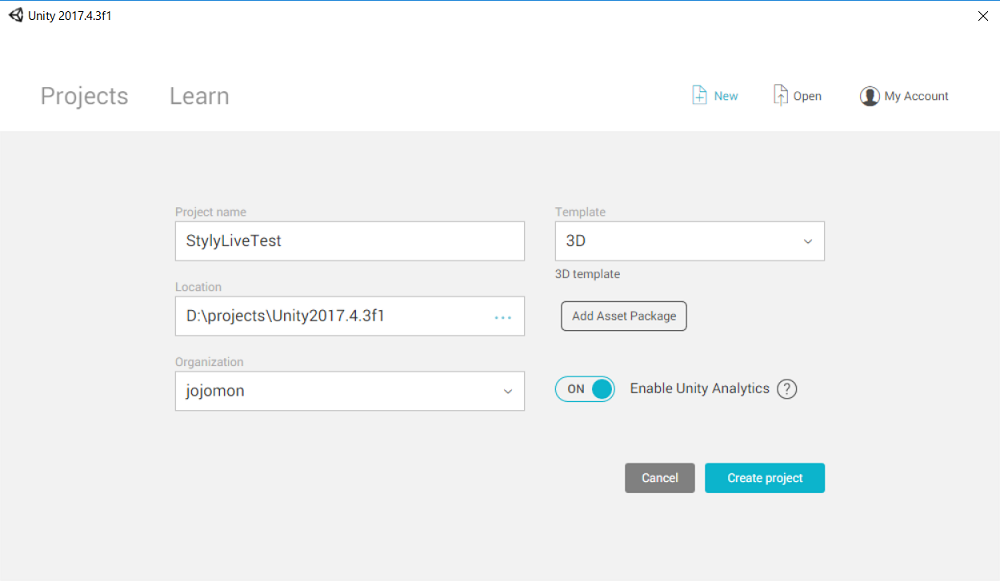
Create a project
Download UniVRM from the official site and install it to Unity.
https://github.com/dwango/UniVRM/releases
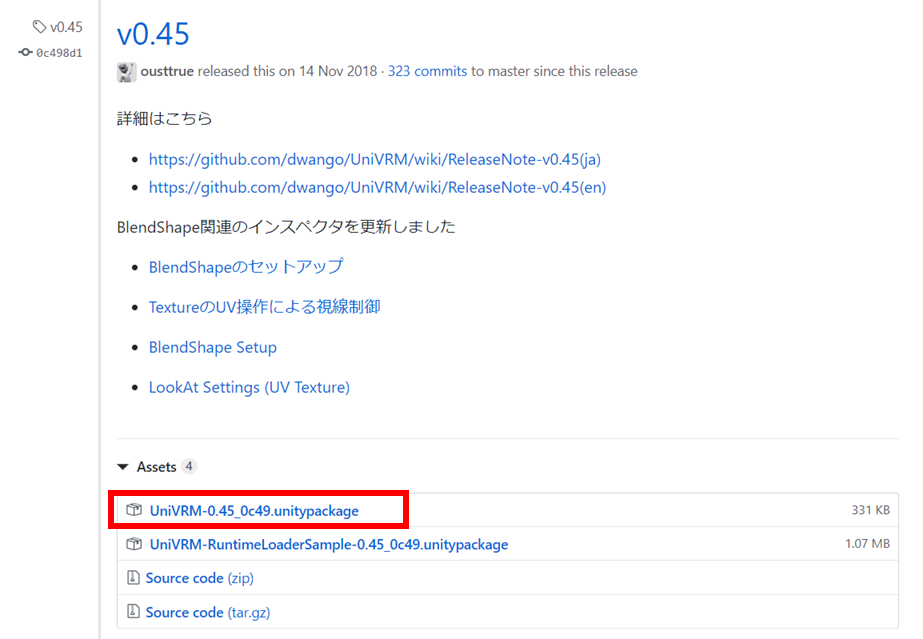
Download ‘UniVRM’
This time, I use ‘UniVRM-0.45_0c49.unitypackage’.
With the project opened, double-click the downloaded ‘UniVRM-0.45_0c49.unitypackage’ to import.
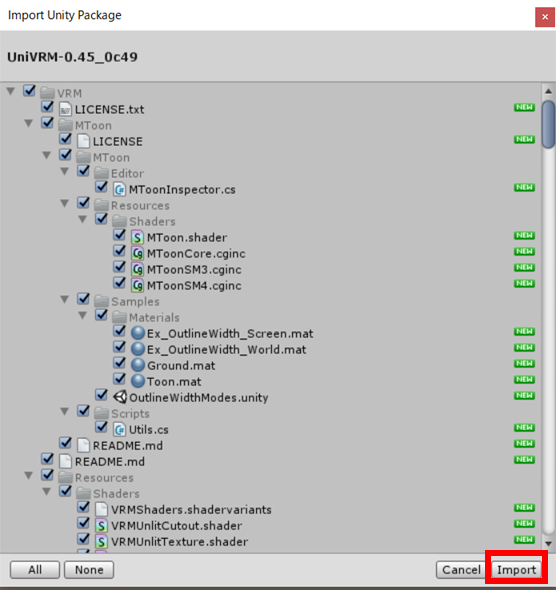
Import ‘UniVRM’
Next, import the VRoid model.
Select ‘UniVRM-0.45 > import’ and select the VRM file exported from VRoid Studio.

Import the VRM file
Drag and drop the prefab into the Hierarchy window. Now the import has been completed.
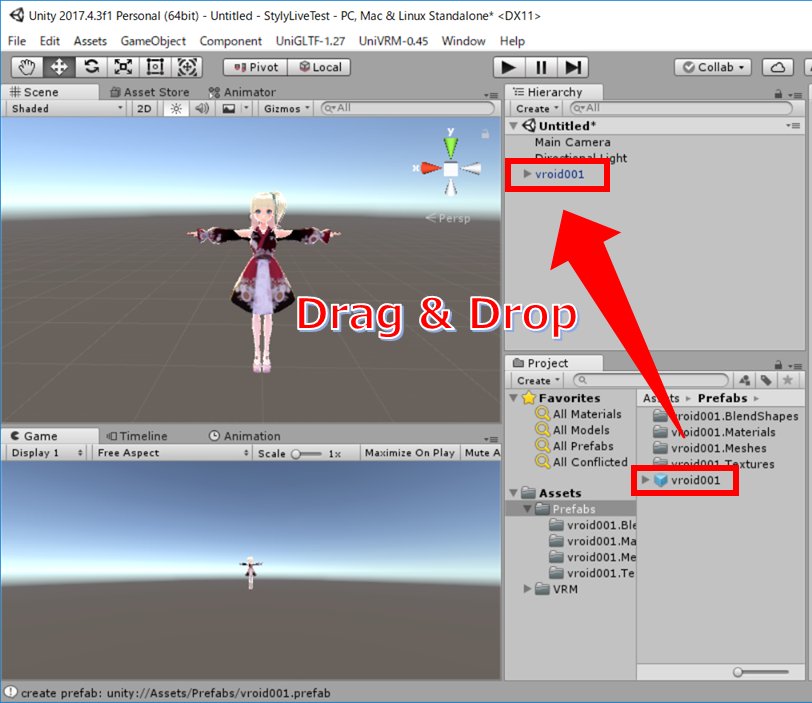
Place the character in the Scene
That’s all for this first article.
In the next article ‘Vol. 2’, I will show how to transfer the base information (Song, animation and etc.) from the ‘CandyRockStar’ project to the project you are working on.
[Related Links]