This article introduces a free CAD open source software called “FreeCAD”. After downloading this software I will explain the basics and the UI needed for CAD modelling. Also, I will go through a tutorial to create a model for 3DCG beginners.
At the end of this tutorial, I will also explain how to import the model to STYLY and display it.
What is FreeCAD
FreeCAD is a free open source CAD modelling software.
CAD software is used for Industrial businesses, to create blueprints. FreeCAD can be used for the same uses.
You can search “FreeCAD”, and find the official page.
FreeCAD top page
You can access the FreeCAD official site from here.
Download FreeCAD
First, click the white “Download now” button. Then, the page shown below will be displayed. Please select the source for the OS you are using.
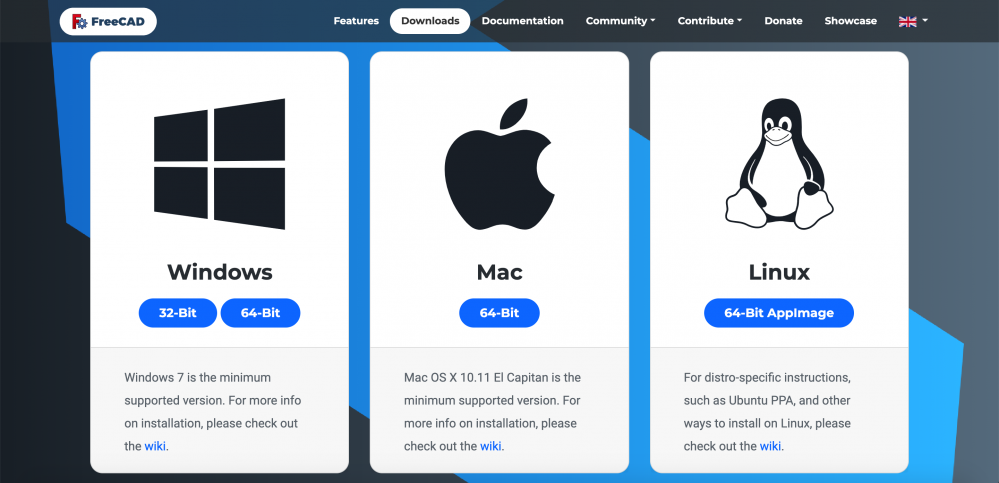
FreeCAD download page
You can start downloading by clicking the blue circle under each OS. Please select the one suited for your computer specs. It depends on your network environment, but it may take more than 10 minutes.
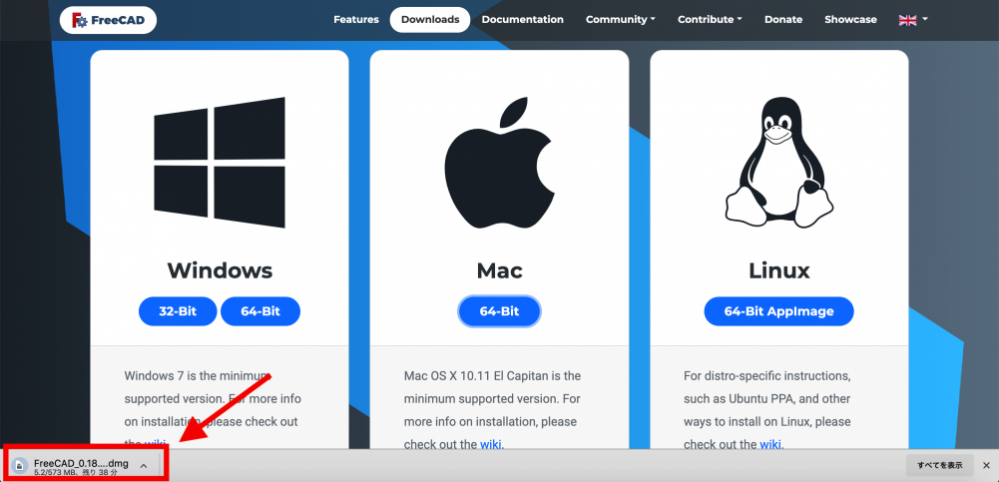
Downloading FreeCAD
Once the download is complete, double click the .dmg file and unzip it.
If you have trouble unzipping due to security,
(If you are using MacOS) System environments>Security and Privacy>Execute permissions for downloaded applications
By executing this file, FreeCAD will launch.
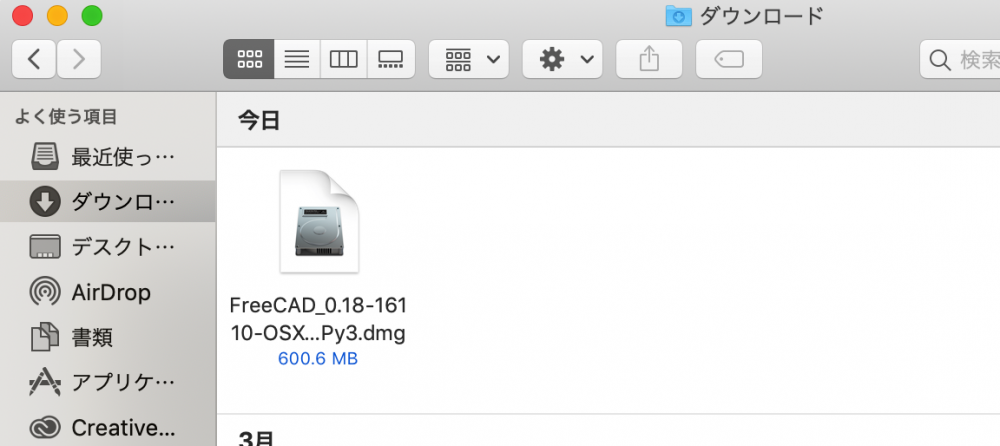
The downloaded FreeCAD file
That’s it for downloading FreeCAD.
UI of FreeCAD
Once your download is complete, let’s launch FreeCAD.
If you launch FreeCAD, the home page will pop up. Most 3D software share a similar UI, so if you have experience with other software, it may be fairly easy to learn.
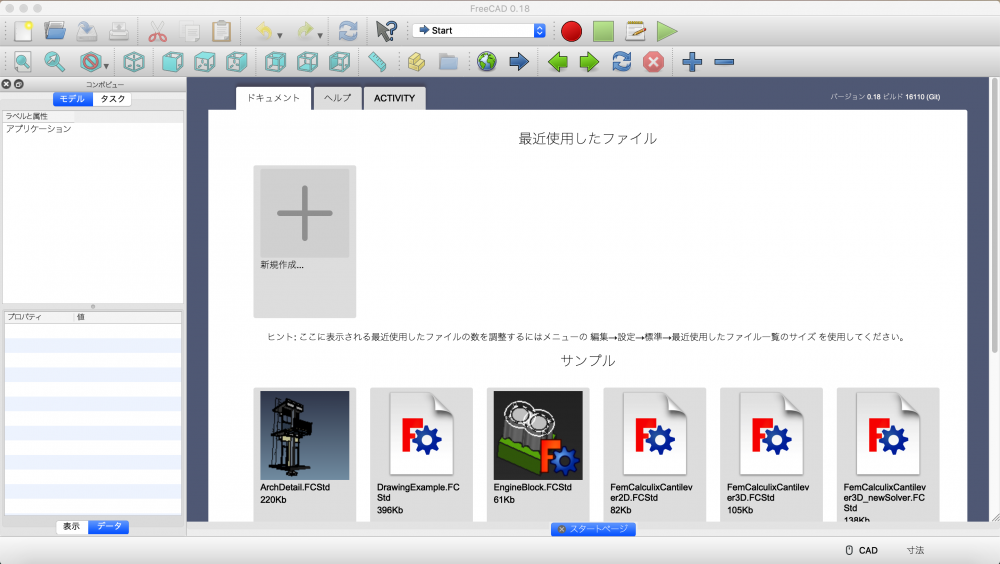
FreeCAD home screen
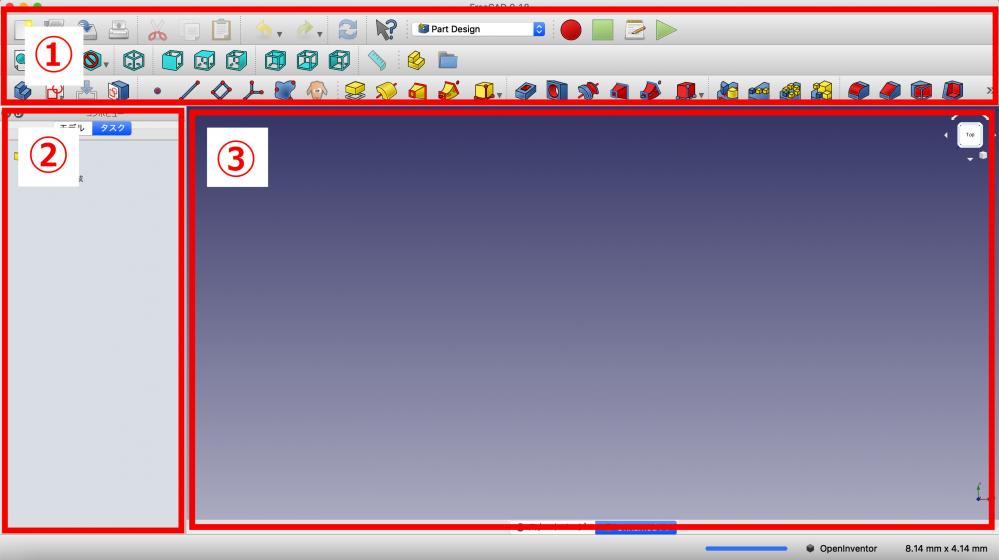
The FreeCAD home screen can be divided into 3 sections. (These names are my original, so please call each area as you wish. For this article, I will call them as below)
①Tool area
②Compo view
③Work area
①In the tool area, you can create planes, transform into 3D, use bevel processing to create models.
②In the compo view, you can check the hierarchy for the objects and effects you created in the tool area.
③In the work area, you can check how the model looks in 3D.
UI of FreeCAD
CG beginners may find it a bit complicated, but for now, all you need to know are 3 basic areas. To make it simple, ①Select the effects and functions you need in the tool area, ②check the hierarchy in the compo view, and ③check your work in 2D or 3D in the work area.
We will use these 3 areas to create a CAD model.
Create a Basic CAD Model
Create a Table Using FreeCAD
So, let’s create a simple 3D model with FreeCAD.
Let’s create a table.
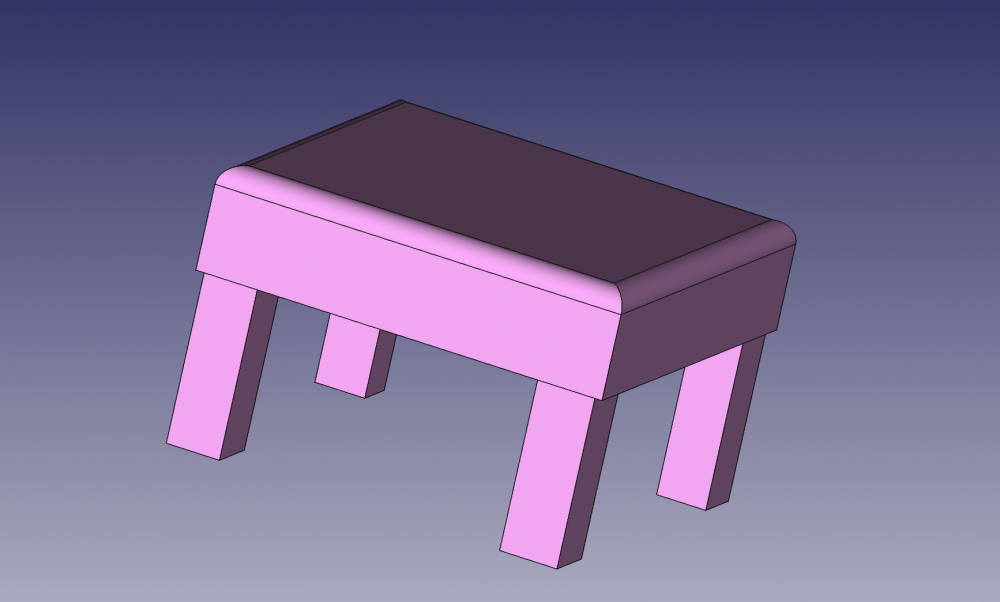
The complete image of the table
First, we need to create a new scene.
Click the white square icon at the upper left hand. Then, a blank work area will be displayed.
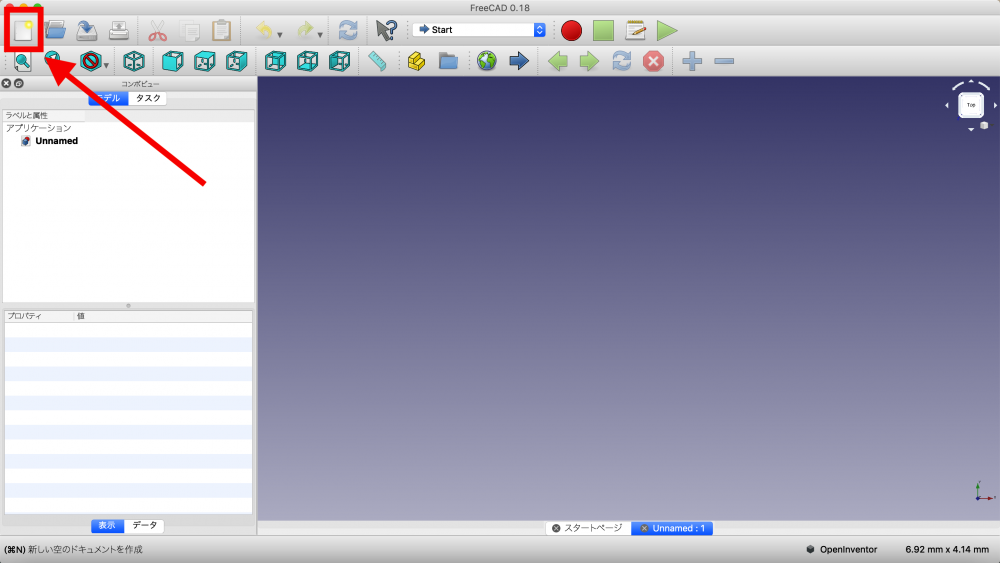
Create new FreeCAD
Next, click the Start tab, and select the “Part Design” tab.
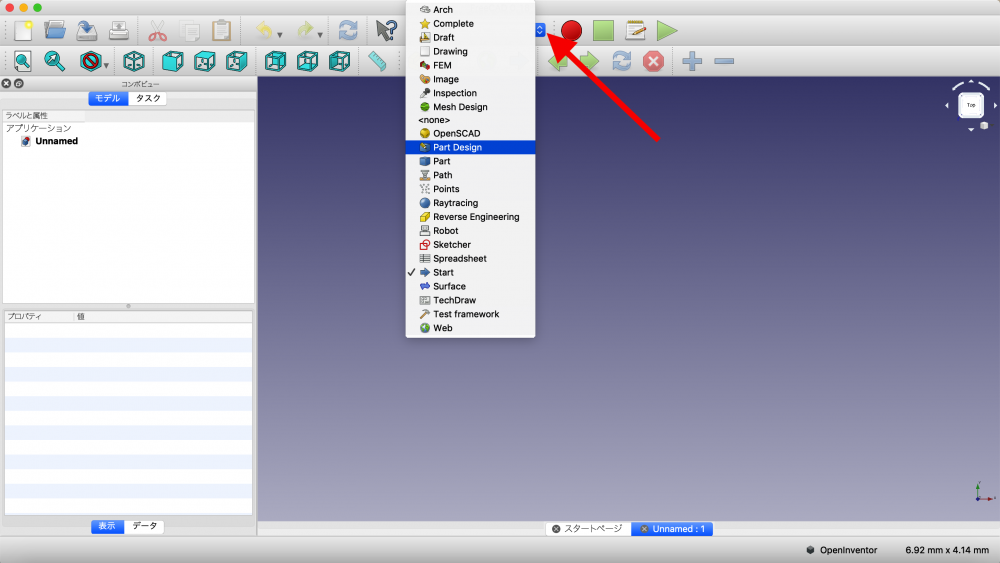
Part Design Select scene
Select the “Create new sketch” button at the upper right.
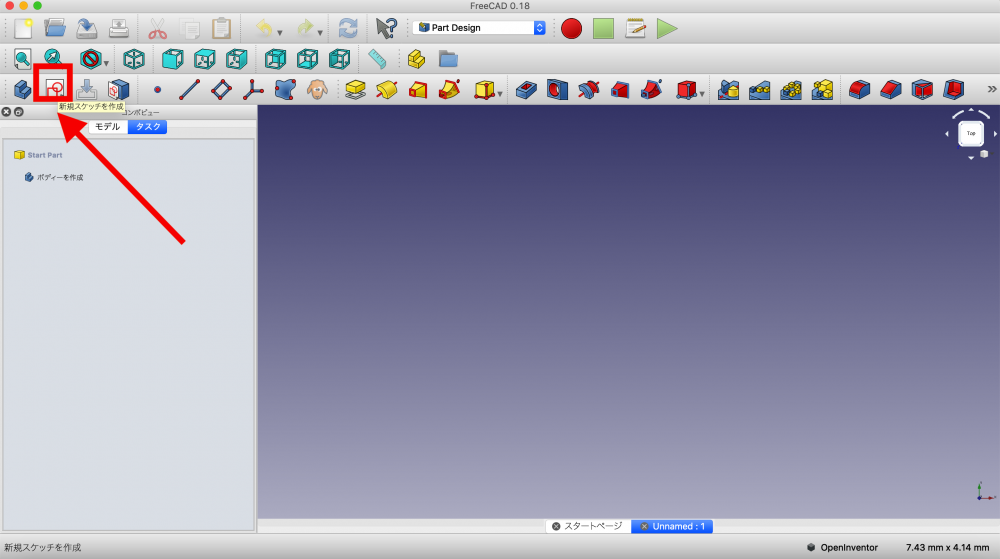
Create New Sketch screen
Next, select the plane you want to create in the compo view. For this tutorial, please select “XY_Plane(base plane)“.
A square as in the image below will appear in the work area.
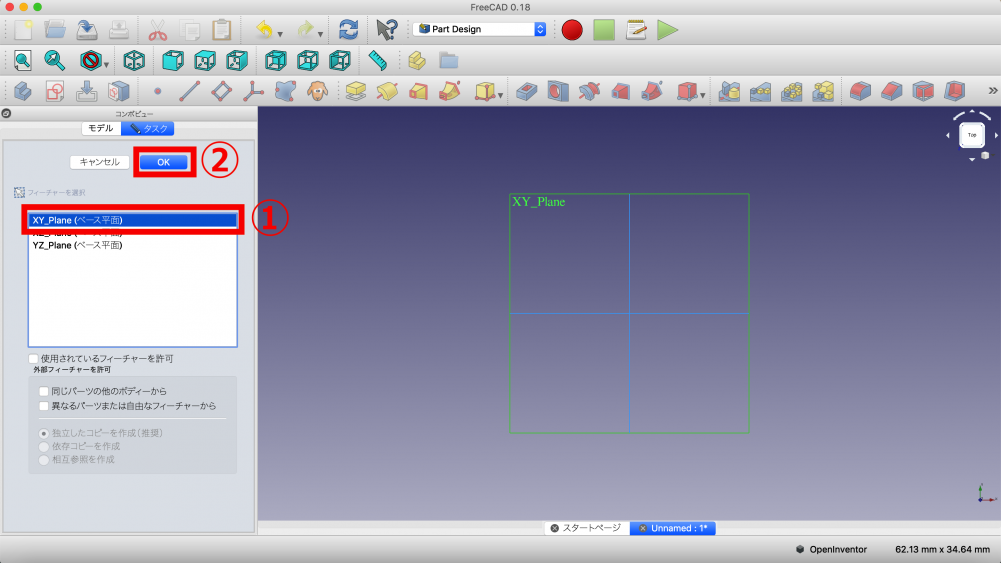
Creating plane sketch
Click the “create rectangle on the sketch” button, and create a rectangle in the work area.
Note: Mac users should use the Command key and Windows users should use the Ctrl key and drag the mouse while clicking the right button in order to create a rectangle.
When you are done creating the rectangle, right click and select creation complete.
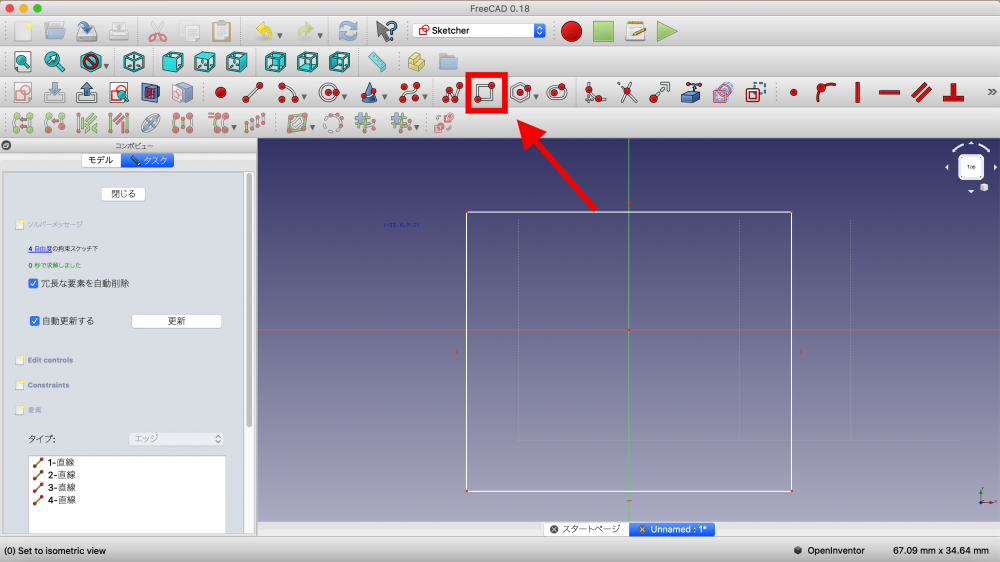
Creating square
Once you are done creating the rectangle, use the Command/Ctrl key to select all of the sides. Then, click “close” in the Compo view and complete the sketch.
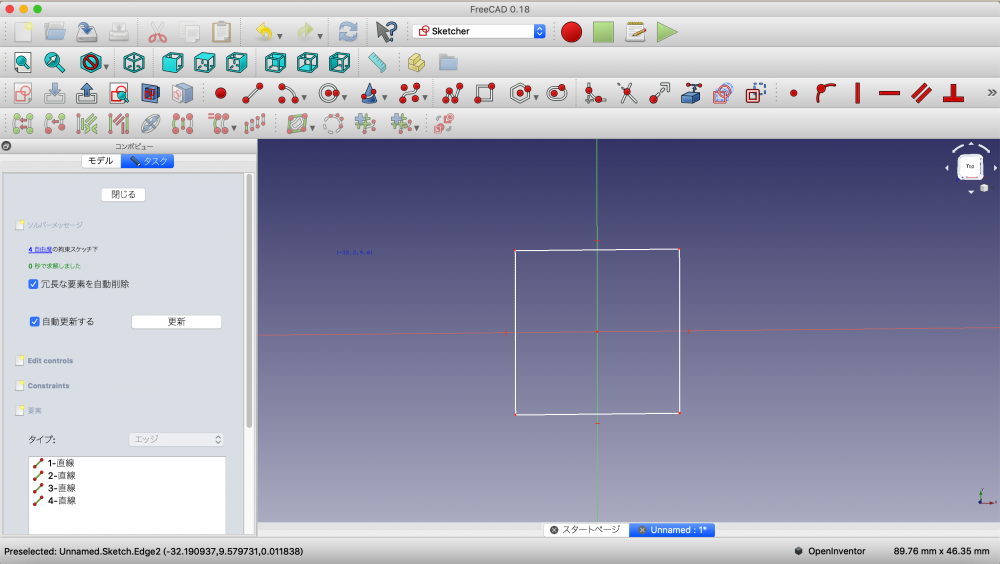
Creating square
Next, let’s add width to the table.
Select “Close“, then click the extrusion button at the screen top, and transform the sketch to a 3D model. Next, go to the Compo view and set the width to 5mm. Click Ok when done.
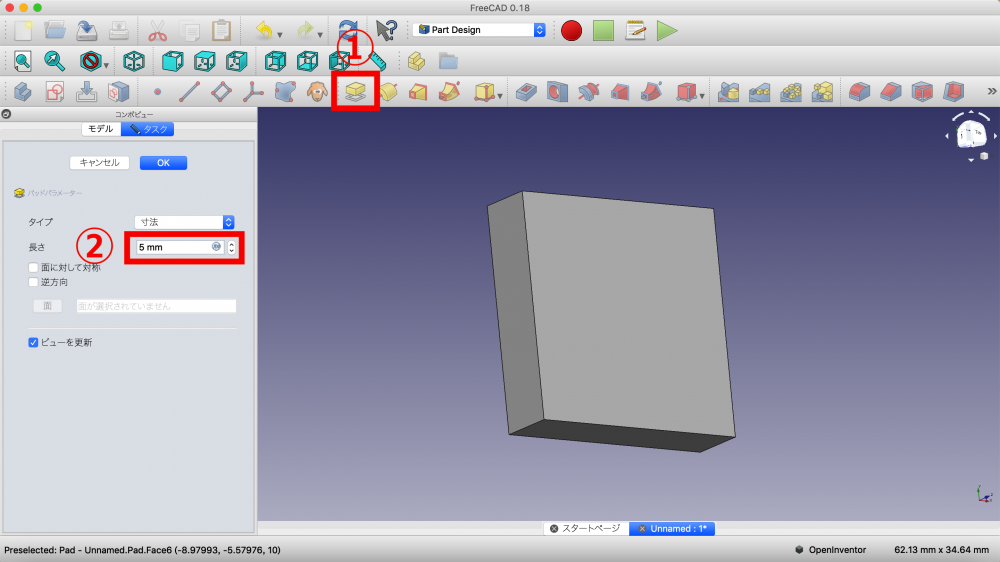
Create extrusion
Next let’s round the table edge.
As in the previous step, choose all of the edges you want to round. If you are using Mac use the Command key and if you are using Windows use the Ctrl key to select multiple edges.
Then, click the bevel icon at ① and round the edges. You can change the amount of the effect applied in the Compo view. In this tutorial, I have set it as 1mm.
We are done with the bevel settings.
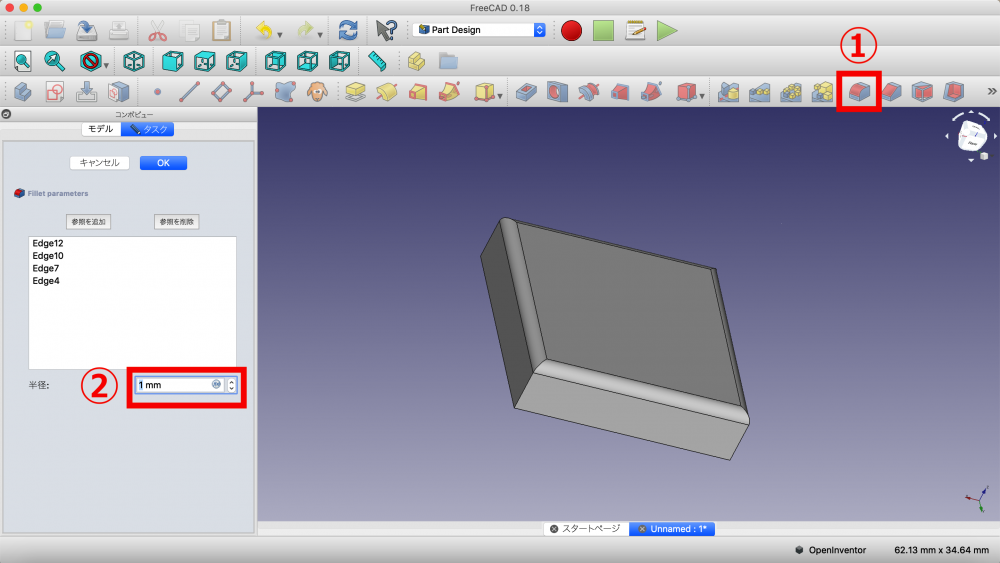
Creating bevel
Next, let’s create the table legs.
First, ①Create the sketch then ②Create the square. These steps are the same as creating the table top.
③Sketch 4 legs.
Add a square as in the image below to the parts that are going to become legs. When you are done with all 4, select all. Then click “close“.
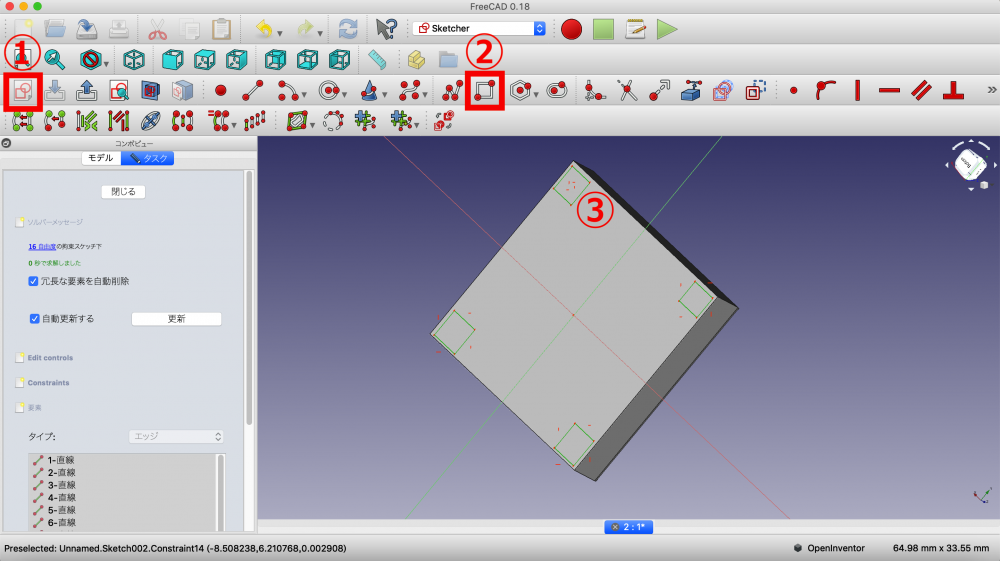
Create table legs.
After clicking “close“, click the extrusion button.
Set the extrusion to 8mm in the Compo view, and select the opposite direction option checkbox. Click Ok to close.
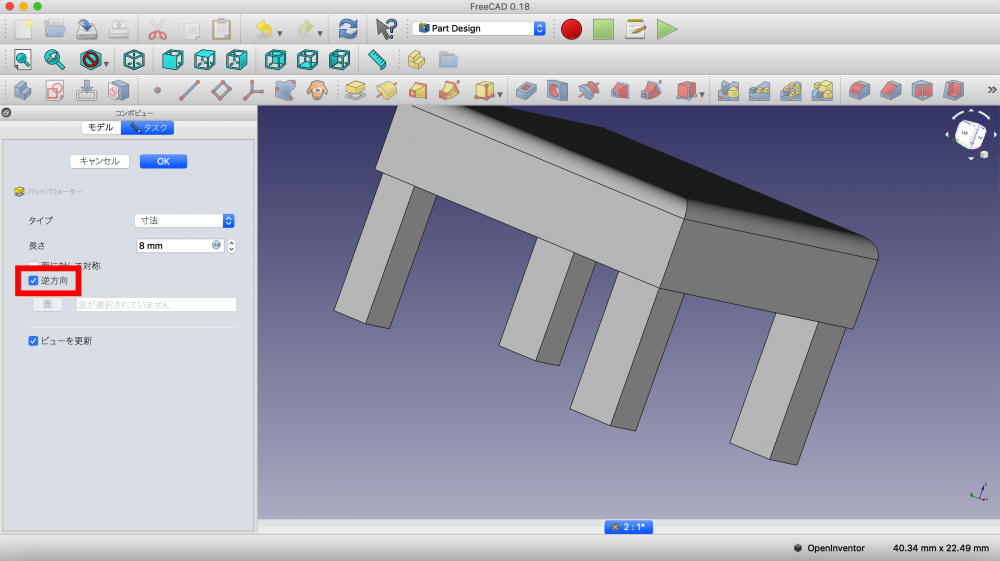
Extrude the table legs
Lastly, we will add colors.
Select Body from the Compo view. The details of Body will appear below, so choose the color you want from Shape Color. Click OK when done.

Adding a color to the table
That’s it for creating the table.
Export Model with FreeCAD
Once the model is complete, the next step is exporting it as 3D data.
Select File > Export > Alias Mesh(obj). We can export the model as an obj file now.
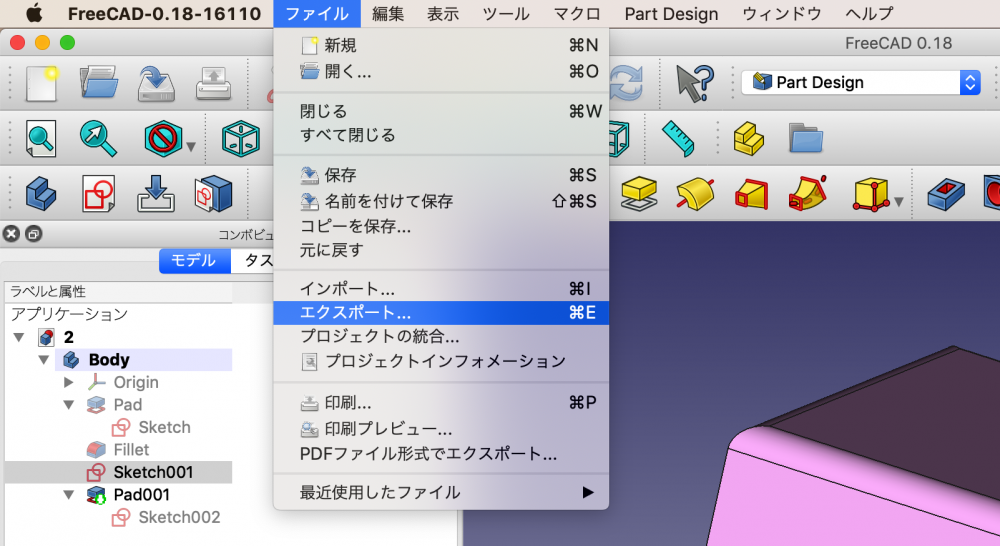
Exporting the model
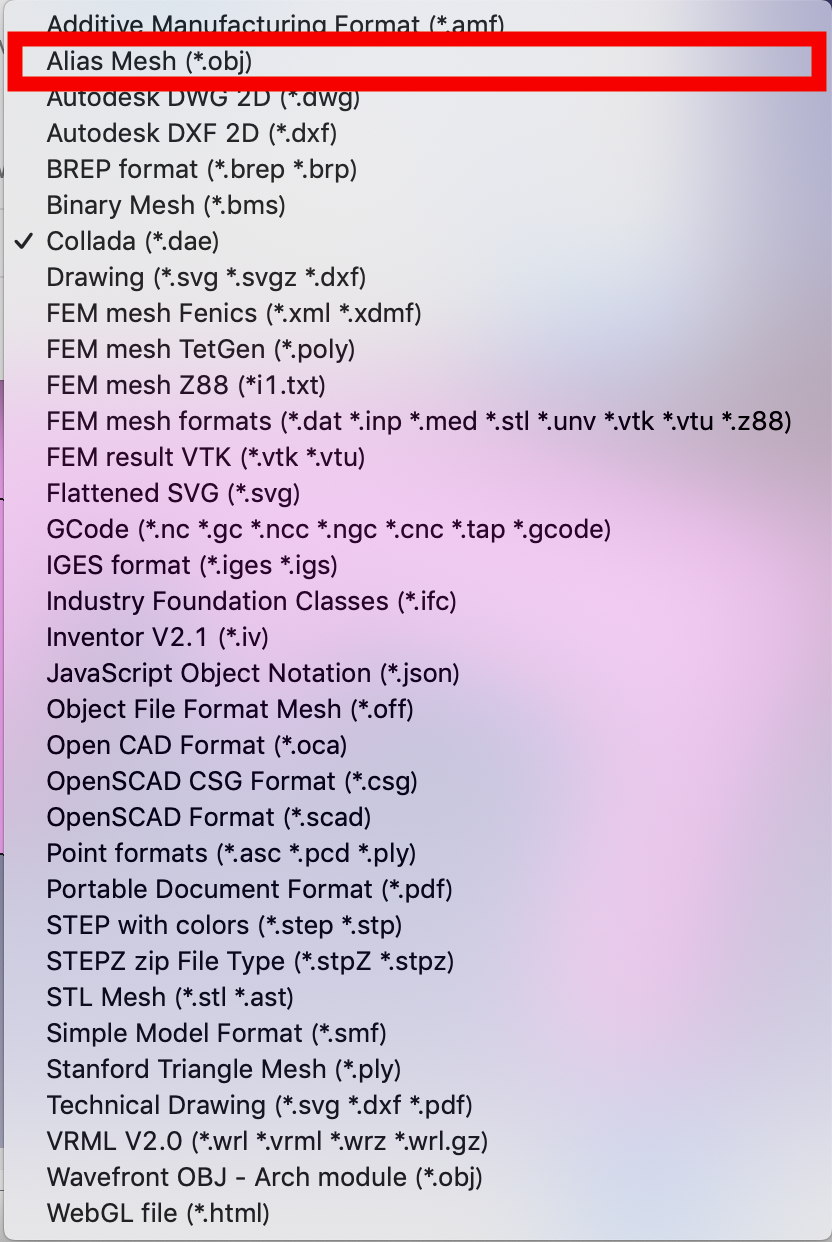
Selecting the obj file
The model export is done.
Import the CAD to STYLY
Finally, let’s import the 3D model to STYLY and check the object in a scene.
Login to STYLY, and create a new scene. Please refer to this article for how to create an account.

STYLY top page
Continue to the model import screen by performing steps ①, then ②.
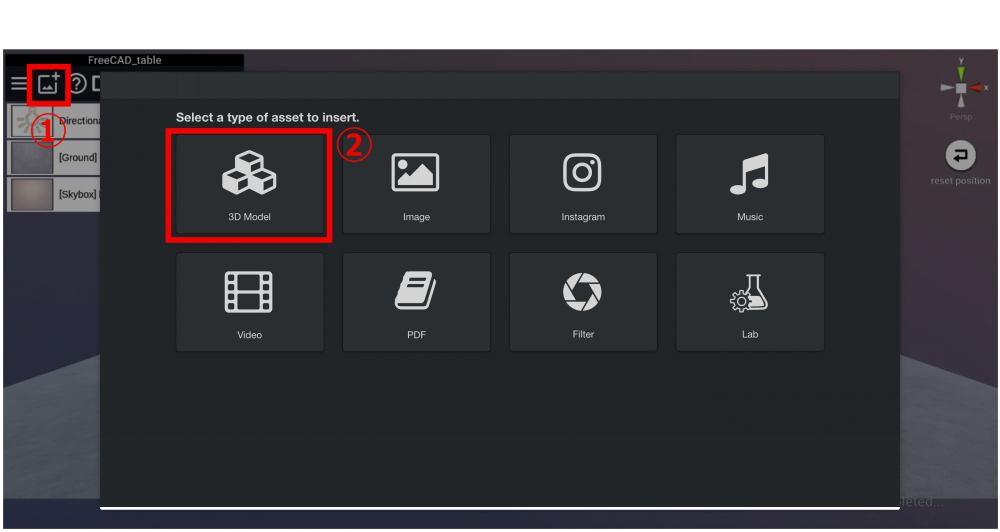
Importing Model ①
Then, go to ③, ④, and in ④ you need to set the model name and model data. When that’s done, click Upload.
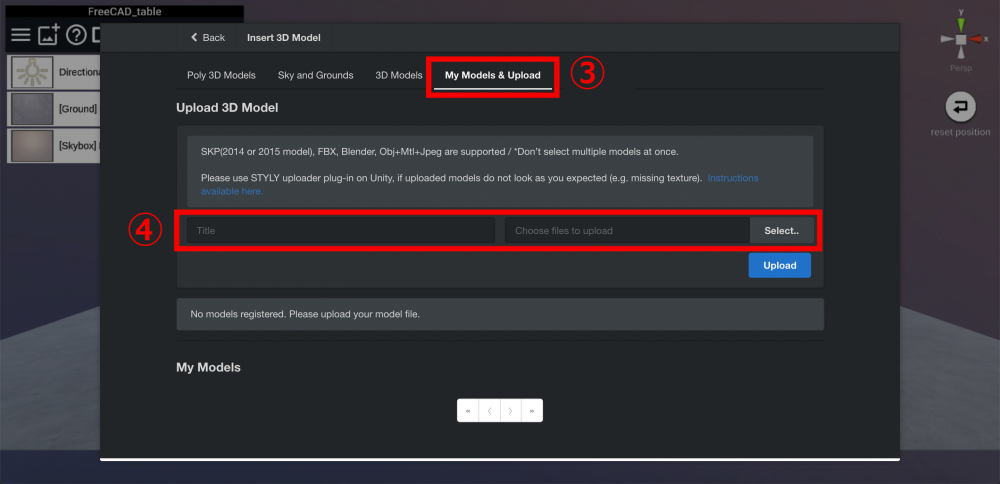
Upload Screen①
When the model upload is started, a status bar will appear, and when it is complete, the model will be added to “My Models“. Click the added model, and it will appear to the Editor.
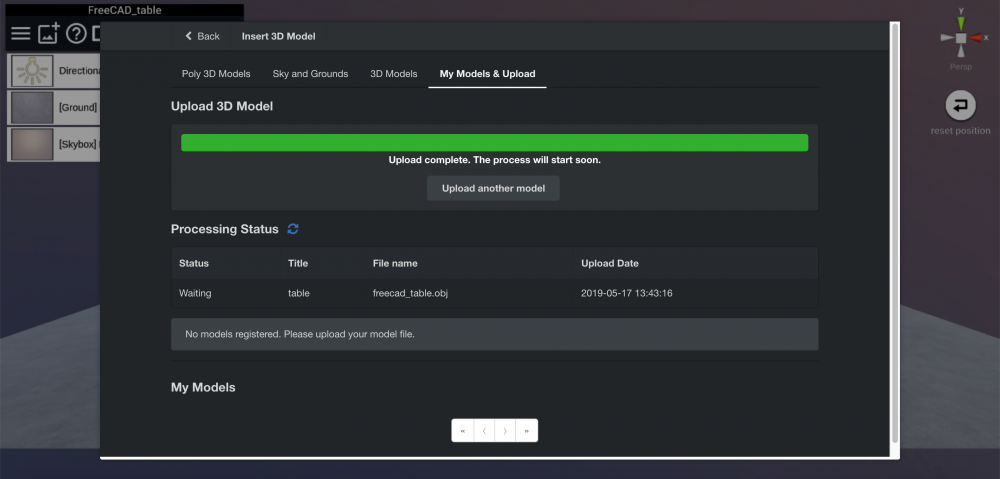
Upload Screen②
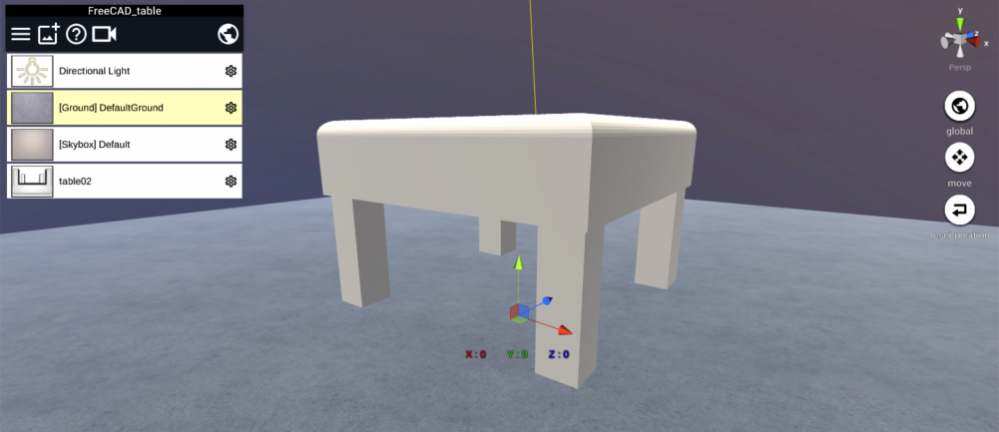
When it is uploaded to the Editor, it looks like this.
The color we added has disappeared, so the color has became the default color.
That’s it for how to import a 3D model to STYLY.
How was the information in this article?
Even for 3D creators, working with CAD software can be a new experience. By using a blueprint software, you will be able to create objects with a businesslike process.
If you are interested in this area, how about creating other objects too?