Hello, this is SensitiveCube!
This tutorial shows you how to create a hologram indicator.
In this article, we’ll edit UVs and bake normal maps using Cinema4D, edit normal maps using Photoshop and Quixel, create shaders using the Unity Amplify shader editor, and script in node-base using Unity Playmaker.

Using the Amplify shader editor and Playmaker in Unity 1.
Create a shader using the Amplify Shader Editor: add the first node.
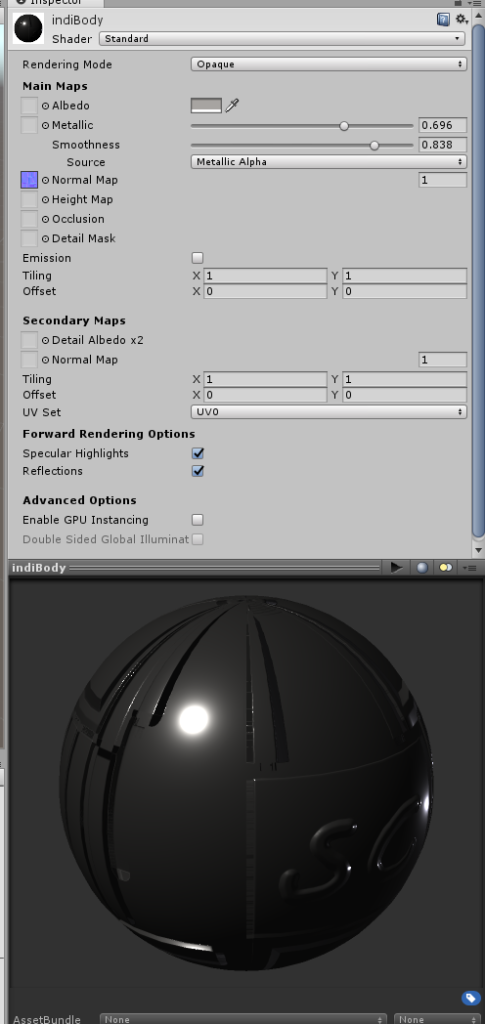
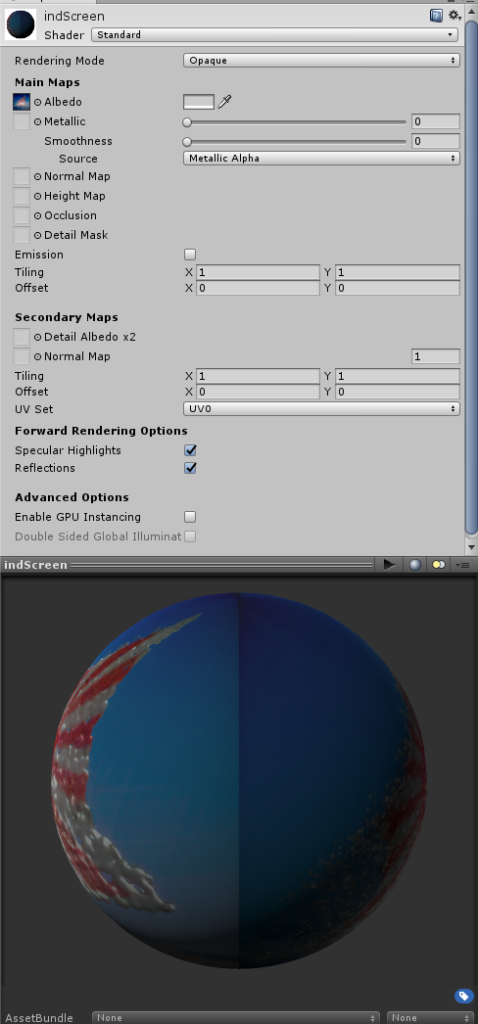
Select the FBX file and click on Extract Materials from Inspector > Materials.
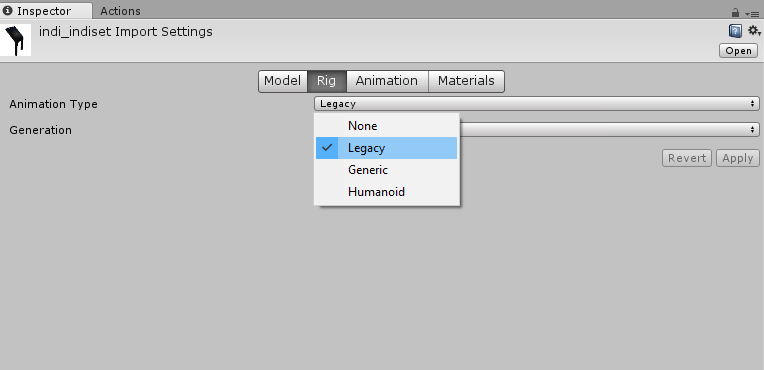
Change the animation type of Rig to Legacy as well.
Create a shader for your hologram. In this tutorial, we will use the Amplify Shader Editor.
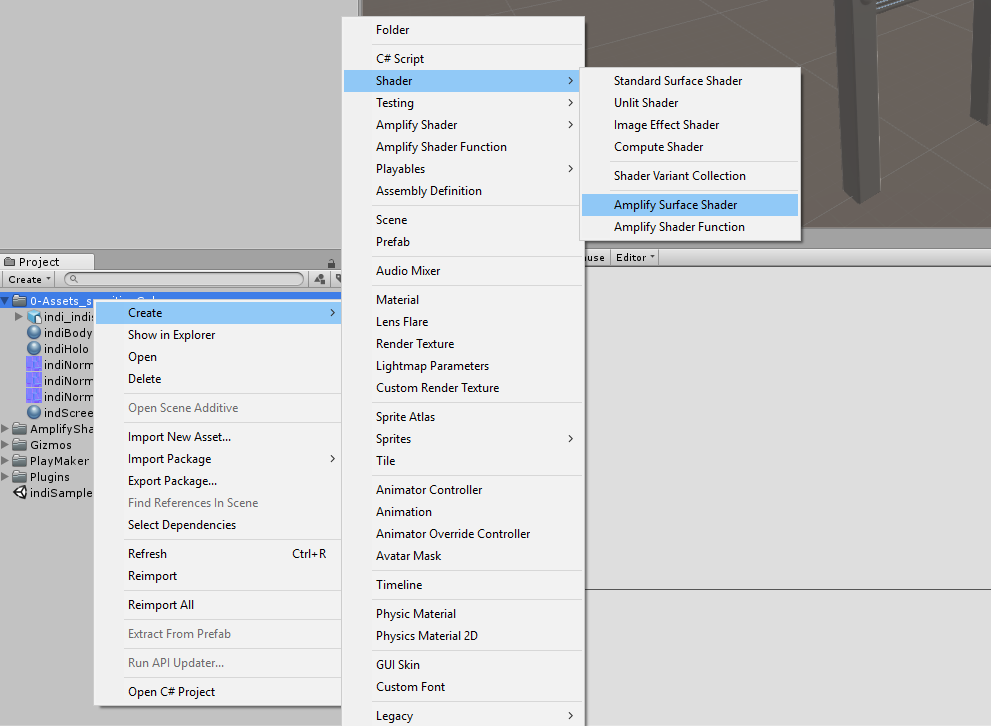
First, create an Amplify Surface Shader in the Project panel.
Using the Amplify shader editor and Playmaker in Unity 2.
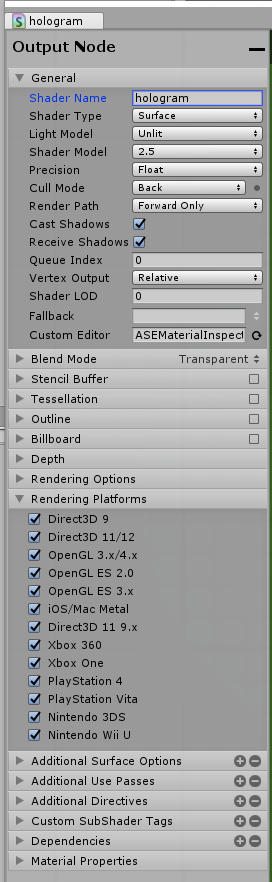
With the left side of the window, change the name to “hologram”.
Change the parameters: Light Mode to Unlit, Shader Model to 2.5, Blend Mode to Transparent, and all Rendering Platforms parameters should be turned on.
Using the Amplify shader editor and Playmaker in Unity 3.
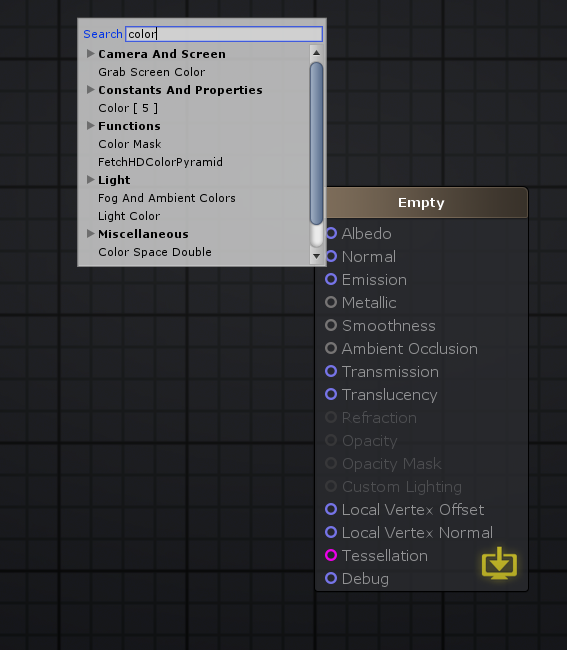
Right-click on the editor, search for “Color” and click “Color[5]”.
Using the Amplify shader editor and Playmaker in Unity 4.
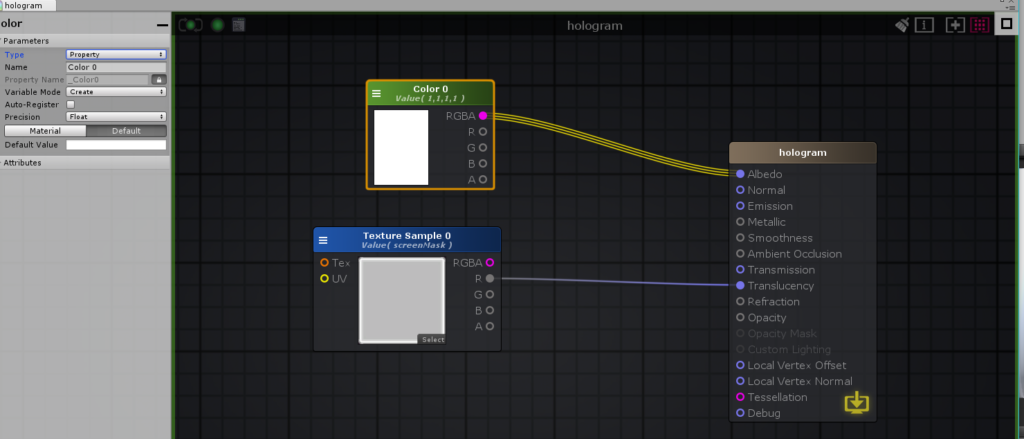
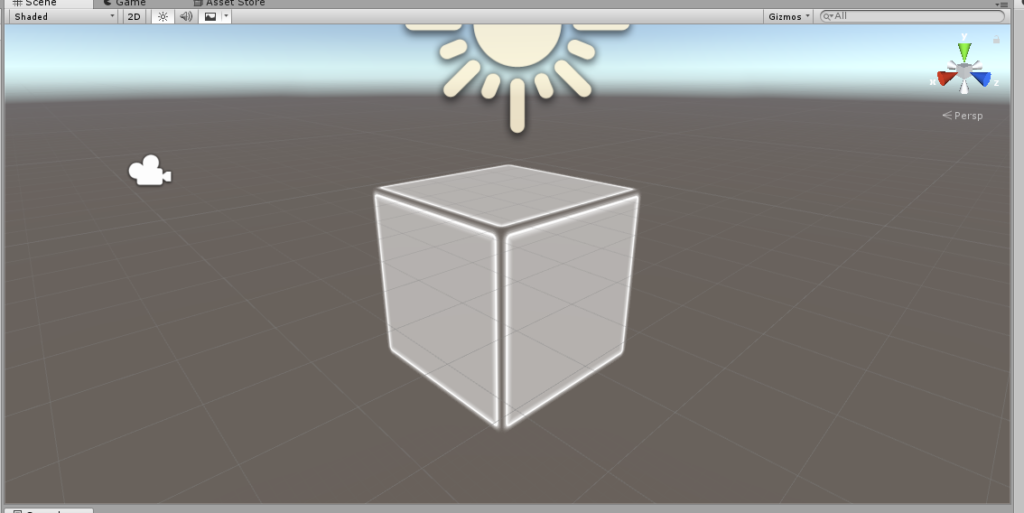
Change the color to white.
Add a texture sample node, select “ScreenMask.png”, and connect R to Opacity.
Using the Amplify shader editor and Playmaker in Unity 5.
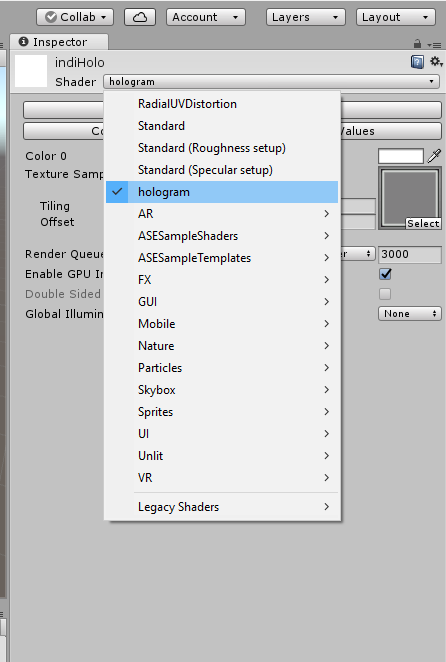
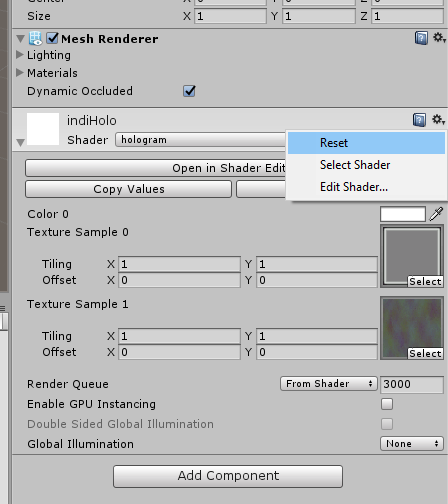
Select the “indiHolo” material and change the Shader to “hologram”.
Using the Amplify shader editor and Playmaker in Unity 6.
Using the Amplify shader editor and Playmaker in Unity 7.
Create shaders using the Amplify Shader Editor: texture animation
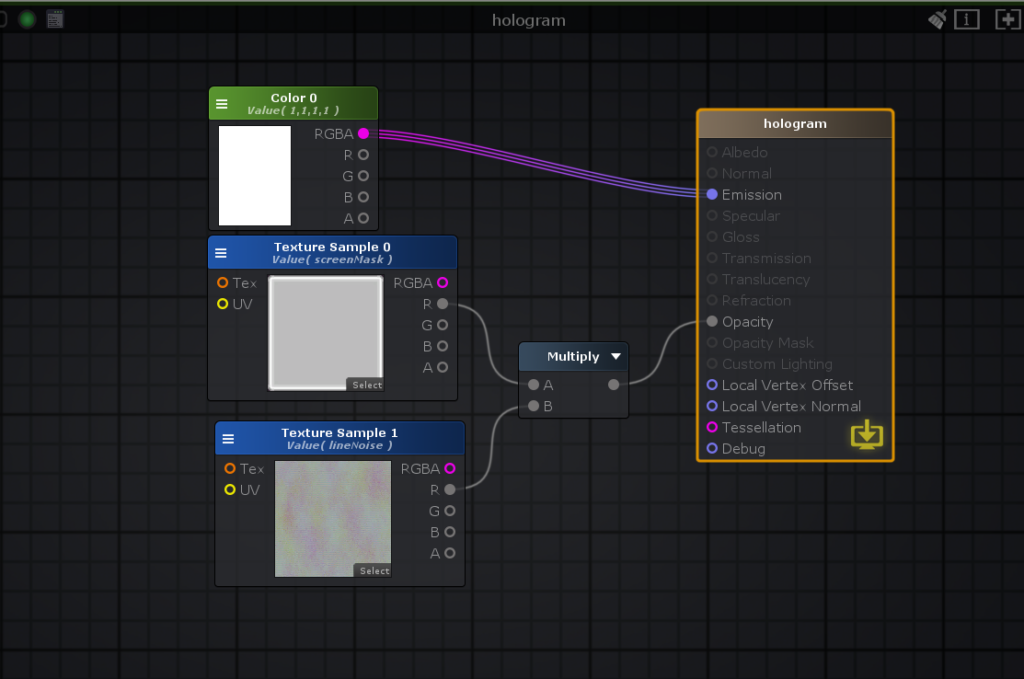
And then compose these textures.
Add a Multiply node and connect the “R” of both textures to the Multiply node.
Multiply should then connect to “Opacity”.
Using the Amplify shader editor and Playmaker in Unity 9.
Now add the animation to “lineNoise.png”.
It’s a bit complicated, requiring five nodes, so first check out the overall diagram in the image below.
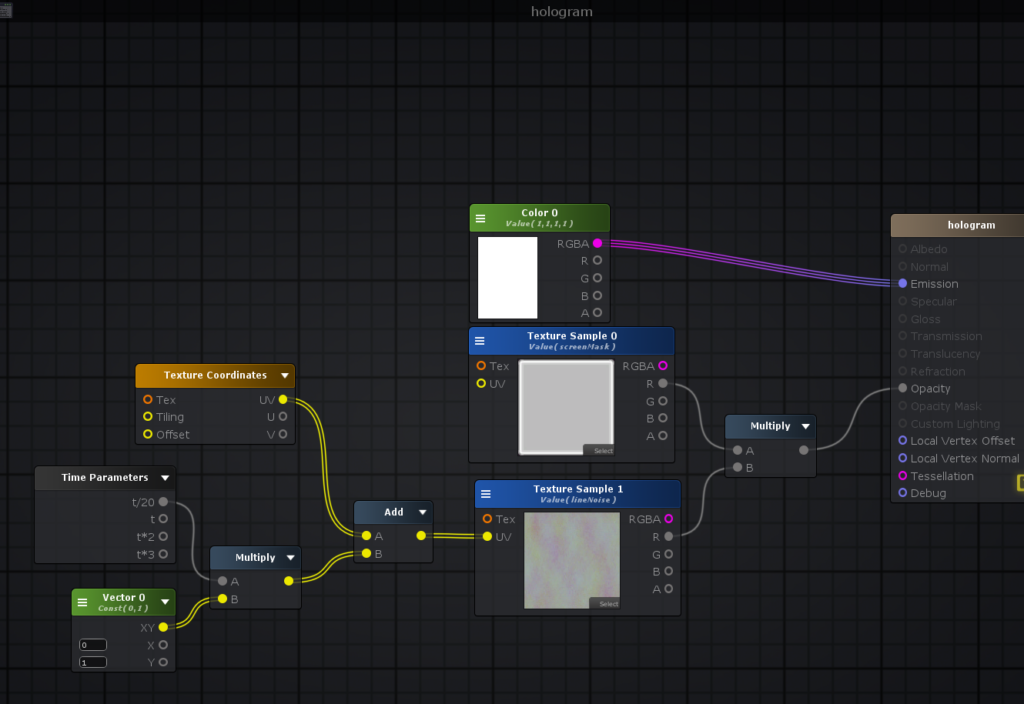
Using the Amplify shader editor and Playmaker in Unity 10.
Vector node is set to animation vertical.
Time Parameter allows you to set the animation speed.
In addition, two more nodes, Texture Samples and Multiply, will be added.
Add “waterFlag.jpg” to your Texture Samples and connect it to Multiply.
Connect the Color node to Multiply as well, and then connect Multiply to the Emission.
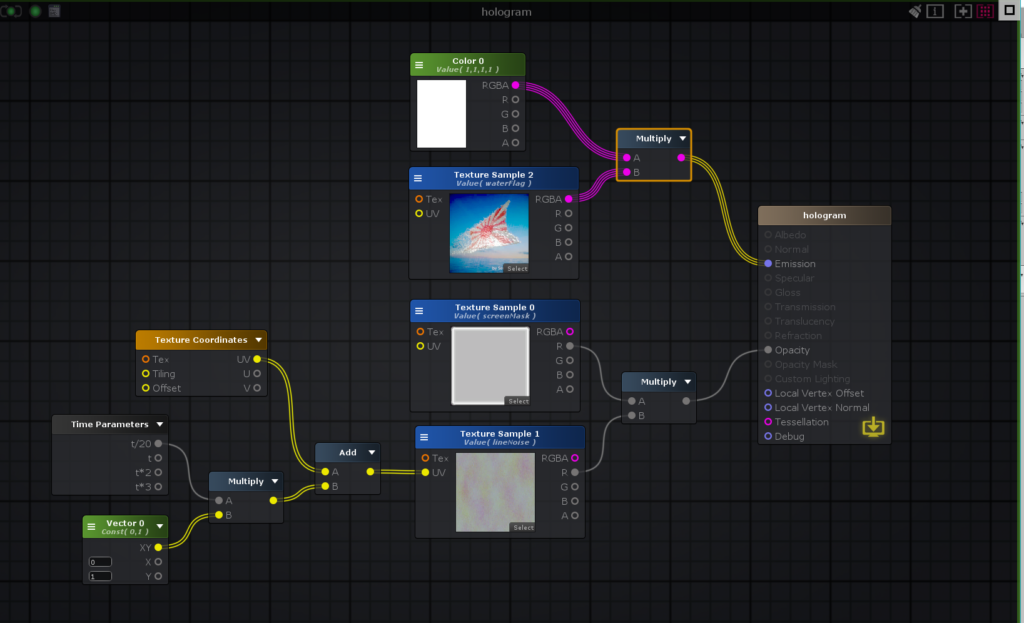
Using the Amplify shader editor and Playmaker in Unity 11.
Visual scripting with Playmaker: Preparation
Select “indi_indiset” in Project, turn on the Viewer’s Animation, and click the Play button.
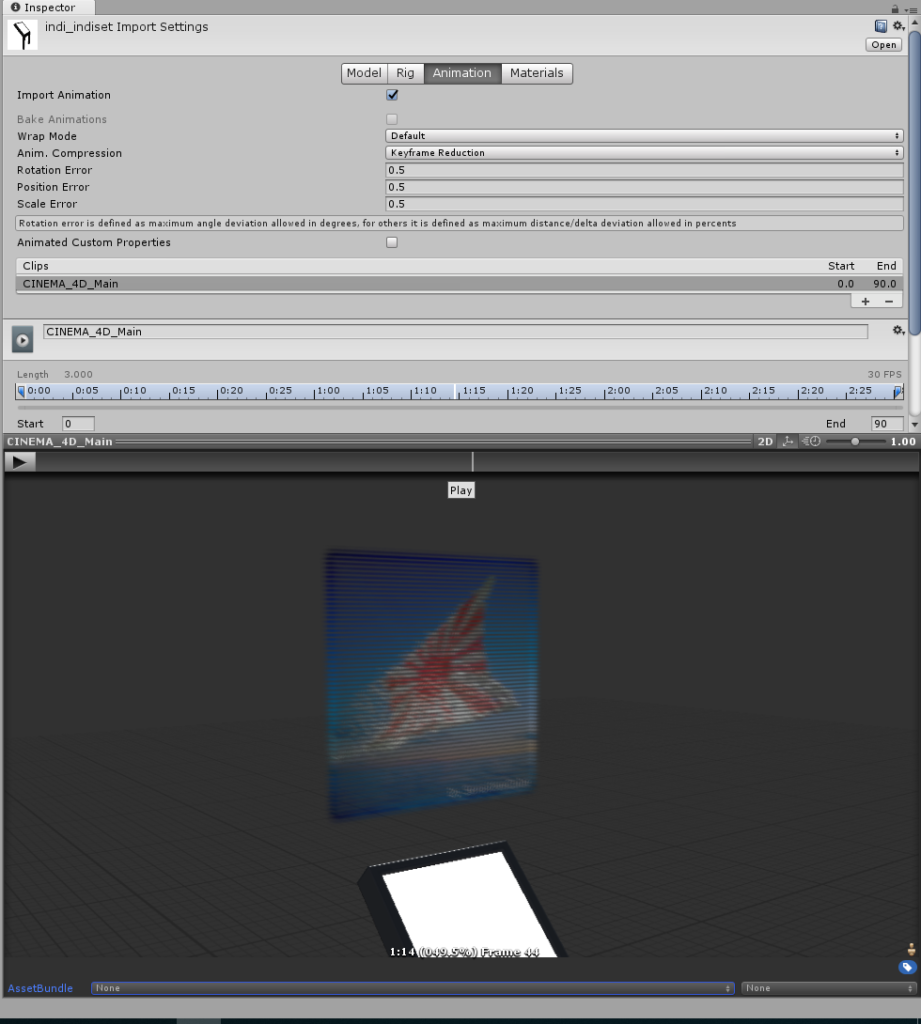
Using the Amplify shader editor and Playmaker in Unity 12.
Using the Amplify shader editor and Playmaker in Unity 13.
Using the Amplify shader editor and Playmaker in Unity 14.
Set the hologram to turn on and off depending on the distance from the player.” Select “indi_indiset” and open the Inspector.
Using the Amplify shader editor and Playmaker in Unity 15.
Using the Amplify shader editor and Playmaker in Unity 16.
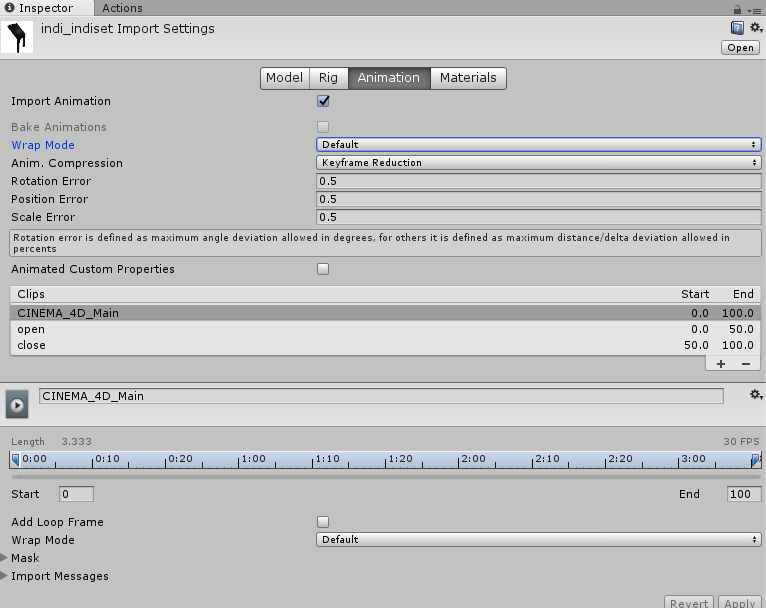
In animation, we create two clips and change the Duration.
Set “open” to 0.0 to 50.0 and “close” to 50.0 to 100.0.
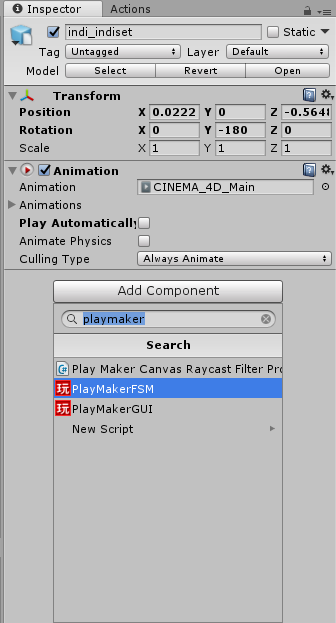
After configuration, please add “indi_indiset” to the Hierarchy.
Visual scripting with Playmaker: varying with distance.
Using the Amplify shader editor and Playmaker in Unity 17.
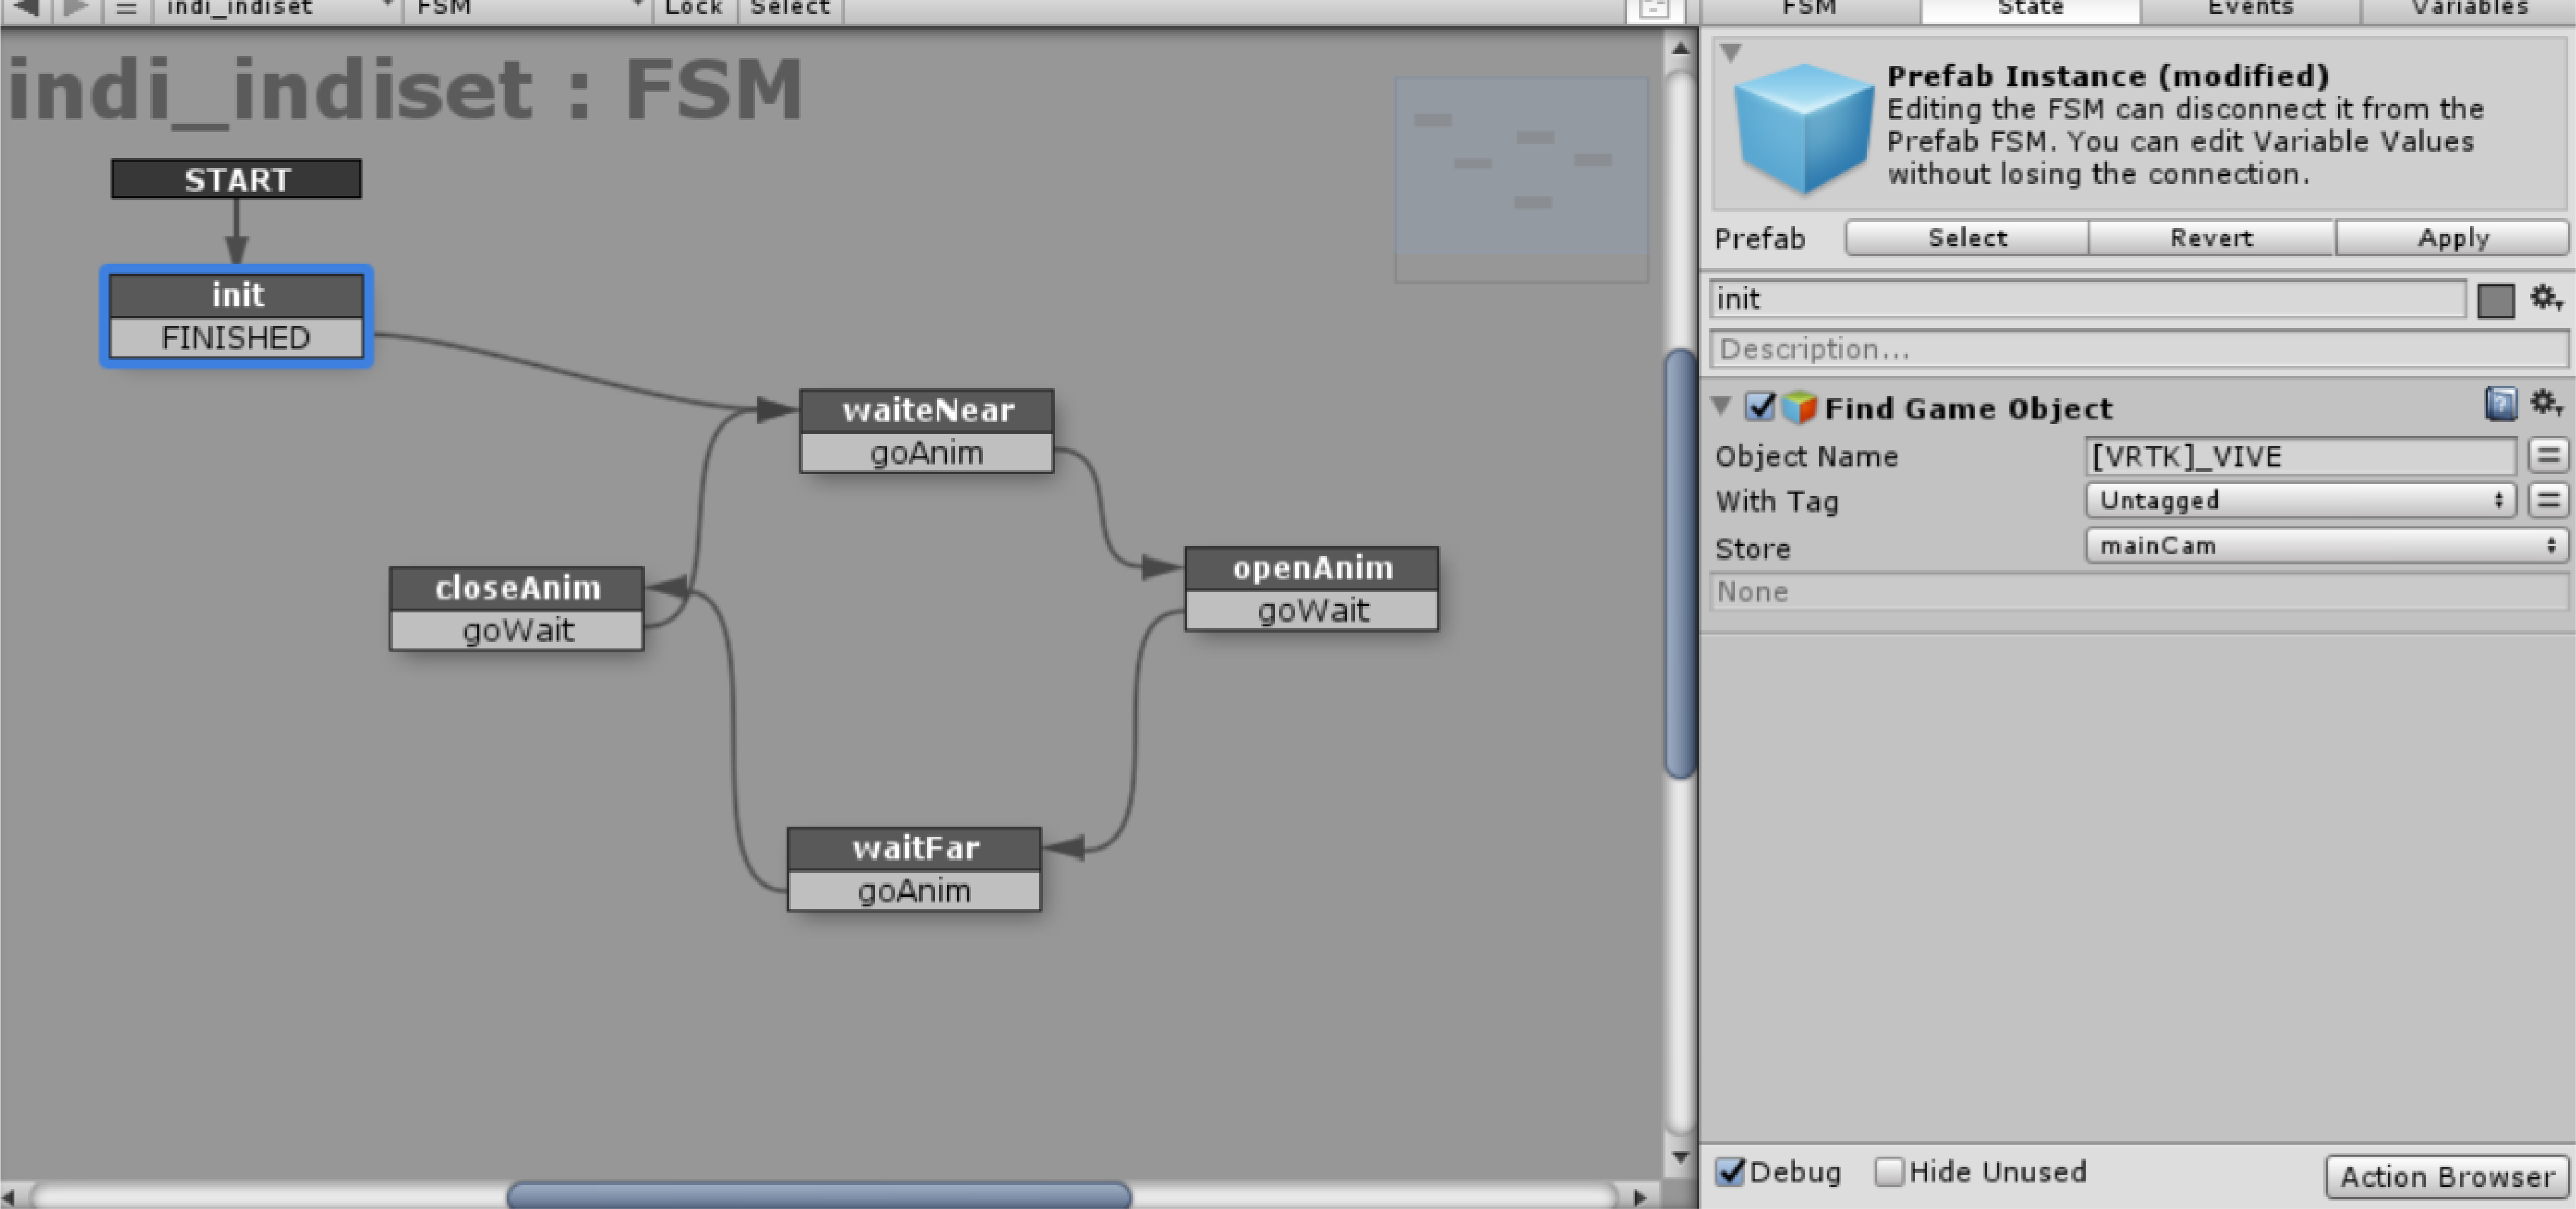
Open the Playmaker editor.
The first step is to get the camera information, see the article below for instructions on how to do this.
![[Unity/Playmaker] How to implement camera acquisition and interaction with camera](https://styly.cc/wp-content/uploads/2020/01/GIF2-4-160x160.gif)
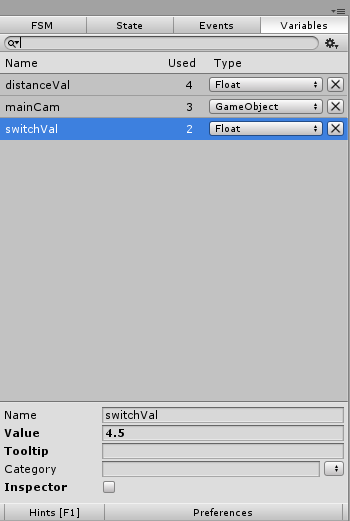
Select “New Variable…” in the Store and save the Main Camera to the “mainCam” variable.
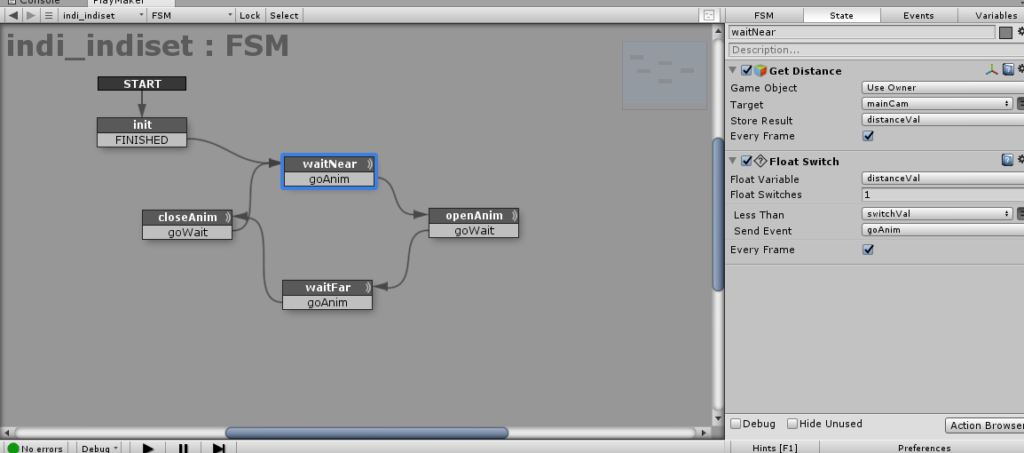
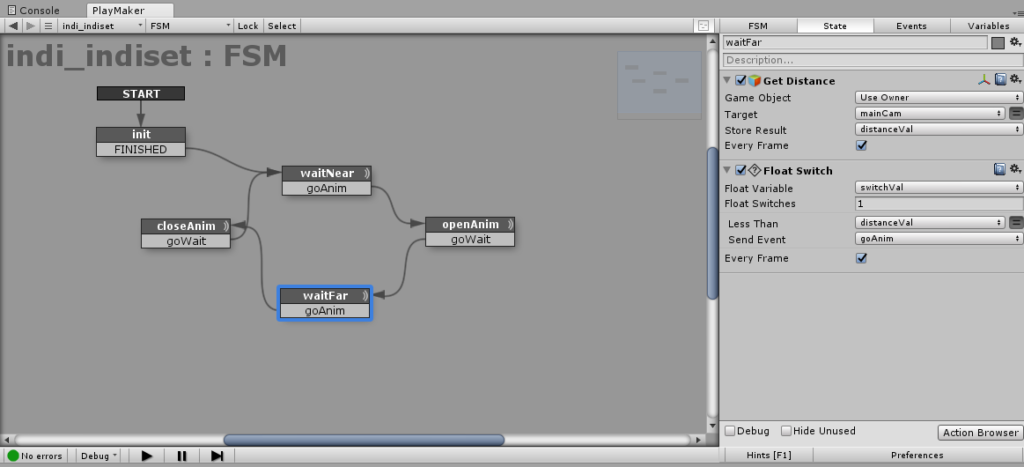
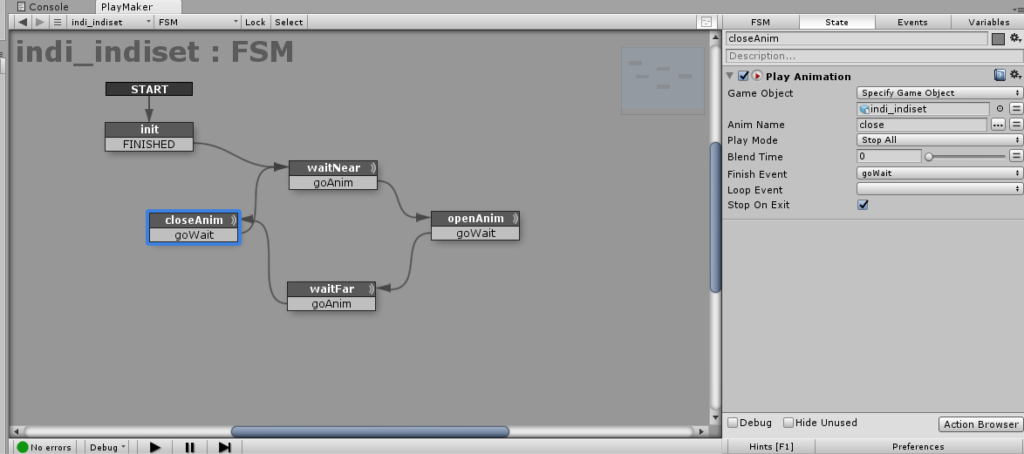
The waitNear and waitFar states check the distance between the main camera (= player) and the object, respectively.
Using the Amplify shader editor and Playmaker in Unity 18.
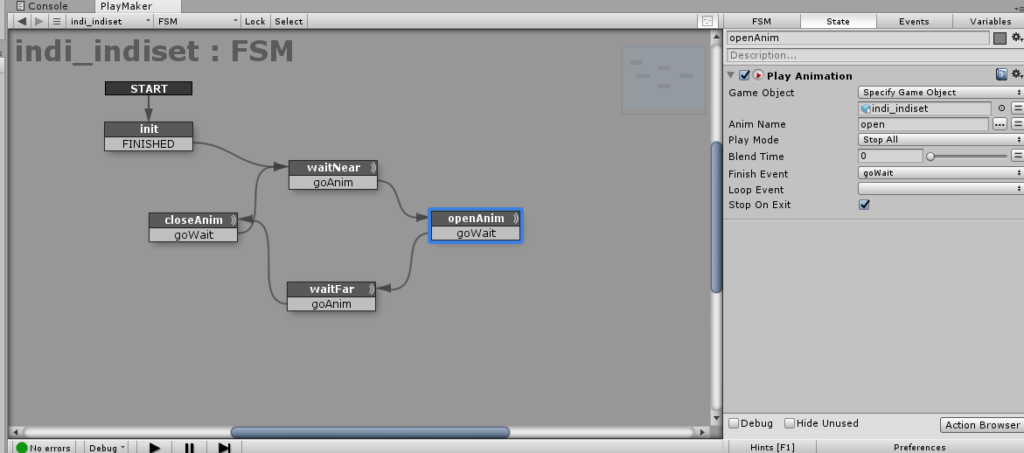
The openAnim and closeAnim states play the animation and move on to the next state. This can be confirmed by running the Main Camera in Unity’s Play mode.
Using the Amplify shader editor and Playmaker in Unity 19.
Using the Amplify shader editor and Playmaker in Unity 20.
Using the Amplify shader editor and Playmaker in Unity 21.
Using the Amplify shader editor and Playmaker in Unity 22.
Using the Amplify shader editor and Playmaker in Unity 23.
Using the Amplify shader editor and Playmaker in Unity 24.